How to make an irish dance practice floor
Dance Dad DIY Project! - Irish Dancing Magazine
Build an At Home Dance FloorOne Step at a TimeProud dance dad, Robert McAvoy, recently built his daughter, Addi, of the Blackbird Academy of Irish Dance in America, an at home practice floor. The project turned out amazing and is a true mini dance studio for Addi. This is a perfect DIY summer family project!
McAvoy says, “I would like to start with giving props to the website ‘What The Feis.’ I Googled ‘build an Irish Dance floor’, and although there were many ideas, the one I found on his site was, to me, the least complicated and most affordable.”
Using the instructions as a guide for his project, McAvoy then developed his own process to build a larger floor.
There is no better time than summer to take on a fun DIY project, so let's get started!
What you will need:
McAvoy recommends coming up with a plan of attack, as he did, before building. “Cut everything you need to cut outside, but then bring it to the location and put it together there. Colors work for me, so I coded the pieces of wood so I knew what I would need. I am not a professional carpenter, so I need all the help that I can get,” says McAvoy.
To incorporate a large dance floor for his daughter, McAvoy expanded the floor into two areas.
With the first frame finished, McAvoy began to construct the second.
“Take your level and make sure you are connecting the frames together straight...Again, I am not a professional carpenter, I'm just a dad doing his best,” says McAvoy.
Now, with the frame level and finished, McAvoy began laying the flooring.
“Making sure your first panel is straight is key to the rest of the flooring fitting,” McAvoy says.
With the flooring fitted and properly down, McAvoy used Gorilla Tape over the seams. This meant it was time to paint.
“Chalkboard paint was suggested, and I must say, it was very easy to apply.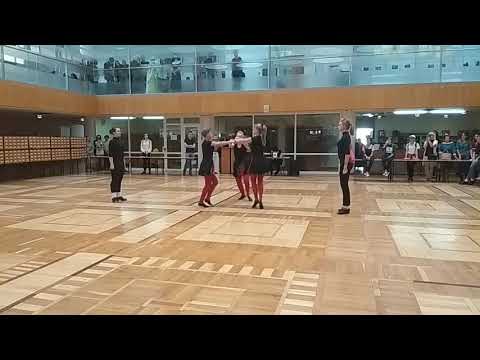 ..chalkboard paint will not break the bank, and I've found that it provides a bit of tack rather than being slippery,” says McAvoy. According to this dance dad, painting the floor is not necessary, as the chalkboard paint takes quite the beating from these Irish Dancers.
Although one can end the project right here, not this dad. McAvoy decided to give his daughter even more of that "in the studio" feel by adding mirrors. If you decide to do this, McAvoy says, “Make sure your wall is clean and flat. If you have brick, like we do, find somewhere else to hang these. Find the flattest part of your wall. Press firmly for a good minute so that the tape can securely bond with the wall”.
With McAvoy’s finished result he says, “Good luck and keep dancing”.
----
Did you know you can now read IDM's monthly edition online? And, it is absolutely FREE for subscribers to access their online edition with extra bonus content! Logon to this website with your email address.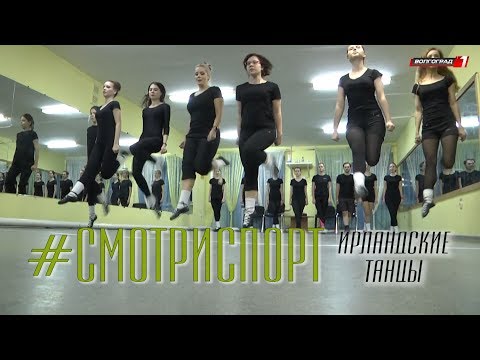 If you are an active subscriber, you will see the word SUBSCRIBER pop up in your toolbar, once you login. From there, click to read our current issue (visit our customer service page for help if you experience any hiccups)!
If you do not currently receive IDM monthly,you can now order either an online or print subscription on our shop page! Click here to see all of our subscription options!
------
Ariana Dolce, content creator with experience in the US and the UK.
Building an Irish Dance Practice Stage...
Posted by:What The Feis onOctober 30, 2015 15 Comments
…by someone who sits on his butt in front of a computer most days.
I can be handy. I have done handy stuff, but lately I have focused more on easier projects like light fixtures, ceiling fans, adding door locks and dimmer switches, replacing toilets and their parts, putting prefab shelves together, etc… I have done bigger projects, remodeled a kitchen (with help), built an entire wall of shelving in a garage, and some others, but it has been a while. Anyway, I figured this dance floor thing should be a no brainer. I was mostly right, but kinda wrong.
Below I am going to tell you how I put TGC’s (the girl child) practice stage together, and some DOs and DON’Ts along the way. It may not be the way you would do it, and if that is the case, please write a blog post and I will put a link out to it. You can also Google the steps. There are various ways to do it. I however, went my own route.
I have put in whatever I could to make it helpful, especially for someone who doesn’t do this kind of thing all the time (or at all). I also tried to put in some tips that I discovered along the way, once again designed for the DIY novice. It may sound over simplified, but if you are not a DIYer, this may not be second nature. I am also trying to have you go to [insert your favorite hardware store here] once for this project, not 3 times like I did.
Please consider this Irish Dance Practice Stage Building For Dummies, and here goes.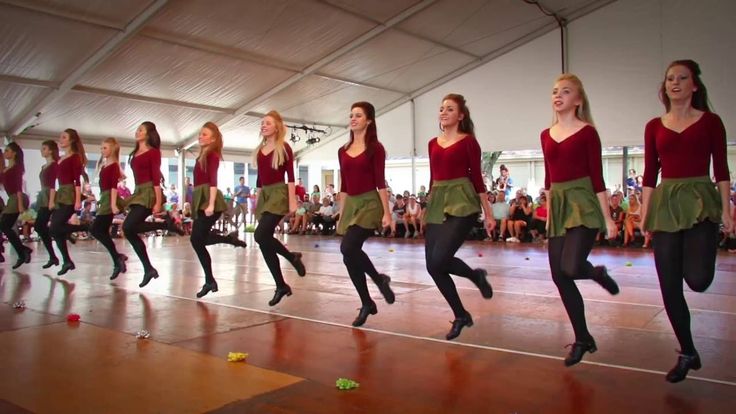
The Project
Create an 8′ x 12′ practice stage suitable for a teenage Irish dancer.
The Tools
- Power drill with screwdriver bits, and a drill bit with a slightly smaller diameter than your wood screws
- Circular saw, or some other 2×4 cutting device
- Hammer
- Small sledgehammer – one handed (not necessary but really handy)
- Measuring tape, at least 12′
- Extension cord
- T-square (or some right angle tool)
- Paint roller
- Paint tray(s)
- Pencil
The Materials
In SW Ohio dollars, no taxes added. Your mileage may vary. And remember, if you are a military veteran, like me, Lowes gives 10% off on everything all the time. Full price amounts shown below.
| Qty. | Item | Cost | Ext. Cost |
|---|---|---|---|
| 3 | 4′ x 8′ sheets 19/32 cat rated sheeting (plywood) | $16.97 | $50.91 |
| 12 | 2″ x 4″ x 96″ select studs | $2. 62 62 | $31.44 |
| 2 | 32 oz cans of chalkboard paint | $9.98 | $19.96 |
| 24 | 3″ x 6″ mending plates | $1.10 | $26.40 |
| 2 | boxes 8×2 50 count wood screws | $4.97 | $9.94 |
| 1 | 1.88″ x 35yd roll Gorilla tape | $8.98 | $8.98 |
| Total | $147.63 |
The Steps
Prepping the Frame
You will need to cut all 12 2x4s to prep them for the frame. For my stage assembly, I laid the 2x4s out on their wide side, which made the stage a little shorter, and provided a bit more support area under the plywood.
- Cut *7 inches off 9 of the 2x4s, leaving 9 @ 89 inches
- Cut 3 of the 2x4s in half, leaving 6 @ 48 inches
If you have help, you may want to have them start putting the first coat of paint on the plywood. If you do not have help, you may want to roll a coat on before you start assembling frames.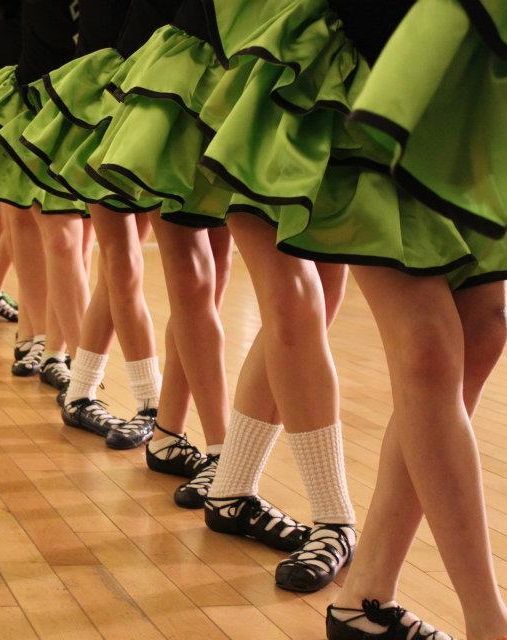 If you are working where you are painting, CUT THE WOOD AND CLEANUP BEFORE you start to paint.
*For you true DIY novices, please note that a 2×4 is really 3.5 x 1.5 inches. Cutting 7 inches off will leave just enough to use a support piece at either end, resulting in an 8′ long frame, perfect for the 4′ x 8′ sheet of plywood. (yes they are actually 4′ x 8′)
Assemble the Frame Sections
You will be making 3 frame sections and will do this step 3 times. I tried to be smart and create just two sections, but it was more work in the long run. See Don’ts section at the end of this article.
Note: If you are using mending plates for attaching the 2x4s together, it is best to work on a cement floor. Carpeted areas will work, but it is not recommended.
For this step you will need 3 of the 89″ 2x4s, 2 of the 48″ 2x4s and 6 of the 3″ x 6″ mending plates. Layout the frame as shown in the image to the left. The Red Xs indicate the position of the mending plates.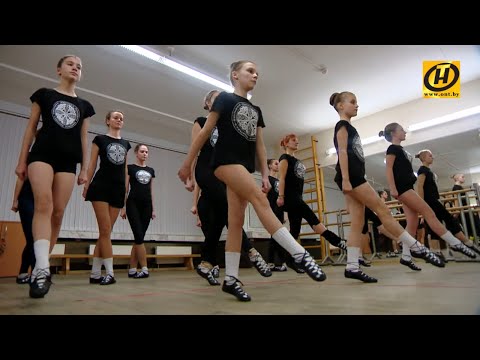 Lay the 2x4s out so that the wide side is to the floor.
Square up one of the corners and using the sledgehammer, start pounding a mending plate into one of the 2x4s, working your way across the join to the other 2×4. You should be able to bang the plate into the 2x4s so that it is nearly flat. A hammer will work, but I found the sledge MUCH more effective.
Repeat this step for the other 5 joins on this section of frame and then repeat this entire step 2 more time until all 3 frame sections are complete. When they are complete, move the frames to where you will do the final assembly on the stage. (I did the prep work in the garage and then moved it all to the basement for assembly).
Note: You can use other methods to make the joins. This was recommended to me, made sense, and worked pretty well, and the plates are not too expensive.
DO NOT get ahead of yourself and attach the plywood. 1, it is probably not dry and needs a second coat of paint anyway, and B, you will need to attach the frames to each other before adding the plywood.
Add a second coat of paint to the plywood if you haven’t already. Shouldn’t be more than an hour or two between coats.
Assemble the Frame
Lay the 3 frame sections out next to each other as in the image to the left.
Note: Make sure you have it as close to the final destination as possible, because it will be harder to move after the next few steps.
Add 6 more mending plates to attach the frame sections together, in the locations marked by the green Xs. Keep in mind that you will be screwing the plywood on to these frames at about 1′ intervals, so try to space the mending plates so they are not in the way of the screws.
Go check the paint, is the second coat dry? If so, bring the plywood to the final build area.
Adding the Plywood
Dry fit all three pieces of plywood onto your frame. If you followed the measurements, and if I explained it correctly, each sheet should cover one of the frame sections nearly perfectly, and all three should cover the entire frame with no overlap or exposed frame. If you are satisfied with the dry fit, remove two of the pieces of plywood.
Lay your first sheet of plywood paint side up ;) , onto the frame. I noticed that my frame was not exactly square due to some of the shortcuts that I took (fixed for this post). If your plywood did not fit perfectly, start laying the first sheet of plywood on the most visible section of the stage, leaving any ‘errors’ for the least visible section.
Dry fit the plywood onto the frame. Take your tape measure and extend the tape 12′, lock it, and lay it along one long side of the plywood. Use this to quickly drill pilot holes every 1′ with the small drill bit. Just laying the tape out keeps you from having to measure and mark the board itself. Drill the pilot hole through the plywood and into the 2×4 beneath. Repeat every foot on both sides, up the middle, and along both shorter ends. Be careful to avoid the mending plates along the long end that butts up to another section of stage, but the plates should still be visible since you are only working a sheet of plywood at a time, so this should be easy.
When you have all the pilot holes drilled, use your drill to add a 2″ screw to each hole. Try to sink the screw far enough in where it is at least flush with the plywood, or maybe even sunk a bit into the wood, so as not to cause a trip hazard for your dancer.
Repeat for the other two pieces of plywood. For the edges that butt up against each other, you don’t need the tape measure, you can use the screws you just added to the previous piece as a guide for where to put the pilot holes. You will need it for the other three sides, but you saved a little time there.
Once all the screws are in, cover each line of screws with a layer of the Gorilla tape. I also covered the edges of the plywood which not only gives it a cleaner look, it also helps keep down any splintering. See the first picture above for the finished project.
Although the stage came out pretty well, there are some things I would have done differently now that it is complete, and some things I would have done the same.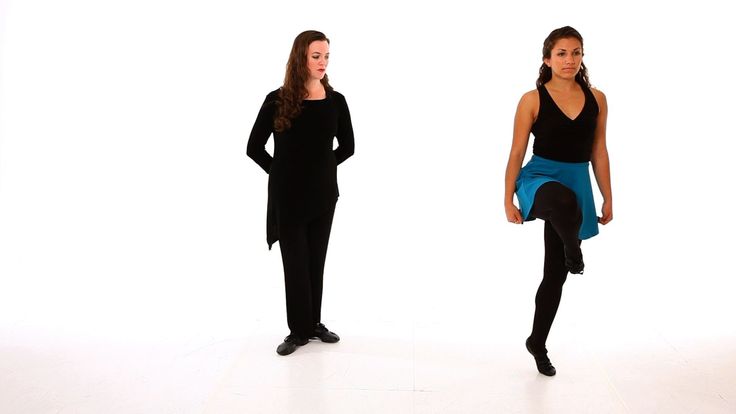 Below is a list of Dos, Donts and Considerations for when you build your stage.
DO
- DO assemble all the frames on a hard surface if you are using the mending plates. It provides a better support surface when you are pounding in the plates and does not give like the carpet (in my case) did.
- DO use premium wood screws. I used an OK screw, but some of the heads striped as I was putting them in. This is going to make it really difficult if I have to take the stage apart.
- DO check the plywood and 2x4s for quality. Buy the plywood as smooth as possible, and the 2x4s as straight as possible. Both of these issues caused extra work for me.
- DO keep band aids handy.
DO NOT
- DO NOT take a shortcut and just use 3 2x4s under the plywood like in the picture to the right. In my head, it would have been fine, but when I dry fit it, the ends of the plywood between the supports was weaker and could have been a hazard.
- DO NOT try to take shortcut thinking you can create one big frame section (replacing 2 of the sections in the steps above) with 8′ 2x4s on the ends instead of 2 smaller frame sections with 4′ supports on either end. I thought of doing that, realized there was no way I could build it and get the completed section (finished size 8′ x 8′) down to the basement. So, I carried the parts down to the basement and started adding on to the 8′ x 4′ section I had already built and moved down. This is when I realized trying to assemble on carpet was not the best idea, but by then I was already to far along to do it the right way (I listed the right way above).
- DO NOT work barefoot, because inevitably you will be working in your carpeted basement, thinking all is well, trying to get the mending plates attached, and you will step on the bag of mending plates. Those are some pointy little demons. (See the band aids note in DOs). I won’t mention the fact that stepping on the bag of plates made me spin around, loose my balance, and step on the bag with the other foot.
 I wish I was kidding. Please just wear shoes.
CONSIDER
- Replacing 4 of the 2x4s with 2 2x8s instead, and using those in place of the 2x4s where the frame sections butt together. This would provide a more sturdy final stage, less cuts, less mending plates, etc… You will have to do your own math on putting that together.
- Alternatives to the mending plates. I was looking for something that was nearly flush when installed. Mending plates worked well in that regard, but were more difficult to install than another bracket alternatives would be. I acted to quick. I should have researched a bit more.
- Consider alternates to the chalkboard paint. It is OK, but after a week, it has taken quite a beating. It is not slick, which is good, and maybe additional coats is the answer. Refer back to the research line above.
- Other surface coatings. Some other stage building blogs suggest using shower pan liner as the topper. You can get shower pan liner at [insert your favorite hardware store here] in 5 foot wide rolls for $8 a foot.
 Quick math says that would add nearly $200 to the cost of the stage I built. There are probably other options.
Tell Me How Yours Goes
The stage is solid and TGC loves it, so my work here is done, but I am not vain enough to think mine is the perfect way to build a dance stage. I do think other people will find this post, so I want to offer as much info as possible. If you have suggestions on how to make this better, please add them below. I may have to do this again. ;)
Categories: Ideas, Parents
Watch Irish dancing
Why Irish dancing is good
Not only because of its spectacularity and dynamism (remember the Riverdance show!), but also due to its rather high energy consumption: a woman weighing 60 kg spends an average of 170 kcal in a half-hour session. “In Irish dances, we combine a lot of aerobic exercise with a part of anaerobic exercise, which we use to work out certain movements, elements or strengthen certain muscle groups,” adds Tatyana Smirnova , Irish dance teacher, head of the Killarney school. - Everything in the complex allows you to keep your body in good shape and effectively remove excess fat. Of course, the main load falls on the lower body. nine0007
In addition, such training allows you to strengthen the small muscles and ligaments of the feet, which in ordinary life we hardly involve in work. And this protects against subluxations and dislocations (including those provoked by wearing high-heeled shoes), and improves blood circulation in this area.
Irish dance classes have a positive effect on posture and core muscles. “The basic position of the body in this dance is straightened shoulders, tightened abdominal muscles, buttocks and a straight back. Moreover, the body must be kept motionless during energetic movements with the legs, that is, all these areas remain in tension for a long time, ”says Tatyana Smirnova. nine0007
Who is Irish dancing for?
Anyone who has no problems with the joints of the lower body, varicose veins, spinal injuries and over 15 kilograms of excess weight - in a word, those who are allowed shock loads and jumping training.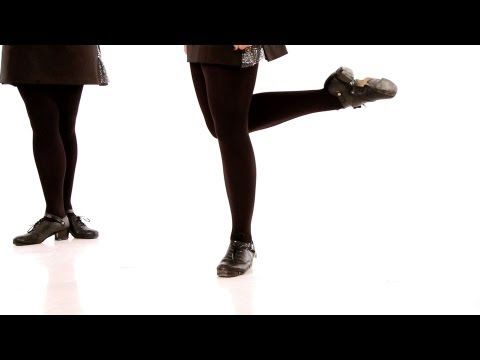 Those who have injured their lower extremities less than two to three weeks ago will also have to refrain from exercising - in all these cases, the opportunity to train should be discussed with your doctor.
Let's be realistic: very few people can master the discipline on their own at a professional level: teaching this area "from scratch" in schools takes from a year. But you can start training at home using the basic movements and warm-up exercises of the "Irish" to improve the silhouette, health and prepare for group classes if, having fallen in love with the direction, you want to take it seriously. nine0007
Irish Dancing: How to Build a Session
* Start your workout with joint exercises (focus on your lower body joints and feet) and vigorous cardio (for 10 minutes). This will help to avoid injuries, problems with the cardiovascular system.
* Practice in light flat shoes , such as ballerinas, to improve grip and avoid falls.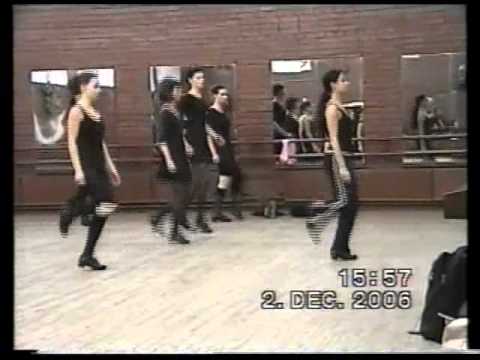 If you train at home, you can practice in socks. nine0007
* Practice 3-4 times per week for 45-60 minutes .
* Maintain correct body position during warm-up exercises and basic dance movements: shoulders are turned, back is straight, abdominal muscles are in good shape, pelvis is fixed, arms are pulled back, elbows are straight, palms are clenched into fists, pressed to the buttocks.
Warm-up exercises
This is a set of static exercises that will help not only develop the joints and ligaments of the ankle, but also strengthen the muscles of the legs (thighs and lower legs). Perform them at a calm pace, lingering at the top of the movement for 1-2 seconds. nine0007
Half Toe Raise
Stand straight, assume the basic body position (described above), place your feet hip-width apart, parallel to each other. Gently rise on half-toes, without bending at the waist and without bending your knees, lower yourself to the starting position. Repeat 8-16 times at a calm pace.
[new-page]
Bent Knee Raise
Return to the starting position of the previous exercise. Keeping your posture and the tone of the abdominal muscles, bend your knees slightly, rise on your toes and linger at the top point for 1-2 seconds, then straighten your knees, lower your heels to the floor. Stretch the crown up, try to keep the pelvis motionless. Complete 8-16 repeats .
Half Toe Raise with Feet Turn
Stand up straight, body in the basic position. Place your feet hip-width apart with your toes pointing out and your heels together. From this position, rise on half-fingers, linger at the top point for 1-2 seconds . Repeat 8-16 times.
Half Toe Raise with Knee Bending and Feet Turning
Repeat the starting position of the previous exercise. Bending both knees at the same time, rise to your toes, straighten your legs. Hold at this point for 2-3 seconds , return to the starting position. Repeat 8-16 times.
"Wave"
Stand up straight, maintaining the basic position of the body. Place your feet hip-width apart with your toes pointing out and your heels together. Transfer the body weight to the left leg, and bend the right leg and put it on the toes. Then straighten it, transfer the weight of the body to both legs and place both feet on the toes. After lowering the right heel to the floor, leave the left leg on the toes and bend at the knee. Then return to the starting position. nine0005 Repeat 8 times in one direction, then the same number in the other.
[new-page]
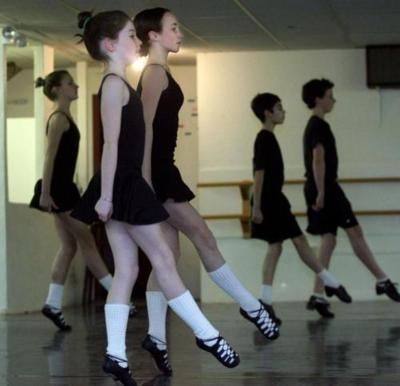
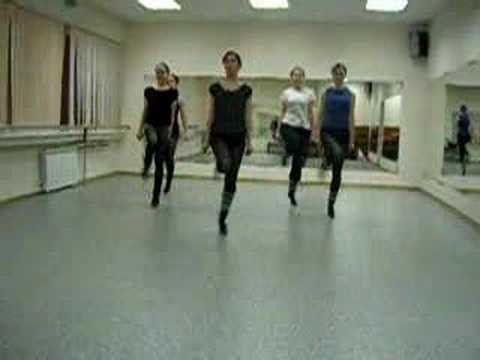
Basic Dance Movements
These movements include several key dance steps.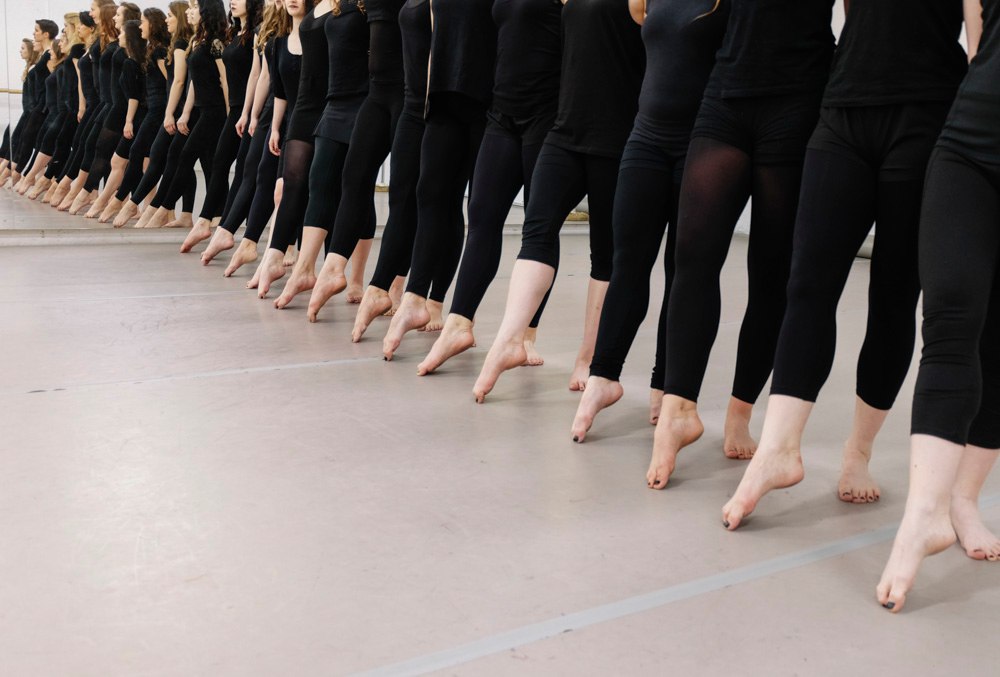 Having mastered the technique and sequence at a slow pace, perform them at an average pace, connecting the described positions of the legs with jumps (jump between them).
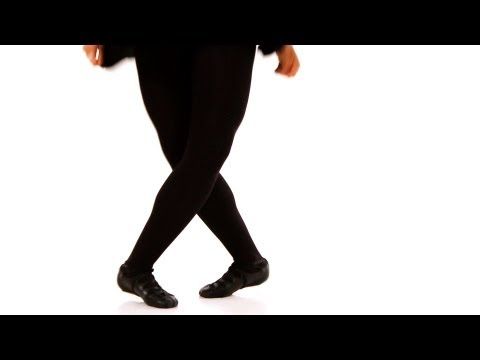
Point and back from base position
Keeping the correct body position, step the right foot in front of the left and cross the feet so that its heel covers the left toe ( is the basic position of , it serves as the starting position for all dance movements). Transfer the weight of the body to the left leg, and stretch the right leg forward and diagonally so that the big toe of the right foot touches the floor and the heel is pointing up ( is the position point ). In a jump, bend your right leg and take it back, sliding your foot along your left leg. Place the left foot on the toes, the right foot behind it. Lower both feet to the floor and return to the starting position. Repeat movement 8 times from each leg.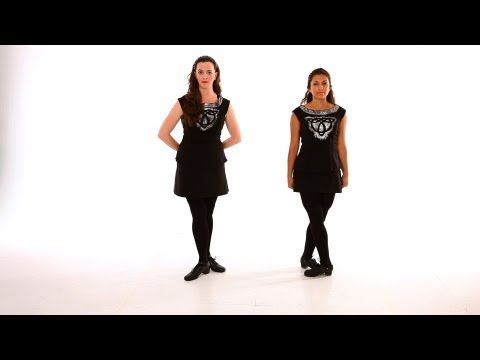
Three point s and back
Then, with a jump, move the right foot behind the left, landing on half toes. Transfer the body weight to the right foot, lowering the heel to the floor, the left - bring forward to position point . Repeat 8-16 times on each leg.
Basic step
From the basic position, move the right foot forward to the position point , then bend the right leg in a jump and touch the left knee with the right ankle. Then jump forward onto the right foot, land on the toes, put the left foot to the right behind it. After that, once again jump forward onto the right foot, land on the toes, put the left behind again, bend and move it forward. Lower it on half-toes, put your right foot. Repeat 8-16 times each way.
Point-hop-out-down
From the base position, make point with your right foot forward, then bend your right leg, raise your knee in front of you and touch your left knee with your toe. Then put your feet in the base position and again raise your right leg, stretching it forward until it is parallel with the floor. Return to the starting position and repeat 8-16 movements in each direction.
Learn the steps and movements of Irish dancing at a calm pace, and only after mastering them, accelerate. Regular exercise will help you strengthen the muscles in your legs and hips, improve your posture and coordination. nine0007
You can learn other dance styles by studying with the LIVE! instructors.
History of Irish Dance ⋆ Kelteria Dance School | Irish Dances
Viking raids destroyed most of the books from this period, as well as written records of any dances. However, the fact that one of the elements of the exquisite Gaelic culture was music and dance is undeniable.
Viking raids on Ireland ended in 1014 after the victory of King Brian Boru of Ireland at Clontarf. Irish dancing competitions originate from this period. nine0007 Brian Boru at Clontarf in 1014, painted in 1914
by James Ward. Photograph: courtesy of Dublin City Council
It was both a trade fair and political gatherings and cultural events with music, sports competitions, storytelling and craftsmanship. Over time, the cultural aspect has become central to Irish dance competitions. These events continue to this day. Although politics has faded into the background, they still have music, dance, crafts and trade. nine0007
Decline of Celtic culture
The Celtic tradition in Ireland quickly faded into oblivion during the twelfth century. The increase in foreign influence weakened the traditional arts, and in 1170 the conquest of Ireland by the Anglo-Norman knights took place. However, for the next two hundred years, the conquerors firmly entered the traditional Irish culture.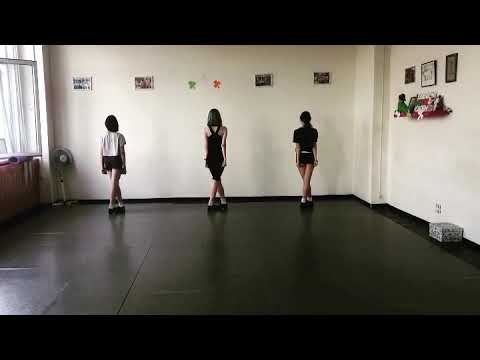
To prevent this merger, the Anglo-Irish Parliament passed the Rite of Kilkenny in 1366, which prescribed excommunication and severe penalties against all those who followed or were associated with native Irish customs. Another 128 years elapsed before the charter was enforced. nine0007
History records many dances performed by the Irish in the mid-1500s. These include the Rinnce Fada or Fading, where two rows of partners are opposite each other, the Irish Hey (figure dance), the jig (probably a group dance), the trenchmore (described as a large folk national dance (country dance) with free movements), and dances with a sword. It is not clear which dances among Irish, English and French influenced which, but it is characteristic that Irish dances had a faster tempo and side steps were present. nine0007
The suppression of Irish culture by the British continued, with the banning of bagpipes and the arrest of pipers exemplifying this. However, Queen Elizabeth I was "extremely pleased" with Irish songs and folk dances. The struggle for power between the Irish and the British continued throughout the 1600s. Penal laws passed in the late 1600s destroyed Irish commerce and industry.
Complete ban and the appearance of secret schools
The education of Catholic children was also prohibited by law, which led to the emergence of secret schools (open-air schools for the poor). There was a degree of secrecy in traditional Irish culture. This period of brutal repression lasted over a hundred years, explaining the initial secrecy of the teaching of Irish dance. nine0007
National folk dances continued, one description says that on Sundays “a violin was played in every field and the girls danced to it until they were foaming at the mouth”; another states that "the youth danced until the cows were brought home." The dancing continued throughout the 1700s, often during holidays, weddings, baptisms, and memorial rites. However, the Church sometimes condemned dancing.
An Irish Jig before royalty 18710003 The main influence on Irish dance and Irish culture was the emergence of dance masters around 1750, starting a controversial tradition that continues to this day.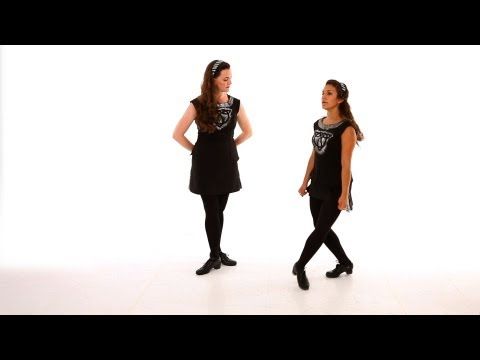 The dance masters typically traveled around the towns, staying in the villages with hospitable families (who were honored to be chosen as hosts) for about six weeks.
Teachers taught Irish dance in kitchens, agricultural outbuildings, crossroads, or open-air schools for the poor. Students primarily studied jig and reel. Sometimes the teacher would tie a rope around the student's leg to distinguish the right leg from the left. nine0007
The presence of an outstanding dance master in the village was a matter of pride for the community. Each dance master had a set of dance steps and over time created new ones. (Eight measures in music are called "step", hence the term "step dance".)
irish dancecing lessonSometimes the masters participated in competitions in Irish dancing, the winner was not the one who danced better, but the one who knew the most steps. The loser had to cede the territory of the city to the winner. nine0007
These masters have created many staged dances and Caylees, and they carefully guarded the art of creating dance steps.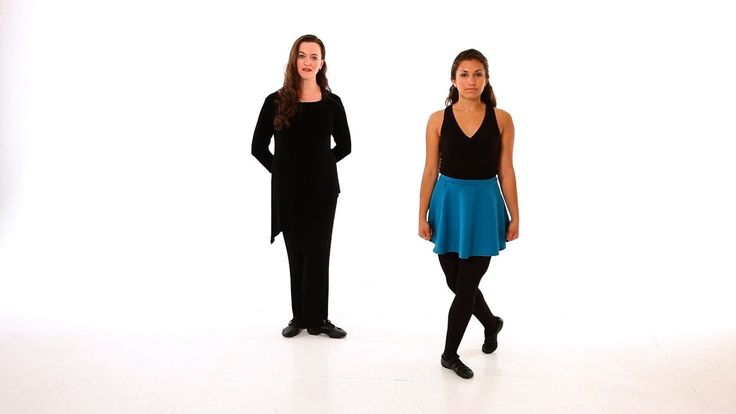 Dance masters created the first dance schools, the most famous being in County Kerry, Cork and Limerick. One dance master described himself as an "artificial rhythm walker" and "an instructor in the art of dance for youth".
The villagers paid the dance masters at the end of the third week of teaching, in "benefit performance". They paid the accompanying musician a week later. Sometimes a dance master was both a musician and a dancer at the same time! Obviously, the level of pay for dance masters was relatively high for Ireland, and room and board were included. nine0007 McCarthy and Wife Additional title Champion Irish jig dancers posed in Irish dress 1873
The suppression of Catholics continued during this time, but ways were found to avoid control. One story says that the Catholics sent a child to watch the meetings or masses they held in the cellars of the eateries. The child danced at a certain pace and with a special tact to warn the Catholics of the approaching soldiers.
During the 1800s, the pie dance was especially popular. The pie was placed on a stand in the center of the field, it was a prize for the best dancer. After the competition, the winner took the cake for himself. Attempts by parish priests to ban dancing were not uncommon, but proved to be largely ineffective. nine0007 Gaelic League Ard Fheis and Oireachtas 1913
Establishment of Irish Dance Commission
This period dates back to 1893 when the Gaelic League (Conradh na Gaeilge) was founded. This group contributed to the revival of Irish culture, which for centuries was suppressed by England. In 1929 the "Commission for Irish Dancing" (Coimisiun le Rinci Gaelacha) was founded in order to lay down rules regarding teaching, judging and competition.
Up to 19For 29 years, there have been many types of local dances, music, costumes and rules for Irish dancing competitions. This led to the development of standards to be followed in competition. Throughout the 20th century, Irish dance has changed dance techniques, costumes and venues.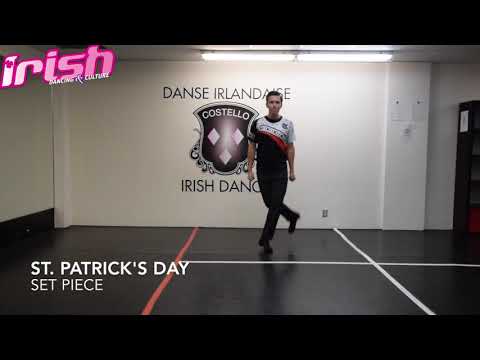
For example, during the period of the dance masters, stages were much smaller, including tabletops, door leaves, and sometimes the "stage" was just a crossroads. (An old poem called the dance of "light walking on the floor"). The dance ability test included dancing on top of a barrel or on a soap table! nine0007
As the stage grew in size, there were at least two changes to the dance. The range of motion of the dancers on the various stages was greatly increased (the judge now deducted points if the dancer did not "use the stage"), and dance steps that required a significant amount of space (such as the running jump) became possible.
The venue has also changed over time, from barns or open areas where flat trucks were used as a stage (and still are) to rooms in hotels, schools or fairgrounds. areas in general. (Note that the fairgrounds hosted ancient Irish dance competitions and their use is especially appropriate in a historical context.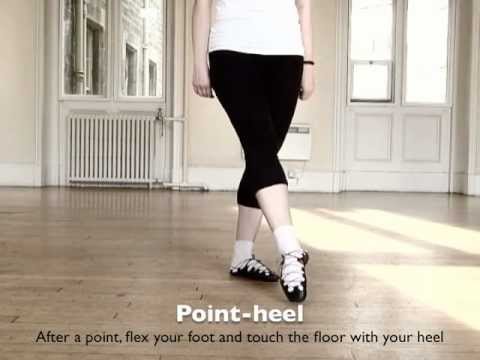 ) nine0007
During the 20th century Irish dance developed in different ways. Education began at a younger age. Among the students, girls began to predominate, not boys (the turning point occurred before 1930).
Girls performing a solo dance in a competition were very rare until the 1920s. The dance styles also changed; for example, hands and palms did not always have to be in exactly the same position during solo dances. Previously, in some cases, they were more relaxed and even placed on the hips. nine0007
Apparently, the influence of parish priests led to keeping the hands in one position; some argue that it was not all that provocative, others are convinced that the Church was trying to increase the self-control of the dancers. Hand movements are still present in figure (group) dances.
The ability to dance was useful to many immigrants from Ireland in the 19th century. They could rarely find suitable work in the USA (the east of the country was full of ads that said they were not hiring Irish people) and therefore began a career in show business. nine0007
On Broadway, tap dance became popular, which appeared due to the fusion of the African-American "shoe dance" and the Irish "tap dance". In the early 1900s Irish show groups traveled around the USA, entertaining the audience with national songs and dances. Becoming a show for the public, Irish dance began to differ from the original national one.
In the 30s. 20th century there was a keili (another name is a figured dance). In the 50s. 20th century Irish dances made their way into the show grounds, they were shown on the Sullivan Show and other television programs, and competitions among masters resumed. nine0007
In 1969 Dublin hosted the World Irish Dancing Championships and since then they have gained momentum around the world.
The culmination and turning point, after which the whole world learned about Irish dance, was the performance of the Irish dance show Riverdance at the Eurovision Song Contest on April 30, 1994, which was held in Ireland. And in February 1995, the Riverdance dance show was first shown at the Point Theater (Dublin, Ireland).