How to make a belly dance panel skirt
6 Classic Belly Dance Skirts You Can Make (NO SEW & 10 minute skirt included!)
Every belly dancer would love to have a beautiful collection of classic belly dance skirts in her costume wardrobe 🙂
But costume skirts can be quite pricey, and most likely, you have to fix off-the-rack skirts to suit your size as they come in a limited range of sizes.
So why not make your own? 😉
If you are new to costume making, you may be wondering, “But isn’t making a skirt really difficult? I don’t even have a sewing machine!”
No problem! In fact, skirts are quite DIY-able, and some are really straightforward!
So today, I’ll share with you 6 classic belly dance skirts (& DIY tutorials) in the order of difficulty 🙂
Build confidence by first making easy ones, then borrow a sewing machine or buy a cheap one, and gradually move up to make advanced designs! Trust me, skirt making is SO fun!
6 Classic Belly Dance Skirts You Can Make!
#1.
Can you believe the above skirt can be made without sewing!? In 10 minutes!? 🙂
Since I shared this tutorial, I’ve seen many people try this method, and since it’s super beginner-friendly, it’s perfect as a troupe costume option!
View this post on Instagram
Perfect fit skirts with @maomurakami ‘s great tutorial : 10 minutes ruffles skirt DIY. We looked stunning @sarah_bellydance_france show 🔥 Photography by K. Sonzogni • • • • #bellydanceshow #bellydancecostume #handmadecostume #bellydance_queens #bellydancelife #bellydancelove #bellydancequeens #bellydancersofinstagram #bellydancesuperstars #bellydanceworld #lovebellydance #orientaldance #rakssharki #costumemaking #costuming #handmadebellydancecostume #sparkybelly #fantasycostume #stagecostume
A post shared by Rapunzel (@rapunzelwardrobe) on
I love how the above group used shiny stretch fabric! The skirts and ruffles look amazing under the stage lights!!!
Click here to learn how to make this 10-minute Ruffle Skirt!
#2.
 DIY Classic Circle Skirt
Once you get your feet wet with the no-sew ruffle skirt, next try a basic circle skirt!
As a belly dancer, you can never have enough circle skirts 😉
This circle skirt has only 2 panels, and yes, it’s best if you have access to a sewing machine, but it’s a great project to practice your sewing techniques on. 🙂
If you’re a beginner, make the first one using inexpensive fabric as a practice. Then move on to using a nicer fabric.
The best part is, you make the pattern once, and you can re-use it over and over to make a circle skirt to fit you each time! 😀
Click here to check out the DIY Circle Skirt tutorial!
#3. DIY Double-Layer 3-Panel Circle Skirt
If you want a bigger, fuller circle skirt that professional dancers wear, try this 3-panel circle skirt. This skirt consists of 3 panels, AND 2 layers.
Because you get to choose 2 colors for the 2 layers, and because I designed this skirt to be REVERSIBLE (who doesn’t want to get more out of 1 skirt? 😉 ), there are so many ways you can enjoy this skirt!
Have a look at this video:
Super fun, right? Which style is your favorite? 🙂
Click here to see how to make this double-layer 3 panel circle skirt!
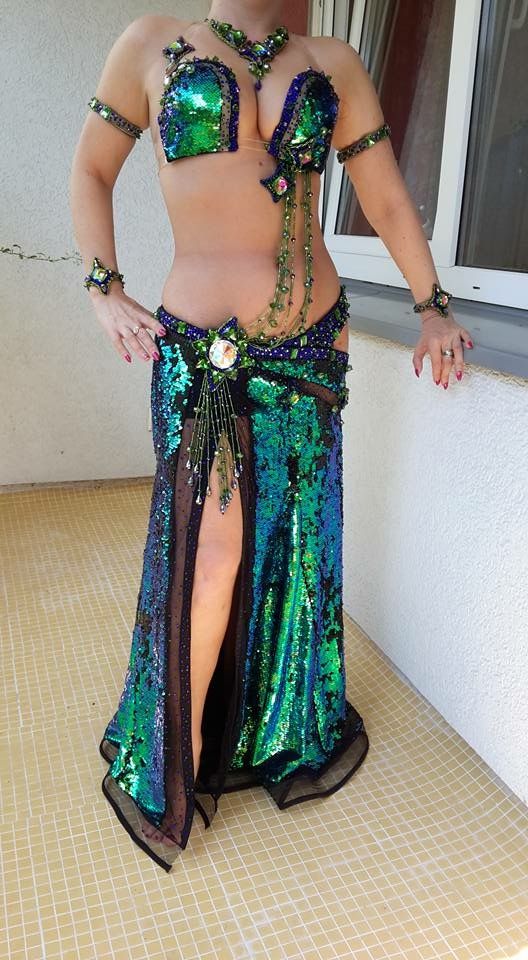
#4. Mermaid Skirt
Once you’re getting familiar with sewing, it’s time to try making a mermaid skirt!
I design all my mermaid skirts with the hourglass silhouette in mind, and this 5-panel mermaid skirt is no exception! It looks really great on every dancer because it’s made to their measurements!
This mermaid skirt has been so popular, and I’ve created a 5-day Challenge where you can make this skirt in 5 days! Here are just a few examples of the lovely dancers / costumers who participated:
View this post on Instagram
A huge shout out to Viktorija (from Albania) who created this gorgeous velvet mermaid skirt for her sister using the Sparkly Belly 5-Day Mermaid Skirt Challenge.
She did this with no sewing skills which proves you can take on this challenge as a total beginner without fear or intimidation. Prove to yourself that you too can create your own gorgeous mermaid skirt.⠀ ⠀ Do you want to dive into the FREE Mermaid Skirt Challenge too? You can by clicking the 3rd link in my bio. ⠀ .⠀ .⠀ .⠀ .⠀ .⠀ #bellydancecostumes #bellydancecostume #bellydancedesign #dancecostume #dancecostumes #applique #bellydancedress #beadedapplique #rhinestone #customdancecostumes #bellydancelife #bellydanceworld #bellydanceshow #bellydanceclass #bellydancestars #bellydancersofinstagram #bellydancers #raqs #raqssharki #raqssharqi #dressmaker #dressmakers #seamstresslife #behindtheseams #ベリーダンス #肚皮舞 #ベリーダンス衣装 #ベリーダンサー #舞台衣装
A post shared by Mao Murakami | SPARKLY BELLY (@maomurakami) on
View this post on Instagram
Sparkly Belly community member, @CarolPlaquin, created this velvet mermaid skirt and we all know that velvet offers its own set of challenges 🙂 I love it and I love the color and the matching bra is perfection.
Great Job Girl!!!!⠀ .⠀ .⠀ .⠀ .⠀ .⠀ #costumemaking #bellydancecostumes #bellydancecostume #bellydancedesign #dancecostume #dancecostumes #ballroomdress #latindress #promdresses #applique #bellydancedress #beadedapplique #rhinestone #customdancecostumes #customdancecostume #bellydancelife #bellydanceworld #bellydanceshow #bellydanceclass #bellydancestars #ballroomdance #figureskate #bellydancersofinstagram #bellydancers #orientaldance #orientaldancer #raqs #raqssharki #raqssharqi
A post shared by Mao Murakami | SPARKLY BELLY (@maomurakami) on
View this post on Instagram
@TammySpurgeon took the 5-day mermaid skirt challenge and here is what she had to say about it, “The skirt had come out beautifully!…I’ve always been afraid of a skirt like this since I am not the best ‘shape’ but it was the most comfortable and beautiful fit and a confidence builder the way it flowed.
”⠀ ⠀ Join the FREE challenge yourself and create your own mermaid skirt by clicking the link in my bio.⠀ .⠀ .⠀ .⠀ .⠀ #bellydancecostumes #bellydancecostume #bellydancedesign #ballroomdress #latindress #promdresses #applique⠀ #bellydancedress #rhinestone #customdancecostumes #customdancecostume⠀ #bellydancelife #bellydanceworld #bellydanceshow #bellydanceclass #bellydancestars #ballroomdance #figureskate #bellydancersofinstagram #bellydancers #orientaldance #orientaldancer #raqs #raqssharki #raqssharqi #ベリーダンス #肚皮舞 #ベリーダンス衣装 #ベリーダンサー
A post shared by Mao Murakami | SPARKLY BELLY (@maomurakami) on
It starts every Monday, so if you’re curious, go have a look & join us below!
Click here to check out the 5-Day Mermaid Skirt Challenge!
#5. Aurora Convertible Skirt
Wouldn’t it be nice if you can get more than 1 look out of 1 skirt!?
This Aurora Convertible Skirt makes your wish come true! 🙂
You get 3+ looks in this Aurora Convertible Skirt with the DETACHABLE side swags and tail!!! The base skirt is a gorgeous mermaid-ish skirt with a huge godet that flares amazingly as you twirl… and with the detachable parts, you can switch up the looks as you please!
It’s my paid course, so the how-to is not free.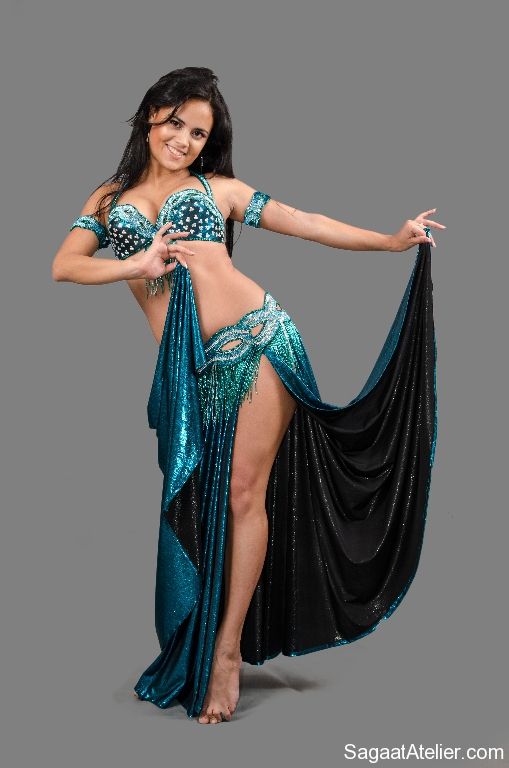 But what you get in this course is not even comparable to free tutorials!
Just to give you one example, you get 32 skirt design options – you’ll never run out of skirt ideas! 🙂 The below skirt is also from this course (Check out the perfect cut-out!):
Click here to learn how to make the Aurora Convertible Skirt!
#6. DIY 25-yard Skirt
If you’ve been studying belly dancing for a while, sooner or later you’ll want one of these, amazingly fluffy, dreamy 25-yard tiered skirts!
Even though I’ve placed this one at the end of the list, it’s actually NOT difficult to make. If I ONLY consider the level of difficulty, I should place this right after the no-sew skirt.
But this one takes patience!
Don’t get me wrong, I LOVE this 25-yard skirt. In fact, I revised my design so many times so that my version requires MUCH less time to make! But it IS a genuine 25-yard skirt. There IS a lot of fabric.
But if you’re up for the challenge, and if you’d LOVE to have this skirt, go for it!!! I’ve seen many dancers in Sparkly Belly’s Facebook group try this skirt with AMAZING results! 😀 😀
View this post on Instagram
I absolutely love what @violetmemories has done with her 25 yards of fabric….it has sooo much movement and grace. I can’t believe this is your first time sewing anything and I can’t wait to see what you do next!⠀ .⠀ .⠀ .⠀ .⠀ #costumemaking #bellydancecostumes #bellydancecostume #bellydancedesign #dancecostume #dancecostumes #ballroomdress #latindress #promdresses #applique ⠀ #bellydancedress #beadedapplique #rhinestone #customdancecostumes #customdancecostume⠀ #bellydancelife #bellydanceworld #bellydanceshow #bellydanceclass #bellydancestars #ballroomdance #figureskate #bellydancersofinstagram #bellydancers #orientaldance #orientaldancer #raqs #raqssharki #raqssharqi
A post shared by Mao Murakami | SPARKLY BELLY (@maomurakami) on
Isn’t it dreamy looking!? This is a really great skirt to dance in 🙂
Click here to check out the 25-yard skirt tutorial!
So which ones are you going to make? 🙂
I think these are really classic skirt styles that can be customized in any way you like!
The best part of all these skirts is that you can make them to YOUR SIZE, which is super important to me! There’s nothing more uncomfortable than performing in a skirt that’s way too long, which makes you worry you may trip and fall every second….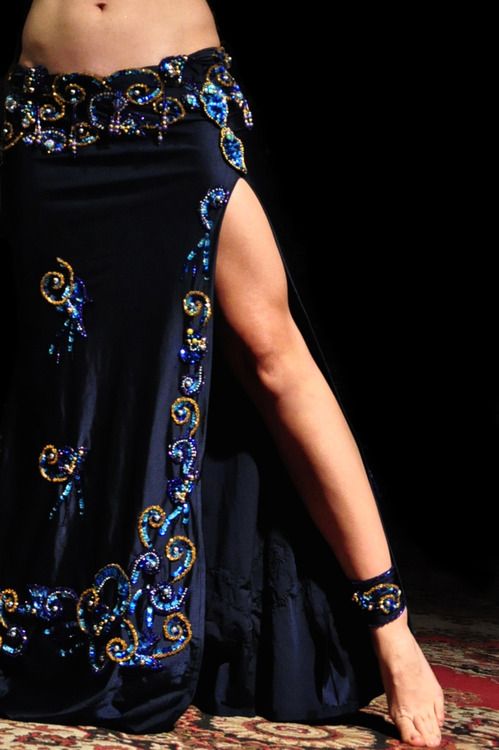 or in a skirt that’s way too short, which makes you worry that you look like you’re in a “borrowed” costume or your audience may be able to see a bit too much through the slit!
Hope you liked this list of 6 DIY classic belly dance skirts, and if you did, please share it with your belly dancer friends! Maybe try the no-sew ruffle skirt for your next troupe performance? 😉
And if you want to start making more costuming bits, let me introduce you to the world of belly dance costume making in my free course, Belly Dance Costume Making 101! Thousands of dancers have taken this free course, and I often hear from those who’re excited to start creating!
Click here to check out the free course!
Thanks for reading, and keep sparkling! 😉
P.S. Pin this image for your next project!
Like what you read? Want to make more costuming bits yourself?
Sign up for my newsletter here and get my free email course, Belly Dance Costume Making 101!
How to Make a Circle Skirt & Pattern for Belly Dancers
by Mao on in DIY Belly Dance Costume Blog, Uncategorized • 14 Comments
What was your very first skirt you owned as a belly dancer?
For me, it was a circle skirt, and I think it is a great choice for the first skirt to dance in.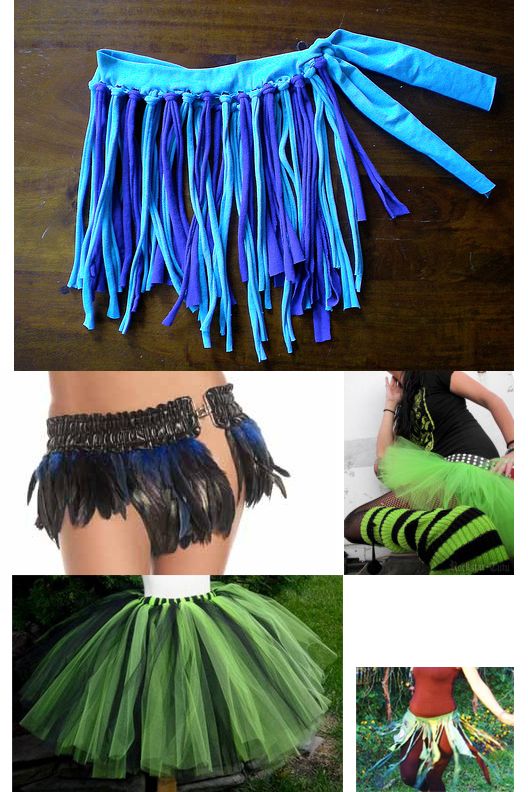
Circle skirts are versatile, and easy to match with different belts and hip scarves. They flow very nicely, and look beautiful when you twirl. I love when a troupe of dancers wear matching circle skirts and twirl all together… it’s a breath-taking view!
So, I thought it is important for belly dancers of all levels to know how to make and fix circle skirts, and I want to share how to make a circle skirt and a circle skirt pattern. You can skip making a pattern, and draw the pattern directly on to the fabric. But once you take the time to make a pattern, you can use it over and over again with different fabric. And it fits you perfectly each time.
In this video, you will see how to make a 2-panel circle skirt and a pattern.
Click here to receive updates and the Circle Skirt Custom Measurement Calculator
To make a circle skirt, you need:
- Fabric of your choice – To make a nice, flowy circle skirt, try to pick a light material such as chiffon and satin.
 Shira has an amazing site with lots of belly dance costume tutorials, and her circle skirt page has a whole list of recommended materials for circle skirts. Check it out here.
 - Elastic – in the video, I used 1 inch wide elastic.
- Sewing tools such as measuring tape, marker, scissors (a pair for paper and another pair for fabric), matching colour thread, pins, needles and sewing machine
- For making a pattern, you need a big sheet of paper or tape pieces of paper together to create one big sheet. I often cut open paper bags to make patterns.
How Much Fabric to Buy
Making a circle skirt requires quite a bit of fabric. If you follow this tutorial for a 2-panel circle skirt, you will need the following amount of fabric. I recommend you buy more than enough, in case something goes wrong, or you want to use the matching fabric to make arm bands or head pieces etc.
Fabric width: 150 cm (59 in)
Hip measurement: 92 – 108 cm (36 – 42 in)
Skirt length: 70 cm (27 in) 80 cm (31 in) 90 cm (35 in) 100 cm (39 in)
Fabric length: 3 m (3.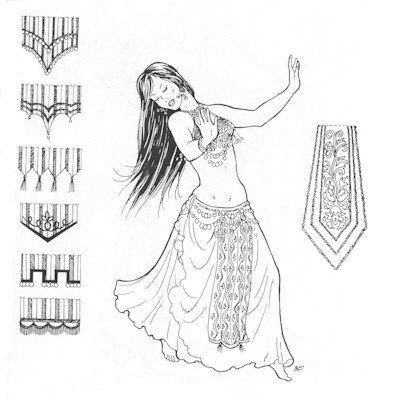 3 yd) 3.5 m (3.8 yd) 4 m (4.4 yd) 4.5 m (5 yd)
This is to help you estimate how much fabric you will need. If your measurement is outside of this scale, please estimate accordingly.
I based this on Shushanna’s formula which is based on the Pythagorean Theorum – check out her circle skirt instruction here. If you want to make more panels, please visit her site to follow the formulas, because just doing calculations for the above table made me want to cry (but I wanted to do it for you!!!) Her site is super informative, and I learned so much from her site over the years.
1. Make a Circle Skirt Pattern
If you spread a circle skirt on a floor, it should make a perfect circle – hence the name, circle skirt. A 2-panel circle skirt is made of 2 half-circle panels.
And we will make a pattern that is a ¼ of a circle.
First, take 2 measurements: the fullest part of your hip and the length of the skirt.
Then do some quick math to find the lengths of A and B to create this pie shape. If you don’t have a calculator lying around, download the Custom Measurement Calculator below, and just plug in your measurements to get the numbers you need.
Click here to get the Circle Skirt Custom Measurement Calculator!
A = hip measurement / 6.28
B = A + length of skirt
Once you have these numbers, take your measuring tape and create this ¼ circle on a big piece of paper. Then cut out the pattern.
2. Cut Fabric
Then take your fabric and fold it in half. Place the pattern on the fabric. Make sure one side of the ¼ circle is aligned with the selvage or raw edge, and the other side is aligned with the folded edge.
Pin the pattern to the fabric and cut along the lines. It makes it easier if you put weights or heavy objects on the pattern, so the fabric doesn’t move around.
If you use chiffon like I am using here, you will notice that the fabric moves around quite a bit, even with the weights. Don’t worry, you don’t need to be super accurate here, and you will see why in a minute.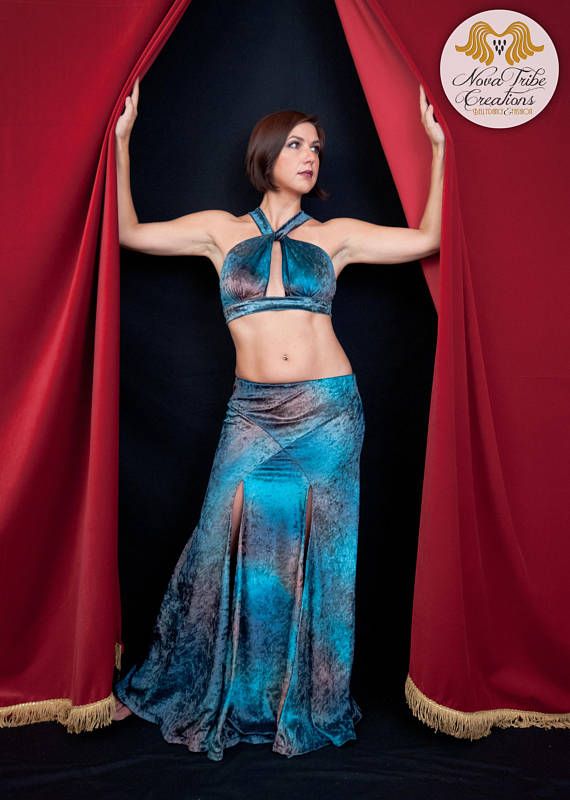 Just make sure you cut as close to the pattern as you can. When you open it, it should be a half-circle.
Repeat this step to create another half-circle.
3. Make an Elastic Casing
Now we make a casing, or a tube for your elastic to go through.
First, cut your fabric into a rectangle. To determine the length and width, you can plug in your numbers in the formulas or use the Circle Skirt Custom Measurement Calculator .
Length of Rectangle = hip measurement + 4 in (10 cm)
Width of Rectangle = width of elastic x 2 + 1 in (2.5 cm)
Next, put the right side of the rectangle and wrong side of a half circle panel together and align the top edge and place pins.
It is a bit tricky because you are aligning a straight edge against a curved edge. You can try pinning them from one end to the other end like this. But you may end up not having enough fabric, because the curved edge tends to stretch out.
Another way to do this is, first, mark 1/8 points with pins by folding the piece in half, mark with a pin, then fold in half again and repeat until you have 7 pins placed on the fabric. Then do the same for the skirt, but just for ¼ points, so you mark with 3 pins. And match up the pins. This ensures that the fabric is distributed equally. Place as many pins as you need to secure the 2 layers, and when you sew, hold the 2 layers nice and tight, and ease in the layers into your sewing machine steadily.
Sew along with a ½ inch (1.2cm) seam allowance. Once the first half circle panel is finished, continue with the second half circle panel.
Then, flip the whole thing over, so you see the right side of the skirt with the wrong side of the casing at the top edge. Pressing the seam makes your work easier here. Fold the top edge of casing over with a ½ inch (1.2 cm) seam allowance and press.
Then fold it over to line up the edge with the stitching line from earlier and place pins. Then top stitch close to the fold. Make sure the casing is big enough to fit your elastic here.
Now, put elastic around your waist (where the skirt should sit) and make sure it is tight enough.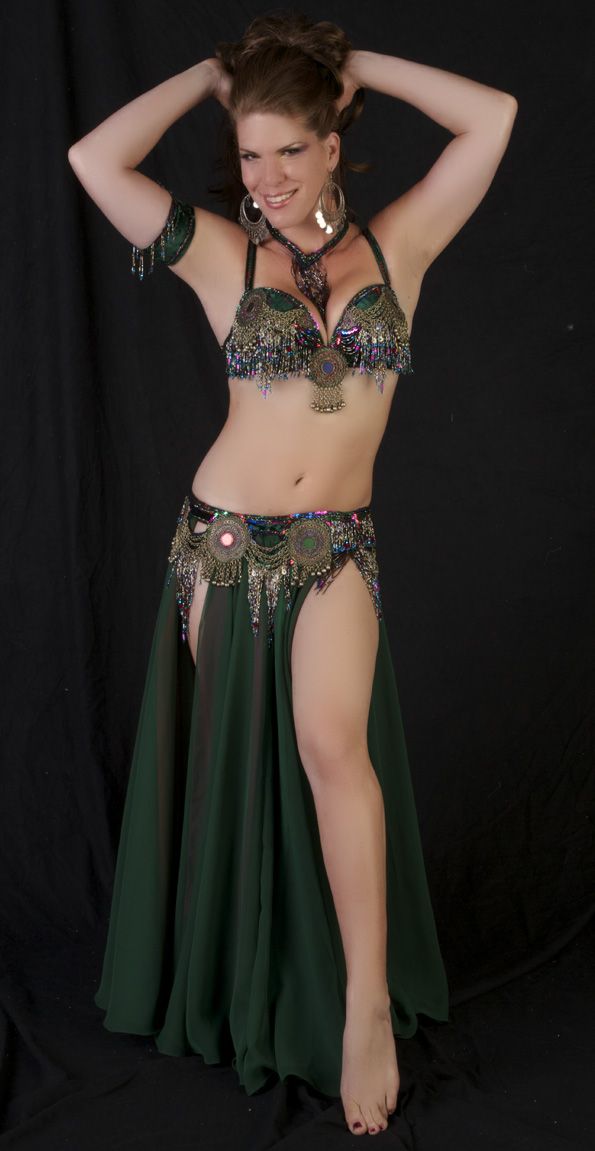 Cut the elastic, and put it through the casing with a safety pin. Stitch together the ends securely.
If you watch the video, I accidentally sewed the ends of the elastic together twisted…don’t do this! I realized it after I stitched the ends together and so I had to rip the seam apart and re-do it. So be careful and check before you stitch the elastic.
Then, insert one end of the casing in to the other, and hide the raw edge by folding the fabric inside a ¼ inch (5mm) or so, and then sew it straight down to close up the casing.
4. Hem the Skirt
At this point, hang up the skirt for at least a few days or a week. This is because fabric tends to stretch, so if you hem the skirt without letting it to stretch, you will have a skirt with an uneven edge.
This is why you don’t have to cut your fabric precisely to the pattern if you are using light weight fabric like chiffon. This type of fabric tends to stretch a lot.
Once the skirt has stretched out, put on the skirt, mark where it has stretched, then hem the edge. You can either get a friend to help you mark the hem with pins, or find something that is as tall as your skirt length and hang the skirt there. I found my fiance’s doumbek plus a chair creates my skirt length, so they act as my dress form 😀
Then just hem the skirt the way you want. If you have a serger, go ahead and use it. I don’t have a serger, so I just do small zig zag stitches all the way around.
Same for the straight sides. You can just zigzag stitch or use a serger, and if you want a slit on either side, leave the sides as they are. If you want a continuous circle skirt with no opening, just straight stitch along the straight edge. It is up to you.
Now you have a 2-panel circle skirt that fits you. This is the simplest circle skirt for belly dance costume, and you can modify, add layers or add more panels as you like.
Hope this was helpful! Now I have 2 favours to ask you. First, if you make a circle skirt or if you have your own tips on making a circle skirt, share them on Sparkly Belly’s Facebook page.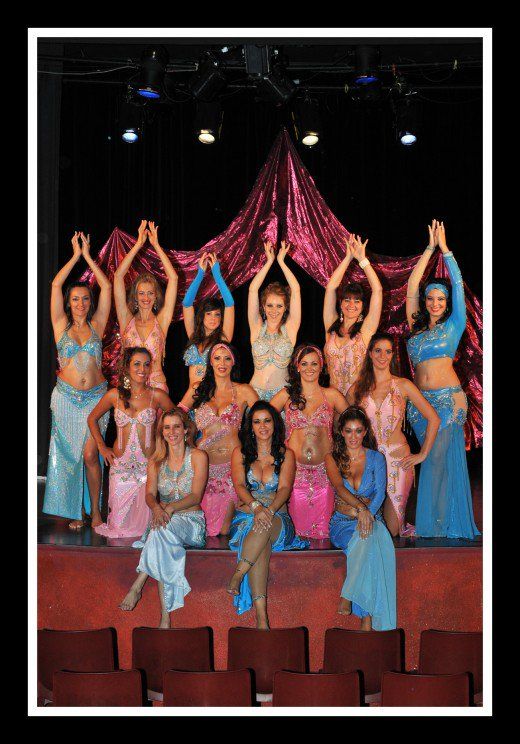
Second, if you find this useful, please sign up for updates and share this article with your friends, students, and classmates, so they can get their own copy of this instruction and custom measurement calculator, and more free resources to come.
Click here to receive updates and the Circle Skirt Custom Measurement Calculator
And if you want to try more advanced circle skirt designs like this ones below, check out the Advanced Circle Skirts Premium Course!
Make these designer grade circle skirts with me here!
OR what about an instant ‘WOW’ skirt like this one?
Make cascading ruffle skirts like this here!
And if you hang out over at Pinterest, pin this and share 🙂
Are you ready to make more costuming bits?
Sign up for my free course, Belly Dance Costume Making 101!
Oriental dance skirt: DIY pattern
At present, oriental dances are becoming more and more popular, and, accordingly, the demand for special costumes for this type of dance is increasing. In this regard, there are more and more organizations and individual craftsmen who are ready to sew such clothes for you for a fee. But often such services are quite expensive, although a skirt made specifically for oriental dances is not so difficult to perform, and any craftswoman with at least some sewing skills can sew such a skirt on her own. nine0003
Oriental dance skirt can be made from various fabrics from chiffon to satin. The main thing is that the fabric flows, shimmers and flies, you can also combine different fabrics in one suit, the main thing is that all this is in harmony with each other. The classic version of the skirt is two suns for the back panel and a half sun for the front panel. At the same time, there is no need to sew them together, since the cuts will pass in the middle of the leg.
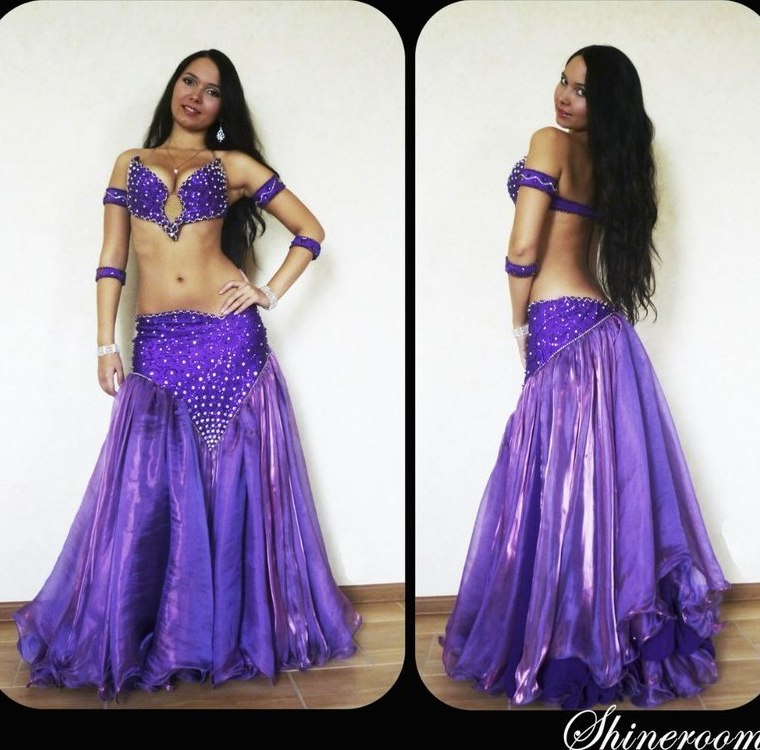
Fish skirts can also be used for oriental dances, which, in fact, are year-round skirts and are great for women with curves, as they visually stretch the silhouette and make it thinner. This skirt is an indispensable option for the performance of the tabla, it well emphasizes the shaking, circles and figure eights with the hips. At the initial stage, you can use an ordinary straight skirt with slits on the sides for oriental dances. The most suitable skirt length for an oriental dance is two centimeters above the ankle, since during the dance the skirt can go down a little and if it is too long, there is a danger of stepping on the skirt. nine0003
So, we figured out the main points when sewing a skirt with our own hands for oriental dances, you can proceed directly to the master class.
We are studying a master class on sewing a sun skirt for oriental dances
We will consider sewing a sun skirt, as it is a classic of this type of dance and, moreover, sewing it can be associated with some difficulties, which we will talk about in this masterclass.
In order to sew a sun skirt, no additional patterns and complex calculations are required - it can be cut directly on the fabric. The main disadvantage is that this will require a fairly large space and in a standard apartment only the floor can serve as this space. So free the floor from unnecessary items and wipe with a damp cloth to avoid soiling the fabric, lay the fabric in one layer with the wrong side up and start cutting. nine0022
To build a pattern, we need only three measurements - this is the waist, hips and skirt length. The pattern of the skirt, as well as the plan for laying it out on the fabric, is shown in the photo below, the arrow indicates the direction of the shared thread.
If you decide to sew a skirt with a belt and a hidden zipper, then the value of R is calculated by the formula R = 0.32 * St, where St is the half-circumference of the waist. With the help of a centimeter tape or by hand, draw a semicircle with the resulting radius. After that, we set aside the required length from its edge and draw a second semicircle. nine0003
If you are making a skirt with an elastic band, then in the formula for calculating the R value, you need to replace the half-circumference of the waist with the half-circumference of the hips so that you can easily put it on.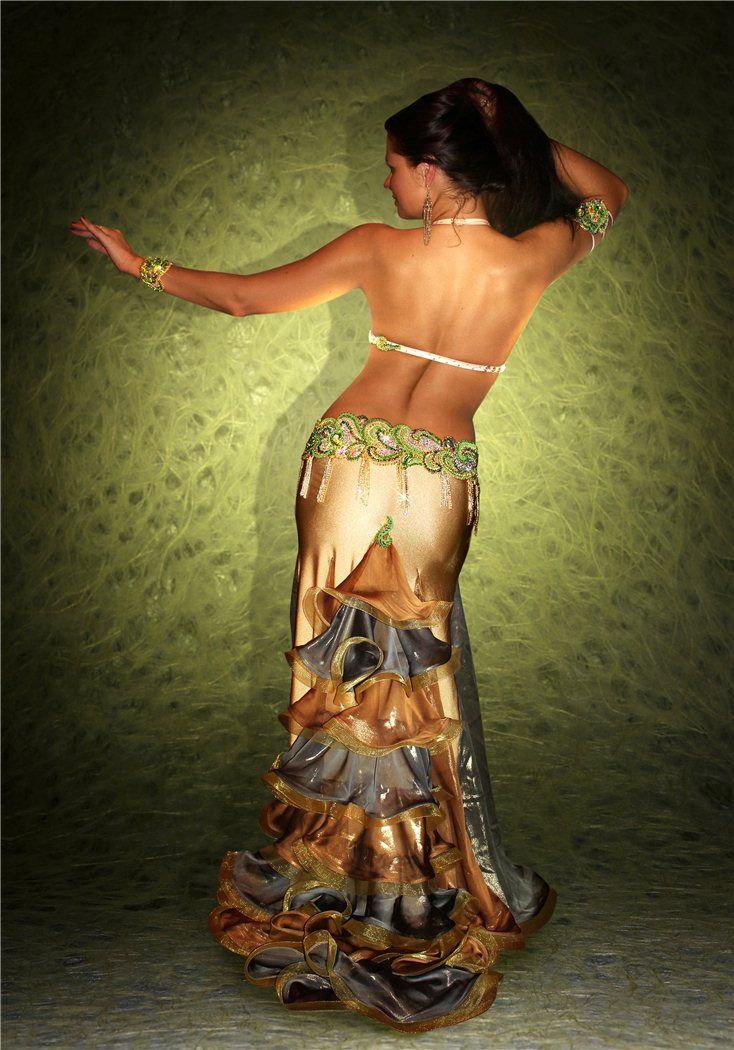 Also, don't forget about allowances for loose fit and seam allowances.
After the pattern is ready, all measurements are checked, you can safely cut it out. Basically, skirts for oriental dance are sewn on an elastic band, so after cutting out, you can immediately sew the side seams, then tuck the top edge to the width of the elastic band and insert it into the skirt. The bottom edge can be hemmed or finished with an overlog or zigzag stitch, depending on what fabric you are using. nine0003
As you can see, sewing a sun skirt for oriental dances is not at all difficult. After finishing sewing along the waist, you can sew adhesive tapes directly onto the skirt to attach the belt, then it will not twist during the dance.
A significant disadvantage of sewing a sun skirt is the high consumption of fabric, which is about 5 meters, and not every seamstress without experience is ready to spend a significant amount of money to buy such an amount of material. If, despite the simplicity of sewing such a skirt, you still doubt your abilities, then sew an ordinary sun skirt for a girl, for example, for a daughter - due to the small size of the fabric, it will take much less, and you will gain invaluable experience and confidence.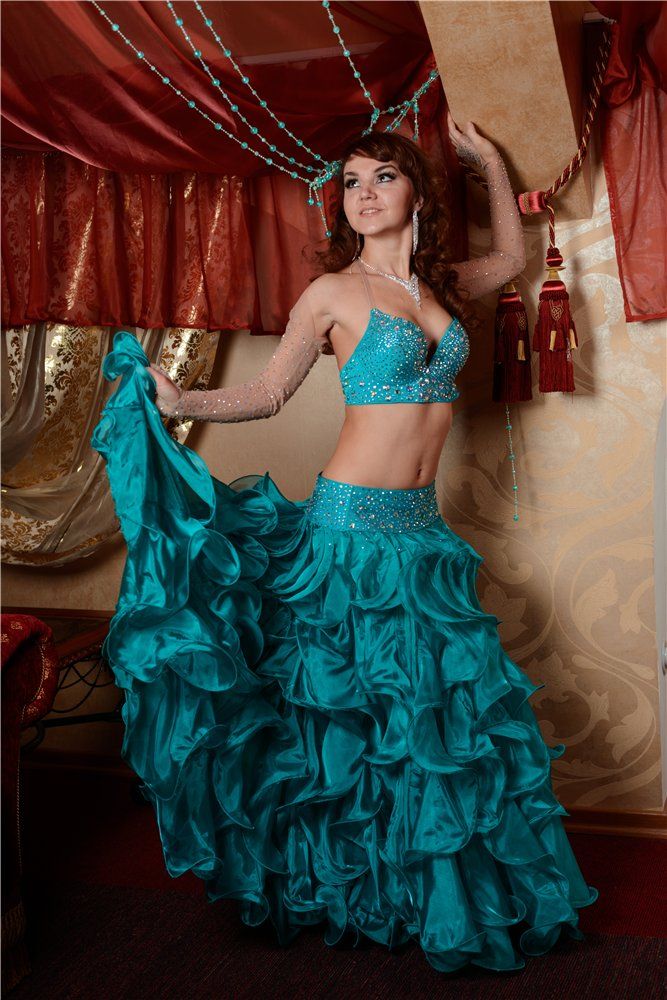 nine0003
Video on the topic of the article
In conclusion, we suggest you watch a few videos about sewing a skirt with your own hands so that you can choose the option that matches your type of oriental dance and clearly see all the nuances of sewing such skirts.
Do-it-yourself belly dance costume
- Sergey Sizov
- 10 Apr 2018, 22:01
- 403
- 0
Contents of the article
- 1 Master class for making a belly dance costume with your own hands.
- 2 Patterns for a belly dance costume.
- 3 Do-it-yourself belly dance costume photo
- 4 Do-it-yourself belly dance costume video
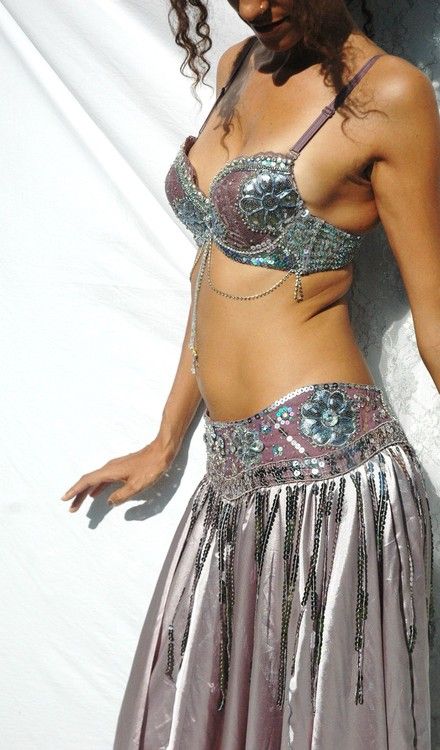
Belly dance came to us from the Arab countries and conquered not only women, but also men with its beauty. The gracefulness of the body and the beauty of the movements are especially emphasized by the beautiful costumes that reveal the best parts of the female body and present them in an advantageous position during the movements. Such costumes are most often decorated with a large number of beads, stones, beads and others. This is what makes them so valuable. Do not be afraid because such a costume can be easily sewn with your own hands. nine0003
Master class for making a belly dance costume with your own hands.
Before tailoring any suit, you need to make the necessary measurements as clearly as possible. Then comes the selection of fabric for the suit. The fabric should be as pleasant to the body as possible, not cause allergic reactions (most often this happens when there are non-natural components in the composition) and not hinder movement (be as elastic as possible).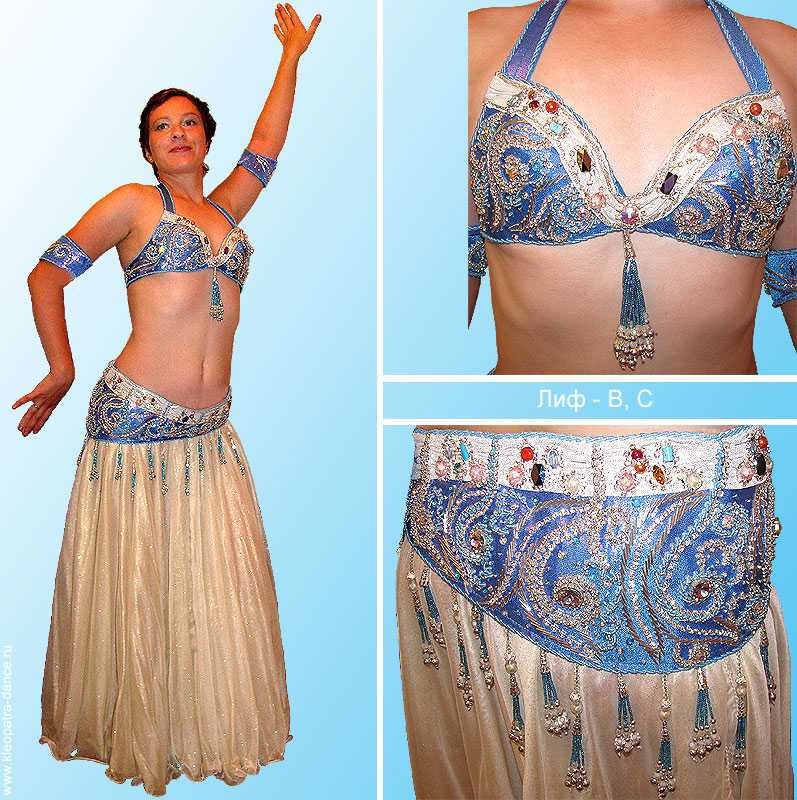 For belly dancing, brighter fabric colors are needed, and one of the best options is silk as a material for tailoring a costume. In addition to the material for such a costume, you may need various decorations - stones, rhinestones, beads, etc. As soon as the purchase of the necessary components is over, you can proceed directly to tailoring. nine0003
The costume consists of 3 elements:
- Bodice.
- Skirt or bloomers.
- Dressing. Over the skirt on the hips.
First you need to choose a bodice, it is best to buy a ready-made bodice, which can be transformed into a part of the costume with the help of simple manipulations. The bodice is better to choose, as shown in the figure without any patterns and decor, the usual solid color.
After you have found the most suitable bodice, many get rid of the internal filling of the cup. This should not always be done, but only if you naturally have your own large breasts and the push-up increases it even more and does not support it, as it is necessary for dancing. Many instead of push-up insert shreds of fabric, which gives rigidity and better fixes the chest. nine0003
It is very important to change the hooks to this kind of rivet, as shown in the photo below. It is they who will support the chest more favorably during belly dancing.
And the last most favorite and most interesting item in the preparation of the bodice will be decoration. You can decorate it with absolutely any materials and according to your design.
After the bodice, we proceed directly to the skirt of the suit.
First, measure the desired material size. Then we cut off the desired piece. nine0003
No lining needed. Elastic, threads and fabric - all you need for a skirt.
The elastic must be sewn to the waistband.
The hem of the skirt should also be processed so that everything looks as beautiful as possible and there are no protruding threads or uneven cut edges.
After the work done, we will get just such a skirt. Everyone chooses the right color and material from which to sew this skirt. It is also worth remembering that it should not be as long as possible and it is better to make one or two cuts on the sides. Then you can embroider and decorate this skirt with all possible beads, rhinestones, shreds from other materials. nine0003
The bodice and skirt are ready, only the belt remains to be sewn. The size and width of the belt can be different and vary only from personal wishes.
Using a sewing meter, measure the hips and transfer it to a piece of material. Next, we make a cardboard sketch of the belt itself.
After we circle the edges of the sketch and cut out the desired section of the fabric. This fabric needs to be stitched along all the edges so that the belt turns out to be even and beautiful.
Belt ready. It also needs to be decorated and the image will be complemented. nine0003
Patterns for a belly dance costume.
For beginners in the world of sewing, below will be given options for patterns, according to which you can easily learn how to sew this kind of suits.