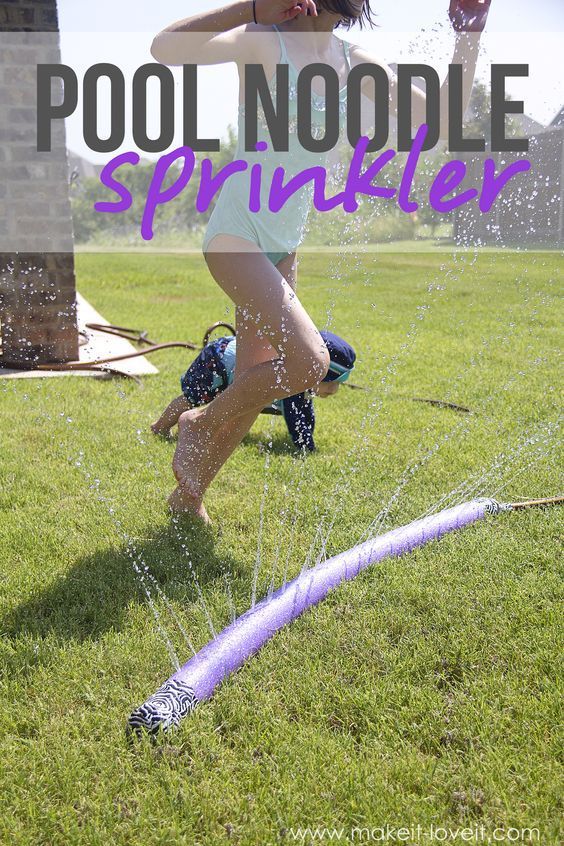
How to come up with a cheer dance
How to Map a Cheer Routine
Just as a well-executed stunt starts with a solid foundation, a flawless competition routine needs to have all of the essential elements that appear on the score sheet. These elements are the fundamentals taken from gymnastics, dance, acro-sports, and more, similar to the way an elementary school program must include the basics of math, reading, science, history, art, and physical education.
In cheerleading, the sections of a routine consist of the following:
1. Opening (2-4 8-counts):The opening section can demonstrate any type or variety of skills. The most important thing to remember is this will be your first impression on the judges, so be sure to show your strengths.
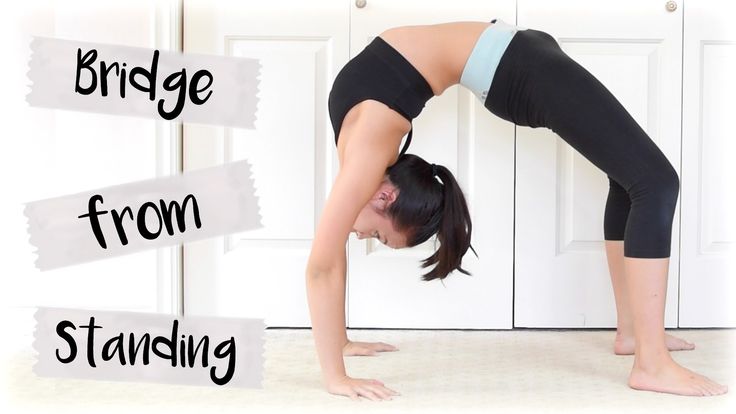
2. Standing tumbling (2-4 8-counts):This section is typically placed in the opening, or soon after, due to the strength needed to perform these skills. Most standing tumbling refers to back walkovers (for lower levels), back handsprings, or a tumbling series ending with a tuck, layout, or full twist as the level increases.
These are stunts (lifting or tossing a flyer) with at least one base. There may be multiple groups or pods, but the flyers do not touch.
4. Running tumbling (6-8 8-counts):This section can be performed either as a group or as an individual’s specialized skill.
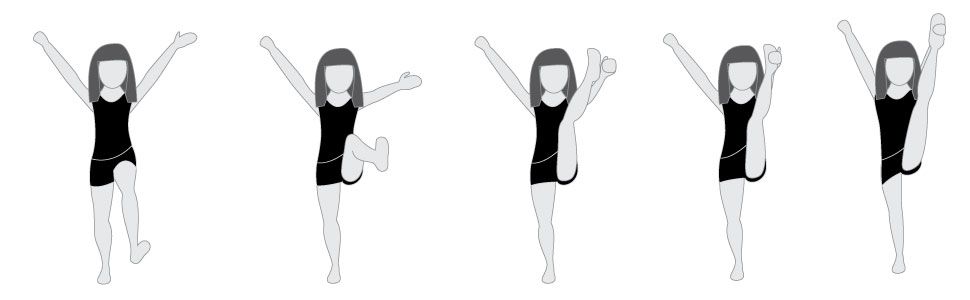
5. Jumps (2-3 8-counts):Toe touches, hurdler jumps, and pike jumps should all be included in routines to max out points. Mixing multiple jumps together and combining them directly into standing tumbling always increases points if performed properly.
6. Basket tosses (2-3 8-counts):For this section, two bases with a front and back spot toss a flyer in the air and catch them in a cradle. The flyer will hit a skill in the air as well, such as a toe touch. Some lower levels cannot perform this skill.
7. Pyramid (6-10 8-counts):A pyramid is executed by multiple groups lifting multiple flyers, with the flyers connecting in some fashion by touching or bracing one another in the air.
This section is typically placed toward the end of the routine and considered the fun part when the team can express its style.
9. Transitions (one 8-count):Transitions are placed between sections, and it is always best to reduce the length and number of transitions to maximize the use of your time gaining points. Transitions do give the judges time to digest and note things, but if they can’t look down because so many creative things are happening, that’s always a good sign. Combining jumps and standing tumbling is a great way to eliminate a lengthy transition. Another way to reduce transition time is to make sure the tumbling sections keep the stunt groups on the same side of the mat.
We’ve listed a wide range for the number of 8-counts dedicated to each skill section because it will vary depending on the age and level of the team. The number of 8-counts is based on a 45 8-count mix, which has an overall time of 2:30.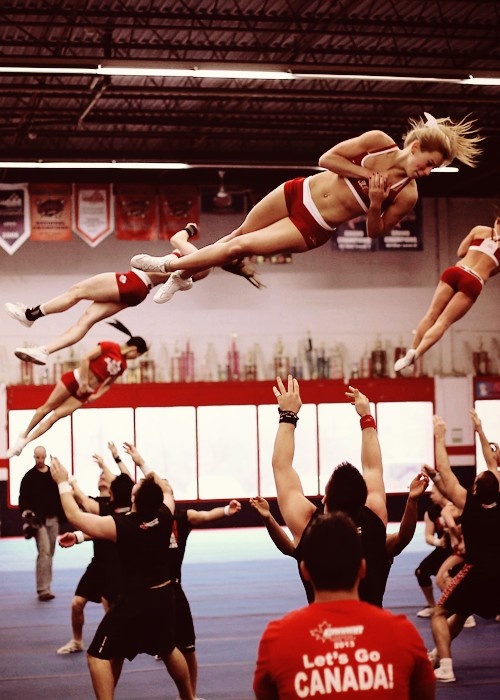 The points system often dictates how much time is allocated to the various sections, which is based on the competitions you attend. It’s important to remember to spend more time highlighting strengths and minimize the time allotted for their weaknesses. Creativity, visual effects, and smooth transitions always help keep the judges and audience engaged and impressed.
Twenty years ago, most teams were ordering music and creating their routine to fit the music, but in recent years, cheer has evolved to a point where most teams aim to cram in as many skills as possible in order to max out the points. For that reason, a majority of elite teams with big budgets create their routine and all the skills in it. Then, with a count sheet and video, the cheer music producer magically takes the desired songs, theme, style, and feel and creates a mix that fits the team’s movement and identity. These custom mixes come at a price, often $700-$3,000, or more.
All of our mixes at Power Music Cheer are set up in the same fashion that the majority of our elite clients prefer. We dedicate the same number of 8-counts per section in the same order they perform them. Plus, if you find the right mix but need more time in one section and less in another, we can fix that! We also offer song swaps if you love a mix but do not like a particular song in the mix.
Perfect 8 Counts | Pom, Cheer and Dance Choreography Videos
Sign up today
Perfect 8 Counts is THE place for pom, cheer, and dance choreography. Pay low prices to receive online routines to learn from the comfort of your computer! In-person workshops are also available for game day routines, sidelines, and motivational workshops. Take your team to the next level!
Sign Up Play Video
Scroll Down
Mary Dill Krow
About the Choreographer
Mary Dill Krow grew up training in jazz, pom, and cheerleading in Tulsa, Oklahoma. She was captain of her Spirit Squad and began choreographing at age 15. Mary attended SMU in Dallas, graduating with a degree in Psychology and a minor in Statistics. After college she spent two years with the Dallas Cowboys Cheerleaders, earning Rookie of the Year, and representing the Cheerleaders on their 80th USO Tour. Mary created Perfect 8 Counts to be an inspiration for girls who find happiness through cheer and dance!
Learn More
Take Your Team to the Next Level
New Routines Available every season
Online Routines
Sign UpGame day routines, Sidelines, Team Building
In-Person Routines
Learn MorePerfect 8 Counts in Action
OSU Pom "Kerosene" 2021
Play Video
DBU Patriettes Pom
Play Video
Tulsa Pom "Lil Bit" 2022
Play Video
OSU Pom "Pickin Wildflowers" 2021
Play Video
BK Spirit "Run It" 2021
Play Video
OSU Pom 2020
Play Video
Tulsa Pom 2019 "Good Girl"
Play Video
OSU Pom Country Routine 2019
Play Video
TU Pom Hip Hop 2019
Play Video
DBU Patriettes 2018 Homecoming
Play Video
TU Pom performs "Youngblood" Routine
Play Video
DBU Patriettes 2018 Pom Routine
Play Video
TU Pom 2018 Country Dance
Play Video
OSU Pom 2018 Country Dance
Play Video
DBU Patriettes Pom Routine
Play Video
OSU Pom 2017 Country Routine
Play Video
OSU Pom 2018 Rock Dance
Play Video
SMU Pom Squad Routine
Play Video
About P8C Choreography
Play Video
University of Tulsa Pom 2018
Play Video
Sign Up To Receive News and Promo Codes!
Basic elements in Hip-Hop (practice)
Exemplary team Dance and sports club AJAX #RedPAntherscrew
Basic elements in Hip-Hop style
Learning the basics. 16 initial movements
Each dance is based on the basic elements on which it is built. The same applies to Hip-Hop
After the student has caught the approximate nature of the movements and understood what he is moving and how, we begin to acquaint him with the base.
Important. The second and third stages take place simultaneously. nine0011 We take 2-3 new movements at each lesson. We disassemble. Adding hands.
At the end - freestyle, to fix all the material.
In this way, we repeat and consolidate the old material and impose new material on it, which allows the student to accumulate knowledge, and not learn new things every time and forget. Every student must know the basics.
Here are 16 basic moves and their variations on the basis of which you can make a combination:
1.Steve Martin 2.Running man 3.Kick 4.Roger Rabbit 5.Alf (March Step) 6.Kriss Kross 7.ShamRock 8.PartyDuke 9.Monestery 10.Bart Simpson 11.Bobby Brown
12.Happy Feet 13.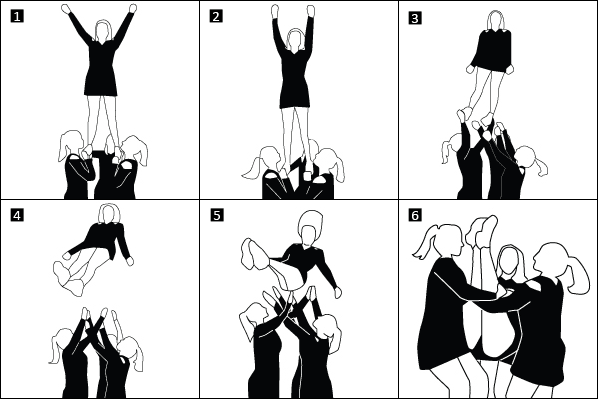 Sponge Bob 14.PartyMachine 15. Atl Stomp 16. Reebok
Hip Hop Basics
Old school (1979 – 1990) Hip Hop Basics old school
- Basic Bounce Combo
- Two step [Tu step] - two steps or step, prefix. The simplest movement found in many hip-hop dances. "One" - a step towards the launch vehicle. "Two" - the second leg is substituted for the PH. The movement is repeated on the other leg. Step stand to the side, forward, diagonally, loop back. nine0028
- Step slide, slide step , Glide , Circle Glide / Turn Glide
- Combination with kick - kick - raise the knee - stand with a body turn. Mandatory accented pumping. We raise the knee and rebound back, without swinging, lifting the leg from the calf muscle.
- Criss cross step on the rise with a jump, cross - initial, add lower back on the sides, knees bent.
 Add diaphragm and uncomplicated hands. Do not strain your neck and back! nine0028
 - Criss Cross Variations
- Humpty Dance Humpty Dance. In this dance, the “Kach” of the pelvic girdle becomes the main one. The dance is performed in the second wide position and the knees must always be bent. Starting position II free position of the legs. "And Raz" - Chris Cross. "I" - the pelvic part of the legs is retracted slightly back. "Two" - So with an accent moves forward. "And Three", "And Four" - "And Two" is repeated. You can add hands, as in the video below, or come up with something of your own. nine0028
- Kick it drink it. Kick [Kik] is one of the most common movements in modern dance. A simple kick in the air. When performing, you must remember about the Groove (Kach). Starting position: I parallel position of the legs. "And" - kick [kick] or kick with the right foot forward. The movement is similar to kicking a soccer ball.
 The body makes a “pitch” forward. "One" - the right leg returns to its original position. The left leg swings back. The body leans back slightly. "And" - the left foot makes a kick [kick] forward. "Kach" forward. "Two" - similar to the movement to "One", only from the opposite leg. On the next beat, the movement is repeated. nine0007 Kick, Kick + Back jump
 - Kick and slide kick and slide. A kick is made with one foot, and then a slide is made with the other.
- Kick & Step - Kick Cross Step
- Kick ball change On I swing, for once swing up, on I swing, 2 steps back and kip up. Hands work in opposition. Back and to the side, back with a twist in the hips, forward, back with a turn and to the side, forward and forward crosswise . Kick out - leg bent to the side, kick, change of leg to the side.
- Party Duke + variations - leg abduction to the side.
- Cabbage patch The name comes from the Cabbage Patch Kids, a toy popular in the 80s and 90s. Usually performed comically. Often accompanied by funny "grimaces". The starting position is free. Hands move in a plane parallel to the floor. Starting from the chest describe a circle. During performance, the shoulders rise. Any steps can be used in the legs. nine0028
- Smurf [Smurf] - movement named after cartoon characters. The knees do a swing with an emphasis down, the body and head with an emphasis forward. Hands in turn move forward, as in swimming. Starting position - free. "One" - one hand begins to "float" forward in a small arc. In the legs, body and head, "kach" begins.
- Prep (Pretty Boys)
- The wop
- Reebok - swing up with shoulder and arm jumping. nine0028
- FILA
- Happy Feat
- Spongebob -knee to shoulder, jump, straightening the leg to weight
- The Charleston
Middle School elements of high school
- Party Machine - VARIATIONS forward kick, opposite arm strike, rebound, leg and arm lashing variation, side jump and arm variation.
- Running Man : Reverse, With touch. Raise the knees, while descending, the weight of the body between the legs, hands “pump the pump”
- Reject Step
- Shamrock - step sideways outward, back, bouncing legs together, landing. Option back. Option 2
- Steve Martin - forward - backward swing, extension of the bent leg back, knee forward, change, remove the error when turning with the knee to the body back.
- Pepper seed
- BK Bounce (Peter Paul)
- Roger Rabbit : Bobby Brown, Janet Jackson, Henry Link. Video 2
- Janet Jackson
- Bart Simpson
- Buttlerfly
- TLC - Stepy with elbows
- Wu Chung - Hands in terms block
- James Brown
- Biz Markie
- CAT DADDY - Robocop variation 2 variation 3
- BARBIE
- Chiken head
- Chicken noodle soup
- Aunt jackie
- Pop, lock & drop it - body twist and lock squat
- Trammps
- GUCCI
- GUESS
- Beneton
hip-hop elements different
hip-hop elements for insulation, waves, infants
- 4 Corners -Circular movements of
- TRAVE WAVE Man - kick sideways pelvic rotation
- Neck-o-Flex - head to side, turn
- Ticking - ticking
- Puppet Style - puppet style
- Run It - forward step twists
- Egyptian Twist - legs together, side twist.
 Egyptian Twist with Step Out . Egyptian Twist with Walk Out
 - Camel Walk
- STEP OUT DANCE - Steps in diagonals
- 9000 9000 KID'NPLAY --PLAY
- Dime Stop
- Up An Down Shake
- Hummer Shake
- Add Locking Tricks
- Squad
- Drop
- Spin drop
- Kick Drop
- Pin Drop
- Slenergy Extreme Ground Combo
- Easy Floor Combo (Hip Hop Dance Moves Tutorial) | Mihrantv
Video with the main elements HIP HOP
Basic movements hip-hop
How to independently put a wedding dance
- +7 812 565-45-32 9002
- Pargolovo
HIP-HOP in the 9000-FILLS, MALES, MADEN buttocks, on the back
Basic landing options. Go downs
Yes, you can! For those who want to take the risk and try to stage their first dance on their own, I want to give some useful tips. I hope that they will help you competently plan and stage a harmonious wedding dance! nine0011 This article will be useful both for those who already know how to dance a little, and for those who are very enthusiastic and want to try their hand and come up with the dance of their dreams on their own.
So, what should be assessed and considered before proceeding with the production?
Size of the dance floor and height of the ceilings
If your dance floor is small, then when staging the dance, you should avoid moving around the ballroom, choosing more compact dance figures for your composition. nine0011 At the same time, if your venue is large, then it is advisable to include several figures in your dance, in which you will actively move around the hall, thus filling the space visually.
Let's take a simple example: a wedding dance set to the tempo of a fast (Viennese) waltz. For the case if you have a small dance floor, you should stop at the “figured waltz” option, performing the figures without advancing, and performing the waltz itself “in a square”.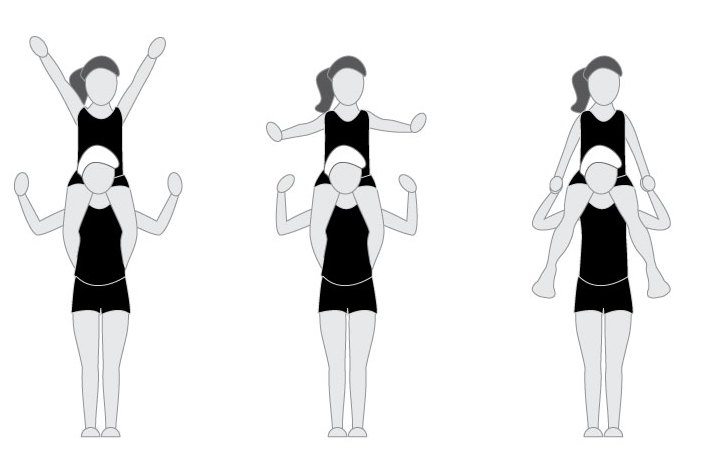 nine0011 If you have a large venue, I suggest including a big circle waltz.
Ceiling height is important for high supports, the simplest of which is lifting the bride in her arms. Before performing such support, you need to make sure that the height of the ceilings allows it. For example, in some restaurants and on steamboats, it is problematic to perform high lifts.
Viewer's side
All your movements, and especially postures, should be laid out in directions and oriented to the "spectator" side. To begin with, determine the configuration of your dance hall, the place where you will go to dance, the place where the main part of the audience will be concentrated, where the photographer and videographer will stand. nine0011 All of your poses must be performed facing the audience. To do this, you need to decompose your dance into directions, so that for the performance of certain figures you find yourself facing your audience.
If you have 2 or more spectator sides, then you need to decompose your dance so that you alternately dance to one or the other spectator side.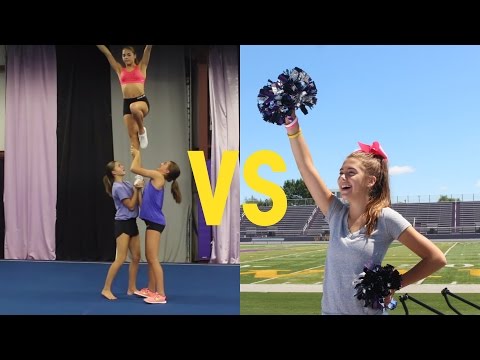 Preference should be given to the side where the photographer and videographer will stand.
Music
You can put the dance to any musical composition you like. It should be borne in mind that it consists of musical phrases, which in turn are divided into measures. The main rules that I recommend to follow in order to achieve the musicality of your performance:
a) As soon as a new musical phrase begins, you must change the movement type. The simplest example: while the singer is singing one phrase, you make one movement, when he starts singing another phrase, you start making another movement. Most often in musical compositions there are verses, choruses and losses. They usually consist of several musical phrases.
b) Play with musical accents and puffs. Accents (beats in music) are perfectly played with rapid hand movements, a sudden stop in movement, or a sharp change in direction. Puffs are best suited for “smeared” smooth poses. nine0003
c) Within each musical phrase there are several measures (most often the time signature for modern compositions is 4/4, for a waltz 3/4). Try to hear them, isolate and decompose your movements into strokes, achieving clarity of execution.
Before decomposing your movements into music, I recommend doing a musical dictation: decomposing your music into phrases, measures, highlighting accents and puffs. And then to impose on them movements.
Duration
Suggested duration of the dance: about 3 minutes including entering the platform and bowing. If your musical composition is longer, then it is worth trimming it using software tools. A longer dance rarely looks good: the audience gets tired and the effect of the first impression is lost.
If you fundamentally do not want to shorten your melody, then I recommend inserting some pantomime scenes into it for contrast (scenes of a meeting, farewell, quarrel, reconciliation). This will advantageously set off the dance part and help make your performance more intense and interesting for the audience. nine0003
Physiology of the bride and groom
The appearance of the couple is very important for creating a harmonious dance.
Couples in which both the bride and groom have an ideal athletic physique and an ideal difference in height (10-15 cm) are few. All dance figures will suit these lucky ones.
But if your pair has features, then they must be taken into account and beaten, using 100%!
For example, for couples in which the groom is much taller than the bride (the difference in height is 20 cm or more), elements in which the groom goes down (visually becomes lower) and the bride remains standing will look very good. Also, for such a couple, support with rotation on the hands will look great, in which the bride is taken in her arms facing the groom (see photo above). nine0003
If there is a small difference in height between partners in a couple or the bride is taller than the groom, then supports are perfect for you, in which the bride deviates, and the groom remains standing straight. Elements in which the girl sits down on bent knees facing the groom will also look good. Rotation on the hands for such a pair is best done in a position when the girl is picked up sideways.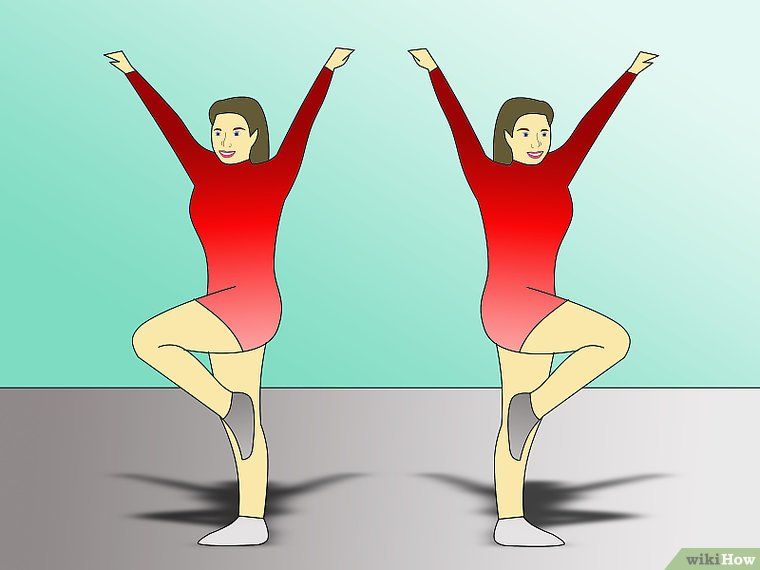
In couples where the bride has a more dense physique than the groom, we recommend avoiding elements with the bride lifting on her hands, in this case it is better to focus on the plasticity of the partner’s movements and courageous lines in the partner’s positions. nine0003
Video work
If you are staging your own wedding dance, you will most likely be using video material. It would be a big mistake to simply copy the movements from someone else's dance.
When watching a video, be sure to select those movements that you understand how beautiful and correct to perform and avoid complex and incomprehensible elements.
You should also be aware that what looks easy and beautiful in a professional performance may not look advantageous for beginners. nine0011 Think about whether the movements you like are right for your couple, whether you perform them well. Take a video of yourself and compare the resulting picture with the original. Leave only those movements that you are good at.
Advice for girls
Girls, think about the features of your wedding dress when staging a dance. If the dress is tight, then you should wear a tight skirt at the rehearsal in order to immediately avoid movements that you basically cannot do in this dress. nine0011 If you have a crinoline dress, then wear a crinoline at rehearsal so that you and your fiancé get used to its size. Remember that the crinoline creates some distance between you in the dance, as well as inertia in the rotations.
If you have a train - then you need to either stab it or support it with your hand. Accordingly, during rehearsals, always keep something in the hand that will be occupied by the train. Often the choice of movements for a wedding dance is largely dictated by the bride's wedding dress!
Time
When working on the wedding dance on your own, you need to start staging about 2 months before the wedding. Chances are you won't have much time right before the wedding, and a good staging is time-consuming (especially if you don't have any dance experience), so it's best to start working on the dance early.