How to make dance pom poms
DIY Cheerleading Pom Poms - Makes and Munchies
Hi Friends! Are you looking for an easy way to make DIY Cheerleading pom pom’s in just a few steps? Look no further, I’ve got your back! You’ll have your very own cheerleading poms in no time at all!
The DIY cheerleading pom pom’s are so fun to use for sports games or at home to watch your favorite game.
And, the GLOW IN THE DARK handles is so fun for kids!
There is a local volleyball team here in San Antonio for kids to join, and little Jozel was signed up on the all-girls Strikers Team.
Jozel loved playing volleyball so much, she continued playing volleyball on several teams for a couple of years after that.
CONTENT
[hide]
- SUPPLIES
- STEPS 1-4 POM POM’S
- STEPS 5-8 POM POM’S
- STEPS 9-11 Pom Pom’s
- TAKEAWAY
Check out how I made DIY Cheerleading pom pom’s to show team spirit, in just a few steps. It’s super easy! Which team colors are you going to choose?
Click to Tweet
Jozel’s volleyball games were every Saturday for a couple of months, and our family were there cheering on her team, with our pom pom’s, of course!
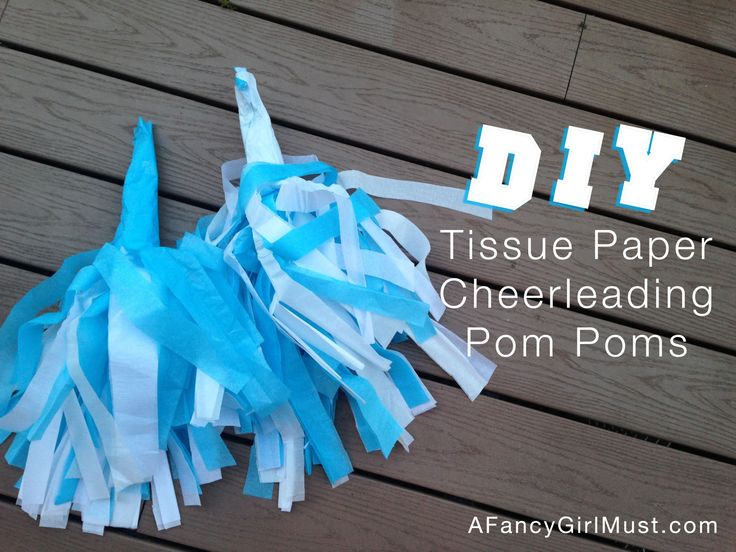
The Strikers volleyball team colors were black, blue, and white, so, to show our team spirit for her team, we made this DIY Cheerleading pom pom shown below.
Ready to make your DIY Cheerleading Pom Pom’s? It’s super easy, I promise! And, It cost me only $5.00 to make these! Outstanding, right!?
Choose your team colors, and LET’S GO!
SUPPLIES
- 6 Large pieces of Blue Tissue Paper
- 6 Large pieces of Black Tissue Paper
- 6 Large pieces of White Tissue Paper
- 1 36 inch piece of Blue Yarn
- 1 Glow in the Dark Bracelet
- Scissors
- Hot Glue Gun
- Glue Sticks
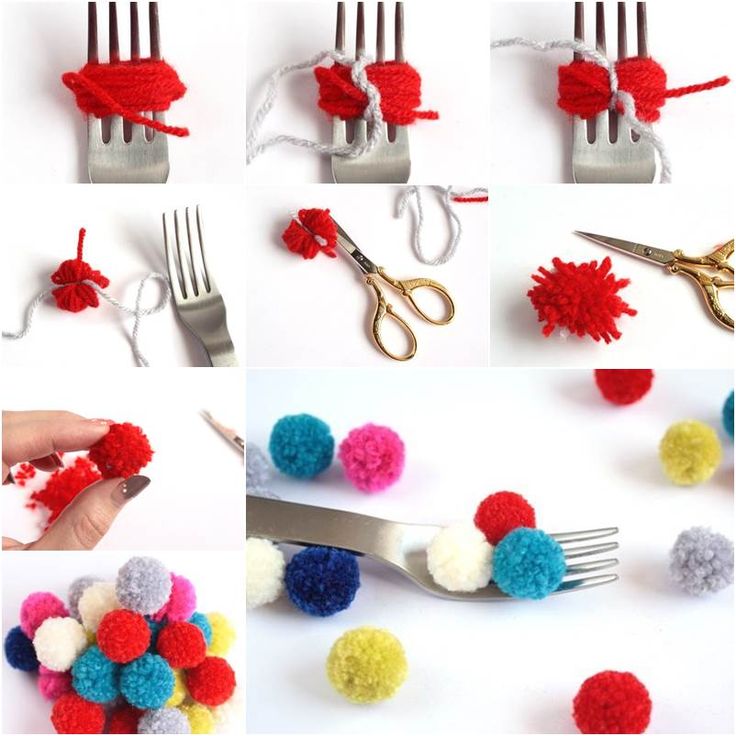
STEPS 1-4 POM POM’S
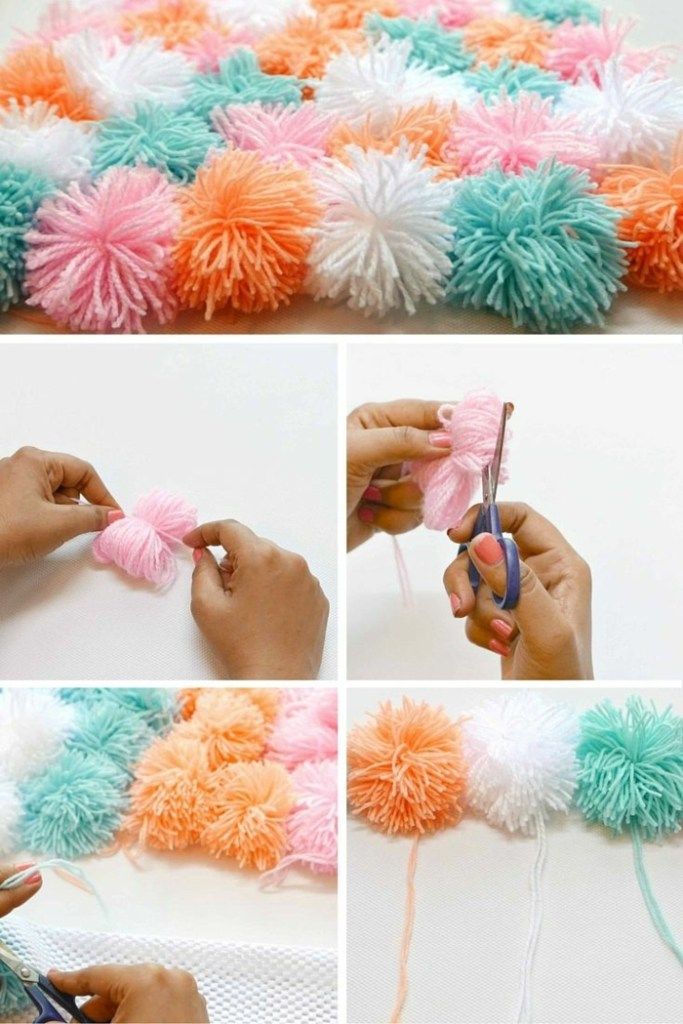
STEP 1: Gather your supplies needed for the pom pom’s. For the Strikers Team. We’re using blue, black, and white tissue paper for this tutorial.
STEP 2: Layer the multiple colors of tissue paper on top of each other as shown in #2 above. Each color will have two sheets of tissue paper.
For example, the layers above have 2 blues, 2 whites, 2 blacks, again 2 blues, 2 whites, 2 blacks and so on.
It’s up to you how many layers you want. The more layers you have, the more fullness you’ll have.
STEP 3: Now, fold the tissue paper in half.
STEP 4: String the yarn in between the folded tissue paper. The yarn is going to be used as a guide for step #7 below.
STEPS 5-8 POM POM’S
STEP 5: Cut your desired width of strips, then grip the bottom edge of the layered tissue paper with your fingers, then cut your strips, leaving at least one inch uncut from the folded edge.
STEP 6: Continue cutting strips from one end to the other.
STEP 7: Carefully, unfold the tissue paper.
At one end, start opening up the tissue paper by separating the strips. The string will help guide you to the center. Simply grab each end of the yarn and slowly separate the strips to unfold.
Now, gather and fold all of the layers from one end to the other, kind of like rolling a pig in a blanket. Ha!
Ha!
STEP 8: Tie yarn around the gathered up tissue paper and tie several knots to keep it secure.
STEPS 9-11 Pom Pom’s
STEP 9: Assemble the handle. Place one Glow Stick underneath the knotted yarn.
STEP 10: Place a small amount of hot glue on one end of the glow stick and place one side of the glow stick fitting onto the glued tip. Repeat on the opposite end.
Your glow stick bracelet is now a pom pom handle!
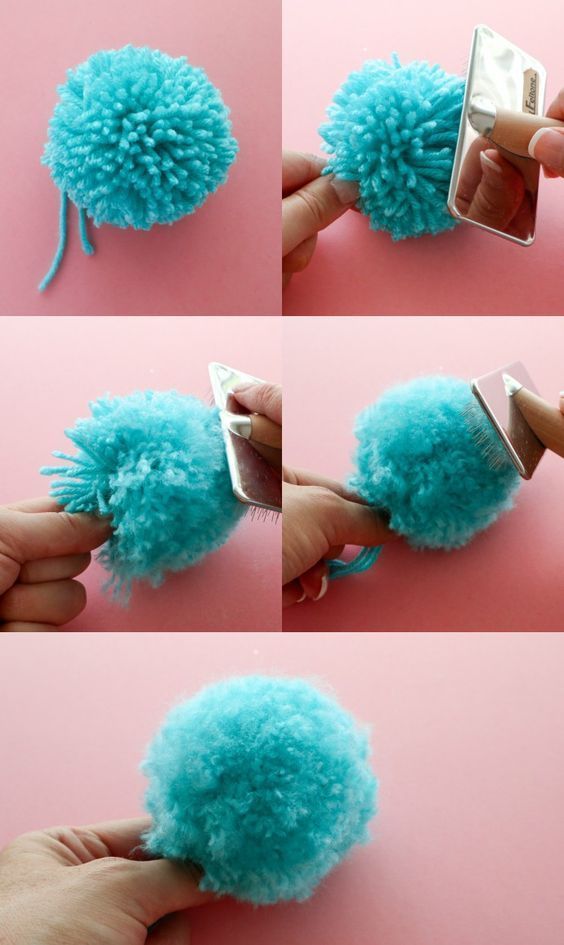
STEP 11: Fluff up your Pom Pom’s and shake to active the glow in the dark handles.
To fluff the pom pom’s, start separating and scrunching the strips in small sections. The more you scrunch and squeeze the strips, the more fullness you’ll have.
That’s it, you’re done!
I’m going to have more pom pom projects in the near future, so, keep a lookout!
If you haven’t signed up to receive M&M updates, be sure to do so.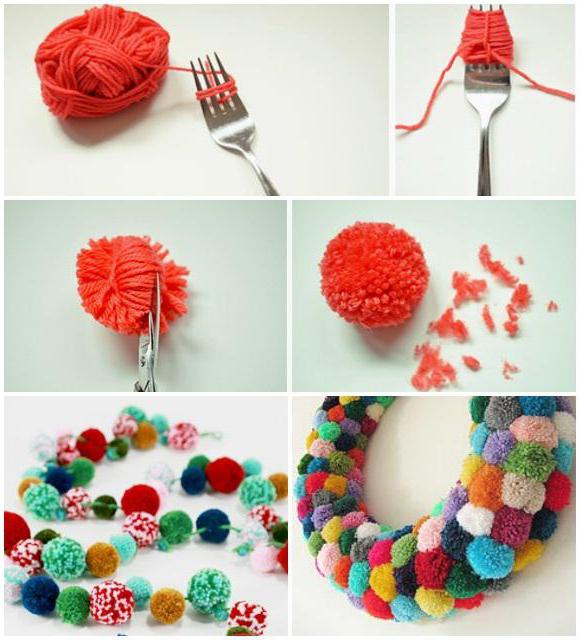 That way, you can be notified of future Pom Pom Ideas I post here on my blog. Sign up here, so you won’t miss a thing!
Or you can simply fill out the form below.
First name *
Your valid email here *
PIN ME!See, I told you it was easy making DIY cheerleading pom pom’s. All that’s left to do is to go spread that team spirit for your favorite team using your very own DIY Cheerleading Pom Pom’s!
GO TEAM!TAKEAWAY
PIN ME!These pom pom’s were easy and fun to make.
To make these pom pom’s, the supplies were inexpensive, and only cost $5.00, can you believe it?
You can add any color you desire, and make them as full as you’d like.
Let me know in the comments below, your thoughts on the DIY Cheerleading Pom Pom project, and which colors you’re going to choose for your team spirit!
Also, I’d love it if you shared this project so someone may benefit from this. 🙂
Don’t forget, keep a lookout, I’ll be creating different styles of pom pom’s in the near future for you Pom Pom lovers!
Your ideas are more than welcome.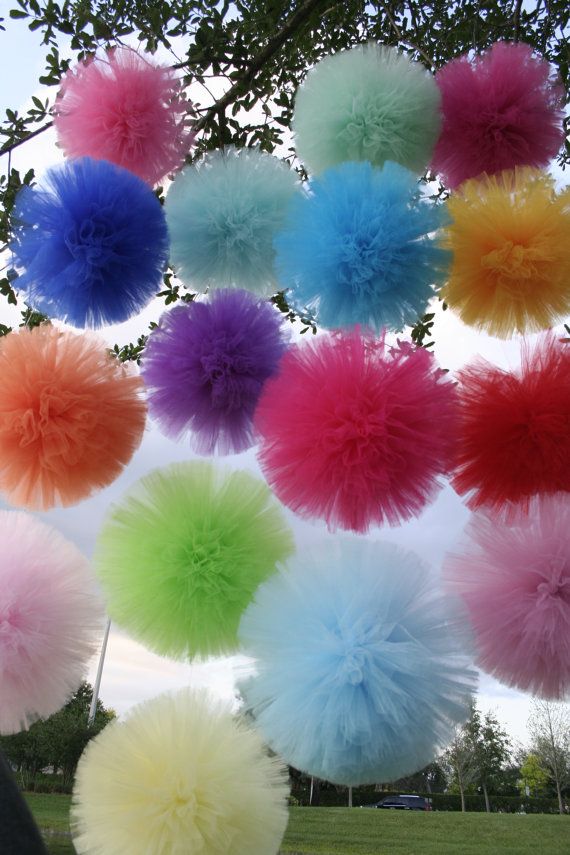
You may also like
How to Make DIY Decorated Orbs
DIY Decorated Charger Plates
13 Easy Kitchen DIY Projects on a Budget
Pom Poms: Find Top Cheer Pom Poms for Less
Adult and Youth Poms For Cheerleaders
One of the most spirited things at a cheerleader’s disposal is a perfect pair of cheer pom poms. Whether you cheer on the sidelines, for pop warner, pee wee, college sports games, varsity cheer teams, junior varsity teams, or all star cheer, pom poms are a big part of your performance. They are bright, they are fun, and they are truly iconic. When you think cheerleading, many people think pom poms! A great cheerleading warm ups, and uniform wouldn’t be complete without the perfect pom poms. Our vast selection of in-stock cheerleading poms and custom cheerleading poms are made of the highest quality materials and are available in a variety of styles and popular team colors, so you always look your best on the field.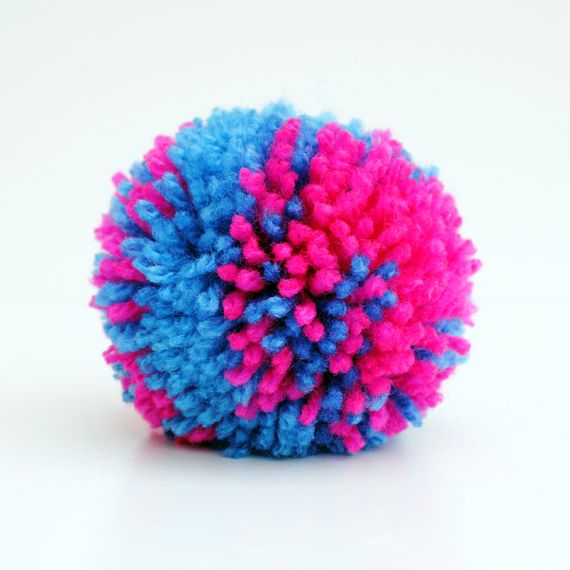 Add some sparkle to your team look with cheerleading pom poms available from Omni Cheer!
We offer cheerleader pom poms in a number of different in-stock styles, like in-stock plastic pom poms, youth cheer pom poms, metallic cheer poms, and holographic pom poms. We also offer custom options like custom youth pom poms, custom metallic pom poms, custom plastic pom poms, custom wet look poms, and custom flash & holographic cheer poms to make sure you have the perfect match for your team’s warm ups, and uniform. We even offer multiple different styles in youth sizes, so no matter your team’s age range, everyone is sure to look and feel spirited!
(First 3 lines of existing content to open, plus existing title)
You want your cheerleaders to run out on any stage or field shining like stars. The magic starts with months of practice to get every crisp move and dance sequence down perfectly. The next step is to select or design a cheer uniform that expresses your style and turns heads. Finally, you need to add accessories that will pump up the crowd and get the screams rolling.
That's where cheer pom poms come into the picture. The right poms become a part of the uniform and will even turn up the pep for your squad when wearing team warm-ups. Whether you're waving them in the air, tossing them high, or laying them on the ground to highlight your tumbling skills, you can't underestimate the importance of a great set of poms.
Complete the Look with Ready-to-Ship Cheer Pom Poms
When you think cheerleading, many people think poms! No cheerleading warm-up or uniform is complete without the perfect pom. Our vast selection of in-stock cheerleading poms are made of the highest quality materials and are available in a variety of styles and popular team colors. We make sure you always look your best on the field.
Add some sparkle to your team look with poms available from Omni Cheer!
We offer cheerleader poms in a variety of in-stock styles, including:
- Plastic pom poms
- Youth cheer poms
- Metallic poms
- Holographic pom
In-stock means we're ready to pack and ship your poms quickly.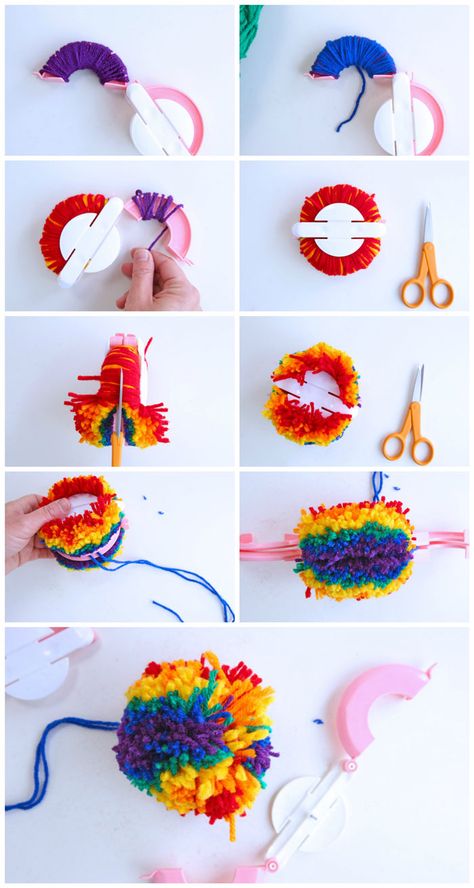 It's always best to order in advance to make sure your pre-designed poms are in stock, but we do last-minute shipments as well. If the first big game, competition, or event is on the horizon and you just now realized you need to update the poms, don't panic. Omni Cheer will help you get what you need on time.
Do You Need Custom Pom Poms?
We also offer custom options to make sure you have the perfect match for your team's warm-ups and uniforms. Have some fun designing your own wet look for poms that rattle with pizazz. Get creative with holographic materials with amazing flash. You can also create a unique look by mixing your team's colors for a multi-colored pom your squad will love.
Custom cheerleading pom poms are a great option if your poms will take center stage in some of your performances. If you want to use them as a statement piece rather than just something to throw in the air at games, then you need a unique design that stands out and leaves an impression.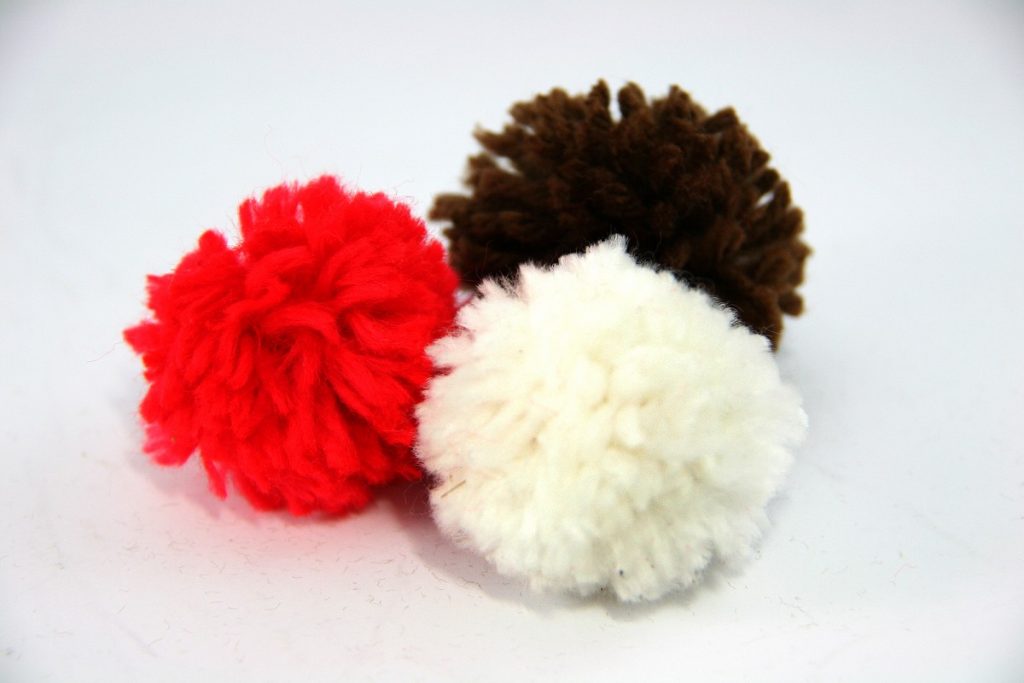
Omni Cheer has the resources to make the design process fast and simple. We carry poms for adults as well as youth, so you can get the perfect size for every team. Look at our selection to see what works best for your needs this season, or contact us if you don't see what you envision.
The right set of poms can take your cheer season to the next level. Once you select your uniform, spend some time browsing our pom inventory. You'll find just what you need, or we'll help you create the perfect pom for your squad. Let's get the poms fired up and bring the team to a win.
Setting the Standard!
- Sign in
- Register
How to make DIY pom-poms out of plastic bags
Home » All about waste
Polyethylene bags are not only used for waste disposal. You can make an interesting accessory to decorate the apartment - pom-poms from garbage bags.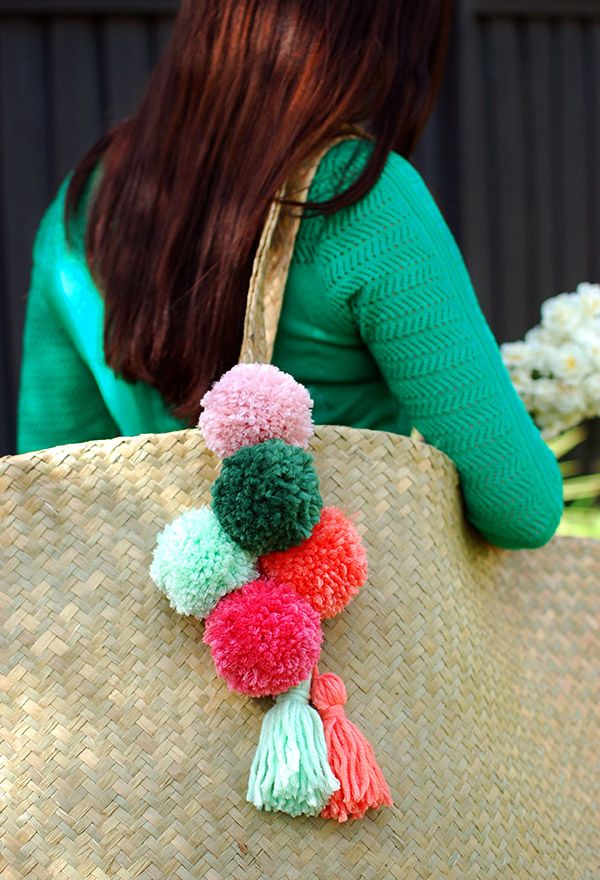
Content of the article:
Polyethylene and ecology
Many plastic bags are produced every day. Used in stores as packaging material and for garbage collection. Not all are reusable.
Few people think about their harm:
- Polyethylene products are dangerous for the environment and living organisms living in it. The production uses toxic lead and other dangerous metals.
- Once in the soil, it decomposes over 500 years. In reservoirs, it has a detrimental effect on local inhabitants. Fish and birds take the particles of the bags for food and swallow them. This leads to death.
- When plastic is burned, hazardous substances are released into the atmosphere. They pollute the air and affect climate change. They enter the lungs of a person, causing diseases.
Bags are rarely sent for recycling. More often than not, they end up in landfills along with the rest of the waste.
Especially for trash bags.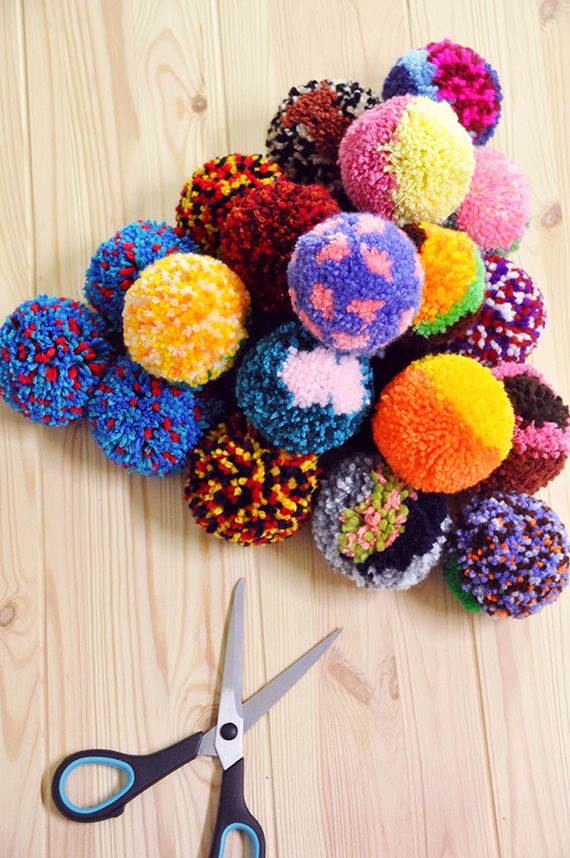 For safe use, they must be free of harmful substances and decompose quickly.
Making pom-poms
Garbage bags can be turned into interesting accessories that will decorate the house or be useful for other purposes. One of these crafts are pompoms. They are easy to make with your own hands.
For this you will need:
- polyethylene bags;
- cardboard;
- tape;
- ruler;
- scissors;
- pencil or pen;
- decorative elements.
The dimensions of the garbage bags are selected depending on the purpose of further use. Small items are used as a bright accent in the interior, when decorating a Christmas tree and as a keychain. Larger bags are needed when making cheerleading pompoms.
The color is chosen based on personal preference. But bright colors are better. White products will replace paper snowflakes on the Christmas tree.
Small size
To create a small pom-pom follow a certain procedure:
- Cut off the bottom and top of the bag.

- Use scissors to make strips. They should be long and narrow.
- Cut out 2 rings from cardboard with small slots in the middle. We connect together.
- We wrap the rings around the entire circumference with each strip. You can add decorative elements in the form of satin ribbons or metallic threads. They will decorate the pompom.
- After wrapping the rings with scissors, cut the bag around the edges of the circle.
- Tighten the thread in the middle so that the strips fit snugly together.
- We take out the cardboard rings, fluffing the resulting pompom.
You can attach a thread to the center by hanging the decoration anywhere on the special hook.
Large size
Large items require a lot of waste bags. The manufacturing method differs from the previous one:
- Stack 10-15 bags on top of each other. When using different colors, alternate layers in the resulting stack.
- Cut off the top and bottom together with the ties.
- Fold again, but in half. The edges must be aligned.
- Open packages. Cut in half along the resulting fold.
- From above and below on each side we make cuts of 15 cm. Width - 2 cm. An untouched strip should remain in the middle.
- We find the center of the packages and tightly bandage them with adhesive tape so that they do not fall apart.
- Fluff the accessory by separating the strips from each other.
For cheerleading, you need a second similar pompom.
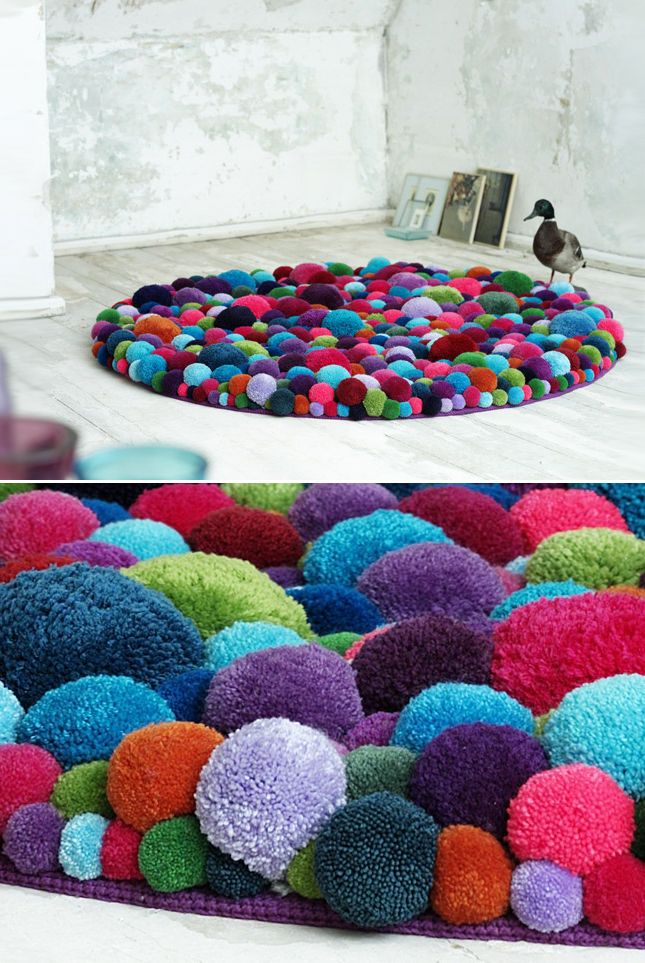
Rug
Garbage bags can be used to make an integral home accessory – a bright rug. You will need:
- ready-made pompoms;
- mesh as base;
- threads;
- marker;
- scissors.
Follow the instructions:
- We count the required number of blanks.
- Mark the details on the grid with a marker. It is possible to create an individual pattern with bright colors.
- We fix the pompoms on the basis with the help of threads.
 We cut off the ends.
 - Delete unnecessary mesh edges.
The resulting rug will fit into the living room or hallway. Dust should be wiped several times a month with a damp cloth.
Garbage bags are used not only for their intended purpose. You can get creative with their use. Get bright pompoms that will decorate the house.
Rating
( 2 ratings, average 3.5 out of 5 )
0
Did you like the article? Share with friends:
Cheerleading pompoms - EpiCENTER DANCE SCHOOL
How to make cheerleading pompoms with your own hands?
Many novice teams are wondering where to get this indispensable attribute of any cheerleader? Our cheerleading team used different pompoms: we both ordered ready-made ones and made our own from bags, crepe paper, New Year's rain and even threads! In the end, we came to the conclusion that making pompoms ourselves, firstly , is much cheaper, and secondly , here you can definitely choose the right color and make beautiful and suitable pompoms for the dance number, and not worry, in what form they will come by mail and whether they will have time for the competition.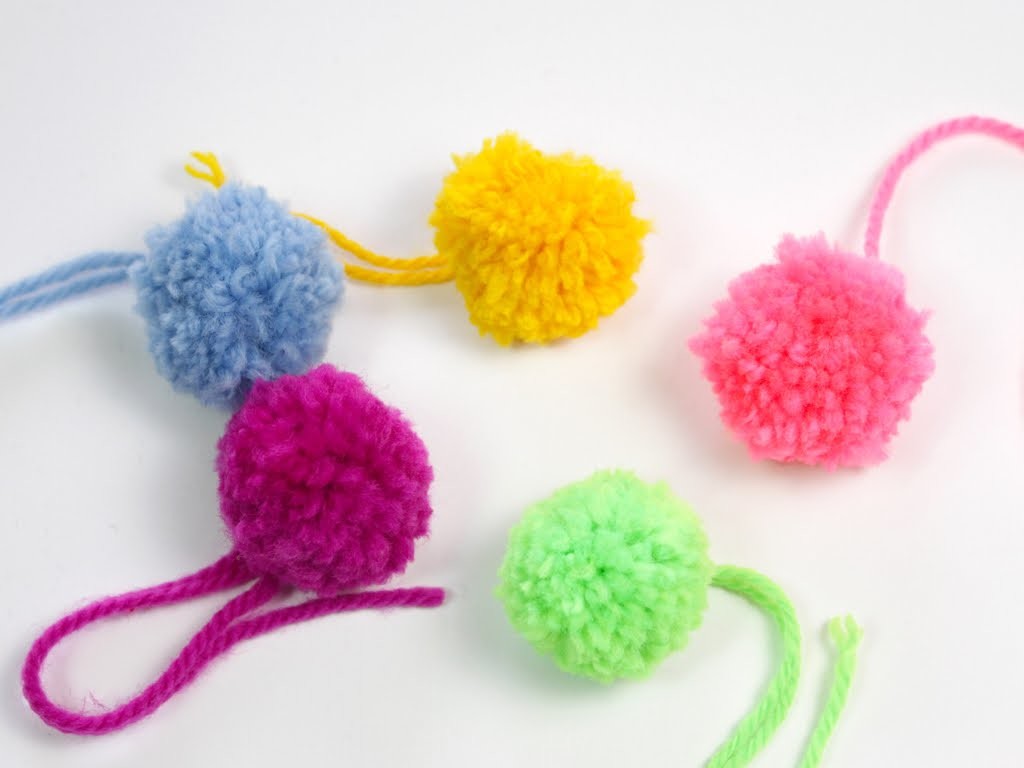
Pompoms available:
- one-sided (single)
- bilateral (dumbbell)
They differ in the material from which they are made and the type of handle or attachment. Recently, our team has been using exclusively double-sided pompoms, because. they, in our opinion, look much more beautiful than the others, and it is also convenient to dance and work with them - toss, pass. But, of course, this is a matter of habit, small one-sided pompoms with elastic bands also look very interesting now - they make it possible to diversify work with them.
The first thing you will need to do is choose the right material for your pom pom. To do this, you will have to become very familiar with the range of florist shops. For our pompoms, we use polysilk or film. It is worth looking for a large florist shop and be sure to "feel" the paper before buying - it should not tear and crumple strongly, be quite dense.
For pom-pom handles we use 2 cm PVC pipes. You can buy them at any hardware store, such as OMA. They are cheap, about $ 1 for 2 meters, which is enough for about 10 pairs of pens. Very cheap, convenient and practical.
What you need to make pom-poms:
- Paper (we discussed it above)
- PVC tube
- Utility knife
- Medium tape
- Iron ruler (preferably at least 30 cm long and 3 cm wide, this will serve as a model so as not to waste time tracing paper)
- Ties (available at any hardware store)
- It is desirable to have a hacksaw (you can use a mini version) or just a blade.
Although it is enough to bring the phone to the father/brother/husband/boyfriend and say the magic phrase “Cut it into X cm pieces, please”, and they will already figure it out)) - To make holes in the handle, you will need a "screwdriver/drill and 3mm drill bit" or "nail and pliers" (to burn a hole with a red-hot nail). But the easiest way is to catch a male and explain what is needed))
Making pompoms
So, let's get started:
- Cut the paper with a utility knife (not scissors) into strips 25-30 cm long (of course, more or less, depending on what kind of pompom you want) and width 3 see .
 Your task is to cut the sheets into pieces with a height of 25-30 cm and no matter what width (Here is an example of cutting a roll with a width of 70 cm ). Then you simply apply a ruler (its width is just 3 cm ) to the edge of the resulting strip and cut with a knife along the second edge. This way you don't have to draw into small strips of 3 cm. To avoid doing this for too long, try to cut several sheets at once (3-4 depending on the density of the boogie and the sharpness of the knife). For one pompom, to make it beautiful and fluffy, you need minimum 200 strips ( 100 per side of handle).
ATTENTION!!!
- You need to cut on a piece of unnecessary fiberboard, chipboard or board. Otherwise, you will damage the surface of the table if you cut on it.
- Why not scissors? So much faster and smoother. You will need a lot of strips, you will get tired of cutting with scissors.
- Congratulations, you have passed the longest stage)) Now you need to make twists, which we will attach to the handle. We take scotch tape (about 70 cm. We take strips of paper and glue one after another to the adhesive tape (the middle of the strip), with the front side of the paper to the adhesive tape. So we glue 16-20 strips. On top of each strip, put one more paper face up (to get a strip in two layers on each side of the color, since usually the paper is colored only on one side). Gently twist the tape with stripes (do not try to mix strip to strip! Just twist as you can) and tighten with a tie in the middle.
Why glue it together, wouldn't it be easier to just stack it? A stack that is stacked evenly will fluff unevenly. And with the method described above, it will be more difficult to twist, but it will fluff up better. At the moment of twisting, the thickness increases and the strips go into discord.
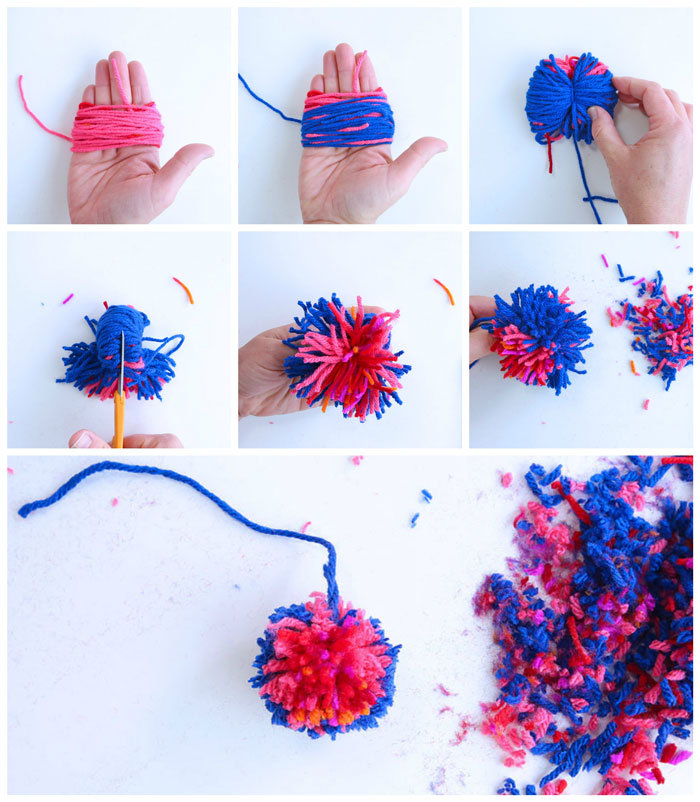
We have one roll, in which there are about 40 strips. We make twists from the remaining strips, for one pompom there should be 6 such twists, 3 on each side of the handle.
- The handle is cut to a length of about 9-10 cm (if the pompoms are for adults). Next, make small through holes at a distance of about 1 cm from the edge. But these operations can be entrusted to the male sex)
- We connect three twists with ties and fasten to the handle on one side and three twists on the other side, so our strips are perpendicular to the handle.
- Almost ready, it remains to separate our strips and “fluff” the pompom, take two strips following one after another and spread them in different directions, taking into account the structure of the paper, the strips will be fixed in this position.
P.S.
Is it possible not to bother with gluing strips? You can, but you will have to cut the 30cm X Ncm blank to half.