How to make a shadow dance screen
Easy Ways to Set Up a Shadow Dance Bar
Hemera Technologies/AbleStock.com/Getty Images
By: Farrah Davis Updated September 15, 2017
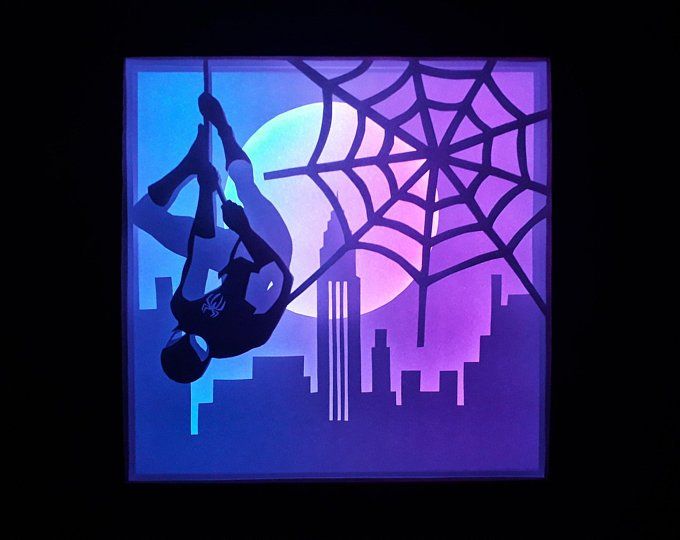
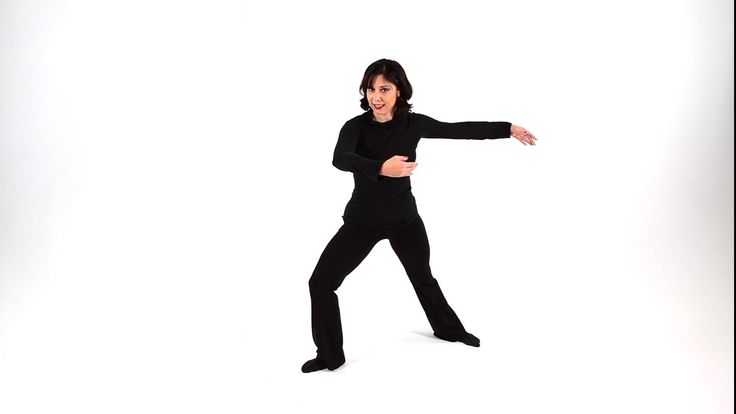
Shadow dancing is a fun and unique type of dancing. Shadow dancing is created by placing a screen with a light source shown in the direction of the dancer (behind the screen). The audience, on the other side of the screen, only sees the silhouette of the person dancing, creating a sensual and exotic type of dance that spices up any home party or nightclub. The way to set up a shadow dance bar depends on how much space you have and your budget.
Simple White Sheet Option
This is the easiest and cheapest option, with enough space to suspend or set up your sheet. Choose a 100 percent cotton sheet, as some thicker materials do not permit light to shine through as well as the cotton. If your space has rafters or beams, it is easier to hang the sheet and put something on the bottom for weight, such as a broom handle. If you cannot hang the sheet, purchase two microphone boom stands and place them and the end of the sheet to pull it tight. These stands are inexpensive and can be found at most musical supply stores.
Custom DIY Setup
To make your custom-sized shadow dance bar, first measure your space. After you get your dimensions, buy your fabric. Buy a little more than the size you want, to allow room to attach the fabric to the frame. For larger-size fabrics, check out curtain backing. This material comes in large rolls and can be cut to any size. Buy lumber to make your frame, as straight as possible. Cut wood to proper lengths and attach them to make the frame with wood glue and a nail gun. Once the frame is built, lie it on the floor and place the fabric on top; pull snug to the edges. Attach the fabric with a staple gun and set the frame in place. Put a light behind it and grab your dancer to start the show.
Professional Rear Projection Screens
You can also use professional projection screens, which come in several different sizes. Most come with portable metal frames that are lightweight and easy to transport.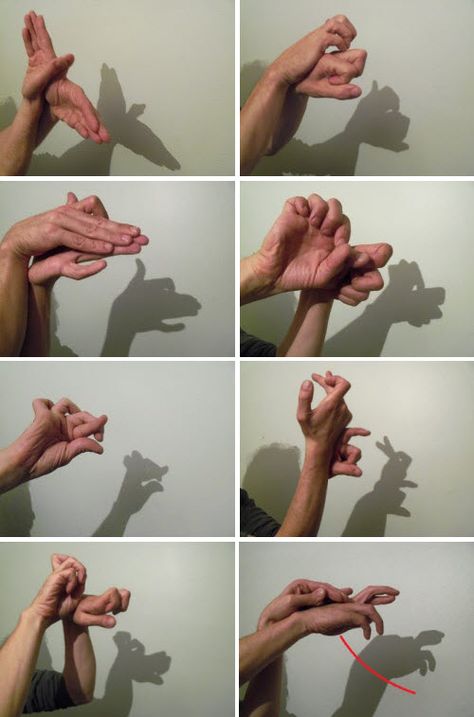 It takes more than one person to set up these types of screens for use, but there are many other benefits. These screens are more durable than homemade screens, which allow the dancer to get close to the screen and rub against it. This makes the dancing more animated and sensual.
Lighting Setup
Your lighting setup should be free of loose cables and high heat. Light should be placed approximately 6 feet behind the dancer, around mid-torso height to spread the light evenly. Use only one light source to create one uniform shadow. You can use a simple desk lamp, utility lights, or strobe lights.
Writer Bio
Farrah Davis began her writing career in 2010. She has worked for Harley Ellis Deveraux and Green Dinosaur as an environmental consultant project manager, writing environmental plans for commercial projects. She graduated from West Virginia University with a Bachelor of Science in interior architecture and a focus on environmental studies.
Related Articles
Shadow Play Screen
The screen that we are using in our workshop comes from Lakeshore (See Page 54 of Lakeshore's 1999 catalog).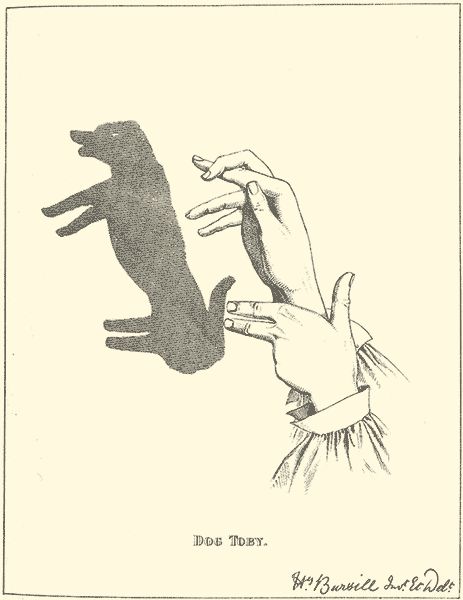 This Shadow Play Screen is a terrific interactive tool for enhancing young children's gross motor skill development. It is perfect for encouraging dramatic play. It is light weight and can easily be taken apart and stored away.
In this workshop we have turned the screen to a vertical position so that it can be used with adults. For classroom use, the screen is set up in a horizontal position so that 2 or 3 children can stand behind it at one time.
Light Sources
We are using a slide projector (you can do this with or without slides). Lakeshore also recommends an overhead projector. You can experiment with light from an open window, a flashlight, or a film projector. Make your shadow projections more interesting by placing a colored transparency or colored sheet on the overhead, or by using a colored light bulb in your light source.
Music and the Shadow Play Screen make a wonderful combination for classroom use. Music and dance can get children warmed up and comfortable with performing in front of others.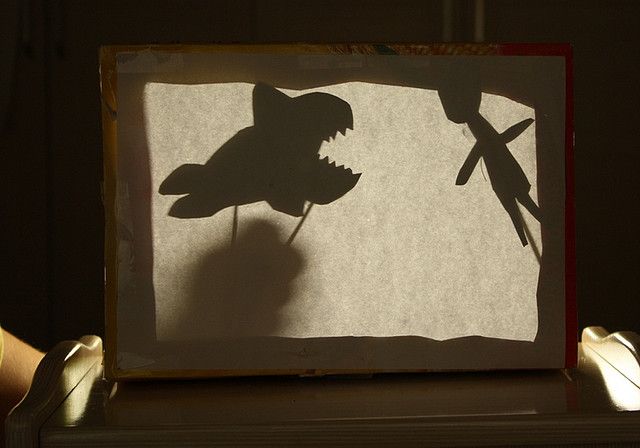 The “barrier” of the screen will help even the most self-conscious children feel comfortable moving in front of an audience. Before beginning an organized activity we suggest just setting up the screen with a few simple rules and let the children “explore”. You will be surprised at the creative ideas that they can come up with to use the screen.
You can facilitate movement by having children take turns being a mirror. Have one student stand behind the screen and made broad movements. The children on the other side of the screen can watch and imitate. Using their hands and arms they can cast shadow puppets, or have shadow plays by having children make stick puppets. For a more interactive variation children will enjoy starring in their own shadow plays. Ask a few children at a time to enact a play from behind the screen while others act as the audience until it it their turn.
Below are three activities to get you started.
Activity #1
You will need:
* The song “Barnyard Boogie” from the recording Teaching Peace.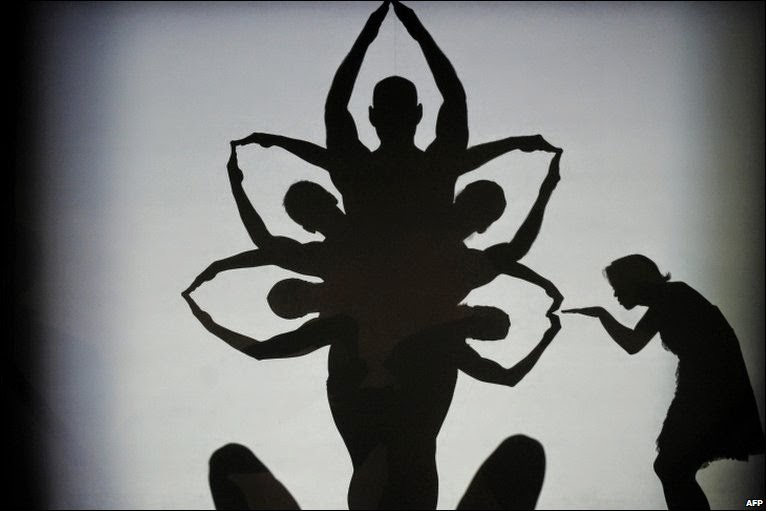
Form a circle with the class. Place the shadow play screen at one end of the circle. The children move the circle in one direction so that eventually each child will walk behind the screen. Play the song “Barnyard Boogie”. As each child takes their turn to walk behind the screen they make broad movements: jumping, dancing, waving arms, kicking etc. The other children in the circle can imitate these gestures. As they become more comfortable with it you can have them act like a rooster while standing behind the screen.
Activity #2
You will need:
* The song “Say Hi!” from the recording Teaching Peace.
* Paper puppets on a stick of a dog, a cat, and a smile face.
Two children stand behind the screen and act out the song about being shy - “Say Hi!”
Activity #3
You will need:
The song “Big Rock Candy Mountain” from the recording
Red Grammer's Favorite Sing Along Songs
Material in the shape of a mountain to tape to the back of the shadow play screen
Gum and Rock Candy glued to 2 suspenders
One puppet of a bee and one puppet of a bird
Hand actions created by the class to use for the song.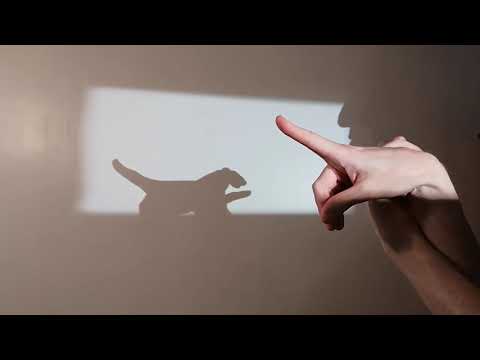
An example would be “buzzing of the bees” - thumb and index finger come together and then wave hand in circles in the air.
Two children stand in front of either side of the screen wearing the suspenders. Using the class hand motions act out the song Big Rocky Candy Mountain. Both of the two children will have one of the puppets to wave behind the screen when those animals are sung about in the song. You could have them pull the gum off the suspenders to chew and make bubbles with during the song.
Shadow Puppets
Materials
File Folders or Oaktag
Tissue Paper
Laminate or Clear Contact Paper
Velcro Dots
Doweling (7/16 x 36)
Scissors (Manicure Scissors)
To make the puppets
Trace onto oaktag the object to be the puppet.
Trace this pattern onto tissue paper.
Using manicure scissors, cut out the inside of the oaktag object leaving a 1/4 border.
Glue the tissue paper onto the oaktag border, you can add details by using fine tip markers and drawing on the tissue paper.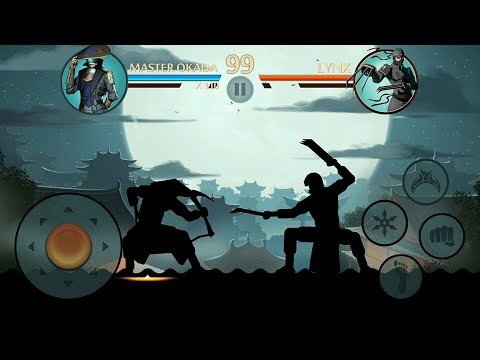
When you are finished adding details to the object, laminate it or cover it with contact paper. We use contact paper.
Attach a small Velcro dot to the back of the object. Note the back is the side with the oaktag border.
Attach the other part of the velcro to the end of the doweling.
How to create a shadow theater | Shadow theater TEULIS
Blog
We often get questions about how you can make a shadow theater without having a lot of resources. Most often, these questions come from students. After a little thought, we decided to lift the "veil of secrecy" and tell you about how to make a shadow theater at home.
1.Screen
When it comes to limited financial resources, expensive rear projection screens are out of the question. Of course, if you have the opportunity to use it and rent a screen, this will significantly affect the result. But you can do without it! At our summer get-together, we generally made a show in an open field.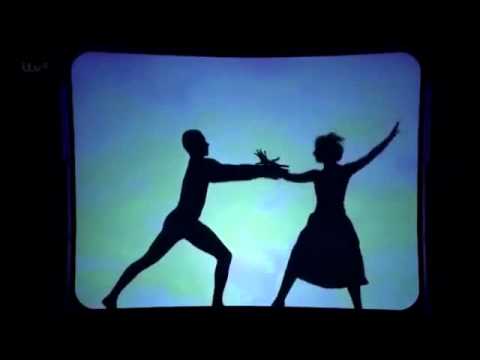 Not a bad budget alternative is raincoat white fabric. It comes in different densities, so you should check when buying how clear the shadow is. This can be easily done by taking a flashlight with you and on a small piece of fabric you can see how the shadow is transferred to the fabric (look from the back, that is, how the viewer will see the shadow). If the result suits you, and you have decided on the size (we have a small 3x4 screen), you can take it and safely proceed to rehearsals!
2.Light
As you know, in order for a shadow to appear, light is needed. In general, any light source will do. Even if it is a spotlight. But you should keep in mind that with such equipment the shadow will be slightly blurred. Our recommendation is to use a projector. Firstly, we are sure that it is not so difficult to find it at the university, secondly, the size of the light supply will match the size of the screen, and, thirdly, the shadow will be clear. A nice bonus is that you can use more than just a white background.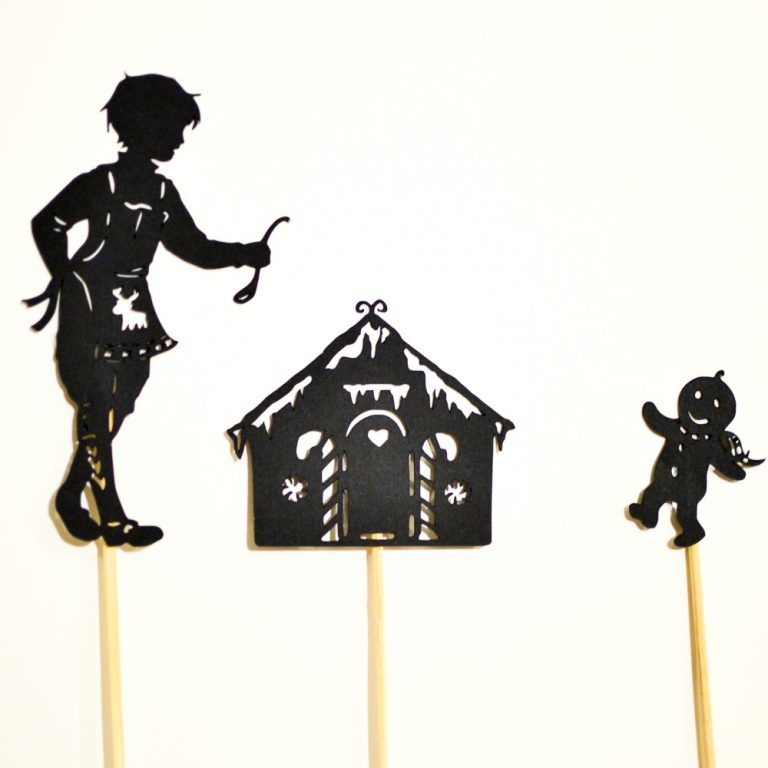 By using images, you can add value to your story, make it more colorful and interesting. Little secret. Once, a long time ago, the TEULIS shadow theater at its first performances used this trick: we created a presentation with a set of suitable pictures and switched them depending on the plot. You can generally set a timer and do not have to do it manually. The main thing is that the pictures you choose fit the plot and are not too dark.
3.Sound and Props
Sound
Silent theater is certainly interesting, but the era of silent cinema is long gone. Use music, text... It all depends on your director's idea.
Props
The TEULIS shadow theater was initially tasked with using props only when it was conceptually necessary (for example, a microphone in the hands). But this is optional. Using props will save you time looking for alternative directorial solutions. For the manufacture of props, you can use cardboard or foam, if we are talking about objects - use them (for example, as a microphone stand for our ostrich).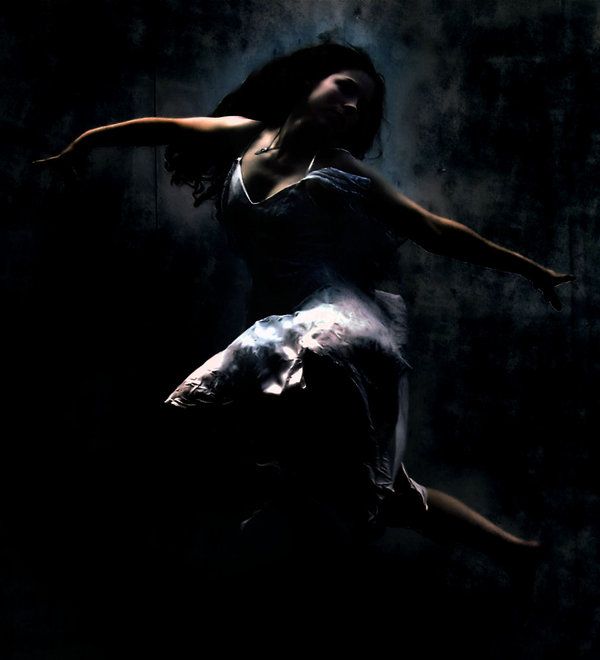
Lastly:
Use your imagination, create new shapes, find your own style. It may be easier to follow the known path, but in this way you deprive yourself of the opportunity to come to something unique. Good luck in your creative endeavors.
Turn off the lights.
The show is starting.
Share:
Facebook Vkontakte Twitter
How to make a shadow theater for children? Master class on making a universal screen and templates for a shadow theater How to make a shadow theater with your own hands templates.
Do you want to offer your child a new interesting entertainment? Looking for original ideas? It is enough just to make a shadow theater with your own hands at home. You don't need any special equipment or materials. All tools are available. Such an activity will captivate the child so much that you can turn it into a creative, developing process.
The principle of organizing the spectacle
Shadow theater is one of the most ancient It used to be available only to the rich, as the puppets were made from expensive materials.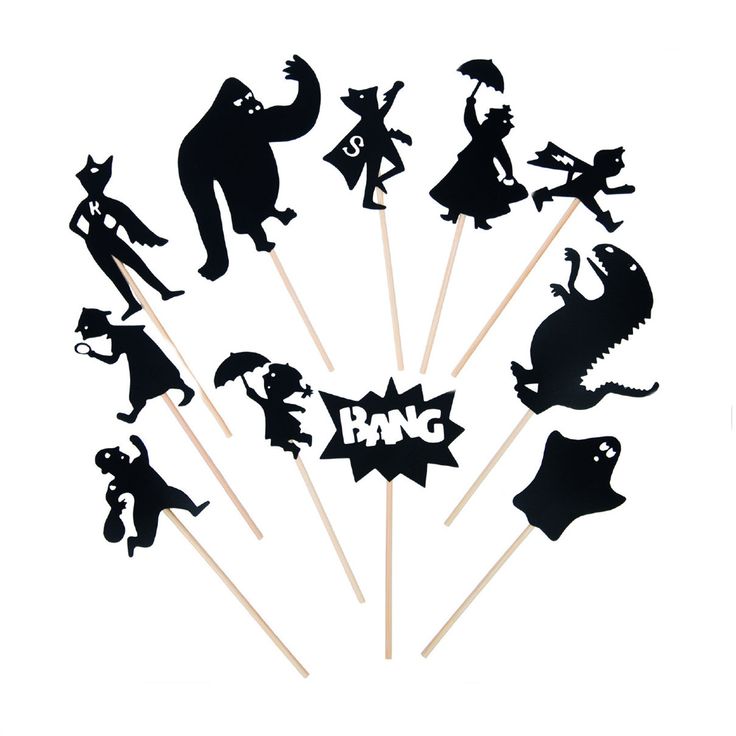 Subsequently, this entertainment became an exciting children's game. Do-it-yourself shadow theater at home is easy to do. You will need the following:
- Shield in white translucent fabric.
- Directional lamp (ordinary table lamp).
- Objects that will act as artists.
- Scenery.
The screen is hung or placed between the audience and the light source. Figures that cast shadows are placed between the screen and the lamp. The closer the characters are to the light source, the bigger they will be on the "stage". It is important that your silhouettes are not in the beams of the flashlight, otherwise they will also be on the screen.
The objects with which the performance is played out can be figures assembled from objects made of paper and other materials, moving people. In the latter case, more space will be required to organize the theater. In the first and second options, the plane of the table is sufficient.
Your hands are the best artists (schemes)
If the child you are going to entertain is still small, it is enough to use your own hands.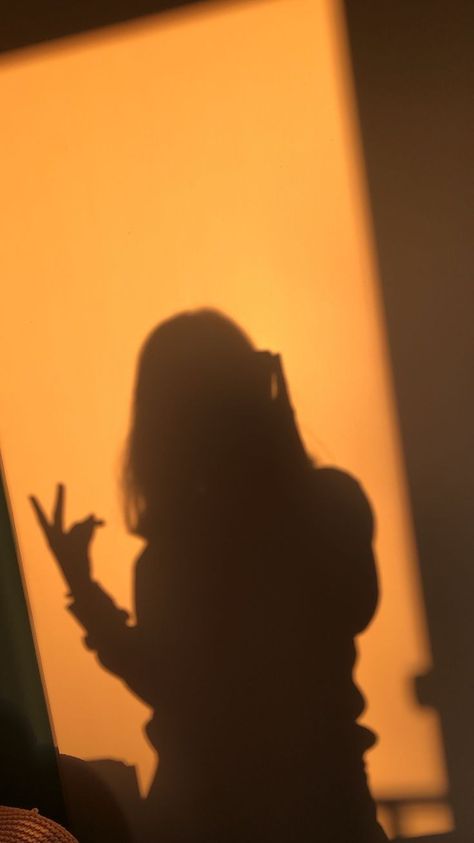 This is the easiest way to make a shadow theater with your own hands. Finger interlacing patterns are shown below.
First of all, you will have to practice folding your arms yourself. You can use static figures that will move along the scene. When this stage is mastered, move on to dynamic characters. Move your fingers, and the bunny's ears move, the wolf's mouth opens, and the bird flies, flapping its wings.
If the kid was impressed by the action and wanted to try himself as a director and director, motivate him, inspire him, praise him for everything he will do. This is a very useful developmental activity, as it improves the motor skills of the fingers. If initially not everything will work out for the baby, do not be discouraged. Gradually he will master this technique. Then it will be possible to move on to more complex productions with puppets and scenery.
Do-it-yourself main characters
When you have mastered the finger theater, start making characters from improvised materials.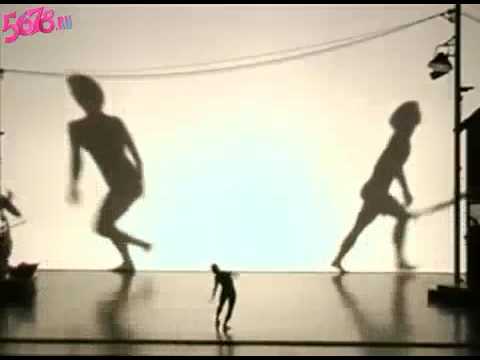 You will need the following:
- paper or cardboard;
- pencil;
- knife or scissors;
- adhesive;
- stencils, fabric (optional).
There are two ways to make figurines:
- on sticks;
- on flat bases.
The first option is more convenient because those who will hold them can be at a distance from them.
It is important that no shadows fall on the screen from the players themselves. In the second case, when the figures are rearranged, the hands of the player are visible. However, this option also has the advantage that the figures can be placed and are in a static state without human intervention (they do not need to be held). At this time, another character will move between the standing figures. This is convenient, for example, to build decorations (trees, houses).
Once you have decided on the design of the figurines, start creating their shapes. The easiest way is to cut them out of paper.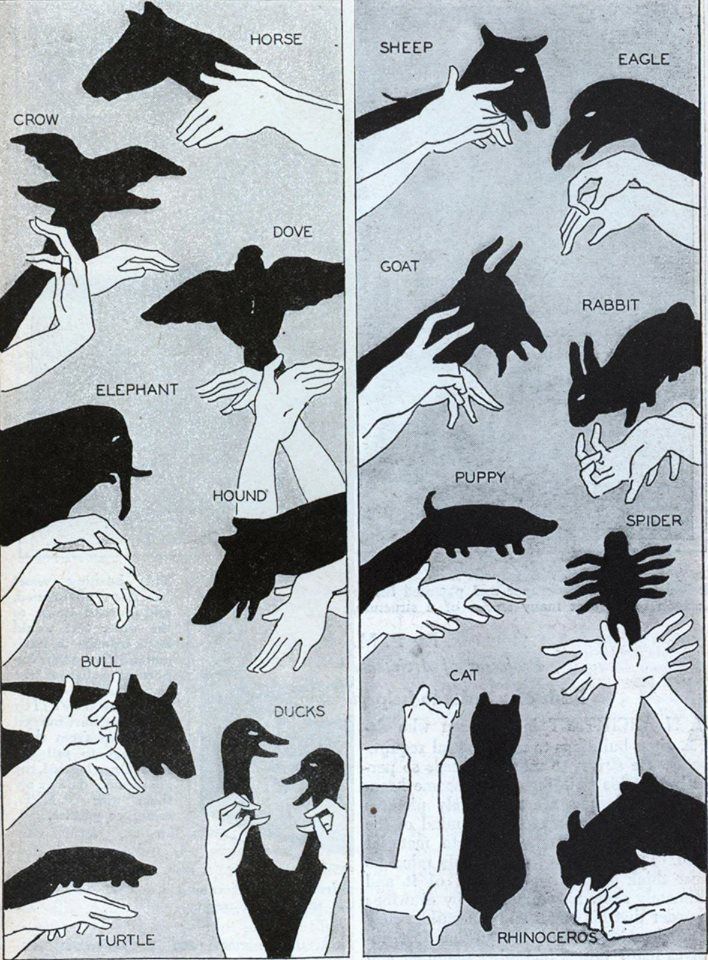 Cocktail tubes are suitable as sticks. Forms can be made solid or openwork, as well as adding fabric decor.
If you need to make a lot of the same items, it's easier to use stencils, that is, make one shape, and then circle them the required number of times. If you have children's stencils for creativity or any others, use them. They are convenient, as they are thematic, for example, according to fairy tales. With their help, you can easily and quickly make all the characters. You do not need to draw the characters yourself or look for samples of illustrations. Now it is easy to make figurines by printing images on a printer and cutting them out along the contour.
Making decorations
In addition to figurines, you can make objects that will create the atmosphere of a particular scene. In this case, do-it-yourself shadow theater is done longer, but it looks more diverse and interesting. It is worth remembering that children are fascinated not only by the production itself, but also by participation in the preparation of the performance.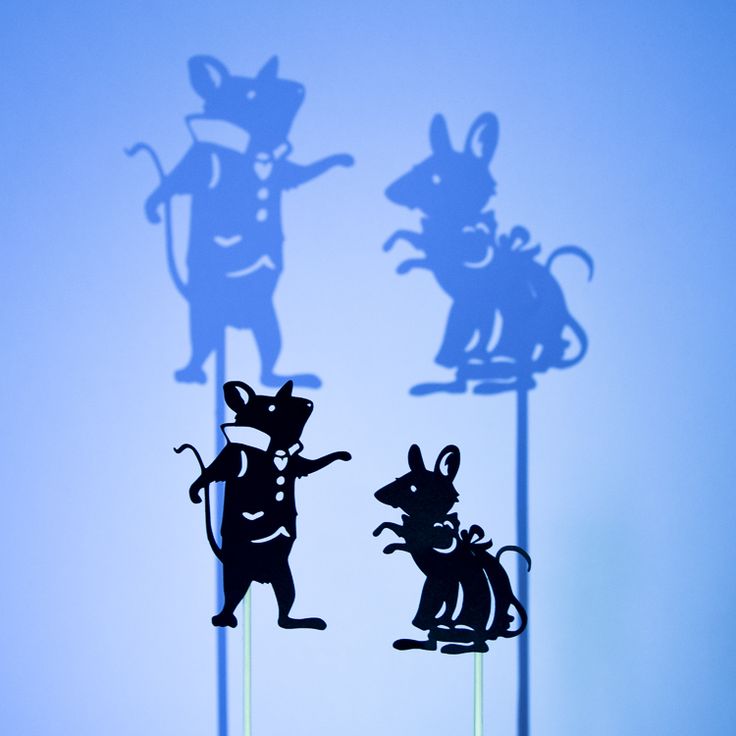
The original idea of creating the scenery and the characters themselves is shown in the photo above. Drawing characters and scenery on (a sheet of paper) with black paint is the performance itself. To do this, of course, you need to be able to hold a brush in your hands. The contours of objects can be outlined with thin lines in advance.
Children also want to be artists
Children can create a shadow theater with their own hands even without the participation of adults. You will be the audience for an impromptu performance. Hang the sheet on the frame, install the lamp. Let the children imitate different movements, imagine themselves
Performance ideas
With the help of such entertainment, you can have fun with friends and their children. Arrange a joint presentation. If you decide to make a collective shadow theater with your own hands, the fairy tale that will be the basis of the script must be selected in advance. In this case, everyone will receive a task, which heroes he should make.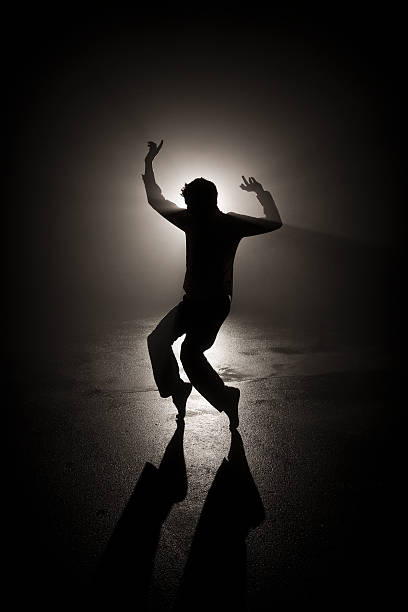 Such a creative process will be very exciting and everyone will like it.
You have seen that it is not difficult to make a shadow theater with your own hands. All materials are available, and the process of creating a performance is as interesting as watching the action. This exciting activity will help to entertain the baby at home and have fun.
Theatrical performance of shadow and light is an unusual and interesting activity that will appeal to all children without exception.
Fascinating preparation, creating scenes and characters with your own hands will give a good stimulus to the development of fantasy and will become one of the brightest and kindest memories of their childhood!
How to make a Shadow Theater at home? Brashechka will tell!
Preparing the stage for the Shadow Theater
We need a light source, an improvised screen and a place where we can feel comfortable as actors :)
As a screen is perfect for a piece of wide white wallpaper remaining after repair, a white sheet, thin paper or, in extreme cases, several sheets of paper fastened together in a butt.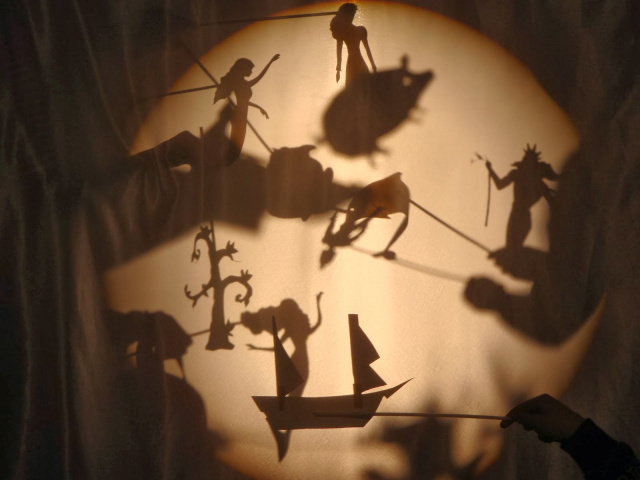
Light source will serve as an ordinary table lamp or lamp - it will need to be installed behind and slightly to the side of the screen.
Important! The smaller the screen, the thinner and more transparent it should be, and the brighter the light source needed!
Now let's decide on the size of the scene.
Large stage for several children or a compact version for one participant? Decide for yourself!
Option 1. Stage of the Bolshoi Theater
Is there a bunk bed? Consider the stage of the Shadow Theater is ready! Happy owners can safely take the entire first floor for the actors. It is only necessary to fix the screen on the curtain rod and press it from below with a mattress.
Less "lucky" with furniture? No problem! :)
Hang a sheet in the doorway, arrange a "house" under the desk or just stretch it between two chairs!
Variant 2. Compact stage for one actor
A very convenient option to store and use many times.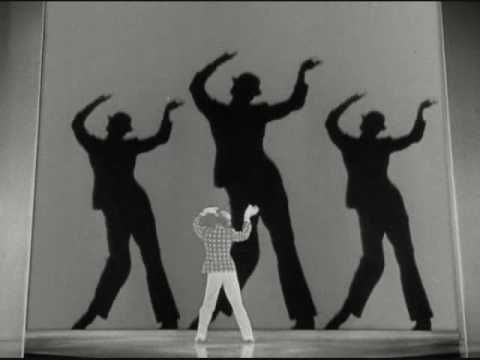
Minus - suitable only for puppet shows and it will take a little longer to make it.
Take an unnecessary (or make your own from improvised materials) large wooden frame, A4-A5 format will be just right. Stretch a thin cloth or transparent matte paper over it, secure it with small carnations and place it on a stand. The stage is ready!
A wonderful folding stage can also be made from a large cardboard box, in the form of a window with shutters. The "glass" of the window will be the screen of our theater, and the "shutters" will provide stability to the improvised stage.
An excellent lighting option for shadow puppet theater - a headlamp! :)
Take care to fasten the screen sheet tightly.
In the future, this will greatly simplify the work of small actors!
The stage is almost ready!
Let's make her a curtain so that our Shadow Theater looks more solemn and very, very real! :)
Sets and figures of characters for the Shadow Theater
We have all played with hand shadows on a brightly lit wall.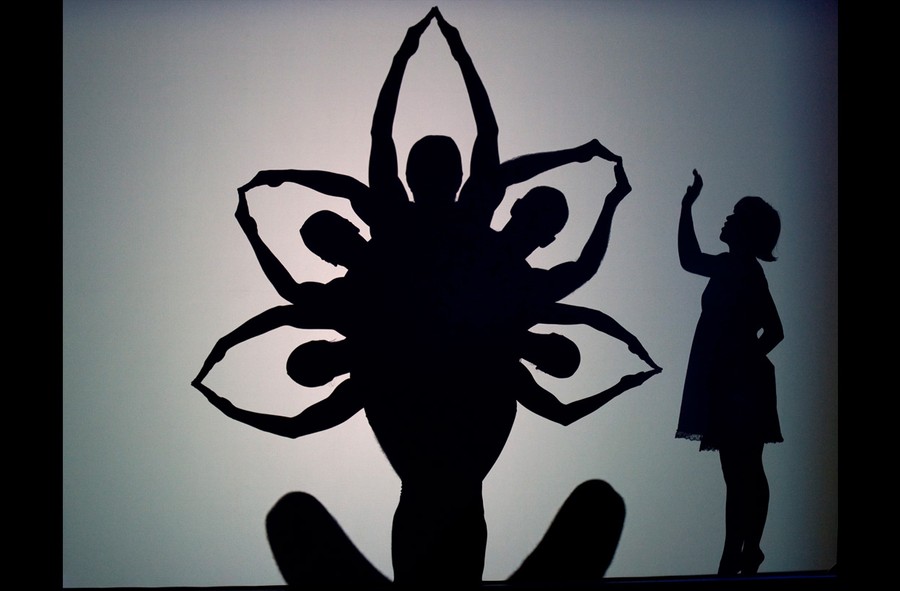
Let's remember a few basic shapes to start with:
Click on the picture to view or print the diagrams of how to fold the shadow of a wolf, dog, goat, rooster, hare, swan, goose or piglet with your hands.
Figure out how to portray someone else!
Figures and sets for the Shadow Theater made of cardboard
For the puppet theater of shadows, we need pre-prepared figures and decorations. You can find and download ready-made stencil pictures for the Shadow Theater, but it is much more interesting to come up with a story and draw its characters for the Shadow Theater yourself!
Ask the child who is the main character in his fairy tale? Is he good or evil? What happened to him? And together you will come up with a great story!
Start with a small number of characters - two or three is enough for the first time. After practicing, you can easily move on to more complex productions :)
Shadow theater sets is best made from thick cardboard, which is used for packaging household appliances. We don't want our castle or a big tree to bend under its own weight?!
Characters , drawn and / or printed on plain paper, glued onto a rigid base and cut out with scissors. As a base, thin cardboard for applications is perfect.
If you plan to use the made figures for the Shadow Theater repeatedly, we recommend to laminate them.
Mounts for scenery and characters
Mounts are needed to control the figures without casting unnecessary shadows with your own hands.
Option 1
Use small folded paper clip hooks as holders for large figures and decorations.
Option 2
Split one end of the cocktail tube and glue it to the inside of the figurine.
Variant 3
Attach thin wooden or plastic sticks to the figurines with adhesive tape.
Staple mounts (option 1) are convenient because such decorations can simply be leaned against the screen. In this case, our little actors will not have to rack their brains about where to get a few more hands in addition to the ones they already have :)
Thinking of a performance in several acts and need to change the scenery? Arrange a small but real intermission! :)
Add some color to the Shadow Theater
Spots of color will add even more mystery to everything that happens! :)
Method 1.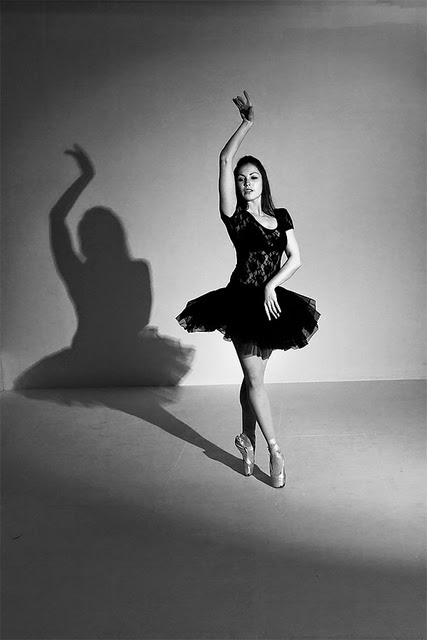
Use a colored sheet for the screen. Shadows on a color screen are visible almost the same as on a white screen.
Method 2.
Try cutting out shapes from tinted sheets of paper, for example, for drawing with pastels. The color of the paper will show through the white screen.
The finishing touch
Here we are, ready to put on a show!
It remains quite a bit - to draw invitations and send them to friends and acquaintances. And after the performance, do not forget to have a tea party with a joint discussion of the performance you have watched!
Theater shadows - an art that originated somewhere in ancient civilizations of India and China over 1700 years ago. The legend tells as if the gods themselves, walking on the Earth, saw cute dolls in the window of the workshop and decided to play with them. figurines, like alive, spun in dance, fluttered, like moths, discarding bizarre shadows.
This secretly spied a magic dance master. He really wanted to repeat amazing dance. And then he attached barely noticeable threads to the pupae and gave them a new life.
Come on let's move on to that distant time and arrange fabulous show full of shadow and light, goodness and magic.
to you will need:
- cardboard box,
- parchment white,
- black cardboard,
- markers,
- scissors, utility knife,
- sticky tape,
- hot glue,
- sticks barbecue,
- tabletop lamp.
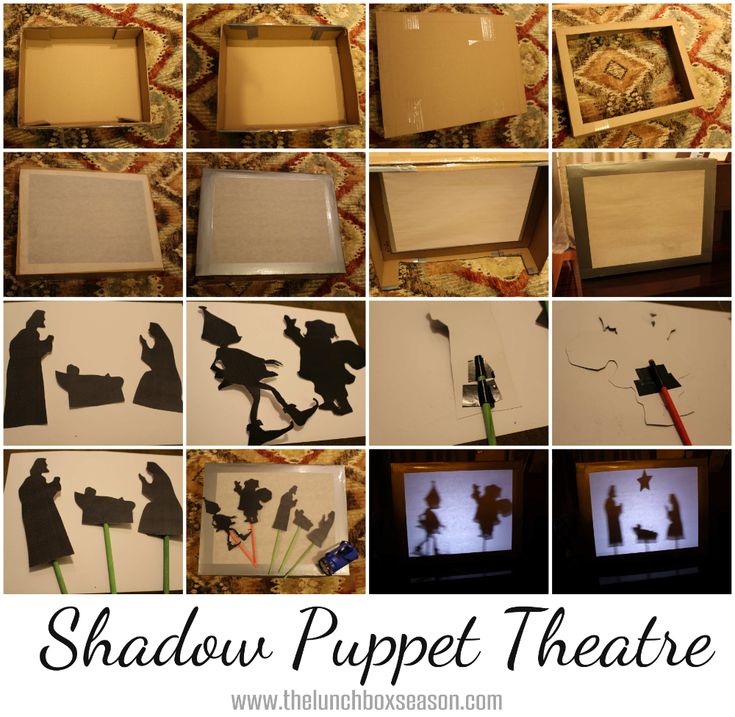
For Let's start by making a scene. It can be made in the form of a window, a castle, a fabulous tent and even a detached house. All depends on the size of the box and your fantasy.
the simplest option. Let's make stage for a performance in the form of a window.
1. Cut out the bottom of the box and glue it parchment. Fix the edges of the parchment with adhesive tape.
2. From make shutters from the rest of the box. paint markers.
Excellent! Half done!
A here is another screen option:
Well and now, so that our stage is not empty, fill it with bright characters. And I, of course, not about color (dolls can be made black). The silhouette of each hero must display characteristic features of his appearance and character.
3. Cut out flat figures from cardboard animals, trees, houses, your loved ones cartoon characters.
4. Glue with hot glue to the stick for B-B-Q.
5. Light up the box with a desktop lamps, and you can play.
More characters - more amazing stories!
here what it looks like from the back:
Now classical shadow theater threatens disappearance. But in the 2000s this mysterious art, a new direction. Dancers instead of puppets create incredible performances on stage, captivating the audience with the flexibility of bodies, play of light and shadow.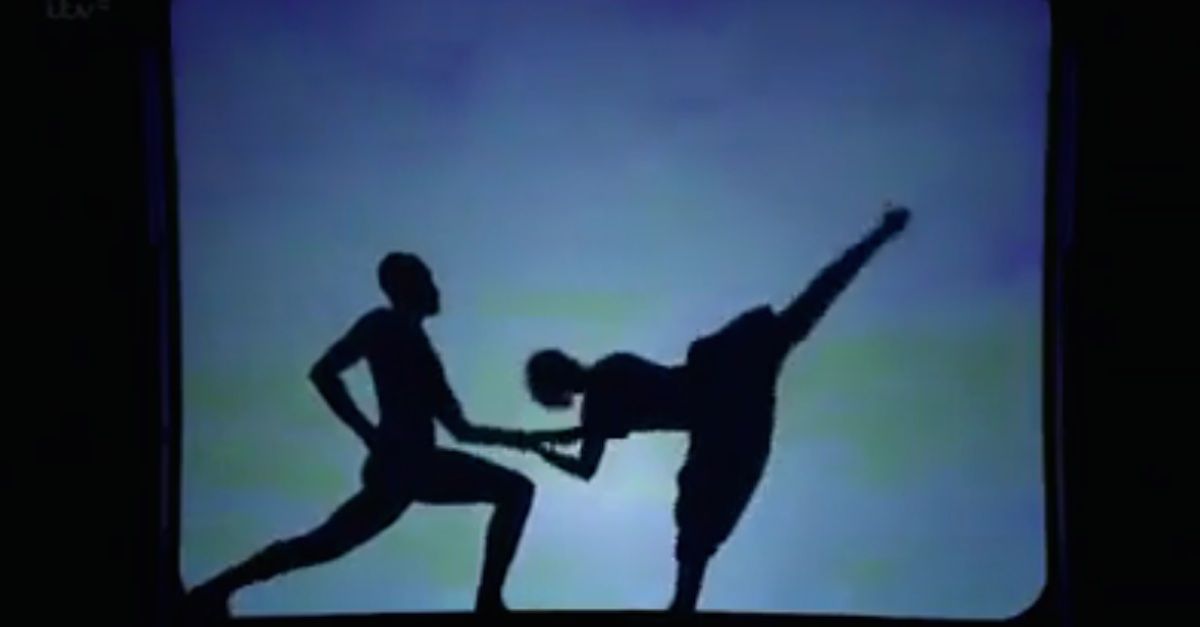
If your children love to listen to fairy tales and act out mini-performances in front of you, reading them by roles, give them a magical gift - a home theater of shadows. With your own hands you will create a miracle. The design will help the children to get acquainted with this art in a fun way. Shadow theater contributes to the development of speech activity and fantasy in children. It will be an excellent teaching aid for kindergarten students or children of primary school age.
An easy way to make a shadow theater with your own hands
The structure can be easily built from improvised materials. For work you will need:
- black cardboard;
- cereal box;
- plain tape;
- double sided tape;
- glue;
- scissors.
Take a box and cut out two windows on both sides. Frames 2 cm wide should remain around the windows.
Also cut out figures of trees, a silhouette of clouds, the sun, birds from black cardboard.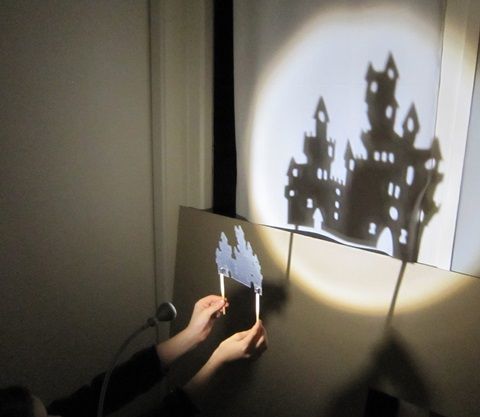 Now you need a sheet of white paper. Stick it all on him. Place the leaf in a cereal box. Fix it with glue. In its lower end part, make a slot 1 cm wide. It should be the entire length of the box. There will be paper actors.
Now you need to fix the structure. Attach the shadow theater for children with double-sided tape to the edge of the table or stool. The main thing is that there is enough space left behind for the leaders. Place a table lamp at the back, light it up and invite the audience.
You can take a much larger box and do the same with it. In order for the design to have a neater appearance, it can be painted with gouache or acrylic paints. Sew backstage for her. Shadow theater for children can be used both at home in individual lessons and in group classes.
Figures
Draw the outlines of the actors and scenery on the back of the black cardstock. Cut them out. Glue the ends of wooden skewers to them. Resist the temptation to color your shadow puppets.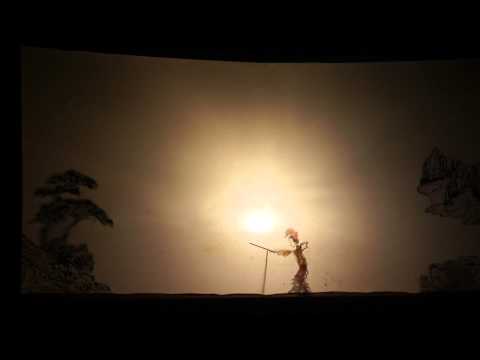 The black color gives contrast on the screen, and the figures are quite noticeable. Experiment with details, for example, butterfly wings can be cut out of a colored plastic folder.
Character limbs can be made movable. To do this, attach a thin soft wire to your legs and arms and move them during the performance. Shadow theater stencils can be purchased at the store or you can draw the figures yourself.
In order for the performance to be successful, some rules must be followed:
- To create clear shadows, the light from the lamp must fall directly. Do not place the light source very close. The optimal distance is 2-3 meters from the wall.
- Start with simple settings. Two or three characters are enough to start.
- Remember: the theater screen must be between the audience and the light source. Be careful: do not forget that the lamp tends to heat up. The figurines should be placed between the light source and the screen.
- The size of the figures during the performance depends on how far or close they are from the screen.
 To increase the character's size, move it further away; to zoom out, move closer.
Shadow theater for professionals
Having made a shadow theater with your own hands and having practiced in small productions, I want to complicate the task. To do this, you can increase the number of actors. Sometimes children ask the question: “How to make a shadow theater in color?” To do this, use colored light bulbs. For example, for evening scenes - blue, for morning scenes - red, as at dawn. For the production, you can also consider musical accompaniment.
Creation of the scenario and rehearsal before the performance
The first stage is over: you have created a shadow theater with your own hands. Now you need to choose a repertoire. Choose fairy tales for performances according to the age of the children. The children like to remake the good old fairy tales in a new way. You can change heroes, add new characters. For example, from the fairy tale "Turnip" you can make a New Year's story.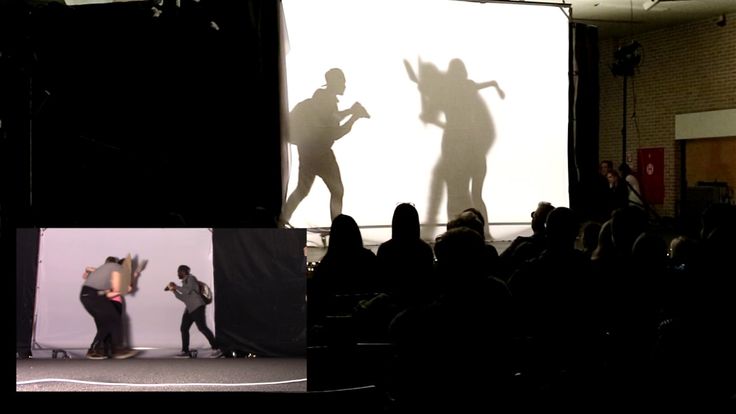 For example, instead of a vegetable, forest dwellers planted a Christmas tree. Couldn't pull it out. Decorated and began to celebrate the New Year.
If you want to show a performance to friends or grandparents, you should rehearse it several times in advance. Roles need to be learned by heart, since it will be difficult to read from a piece of paper in the dark. If the guys like the game, then expand it by making a real screen, programs, tickets. Have an intermission with real snacks.
Imagine - evening twilight, tightly drawn curtains and spectators frozen in anticipation of a miracle. Soon, near the most ordinary lamp, a magical performance will begin, woven from almost nothing. The shadow theater is a fascinating spectacle that children of all ages like, from one-year-olds to primary schoolchildren, who are happy to take part in the preparation of the performance and come up with their own fairy tales for the shadow performance.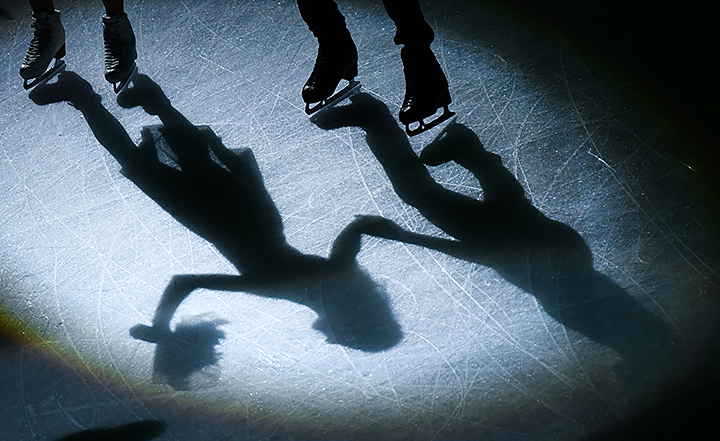
You don't have to go to a real theater to see a theatrical performance of light and shadow. All this can be arranged at home using improvised materials. Home shadow theater is an exciting and useful activity for the whole family. Everyone can participate in the preparation and holding of the performance, fantasy is in full swing, the plot is full of surprises, and the level of complexity of the scenery and figures depends on the interest of the kids and the time that everyone is ready to devote to this.
What shadow theater is there?
Finger theater is the shadows that appear on the screen due to the different positions of the hands and the interlacing of the fingers of the "director". Most often these are images of well-known animals, but professionals can show human faces or some inanimate objects. It's great for fine motor skills and coordination. puppet theater The characters are cut out of cardboard, fixed on sticks and moved according to the action. Due to the fact that almost everything can be cut out of cardboard, the puppet theater of shadows is an endless field for the flight of children's imagination.
What do you need for a home shadow theater?
1. Light source - this can be a simple table lamp, camping torch or any other spotlight.
2. Screen - is a translucent white plane that can be made from different materials - tracing paper, white thin sheet, ordinary Whatman paper or sheets of white paper fastened together in a joint. The frame for the screen can be a cut-out lid from any box, an artistic stretcher, a two-story children's bed - any design on which you can stretch the screen. can be made from an unfolded shoe box, pull a sheet over a bunk bed. A small "stage" is suitable for simple finger performances, and if you want to prepare a real puppet show, it is better to make a spacious large screen where the whole story will fit.
3. Sets and characters - choose what you want to start with. If you decide to try finger theater, practice with your child to fold their palms and fingers in such a way that “live” images of animals appear on the screen.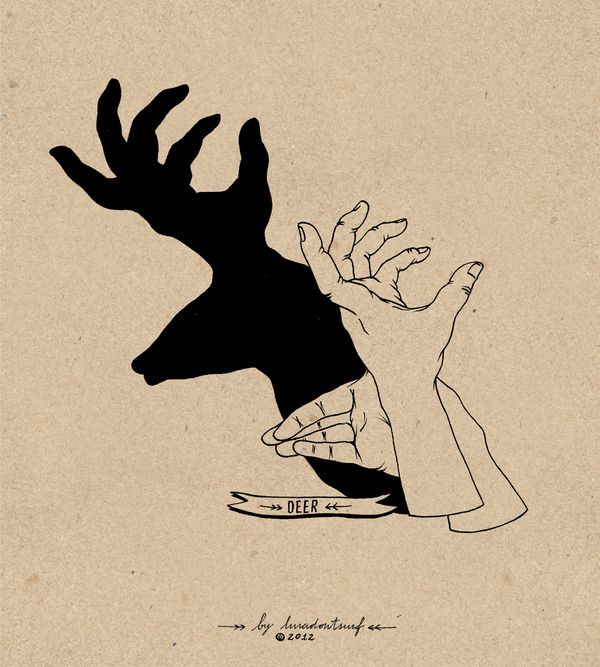 A dog can bark, a crocodile can open its toothy mouth, a bunny can move its ears - whatever you think of. For the puppet theater, you will need thick cardboard, from which you will cut out the scenery and figures.
Tips:
1. The screen must be placed between the audience and the lamp. The actors are between the lamp and the screen. Keep in mind that the lamp heats up and it is best not to touch the light source during the performance.
2. In order for the shadows to be clear, the light should fall directly, and not from the side, and the lamp should not be close, but two or three meters from the wall.
3. The light source should always be behind the screen and slightly to the side. Stand so that the shadow from your body almost does not fall on the screen, and the shadow from the hands is evenly clear.
4. It is better to paint cardboard figures with black paint, then they will be contrasting and noticeable on the screen.
5.