How to keep arms straight in irish dancing
How to improve your posture for Irish dance
Fitness and Conditioning
23 0 Share
One of the fundamentals of Irish dancing technique is good posture. This seemingly simple instruction – stay up straight – is actually very difficult to master as steps get harder, with lots of traveling, leaping, and kicking up as high as you can. Suzanne Cox, TCRG and Accredited Exercise Physiologist (ESSA) with the Australian Institute of Fitness, gives us the insight into why our shoulders might hunch and what exercises we can do to fix it.
Why do my shoulders hunch when I dance?
Irish dancers are renowned for their lower body strength but what influence does the upper body have? With an art form that has a large focus on footwork it can be easy to forget about what is happening from the hips upwards.
Hunched shoulders are primarily down to 2 main reasons;
- A lack of muscular strength to keep the shoulders back and the shoulder blade in a good position.
- Tight muscles that are pulling the shoulders and shoulder blades forward.
Let’s take a look at the first issue to begin with. How the shoulders sit will be directly related to how the scapula (shoulder blade) sits, and the muscle strength around it. Weakness in particular muscles controlling the scapula and shoulder can be from weak and untrained muscles, or can be from a poor postural habit that has become the norm over time, which actually causes muscular weaknesses. There is some commonality in what tends to be going on for a large amount of the population, including dancers who hunch their shoulders. Generally speaking, here is what happens;
- The muscles that surround the scapula (shoulder blade) and shoulder are weak. These muscles act to hold the shoulder blades back and down. They can become weak from spending time at a desk for long periods while studying or reading, continually sitting hunched over, or having a ‘slouch’ when traveling.
- Muscles work in pairs, so if the muscles on the back side of the body around the scapula become weak, the muscles on the front side of the body become tight. In this case the most common muscle groups are the chest muscles and the muscles at the front of the shoulder. When these muscles are tight it becomes even harder for the muscles in the back to do their job properly.
How can I correct my posture?
Here are a couple of basic exercises and stretches that can help. It’s important to remember that poor posture doesn’t develop overnight so consistent and long term muscle re-training is vital to make a difference.
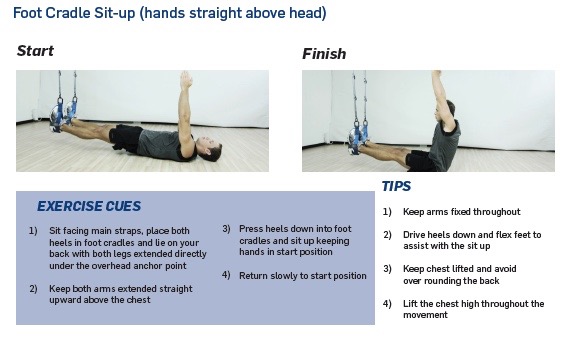
Prone back extension
This exercise is great for strengthening muscles on the back side of the body, in particular some of the ones that will help to keep our scapula in a better position.
- Lying on your front, place one hand on top of the other with your palms facing the floor. Put your forehead on your hands.
- Lift your arms, shoulders and head off the floor ensuring you don’t bend from the neck.
 The neck should remain in line with the upper back for good alignment and good postural development.
 - Aim to hold this for 15 seconds to start and build up to 30 seconds. Work your way up to a minute but remember this will take time – this exercise is usually very hard for Irish dancers!
Chest stretch
This stretch is great for stretching the muscles in the front side of the body that can pull the shoulders and shoulder blades forward causing a hunch.
- Using a doorway, place your forearm up to your elbow on the side of the doorway, bending your elbow at 90 degrees.
- Rotate from your feet slightly, away from this arm until you feel a stretch across the front part of your chest.
Do you struggle with your posture when you dance? Do you have any exercises or stretches that have helped you? Leave a comment below, or join the conversation on our Facebook page.
Post- Turning Pointe
Written by Beth Jordahl
“Irish dance doesn’t fit in a box.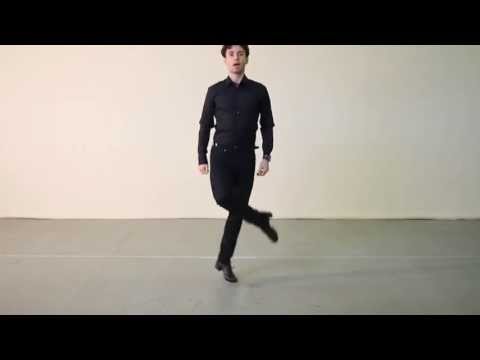 Irish dance is whatever it means to the person who is passionate about that activity. It grows and changes with everyone it touches.”
- The Gazette (Teelin Irish Dance Company)
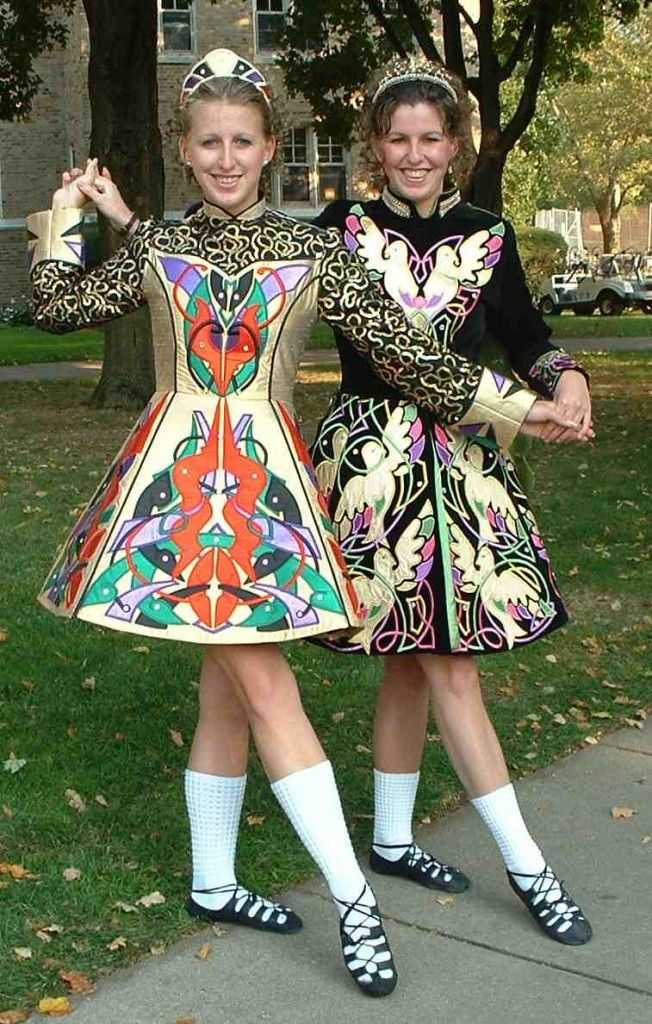
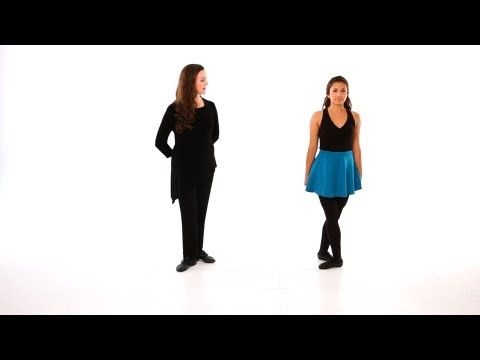
There is something magical about Irish dance. Strong dancers working together to create rhythm, pattern, sounds, and pictures. The curly hair, the green or vibrant costumes, and the still arms all contribute to a dance form that is very unique.
Irish dance is definitely a key component of our studio. So as we celebrate this form of dance and St. Patrick’s day this week, here are some fun facts:
1. Irish dance may have started as early as 1600 B.C.
While there isn’t much documentary evidence of Irish culture prior to the 17th century, due to Viking invasion. It is believed that these early tribal dances were accompanied by the music of the Tuatha de Danaan, or "skilled workers." The dances would have been a part of spiritual rituals, work, war, courting, and social recreation.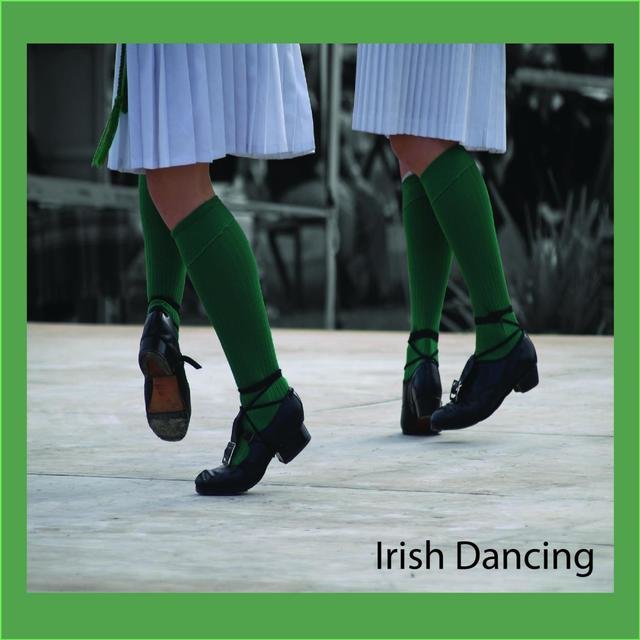
The first documented evidence of dancing is an account of the Mayor of Waterford’s visit to Baltimore, County Cork in 1413, where they took to the floor to celebrate Christmas.
2. Irish dancers actually did “Take the Cake”
The phrase “takes the cake” has been found to be used as far back as the 5th century, and became very popular in early 20th century as “cake walks.”
Before those traditions, Irish dancers actually held “cake dances”! The cake would be put in the middle of a field, and they would hold a dance competition for the opportunity to take the cake home.
3. Irish dancers may have started holding their arms straight to fool the Brits.
Of course, not all Irish dances involve still arms. So why is it a common practice today? Riverdance definitely popularized the still arm style in the 90s, but even before that there may have been any number of reasons. Here are a few hypothesis:
- Religious reasons, perhaps the church didn’t want boys and girls holding hands.
- Proper manners, etiquette may have dictated that still arms were more proper.
- Lack of space. pubs were tight spaces, so maybe they had to keep their arms still. They would also take doors off their hinges and lay them down to dance on top of and it would have left very little space for the dancers.
- And lastly, the English had forbidden the Irish from singing or dancing or celebrating their culture, so parents started teaching their children to dance with their arms down. This way, if anyone looked in through a waist high window, it would appear as if the dancers were actually just meandering around.
What do you think? It could have been a combination of all of these reasons.
4. There are three types of Irish dance shoes.
There are two types of soft shoes, Ghillies and Reel Shoes. Ghillies fit similar to ballet slippers and are laced from toe to ankle. They are quiet and flexible shoes. They are worn by female dancers for reels, jigs, and group dances.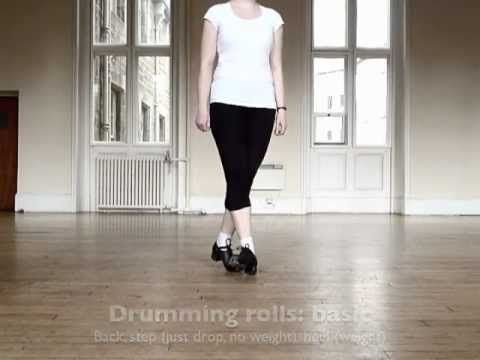 Reel Shoes are a soft shoe worn by male dancers. They are similar to jazz shoes, and some of them have a fiberglass heel.
The hard shoes are sometimes called “heavies” or jig shoes. They tend to be bulkier and typically have fiberglass tips for a louder sound. Originally in the 17th and 18th century, the sound was created with wooden taps attached to the shoe with metal nails.
5. Irish dance culture is now a global tradition.
Today Irish dance is taught all over the world. Championships are held in Dublin every Easter for competitors from around the globe. And some traditional dances, such as, the Feis (feast dances) and Ceilis (small group dances) are still held by Irish and Irish dance lovers alike. The rich tradition and history of Irish dance continues to run strong as it influences the ever-evolving performance and celebration aspect of this beautiful dance style.
If you would like to try a Irish Dance class, email info@turningpointeschoolofdance.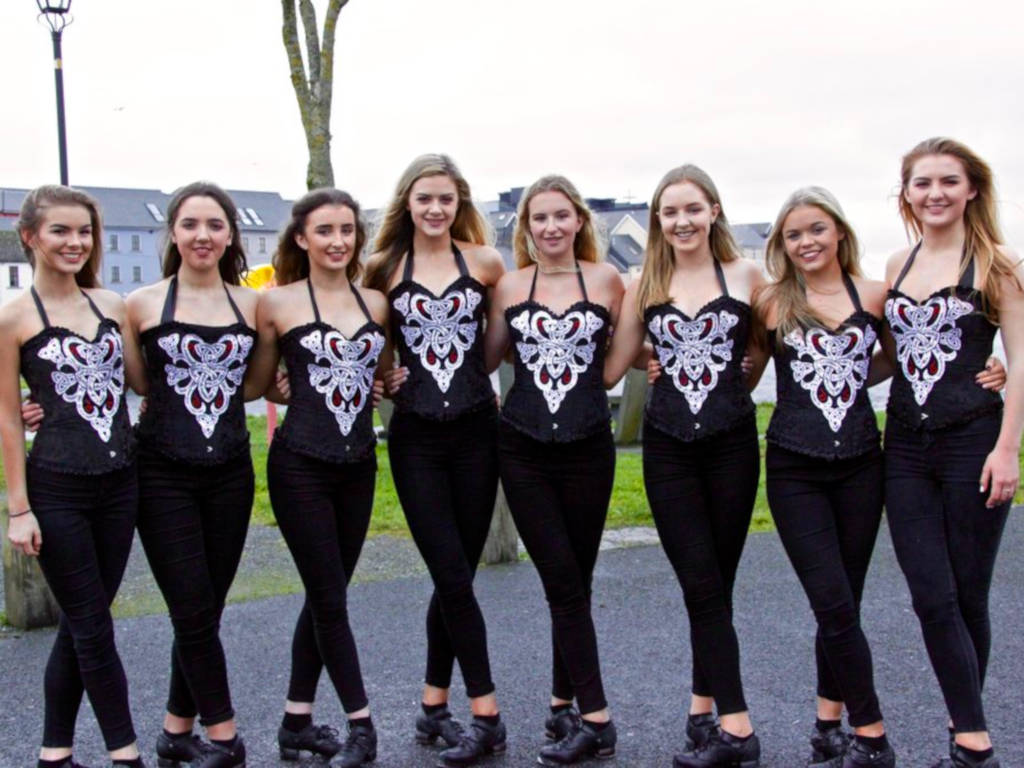 com to schedule a solo or small group lesson, in-studio or online!
Watch Irish dancing
Why Irish dancing is good
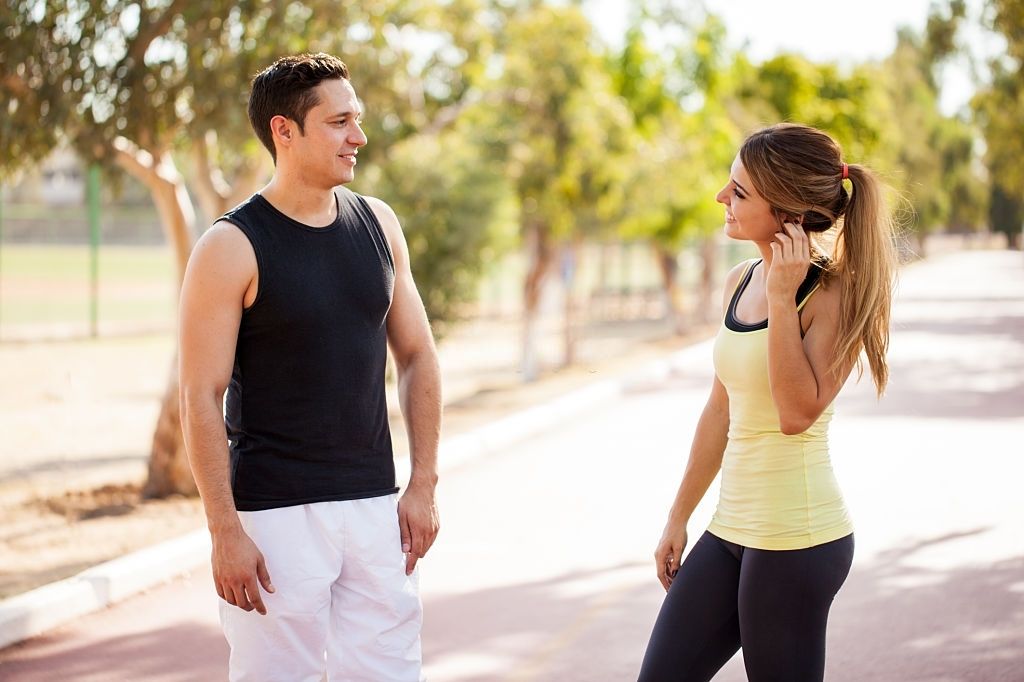
Not only because of its spectacularity and dynamism (remember the Riverdance show!), but also due to its rather high energy consumption: a woman weighing 60 kg spends an average of 170 kcal in a half-hour session. “In Irish dances, we combine a lot of aerobic exercise with a part of anaerobic exercise, which we use to work out certain movements, elements or strengthen certain muscle groups,” adds Tatyana Smirnova , Irish dance teacher, head of the Killarney school. - Everything in the complex allows you to keep your body in good shape and effectively remove excess fat. Of course, the main load falls on the lower body.
In addition, such training allows you to strengthen the small muscles and ligaments of the feet, which in ordinary life we hardly involve in work. And this protects against subluxations and dislocations (including those provoked by wearing high-heeled shoes), and improves blood circulation in this area.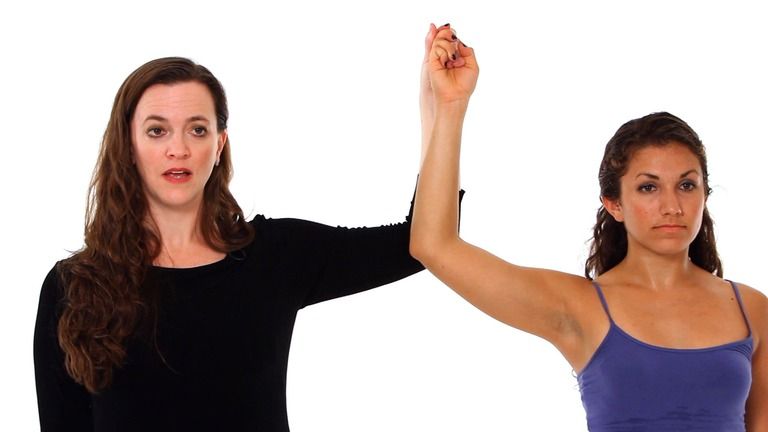
Irish dance classes have a positive effect on posture and core muscles. “The basic position of the body in this dance is straightened shoulders, tightened abdominal muscles, buttocks and a straight back. Moreover, the body must be kept motionless during energetic movements with the legs, that is, all these areas remain in tension for a long time, ”says Tatyana Smirnova.
Who is Irish dancing for?
Anyone who has no problems with the joints of the lower body, varicose veins, spinal injuries and over 15 kilograms of excess weight - in a word, those who are allowed shock loads and jumping training. Those who have injured their lower extremities less than two to three weeks ago will also have to refrain from exercising - in all these cases, the opportunity to train should be discussed with your doctor.
Let's be realistic: very few people can master the discipline on their own at a professional level: teaching this area "from scratch" in schools takes from a year. But you can start training at home using the basic movements and warm-up exercises of the "Irish" to improve the silhouette, health and prepare for group classes if, having fallen in love with the direction, you want to take it seriously.
Irish Dancing: How to Build a Session
* Start your workout with joint exercises (focus on your lower body joints and feet) and vigorous cardio (for 10 minutes). This will help to avoid injuries, problems with the cardiovascular system.
* Practice in light flat shoes , such as ballerinas, to improve grip and avoid falls. If you train at home, you can practice in socks.
* Practice 3-4 times per week for 45-60 minutes .
* Maintain correct body position during warm-up exercises and basic dance movements: shoulders are turned, back is straight, abdominal muscles are in good shape, pelvis is fixed, arms are pulled back, elbows are straight, palms are clenched into fists, pressed to the buttocks.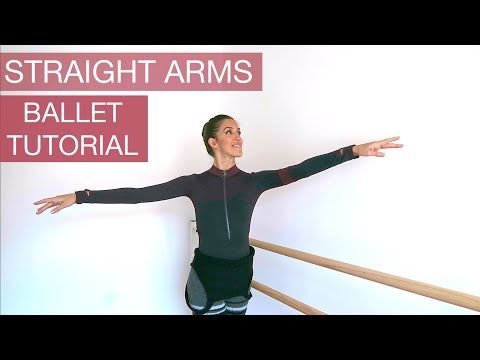
Warm-up exercises
This is a set of static exercises that will help not only develop the joints and ligaments of the ankle, but also strengthen the muscles of the legs (thighs and lower legs). Perform them at a calm pace, lingering at the top of the movement for 1-2 seconds.
Half Toe Raise
Stand straight, assume the basic body position (described above), place your feet hip-width apart, parallel to each other. Gently rise on half-toes, without bending at the waist and without bending your knees, lower yourself to the starting position. Repeat 8-16 times at a calm pace.
[new-page]
Bent Knee Raise
Return to the starting position of the previous exercise. Keeping your posture and the tone of the abdominal muscles, bend your knees slightly, rise on your toes and linger at the top point for 1-2 seconds, then straighten your knees, lower your heels to the floor.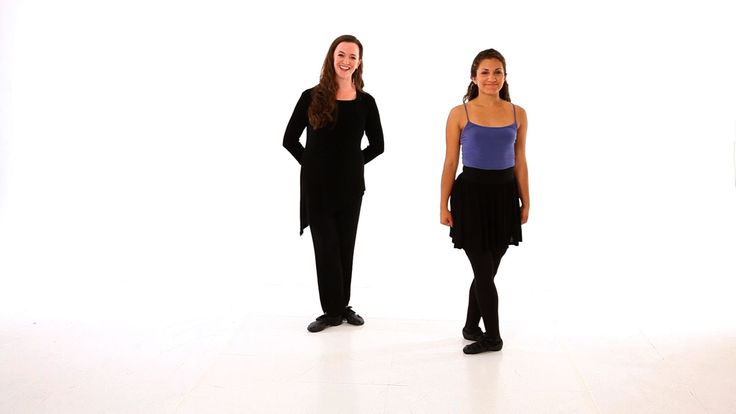 Stretch the crown up, try to keep the pelvis motionless. Complete 8-16 repeats .
Half Toe Raise with Feet Turn
Stand up straight, body in the basic position. Place your feet hip-width apart with your toes pointing out and your heels together. From this position, rise on half-fingers, linger at the top point for 1-2 seconds . Repeat 8-16 times.
Half Toe Raise with Knee Bending and Feet Turning
Repeat the starting position of the previous exercise. Bending both knees at the same time, rise to your toes, straighten your legs. Hold at this point for 2-3 seconds , return to the starting position. Repeat 8-16 times.
"Wave"
Stand up straight, maintaining the basic position of the body. Place your feet hip-width apart with your toes pointing out and your heels together. Transfer the body weight to the left leg, and bend the right leg and put it on the toes. Then straighten it, transfer the weight of the body to both legs and place both feet on the toes. After lowering the right heel to the floor, leave the left leg on the toes and bend at the knee. Then return to the starting position. Repeat 8 times in one direction, then the same number in the other.
[new-page]
Basic Dance Movements
These movements include several key dance steps. Having mastered the technique and sequence at a slow pace, perform them at an average pace, connecting the described positions of the legs with jumps (jump between them).
Point and back from base position
Keeping the correct body position, step the right foot in front of the left and cross the feet so that its heel covers the left toe ( is the basic position of , it serves as the starting position for all dance movements). Transfer the body weight to the left leg, and stretch the right leg forward and diagonally so that the big toe of the right foot touches the floor and the heel is pointing up ( is the position point ). In a jump, bend your right leg and take it back, sliding your foot along your left leg. Place the left foot on the toes, the right foot behind it. Lower both feet to the floor and return to the starting position. Repeat movement 8 times from each leg.
Three point s and back
Then, with a jump, move the right foot behind the left, landing on half toes. Transfer the body weight to the right foot, lowering the heel to the floor, the left - bring forward to position point . Repeat 8-16 times on each leg.
Basic step
From the basic position, move the right foot forward to the position point , then bend the right leg in a jump and touch the left knee with the right ankle.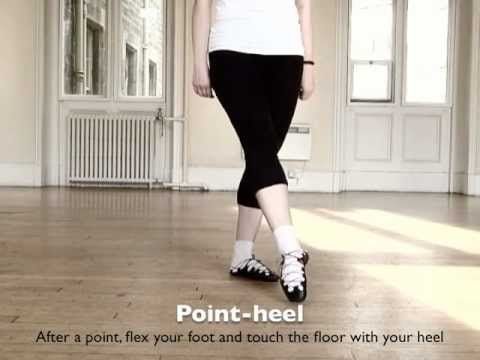 Then jump forward onto the right foot, land on the toes, put the left foot to the right behind it. After that, once again jump forward onto the right foot, land on the toes, put the left behind again, bend and move it forward. Lower it on half-toes, put your right foot. Repeat 8-16 times each way.
Point-hop-out-down
From the base position, make point with your right foot forward, then bend your right leg, raise your knee in front of you and touch your left knee with your toe. Then put your feet in the base position and again raise your right leg, stretching it forward until it is parallel with the floor. Return to the starting position and repeat 8-16 movements in each direction.
Learn the steps and movements of Irish dancing at a calm pace, and only after mastering them, accelerate. Regular exercise will help you strengthen the muscles in your legs and hips, improve your posture and coordination.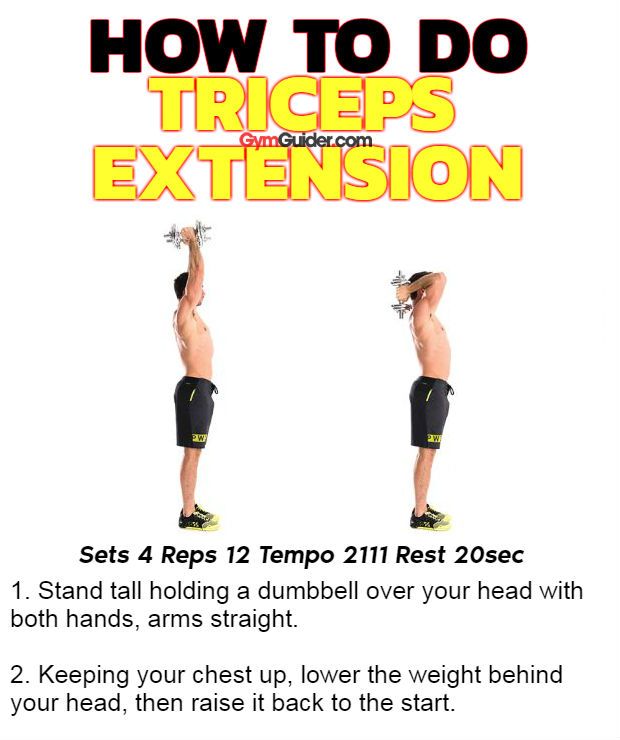
You can learn other dance styles by studying with the LIVE! instructors.
| Main page | Our library | Irish dance technique - part 1 | ||
| Irish dancing in its current form today is markedly different from what was danced before. Steps are becoming more complicated, elements are noticeably added, and, of course, the demands of judges who evaluate the skills of dancers are also growing. To date, there is a clear list of tasks that are set before the dancer by his teachers, and what you should always strive for. Because everyone knows that there is no limit to perfection and you can always find an opportunity to improve and transform both the technique and the whole dance as a whole. In the first part of the review, we will focus on the most important details of the requirements for the performance of Irish dances. 1. Turn Out. This is one of the main criteria for evaluating judges. Your feet should always be pointed/turned outward as far as possible. This means that the toe points outward and the heel points inward. This position of the legs must be maintained all the time throughout the dance. The exception to this rule is only certain items at high levels that do not require it. For beginner dancers, especially those who have no previous choreographic experience, it usually takes a long time to master the eversion. Actually, this is where training begins - setting the correct position of the feet. This is especially important for all jumping movements - it is important to push off correctly and land correctly. How to determine if you have the correct eversion of the foot. Stand in front of a mirror with your feet together. A dancer with poor turnout dances with “feet forward” and sometimes even turned inward. This leads to pain in the legs, from the ankle to the hip joint. And most importantly, such a position of the feet is incorrect and traumatic. Therefore, you should be more attentive to the comments of your teacher, perform all the exercises, and also repeat them at home. At a minimum, the simplest thing to do is to always try to turn your feet when walking down the street. 2. Cross Over. Keep your legs crossed at the knees. This is the second most important assessment criterion. That is, the correct cross for Irish dance is when all the elements performed and the movements performed are close to the center line of your body. Crossedness should be systematically and constantly trained in the classroom with special drilling exercises, which will certainly need to be repeated at home. 3. Timing. This is also one of the most important and indicative components in assessing the technique of Irish dance performance. Even if somewhere you could not hold other correct positions, timing, or rather, its absence, is forgiven in rare cases. On the contrary, if the dancer clearly hears the music, knows how to keep the correct rhythm set by the dance, then such an indicator can cover some other dance flaws. At the initial levels, the movements are simple and almost always coincide with one or another part in the music, there are no stretched or drawn-out moments, everything clearly goes to the beat of the melody. At higher levels, the steps are already more complex and can not always be understood by the uninitiated, that is, the timing itself can be difficult. While the sense of rhythm can be developed, timing can only be learned through practice. Regular classes, multiple and systematic multi-rhythmic drills and, of course, multiple repetition of steps, whole dances and its individual elements. Listen and repeat your dances to music outside of class. All this will work for your correct timing and develop your ear. 4. Keep Rhythm or timing again. Keep the rhythm. Of course, this can be traced most clearly in step dances, when the dancer's frank flaws are heard loudly and clearly, or on the contrary, he dances with a muffled and quiet shuffling. The correct and clear rhythm is developed by systematic drillings aimed at working out one or another rhythmic pattern, a separate element or piece of dance. The basic scores for Irish dance technique are described above. Next come the no less important technical components of the Irish dance, without which, in general, there will be no complete picture either. Let's continue the review of the position of the legs and fingers and then go up to the body. So... 5. The correct position of the toes (Point Toes). To put it simply - you need to pull the foot on the toe - "pull the socks". But it's simple only at first glance. It can be very difficult to actually achieve the correct position of the fingers. It is even more difficult to get used to the fact that this position must be controlled all the time. In the correct position, your foot is stretched from the rise and should be an extension of the lower leg and be turned outward, while the heel is looking inside up. This position also requires practice, and sometimes some stretching of the ankle and lifting in general. 6. High On Toes. Irish dances are performed on the toes, that is, in the position "on the toes", as they say. This is required by the technique of performing both soft and step dance. At the same time, your heel should not only be torn off the floor, you should stretch as high as possible on your toes up. And, as usual, you need to control such half-fingers throughout the dance. This is a peculiar feature of Irish dance: dancers, making jumping elements, push off simultaneously with their feet and use their knees; in a jump, everything is stretched - both the toe and the knee; when landing, the same foot and the same knee are used for cushioning; and after landing, the "shock-absorbing organs" must be returned to their initial extended position. This is very difficult to get used to, as you will have to shift your center of gravity from what you are used to with normal walking. You should feel at all times that the pad at the base of your thumb is completely on the floor. It is in this way that it will be possible to maintain balance and avoid injuries, because when deviating from this position, the leg is very easily tucked. This is especially important for beginner dancers who do not yet have a sufficiently strong muscular-ligamentous corset on the foot. He trains with all kinds of exercises on the half-toes, as well as power and jumping, aimed at strengthening the muscles on the calves, and all the legs in general. 7. Stretch Legs and Knees. The leg must be tensed and clearly extended from the hip to the tips of the toes, with the knee retracted and equally extended. We know that when you land, you need to cushion your knee and foot, but immediately after landing, you need to stretch up and bring your legs back to their original level position. In combination with high half-toes, the audience will have the feeling that you are just hovering above the floor. Very often, dancers, who do not have strong feet, mostly cushion with their knees, that is, "sit on their knees." This is not only not good for the dance, judges or spectators, but also harmful for the knees themselves, which are systematically subjected to intense stress. Remember - your main depreciation element is the foot and a little knee. Increasing the strength potential of the foot should always be given a lot of attention, especially at the initial stage of training, we read about this above. 8. Keep Knee Back or again about the knees Remove the knee back. We know to extend the knee and remember the crossed position. But there is still a feature of the Irish dance, when, when making backward movements of the legs, the knee still needs to be hidden as far as possible. In front, it should be at a minimum or not be at all, it all depends on the element being executed. Most often, it is required that the back knee does not go beyond the height of the raised front leg. This is achieved by the fact that the rear leg is in a high position, that is, the toe of the hind leg tends higher and points upward towards the waist. 9. Keep the hip - Keep Hip During the movement with crossed legs and turned feet, it is sometimes difficult to keep the hip in the pelvis so that it is not directed towards the raised leg, for example. However, the position of both hips in front must be maintained and not directed after the legs. 10. Keep Arm Stretch and Back This is what makes Irish dancing unique (significantly different from other dances) and what most people notice about Irish dancers right away. In shows or stage performances, dancers allow themselves to move freely with their hands, in keili there are certain positions of the hands raised up or stretched out in a certain way. The canonical performance of the Irish solo dance requires that: your arms are straight, extended at the elbows; they should be slightly laid back behind the outer line of the thigh; The hand should be in the "collected into a fist" position, where the thumb is retracted. And, of course, while you are dancing, your hands should be motionless. With insufficient self-control, sometimes the dancer bends the elbow, flexes the fingers, or even “waves his arms”. 11. Keeping the Body Still (Keep Body) Another hallmark of Irish canonical dance is when the body is kept still throughout the performance. All movements of the legs with all kinds of turns do not affect the position of the body. Everything from the hip to the head, inclusive, is your immovable organs during the dance. The dancer is one with the body and moves with it. 12. Keep Shoulders Back This assessment of technique is clearly related to the previous one, since slightly lowered and retracted shoulders are the key to good posture, which means that your body will be even. Try always, even if you are not on stage, and not in group training, to watch the position of the shoulders. This is the key to a good prize performance, and, most importantly, a healthy spine and back. 13. Keep Head Up and Eyes Up (Keep Head Up and Eyes Up) Proper head and eye position is important in any kind of dance. You can’t dance with your eyes lowered to the floor, or vice versa, looking into the heavenly distance; with the head thrown back, turned to the side or lowered. Correct head position is a continuation of correct shoulder position. The head should crown a beautiful elongated neck, the chin makes a right angle relative to the cavity between the collarbones. A feature of the Irish dance is that the head always looks forward relative to the body. Make it a habit to look at yourself in the mirror when you dance in class. If you are dancing where there are no mirrors, determine the level (height, object) at which your head and eyes will be in the correct position, and maintain this position while dancing. In the next part we will focus on the general requirements for the technique of Irish dance, specifically for the schemes (steps) of the dance and general assessments of its performance. Pictured: Killarney Irish Dance School dancers. All articles on the site are written by members of our team and are unique. Placing our articles on your resources is possible only with the permission of the site administration and with a mandatory active hyperlink to this source http://killarney.  . .
| ||

 Then spread your socks to the sides as wide as possible. Those. we get up in everything known position - "heels together, socks apart." Bring the right foot forward and place it in front of the left foot. It turns out a slightly “pinched” 5th classical position of the legs. If your legs are turned out properly, you should ideally see a diamond in the space between your toes and ankles.
  Perhaps the most difficult moment in dancing. You must constantly remember that one knee must always overlap the other, even when you bring one foot forward relative to the other or do jumping elements, or other other dance patterns. That is, your legs should always be or return to a crossed position after performing the steps. How to determine if you have the correct leg cross. Return to the starting position and place one foot in front of the other. Your knees should be closed, your back knee and your back toe should not be visible, the viewer sees only your back heel and, of course, turned in the right direction.
 Remember, if soft dances can be easily obtained, then the step rhythm can only be developed with repeated repetition and constant practice. Patience and hard work will help you.
  When performing the point itself, all the toes are brought together, and the foot is placed exclusively on the big toe. The dancer is obliged to control this position of the foot all the time, whether he takes his foot off the floor (performing an out, point, jump, etc.) or standing still. The exception is movements that use a different technique.
  Moreover, in elongated and high half-toes there is a trick - stretching up on your toes, you pull your knee, and you yourself reach up, straightening your back as well. Therefore, no matter what you do - jump or step, it is important not to drop the heel and leave it in a high position relative to the floor.
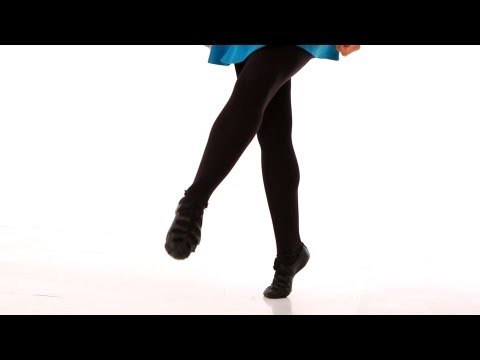
 But this problem is peculiar only to the most beginner dancers and the correct position is quickly developed. However, this should also always be remembered - two hips are directed forward.
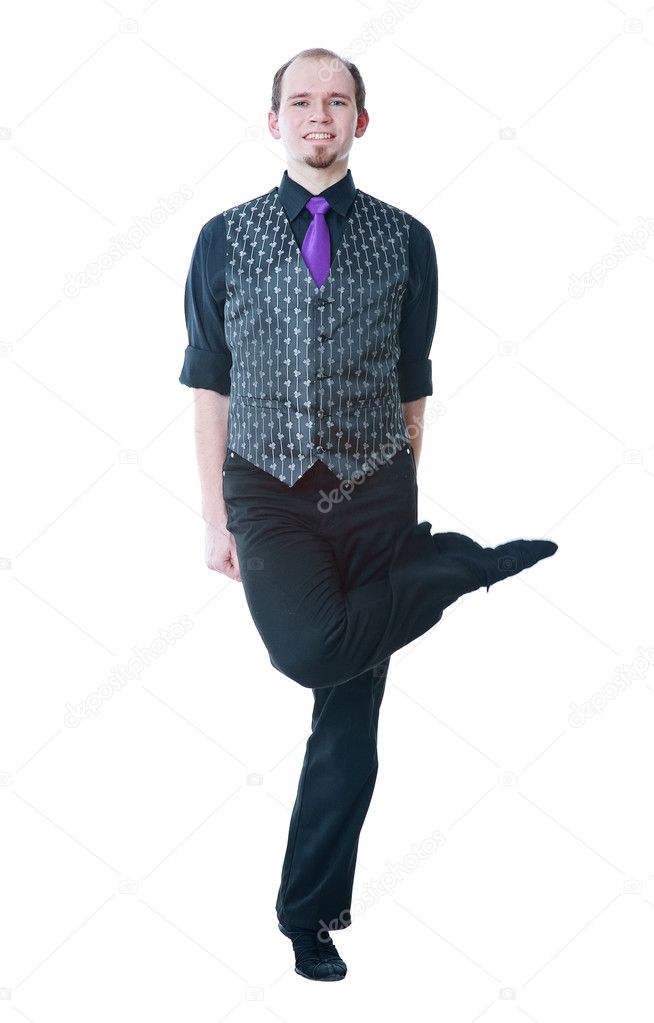
 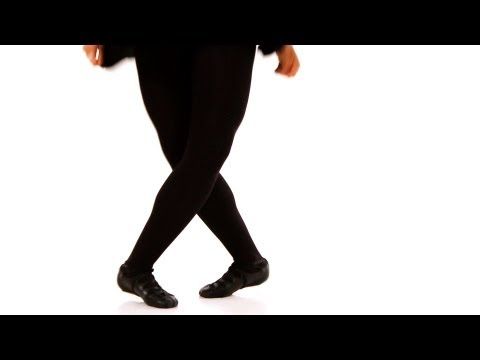 This is unacceptable and is punishable by a decrease in the judge's mark. In addition, unnecessary hand movements will only interfere: the dancer spends a lot of energy on unnecessary body movements. Therefore, the correct position of the hands is an equally important aspect of performance technique, which also needs to be paid great attention to in your workouts and listen to the recommendations of the trainer.
 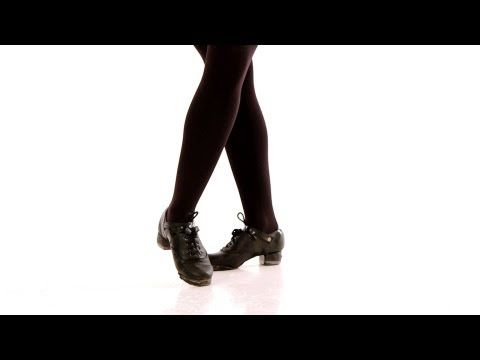 Of course, if you dance for several hours in a row, the accumulated fatigue will pull your shoulders down and round your back. But the dancer cannot afford it. Even if your hands are in the right position, a stooped dancer is an unattractive sight.
 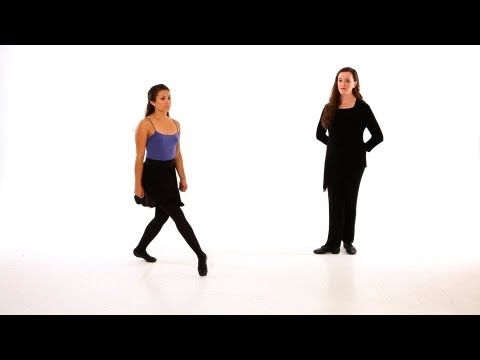 Remember that downcast eyes pull down on your head and shoulders. And know that lowered eyes are an indicator of the dancer's great insecurity. You need to look clearly ahead and, preferably, smile at the same time.