How to do isolation dance moves
How to Practice Isolation for New Dancers
When you are starting out dancing, isolation is the first thing that challenges you. To move onto the next level, you have to climb this wall.
Although it is classified as basic in the dance literature, it is frustrating how difficult it can be. When you actually try it, your body does not go as smoothly as one expects.
Yet, isolation practice is necessary if you want to graduate novice dancer and start to look like an expert (see "Reasons why your dancing looks amateur and how to fix it").
The road to mastery is bumpy however. The first thing you would notice is the pain your muscle feels. Just like extensive stretching (as mentioned in "[The insider secrets to stretch and master split]" (http://dancesensei.com/dancing-tips-the-insider-secrets-to-stretch-and-master-split/)), the movement feels unconventional to your daily life. It is often the case that pain is the only noticeable indication that you are getting better.
To teach isolation is also the troublesome part. Luckily from interacting with countless dancers, I found a highly effective method of teaching for beginner people.
So this time I will introduce the way to practice isolation without failure in each of your body parts: neck, chest, and waist. It makes use of the natural flow of your physiology.
The technique of manipulating the body that you acquire through executing isolation skillfully is one of the most important forces to improve dance.
Key points to learn isolation
Because it becomes unintuitive and sometimes difficult depending on your practice method, it is better if you build proper knowledge and attitudes to acquire isolation skills properly before we go into the actual methods.
Never move it by force
One thing that is most unwelcoming in isolation practice is the strain.
As soon as force comes into play, your muscle becomes stiff, narrowing the range of motion. As a result, you will not be able to move as much as expected.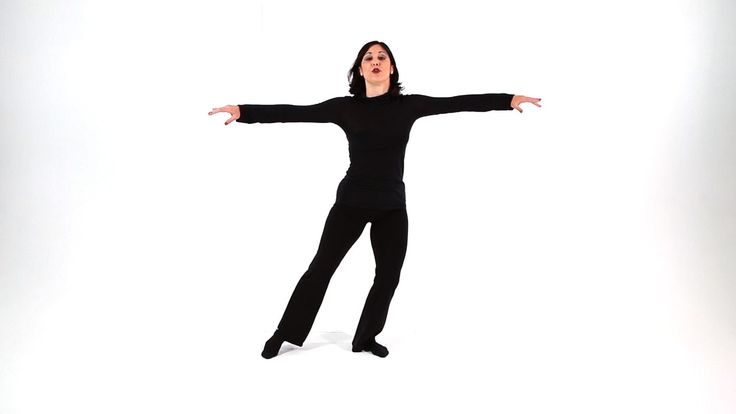
Instead of pushing your muscle as far out as possible, think of it like a puppet. You are being controlled by a single thread, and a part of your body is being pulled away gently.
Let's try to practice with relaxed sensation.
Experience the
first possibleThe first step towards mastering anything is to know your current limit. The process is more like accumulating incremental step rather than ending in one shot.
It is important to set an achievable goal every time, and experience what is physically possible with your body. You will also gain confidence in the meanwhile. Remember what you can do here.
This point is a nice segue to my next point.
Repeat or else forget
After experiencing how much isolation is possible with your body, you only need to reproduce the format every time and practice it over and over.
Depending on your body condition on that day, the practice outcome will vary inevitably. It is the memory of experience and confidence that helps you navigate the progress.
Your final destination is to be able to move your body parts in isolation without dedicated concentration. You should not need conscious effort to move. It should come out naturally to your body instead.
In this step, be careful not to leave a large interval between each practice. A little time of practice every day is always better than one big practice once a week. It is a common pitfall for beginners (see "[How much dance practice time do you need to become good?] (http://dancesensei.com/how-much-dance-practice-time-do-you-need-to-become-good/)").
Be sure to use mirrors for practice
In order to judge if you are doing it right, you need to be able to observe yourself. If there is no mirror available, you can always find a window reflection or take a photo snapshot of yourself. There is no excuse f this smartphone age.
Practicing isolation without confirmation is only pleasing yourself.
If you rely on your feeling without checking, you think isolation is done after the first day.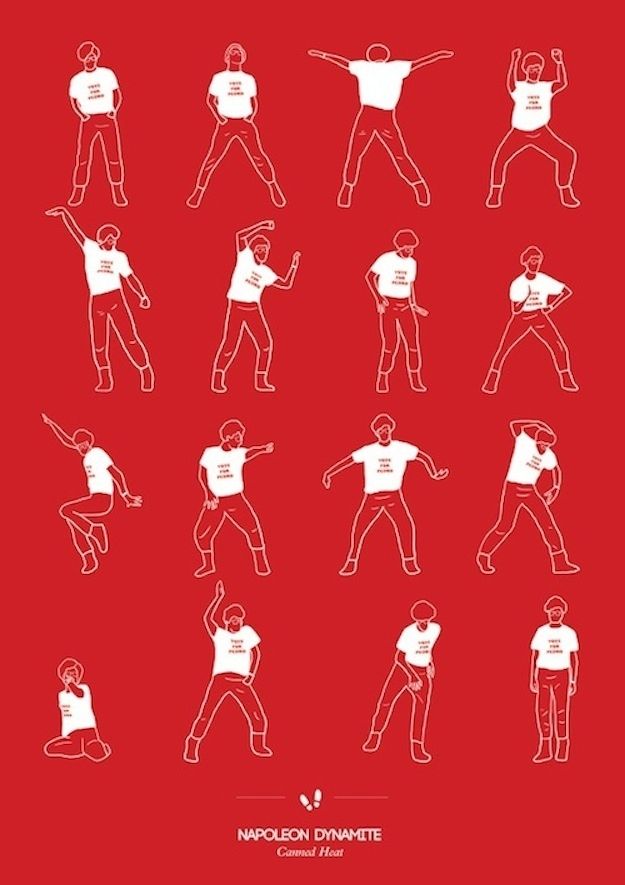 Mission accomplished. However, you have likely picked up some troublesome habits along the way.
Yes, I understand that for some it is challenging to face your awkward self. But that is the reality. You are spending as much time anyway. Why not do it right from the first time?
If you are ready with these mindsets, let's dive into the practice methods.
Experience neck isolation
For the isolation of neck, bring your friend and set up a pair. Divide the role between the one who experience the movement potential and the other who supports.
One whose neck is moving
This person's job is easy. Simply lie down on a bed or table, and stick out just your head. The head is up in the air now (the other person should be holding).
You should let go of strain and relax fully. Trust the other person.
Supporter who moves the neck
Because the muscle around the neck is delicate, you who moves must handle the head with care. It is important to start this exercise in the relaxed stage. You can check it by shaking off the head lightly. If the head resists moving, it means that there is still room to loosen up.
Once confirmed, slowly move the head to front and back. Shake it off again to put it back to the default stage. Then slide your head to left and right. It is not tilting but sliding. Your chin stays in the same angle sliding left and right.
4 directions in total: front and back, horizontally left and right. At each peak point, stop for a while to let the other person absorb the full experience.
This exercise helps in recognizing your physical limit and making a mental note of which part of your muscle is actually moving. It will benefit your own practice in the future.
Experience chest isolation
Being able to move your chest in isolation is important because it helps in showing musicality. This is where dancer grove comes from.
Back and Forth
Open your legs about 1.5-2 times the shoulder width, and slightly bend your knees. Stand with a hand on your waist. This form moves your chest more flexible.
To move your chest forward, inhale deeply with your nose. While doing that, with your hands still attached to your waist, move your elbows as if you are touching them together behind your back.
That will form a shape of the chest sticking out. Repeat the step until your body will remember the shape.
To the contrary, exhale from your mouth with a moment to move your chest backward. Pull both of your elbows in front of the body this time, with hands still attached on the waist.
We will take an advantage of breathing to let your body soak in the sensation. Once you get used to the movement, you will be able to do it with a little concentration on your chest.
Left and Right
Not only front and back, but you also want to move it to the sideway.
The first step is the same; open your feet for 1.5 to 2 times the shoulder width, and lightly bend the knee. Relax.
As for hands, just hang them down on the side. It is not much posing but more like regular standing without any tension.
When ready, slowly move up both of your arms to the left. Then, your center of gravity naturally slides to the other direction (right) in order to keep up with the balance. That movement is the isolation. Repeat it on the right side.
As you get the hang of it, drop your arms and only move the chest part. It is important to keep your shoulder on the horizon. You will feel your stomach gently being pulled apart.
Experience waist isolation
Waist isolation is indispensable for making a dance step smoothly. You would want to control your waist zone at free will. To experience this, it is convenient to have a tool.
Prepare a round object that you can hold in your hands. It is better to have an object with some weight like your backpack or basketball.
Back and Forth
Again, open your legs about 1.5 to 2 times the shoulder width, knees bent slightly. Again, relax.
With that position, hold that object with both of your hands in front, and start rotating it around your body.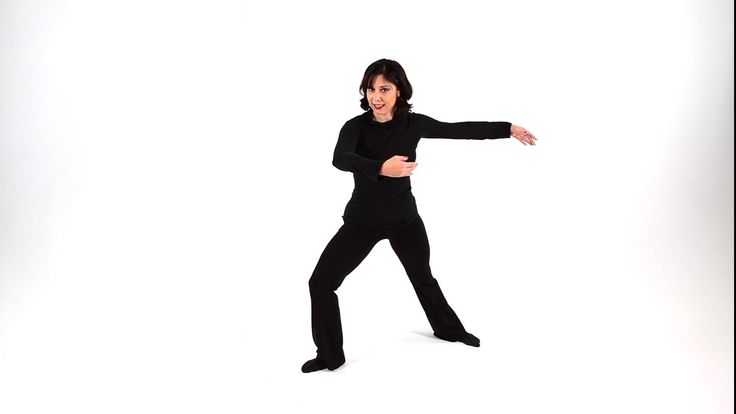 Because of the relationship between the weight of the object and the range constraint of your body movement, your waist will try to make a space. It then starts to move back and forth naturally. That is the isolation.
Left and right
The procedure is the same as front and back. You will be rotating the object around your waist, and the waist will move in the other direction naturally.
The important thing in this waist exercise is to focus on the movement of your waist vertically and horizontally, rather than the rotation.
In any direction, be careful not to have your soles in the air either. Keep them attached to the floor all the time for the full experience.
Isolation for your everyday practice
Even though it is called the basic skills for any dancer, it can be so tedious and frustrating for beginners that they can just give up dancing.
The methods introduced today are for those people. Because it focuses on going along with your natural body movement, you should find it pain-free.
Please keep 2 things when practicing. Never force your way in and experience the possibility first. If you keep them in mind, you will surely improve.
Once you get over these initial hurdle, you can move onto gaining finer isolation and raising the range of motion of each part to the maximum.
Basic training always pays off in the long run. Without it, obtaining intermediate and advanced skills becomes almost impossible. Even 10 minutes is effective. Let's incorporate isolation into your everyday dance practice.
The Best Guide To A Complete Body Isolation Workout
Table Of Contents
- 1. What is body isolation?
- READ MORE
- 2. Why is body isolation important?
- 2.1. The command over your body
- 3. How do you isolate your body?
- 4. How do you isolate your neck?
- 4.1. Body isolation for Neck:
- 4.2. Comment
- 5. Body isolation for the shoulders
- 5.
 1. Shoulder roll forward
- 5.
- 5.2. Backward roll
- 5.3. Shoulder tap
- 5.4. “I don’t know”
- 6. How do you do chest isolations?
- 7. Body isolations for the hips
- 8. Other parts of your body you can isolate
- 9. Body Isolation-Movements-Flexibility
- Discover new, untapped materials
- You Might Also Like:
- Ekagra-ji Recommends
Body isolation is one of the key fundamentals to transform your body into a malleable tool you can play with. Everybody should practice body isolation and movement as a way to keep every parts of your body healthy, flexible and ready for bigger physical activities.
1. What is body isolation?
Have you ever witnessed someone moving his head sideway while keeping his body still? Body isolation is the act of selecting a particular section of your body that you will manipulate while other parts of that body remain motionless. Of course, most would probably say that this is not possible. And in a certain way it is true that other parts of your body do move even if it does not look that way. But in essence what you do is dictating your body to act a certain way. Kind of mind over body philosophy.
2. Why is body isolation important?
Body isolation along with flexibility are the gates that separate you from complete ownership of your body. Many athletes focus on their physical conditioning and spend less time on their flexibility and body isolation. They then pay the price later as age mounts on them while their body slumps down.
However, working on flexibility alone can be the recipe for disaster, especially in activities such as yoga. That’s where body isolation come to play. Before you engage in a physical activity of any sort, doing body isolation exercises will do marvellous things for the health of your body. It will prepare it for what is to come and make sure you created a healthy pre-activity in every parts of your body. Once I did a body isolation demo before a salsa class. One of the students mentioned afterward that a neck pain that had harassed her for while somehow disappeared.
2.1. The command over your body
Whenever you see a dancer do things with his or her body that seems out of this world, you can be sure that he/her has spent lots of time on routines such as body isolation. The way to think about body isolation exercises is to consider the body as either a stiff bar or a modelling clay. And ask yourself “with which material can I create the shapes that I want?”. In essence that’s what body isolation exercises are there for. To allow you to command your body to do what you want when you desire it.
3. How do you isolate your body?
In order to conduct a proper body isolation, it is important that other parts of your body remain still. For example, if you want to work on the upper parts of your body, you can either stand firmly on your legs while playing with the body parts you want to work on. Or you can seat on a chair while doing the exercise. The point is to make sure that when you move some parts of your body, the other parts stay as still as possible.
Following are some specific instructions into how to isolate certain areas of your body.
4. How do you isolate your neck?
Neck flexibility is important to avoid issues such as stiff neck or other related neck pains. I found out that working on the isolation of my neck reduced drastically the chances of cervical neck strain.
4.1. Body isolation for Neck:
🔵 First your slowly move your head sideways, left to right. You try to extend as far as possible.
🔵 Then you do a similar motion from up to down. Be sure not to do the motion too fast and avoid them all together if you have any injuries (speak to your doctor first).
🔵 Following these two motions, the third exercise is to let your neck drop from one side of the shoulder to the next. Don’t exert force with your hand. Just let it drop as far as it can.
🔵 From there, the fifth exercise consist of “sliding” or “rolling” your head from one side to the other.
4.2. Comment
At first, you will have the tendency of moving your shoulders either upward or downward, and other parts of your body might move too. Just keep your gaze in front of you and ignore the movements of your body. With time and practice you will see that you are able to move your head while the remaining of your body stays still.
5. Body isolation for the shoulders
This is another important parts of the body I like to work extensively on. I realised it not only helps with my dance movements, but shoulder isolation also helps me avoid serious injuries when I do physical activities such as push-up or handstands.
Similar to the neck isolation exercises, you will stand straight (in front of a mirror if possible).
5.1. Shoulder roll forward
As you roll one shoulder clockwise, you try and make sure the other one does not move. As a matter of fact, focus on the shoulder that should stay still. Indeed, this will educate your mind to command your body not to move. After a while you change shoulder.
5.2. Backward roll
You start again with the shoulder you first worked on. Only this time you do the movement backward (anticlockwise). After a while you can change side.
5.3. Shoulder tap
A third exercise for the shoulder consists of creating a “beat the drum” motion with them. You go from backward to forward as if you trying to play the drum with your shoulders. You can stat with the right side. Then, after a while you can change shoulder.
5.4. “I don’t know”
This next exercise could be best described as the lifting of the shoulders when someone ask you a question to which you don’t know the answer. You raise them up then just drop them down. As for the previous exercises you can do it first with one shoulder, then the other one. Finally, you can do both either together or with quick alternance between one shoulder and the other.
6. How do you do chest isolations?
Another section of the body you can work your body isolation on is your chest. First, you keep your body strongly planted on your feet, bending the knee slightly to create pressure with the floor. Then you move your chest forward (as if you were protruding). Then backward (as if someone had punched you and you felt the effects). You then come back forward toward your right. Go back forward in the centre. Finally forward to your left. You then restart the exercise in these four directions, until you feel confident and can execute the move in one big circular motion.
7. Body isolations for the hips
I love isolating this part as I consider that the basis of all activities starts from the core, hips and manipura chakra. Like with the chest isolation, you move your hips fully to the right while making sure your feet are planted to the floor and your upper parts are in line with your feet. It should look as if your body was cut in 3 parts with the middle part going to the right.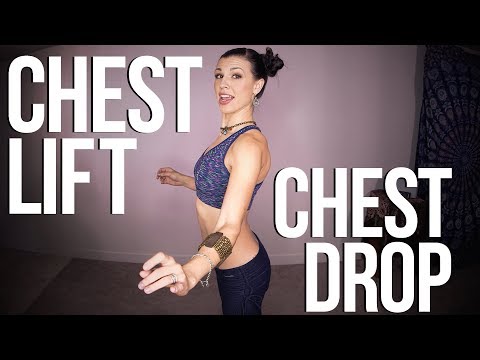 You then do the same exercise to the left. Then backward and forward. Once you get a grip of the exercise you can do it in a circular motion. This move definitely looks provocative but I know its secret power when I dance (these are stories for another time).
8. Other parts of your body you can isolate
I love to stand still on one leg, lift the other one up, and either stretch the lifted leg forward and backward. I can also rotate that it around the knee joints. This small exercise is very effective in helping me avoid injuries while stretching my leg.
Another part of your body you can also isolate are your ankles. Again, this prevent injuries especially if you are dancing or running.
9. Body Isolation-Movements-Flexibility
Body isolation works great with body movement, flexibility, recovery and breathing. In my post on the perfect flexibility routine, I go over a step-by-step guide that will allow you to get a full routine that will help your body tremendously, no matter what physical activity you engage in.
Discover new, untapped materials
Be the first one to check-out all the exciting info I put out on Salsa, Zumba, Bachata and other Afro-Cuban dances. I have many thrilling programs that will transform and challenge you. These life-changing and great VIP programs can take you from novice to master in less than 3 months. They are badass and will definitely introduce new muscles to your body.
You Might Also Like:
Ekagra-ji Recommends
No Comments
The difference between salsa vs bachata lies mainly in the tempo and rhythm. One (bachata) has a more straightforward rhythm which can be helpful when you try to learn salsa.
Read More
No Comments
Cuban son is a unique and gracious couple’s style of dance. Although its rhythmic patterns are different from salsa, if you can master son, you will be able to dance salsa.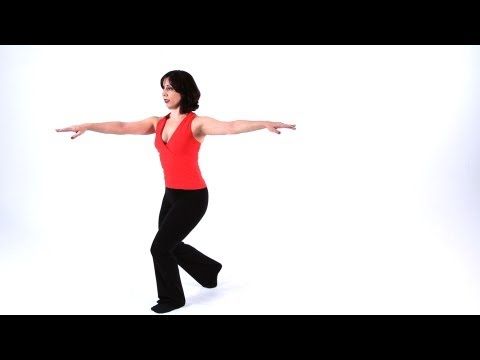
Read More
No Comments
Zouk dance has become widely popular over the last few years, with people going crazy for Brazilian zouk dance, for example. But zouk dance is not new and, in fact, has been there for many…
Read More
No Comments
My body balance system is a proven system that ensure you not only get flexible, but that you also get physically strong and have your mind re-aligned. Enter this 48-day challenge that guarantees great results,…
Read More
No Comments
Here is my proven system to get flexible fast, that guarantee great results within few weeks. The system proposed will revolutionise your flexibility.
Read More
No Comments
Today we will cover Flexibility stretches for dancers of any kind. I show you how to dramatically increase your stretches in 30 days!!!
Read More
Isolation exercises for the shoulders: examples of how to do, video tutorials
Every person who plays sports and develops his body faced difficulties in working out certain muscles of the body, especially with isolating exercises for the shoulders. In addition, there are as many simulators and exercises with them as there are these same muscles in the human body, and it will be problematic for a simple layman to keep track of everything at once. Of course, you can not delve into the subtleties of improving yourself, but then the effect will be appropriate. And just the same, shoulders can be the first problem for a beginner in the gym. In this article, we will talk about how to properly pump your shoulders in the gym and at home.
Shoulder exercises, like any other exercises, have a number of features that you need to know before starting a workout. And without which training will be less effective.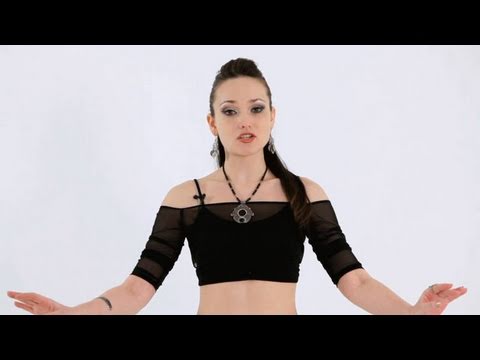 Let's figure it out in order.
To begin with, it is worth clarifying that you will mainly work with the front and middle shoulder deltas. Care must be taken when working with these muscles, as the back takes an active part in the load. It is worth paying attention to the performance more closely, since some exercises differ only in degrees, but the degree of their benefit is radically different. Of course, one cannot fail to say that when performing, it is necessary to exhale at a moment of tension, and inhale on the contrary, at a moment of relaxation. And one of the most unpleasant features - the gym gives more opportunities for correct execution, correcting the movement of the hands and, accordingly, muscle tension.
First, let's analyze the work with the simulator, as it gives a more correct performance.
Shoulder Press
Should be the first and introductory exercise to prepare the body if possible. First you need to prepare the simulator itself.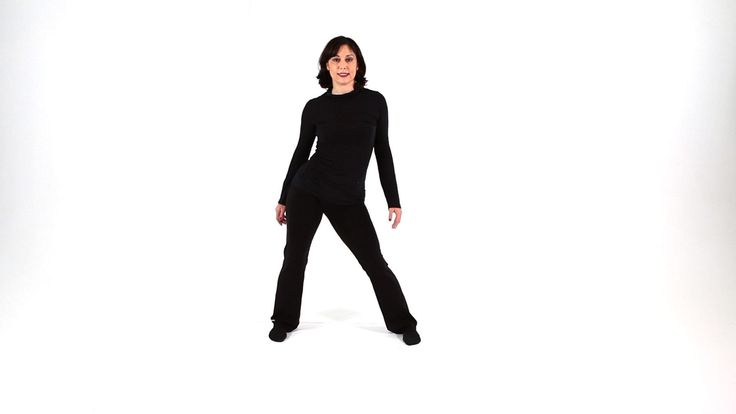 You can not take too much weight, and besides, the seat should be located so that at the top point your arms can be fully extended. Sometimes the design includes several types of handles. This is normal, they do not play a special role, rather they serve to ensure maximum convenience during execution. Also, this simulator has one plus: the exercise is performed while sitting, which makes it impossible to help yourself with your legs. And this is in addition to other advantages, including automatic regulation of the amplitude and degree of execution. But whatever one may say, we must not forget that you need to monitor your performance. You need to move slowly and lingering for a second at the top point for maximum effect.
For more information about this option, see the article “Exercises on the simulator or the correct shoulder press”.
But unfortunately not everyone has the opportunity to work out in the gym. This is not a problem, you can train at home, and no worse than in the gym. And even if there are no dumbbells at hand, then you can use the most ordinary water bottles. So, armed with some sports equipment, you will expand the number of possible exercises. Although to be precise, these are different types of dumbbell swings. Let's analyze everything separately.
Standing Dumbbell Side Swings
This exercise can be done in two different ways. Raising your arms horizontally, or slightly moving forward. There are no special secrets when performing. Everything is pretty standard: feet shoulder-width apart, accurate execution without the use of inertia. It's just important to consider that the first version of the exercise, when the arms remain vertical, is better, since more stress goes to the shoulders.
Dumbbell swings to the sides in the prone position
In this case, it is necessary to lie on your side and rest your elbow on the bench. Unlike the previous version, where the maximum load occurs at the top point of the movement, here, the maximum load comes at the bottom point, which allows you to work out the muscles in a different way. And another advantage of this embodiment is that the load on the back and, in particular, on the spine is minimized. This may be important for some people.
Exercises with a cable and with an expander
Such methods are good in their own way, since the cable, for example, keeps the muscles in tension throughout the entire movement, which is an integral plus. Yes, this does not apply to the expander, it sets more tension as it lengthens and loses elasticity, but thanks to this, it is easier to adjust the complexity of the exercise.
To work with the shoulders using a cable, a block with a lower roller is required. So, if you take the roller with your right hand, then the block should be to your left. Now you need to raise your hand with the roller until it is parallel to the floor. To help in your free hand, you can take some weight, this will help you maintain balance and better focus on execution. Again, the cable is one of the most effective ways to work the muscles, as tension is maintained regardless of the position of the hand.
Now let's move on to the expander. In general, the execution technique does not differ from the technique of working with a cable. The only difference is that now the expander needs to be held with your feet. For maximum efficiency, the right handle of the expander must be taken in the left hand and vice versa. Then its tension will be greater, which means that more forces will have to be applied. If this option seems complicated, then you can do without switching sides.
It is important to find a balance between complexity and your possibilities.
More information about these exercises can be found in the article "How to build shoulders at home?"
An illustrative example of the above exercises can be seen here:
These were the basic rules and basic exercises for working with the shoulder muscle group, as well as isolating exercises for the shoulders. The main thing is to remember the basic rules when doing it, to take care of yourself. Do not rush and do not overload your body. Then the qualitative result will not keep you waiting, the strength will begin to grow, and with them the weight and the number of times in each approach. And this is already a sign of a positive result.
Biceps Isolation Exercises: Efficiency and Technique
If you are looking for an effective set of biceps isolation exercises, then you are in the mood to work this muscle seriously and achieve noticeable results. Perhaps you have already tried different exercises, but did not achieve the desired effect. Even if you are at the very beginning of the journey, it does not hurt to familiarize yourself with common mistakes in order to prevent them. From this article, you will find out why the biceps do not grow, despite all efforts, and what to do to make them grow. Also here you will find a selection of the best isolation exercises aimed specifically at the biceps.
Guys who care about the beauty of their bodies always pay attention to the relief of their hands. Distinct biceps are a sign of masculinity and strength. A combination of basic and isolation exercises for the biceps can achieve the desired result. But first you need to understand what hinders growth.
Why don't my biceps get bigger?
Most likely you have noticed such an injustice: someone does exercises with dumbbells at home and shows off their bulging biceps, and someone carries iron in the gym, but cannot achieve such an effect. What is the reason for this difference?
First of all, it is worth learning that strength exercises are effective for everyone and always. This fact has been proven by numerous sports medical studies. However, the potential of the muscular system is determined by genetics. People tend to have a different ratio of white and red muscle fibers, so the response to the same exercise will be different. For this reason, exercises are performed in complexes.
In addition to the wrong choice of training program, the reason may be:
- abuse of cheating;
- incorrectly selected equipment;
- lack of rest and overtraining;
- low calorie diet;
- the monotony of the exercises performed.
The most common mistake is overtraining, followed by undernutrition. Beginners want to get results as quickly as possible, and on the basis of this they tend to train as often as possible and do as many exercises as possible per workout. As a result, the muscles do not have time to recover, they do not grow, but, on the contrary, are destroyed.
To increase the volume of the biceps brachii, you need to work on the percentage of total muscle mass in the body. Therefore, it is worth starting with general strengthening programs, later connect basic exercises, and even later - isolating ones.
It is better to train biceps together with the muscles of the back, 2-3 exercises will be enough for such a split.
Overtraining and degradation of muscle tissue is caused not only by frequent workouts, but also by short pauses between power sets. Another common reason is the lack of a daily routine and insufficient sleep. Nutrition should not be ignored, in order for muscles to increase, a surplus of incoming energy is needed, a large amount of protein and healthy carbohydrates in the daily diet.
Possibly due to technical errors:
- protrusion of elbows during exercises;
- throwing the bar using the forces of the whole body, not the arms;
- range of motion too small;
- lifting the elbows up when they are bent.
Each of these oversights will cause muscle growth to stop. When performing any of the methods for working the biceps, the elbows should be pressed against the body, this will provide it with a stable load. At the end point, you can’t fully unbend your elbows, otherwise the biceps will relax, you can’t allow this, it must be tense. The strongest voltage comes at the upper limit of the amplitude, so it is necessary to stop in it for a couple of moments, fixing the load.
You can find other subtleties in the material "How to properly pump up the biceps on your own?".
Basic exercises
Isolation exercises are very effective, but basic exercises form the basis of the training program. Before them, be sure to do a warm-up - bending your arms at an angle of 90 degrees with light dumbbells, no more than two kilograms. Wrap your palms towards you, then turn them out so that the joints warm up well.
Due to the structure of the biceps, the only basic action is provided for them - pull-ups on the horizontal bar with a reverse grip and narrow arms. For all other actions, only the elbow will be active, respectively, they isolate. Such pull-ups are good to include in the program after working out the back. They will give a good load to the latissimus dorsi and biceps, the latter will be fully included in the work. The mechanics of the movements will be similar to barbell lifts, but the target muscles will receive more work. In the process, control the location of the elbow joints, they must be brought to the body. If you place them to the sides, then the back will take most of the tension.
If you are interested in this topic, then pay attention to the article "The best exercises for pumping biceps for men."
Isolation exercises
There are dozens of such exercises, but only a few are the most effective. For a biceps growth program, two from this list will be enough.
Straight Grip Standing Curl
Performed with a barbell, it is often referred to as basic, but it is not. It has one disadvantage - a high load on the wrists, to compensate for it, choose a curved neck rather than a straight neck.
Grab the bar with an open, straight grip, place your feet shoulder-width apart, and turn your toes a little to the sides so that the position is stable. Control that the back is straight, do not tilt it forward or backward, do not allow rounding. As you exhale, bend your elbows and lift the weight to your chest so that it is the biceps that are working. While inhaling, slowly return to the starting position, do not fully extend your arms, immediately do the next repetition.
Standing dumbbell raise
Performed in different variations: in turn or with both hands at once, but the hands should always be turned, as when working with a barbell. The movement is similar to the previous one, but the amplitude will become much larger, since the body will not block it. The most complex and effective version is with a brush turn in the process.
Stand up straight with dumbbells in your hands, holding them in a neutral grip so that your palms are facing each other. Exhale and raise one or two dumbbells until your forearms are at a 45 degree angle to your body. While lifting, turn your palms so that they are already directed away from you.