How to make harem pants belly dance
How to Make Belly Dancer Harem Pants
by Mao on in DIY Belly Dance Costume Blog, Uncategorized • 11 Comments
I was requested to make a video on DIY harem pants over on Sparkly Belly’s Facebook page, and a few dancers were working on harem pants and sharing their creations there! So that inspired me to make a pair myself.
By the way, the number of members at Sparkly Belly’s Facebook page is growing, and it is such a beautiful community of supportive and crafty dancers. The recent post on the Facebook page made me emotional, because everyone was so caring and supportive and offering practical tips and advice that would help each other grow. If you are part of the community already, thank you for being there, and thank you for being YOU! If you haven’t checked out this wonderful community yet, you can check it out from here. 🙂
Okay, back to the topic…So belly dancer harem pants come in different shapes, and in this video, you will see Princess Jasmine style harem pants that are loose and balloony but has separate legs as opposed to Aladdin style (also known as Afghani pants) that is super loose in the centre and has short to almost no separate legs. And you’ll see how I cut corners and save probably 30 minutes or more making these harem pants. So let’s get started!
Click here to sign up for the Sparkly Belly newsletter!
To make Aladdin Jasmine style harem pants, you need:
Fabric – You need about twice your pant length plus about 20cm or 8in. You can use any light weight material that flows nicely, and you can use stretch or non-stretch, it doesn’t matter. I’m using printed chiffon and it has sequins sewn onto it.
Thick elastic for the waistband and thin elastic for ankles – Thick one should be about 2-2.5cm or 1in wide, and the thin one should be about 5mm or ¼ inch wide.
Pants – Find loose pants you have, it doesn’t matter how long they are. Pajama shorts or pants are perfect. We will use these as our pattern
Measuring tape & marker
Scissors or rotary cutter
2 Safety pins
Matching colour thread Sewing machine
How to Make Belly Dancer Harem Pants
First, measure from your belt line or where you want your pants to sit, to the floor. If you tend to wear your harem pants higher at the back than the front, take your measurement at the back to ensure the pants will be long enough.
Then lay your fabric on a flat surface, and fold it in half.
Next, take your pants, turn them inside out, and put one leg inside the other one, so you can see the curves of the crotch section. The back part tends to be longer, so line them up at the seam of the leg like this.
From the fold, measure 4 cm or 1 ¾ in and place the top of the back side of your pants there and the side of the pants is 1 cm or ½ in from the edge. Then trace the curve 1 cm or ½ in away to give it a seam allowance.
Now quickly measure the distance between the fold and the end of the curve you just drew, and transfer it to the other side of the fabric. These two edges will be sewn together later, so this helps us make sure the lengths of the edges are the same.
Next, bring out the front side of your pants, place it 1cm or ½ in away from the mark, and trace it with a seam allowance just like we did for the back side.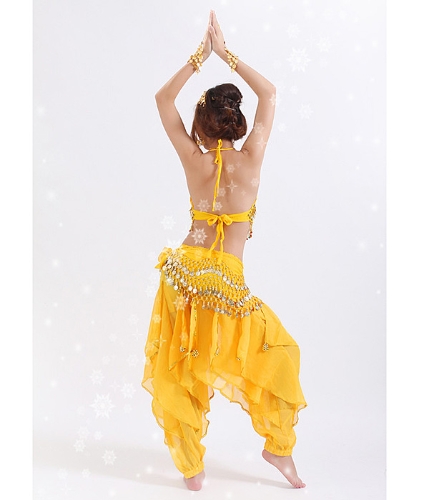 You’ll see that the front side is shorter than the back side, which is normal, and just extend the line upward to meet the fold.
Okay, now measure your pants length plus 6 cm or 2.5 in from the fold and draw a line here.
Cut along the lines, and separate the fold. You’ll have 2 panels.
Now do a straight stitch along the inseam, which is just a fancy term meaning from the crotch to the bottom of the pant. Do this for both legs. What’s great about these harem pants is that because we used the whole width of the fabric and the ends are finished already, we can skip finishing the inseam. I like to cut corners and save time like this especially when it still achieves a similar result. 🙂 But of course, if you like a more professional look, feel free to finish the edges as you like.
Then, here is a little bit of a fun trick, flip one of the legs inside out, and stick it inside the other one, so the right sides are facing together. Line up the inseams and place pins along the curve.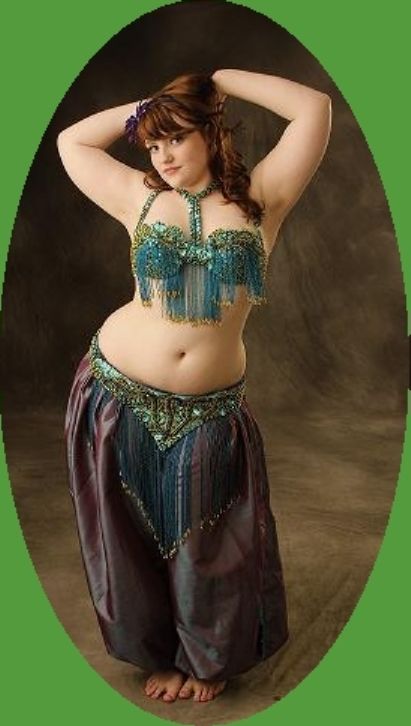 This makes it easier to sew the curved crotch section together.
So go ahead and do a straight stitch, and for the raw edge, you can do a zigzag stitch, or if you have a serger, you can finish the seam with your serger.
It’s exciting, take the inside leg out, and it should looks like a pair of huge pants!
Now, I didn’t want to go back to the fabric and cut and measure more to make elastic casings, so I incorporated it into the original pattern. So at the waist of the pants, fold about 1cm or ½ in at the top edge, then fold again 3cm or 1 1/4in from here. If you’ve got enough patience, you can press it to make it neat and easier to sew. If not, fold and place lots of pins. Do this all the way around the waist of the pants.
Sew with a straight stitch, a couple of mm or 1/8 in or so from the folded bottom edge. At the back or front, make sure to leave a gap about 5cm or 2in long, so you can insert elastic from here later.
Now we’ll do the same thing for the bottom of the pants.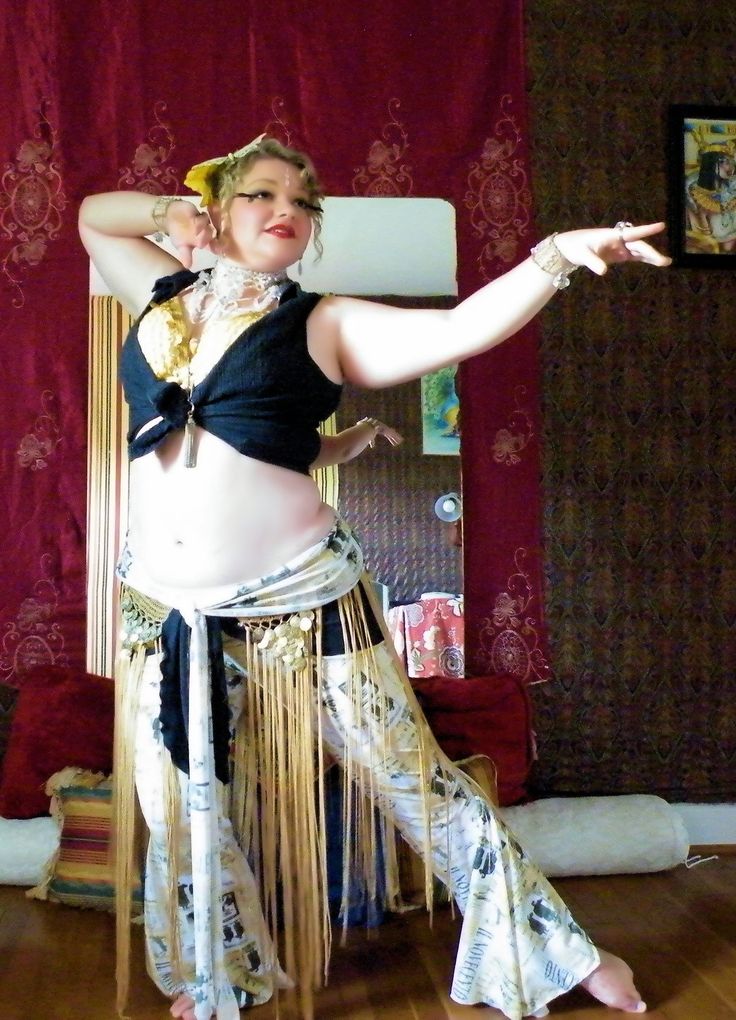 Fold 5mm or 1/4in, then fold again 1.5cm or 1/2in. Press and pin or just place pins, and do a straight stitch all around it, and again don’t forget to leave a few cm gap. And repeat this for the other leg.
It’s a good time to stand up, do a bit of stretch, and see how much elastic you’ll need for your waist. Take your thick elastic, place it around your belt line nice and snug, and cut with 2cm or 1in or so seam allowance. Do the same for your ankles with thinner elastic.
Insert the elastic through the casing you created. Put safety pins on both ends of the elastic, and secure one end somewhere near the gap. This way, you won’t lose the other end of the elastic, which I’ve done too many times not to learn a lesson!
I like to pin it to the seam so even if it leaves holes, they don’t show on the outside. Using the other safety pin, you can guide the elastic through the casing. Then sew the ends together, and stitch up the gap. Do the same for the hems of the pants.
And your harem pants are finished! It may seem like a lot of steps involved, and that’s only because I explained every single detail.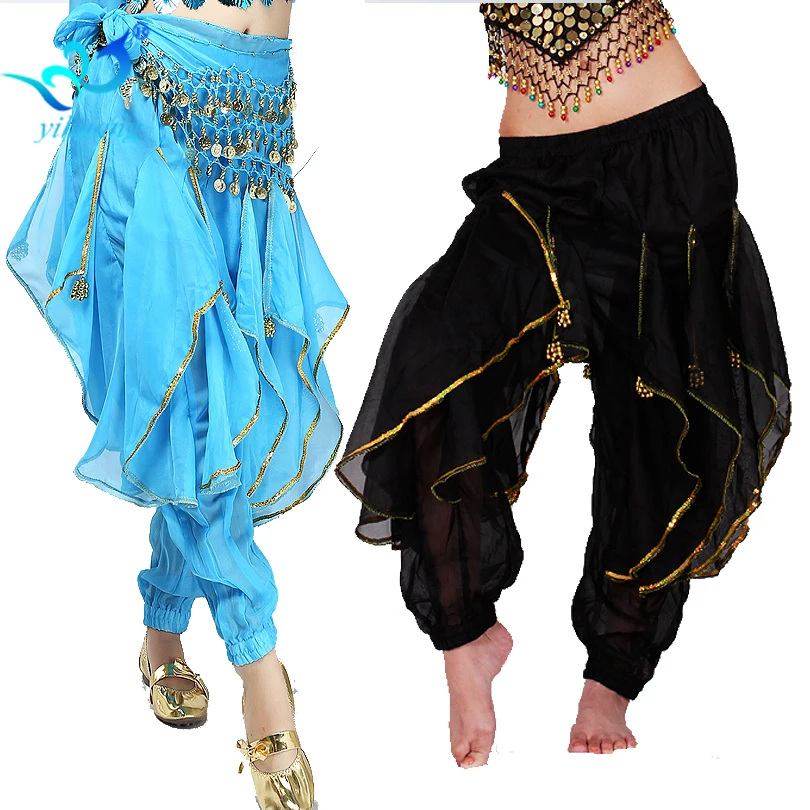 But the construction of these pants is very simple, so if you give it a try, you’ll be surprised how easy it is 😉
I hope you feel like trying, and next week, you will see a thinner version of harem pants that come with slits on the sides. So if you don’t want to miss it, sign up for the Sparkly Belly newsletter from the below link to get updates and free patterns and resources only available to subscribers.
Click here to sign up and get access to the subscriber only page 🙂
Thanks for reading, and keep sparkling!
P.S. Happy pinning 🙂
Want to make more costuming bits yourself?
Sign up for my free course, Belly Dance Costume Making 101!
DIY Pantaloons - 4 yard ATS / Tribal Fusion Belly Dance Harem Pants
I’ve been getting SO many requests to do ATS and tribal fusion costuming over the years 🙂
Now that I got inspired to do ATS / fusion costuming, I had a problem. What should I make!?!?
So I asked everyone on my newsletter to submit their ideas, and I decided to do one that was very popular and best of all, I’d LOVE to wear 🙂 And that was 4-yard pantaloons!
These pants are often called 4-yard pantaloons.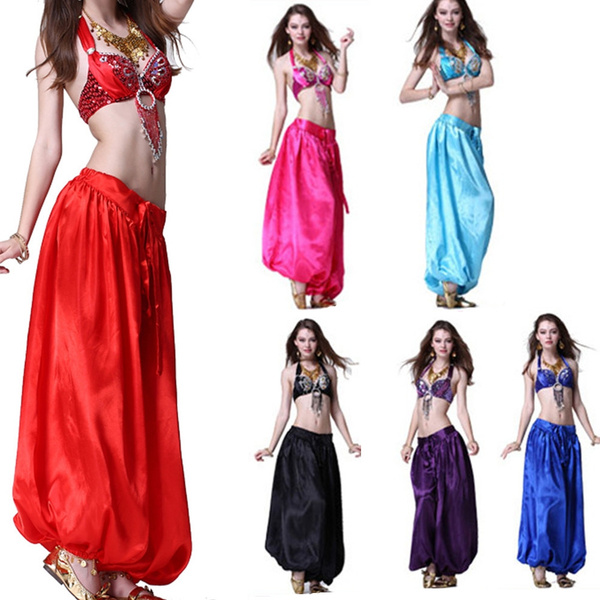 They are like harem pants but much looser because there are about 2 yards of fabric around each leg!
I’m so excited to share this tutorial with you because they’re super comfortable and puffy, and they beautifully flare out as you spin! And they’re quite simple to make! So let’s get started!
Click here to sign up for my newsletter & get the ATS belt tutorial next week in your inbox! (Bonus: I’ll send you 6 more ATS/tribal fusion tutorials! 😀 )
Looking for this style?
Check out how to make this style with sassy side openings here!
To make these tribal fusion/ATS pantaloons (with no side openings), you need:
Lightweight cotton – Lightweight cotton is recommended because it’s breathable! To make 4-yard pantaloons, make sure the fabric is about 100cm (40in) wide. And you need about 4m (or 4yds) plus 30cm (12in) extra.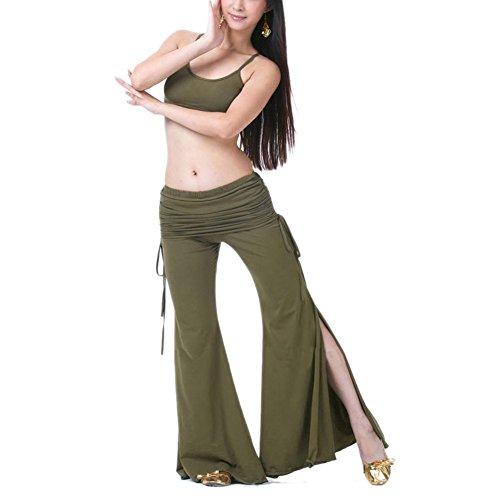
Loose fitting shorts or pants to use as a pattern
1m (1yd) of 5cm(2in) wide elastic
50cm (20in)of 1cm (3/8in) wide elastic
Matching color thread
How to Make DIY Pantaloons for ATS / Tribal Fusion Belly Dance
First, measure your hip circumference. It’s the largest part of your hips.
Make Pants
Next, cut your fabric into two 2m (2yd) long pieces and lay them right sides together. Since it’s lightweight fabric, it’s hard to align all edges, so focus on aligning the top corners.
Turn your pants inside out, and put one pant into the other one so you can see the crotch seam well.
Place the backside crotch, which has the deeper curve, 1cm (3/8in) away from the edge, and the waistband also 1cm (3/8in) away from the top. But I placed my waistband a little lower, because this fabric has this beautiful border and I wanted it to come right next to the waistband. If your fabric doesn’t have any requirements like that, or what I’m saying doesn’t make sense, it’s perfectly fine to place the waistband at 1cm from the top.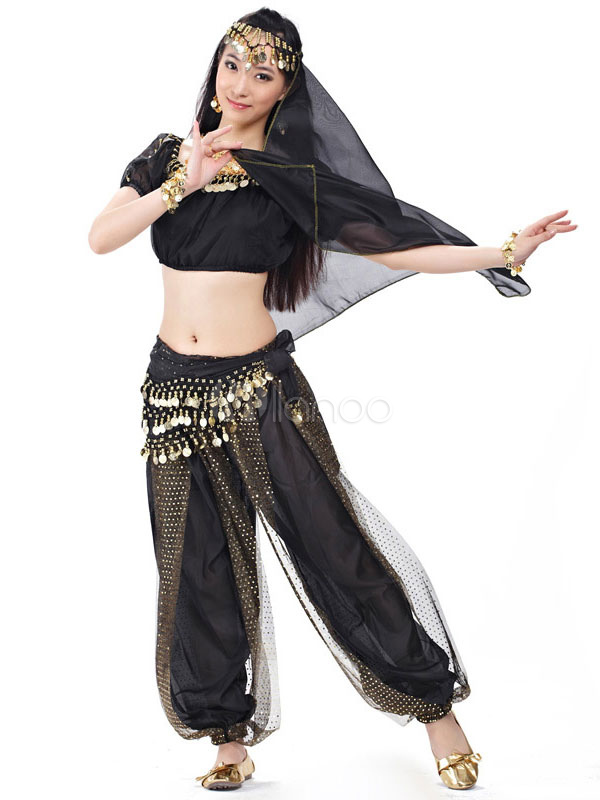
Trace the curved section 1cm (3/8in) away from our pattern. The 1cm extra is for a seam allowance.
Then, measure the distance from the top edge to the end of the curved section, and measure it on the other edge of the fabric. Mark a point right there.
Flip your pants so the front side crotch or the shallower curve is visible, and place the end of the curve 1cm (3/8in) from the point you marked.
Just like we did earlier, trace the curve 1cm (3/8in) away from the pattern, and at the waistband, extend the line right up to the top edge.
Cut along the lines, and finish the curved edges and side edges of the panels so they won’t fray. I used pinking shears to cut so I can save time, but of course, you can use a zigzag stitch or do a rolled hem, or use a serger. If you use the selvage edges at the top and bottom like I am here, you don’t have to worry about these edges.
Then take one of the panels, and fold it right sides together. Align the straight edges, and do a straight stitch along these edges with a 1cm (3/8in) seam allowance.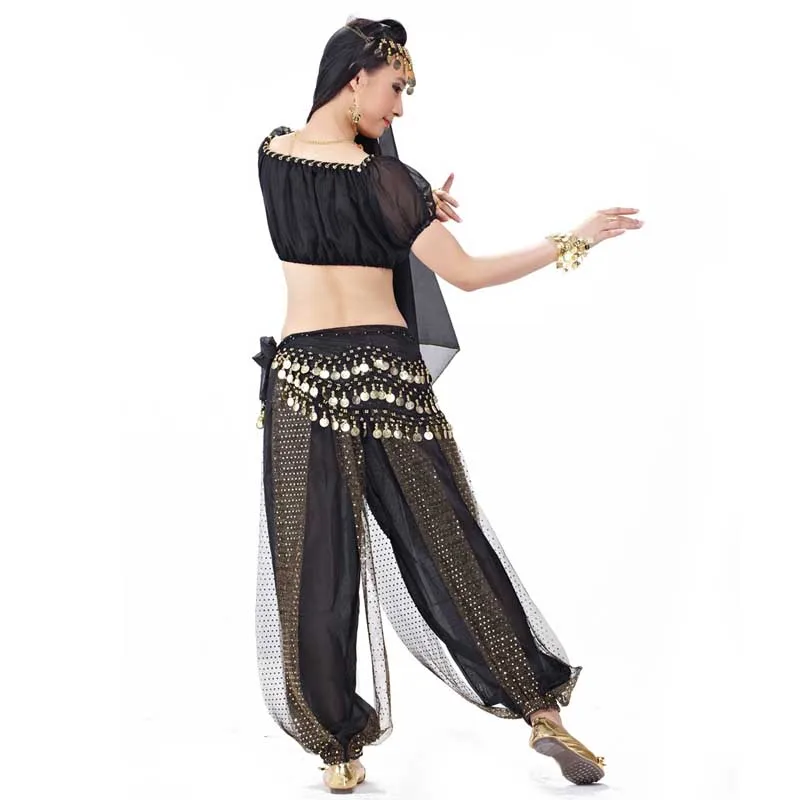 This is the inseam of the pantaloons
Repeat for the other panel.
Now here’s the fun part. Flip one of the legs right side out, and stick it inside the other leg so the right sides are facing each other. Align the front and back crotch section, line up the inseam, and do a straight stitch along the curve all the way from front to back.
Take the inside leg out, and you have a pair of gigantic pants. Don’t worry, we’re going to make them fit you just right.
Pleating
Next at the top of the pants, we’ll fold the fabric here. It’s called pleating, and it helps reduce the puffiness around the waist.
To do this, first, measure the entire waistband section for your pants.
And do a quick calculation. Take the waistband measurement, minus your hip measurement plus 3cm (1 1/4in), then divide that number by 24. Let’s call this number Length A.
So let’s try pleating. From the center seam on the pants, first measure 6cm (2 3/8in) to one side.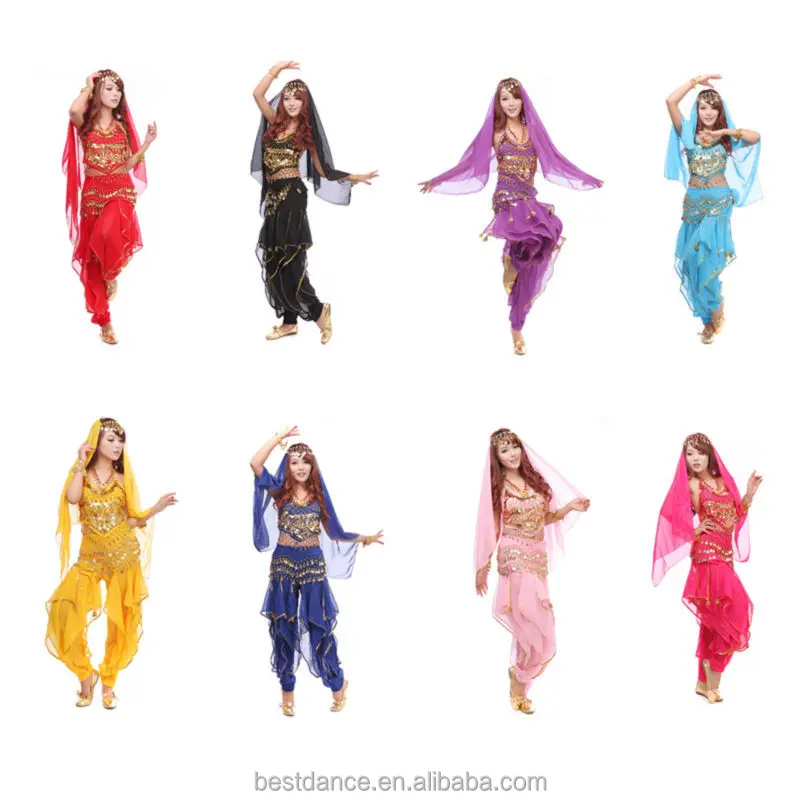
Make a fold there, so that the width of the fold is Length A. So the distance between the 2 folds created there should be Length A. Place pins or clips there, so we won’t lose the folds.
Then from the first fold, measure Length A again, and make another fold there. The width of the fold is also Length A, so the fold under the top layer should align with the first fold.
Repeat to make another fold. So you have 3 folds on one side right now.
Then do the same for the other side. First measure 6cm (2 3/8in), make a fold and make sure the width of the fold is Length A.
Measure Length A from the first fold, and align the bottom fold to the first fold. Repeat to make 3 folds on this side as well.
Repeat the folding on the backside of the pants, and you’ll have 12 folds in total. At the side seams, your folds may have to overlap. Then just overlap them with the front fold over the back one.
At this point, just to be sure, measure the total length of the waistband here.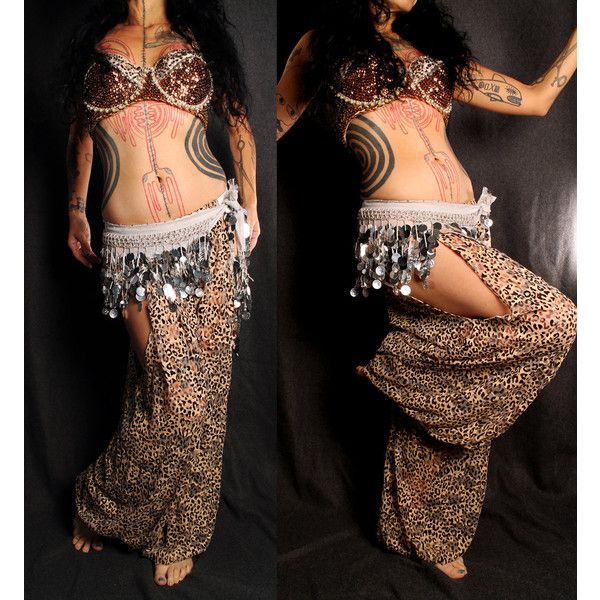 It should be about your hip circumference plus 3cm (1 3/8in). If it’s way off, double check your the numbers or width of the folds.
Then do a basting stitch with a 5mm (1/4in) seam allowance to keep the folds in place. A basting stitch is basically a straight stitch with the longest stitch length setting.
Make a Drawstring Waistband
Waistbands come in different styles. For these pantaloons, I chose this drawstring waistband that I used for making the 25 yard skirt before. This is a nice sturdy stretch waistband, but the elastic won’t roll around inside, and you can fit better with the drawstrings.
First cut a 14cm (5.5in) wide strip that is your hip measurement plus 5cm (2in) long.
At the centre of the waistband strip, mark 1cm (3/8in) tall lines that are about 2.5cm (1in) apart, from 3.5cm (1.5in) from the bottom edge.
And sew button holes around them. It’s basically a narrow zigzag stitch with the shortest stitch length around the lines.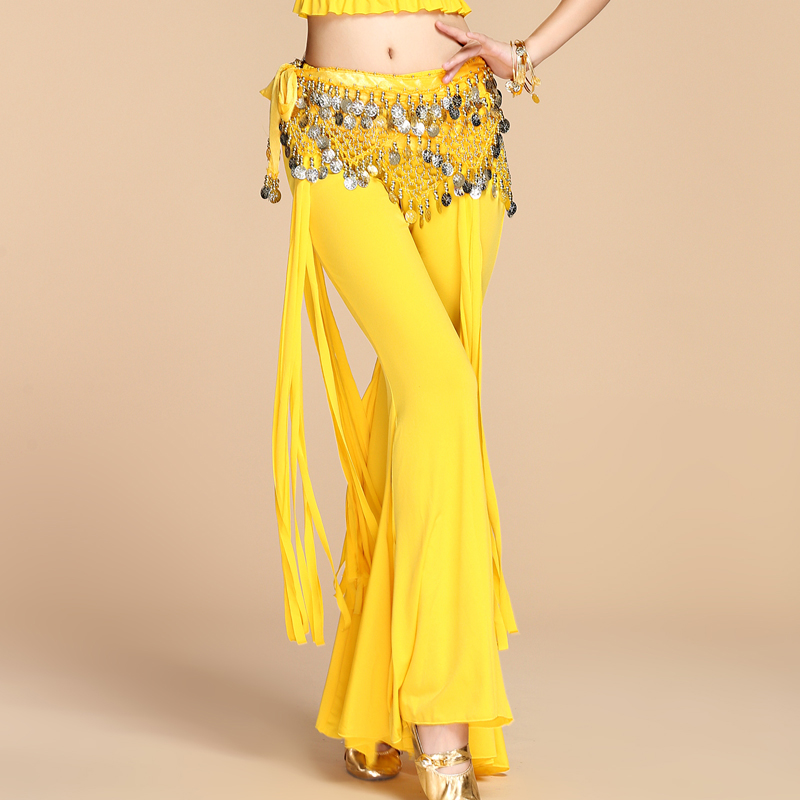 And open up the button holes.
Take it to your ironing board, and fold 1cm (3/8in) from the top edge towards the wrong side and press. Do the same from the bottom edge. Then fold it in half and press again.
Then open it up, and sew the short ends right sides together with a 1cm (3/8in) seam allowance to make a circle.
Now match up the top of the pantaloons and waistband right sides together, and make sure the edge closer to the button holes is aligned with the top of the pantaloons. And first align the back seam of the pants and the seam on the waistband. Then align the front seam of the pants and the center point of the 2 button holes. Then match up sides.
And that’s how you should do it, but as I mentioned earlier, I moved my waistband a little lower on the pants, so the border on the pants will end up right beside the waistband.
Then stitch along the fold of the waistband.
Then fold the top edge of the waistband 1cm (3/8in) and fold it over to encase the seam allowance and cover the stitches on the wrong side of the pants.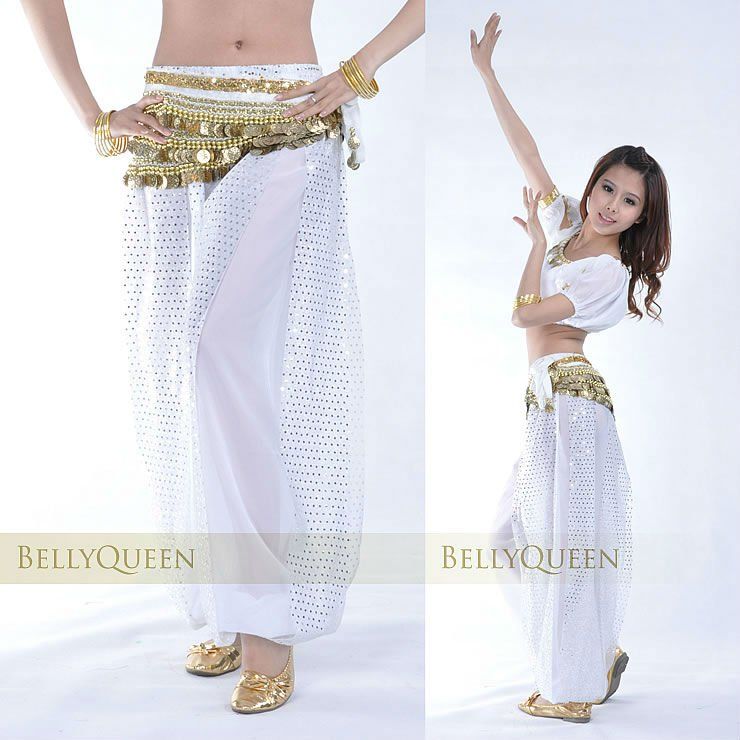 Place a pin on the right side of the pants to hold the fold in place, and do this all the way around the waistband.
With the right side up, do a straight stitch right along the seam. It’s called ‘stitch in the ditch’ 🙂 And leave a few inch gap to insert elastic.
Take your elastic and figure out how much you need for it to be snug around your waist. Add 2.5cm (1in) to it, and cut.
Insert the elastic through the casing. I’m using a safety pin to guide the elastic. Once it’s gone through the entire casing, make sure it’s not twisted in there, and overlap the ends 2.5cm (1in). Sew the ends together, and close the waistband by stitching in the ditch.
Now using a straight stitch, do a top stitch over the elastic waistband at 1cm (3/8in) from the top and another one at 1cm (3/8in) from the bottom. Pull and stretch out the waistband while you sew. This keeps the elastic from rolling around inside the casing AND creates a channel for you to add a drawstring in.
Now if you have a long string for this, go ahead and use that, but if you don’t, you can cut a strip like this that’s 2m (2yds) long and 3cm (1 1/4in) wide.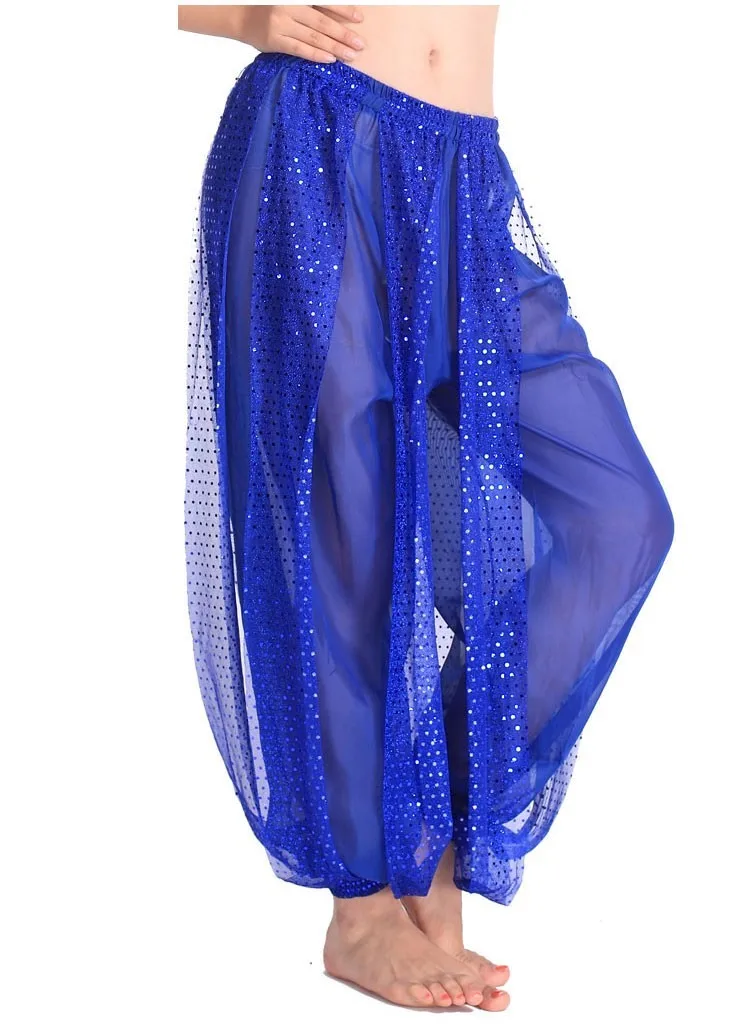 I sewed 2 strips together to make 2m. Fold it right sides together lengthwise, do a straight stitch with a 5mm (1/4in) seam allowance, and turn it right side out. Fold in the ends, do a straight stitch, and give it a good press, and you have a nice matching string.
Take your string, and insert it through the channel using the buttonholes.
Once it comes back out, tie a knot at each end of the string. The drawstring makes the waistband sturdier and helps hold up the pantaloons made of 4 yards of fabric!
Finish up!
Finally, at the bottom of the pants on the wrong side, fold 5mm (1/4in) then fold again 2cm (5/8in). Press, pin, and sew with a 2mm ( ⅛ in) seam allowance. Again, leave a 5cm (2in) gap.
See how much elastic you need for your ankle, and add 1cm (3/8in) and cut 2 pieces at this length.
Insert one of them into the elastic casing. It helps to attach another safety pin to the other end and the fabric, so you won’t lose the end as you pull the elastic through the casing.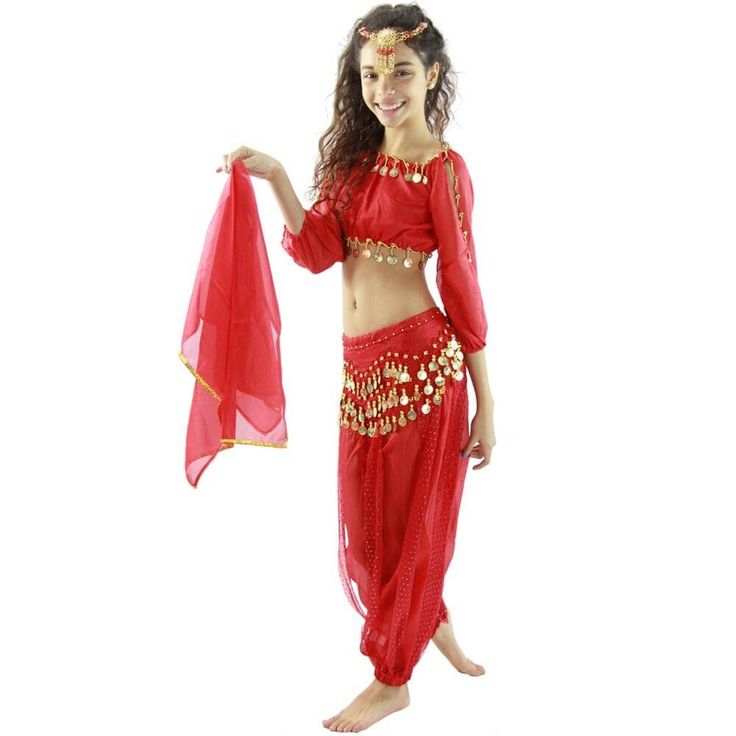 Overlap the ends about 1cm (3/8in), and top stitch to secure the ends. And stitch the opening shut.
Repeat this for the other pant.
And now your 4-yard pantaloons are complete! I can’t wait for you to try them on! 😀
They are really comfy, and even though they have the beautiful volume, the waist area is NOT puffy thanks to your pleating effort, and the pantaloons are pretty light! Make sure to try spinning while you’re in them, because they flare out so nicely, and they look amazing under a skirt as well. They certainly add colors and fun to your ATS or tribal fusion costumes!
I really enjoyed making these pantaloons, and I hope you liked this tutorial! If you did, please share the love and share this tutorial with your dancer friends. 🙂
And if you make your own pantaloons, share your creation at SparklyBelly’s Facebook group! I really love seeing what you all make inspired by my tutorials, and you’ll find lots of amazing ideas shared by members there!
And next week, I’ll continue the ATS theme, and I’ll show you how to make a simple yet fun ATS belt!
If you’re curious how to make the belt, be sure to sign up for my newsletter below so I can send it to your inbox!
Click here to sign up for my newsletter & get the ATS belt tutorial next week in your inbox! (Bonus: I’ll send you 6 more ATS/tribal fusion tutorials!)
Thanks for reading, and keep sparkling! 🙂
P.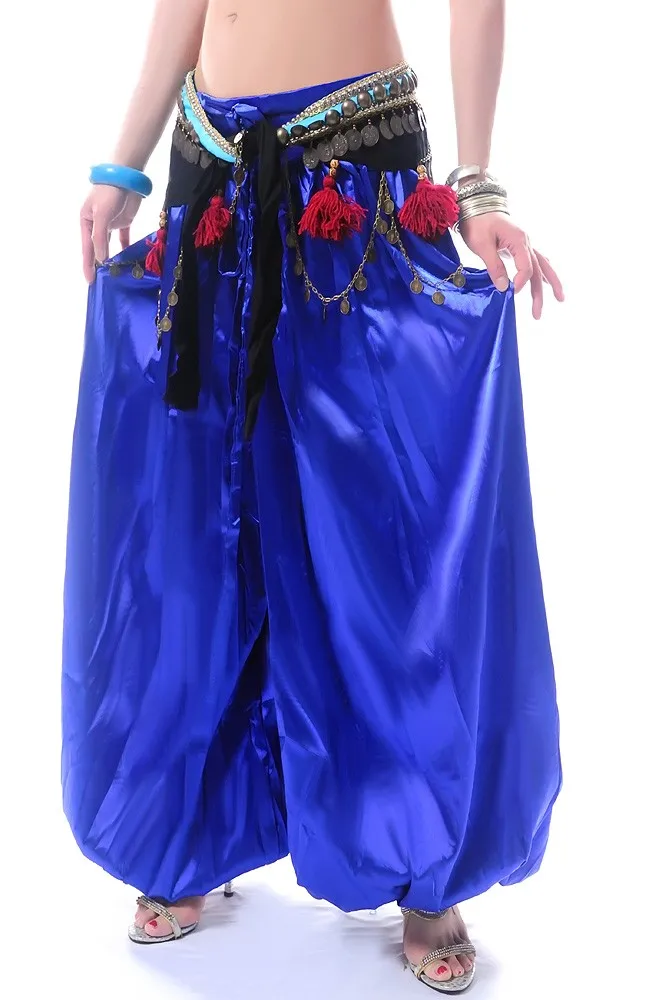 S. I now have another style of pantaloons! Check it out 🙂
Learn to make this style here!
P.P.S. Pin this image on your costuming board! 😀
Like what you read? Want to make more costuming bits yourself?
Sign up for my newsletter here and get my free email course, Belly Dance Costume Making 101!
Belly dance Belly dance - «Bellydance? My belly dance love story...How long does it take to learn how to dance? And what is the benefit of the female body from belly dancing? As well as my Bellydance costume collection."
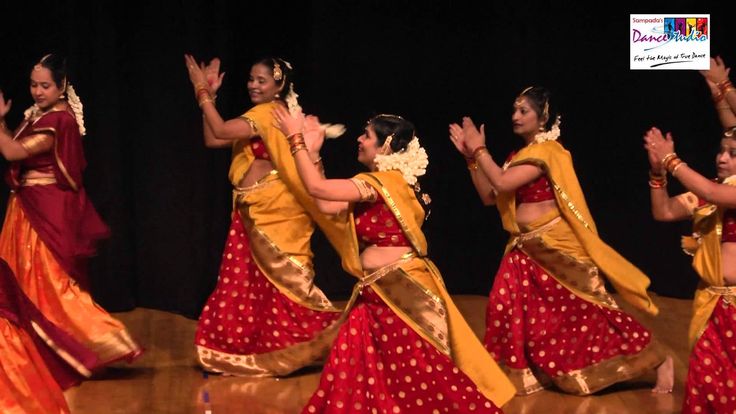
Bellydance is the most feminine of all dances, helping to reveal the beauty and charm of a woman's nature, while bringing health benefits. Smooth movements of the hips, waves and spectacular shaking, penetrations - the technique of belly dance is diverse. The movements of the anterior abdominal wall-waves, shaking, belly punches make the dance special, give it its uniqueness.
And despite the fact that the dance belongs to another culture, it is very close to many people.
Belly dance (English bellydance-belly-dance, dance-dance) is a modern European name for stage dance.
The word "belldens" is consonant with the Arabic word "beledi", which literally translates as "I live here", in other words, "local".
My introduction to the Bellydance started with discs with an initial course of Bellydance fitness format from twin sisters. I fell in love with this dance at first sight, I liked everything: the smooth movements of the arms, the waves of the belly and the hips. I wanted to learn everything at once! But doing it right takes time and effort.
Then I began to work out in a fitness club, among the same girls who fell in love with belly dancing. My relatives supported me in my hobby, which was especially nice. Due to the fact that I had already learned some movements at home, a lot of things worked out in training. But of course, disc lessons cannot replace full-fledged training with a belly dance instructor. Rather, they can prepare for more serious training, bring up to date.
After a year of training with an instructor in Bellydance , I became a member of a dance group, I liked performing on stage.
I think that if you have a desire to learn to dance, as well as systematic classes (at least three times a week), it takes about a year to master the basic, basic movements of Bellydance. Of course, the learning process is purely individual, but a year is an adequate figure. After all, complex movements, such as shaking, combined with penetrations cannot work right away, everything starts with "circles" and "eights", without them there is no way.
But most of all I liked solo numbers. The process of preparing the number is very exciting and time-consuming. First you need to decide on the staging of the dance, the music for it, then think over the costume for the performance. Unfortunately, I don’t know the art of sewing on a sewing machine, my friend seamstress sewed stage costumes. But I always did the finishing of the costume myself, bought accessories, beads, sequins and in the evenings sheathed the fabric. She strung beads for hanging on the bodice and embroidered the belt.
~~~~~~~~~~~~~~~~~~~~~~~Bellidance Costumes~~~~~~~~~~~~ ~~~~~~~~~~~
For training, clothing should be comfortable and not restrict movement. The abdomen may remain open or covered with clothing. Personally, it is more convenient for me to practice in a top that does not cover the abdomen. On the legs are sweatpants, leggings or capri pants, whatever you like. But it is better if the bottom is not too voluminous and short shorts are also not very comfortable for classes.
You can practice barefoot, or you can use dance ballet flats or shoes, whatever you like.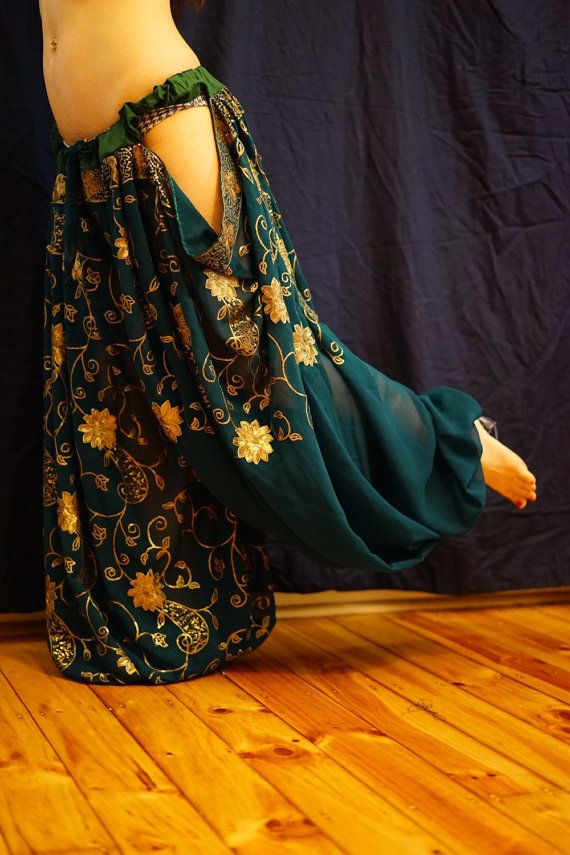 It is better to tie a scarf on the hips, belts with coins used to be common, the ringing from them is loud and loud during active movements. But there is a good alternative to a crochet mesh air scarf. No ringing from him, but it looks beautiful!
Stage costumes. The traditional costume for Bellydance is a top (bodice), embroidered and decorated, a belt with a beaded hanging and accentuating the hips, a wide "sun" skirt, with or without a slit. But depending on the style of dance, other options are possible, such as bloomers or a dress used in the dance with a cane and with a shamadan (candelabra).
I would like to introduce you to my costume collection.
My first suit was very simple, I didn't sew it, but bought it ready-made. A black bodice and bloomers, a belt with coins, everything is very modest. She sewed a black chiffon skirt for him. But even with this outfit, I was very happy, I performed in it at my first concert.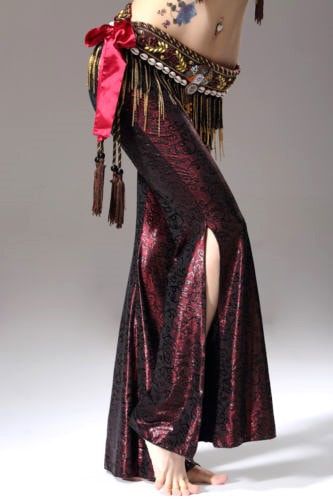
A white suit, consisting of trousers and a bodice, was brought to me from Egypt. It looks more interesting, hand-embroidered with beads, as an accessory it has detachable sleeves.
The first costume in which I took an active part in the creation of a pale pistachio color, in which I performed a group dance. She sewed a hinge on the bodice, came up with patterns and embroidered it with beads. She also embroidered the cuffs of the sleeves.
And here is the electric blue suit for a solo performance with a headscarf. In it, I sewed a beaded hinge to the belt of the skirt and decorated the bodice. This costume brought me good luck, at the reporting concert they chose the best dance among the participants, the dance performed by me was given preference.
Later, the leader of our team entrusted me with the training of a beginner group in her studio.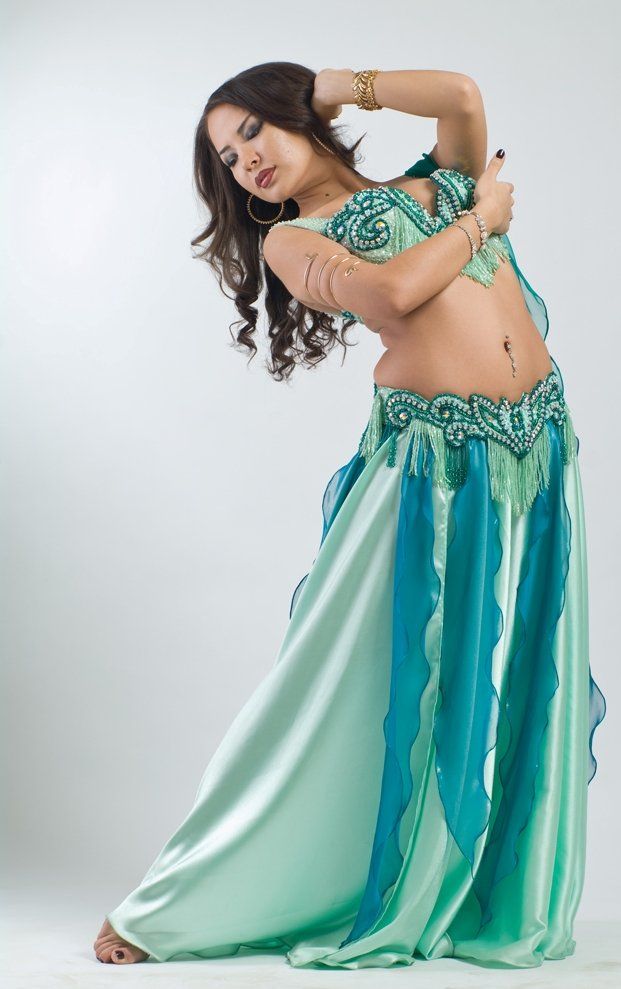 I began to teach beginners, teaching them the basic movements of Bellydance, the basic movements.
One of my favorite costumes is emerald green. It includes bloomers, belt and bodice. My husband helped in decorating this costume, stringing beads with me so that I could finish the work before the performance!
A hot pink suit consists of a belt, a bodice, a skirt with chiffon wedges at the bottom. In it, I danced several group dances with girls, also a dance with a headscarf.
The leopard costume has unusual fittings made of wooden beads, small feathers, and a belt with ties.
Creating a dance costume is a very interesting activity, but at the same time it is also costly.
~~~~~~~~~~~~~~~~~~~~~Belly dance styles~~~~~~~~~~~~~~~~~ ~~~~~~~
Bellydance has several styles, this is due to the fact that the dance developed in several geographical places in East and Africa at once.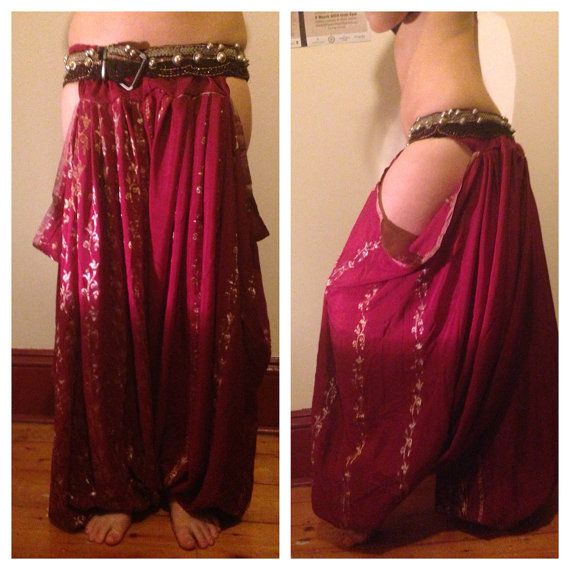 The Egyptian version is called "Rax Sharqi", it is more restrained. Dancers often wear shawls while dancing.
Style " Khaliji" with numerous head and hair movements, refers to Persian dance.
Turkish style of belly dance is characterized by open and amplitude movements, the outfit of the dancers is open and richly decorated with beads. The dance often contains elements in the parterre (on the floor), cymbals (sagats) can be used.
Tunisian and Algerian dances have a folk coloring, many decorations are used.
In the dance studio of my city they taught Bellydance in the style of Raks Sharki, but we also got acquainted with the style of "Saidi" and "Khaliji".
~~~~~~~~
Belly dance music can be of various genres, depending on the style of dance performed, from classical Middle Eastern music to modern.
Some dances use folk music, and more often you can find a mix that combines several styles at the same time.
There are unique Arabic instruments, such as tabla (Arabian drum), cymbals (percussion instrument in the form of small cymbals, often used by dancers during the dance), oud (oud) string instrument, grains - musical horn for performing folk style and other instruments.
The main thing is that the movements look harmoniously with the chosen music.
My favorite music is tabla.
~~~~~~~~~~~~~~~~~~~~~~~Health and Bellydance~~~~~~~~~~~~~~~ ~~~~~~~~~~
Belly dancing is a type of physical activity that not only helps keep the body in good shape, but also has a positive effect on the body as a whole. Especially Bellydance is good for women's health, doing it regularly can solve some of the women's problems.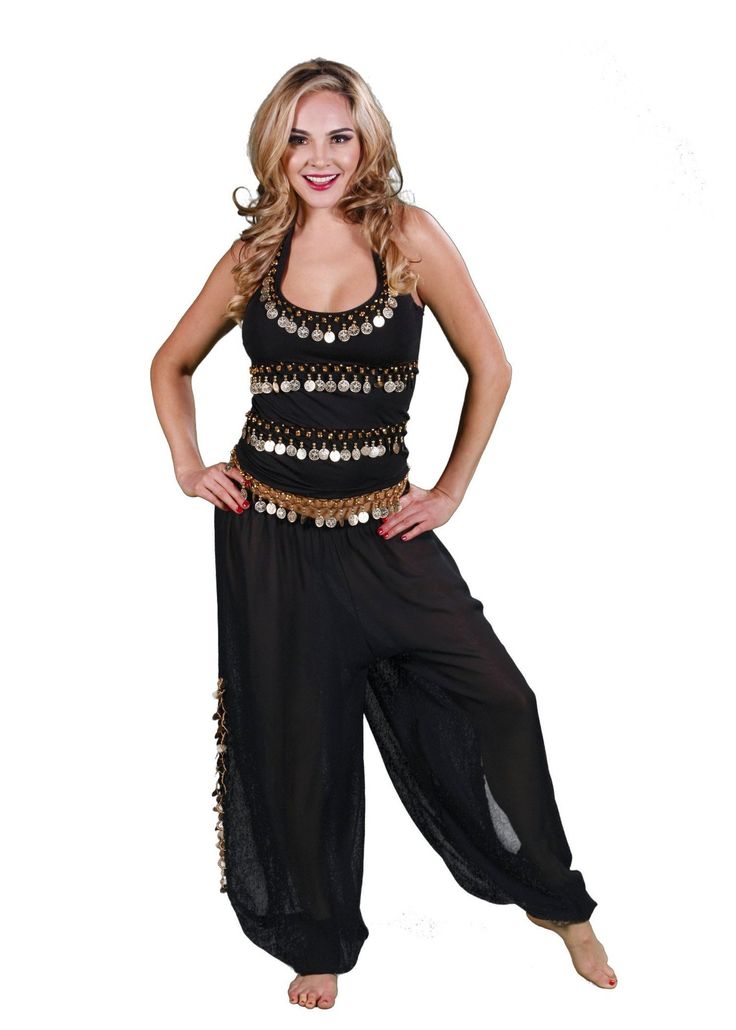 The fact is that dance works muscles that we rarely use in ordinary life, performing movements in the lower body characteristic of bellydance, we improve blood circulation and blood flow to the internal organs of the pelvis.
I can say from my experience that belly dancing prepares the muscles for childbirth, thanks to numerous movements of the abdomen - waves, blows and shaking - the abdominal muscles are quite strong, but not inflated. It also promotes rapid recovery after childbirth.
Bellydance also has a positive effect on the coordination of movements, improves heart function, helps keep the muscles of the hips, legs, arms and chest in good shape. It has a beneficial effect on the skin and serves as a preventive measure for the occurrence of cellulite.
Various parts of the spine, from the cervical to the coccyx, are involved in the various movements. Thus, various diseases are prevented , in particular osteochondrosis. Of course, , subject to the correct technique for performing movements.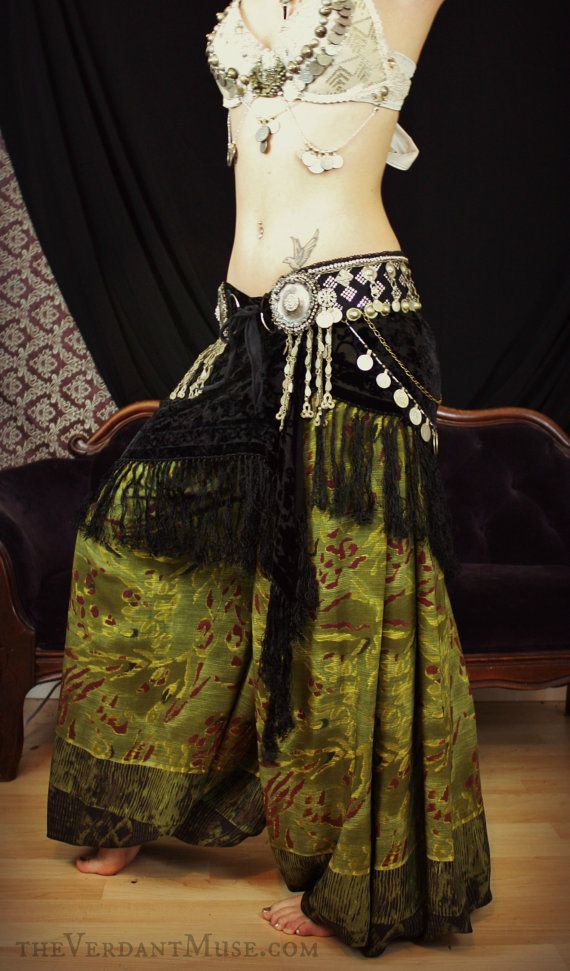 Therefore, it is important to study with a competent instructor who pays due attention to the correct positioning of the body in the classroom and, if necessary, corrects the students.
Belly dancing improves posture and makes walking more feminine.
Bellydance also has an effect on the psychological state. Some women take up belly dancing to feel more feminine and desirable. Dance helps to acquire grace and flexibility for the body, and harmony for the soul. Thanks to the belly dance, not only external transformation takes place, but also internal.
"It amazes me how much HEALTHIER bellydance is. Instead of overworking and forcing the muscles to overstep their normal limits, like in ballet, we learn to relax: you can't make tense muscles vibrate, you need to relax them and relax on your own. You can keep doing this as long as you can move." Shakira/Elizabeth Fannin
~~~~~~~~~~~~~~~~~~~~~Accessories~~~~~~~~~~~~~~~ ~~~~~~~
Various accessories can be used in Bellydance, for example:
Handkerchief.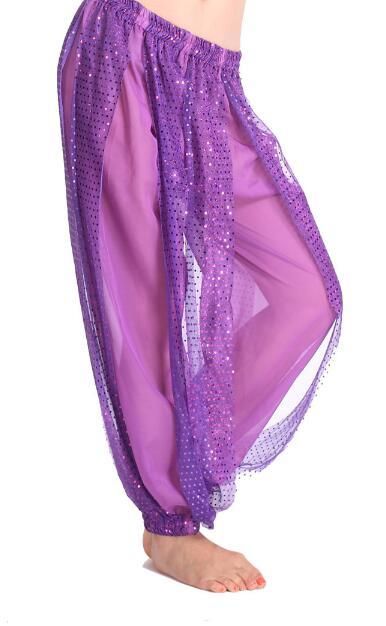 The headscarf is mainly used for a spectacular appearance on the stage, as well as in the first part of the performance. Then the dancer throws it away with a slight movement. It is important to know that in no case should you step on the scarf, it symbolizes the honor of the dancer.
Walking stick. The cane is used in the Saidi style dance. The use of a cane requires some skill, during the dance, rotations are performed in front of you, over your head and various variations, such as, for example, "eights". The dance can be performed both solo and in a group.
Wings. Wings are an attribute of the show. They are made of corrugated fabric and can be of various colors. Attached to the dancer's neck with Velcro. During the dance, various rotations, turns and swings are performed, making the dancer look like a bird or a butterfly.
Shamadan (chandelier). Initially, the dance with the candelabra was performed at wedding ceremonies, later it became one of the variants of the stage dance.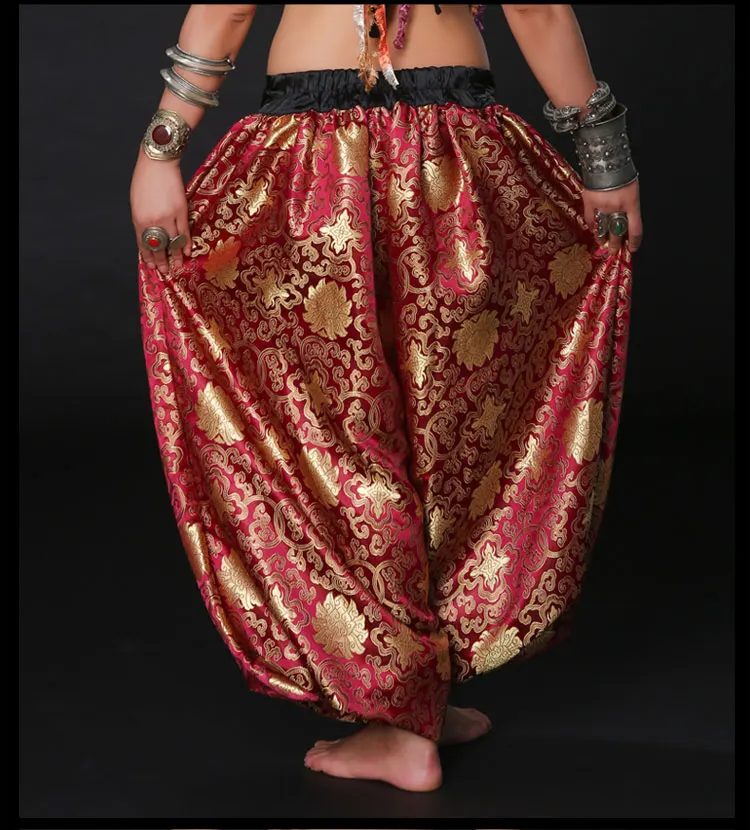 It is also possible to dance with small candles in the hands (in small rounded candlesticks that fit in the palms).
Fans (veils). Dance with air fans is also one of the show performances, it looks spectacular thanks to various movements that make the silk fabric of the fan "fly".
Cymbals (sagats). Small metal "cymbals" that make a melodic sound when struck. The dancer puts two "cymbals" on each hand and beats them, tapping out the rhythm.
There are other accessories for Bellydance such as a saber, a tambourine and even a live snake (boa constrictor).
Of the accessories listed above, I used the following:
Handkerchief. At first I danced group dances with a scarf, later solo. A scarf is best made from a light fabric, such as chiffon or organza. For the sake of beauty, I sheathed my first scarf (for a black suit) with gold braid, due to ignorance, because of this, it came out a little heavy, making it more difficult to fly than others.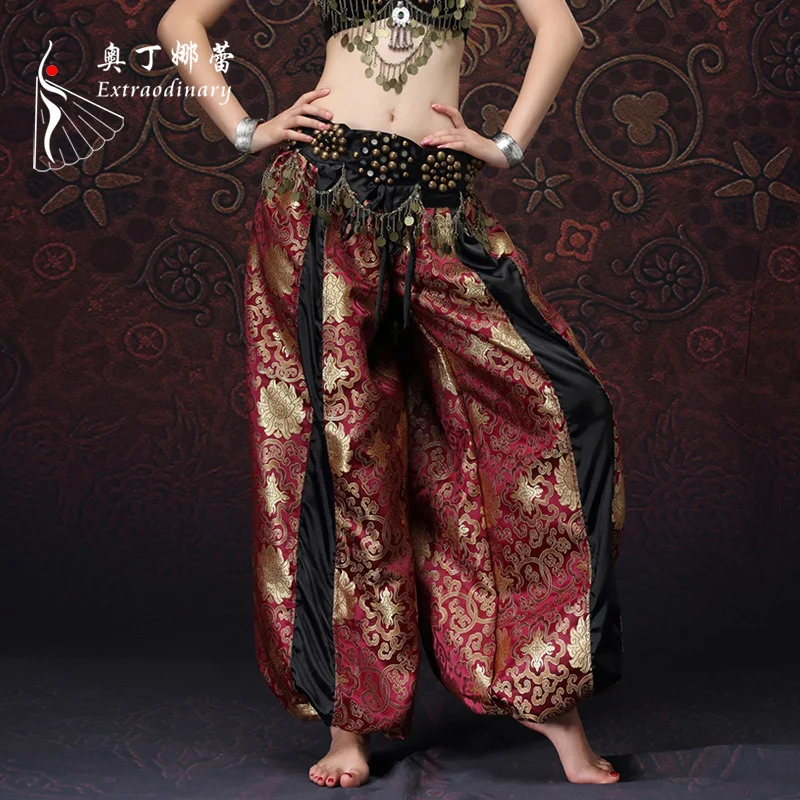
Walking stick. My walking stick is made in "silver look". I danced a group dance in the style of "Saidi".
Wings. Three of us performed the Dance with Wings, a very spectacular number with numerous rotations and handwork.
Shamadan (chandelier). Candelabra requires good balance and clear movement isolation, fire dance is one of my favorites.
Fans (veils). With fans, I took part in the production of "The Struggle of the Elements", more precisely, fire and water. I was "out of the water", my veils are blue with white fading. Thanks to the light silk fabric, the fans stay in the air very well.
I tried to work with cymbals (sagats) , but I haven’t used it in dance yet.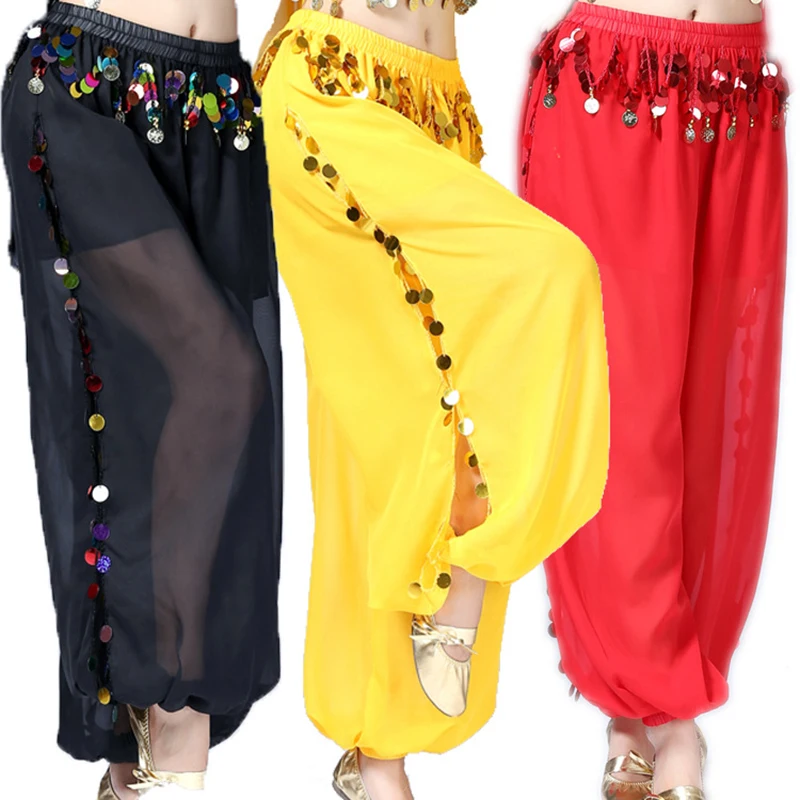
I already have many accessories in my "dance arsenal", it remains to master the saber. (Dancing with a snake is too exotic for me, and I think the boa constrictor is not enthusiastic about participating in dances). And my daughter is growing up, (soon four years old) there is someone to pass on her experience in dancing, she is already showing interest. So I think in the future the chandelier will not stand idle!
Belly dancing has not become a job for me, it is a pleasant hobby. At the moment I do not visit the studio. But I do it with pleasure at home and I think in the future I will learn more than one dance.
I like Bellydance in all its variants, gentle and smooth movements of the arms and hips, active shaking and waves of the stomach, I dance for my own pleasure!
Be always beautiful!!!
Elena Krasa.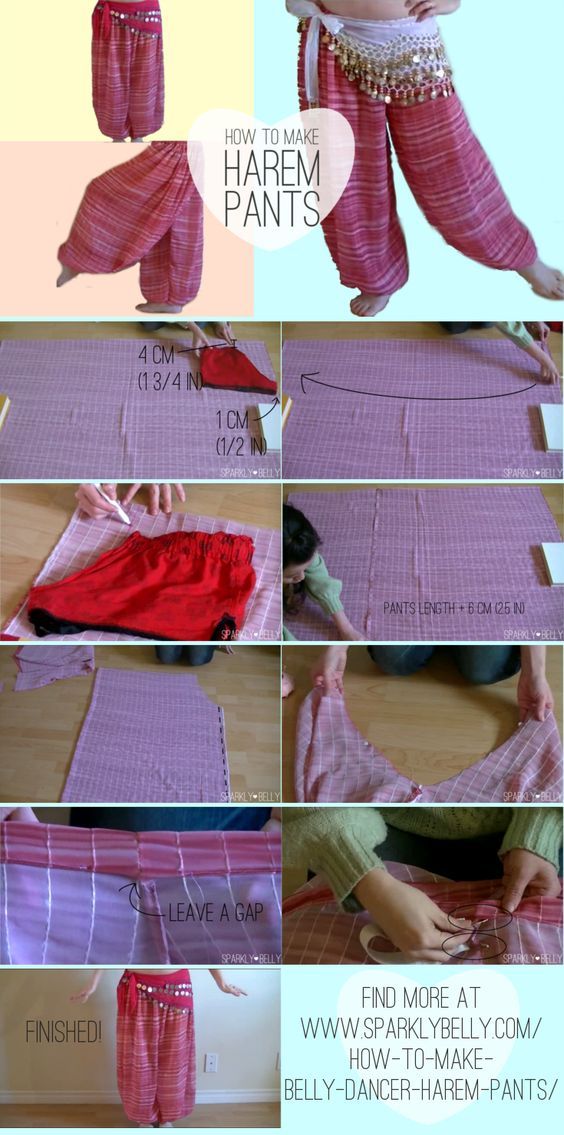
My earnings on IRecommend review with pictures!
Amir - Livejournal
"Oriental Dance" - this is a dance that has its origin from the peoples of North Africa, the Middle, Middle East and Turkey , in which the whole body is involved, but the main emphasis is on the movement of the hips.
Raks Sharqi - in Arabic means "dance of the East" or "oriental dance", usually the same style of stage dance as "bellydance" in the West. The dancers of the East themselves prefer to use this term. This term was coined by Badiya Masabni, the "mother" of modern belly dance, a stage dance born in her cabaret, created on the basis of the belyadi style with elements of classical and latin, adapted into an Arabic basis. For the refined taste of the aristocrats and the rich who visited the cabaret, the name of the dance "belyadi" did not sound elegant enough: "native", "folk" . ..
..
Belly Dance or Belly dancing - translated from English into Russian means "belly dance". This is the Western name for the Eastern dance. The exact origin of the term is not known, but it may have come from a misunderstanding of the word "Baladi" ("beladi" in Arabic translates as "folk") or the French phrase "Danse du Ventre" (for more on this, see "History of bellydance"). Although this name is considered incorrect, over time it has become so “stuck” that many still prefer to say “bellydance” (even here, in Russia, it is popular). The phrase "Danse du Ventre" itself translates as "dance of the stomach" or "belly dance".
Oriental Dance or Danсe Oriental is a term sometimes used as a synonym for Raks Sharqi and is more inclusive, including "belly dance" styles, styles from Raks Baladi. Oriental, translated from English, means "Eastern".
We are talking about the same dance using different terms. There are eight major schools of oriental dance: Turkish, Egyptian, Pakistani, Botswana, Thai, Bhutanese, Aden and Jordanian, as well as many smaller ones.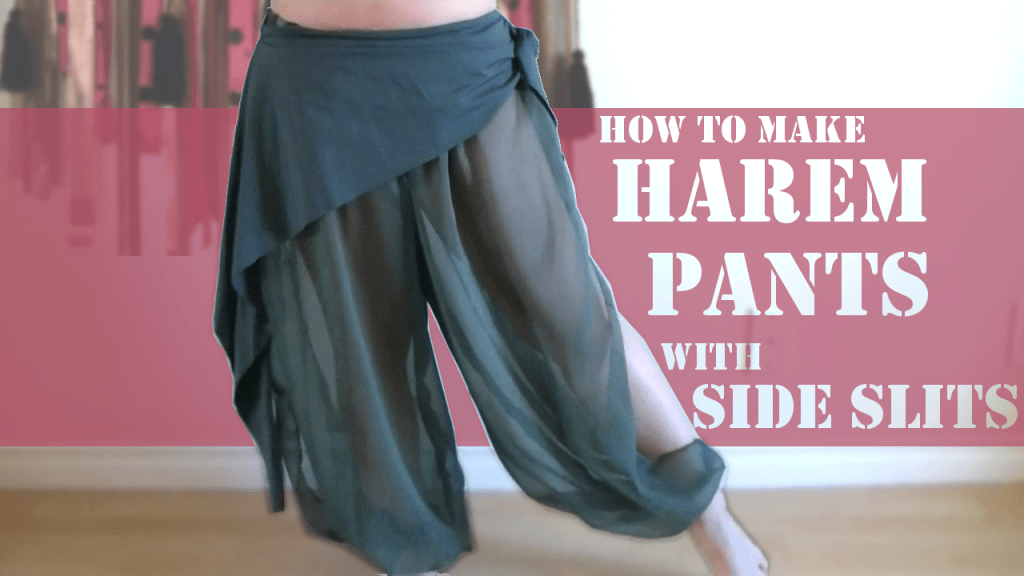 Depending on the geography of belly dance, there are different manners of its performance.
Oriental dance includes classical Raks Sharqi, Folklore and Show Bellydance. Let's dwell on them in more detail.
Classical Raks Sharqi
This is the most elegant performance of Middle Eastern dances. This style is danced throughout the Middle East, and especially in Egypt, Lebanon, Syria and Turkey. Usually Raks Sharki is interpreted by one dancer who often improvises. Body movements are isolated and pronounced. The dancer is very often on her toes, the posture is straight, and the movements of the hands are harmonious and never haphazard. The Raks Sharki style also differs in the technique of execution: depending on the country where it is performed.
Lebanese style. The movements differ from the Egyptian style in greater expressiveness, especially the movements of the hips, the muscles of the diaphragm are used more. Work on the floor is also much more common. In Lebanon, slim dancers are preferred. The dance is more pronounced temperament, and the music is on average more dynamic.
The Turkish style is called "Oriental Tansi". The main difference is in the range of motion. Egyptian dancers move on stage with restraint, controlling their bodies, while Turkish dancers, on the contrary, have enfatized movements. This style is very energetic and even includes acrobatic elements. A lot of groundwork is used, which was forbidden in Egypt and eventually lost its popularity.
In Egypt, it is performed at festivals and various celebrations (for example, weddings), as well as in five-star hotels.
The rise of the classic rax sharka in Russia began in 2006. A separate nomination appeared for it at competitions. Finally, there was a clear distinction between the classical style and show belly dance. Raks Sharqi is classic antre, shaabi (shaabi is a classic version), baladi (balyadi is a classic version performed to accordion music). In the dancer's repertoire you will always find a composition called "entre" or "meigence" (this term is of French origin, but widely used in the East), which is the "calling card" of the dancer and includes various rhythms from folklore styles.
Naturally, music has a huge influence on dance. The Turkish and Lebanese styles of Raqs Sharqi use the same instruments as those used in Egypt with one difference: the rhythm. Two rhythms are commonly used: for example, Saidi and Khaligi. The music for this style does not have any differences from that used in other styles. She can change the rhythm several times during one composition. Unlike Turkish and Lebanese styles, here the dancer works for the melody and not just for the rhythm. There is always "Taksim" - a musical improvisation, usually performed as a solo of one instrument as "Oud", "Nay" or accordion with the possible addition of a percussion instrument. During the performance of “Taksim”, the musician masterfully demonstrates his improvisation abilities, and the dancer conveys to the viewer the very essence and emotionality of the composition. This interpretation is very individual, impossible to learn, as it comes from the very personality of the dancer. Usually "Taksim" is slow emotional and filled with feelings music. The end of the composition mainly involves the use of a percussion instrument on the rise and a fast ending. Classical music is Oum Kalthoum, Warda, Abd el Halim Hafiz, Abd el Wahab and others who have become classics. Of the accessories, the most commonly used is a veil or tarha (shawl), which the dancer throws off and picks up at the end to finish the dance. You can also use sagats (cymbals).
The costume of Turkish dancers has many differences from the Egyptian ones, which also affects the impression of the dance. Turkish bedla skirts are worn higher than Egyptian ones and the side slits are much more used - thus the entire legs of the dancers are visible. Also, high-heeled shoes are used much more often than in Egypt. The classic Egyptian costume is a bodice and belt (Bedla), and recently beltless suits and dresses have become more popular.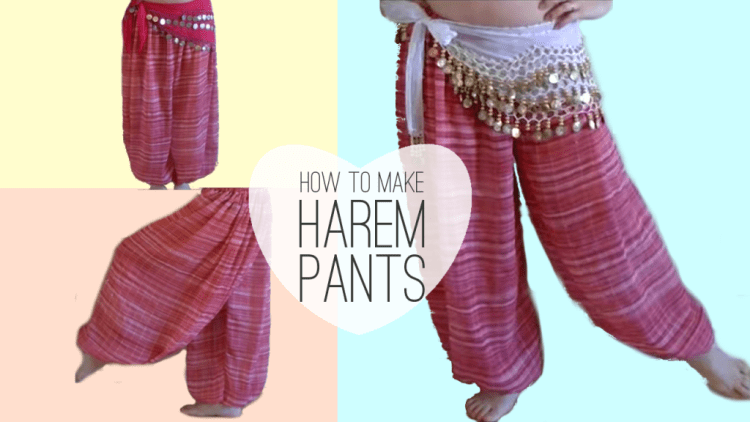
Show BellyDance
It differs from other directions in that it is a freer interpretation of belly dance. There are no restrictions in the choice of musical material. It can be like popular music or an oriental song. It can also be a mix of oriental music with any other musical styles. For example: hip-hop, classical music, disco, etc. There are also no canons and restrictions in the choice of dance vocabulary. The main thing is to be able to convey the idea of a dance composition to the viewer by the chosen means, to force the viewer to be an accomplice to what is happening on stage. The costume in this dance direction plays a special and very important role. It can both help in creating an interesting, original image, and destroy an interesting idea of a dance composition. In general, the BellyDance Show is always an experiment that allows the dancer and stage director to express themselves, being not constrained by traditions and other restrictions that are in the classical and folk styles.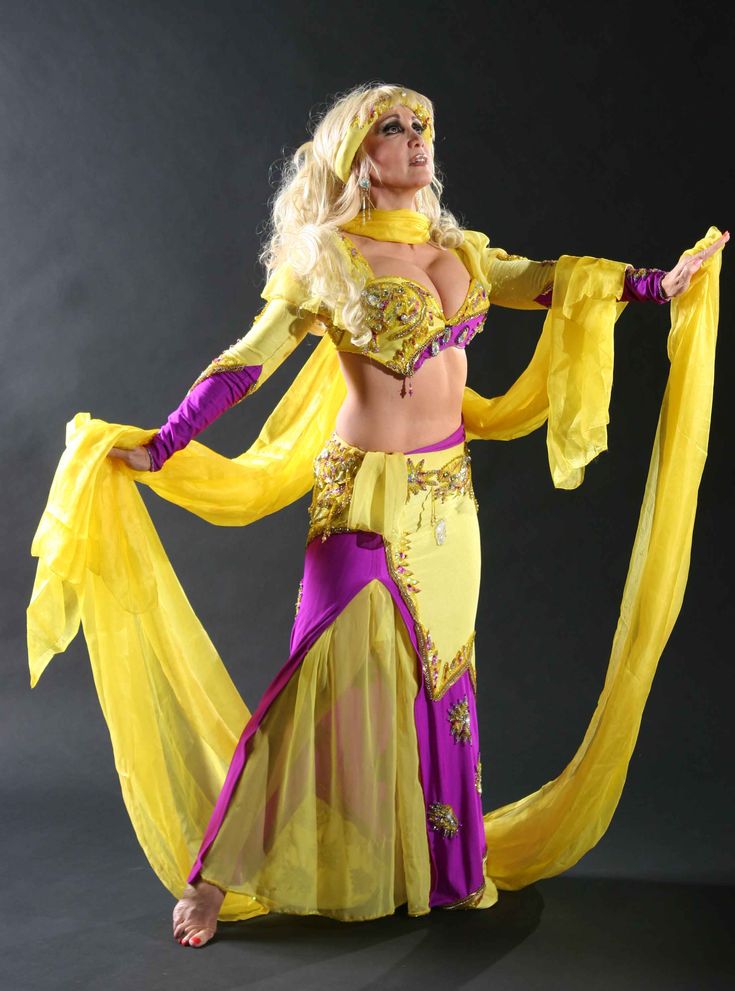
It is impossible to determine the percentage of belly dance elements and dance vocabulary of another dance direction in Show Belly Dance, and this is not necessary. But mastery of the Belly Dance technique is fundamental. At the same time, it doesn’t matter how many movements a dancer or a dancer from belly dance will make, and how many from another dance direction. A good performance technique can be demonstrated in ten movements, everything else is a matter of good competent and interesting composition and artistic performance. Of course, interesting finds, ideas in staging, as well as entertainment are welcome. In this type of dance direction, there are very large, almost unlimited, opportunities to interest and involve the viewer in your small stage performance.
In this category, the composition may include any dance direction, props - swords, sabers, candelabra, fire (poi), candles, wings, canes, snake, scarves and circus elements. Almost any music can be used here, including Arabic pop.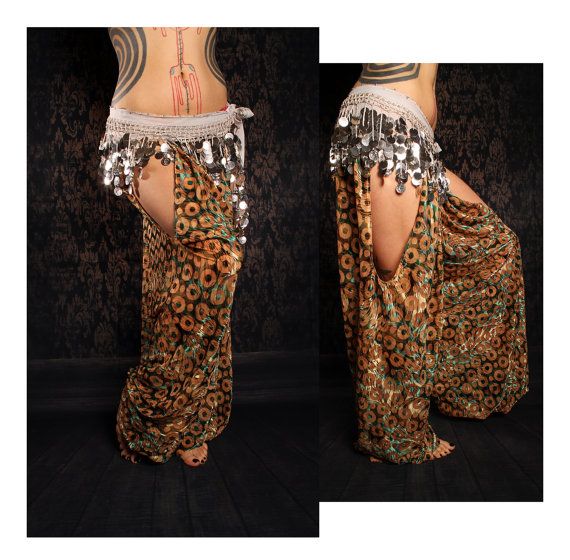 Show bellydance includes fusion - a mixture of styles from different cultures. For example, Arabic with Spanish - Arabic flamenco, aspani raks.
Show bellydance also includes tribal, gothic dances, pharaonic (Egyptian frescoes), Shakira style, etc.
The direction of show bellydance can determine the image. For example, the image of a flower, a bird, a peacock, a mermaid, a butterfly, a snake, etc.
There is another trend - fitness belly dance. Most often, at Russian competitions, this type is determined in the nomination of show-bellydance. But there are times when fitness bellydance is separated from all nominations into a category that is called "fitness bellydance".
Folklore
Each eastern country has its own folk dance - folklore.
Consider Egyptian folklore as an example. Raks Baladi is a folklore style of Middle Eastern dance. This style was and is danced in many villages throughout Egypt, usually performed at home and for women.