How to make dance music in ableton
Mixdown dance music using Live - Video tutorials
Live excels at all sorts of different tasks, from performing to recording and arranging. It’s perhaps lesser known as a tool for mixdowns, a process that demands a fine balance of technical know-how and creative care. Mixing dance music in particular can be a daunting task, one that requires controlled power and a sensitive understanding of dynamics and color. This three-part video series from Point Blank shows you how Live can be used to break down the challenges into manageable pieces.
Part one examines the bedrock of any great dance music production: drums and bass. You’ll learn the finer points of kick drum EQ and compression and how to get your basslines balanced with your kicks and subs.
In the second installment you’ll find tricks for bringing your synths to life. Convolution verbs, automated delays and crafty side chaining techniques can help emphasise and morph the character of your synth tones and help them slot into your mix.
In the final video vocals go under the microscope. Check how gating, dynamics, stereo imaging and EQ can help you find a place for those hard-to-work-with human elements. The icing on the cake is a run down of master plug-in chains; it’s a technique best approached with care but it’s an important piece in the mix down puzzle which can bring the best out of your hard work.
We’re always interested to hear how you get on with tips and tricks like these; don’t forget to share your finished productions with us using #MadeWithLive.
More mixing tips and tricks from Pyramid Training.
Posted on Nov. 12, 2014 in Tutorials
Sign up to our newsletter
Enter your email address to stay up to date with the latest offers, tutorials, downloads, surveys and more.
- Register Live or Push
- About Ableton
- Jobs
- Youtube
Education
- Offers for students and teachers
- Ableton for the Classroom
- Ableton for Colleges and Universities
Community
- Find Ableton User Groups
- Find Certified Training
- Become a Certified Trainer
Distributors
- Find Distributors
- Try Push in-store
Language and Location
EnglishDeutschFrançais日本語简体中文
Please chooseUnited StatesUnited KingdomFranceGermanyCanadaJapanChinaAfghanistanAland IslandsAlbaniaAlgeriaAmerican SamoaAndorraAngolaAnguillaAntarcticaAntigua And BarbudaArgentinaArmeniaArubaAustraliaAustriaAzerbaijanBahamasBahrainBangladeshBarbadosBelarusBelgiumBelizeBeninBermudaBhutanBoliviaBonaire, Sint Eustatius and SabaBosnia And HerzegovinaBotswanaBouvet IslandBrazilBritish Indian Ocean TerritoryBrunei DarussalamBulgariaBurkina FasoBurundiCambodiaCameroonCanadaCape VerdeCayman IslandsCentral African RepublicChadChileChinaChristmas IslandCocos (Keeling) IslandsColombiaComorosCongoCongo, The Democratic Republic Of TheCook IslandsCosta RicaCote D'IvoireCroatiaCubaCuracaoCyprusCzech RepublicDenmarkDjiboutiDominicaDominican RepublicEcuadorEgyptEl SalvadorEquatorial GuineaEritreaEstoniaEthiopiaFalkland Islands (Malvinas)Faroe IslandsFijiFinlandFranceFrench GuianaFrench PolynesiaGabonGambiaGeorgiaGermanyGhanaGibraltarGreeceGreenlandGrenadaGuadeloupeGuamGuatemalaGuernseyGuineaGuinea-BissauGuyanaHaitiHeard Island And McDonald IslandsHondurasHong Kong SAR, ChinaHungaryIcelandIndiaIndonesiaIran (Islamic Republic Of)IraqIrelandIsle Of ManIsraelItalyJamaicaJapanJerseyJordanKazakhstanKenyaKiribatiKorea, Democratic People's RepublicKorea, Republic OfKuwaitKyrgyzstanLao People's Democratic RepublicLatviaLebanonLesothoLiberiaLibyaLiechtensteinLithuaniaLuxembourgMacao SAR, ChinaMacedonia, Republic ofMadagascarMalawiMalaysiaMaldivesMaliMaltaMarshall IslandsMartiniqueMauritaniaMauritiusMayotteMexicoMicronesia, Federated States OfMoldova, Republic OfMonacoMongoliaMontenegroMontserratMoroccoMozambiqueMyanmarNamibiaNauruNepalNetherlandsNew CaledoniaNew ZealandNicaraguaNigerNigeriaNiueNorfolk IslandNorthern Mariana IslandsNorwayOmanPakistanPalauPalestinian Territory, OccupiedPanamaPapua New GuineaParaguayPeruPhilippinesPitcairnPolandPortugalPuerto RicoQatarReunionRomaniaRussian FederationRwandaSaint HelenaSaint Kitts And NevisSaint LuciaSaint Martin (French Part)Saint Pierre And MiquelonSaint Vincent And The GrenadinesSamoaSan MarinoSao Tome And PrincipeSaudi ArabiaSenegalSerbiaSeychellesSierra LeoneSingaporeSint MaartenSlovakiaSloveniaSolomon IslandsSomaliaSouth AfricaSouth Georgia And The South Sandwich IslandsSouth SudanSpainCanary Islands (Spain)Sri LankaSudanSurinameSvalbard And Jan MayenSwazilandSwedenSwitzerlandSyrian Arab RepublicTaiwanTajikistanTanzania, United Republic OfTerritory of the French Southern and Antarctic LandsThailandTimor-LesteTogoTokelauTongaTrinidad And TobagoTunisiaTurkeyTurkmenistanTurks And Caicos IslandsTuvaluUgandaUkraineUnited Arab EmiratesUnited KingdomUnited StatesUnited States Minor Outlying IslandsUruguayUzbekistanVanuatuVatican City State (Holy See)VenezuelaViet NamVirgin Islands (British)Virgin Islands (U. S.)Wallis And FutunaWestern SaharaYemenZambiaZimbabwe
Contact UsPress ResourcesLegal InfoPrivacy PolicyCookie SettingsImprint
Made in Berlin
How To Use Ableton Live: The Producer's Guide
If you’re new to music production, you might be here because you chose Ableton Live as your DAW. Good choice.
Or, you might be considering your options still, in which case this article might give you an idea of Ableton Live’s workflow.
Either way, this guide is designed to help you to get beyond the blank DAW:
to this:
This isn’t just a one-off tutorial. In this guide, I’ll not only cover how to use Ableton Live, but I’ll also cover:
- The two main ‘views’ you can use to create and sequence music
- The general sections of the interface
- Where to find the main tools for making music, and how to add third-party options
- Ableton Live’s secret power – racks
- Suggestions for how to approach making your own music in Ableton Live
Let’s get started.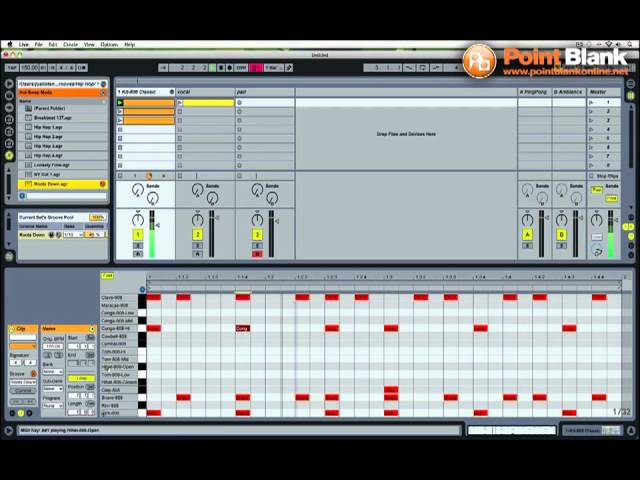
Note: This guide is for Ableton Live Standard version 10.1, and was last updated in April 2020.
The Interface
When you first start learning how to use Ableton Live 10, no matter whether you have Intro, Standard or Suite, you’ll be confronted with the following interface:
Note: The Collections feature may not look the same, and the default tracks may will be named differently. This is just my default setup.If not, just press Tab and it should open up to this view, which we call the ‘Arrangement View’.
The other view, which looks like this:
is called the ‘Session View’.
We’ll get into both of these in a second, but let’s confront the general interface.
General Controls
Along the top we have the main transport section, which gives you all of your standard DAW features:
- Play
- Stop
- Record
- Looping
- Loop size is controlled by the loop brace in the arrangement
- + more
The benefit of Ableton Live is its unique transport functions, including a ‘MIDI Capture’ feature which allows you to ‘record’ MIDI after it was already played in.
The unique features are:
- Capture MIDI
- Automation Arm
- MIDI Arrangement Overdub
- Session Record Button
- Follow
For now, don’t worry about all of these. Just know they exist.
On the top left side, we have some more tempo, timing and quantization controls.
Here you can set the BPM and time signature of your projects, as well as enable the metronome, and clip quantization.
(Personally, I like to turn clip quantization to ‘None’ as I make music in the Arrangement View, but you can leave it on if you like. Just be aware that if you move the playhead when there is a quantization value of a bar, it will wait for the bar to reset before moving.)
On the right, we have some MIDI mapping controls, which allow as to map either our keyboard keys or MIDI controller parameters to certain Ableton Live features.![]() We won’t go into this right now, but just know its there.
We won’t go into this right now, but just know its there.
Recommended: Electronic Music Production Glossary
The Browser
Ableton Live’s Browser is where all of the sounds, instruments and presets are stored, and where you can load up your own sounds and plugins.
It’s fairly intuitive from the get-go – the main folders are on the left, and the subfolders are on the right.
To navigate, simply use either the mouse or the arrow keys. Personally, I like the arrow keys for their speed.
In Ableton Live 10, the Browser is split up into three sections:
- Collections
- Categories
- Places
And it has a sample player at the bottom for listening to what you’re browsing.
Note: the ‘Groove Pool’ is also pictured above underneath the sample player, but we won’t cover that in this article.
Categories
This is where a lot of Ableton Live’s default instruments, effects, sounds and devices are kept. As you can see, there are a number of sub-sections with different icons:
Each of these is self-explanatory. ‘Sounds’ contains, well, sounds.
That being said, I’ll explain a few things that you should know:
- ‘Drums’ contains a selection of Drum Rack presets that you can load it to start jamming on. Any Drum Rack presets you save will also show up here
- ‘Instruments’ and ‘MIDI Effects’ can only be loaded into MIDI tracks, audio effects can be loaded onto any track
- ‘Sounds’ organizes all the instruments by ‘type’ rather than by the device used to create it, but you can load up presets from either menu
- The dropdown menus next to each instrument/device shows the list of presets available for it – you can drag the preset and load it directly from the browser
- ‘Plugins’ shows any third-party devices you have installed
- I’ll show you how to do this in Ableton later in the guide
- ‘Samples’ not only shows all of Ableton Live’s default audio samples, but also any that you load in via the ‘Places’ section later on
- If you have over 10000 samples, it will only show 10000 at a time
Places
Here is where Ableton Live will show any relevant folders or third-party folders that you add.
The first three that will appear in the list are:
- Packs
- Shows any Ableton Live packs that you have installed from the Ableton website, including the Core Library that comes with Live
- User Library
- The default directory Ableton uses to store all of the user content, including samples, presets, clips and default presets
- Current Project
- Any material directly related to the project you are working on now. You can expand the dropdown in the project file to see the tracks you are using in any given project. Until saved, this is blank.
Beyond this, you can also add your own folders (e.g. sample packs), which we will cover later.
Collections
I have left collections to last because they don’t make sense unless you have been through the rest of the Browser.
Collections is also one of my favourite features of Ableton Live, because it helps you stay organized and on top of things.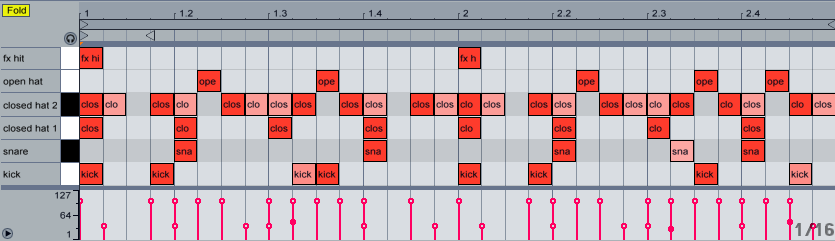
How does it work? Well, you have up to 7 collections to add anything to – presets, samples, clips, anything!
Here’s a few ways you could use this:
- Use a collection for your favourite drum samples
- Save your favourite devices and plugins in one place
- Save a variety of presets and racks for you to quickly use on the fly
- Create ‘vibes’, combining presets, samples and effects into collections for different styles of music
There are endless possibilities.
So, how do you add something to a collection?
Well, no matter where you are in the browser, right-click on the file in question and select it from the list. You can also use the number keys to do this quickly.
If you need more collections, click the ‘Edit’ option while hovering over ‘Collections’ and tick the boxes for the colors you want to use.
At the same time, you can also hide other categories across the browser by doing this.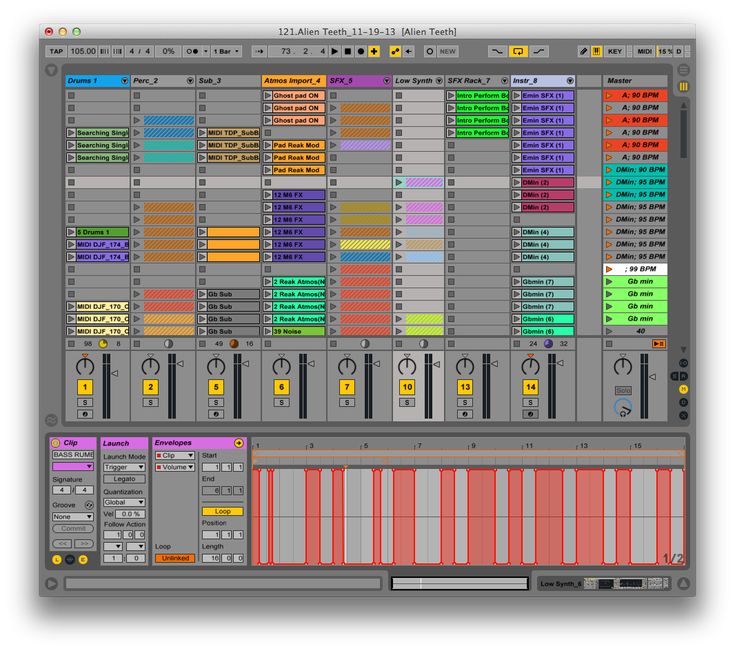
Preview Tab
When scrolling through your sample library, you want to hear what you’ll be working with.
This is where the Preview Tab comes into play. Any sample or ‘playable sound’ will simply play when selected in the browser.
You will also see the waveform down the bottom to get a feeling for the sound:
If you want to turn this feature off, simply turn the headphones icon off to the left.
If you have the arrangement playing while you are navigating the browser, Ableton Live will attempt to warp any relevant samples into time so you can audition effectively.
Once again, if you want to turn this off, just select the ‘Raw’ option on the right, and it will play the audio ‘as is’.
Session vs. Arrangement
The main differences between the two are the following:
| Arrangement View | Session View |
| Designed for music production | Designed for jamming and live performance |
| Useful for laying out clips over time and seeing the full structure | Great for trying out different musical ideas and swapping different patterns/clips in and out |
| Easier to implement automation and movement over time | Can be better for the mixdown with faders |
Most of the time, producers will be using the Arrangement View, as it is the easiest to understand and is similar to a ‘standard’ DAW layout.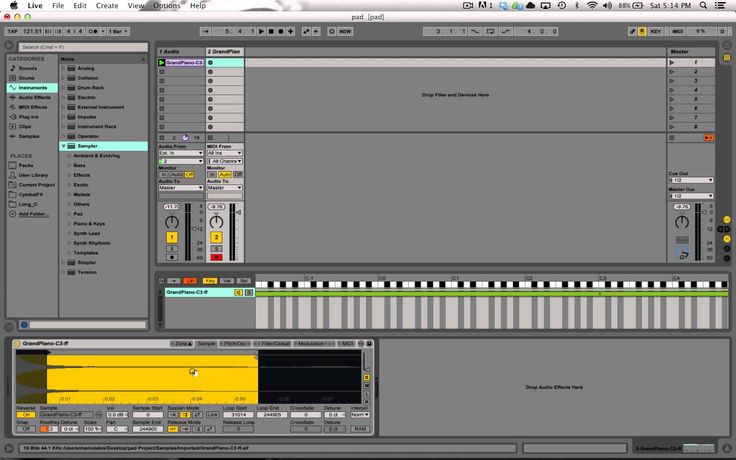
Arrangement View
On the right, you have the ‘Mixer Drop Area’. Here is where all of your instruments, audio and MIDI tracks will live when loaded up.
You can control the following controls for each track:
- Volume
- Panning
- Solo
- On/Off (Mute)
- Track Routing
- Recording
On the far right, you can also see a miniturized version of the metering for each track, which shows you how loud things are.
Down the bottom of this area is the ‘Master’ channel. This is where all of the audio routes to, and controls the overall sound of the track you are working on.
Generally, you want to leave the Master volume at 0dB, unless you have a specific reason not to. This is to ensure that any master processing will allow the audio to stay at the maximum loudness without clipping.
In the centre of the interface, however, is where the magic happens.
This is where you will drag in audio samples, create MIDI clips to program sounds, and draw in any automation.
Session View
Even though this guide will be centered around the arrangement view, I do want to briefly highlight the importance and usefulness of the session view.
Unlike the arrangement view, all tracks are listed vertically, and instead of an arrangement, you have ‘Clip Slots’.
In these clip slots, you can create/import loops and samples (on Audio tracks) and create MIDI clips (on MIDI tracks).
In the ‘Master’ section, you also have ‘Scenes’. These scenes allow the users to trigger all the clips in that row, which can be great for jamming and performing.
For example, you could have two different loops you want to switch between.
That way you can compose them individually, and then bring them together by playing with scene triggering.
Apart from this, you have a lot of the same controls as in the arrangement view, but with a different layout.
The most obvious difference is a fully-featured audio meter, which you can control more like a traditional fader.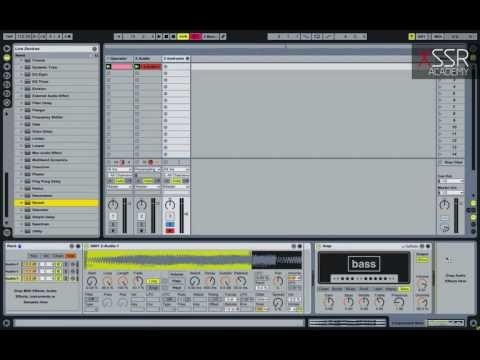
Now, back to the arrangement view.
Audio & MIDI Tracks
Ableton Live utilizes two main types of tracks to create sound – audio tracks and MIDI tracks.
Both can be useful depending on your workflow and what you’re trying to achieve.
Audio Tracks
Audio tracks allow you to use raw audio ‘as-is’ in the arrangement. This can consist of loops, one-shots or any form of audio recording.
There is no ‘instrument’ to trigger or play sound in this case – what you hear is what you get.
That being said, you can drag effects and the like onto these tracks, in order to process and manipulate the audio.
This is where the Clip Editor comes into play. You can view individual audio clips on an audio track by double-clicking on one.
Here you have a variety of controls, including warping, which we will get into a bit later.
MIDI Tracks
Unlike audio tracks, MIDI tracks don’t produce audio in themselves.
The tracks require an instrument (e.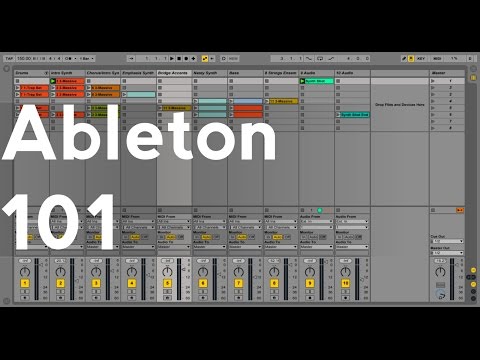 g. Ableton Operator) to be loaded onto them in order for the programmed MIDI notes to tell it what to play.
For example, you might want a piano sound, but drawing in a couple of notes would only get you half way. You have to load in a virtual piano instrument for those notes to result in sound.
You could then change the instrument to any sound – a synth pad, a bass, or even a sampler.
For this reason, MIDI tracks are ideal for expressive composition, whereas audio tracks are great for arranging and manipulating.
When creating MIDI clips, you also get access to the editor and piano roll, which has a similar interface to the clip editor. Except you’re working with MIDI and not audio.
You can create a blank MIDI clip by selecting a portion of time on the arrangement, right-clicking and selecting ‘Insert MIDI Clip’.
Then, you can start adding in notes.
Recommended: Ableton Live Piano Roll: 19 Tips
Warping, Timestretching and Pitching
Going back to the audio tracks, one feature I briefly mentioned was warping.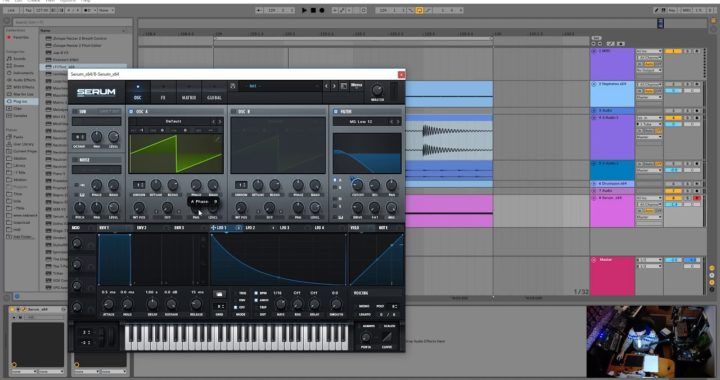
Warping allows you to adjust the timing and pitch of an audio clip exactly how you want to.
Got out of time drums? Warping puts them in time.
This is in contrast to ‘normal’ timing changes, where the pitch is directly related to the speed of the audio.
In other words: faster = higher pitch & slower = lower pitch.
In my opinion, this is one of the most powerful and fun features in Ableton Live.
Why? Because not only can you keep the toughest audio material in time, but you can stretch, mangle and chop audio in ways that you couldn’t achieve with even the best plugins.
Let’s take a look.
Ableton Live’s Warp Modes
Ableton Live comes with a variety of warp modes, each designed to stretch the audio in different ways:
- Beats: designed to preserve transients in percussive material, like drums, plucks and other sounds
- Tones: designed to preserve the tonal quality of a synth, lead or other melodic material
- Texture: keeps the original texture of a sound in check
- Re-pitch: preserves the natural waveform dynamics by maintaining the relationship between pitch and time (i.
 e. the old school approach)
 - Complex: works well on hybrid audio material or full tracks
- Complex Pro: ideal for vocals where it’s important to preserve the formants and qualities in a singer’s voice
Ableton Live’s Instruments, Effects and Sounds
One of my favorite feature sets of Ableton Live is the included devices and sounds that come included with it.
I actually recommend people who get Live not to download any plugins before trying them out.
(Don’t worry, I’ll still show you how to add plugins in Ableton Live later on.)
Using Instruments & Effects
You have an incredible range of synths/instruments:
- Operator
- Analog
- Electric
- Wavetable
- Sampler
- Simpler
- and more
Audio effects:
- EQ Eight
- Glue Compressor
- Saturator
- Multiband Dynamics
- Echo
- Drum Buss
- Amp
- Vocoder
- and more
and MIDI effects:
- Chord
- Arpeggiator
- Pitch
- Velocity
- Scale
- and more
These are found in the Browser under the respective categories and can be loaded in by double-clicking, or clicking and dragging.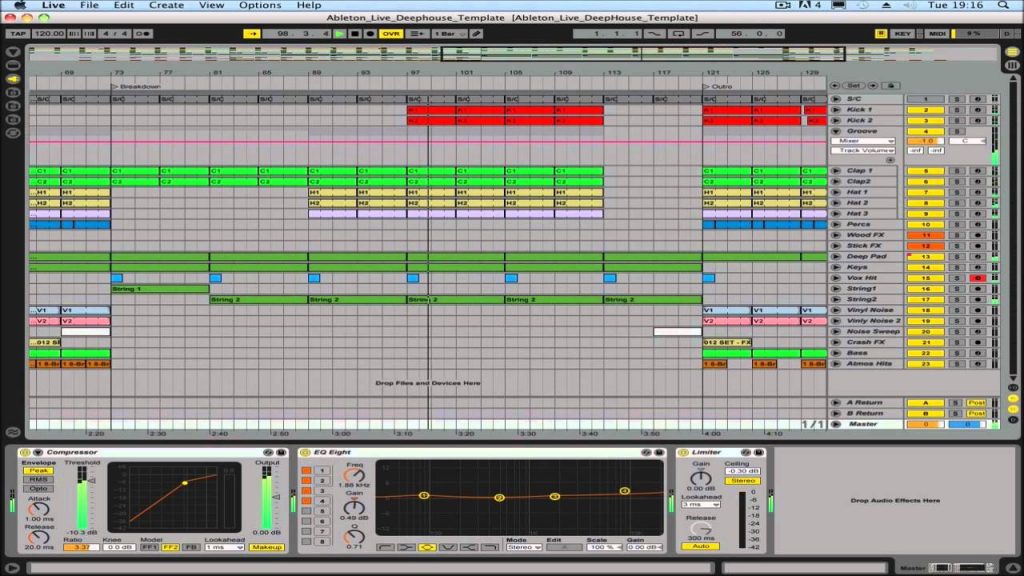
Click on the linked resources to find out more about each of these powerful devices! 👆
Recommended: Finishing Music: Strategies For Completing Your Tracks
Samples & Clips
Ableton Live comes with a great selection of samples and clips available for you to use (especially in Suite).
But what’s the difference between clips and samples?
Clips: Ableton Live’s Superpower
Ever worked on an idea, but you only like a particular loop with some effects and processing on it?
Maybe you’re cleaning up your project library and you want to delete a particular project, but keep that one loop.
Your options are:
- Export the loop to audio, but lose the ability to tweak the MIDI or effects later
- Export the MIDI, but forget which synth and processing you use
- Export the instrument racks with the FX, but forget the notes played
But what if I told you can export a track with the clip, the way it is?
By dragging an Ableton Live clip directly into the browser, you not only save the MIDI/audio as is, but all the track settings along with it – the level, instrument and effects used and any other features (e. g. track color and name).
How neat!
Adding Plugins & VSTs
Of course, many of you are going to want to be adding your favourite synths, samplers, and effect plugins to make music with.
Fortunately, Ableton Live makes this very easy by scanning your system’s default plugin locations on your hard drive, no matter whether you use macOS or Windows.
If you plan on using Audio Units on Mac, you’re using a custom system folder for VSTs, or your plugins aren’t showing up, you’ll have to load up your preferences and enable them.
Click ‘Use Audio Units’ if applicable, and then click ‘Rescan’.
If you’re using a custom folder, you can set this here and then click the ‘On’ switch to enable the folder.
After that, you should have plugins show up! Depending on the plugin, they may show up organized by the manufacturer, or just come up under the list.
Using plugins in Ableton Live
There are two kinds of plugins: instruments and effects.
In Ableton Live, instruments will have a little keyboard icon next to the plugin name, and effects will have a blank box.
To load an instrument up, simply double click and it should automatically create a new MIDI track with the instrument loaded up. Otherwise, you can click and drag your instrument plugin onto an existing MIDI track.
With an effect plugin, double-clicking will load it up onto the currently-selected Audio or MIDI track, in the next available section in the signal chain. You are also welcome to drop and drag it into a specific location.
Adding Your Own Samples in Ableton Live
Even though we’ve discovered Ableton Live has some great audio samples (especially in Suite), you’ll still likely want to add in your own samples, whether they are downloaded packs or from a service like Splice Sounds (sponsored).
Once again, Ableton Live makes this simple by offering an ‘Add folder…’ option in the ‘Places’ section of the browser.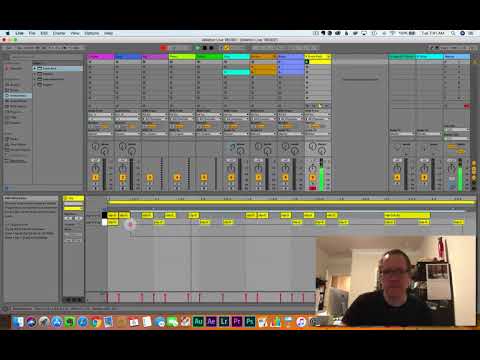
Simply navigate to your samples location and add the folder. You can add and organize them however you like – all in one folder or using multiple folders.
Once you’ve added your folders, you can treat these like standard samples, and drag them into the arrangement, or into an instance of Simpler/Sampler/Drum Rack.
Recommended: Free Sample Packs
Some General Beginner’s Tips for Ableton Live
Now that you’re a bit more comfortable with Ableton Live, here are a few of my recommendations.
Audio Settings
One of the first roadblocks I ran into as a producer was dealing with an inadequate system.
I’m sure many of you out there are the same, and are experiencing clicks, pops and glitches when trying to play audio.
In order to overcome this, you’ll have to play around with the audio settings in order to get the best performance on your computer.
First and foremost, if you’re on Windows, make sure you grab the ASIO4ALL drivers, if you don’t have them already (if you’re using an audio interface, sometimes it may come with it).
Once you have selected the appropriate audio driver type (CoreAudio on Mac, ASIO on Windows) then you can select your output device.
Underneath this you have the Latency section. Here is where you can change the ‘Buffer Size, which is key in reducing unwanted clicks and pops.
Zoom Display
If you’re like me, and you’re using a smaller display on a laptop, then changing your display zoom can be a life saver.
Simple head to the ‘Look Feel’ preferences and play around with the ‘Zoom Display’.
Lots of fun!
Template
When loading up Ableton, wouldn’t it be nice if your favourite sounds and devices were already pre-loaded?
Fortunately, you can do this. Simply head to your Preferences and under the ‘File Folder’ preferences, you will see an option titled ‘Save Current Set as Default’.
Once you have things set up the way you want, simply click Save, close Ableton Live and reopen it. Your template will now open every time.
Auto Fades
Many students in our EDM Foundations course came across this problem when using samples in Ableton Live for the first time.
Punchy and percussive samples would not sound the same as they did when previewed.
To fix this, open up your Preferences and navigate to the ‘Record Warp Launch’ tab. There is an option under ‘Warp/Fades’ to turn off ‘Create Fades on Clip Edges’.
Ableton Live Themes
As creatives, we often like to make our workspaces customised to our wants and needs.
One of the ways you can do this is to use a different color theme. You can choose from the default options by heading to the ‘Look Feel’ preferences and selecting an option.
Apart from that, there are a number of online resources for Ableton Live themes. One of the beauties of Ableton’s interface is the fact that it’s easily changeable.
Our favourite resource is abletonthemes.com.
Sidechain Compression
Everyone wants to learn sidechain compression. Probably because it’s a very sought-after effect for that drastic ‘pumping’ sound.
But the reality is sidechain is a very useful thing to know, and Ableton Live makes it very simple.
If you don’t understand compression first, check out our definitive compression guide first.
Once you know the basics of compression, load up Live’s Compressor on the track you want to sidechain.
There’s a little arrow up the top left next to the On/Off switch. Clicking it will bring up the extended interface.
From here, enable the sidechain button like I have above, and choose your input source (e.g. if you’re sidechaining from a kick, select the kick channel).
Once set, configure the controls to shape your sidechain envelope. You should start to hear a ducking effect, especially once the threshold is brought down.
And that’s a few tips to take your learning further.
If you want more inspiring tips for Ableton Live, check out 100 of them here. Or if you prefer YouTube tutorials, check out our curated list.
Optional: Ableton Push
The Push is a great addition to any Ableton Live setup, especially if you like a more hands-on approach, even if it’s technically not a necessity.
While this isn’t a comprehensive resource for the Push, I’ll leave a few links below for you to check out:
- Ableton Push site
- MusicTech Push tutorial
- Sonic Bloom Push tutorials
That’s A Wrap!
Hopefully you’re feeling a bit more comfortable in Ableton Live, and are able to start making music.
But understanding the basics is only the first step – you’ll need a more comprehensive yet simple way to go further.
And who actually reads the manual, right?
That’s why we created the Ableton Workflow Bible – a complete eBook to help you master working inside Ableton Live.
Like I said earlier, we used to charge money for this, but now you can grab it for free below:
Missed anything? Email me at [email protected] and I’ll sort it out for you.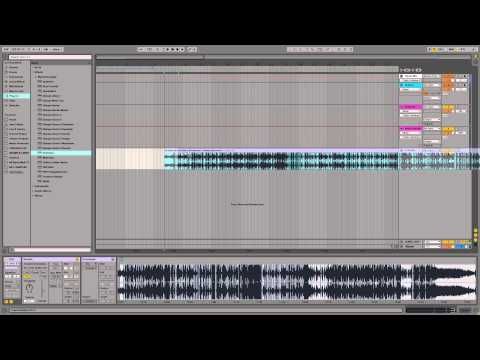
Creating music in Ableton
After getting acquainted with the Ableton program, with its main functions and capabilities, after setting it up, you can proceed to writing your first music. Do not forget that this is a creative work that requires perseverance and extensive knowledge, both theoretical and practical.
Today we will deal with the elements of building your own track, and now you can try to implement your first ideas, write a rhythm section, make various blanks and form tracks. And further, in the process of in-depth study of the material, you can use the achievements to constantly improve the sound quality. 9Ol000
B A C - LIN and I
As a result, we made the first few squares of drummers and we already have an approximate understanding - how and what will knock in our track. It's time to expand your ideas and composition ideas!
From this point on, start composing the musical part of the track (some of you may even first scroll through your head with a rough melody or some kind of musical part). In electronic music, the energy of the track plays an important role. That energy is in drums and bass. What power is inherent in these elements, your composition will have such strength and energy. So your next step will be the bass line.
It's important that the bass line of the track also sounds good with your drummers.
The bass part changes depending on the style of the song. For example, in house music, the bass line is used to fill the track with low frequencies and energy. At the same time, the melodic component of the track (synth, pad) plays a dominant role. In breaks or drum & bass, the bass is dominant, so it should be especially pronounced and “diverse”.
ADDITION/CORRECTION
At this point, you need to add some dynamics to the track. Again it all depends on the style of the track - add different elements to the GROVE! For example, reversed Crash, or sounds (say, clicks, noises, etc.). I advise you to work on Sub-Bass as well.
MAIN SYNTH
Now it's time to wind up the melodies and "wind the synths." Implement the musical component of the composition. To do this, you need to select any favorite synth and play it on the midi keyboard (or on computer keyboard) the tune you wanted to hear in the track. Now you have a midi track of the melody - you can start “winding up” the synthesizer. Competently twisting the knobs and changing the value oscillators , filters and effects , get the sound you want. Of course it is possible, use default presets (settings) synth.
VOCAL
If your There is vocals in the idea, so you need to record and insert it right now. Once the vocals are inserted and corrected, go to the next step.
Waveform of the track's vocal art sample.
ATMOSPHERE
The atmosphere of a track refers to all the melodies and sounds that fill the track, the whole environment in our stereo panarama.
Add pads.The basis of the atmosphere is the creation of pads (pad). As a rule, pads are based on one (several) notes. The pad sound is a continuous sound that fills space.
SOUND BALANCE
It's time to do some work with effects, processing and volumes. In the future, we will dwell on the issue of mixing (mixing) in more detail. The main meaning of information lies in the competent balance of all the instruments of the composition. For example, percussion should be clearly distinguishable, but not excessively loud and not overlap with other instruments; bass must be bass but don't obscure the entire stereo panarama, etc.
ARRANGEMENT
After like all important track components are ready, proceed to the next step. Right now you will make a track that will sound in clubs and players.
There are 2 ways transferring our audio and midi clips to arrange mode:
- After generating all the scenes in session mode, press the Record button and run the scenes in order.
 All clips are now in arrange mode and in the order they were played in session mode.
 - Transfer directly all clips from session mode to arrangement. I prefer this way, because it makes it easier to implement the very idea of the track. Start with the main part and gradually expand the entire track.
Now it's time to switch to Arrange mode and adjust the elements of the track, as well as adjust the clips to the right positions, add various effects, etc.
See also the article: 22 Good Track Arrangement Tips
You already have a complete version of our track - you can proceed to the next step.
EFFECTS
Modern music production requires ever higher quality sound and elements. The literacy of musicians is increasing every year and the level of production is growing. Accordingly, the number of different elements grows.
In this step, polish your arranged composition. Add effects, equalizations, draw Ableton automation curves.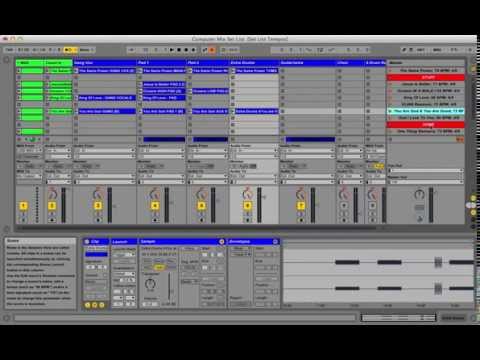 To a greater extent, this applies to the breakdown part (the so-called pit).
MIXDOWN
After you « licked » the composition, added effects, additional sounds, and now it sounds like a finished element, proceed to the final step - mastering.
Mastering (mixing) is the process by which we achieve the necessary professional sound, using the basic skills of working with equalizers, compressors, limiters, etc.
Mastering is the final stage of writing music. It can be called the final point in music sound recording editing.
The result of mastering is a sound recording - the so-called "master copy" - which is the basis for subsequent duplication.
How I learned to write dance music and started releasing on labels — Music on DTF
A big story about finding yourself in creativity. With pictures and music.
14,801 views
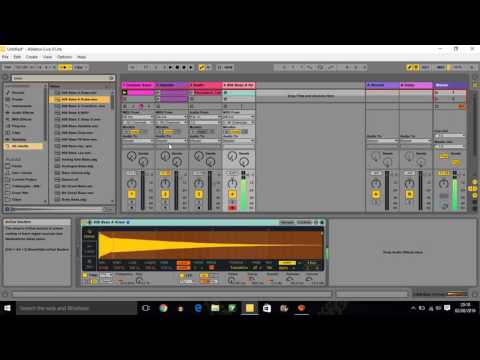
Hi, I'm Muchkin. I write music. I make money with soundtracks for indie games, and for my soul and career I also make tracks in the genre of melodic house and techno. About how I came to composing, I wrote in a recent text. Now let me tell you about my path in dance music.
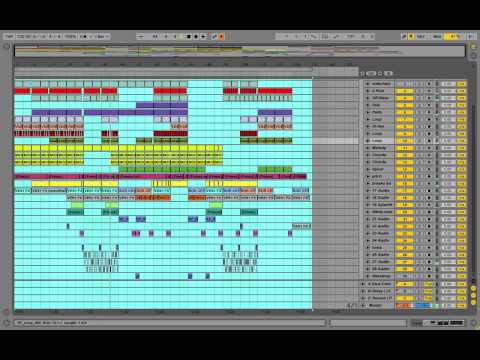
Screenshot of my latest project so far
Beginning
Somewhere in the ninth grade, I first heard Prodigy - Voodoo People (Pendulum Remix) as part of a mix from DJ Stroitel. I got crazy and started to get interested in drum and bass. I listened to Pendulum, Noisia, Spor, danced drum and bass dance, which we called drumstep.
Then I thought that I also want to write the same energetic cool music with rich drum parts. I had no idea how it was done, and the search led me first to some kind of MIDI editor, in which I made a couple of songs. And then I found FL Studio, a sequencer that I've been using for over a decade.
The first tracks were awful.
I shared them under a shameful pseudonym on PromoDJ, in an active community of fellow beginners. We intelligently criticized each other's tracks, not knowing anything at all about how music is created. But it's always like that when you start.
I once read the idea that you need to make the first 100 songs as quickly as possible, because after them normal music will follow. In my experience, yes, something like this is
Toward the end of school, a dream began to form in me: I will learn how to make cool music for the university, and by the end of the fourth year I will become, if not a world star, then certainly a professional and respected music producer (a person who earns money by creating and performing electronic music ).
University
In fact, during my four years at university, I basically did only three things: studied (albeit well), played video games, and suffered from fears and anxieties. Despite the fact that the dream still lived somewhere on the border of consciousness, and I considered myself a music producer, writing tracks faded into the background.
It wasn't because I was lazy or because I didn't want to make music.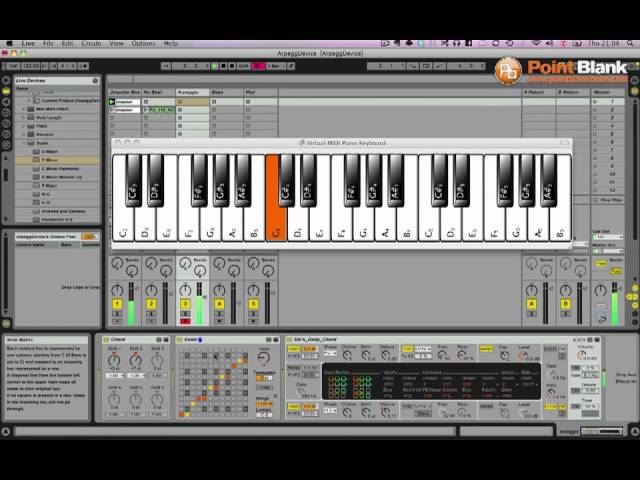 Just because I thought of a great success in advance, creativity turned into a hard and painful task. High anxiety, disorders, traumas, and just the peculiarities of the psyche (which I realized only ten years later thanks to psychotherapy) exacerbated the situation.
For example, I wrote this track for a whole year and spent more than hundred hours on it . That was the pace at which I produced finished works at that time.
Funny story. Born in Space found some cunning guy on PromoDJ and wrote me, they say, let's release it on my label. I went nuts from the word "label" and agreed. We even signed some kind of contract through the Proton system. After that, the man disappeared. Until now, the composition can be found on streaming services - he released it ten times, probably, and all under different "labels".
I didn't make a dime from it, of course. I suspect that he is also
Among my other works during this time, one can single out this psychedelic “neurofunk”, in which everything that is possible is not in tonality.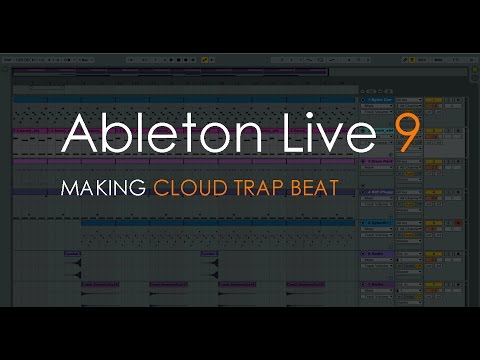 When I wrote it, I did not yet know what tonality was.
This was supposed to be an intro for my friend's YouTube show, but it never launched.
At the university, I wrote little music, but this does not mean that I did not develop creatively. I listened and analyzed bass genres a lot and sometimes through suffering I made tracks. Many did not finish. So there was progress, but very slow.
This composition also took about a year and 60-80 hours of work.
My music from this period seems to meet some minimal requirements of the genres (the structure is readable, the sounds are more or less intelligible, the kick and snare give some kind of energy, sometimes there is even a sub-bass), but they are crooked, poorly thought out and uninteresting .
I just used samples, notes and instruments that seemed appropriate and didn't think about the big picture, melody or atmosphere. And, I suspect, for the better. If I had been worried about this as well, then anxiety would have completely crushed me.
By the way, my suffering also had some advantages. From the very beginning of working in FL Studio, I decided that I needed to create all the presets for the synths myself, and so I did. By the time I received my diploma, I had a good knowledge of the standard synths of the program and even a small library of presets.
By the way, about the diploma: I wrote this experimental composition dedicated to a headache closer to the defense, which is symbolic.
Work
After my bachelor's degree, I went to the master's program and at the same time started looking for a job. For a year and a half, I was doing all sorts of small jobs (once I even made the whole foley for a short film). I didn’t do much music, although I was able to complete a couple of projects.
For example, this future beats track inspired by Ivy Lab and Noisia Radio selections.
And an old school drum and bass remix for Dorn (there was a PromoDJ contest).
I was looking for ways to make money on music: I applied to local game and recording studios, I tried my luck in creating beats and stock tracks. In vain. As I studied the market and read the stories of more successful producers, an unbearable, terrible thought formed in my head.
To achieve something, you have to work very hard
That explained a lot.
At the beginning of 2017, I was accepted to DTF. Since childhood, I loved games, I read LKI, the Land of Games and Igromania, so I was very happy with this opportunity.
I was part of the editorial staff for almost two years. At this time it was difficult to find the strength and time for music. I watched tutorials, analyzed other people's tracks, replenished my database of samples and presets, but completed projects during this time can be counted on the fingers of one hand.
Weird downtempo project - time.
Dubstep with the voice of YouTuber Jacksepticeye - two.
Gloomy base house - three.
Drum and bass, started back in 2016, four.
I tried to send each of these tracks to labels, but they were not taken anywhere. I was surprised: how is it that they have everything. And powerful basses, and cool drums, even some interesting effects. Isn't that enough?
Oh, how little I understood.
Composing
In the spring of 2019, I started building a career as an indie game composer. A few months later, this occupation even began to bring in some money and soon became the main one for me. (You can read about this path here.)
I found a way to make money with music and immersed myself in creativity. A little bit not the direction that I dreamed of, but still it was progress. Working on the soundtracks, I learned to feel the music better, learned new techniques and added to my own libraries even more.
As for dance tracks, at the end of 2019, aggressive and fast base house was popular, and I tried to sit on this hype train.
But no labels took the track, so I released it myself through distributor DistroKid. It was my first "adult" release - the one that appeared on streaming services. So far, I have earned exactly $0.03 on it. That's 17 auditions.
Back in the beginning of 2020, I made time for the LEAVEMEALONE halftime track.
The flops over the past couple of years made me wonder: what is wrong with my music? Why doesn't anyone want to take it? Reflection and reflection led me to an important conclusion: in the first place, I do not make the music that I really want.
I became interested in making music thanks to drum and bass, then I started listening to dubstep and electro house, and for some reason I always felt that these genres were what I needed to work on. But as soon as I listened to myself a little (which I had never done before), it turned out that I had nothing to express through bass music.
Therefore, I spent the following months looking for genres that would most accurately reflect my inner state. They were melodic house and techno.
Brute force
Since April 2020, I have decided to get into dance music properly.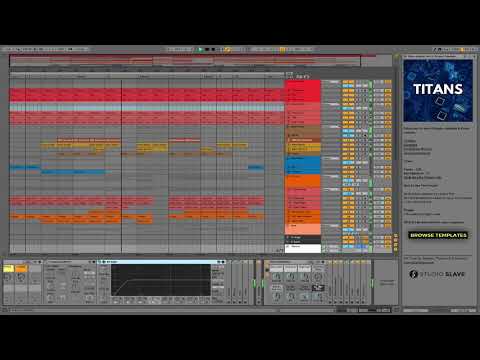 Since I used to be able to create compositions only through force, I came up with a challenge for myself: to finish one track every month.
The logic was like this. By forcing myself to work on dance compositions month after month, sooner or later I had to develop all the necessary skills needed to create cool music.
I was going to basically brute force my creative powers
The first track turned out to be clumsy. The mixing is murky, there is not much development, both drops are arranged as if it were a summer banger, although a soulful melodic techno was conceived. But for starters, it will.
This track (and several others) I released again via DistroKid. Even tried to buy ads for him through Facebook. There were still few auditions (39 to date), but I was resentful of the label system after so many rejections and was determined to make a name for myself.
The next composition in May, Pasturage, was much softer. Birds, forest, nice sound design and summer rain atmosphere.
For this track, I also purchased advertising. This time I set up the ad better and invested more money, so the output was more tangible. Now he has 138 plays.
The June track Arcane turned out to be mysterious and attractive, like a Celtic forest. Hence the name.
I did not commission advertising for him, because the determination to promote myself in the music industry began to fade. I didn’t pour so much money into advertising tracks, but there was no more extra money.
The conclusion was that you can break through on your own only in two cases: if you have a lot of money for advertising (I didn’t), or if you know how to do cool PR in social networks (I didn’t know how). So I started looking towards
labels again.
Arcane was not taken to the labels (I did not even hope), but they took Autarca - the July track. Here's a snippet of it, and you can listen to it in full here.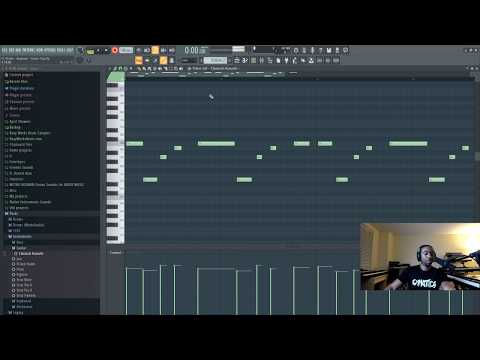
It was released as a compilation on the sub-label of a small St. Petersburg publishing house Polyptych. I knew perfectly well that this would not bring me any money or popularity, but I signed the contract anyway. You have to start somewhere.
The next track was a bit hooligan Help a Robot. I didn't send it anywhere, because big labels wouldn't take it, and it was long and tedious to look for small labels with such music. How do you even google them? "Labels with frivolous electro-house"?
In autumn I decided to make a three-track mini-album. For some reason it seemed to me that labels were more willing to take EPs than singles.
Even by this moment I had heard a lot of music in the selected genres and realized that in melodic house and techno, few people make tracks shorter than six minutes. So from now on, all my new compositions slowly fade in and out.
In general, the music has become less hasty and more conducive to immersion and thoughtful listening
As you might expect, my plan to boost my chances with labels with the EP didn't work out very well.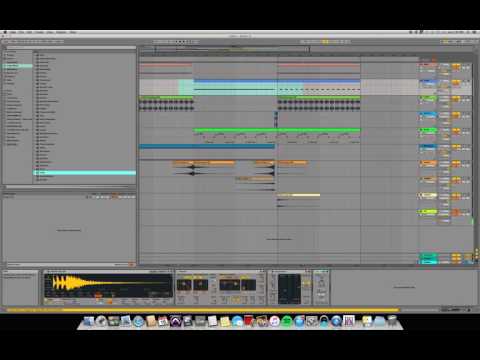 The release was eventually taken to the same Polyptych Limited (it will be released on July 5), but I was hoping for something bigger.
In December I finished the new track Rewired and decided to take a break. Working non-stop for nine months (and I also did soundtracks) without tangible results led to the fact that I just burned out.
Rest helped me rethink my priorities and figure out which way to go. I stopped caring too much about labels and started focusing more on creativity and self-expression. Plus, psychotherapy helped (and still helps) to listen to yourself better.
Rewired was included in the compilation for the Moscow label ONESUN (will be released sort of like in the summer).
Opening
I wrote the next composition at a more relaxed pace: burnout forced me to abandon the "one track per month" mode. Simultaneously with the work on the track, I was doing research. He carefully studied music in the chosen genres, pestered successful producers with questions, whom he could reach.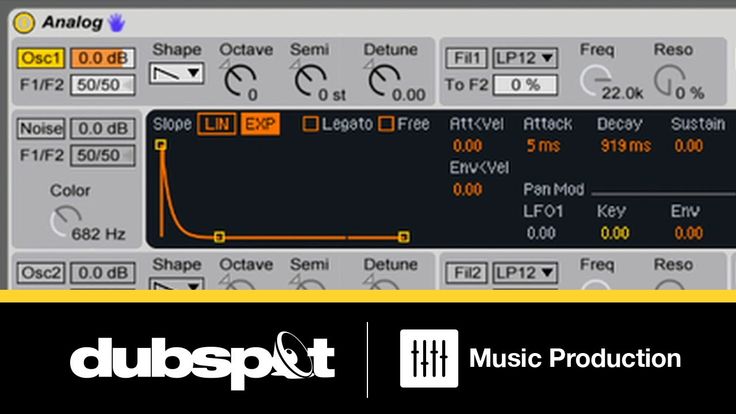
The result was the biggest takeaway of all time: major labels need unique music first and foremost. One that has not yet been
Within the genre, of course, although the boundaries between melodic house and techno are blurred.
How to achieve uniqueness? For me, the answer is simple: it comes from the uniqueness of the psyche. If you learn to listen well and express yourself adequately, then creativity will be unique. Therefore, when creating Bird Law in January 2020, I tried to listen as often as possible to what melodies, sounds, effects and just decisions resonate with me.
This track doesn't just meet some technical requirements, it's undeniably my . For example, the title is taken from a comic book that I really like.
It's the law
And the theme of birds in it is not only because of the name, but also because these animals (but not all) touch me and my wife very much.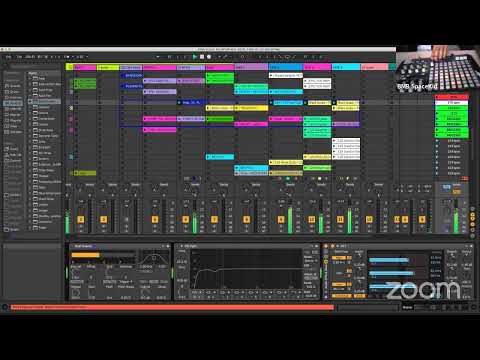 And also partly a track about the love that I feel for my wife, and this has something in common with the comic book. In general, a warm work about good things. The ones in me.
I don't know how noticeable this is to the outside listener, but I see a massive improvement over the previous compositions. He was even taken to a more serious label - the Italian Natura Viva. They promised to release it as part of a compilation. I don't know when exactly: for some reason, labels rarely notify me about such things, and I myself don't really care. I'm more focused on future works.
The last track so far is called You're Not What Your Mind Tells You. It's about my many battles with my own brain. It is a little sad, but with a light undertone, because no matter how scary the battles are, there is always a possibility to win. At least I can.
The other day I signed him to the Belgian label Sound Avenue. It will first be released exclusively on Spotify to try and push it into the platform's playlists, and will be released as part of a sub-label compilation in August.