How to make a tap dance board
Tips for Tap at home: Tap Board DIY
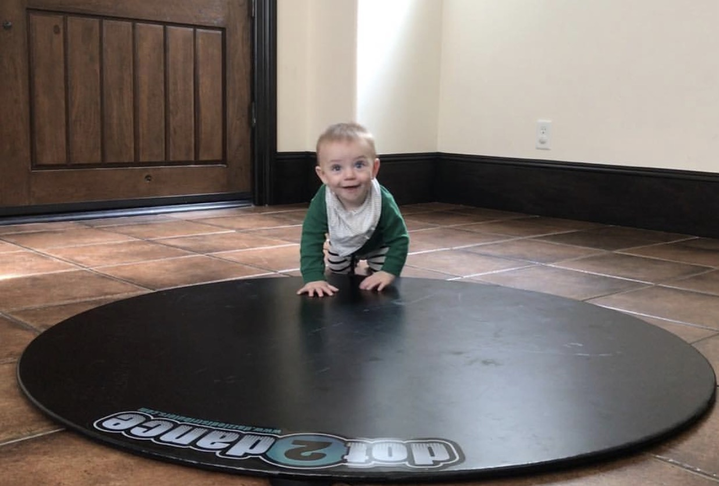
Whether you are taking a tap class virtually, or just want a place to practice your steps, a tap board is a great tool to invest in and can greatly improve your at-home tap experience! While there are many expensive options online to purchase a ready-made tap board, it is super simple and affordable to DIY your own board. I have sourced a few products below through Home Depot, but I am sure the same products are available at other hardware stores.
Easiest (and cheapest) DIY tap board:
Owning a tap board can be as simple as buying a piece of plywood. This allows your dancer to still practice in their tap shoes at home without ruining any hardwood floors! A 4 ft x 8 ft board of plywood is pretty standard, however you can find larger sizes or ask for a piece to be cut in half (4 ft. x 4 ft.) to accommodate your space. Regardless of the surface area of your board, you will want at least ½ inch thickness. A 1 inch plywood will be more durable whereas anything thinner than ½ inch will be pretty flimsy. Also consider how often you will be moving the floor, as they can get pretty heavy with greater thickness.
Improved tap board:
If you have any craft family members, there are a couple of easy ways to improve on the simple plywood piece. These improvements will give your tapper better sounds and make dancing on it more comfortable.
Cushioning: By adhering a cushioning layer to the bottom of your plywood, the board will have a little more give and be a bit easier on your dancer’s joints. An easy option is the interlocking play mats (which you may even have laying around at home already). These are 2 ft. x 2 ft. so it is easy to line these up your piece of plywood. Attach the mats by first interlocking and gluing the mats together to the appropriate size, then glue them to the bottom/rough side of your
plywood piece. Gorilla Glue or Liquid Nail Subfloor Adhesive works great for this. It is important to make sure the mats are pressed firmly into the wood (use books or other weights) so they adhere completely. Use lots of glue and let it dry overnight.
Interlocking mats can be found here!
Top coat or laminate layer: If your tapper is using the board frequently, there is a good chance they will start to chip the board with use. One option is to add a layer of interlocking laminate to the top of your plywood, gluing it on as you did the interlocking mats above. When selecting a laminate flooring, you will need to ensure you measure the size of the interlocking pieces to fit the size of your board, and that the pieces fit together snug. You do not want any ridges or spaces between the laminate pieces as it is really easy for your tapper to trip on these when their taps catch on them. To avoid this, another great option to reduce chipping is to paint a wood finisher onto your plywood. Make sure to follow the instructions on the polyurethane, cleaning the board with a dry brush and then allowing each layer to dry and cure. This takes a bit longer, as you will likely want to do multiple layers for good protection.
Get the goods:
Laminate Flooring
Varathane Polyurethane
Keep dancing!
About the Author: Miss Lauren is a dance teacher with Flexpointe Studios Inc. This summer she’s taking her tap classes outside! We hope you’ll DIY up your own tap board and join her.
How To Make Your Own Practice Board for Tap Dancing
How to Make Your Own Home Tap Dancing Floor | Instructions for Making a Tap Dancing Floor
| A Note From Kathie: Kathie Walling, Editor Tap Dancing Resources | Contact Kathie | | | Instructions for making your own home-size tap dancing floor. The most basic home practice floor is simply a piece of plywood. Most Basic Home-Made Tap Floor Improved Home-Made Tap Floor Sebastian's DIY Tap Floor Cassandra's Tap Dancing Practice Floor Double Zero "Tap Floor DYI" Instructions Discussion About Home-Made Tap Floors: Heather Happens "DUYI Dance Board" Video Kateire "Build Your Own Tap Dance Floor" Video More About Dancing Floors Products for Tap Dancers Regional Tap Dancing Resources All Tap Dancing Resources See also | | Amazon Ad Tap Events: Tap Festivals Tap Worlds Tap Dance Day Practice Tool Online Metronome Follow Us On Social Media
Tap Shop Tap Shoes Amazon Ad |
 Enhancements can include attaching material to the top of the board for durability or a better tapping surface and attaching cushioning material to the bottom of the board to make tap dancing easier on your bones and joints.
| | Argentina | Armenia | Australia | Austria | Belgium | Brazil | Bulgaria | Canada | Cayman | Chile | China | Colombia | Costa Rica | Croatia | Cuba | Czech Republic | Denmark | Dominican Republic | Egypt | Estonia | Finland | France | Germany | Greece | Guatemala | Honduras | Hong Kong | Hungary | India | Indonesia | Ireland | Israel | Italy | Japan | Korea | Latvia | Lithuania | Malaysia | Mexico | Mozambique | Namibia | Netherlands | New Zealand | Norway | Peru | Philippines | Poland | Portugal | Russia | Serbia | Singapore | Slovakia | Slovenia | South Africa | Spain | Sweden | Switzerland | Thailand | Turkey | Turks Caicos | Uganda | Ukraine | United Kingdom | United States | Vietnam | | | Topics Awards Classes Dancers Ensembles Events Regions | | Products Tap Shoes E-Classes Accessories Books Suppliers Products Menu | | Follow Us Tap Dance Blog Facebook Group Facebook Page Twitter Feed |
Repair of the floor in the dance hall: photo, do-it-yourself
It is important for a dancer not only to learn how to dance, but also to have a stable and reliable surface under their feet. And the floor in this case plays a paramount role, since it is one of the main elements of any dance hall. It is important that floors are non-slip, comfortable to avoid injury and damage. Therefore, if you are going to make repairs to the floor in the dance hall with your own hands, we recommend that you pay special attention to the choice of material. nine0003
Thinking about how to equip a dance studio, you first need to think about high-quality flooring. Its "walking" boards, bumps and similar flaws, which are imperceptible at first glance, can play a cruel joke on the dancers.
Serious demands are always placed on the floor for the stage, since the quality of the dancers' performance directly depends on their quality. Of course, the reliability and quality of the floor plays an important role here. nine0003
The floor in the dance hall must be:
- resilient;
- perfectly flat;
- resistant to abrasion and high impact and static loads;
- non-slip.
Moreover, the dance floor must be highly durable, because the replacement of the floor covering is a technically complex and time-consuming process, and this can disrupt the schedule of concerts and rehearsals for a certain time.
For high-quality dance hall equipment, all the nuances must be taken into account, since it must be comfortable and practical. It is worth considering all the little things: from the renovation of the premises itself to such additions as a locker room and showers.
The dance floor is regularly subjected to high loads, so it is important that it is of the highest quality, but at the same time not too hard. You should not save on it, since its constant replacement will cost much more. nine0003
So, what materials are most often used for arranging the floor in the dance hall:
- parquet board;
- wood;
- laminate;
- linoleum;
- bulk coating.
As a rule, a wooden floor is chosen for a dance hall, due to its low cost. It is timeless and great for all types of dance. Nevertheless, a tree is not the most budget option in terms of cost, so a parquet board can be an alternative to it. nine0003
When choosing linoleum, you should immediately take into account that it is not suitable for all types of dance. For example, traces of heels will immediately ruin it. It is more suitable for yoga and fitness exercise.
Laminate is also not suitable for all types of dance. Moreover, the floor for the dance hall should not be made of chipboard or concrete, although their cost is quite attractive. Chipboard is slippery and concrete is too cold. Many experts recommend giving preference to unvarnished parquet. Such material does not slip, and the dancers will be able to feel more than comfortable. nine0003
In recent years, floor materials such as self-leveling floors and dancing linoleum have gained particular popularity on the market. Bulk coating in many respects outstrips even traditional materials. They have the following properties:
- durability;
- smoothness;
- do not slip;
- hygiene;
- vibration resistance;
- resistance to various influences;
- high security. nine0018
There are several types of self-leveling coating, but the most popular of them are epoxy and polyurethane floors for the dance hall. The latter is highly wear resistant and is made on the basis of polymeric substances. It differs in design and color. By adding certain additives, certain properties of this coating can be significantly improved. Epoxy self-leveling floors are also not much inferior in terms of characteristics. Their advantage lies in resistance to vibration, so they are often placed on sports fields. nine0003
But when installing a self-leveling floor for a choreographic hall, it is better to turn to specialists. They will do their job efficiently, quickly and provide a guarantee for long-term operation.
Do-it-yourself floor repair in the dance hall with materials from the best manufacturers
To provide the possibilities, methods and purposes of floor coverings for dances and stages, it is enough to get acquainted with professional floorings from the world's leading manufacturers for dance, ballet and stage. nine0003
We will consider the products of the world leader from the manufacturer "Harlequin" / "Harlequin" (Luxembourg). Next, the main collections will be considered, as well as their descriptions.
Collection "DUO"
The most common floor covering made of PVC, consisting of two layers, forming on each side a non-slip surface of high wear resistance. It is used for stationary laying and touring with adhesive tape on wooden tablets.
- Roll length: 30, 25, 20, 15, 10 m.
- Roll width: 2 m and 15 m.
- Thickness: 1.2 mm.
- Weight: 1.6 kg/m 2 .
Studio Collection
One of the most popular floor coverings available. Multi-layered PVC construction, including a canvas that is reinforced with fiberglass, as well as a shock-absorbing foam backing to reduce the likelihood of injury to the legs. With temperature fluctuations, the coating retains its dimensions. It can be laid on any leveled surface. nine0003
- Roll width is 1.5 m.
- Length - 30, 25, 20, 15, 10.
- Thickness - 3 mm.
- Weight - 2.3 kg/m 2 .
- Color: white, grey, black.
Cascade Collection
The ideal flooring used for classical ballet. Advantages: optimal for spinning, no slipping, perfect foot grip on the floor. It is used both for stationary styling and for tours. nine0003
- Roll length: 25, 20, 15 and 10 m.
- Width - 2 m.
- Thickness - 2 mm.
- Color: white, grey, black.
Allegro Collection
Specially designed for the dance hall with a rigid base. Among all the floor coverings known in the world, it has the maximum thickness. Material: PVC, which is reinforced with fiberglass, a substrate (reinforcing) made of foam rubber with a closed structure. An alternative to springy floor options. nine0003
- Roll length - 20, 15, 10 m.
- Thickness - 8.5 mm.
- Width - 20, 15, 10 m.
- Weight - 6 kg/m 2 .
- Colour: grey, black.
Tempo collection
Used in multifunctional dance halls, discos and barefoot dances. The covering has additional protection against rough floors. For stationary and mobile installation. Has high wear resistance. nine0003
- Length - 25, 20 m.

- Thickness - 3.7 mm.
- Length - 25, 20 m.
- Weight - 3.13 kg/m 2 .
- Colour: grey, black.
"Standfust" collection
For multifunctional halls and stages with harsh conditions. Recommended as a stage cover for modern and classical dance, for concert halls and drama theatres. It is intended for stationary laying on glue with special welding of seams. nine0003
- Roll width - 1.5 m.
- Length - 20.15 m.
- Thickness - 2.6 mm.
- Weight - 3.5 kg/m 2 .
- Colour: light grey, grey, dark grey, black.
Showfloor Collection
Monochromatic multi-layer PVC flooring, reinforced with fiberglass, based on honeycomb foam. Used for dance halls, TV studios, exhibition stands, stages and podiums. Fits on any leveled surface with fixation by adhesive tape. nine0003
- Roll length - 25, 20 m.
- Thickness - 1.8 mm.
- Width - 2 m.
- Weight - 1.5 kg/m 2 .
- Color: white, light grey, grey, dark grey, black.
"Hi-Shine" collection
Cover for quick installation on the stage. Used for any show using wet surface or mirrored floors. Glossy surface composed of a hard polymer with good scratch resistance. nine0003
- Roll length - 30, 20 m.
- Thickness - 1.5 mm.
- Width - 1.5 m.
- Weight - 1.96 kg/m 2 .
- Color: white, black, red, blue.
Fiesta Collection
For drama theaters and halls. An alternative to conventional parquet. For fixed laying with butt welding. The coating is characterized by high wear resistance. It is used for the dance floor, which is subjected to a high load (step, tap dance, etc.). nine0003
- Roll length - 25, 20 m.
- Thickness - 2 mm.
- Roll width - 2 m.
- Weight - 3 kg/m 2 .
- Colour: oak imitation.
Feeders and what to feed birds in winter
I publish articles by a specialist biologist on this topic
source
Winter is a difficult season for birds. The cold forced all insects to hide, only some trees retained their fruits, and seeds can be found on large weeds sticking out from under the snow. nine0313 Many people try to help their feathered neighbors through this difficult period by setting up feeding grounds and feeders. But everything must be approached with skill, because by feeding the birds incorrectly, it is easy to harm them.
First of all, you need to understand that you cannot feed the birds, you can only feed them. How is feeding different from feeding? When feeding, the birds receive the entire daily ration only from the feeder, and when feeding - only a part of it and have to find the rest in nature. In nature, the diet of birds is very diverse.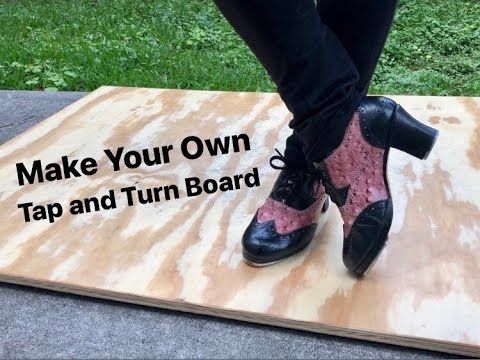 Moving through the forest, flocks of tits check cracks in the bark in search of wintering insects, their larvae and pupae, pick up seeds of various plants, and eat only seeds and fat at the feeder. And with a constantly full feeder, tits simply stop looking for other food. A monotonous diet, and even rich in fats, leads to liver disease. Instead of benefit, we cause irreparable harm to birds. nine0313 It is better to accustom yourself and the birds to a certain regime, filling the feeders once or twice a day at the same time. They poured a glass of seeds, tits pulled them apart, and that's it. No matter how they beg you, banging their beaks on the glass, be persistent and do not give in to feelings. Some bird foods are harmful and often deadly. First of all, it's all fried and salty. When eating salty food, salt quickly accumulates in excess in the body of birds, and their excretory system is less efficient than that of mammals, and poisoning of the body occurs. When frying, fats change their structure and cause severe damage to the liver.
 Also, spoiled food, rancid grain, moldy, musty products should not be used. They contain strong toxins. Even if poisoning does not lead to a quick death of the bird, it will weaken the body, the bird will fall ill and eventually die. nine0313 Do not give birds and millet. Unlike millet, millet is devoid of a shell, which leads to the oxidation of fats on its surface, the appearance of toxic substances, pathogens. Dangerous for birds and black bread. Rye starch is poorly absorbed by the bird's body, black bread is always more moist than white bread, has high acidity, which often leads to strong fermentation in the intestines up to intestinal volvulus.
So, what should never be given to birds? Fried and salted seeds, salted bacon, millet, black bread and spoiled food with an unpleasant odor or mold. What then can feed them? nine0313 It is best to feed urban pigeons with a specially prepared mixture or at least wheat, and preferably barley, which can be bought at the Bird Market in Moscow. Of the cereals, pearl barley, which is peeled barley, is most suitable. White bread is not the best food for pigeons, but in small quantities it is quite suitable (but fried pies, whites, pizza, etc. are very harmful). You can add oatmeal to the Sisars, but not instant, but dense, not loose. In a small amount, you can add unroasted seeds. Barley is too tough for sparrows, but everything else that pigeons eat is fine for them too. Ducks are best fed with grain (grain mixture or wheat) or chicken feed, but these types of food sink in water, so there is practically no alternative to white bread. They eat ducks, but less willingly, and unroasted seeds that do not sink in water. nine0313 Unroasted sunflower seeds, medium-fat cottage cheese mixed with white breadcrumbs so that it does not stick together, scraped lean beef, grated hard-boiled egg, finely chopped fresh apple are placed in the bird feeder. On frosty days, it is good to hang a piece of unsalted bacon, put a piece of butter. Tits should get used to other foods, except for seeds, so don't be upset if they don't eat it at first.
 In addition to these foods, nuthatches are happy to eat watermelon and pumpkin seeds. nine0313 All the best to you and your feathered friends!
Konstantin Razhaisky,
livestock specialist of the department of biodiversity, monitoring and environmental education How to feed the birds
How can...
You can feed almost any birds. Preparation for this must begin in the summer, preparing food. Sometimes it's just enough not to throw away what we don't need. When eating watermelons and melons, collect and dry the seeds. In winter, they will be happy to feast on tits. They are also fed with sunflower and pumpkin seeds (not fried), hemp, pieces of unsalted bacon and meat, various fats - margarine, butter, etc. They willingly eat tits and bread crumbs (black rye should not be given). It is better to use crushed stale bread. Fresh in the cold freezes and the birds will not be able to do anything with it. Sparrows and pigeons are also happy to eat bread. nine0313 For bullfinch and other granivorous birds, bunches of weeds are dried from summer and autumn - quinoa, nettle, horse sorrel, burdock, etc. For waxwings and thrushes-field ash - clusters of berries, viburnum, mountain ash, black and red elderberry. Bullfinches also willingly feast on them, but unlike the previous species, they do not eat berries, but bones.
In winter, near the feeding trough you will see such forest dwellers among the city as the nuthatch, woodpecker, jay. Nuthatches and woodpeckers feed together with tits and often stay in common flocks. The nuthatches eat everything that the tits do, but above all they are interested in the hung lard, meat, pieces of fat. Jays also eat everything. Especially for them, from September-October, you can store gifts - collect acorns. nine0003
...and why not?
Birds should not be fed salted nuts, chips, coconut flakes, and it is better not to feed lard or pieces of fat. There is no such food in nature, it is harmful for birds! Do not use bread, crumbs and any other hygroscopic or containing a large amount of moisture.
Before pouring the food, it must be thoroughly ignited in a frying pan or baking sheet, until absolutely dry and flowable. After cooling, it is poured into a bottle and the cork is screwed on. nine0003
How to make a feeder?
Everything is in order...
Setting up the feeder is easy. In the simplest version, this is a plank with sides nailed to the edges so that the food is not blown away by the wind. When arranging feeders, you should not chase too complex and bizarre designs. It is better to make a few simpler ones and feed more birds. It is only important that, if possible, their food is protected from bad weather and pigeons. In winter, birds are not up to luxury - just to survive. The complication of the design of the feeder goes, first of all, in the direction of protecting food from bad weather and competitors of those birds that you want to feed. For protection, various covers, side walls are made. nine0003
Bower-shaped feeder (for small forest birds and squirrels)
1. Fasten four posts, total length 150 cm, from below with crossbars along the perimeter.
2. Fasten two opposite crossbars with a block or board 10 cm wide. This block (board) is a support for fixing the central post.
3. Two tiers of feeders are attached to the post. The upper tier (in the form of a tray with a side along the perimeter) is located directly under the roof itself and is intended for small birds. nine0313 4. Below, at a distance of 1/3 from the top, there is a second feeder for large birds and squirrels. It is also made in the form of a tray with a rim around the perimeter. A hipped roof made of improvised material (unpainted boards) protects the feeder from rain and snow.
Installation recommendation: Install under tree canopy.
Feeder in the form of a gallery for small forest birds
1. The roof and base of the feeder are made of a wide board or several boards with a total width of 15-20 cm, a length of 40 cm.
2. The roof and base are fastened with vertical posts made of improvised material (board or wooden slats). Width between uprights 30-35 mm to let small birds through.
Installation instructions: the feeder is screwed to the tree knot with wire.
House Feeder
Hanging:
1. Make a pallet out of boards with a small edge of planks.
2. Gable roof - roof slopes are recommended to be made from lining. Nail the top and bottom of the roof with nails. nine0313 3. If boards are used, then fasten the boards of the slopes with planks from the inside.
4. Make a stainless wire hanger to attach the feeder to a thick branch of a tree.
On a pole:
1. A pole is required for the hanging feeder.
2. Attach the large feed tray to the post. The pallet is made of two boards that have cutouts for the pole. The ends of the pallet are bordered by a low side.
Where to hang? It is best to hang the feeder on the south side at a height of 1.5-2 meters. Thus, you will protect it from wind and snow (in our country they are usually northwestern), on sunny days the food will warm up and thaw (if moisture suddenly gets into it), a high altitude will not allow rodents to get to the food. nine0313 In a sparsely populated place, you can arrange a whole "restaurant" for birds. Under a common large canopy, the main feeder is placed in the middle, and pieces of bacon, bunches of berries and weeds, various packages, etc. are hung around the edges. In this case, many more birds can feed at the same time. Here it is better to make several small feeders than one large one, because tits are very aggressive towards relatives. At the same time, 1-2 birds can be on the feeder.
Tit feeders can be placed everywhere. They will find them both in the forest and in the city center on the windowsill. Bullfinches, goldfinches, tap dancers, siskins are more careful. It is better to feed them on the edges, in large parks, in wastelands. Bunches of weeds and berries are tied on the branches of bushes or trees not high from the ground. You can even stick them in the snow. For waxwings and thrushes, bunches of berries are also hung on branches or near large feeding tables. Don't stop helping until spring! Birds will soon get used to your "dining room" and will rely on this source of food.