How to make a homemade dance floor
How to Build a Dance Floor
Home / Latest Posts / Life / Party Ideas / How to Build a Dance Floor
By: Leigh Anne Wilkes
This tutorial will show you how to build a dance floor using 2 x 2’s and sheets of plywood. So easy and less expensive than renting one.
I shared with you in a previous Wedding Carnival post the story of our dance floor. When we decided to book a live band for the Wedding Carnival I thought we needed a dance floor. My husband did not. We have a large backyard and plenty of grass and he thought dancing on the grass would be just fine.
I am not easily dissuaded or discouraged.
I got on line and immediately started pricing dance floors from rental companies. They are not cheap, between $700-800 for the size we needed. It wasn’t in the budget so I decided I needed to get creative.
To make a somewhat long, 5 month long story short, I had a dance floor and then I didn’t have a dance floor, I had a dance floor and then I didn’t. In fact I thought I had a dance floor until the Sunday before the Wedding Carnival. It fell through – five days before the event.
Remember I am not easily discouraged so I decided we were going to build a dance floor. Or rather my daughter Cali and her friend Hannah were going to build me a dance floor (with some help from dad of course.)
By this time I had totally broken Jim down and he agreed so we headed to Home Depot on Monday night (the Wedding Carnival was Friday).
Dance Floor Supplies
- 6 sheets of 1/2″ plywood
- 30 eight foot long 2 x 3’s – cut 18 of them into two 45″ pieces (you will have pieces leftover) This will leave 12 of the boards 8 ‘ long. They cut them for free for you at Home Depot.
- Nails and hammer
- Floor Paint and supplies for painting
- Painters Tape
- 6 Mending plates to join the pieces together
How Big is the Dance Floor?
The dance floor measured 12 x 16 and was created out of 6 sections that were 4 x 8 which is the size of a sheet of plywood.
How to Build A Dance Floor
The whole neighborhood got involved or enjoyed watching the process taking place out in front of our house.
The above photo is about how involved Tessa got – she held a hammer for a photo but she was working full time so we need to cut her some slack.
- Create 6 frames from the 2 x 3’s that measure 4′ x 8′.
- Add four support pieces to each frame
- Nail a sheet of plywood to the top of each frame. Nail it down along the edges and across the support pieces.
- The moms got involved in this step of the process. Had to bring in the big muscles!
How to Paint a Dance Floor
The next step was the painting process. I decided that I wanted the floor to be checker board to go along with the carnival theme so I purchased black and white floor paint. We primed the boards first and then added a coat of white paint to each section.
Yes, I sat in a chair and watched it dry! I like watching paint dry.
After it was dry, the girls used blue painters tape to tape off the squares. The squares measured 24″ x 24″ so each 4 x 8 section had 2 x 4 squares.
Using small foam rollers the girls rolled the black paint into the taped off squares.
We waited for the paint to dry, removed the tape and we had a dance floor!
Finally, we numbered the pieces so that we knew how to put it back together once we moved it into the backyard.
The mending pieces were hammered into to hold the pieces together.
How Much Does It Cost to Build a Dance Floor
Total Cost of Dance Floor (including paint but not including labor) Approx. $300.00.
It was perfect and it was a wonderful addition to our carnival and YES, we needed a dance floor. Even my husband admits that now. It added such a fun element to the carnival and really got people dancing.
Who wouldn’t want to dance on a black and white checkerboard dance floor!!!
Reader Interactions
Build Outdoor Dance Floor on Ground
If you're wondering how to build a dance floor on uneven ground, then consider this DIY dance floor option, the quick answer is you should check into portable dance floors from Greatmats.
One of the great advantages of portable DIY dance floors is that they can be used in many different locations, so you can literally take the dance floor with you. Whether you're setting up a dance floor for a special performance or need a dance floor for a wedding or other event, you may find yourself in search of flooring for dance that can be used outdoors.
DIY Dance floors are versatile, but they aren't all versatile enough to be used on grass. Grass poses a number of different challenges. First of all, you'll need an outdoor dance floor on uneven ground that can withstand moisture without being damaged. Secondly, outdoor use means that you'll need a floor that can withstand UV rays. This article can inform how to build a outdoor dance floor on uneven ground.
Don't worry, though - at Greatmats, we understand the importance of being able to install a DIY dance floor over grass. That's why we stock a number of suitable temporary dance floor products that can give you the versatility that you're looking for. This article can inform how to build a portable outdoor dance floor on uneven ground.
Necessary Features for A DIY Dance Floor on Uneven Ground or Grass
Waterproof Flooring: Make sure that any dance floor you consider for use on top of grass is fully waterproof. Even if you plan on covering the floor with a tent, there will still be moisture in the grass which a non-waterproof floor could absorb. We offer plenty of waterproof flooring options that are suitable for outdoor use.
As an added benefit, if you're working with waterproof flooring, it's no big deal if a guest spills a drink. Cleanup is easy.
If the ground is uneven, you'll need to provide a surface to help level it out before installing a dance floor, such as a waterproof composite mat system with strong interlocks. If you are confident that the ground won't get wet, simple plywood may do the trick to create a stable subsurface.
Shop Waterproof Flooring
UV Resistant Dance Flooring on Grass
Even a temporary outdoor dance floor on grass will be exposed to UV rays, which can cause your average flooring to fade, and possibly degrade the quality of the flooring over time. Look for a dance floor that has been treated for UV protection so that it can safely be exposed to the sun.
Portable DIY Dance Flooring
When you're working with a grass area, chances are you won't have a flat floor to wheel a flooring cart over. This means you'll need to carry the dance floor, so the portability of the floor is a major factor.
Modular dance flooring tiles are an ideal solution. These tiles are conveniently sized and easy to lift and carry, so even if you're installing the floor in a large field, getting the flooring into location won't be an issue. This will make installing the portable outdoor dance flooring on uneven ground or grass, and depending on the size of your floor, it's a task that a single individual can perform; no need for a professional installation. If you're attempting to install an outdoor dance floor over uneven ground, you may want to consider first laying down a layer of plywood, ground protection mats, or composite mats to level out the surface and prevent tiles from separating.
Easy DIY Dance Floor Installation
When you're working with tiles, you'll want a flooring product that connects together easily. Most of our tiles have a snap together or tab and loop closure design. Either of these systems is easy to use, and lets you quickly connect and disconnect tiles. This means you can quickly assemble the dance floor on grass, giving you plenty of time to finish with the rest of your event preparations.
Additional Tips for Choosing the Right Portable Dance Floor on Grass
We outlined a few specifications above about what to look for in a dance floor that will be installed on grass, but there are a few other tips you should know about choosing a dance floor for any event or venue.
- Consider the type of shoes dancers will be wearing - Footwear, particularly high heels, can damage some types of dance flooring. Make sure you select a product that-s appropriate for what people will be wearing.
- Think about the aesthetic that you want - Are you looking for a classic floor with a wood grain finish? Or is a more generic tile suitable for your needs?
- How large of a dance floor on grass will you need - How many dancers will you have, and how large does your finished floor need to be? Remember, you can always add or remove tiles to customize the size and dimensions of your floor during different events.
- Think about additional accessories you'll need, like ramped edges. Many of our products are available with ramped edges for safety, and for an overall clean finish.
Dance Floor on Grass - DIY Tile Options
Portable Dance Floor Tiles: Our Portable Dance Floor Tiles are versatile enough to be used both indoors and outdoors. These tiles are UV treated, so they'll resist fading when used outdoors. The tiles fit together tightly so you don't have to worry about them pulling apart while in use, and the commercial grade vinyl top surface is durable enough to hold up to serious dancing.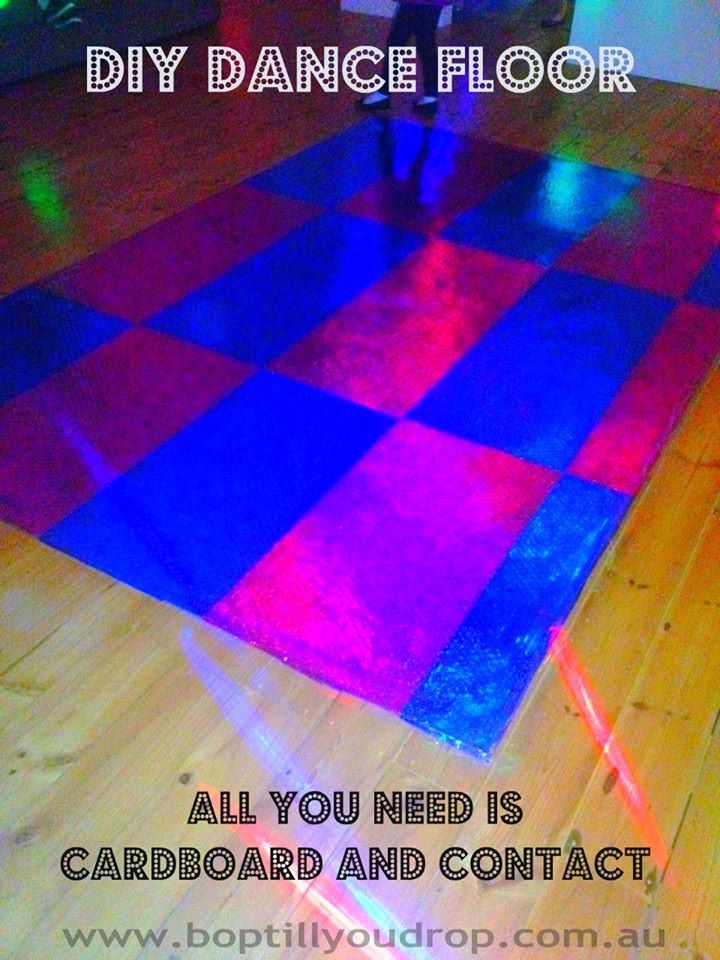 Ramped border edging is available to create a clean, finished edge that is both safe and attractive.
One major benefit of these tiles is in their construction. The tiles themselves are built on a raised base, so air and moisture can circulate freely beneath the tile's surface. This helps to prevent water from working its way up to the actual dancing surface, even when the tiles are used outdoors.
Sized at 12x12 inches, these portable dance floor tiles are easy to handle and transport. You can vary the size of the floor by setting up just some or all of the tiles, and can also customize the floor's dimensions according to your needs. The tiles fit together quickly and easily, and you can assemble a 10x20-foot dance floor on grass in just minutes. They can be installed over grass, but note that they're only intended for temporary outdoor installations and do still require a hard, flat surface. Significant bumps, spongy ground and/or mud in you grassy surface can cause the installation to become difficult and/or uneven.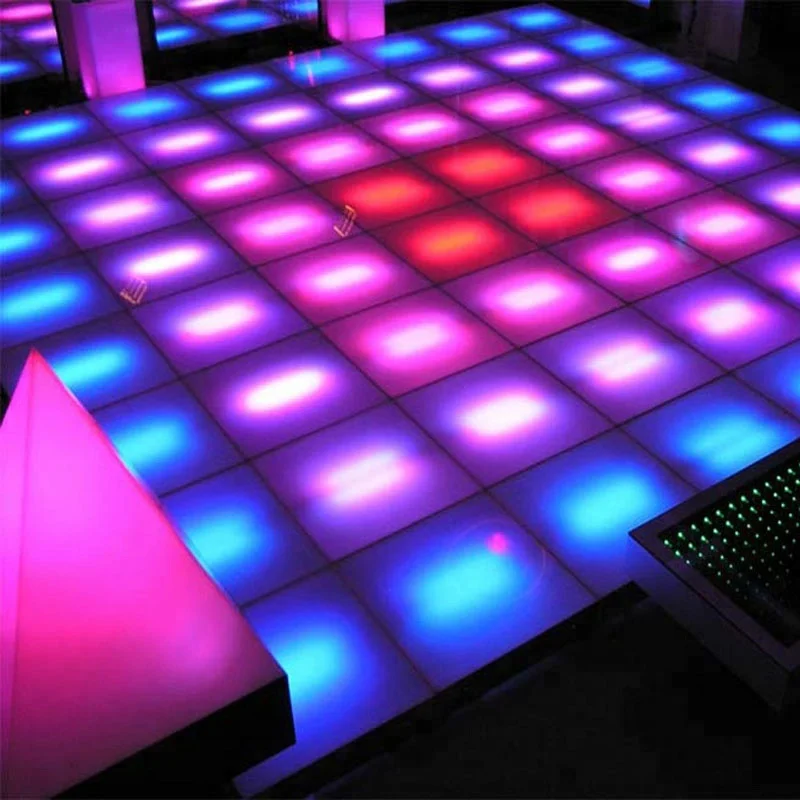
With a choice of eight different finishes, including six eye-catching wood grain options, you can have a beautiful floor suitable for any event.
Shop Portable Dance Floor Tiles
Portable Outdoor Floor Tiles
For a highly durable option, consider our Portable Outdoor Floor Tiles. These tiles are extremely strong, and can even support the weight of vehicles. While they don't offer the traditional wood grain finish of a dance floor, they are highly versatile, making them a great investment for event facilities.
These tiles are both waterproof and UV resistant, so they can be safely used outdoors. Their unique hinge system makes installation a breeze, as it quickly locks into place for a secure fit that won't separate during use. Measuring 3/4 inch thick, these tiles are made of a polypropylene plastic that is strong enough to easily support large crowds.
Perhaps the greatest benefit of these tiles is the fact that they can be used over many different existing surfaces, including uneven terrain. There's no worrying about finding a perfectly flat space, which will save you both time and stress. You can place these tiles directly on top of grass, and the tiles can even be rolled up for easy storage and a faster installation the next time. Just keep in mind that the tiles will, to a certain degree, conform to the ground it is sitting on, so you will not have a completely level dance floor on grass if the subsurface is uneven.
Shop Portable Outdoor Floor Tiles
Durable Dance Flooring Tile
Want a durable dance floor on grass with the look of real wood? Our ProCourt Gym Flooring Tiles offer you both. These tiles feature a generous 20-mil wear layer that is both scuff and stain resistant, ensuring the tiles continue to look great. Please note that these tiles aren't UV treated, and should only be used outdoors temporarily.
These tiles offer a raised flooring surface which will grip and accommodate grassy surfaces. They snap together easily for a fast installation, and are designed to withstand repeated installations.
Shop Portable Outdoor Floor Tiles
What You Need to Know About Installing a Dance Floor On Grass
While the above products are suitable for use as a portable outdoor dance flooring on uneven ground, it's important to realize that these products are only intended for temporary use. Don't leave them in place longer than necessary, and if possible, install a tent or find another way to protect the flooring from the weather, which will prolong its life.
When deciding where to install the dance floor, look for an area that is as flat and as level as possible. Installing the flooring on an uneven surface may make it difficult to get the tiles to connect correctly, and can place unnecessary stress on the tiles. It may also make the flooring itself uneven, and an uneven dance floor on grass can be dangerous for dancers.
You'll have the best results if you install the flooring over grass that has been mowed, since it will create a firmer, flatter surface than you'll have if you're working with grass that is longer. Placing a layer of plywood under any of these tiles will definitely help create a flatter, more stable and safer dance surface as well.
When it comes time to uninstall the flooring, try to do so when the flooring is thoroughly dry. If the weather isn't cooperating, then dismantle the flooring and allow it to dry indoors before stacking it and storing it away in a closed space, like a closet.
Most of our dance flooring tiles are designed to be easy to clean, but be sure to review the specifications for the particular product that you purchase. In most cases, you can damp mop the floor with a household cleanser.
Please don't hesitate to contact our great customer service team if you have any questions as you explore our many outdoor dance floor options.
Bar, dance floor, private rooms...
Living room, sofa, or home cinema. When closed, the curtains create the desired blackout in the cinema hall. An element of luxury - long curtains in the Austrian style, with folds swirling on the floor. A bright red flower pot will eventually be replaced with a calmer color View across the dance floor to the home theater area. The composition and proportions of colored architectural decorations are harmoniously connected even with the size of the laminated parquet boards. When you enter the apartment, wide apartments with a dance floor in the center gradually open up from behind the column. Warm orange floors, cooler greenish-yellow walls with pink décor, and a very cool ceiling in the shade of the evening sky. These slanted pylons frame the entrance to the private area. A wooden door leads to the nursery, opposite the door to the dressing room. There are also two columns out of four, marking the boundaries of the dance floor View from the sofa to the living room and dining room. A long diagonal, marked by the laying of parquet, permeates the entire guest area - from a large TV to a podium for decorative sculpture in the farthest corner The pale lilac square on the ceiling is an exact projection of the square of the dance floor below it.
 The avian green lampshades of the chandeliers blend seamlessly into the pale lemon background of the ceiling. Bar counter on the border of the kitchen and the dance floor. The barrier under the counter is laid out in half a brick. The entire kitchen is on a low podium. Pull-in here added expanded clay Italian dining table-transformer with chairs PIANCO bought in the MODERNO salon. For a large number of guests, it is placed parallel to the kitchen and moved apart. The classic combination of pink and gray is an almost win-win option. Before the renovation, there was a storage room. Sufficient area, proximity to water supply risers and the presence of a window, albeit a small one, made this room suitable for a kitchen. Kitchen furniture with sink - ARAN NEW FORM Guest bathroom. The plumbing box hides not only the piping system, but the body of the washing machine (model WM5487A, SIEMENS) is almost completely “drowned” in it, the same black as the tiles on the podium. A Swedish toilet (model Marly 8541-11, GUSTAVBERG), a similar one was installed in the bathroom.
 Compact washbasin - model Nordic 590-4, GUSTAVBERG; faucet - GROHE Bedroom, beginning of the private area. A door with glass inserts leads to the dressing room, then the bathroom, and behind the bathroom, the nursery. Cozy and very comfortable The podium is a capacious container for storing things. The steps are sheathed in the same laminate as the floor. Bed ZANETTEOS and mattress (model "Favorite", 160200cm) were bought in the salon "ANGELINA". Armchair on the podium - from IKEA Loggia. A flat walnut plinth was chosen to match the furniture. The podium, lined with soft lilac carpet, is the property of the hostess, here is her dressing table Bathroom. One of the doors leads from here, through a small patch of parquet, to the nursery. There is the same laminate, but a bluish tint and laid parallel to the walls The nursery was conceived by the owners as an autonomous, personal zone of the child. It was designed as simply as possible, without burdening those constructivist0003 sky elements that abound in the rest of the premises.
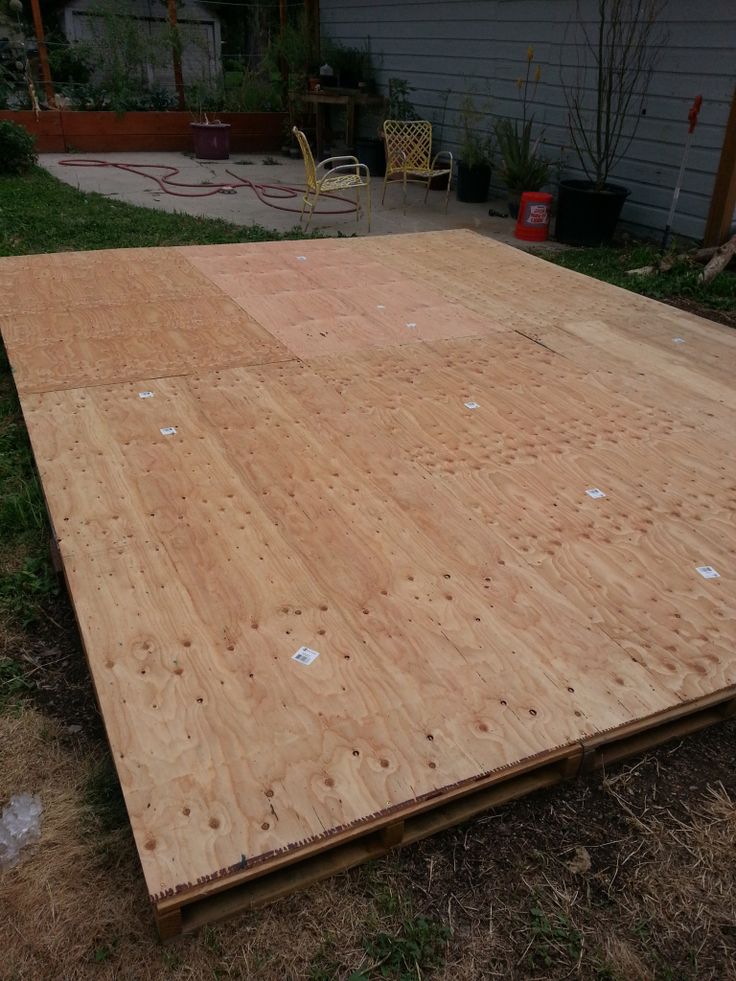
Until recently, this apartment was a typical three-room apartment, but now it has four rooms and everything is different. The new owner and hostess are young and hospitable people. Friends they decided to take "wide leg" and for this they wished to have even a small dance floor. The architects divided the apartment into two autonomous parts - guest and private. With such a layout, nothing interferes with the correct regimen of a small child
The client's desire is almost a law
In the process of discussing the concept of the future apartment with the owners, the architects determined several main requirements for the interior. Young spouses dreamed of a minimum number of cabinets and, accordingly, a minimum of things. For things that are required from time to time, the customers intended to create a storage system in the podium. (This is now fashionable. It is convenient if the ceiling height is at least 2.7 m.) The podium was built in the bedroom, bicycles, sun loungers, skis, etc. now "live" in its depths. Such storage facilities are an alternative to the previously common mezzanines, only they are located not at the top, but at the bottom. Like the mezzanine, the podium does not take away the now expensive square meters of living space from the apartment.
In the three-room apartments of the houses of this series there is a small utility room (pantry) with a small window. Its owners immediately decided to turn it into a kitchen. Bringing communications here is not difficult, since behind the wall there is a guest bathroom with hot and cold water risers and a drain. (Permission for the redevelopment was easily obtained, as the new "wet" area is not located above the living quarters, but above the exact same pantry). Akukhnya, from where there is access to the loggia, was transformed into a bedroom. Now the former three-room apartment became a four-room apartment.
Taking into account the wishes of the customers, the architects placed the bed with a headboard to the window and attached a loggia to the bedroom. Note that this connection was made without dismantling the opening leading to the loggia. The project also complied with such a condition necessary for attaching an insulated loggia, such as installing a sliding partition door across the entire width of the opening. This "accordion" partition will be installed after the repair is completed.
Idea after idea
Joint reflections of customers and architects on the reorganization of the apartment led to the birth of a whole bunch of ideas. The guest half of the apartment was planned to be divided into three parts: the dining area adjacent to the kitchen, the dance floor and the dimmed sofa-cinema area. Of course, young customers wished to make the dance floor the semantic center of the living room and set the architects the task of highlighting this patch with architectural and design means. So the dance floor became (so far theoretically) the key moment of the composition of the whole apartment.
With this baggage of master's wishes, the architects set to work.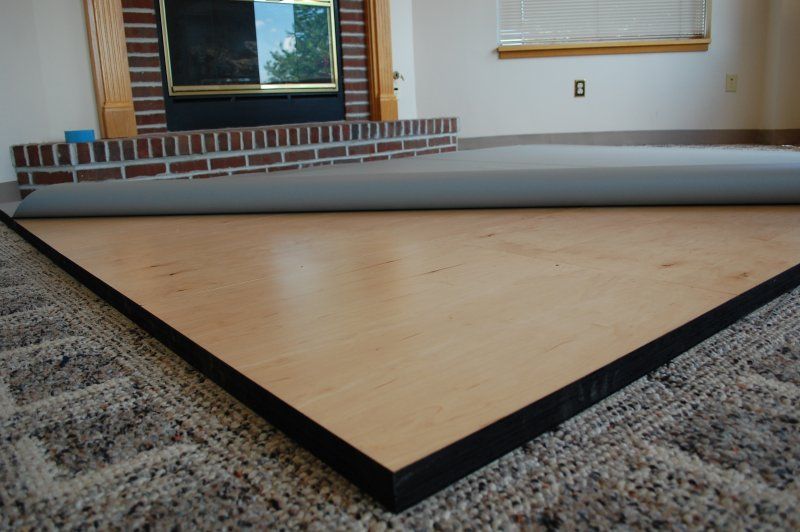 As a result of a long creative search, a walk-through bathroom was offered to customers. Agree, in a typical apartment you rarely see a bathroom with two doors. Developing the idea, they also came up with a small dressing room, also through and also with two doors. So four rooms lined up in a chain: a nursery, a dressing room, a bathroom and a bedroom. Since the enfilade was assembled around the bathroom (more precisely, around the water supply and sewerage riser, which cannot be moved to another place), isolated, private chambers closed within their limits were obtained. Inside them, you can move from one room to another without leaving the guest area. It is not surprising that even at the preliminary design stage, this idea was accepted by Naur's customers. At the same time, 1.5 m 9 was attached to the hallway0020 2 "cutting off" them from the landing (permission has been obtained).
Farewell, walls!
In general, events developed according to the standard scenario, although there were some minor problems during the repair process. For example, dissatisfied with the quality of construction of his panel house, the owner spoke about the need for tighter sealing and insulation of external seams. For the sake of this, a sealant for outdoor work was purchased. A specialist climber was invited to perform the operation.
When the project was ready, approved, approved and approved by the BTI, they began, as usual, to break down the old partitions. Then they built (or rather, assembled from a frame and plasterboard sheets) new sections of the walls, creating a planned layout and decorating the surfaces with original architectural details. They cut and reinforced with steel structures new openings in the load-bearing walls - one to the bedroom, the other to the kitchen (in addition to the one already available). The opening between the living room and the dining room was raised and widened (from 1.31 to 2.22 m). Thanks to this, a large, unobstructed light space opened up - from the living room window to the dining room window opposite.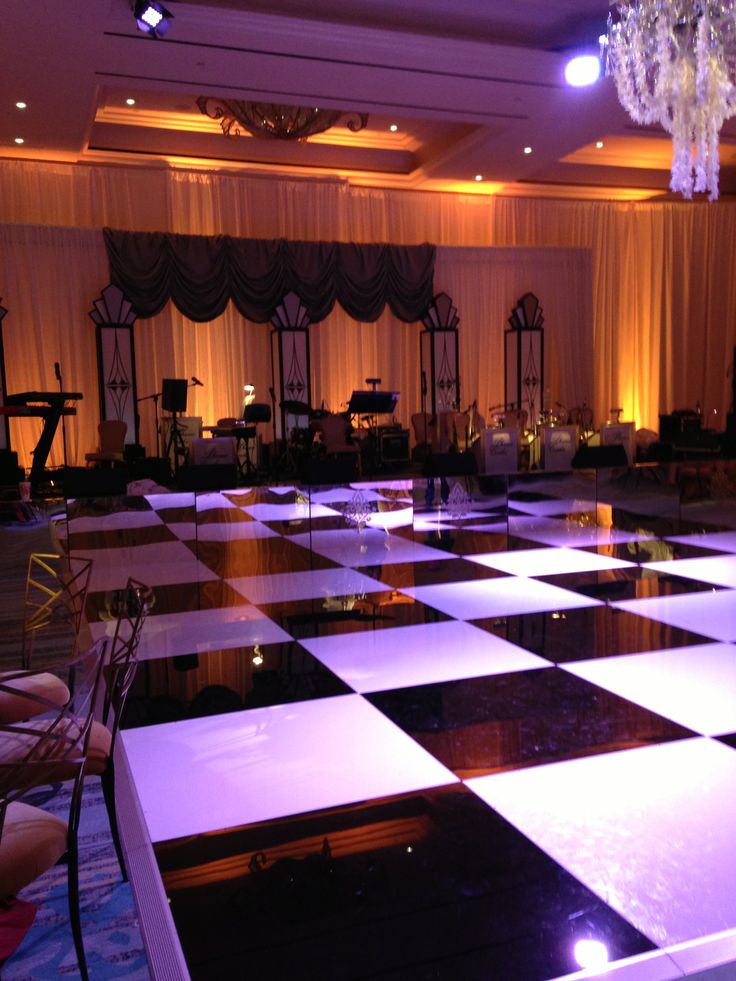
On their own initiative, driven by a thirst for excellence and further creativity, the architects conceived an original design for the dance floor. The large space of the living-dining room stretching across the entire width of the house would have turned out to be monotonous and boring among the long parallel walls if the architects had not deployed the “dancing square” diagonally to the load-bearing walls. The location of the dance floor is punctuated by columns at the corners and supported by numerous architectural details. These are plasterboard diagonal niches, shelves and visors, decorative rustication on the walls, inclined pylons.
Electricians and plumbers worked in the apartment in the process of implementing the architectural concept. The first did the wiring under the screed on the floor, in the walls and on the ceiling. The second installed communications for the bathroom, bathroom, new kitchen, as well as the heating system. Then the walls and ceilings were finally sewn up with plasterboard and the floor was leveled with the Vetonit mixture (OPTIROC, Finland).
Between us painters...
Here, when the turn of plastering and painting work came, a lot of time, creative and physical effort had to be spent on finding the exact color solution. Since the apartment was decided to be made multi-colored, there was a danger of spoiling the interiors by mechanically painting the walls with colors that were not tested “on the spot”. Therefore, further samples of shades were no longer made on sketches, but directly on the walls. The choice of the exact color for a particular wall is a very delicate matter, requiring a good imagination, flair and taste. A professional designer knows that just a little mistake in the color or tone of the walls is enough, and the interior is ruined. Such mistakes are not uncommon. Saving paint for trial tinting, they stop at the very first options, but after entering the finished premises, they understand that the color needs to be changed. Therefore, we first bought doses of trial paints, and only having finally decided, we acquired the desired colors in full.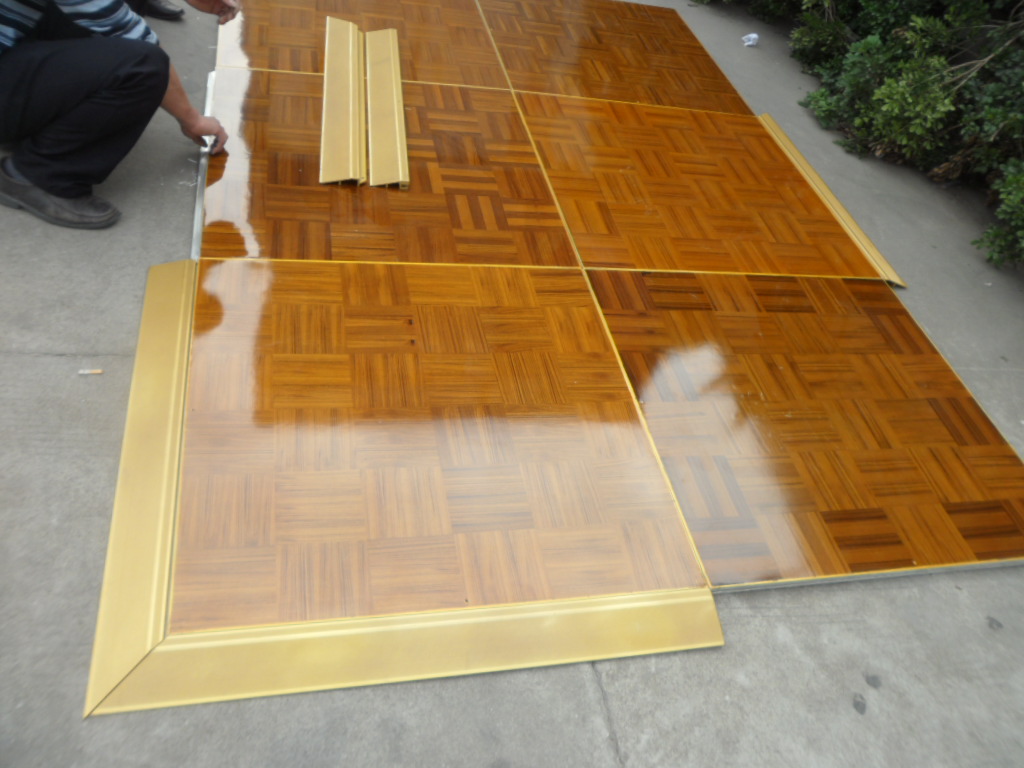
Even more difficult is the definition of the correct combination of two, three, four colors. It was in this situation that our architects found themselves in company with customers who took an active part in this artistic process. Spots of paint were rolled out directly on the walls and ceilings, experimenting on them as on a palette. The architects offered many options for color combinations, for which they spent several liters of different colors, mixing them and adding different amounts of white. The paints themselves (Euro7, TIKKURILA) were bought at the OLD MAN HOTTABYCH store.
Having found the right color (pink and lilac tones on a pale sand-lemon background), the walls and ceilings were plastered (having glued the seams with a mesh), primed, the load-bearing walls were plastered, leveled and, finally, "dressed" in the desired colors. At the same time, tilers tiled the walls and floor of the bathroom and guest toilet, as well as two walls of the kitchen. The walls of the nursery, lined with a mixture of "Vetonite" (OPTIROC), were covered with wallpaper. Note that the architects designed the square of the dance floor with four columns cast from plaster. Each of them was assembled and glued together from two hollow halves ordered from TOROS. The builders cut the delivered blanks to the required length, glued them and mounted them in accordance with the project to the screed, walls and ceiling.
Laminate, granite and tiles
After that it was the turn of finishing the floors. In the living room, dining room, bedroom, nursery and, of course, on the dance floor, laminated parquet was laid. Of all the possible options, we chose the most wear-resistant - the one that is usually laid in offices and public places. After all, the floor will have to experience considerable loads - children's games, guests, dances ... The diagonal direction of laying the floor is emphasized by inserts of boards of a darker tone and, according to the plan of the architects, reveals the main axis of a large living room - from the sofa to the dining room.![]() At the end of the "path", in the far corner of the dining room, they mounted a small podium against the background of colored rustication. This is a pedestal for a future decorative composition - an abstract sculpture made of chrome-plated curved pipes and metal balls. The sculpture will be illuminated by a small spotlight and a bright dominant will complete the entire architectural structure of the interiors of this zone. Apoka the sculptor is working, and the owners are saving up money for a masterpiece, it will be possible to put a Christmas tree on the podium at Christmas time. In anticipation of the influx of guests, in the hallway, in the kitchen and on the floor of the loggia, they laid the most resistant, almost eternal material - ceramic granite (produced by MARAZZI, bought in the "SHIK" store). On the contrary, the owners wished to cover the podium in their bedroom with soft carpet. The bases of the columns around the dance floor are interestingly lined - this “variation on the plinth theme” is assembled from pieces of a baguette and ceramic tiles.
At the end of the "path", in the far corner of the dining room, they mounted a small podium against the background of colored rustication. This is a pedestal for a future decorative composition - an abstract sculpture made of chrome-plated curved pipes and metal balls. The sculpture will be illuminated by a small spotlight and a bright dominant will complete the entire architectural structure of the interiors of this zone. Apoka the sculptor is working, and the owners are saving up money for a masterpiece, it will be possible to put a Christmas tree on the podium at Christmas time. In anticipation of the influx of guests, in the hallway, in the kitchen and on the floor of the loggia, they laid the most resistant, almost eternal material - ceramic granite (produced by MARAZZI, bought in the "SHIK" store). On the contrary, the owners wished to cover the podium in their bedroom with soft carpet. The bases of the columns around the dance floor are interestingly lined - this “variation on the plinth theme” is assembled from pieces of a baguette and ceramic tiles.
Sconces, lanterns, spotlights
Electrical distribution panel with automatic devices (VIMAR) was installed in the same nook attached to the apartment, which used to belong to the landing. Now the home electrical control panel is located to the right of the front door. The lighting system is replete with a variety of options, an abundance of decorative and functional lighting. Special electrical cords with a transformer, cartridges and a set of argon bulbs for hidden lighting (mounted deep in the ceiling visors) were purchased from the AMPIR company. On two meters of such a cord, there are 15 small lamps. Due to their frequent arrangement, the illumination is very uniform - it emits a soft, calm glow.
A floor lamp and mobile ceiling lamps were installed in the nursery - two so-called LVOS (low-voltage halogen lighting systems) from the company PAULMANN. They are a combination of mirror reflectors with a scattering of light bulbs in small lampshades made of multi-colored glass. One such garland is attached to the busbar system; the other, parallel, is on red stretched self-supporting wires.
Small directional spotlights were mounted above the dance floor, three silvery lamps on long cords above the dining table, and compact sconces in the bedroom and dining room.
The ceiling above the square of the dance floor is decorated with a flat plasterboard structure, also square. Outside built-in 8 halogen lamps. The same ones are in the ceiling of both bathrooms, in the hallway, in the ceiling peaks of the living room and bedroom, in the kitchen and in the attached loggia. This whole thoughtful ensemble is crowned by three main chandeliers - in the sofa, above the center of the dance floor and in the dining room. The owners have the opportunity to turn on the lamps in a variety of combinations, varying the sources, intensity, and direction of artificial light.
Nursery, bedroom, kitchen
Wallpaper pasted only in the nursery. From here they put the only wardrobe in the apartment - voluminous, corner, with a mirror. It holds all the children's things and a large supply of toys. This cabinet with numerous shelves inside, as well as shelving in the dressing room and the countertop of the bar counter, were made to order by the sketches of our architects by Mr.DOORS specialists.
The space on the podium in the bedroom was given into the possession of the hostess. From a wide, wall-length window with shutters, an even diffused light pours onto her dressing table with a mirror. Instead of a bedside table for storing things, a second narrow podium was constructed along the wall. Its upper plane opens like a hatch. The stand for the bar counter is made of brick (half-brick), according to the sketches of the architects. Kitchen furniture with a short working plane - Italian (ARAN NEW FORM), bought and installed for $2350. We chose the most compact models, cutting out literally centimeters so that the equipment takes up less space in a small kitchen. All built-in appliances - microwave, oven, extractor hood, refrigerator, hob and dishwasher - from BOSCH. Faucet - GROHE.
Decor and color
A creative search for the right colors was crowned with a successful find. This is a combination of purple, lilac, pink shades on the main light background of lemon-ocher walls and ceilings. Rich color accents in this sophisticated major palette are walnut doors, a golden-amber "field" of laminated parquet and the same rich tone of wooden dining furniture. As a result, the somewhat rigid constructivist structure of the interiors was balanced by the soft color of the walls and ceiling, the streamlined shapes and colors of the furniture, curtains, and the lighting system. The space, although divided into zones, is not fragmented. The interiors are united by a common color scheme, recruited from “spots”: curtains, parquet, decorative architectural ceiling structures, and furniture. The laying pattern of the laminated parquet follows the design lines of the ceiling.
The finished sofa and armchair (made by the domestic factory "MARTA") seemed to be waiting for our heroes to buy them - so exactly the colors of the upholstery correspond to the color of these interiors, and the squat proportions correspond to the shapes of the ceiling visors.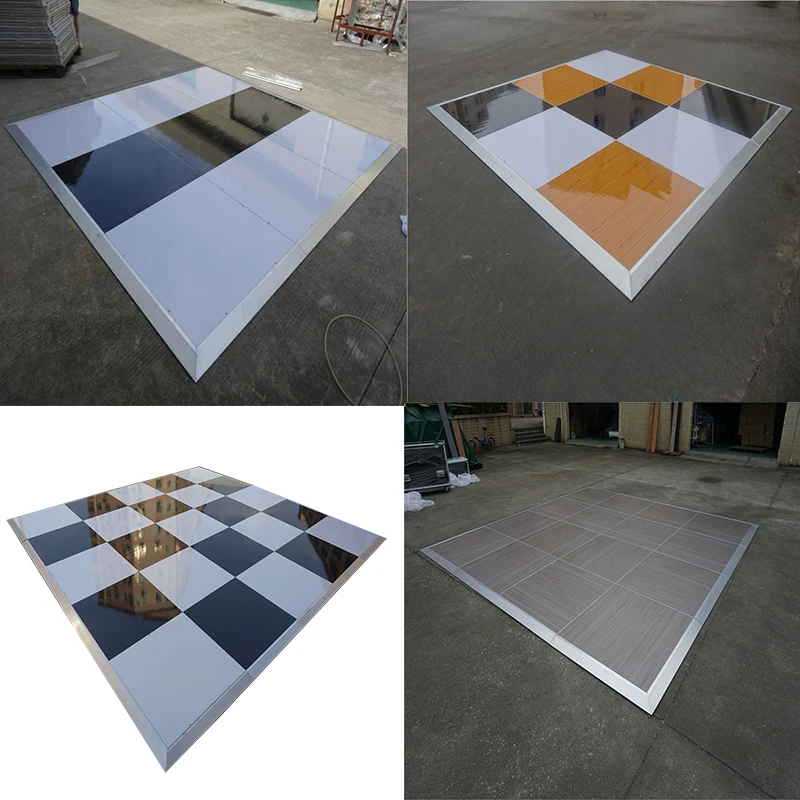 Spots of neutral gray (pearl, lead, anthracite) finally balance the entire color system - these are curtains, an armchair, upholstery of chairs, gray granite in the kitchen, silvery metal of equipment.
The selection of finishing materials, plumbing, furniture and equipment was carried out on the principle of a reasonable ratio of price, quality and design. Therefore, in the search process, sometimes significant financial, design, or construction problems arose. For example, curtains for all windows were sewn according to the sketches of Olga Lusenkova by a familiar dressmaker. At the same time, fabrics were selected and bought in the "House of Fabrics". And it worked out well.
In essence, the redevelopment, which involves the creation of an autonomous private zone, is suitable for any apartment with two bathrooms, one of which is located between two rooms. These are three- and four-room apartments in houses of some typical series, for example, PD-1, PD-4, P-3M, P-46M, I (491) A, I-9522A, P-30, II-68-03, " Prism", "Bekeron", as well as in monolithic houses.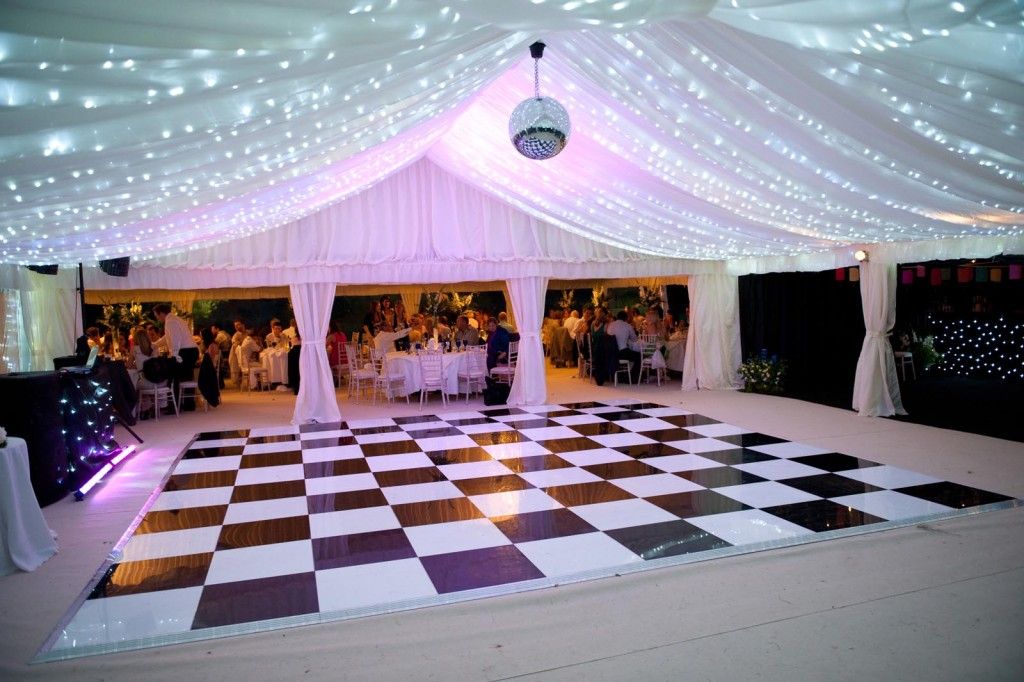 In apartments with electric stoves and a pantry, you can also transfer the kitchen to the pantry and get another living room.
Coordination of redevelopment and reconstruction of the apartment cost $2000. Design work was completed in 1.5 months, construction and finishing lasted 5 months.
Construction, finishing materials, equipment
| Designation | Quantity | Price, $ | Cost, $ |
|---|---|---|---|
| Moisture resistant plasterboard "GIPROK" (with mounting profiles) | 80m 2 | 7.5 | 600 |
| Plastering and adhesive materials | 1 set | 600 | |
| Ceramic tile MARAZZI (Italy) | 20m 2 | 20 | 400 |
| Laminated parquet QUICKSTEP (Belgium) with underlay and skirting boards | 80m 2 | 28 | 2240 |
| MARAZZI matt ceramic granite (for the kitchen, hallway and loggia in the nursery) | 20m 2 | 28 | 560 |
| Ceramic tiles STEULER (Germany) | 15m 2 | 28 | 620 |
| Toilet bowl Marly 8541-11, GUSTAVBERG (Sweden) | 2 pcs. | 180 | 360 |
| Guest washstand Nordic 590-4, GUSTAVBERG | 1pc. | 30 | 30 |
| Washbasin Marly 8541-11, GUSTAVBERG | 1pc. | 60 | 60 |
| Cast iron bath Antares (JACOBDELAFON, France) | 1pc. | 450 | 450 |
| GROHE faucets (Germany) | 3pcs. | 180 | 540 |
| RIVEKO PRO-PLAST windows | 7pcs. | 360 | 2520 |
| Doors with architraves and fittings - BARRAUSE (Italy) | 5pcs. | 300 | 2160 |
| TOROS columns (with delivery) | 4pcs. | 100 | 688 |
| Wiring accessories VIMAR | 1 set | 956 | 956 |
| Radiators | 8pcs. | 80 | 640 |
Built-in wardrobes (in the dressing room, children's room, bathroom) and bar counter - Mr.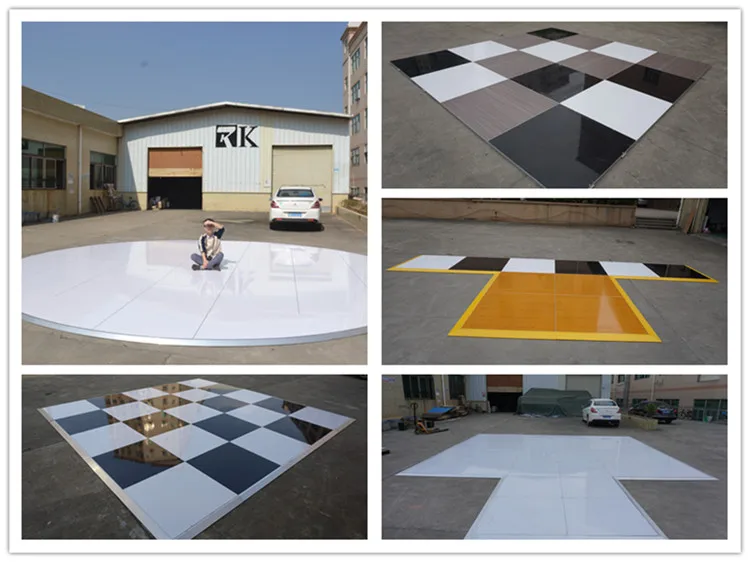 DOORS (Russia) DOORS (Russia) | - | - | 2955 |
| TOTAL: | 16367 | ||
Construction, installation and finishing works
| Type of work | Volume | Cost, $ |
|---|---|---|
| Preparatory work (dismantling of walls and bathrooms, cutting and reinforcing new openings, garbage removal) | - | 800 |
| Creation and lining of floors (installation and leveling of screed, waterproofing, laying laminate and floor tiles, installation of skirting boards and thresholds) | 100m 2 | 2500 |
| Erection and finishing of walls (installation of sections of walls and partitions; installation of decorative peaks, shelves and racks; plastering, tiling and painting; wallpapering) | - | 5200 |
| Ceiling finishing (ceiling plastering, plastering and painting) | 100m 2 | 1900 |
| Climber's work on sealing external seams between panels along the perimeter of the apartment (with material) | - | 200 |
| Electrical work (installation of electrical wiring; installation of an electrical panel with automatic machines; laying wires in wall strobes, under the screed and inside ceiling structures; installation of sockets, switches) | - | 1500 |
| Plumbing works (supplying communications to water points, installation of plumbing fixtures and equipment, installation of a washing machine and dishwasher, installation of a water heating system and installation of radiators) | - | 1800 |
| Trucking | - | 600 |
| TOTAL: | 14500 | |
| Plan before reconstruction | Plan after reconstruction |
The editors warn that in accordance with the Housing Code of the Russian Federation, the coordination of ongoing reconstructions and redevelopments is required.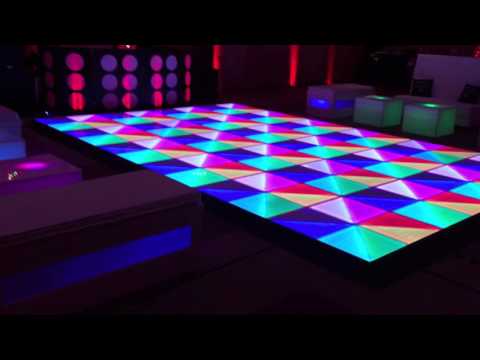
HOW TO BE YOUR OWN WEDDING DJ
Nothing beats live music at a wedding ceremony and reception, but sometimes that's just not an economic reality. A good alternative is a professional DJ, but it can also be expensive. I think you understand what I'm getting at. I'm going to tell you that you can be a candidate for a DIY iPod/laptop DJ wedding. And if so, the dance floor will be filled all night following these tips...
This is a debatable topic, but I can say with some confidence that if you are willing to take the time to plan your soundtrack, you are ready to give up (or prefer to do without) bumbling ringleader and accept the possibility that the end result may not be 100% perfect, you could still fill your wedding dance floor with revelers and save $1,000 or more.
However, saving money is not the only reason why you should make your own wedding music. Some of us just like to control every song that is played for guests. Music sets the tone for the event and showcases your personal style.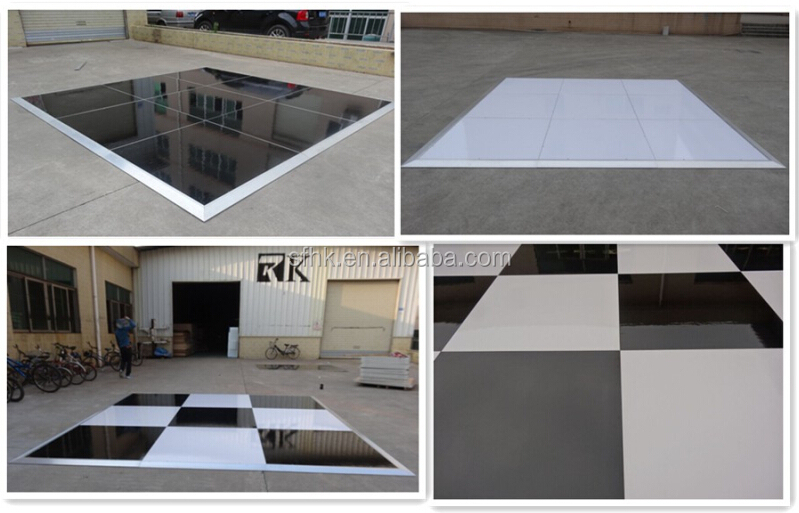 You can do it if you want. Check out these tech tips and tricks to take on musical duties at your wedding.
You still need a human touch
Some people appreciate the attraction of a traditional DJ as the host of the ceremony (introducing the bride and groom as well as their wedding party, telling silly stories, throwing toasts, motivating people to get out of their chairs, etc.).
I don't.
If you're going to do it all yourself, find your noisiest friend to grab the microphone and ask him to direct the action. But a laptop or media player cannot work by itself. You need what my fiancé and I call Music Monitor. This is a responsible, tech-savvy friend who we'll pay a small fee to keep the speakers connected so that the right songs are played from the appropriate playlist in the correct order (shuffle is not allowed at well-organized DIY DJ weddings).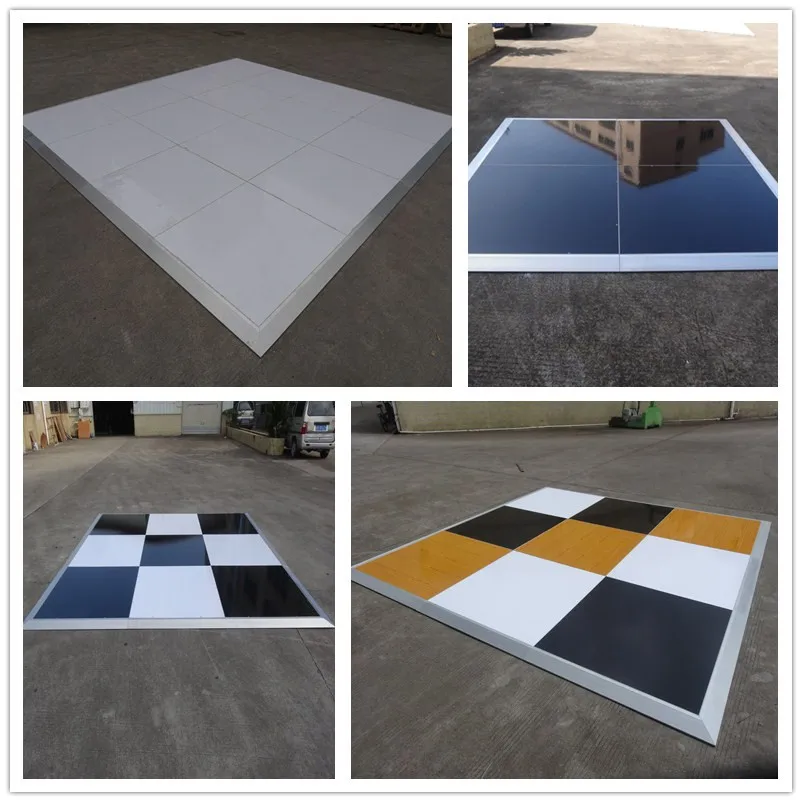
(Image credit: Apartment Therapy)
The Music Monitor will also have to keep cocky guests away from their laptop or iPod: please don't suggest songs during the party (which is why we ask guests to suggest songs to wedding through our wedding website). This friend will not be able to enjoy 100% of the time during the wedding, so we pay him for his efforts. But he won't have to play music all night. Some of our playlists (cocktail hour, lunch hour, dance set) will be over an hour long so he can boogie too.
Get your hands on some equipment
Wedding music can be controlled with an iPod / MP3 player or laptop. It might make sense to use an iPod for the ceremony and then set up a full-fledged portable computer for the reception. In any case, you will need a pair of active speaker systems on stands. You don't want your music to fail - your guests can only feel immersed in your playlist if the speakers can be loud enough.
If you are lucky, you may know a friend/musician who will let you borrow your speakers.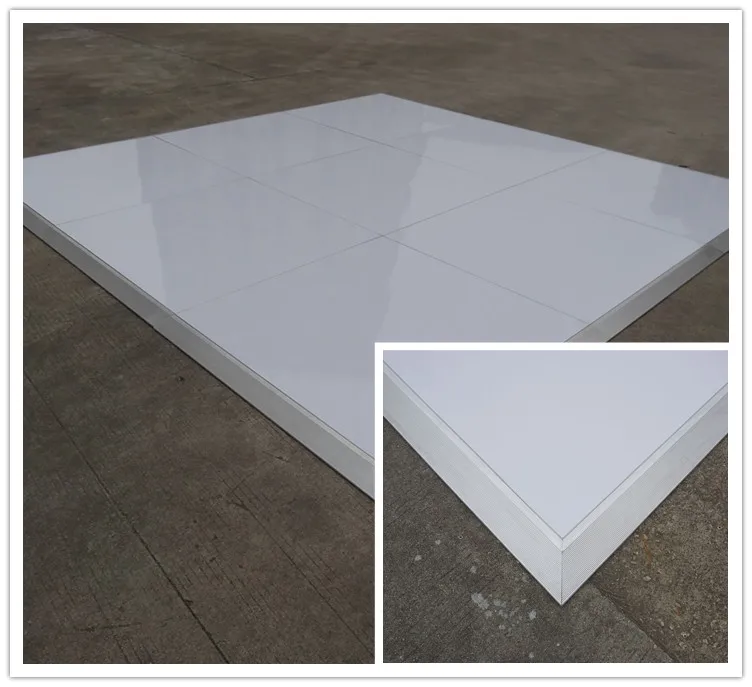 Otherwise, you will have to rent them. We had about 300 dollars. The rental company must create and dismantle them. Our package also includes a simple wired microphone (with an on/off switch, of course!). The officer will use this during the ceremony and we may make one or two announcements during the reception.
(Image credit: Apartment Therapy)
Save Pin it
(Image credit: Apartment Therapy)
angel numbers 1111 valueSave Pin it
(Image credit: Apartment Therapy)
222 angel number
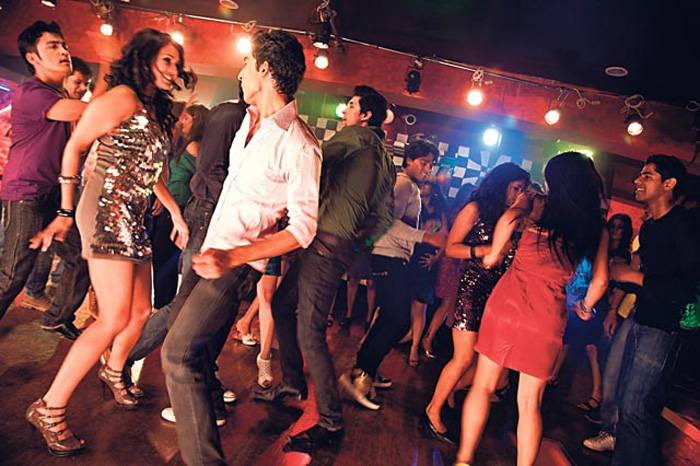
But when it's time to dance, the dance floor only fills up if you fill your playlist with real dance music that many people already know. This means something different for every band and generation, so consider including these crowd pleasers for the first hour: big band, jazz standards, hip hop, 80s pop and Motown, Motown, Motown (I never I have never seen another genre attract so many diverse guests at once). Later at night, when there are only a few friends on the dance floor, feel free to upload a playlist of your favorite genres. If on your wedding day you misunderstood the mood of a particular time period, you can always edit it on the fly.
Does an iPod or iPad sound easier than a laptop? Try this app
Save Funny It(Image credit: Apartment Therapy)
All of the tips we just gave about playlists above have been reworked into a $4.99 iOS app called MyWeddingDJ . The app will even overlay your songs so there's no dead air between tracks. It also makes it easy to skip songs and jump from playlist to playlist if something needs fixing at the moment. MyWeddingDJ actually makes organizing playlists easier than iTunes itself, although it will only play music already stored in iTunes on your device.
Did you DJ your wedding? Let us know in the comments what worked for you. And if you are a firm believer in the talents of professional DJs, remember that I believe too, but not everyone can afford it.