How to do a leg extension dance
Stretches and Strengtheners to Increase Your Extensions
If you’re aiming for a higher développé, chances are you might not be working toward it in the most effective way. “Everybody focuses on the splits. That’s fine, but there are so many other ways to gain flexibility that don’t perhaps overstretch the wrong tissue in your hips,” says physical therapist Michelle Rodriguez, founder and director of Manhattan Physio Group.
“Having a higher extension to the front or side not only requires flexibility in your hamstrings and adductors, but it also requires strength to lift the leg and hold it in that position,” she continues. When working in arabesque, the mechanics are a bit different: Stretching should focus on opening up the front of the hip and creating length, not compression, in the lumbar spine.
Here, Rodriguez offers safe stretching and strengthening exercises for improving your extensions to the front, side and back. Always make sure you’re fully warm before doing any static stretches. If you have a break before développés at the barre, that’s the perfect time to incorporate these exercises.
You’ll need:
- strap or resistance band (optional)
- barre
- physioball
Devant: Stretch
Lying on your back, hold on to your ankle (or loop a strap around your foot, holding an end in each hand) and extend your right leg toward your chest. Keep your left leg extended on the floor, and try to minimize how much you tuck your pelvis. As you pull your leg closer, your pelvis will move a bit, says Rodriguez, but the straighter you can keep your spine, the purer the stretch you’ll get through the hamstring. Hold 60 seconds. Repeat on both legs in slight turnout and parallel.
Devant: Strengthen
Angle into the barre with your right leg placed on it in front of you. Engage your abs and lift the leg a few inches off the barre, without gripping your quad.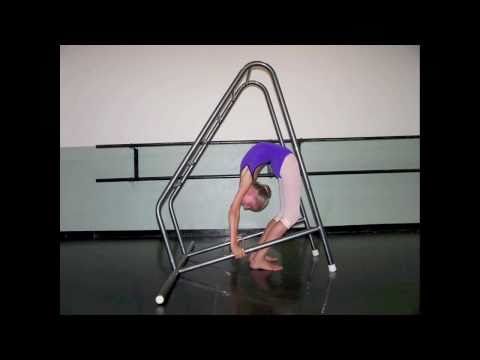 Hold for 2 counts, slowly control to return. Work up to a hold of 4 to 6 counts.
À La Seconde: Stretch
Lying on your back, reach your right leg front and then carry side, keeping it turned out. (Depending on your flexibility, you can hold on to your ankle or use a band.) Keep the pelvis as level as possible. Hold 60 seconds and repeat on the other leg.
À La Seconde: Strengthen
Face into the barre with your right leg placed on it in à la seconde. Engage your abdominals and think of spiraling the leg to maintain your turnout as you lift it a few inches off the barre. Hold for 2 counts, slowly control to return. Work up to a hold of 4 to 6 counts.
Derrière: Stretch
Kneel on your right knee with your left foot on the floor, slightly in front of your left knee. “Zip up” from pubic bone to belly button, says Rodriguez, to activate your abs. Tighten the right glute and slightly tuck your pelvis to stretch the front of your right hip and thigh.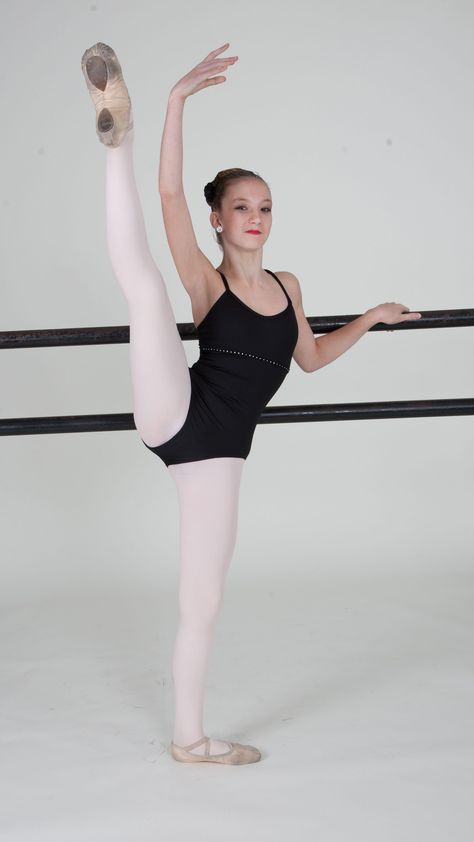 Meanwhile, reach your right arm to fifth, lengthening the torso toward the ceiling. Hold for 60 seconds on each side. If desired, finish the stretch by extending into a slight cambré back, being careful not to compress your lower back.
Derrière: Stretch-and-Strengthen Combo
Face the barre with your right leg in a low arabesque, resting the foot on top of a physioball. With your abs lifted and engaged, roll the ball backwards and plié the supporting leg. Focus on lengthening through the front of your torso and hip, while maintaining space in the lower back. Stay in plié for 2 deep breaths, roll back in and straighten. Repeat 10 times on each leg. To build strength, practice lifting your leg slightly off the ball.
All photos by Emily Giacalone, modeled by Brittany Larimer
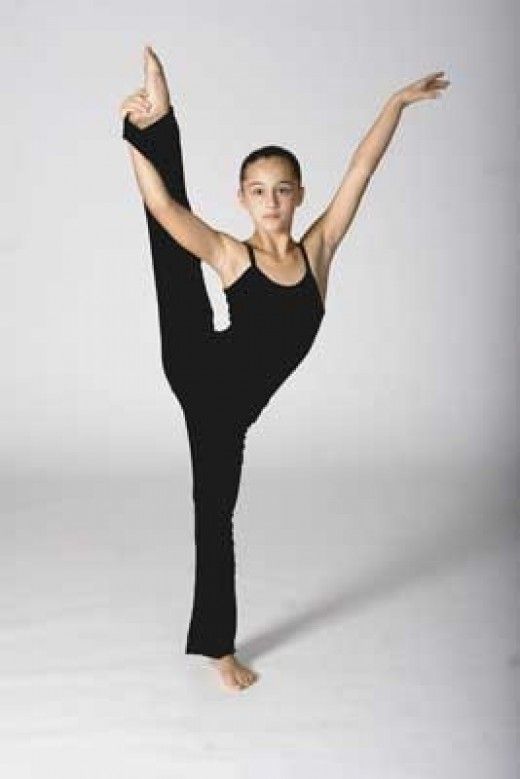
How to get glorious extensions
IT IS July 2002 and I have travelled to Melbourne from Perth to see the Royal Ballet. It is the first time I have seen this renowned company, and also the legendary Sylvie Guillem.
 Fast forward eight years to 2010 and the first image that comes to mind, when I recall the exhilaration of watching Guillem live, is of her developpe to seconde, performed on pointe and held for a seemingly impossible length of time.
Of course, Guillem’s incomparable leg extensions are not solely responsible for her reputation as one of the world’s leading ballerinas. Many factors combine to make a beautiful dancer, and artistry and fluidity of movement are as important as immaculate technique. However, moments of extreme technical prowess definitely make us gasp. There is something magical about a gravity-defying arabesque or developpe a la seconde.
So, how are such lines achieved? With my memory of Guillem at the forefront of my mind, I embarked on The Quest For the Secrets of High Legs, hoping to discover the formula that would allow teachers and their students to achieve their best possible leg extensions.
The Quest took me to a variety of sources, starting with Andries Weidemann, lecturer in classical balletat the Western Australian Academy of Performing Arts (WAAPA), and Lisa Hutchinson, a Perth physiotherapist specialising in dance injuries.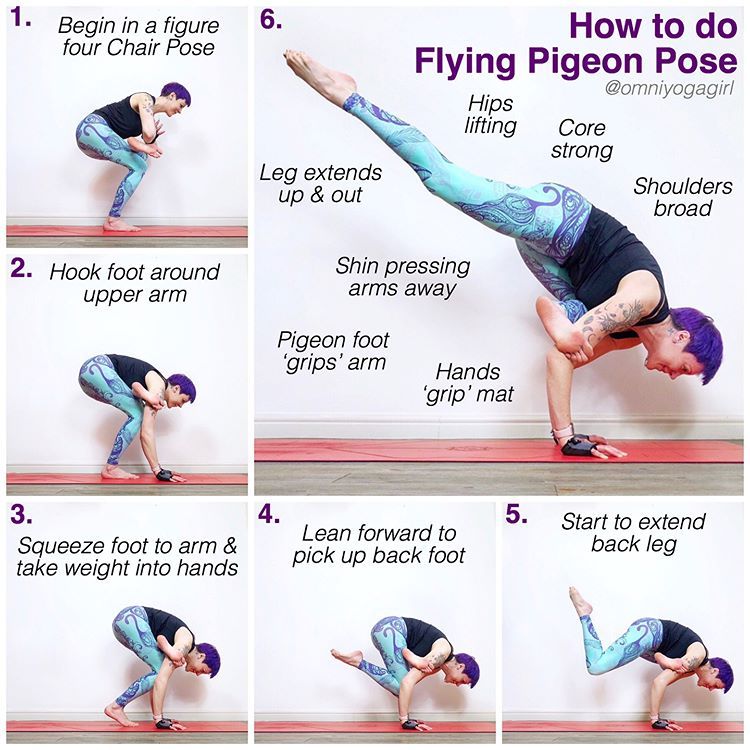 I then spoke to Dame Lucette Aldous, and her daughter, Tasdance dancer Floeur Alder. Lucette is highly regarded for her role as Kitri in Nureyev’s version of Don Quixote and continues to be an active practitioner and teacher of Boris Kniaseff’s floor barre in WA. Finally, I caught up with three staff members from the Australian Ballet School (ABS): Elizabeth Hewitt (exercise physiologist), Mark Annear Way (physiotherapist).
My first question was: “What is required of the body to achieve a high leg extension?” For Hutchinson, core stability is most important. “If you don’t have the muscles of the core on, you won’t get your legs up,” she states.
“If you are wobbly in the middle, you have no rigidity against which to create leg lines.” Annear agrees that core stability is vital, adding, “Strength and stability of the supporting hip/pelvic muscles is of the utmost importance.”
Once a strong base has been established, teachers and health professionals agree that range of motion at the hip joint is crucial to the height the leg can reach, devant, derriere or second.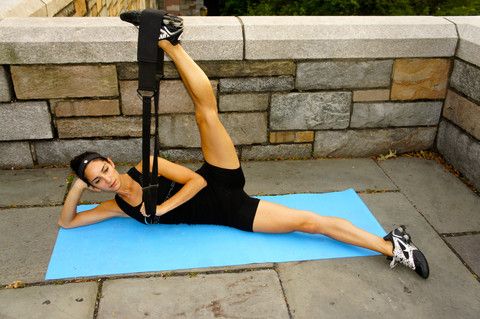 But flexibility alone is not enough. “Dancers need an abundance of both strength and flexibility to achieve high leg lines,” says Hutchinson, “and the strength needs to be developed within the range of motion of the extension.” The ABS staff also emphasise the dual importance of strength and flexibility: “Flexibility is required to be able to achieve the range of movement in the joints and muscles, i.e. the desired position of the body, and strength is required to sustain the position.
They are developed concurrently through years of training,” explains Hewett.
Of course, some bodies are better suited to achieving high lines than others. “To have beautifully high extensions, you do have to be born with the right genetic material,” says Weidemann. “A mobile hip socket helps a lot.” Hutchinson agrees, saying, “The lucky ones are those that are born flexible. It’s easier to build strength in a flexible body than it is to loosen up a strong but less flexible body.”
For those who are not naturally flexible to the degree to which they will be able to improve flexibility depends, to some extent, on whether it is the ligaments or muscles that are restricting the range of movement in the hip. “You can test this by getting the dancer to lie on their back with their legs in a ‘frog’ position. Push gently down on their knees and ask them where it hurts,” suggests Hutchinson. “If they go straight for the hip crease, then the restriction is probably ligament length. legs, it’s probably muscular and that will be easier to improve than ligament length.”
AND SO, onto the advice! How do we get those legs higher?
The importance of a strong core and stable pelvis should not be underestimated. Any exercises students are doing to improve leg strength and flexibility must be supplemented by exercises that strengthen the muscles of the abdomen and the pelvis. Assuming that the core is strong, it is then important to remember that a high leg line requires the muscles of the legs to be active while extended.
Therefore, dynamic stretching is preferable to static stretching.
“Bear in mind that the hip is a ball and socket joint, and you need to stretch it in the round,” says Weidemann. “You should stretch in a range of motion that will allow the leg to move easily from devant, to a la seconde, to derriere and back again. It’s all very well to train students to be able to do the splits in every direction, but they need to be able to have their legs to the side and, from there, be able to move into splits on either side.
What you are looking for is a kind of ‘mobility in the round’ rather than just straight line muscular flexibility. That’s something that teachers should be encouraging – with care – from a young age.”
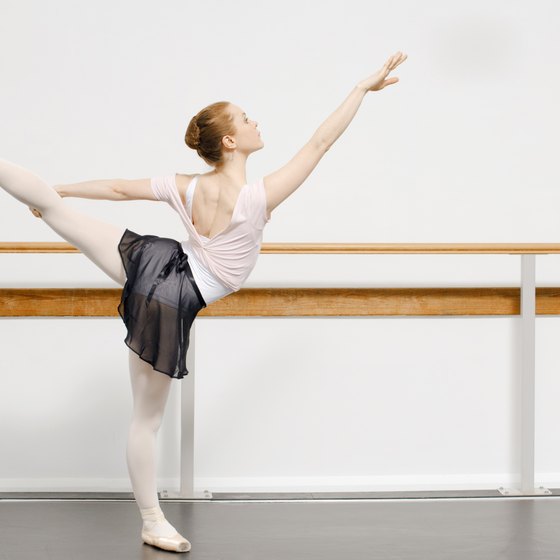
As discussed earlier, Hutchinson highlights the importance of strengthening the muscles in the range of motion that strength is required. “You’ve got to get the leg up and practise holding it there,” she explains, “and that’s where a barre is useful. Get the leg up on the barre. Check that the alignment of the hips and pelvis is correct, and that the core is active. Now try to lift that leg off the barre without compromising the placement of the hips or pelvis! Even if you can’t actually lift it up, you’re going to strengthen in the range.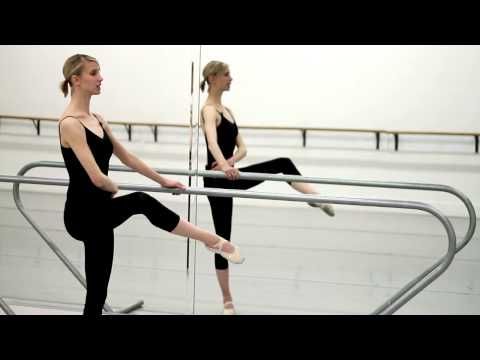 ”
”
This exercise can be conducted with the leg devant, a la seconde or derriere, but Hutchinson does warn that care must be taken to ensure correct placement is maintained. The ABS staff also talk about the importance of strengthening muscles in relation to use.
“Conditioning exercises need to be specific to the movement they are trying to assist, i.e. they should replicate the way the muscles will need to work in leg extensions for classical ballet,” says Hewett. “Well-trained Pilates teachers will know strengthening exercises based on the classic Pilates position ‘the teaser’, as well as ‘leg circles’ and, for back strengthening, exercises such as ‘dart’ which can be increased or decreased in difficulty as required.”
Weidemann’s tip for a high developpe is based on the understanding that the retire has to be lifted before extending the leg.
“When I ask the first year students at WAAPA to break down the stages of a developpe, they’ll say, ‘retire, then attitude, then extension’, and I’ll say, well the second stage for me isn’t attitude, it’s get your knee up,” says Weidemann.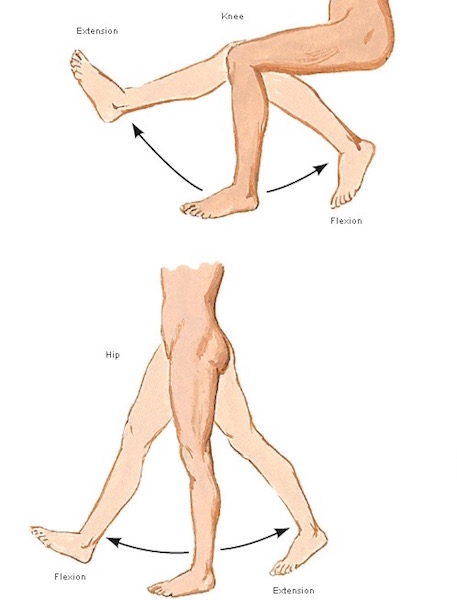 “I get them to stand in retire and lift the working knee as high as they can. Then I get them to hold the working leg with their arm under the knee, and just dangle the leg. At this point I check that their pelvis is correctly placed, and then I get them to extend the leg.”
Aldous and Alder also talk about using the arm to hold the working leg under the knee. “Holding the leg allows you to soften at the hip crease and drop the hip – as soon as you lock the hip flexors, that leg will never go up,” says Alder. The tension should all be taken in the lower abdominals instead. “The abdominals have to be engaged – the lower abs are really ‘in’,” adds Aldous. “If you get the angle of the thigh up, especially a la seconde, the femur sits down into the hip joint.”
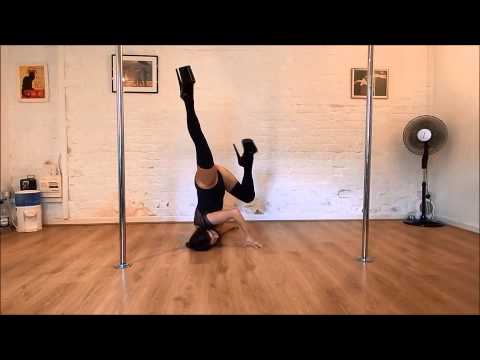
Aldous’s top secret for high legs, however, is undoubtedly Kniasseff’s floor barre, a system of exercises conducted lying or sitting on the floor which are designed to increase core stability, and general strength and mobility.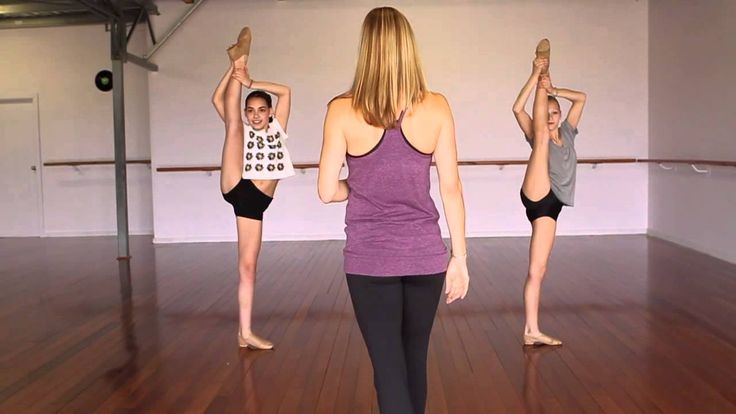 Given that Aldous, in her 70s, demonstrates various floor barre exercises to me with the agility of a dancer in her early 20s, it is clear that floor barre has much to offer.
Like yoga, floor barre is designed to stimulate circulation and lubricate the joints, which Aldous says is crucial when aiming to increase range of movement. “When joints are moving, it sends synovial fluid into the joints – it’s like you’re lubricating those joints,” she explains. An advantage of working on the floor is that it is easy to feel if posture is correct. “Lie down on the floor and do any leg extension and you’ll immediately feel if the placement of the pelvis is incorrect,” says Weidemann. In floor barre, the hands are also used to ensure correct placement. In exercises that take the leg a la seconde, one hand sits under the working hip while the other is placed on top of the supporting hip so that the student can correct the hips if they feel them rocking towards the working side.
In the absence of a floor barre, Aldous recommends yoga. “Yoga is what floor barre is based on. It stretches the hamstrings, involves the core muscles and uses the principle of increasing circulation prior to intense stretching and conditioning.” Aldous also suggests that students who are struggling with flexibility take a magnesium supplement.
Lastly, I ask : “At what age or stage should teachers be encouraging students to work for high leg lines?” ABS students work towards 90 degree extensions from the age of 10 but placement is always prioritised over height. All the experts agree that leg height depends on a student’s capabilities. If a dancer can maintain core stability and correct placement of the pelvis, when extending the leg at 90 degrees, then they are ready to start working higher, regardless of their age or grade. The same is true in reverse – if a student can’t maintain placement at 90 degrees then theyneed to be working lower. Although there is no single magical formula, much can be done to improve leg height. So, stick up a poster of Sylvie Guillem in your studio, and lift those legs!
This article was first published in the June/July 2010 issue of Dance Australia
The correct technique of flexion and extension of the legs in the simulator.
Keep it for yourself so you don't lose:
- Which muscles are involved?
- Correct technique
It is hardly possible to find an exercise comparable in effectiveness to the extension and flexion of the legs in the simulator. It is included in the TOP of isolation exercises aimed at working out the legs and hips. But how to make it as safe as possible and minimize the risk of injury? In this article, we will talk about who needs to do the extension and why, as well as the correct technique, which largely determines the productivity of the workout.
Which muscles are involved?
The design of the simulator is designed in such a way that when performing the exercise while sitting, the quadriceps receive the maximum load. This is the largest group that gives volume to the legs. If you are doing lying or standing, the target will be the hamstrings. Extension is aimed at creating a pronounced relief in the hips and their visual separation from the buttocks.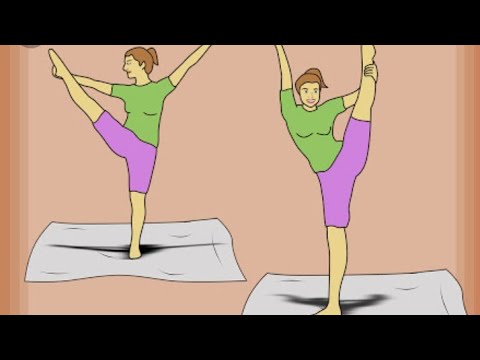
Target muscles for training while sitting in the simulator:
- Straight - starts extension;
- Intermediate - stabilizes the leg;
- Lateral is activated when the socks are directed to the side;
- Medial is activated by pointing the toes inward.
Target muscles for exercise lying on the stomach or standing in the simulator:
- Biceps;
- Semitendon;
- Semi-membranous.
Other muscle groups are not involved.
Correct technique
The first and most important thing is to set up the simulator for your parameters. The position of the fixing roller and the backrest is adjustable, which allows you to find a comfortable position for athletes with different builds. Often beginners neglect this step. An incorrect position not only reduces the effectiveness of training, but can also cause injury to the anterior cruciate ligament. To prevent this from happening, you need to follow the correct technique and select the load based on the level of your physical fitness. A pronounced relief in the hips can be achieved not by increasing the weights, but by increasing the number of approaches.
Basic principles:
- After adjusting the position and angle of the backrest, return to the starting position. The back is completely relaxed, the emphasis is on the back, the hips lie on the seat, the shins are at an angle of 90 degrees to the thigh and are securely fixed with a pillow. If the exercises are performed lying or standing, you need to lean on the bench alive.
- Athletes in the rehabilitation period are recommended to perform the exercise with a minimum amplitude. To do this, you need to fix the roller closer to the knees.
- It is better to start with the study of quadriceps, pointing the socks a little towards yourself;
- When performing movements, do not use inertia;
- Excessive knee extension should be avoided;
- At the moment of execution, you need to focus on squeezing the weight from the quadriceps or biceps, and try not to "pull" the handles on yourself.
- It is recommended to perform flexion/extension after basic leg exercises.
- The average number of sets is 3-4 x 15-20 repetitions.
Stages of execution and recommendations on the sitting leg extension technique:
- Back and lumbar must be pressed against the back of the machine;
- Hands should be held on the rails or edges of the seat, this will keep the body stationary;
- While inhaling, straighten the legs to a horizontal position, after which, lowering the rollers, smoothly return from the starting position;
- At the lowest point, do not fully straighten your knees and relax your muscles;
- Movements should be as smooth as possible, without jerks;
- At the end of the movement, exhale.
When performing an exercise lying on your stomach or standing, the principles and technique of execution will be similar. The fixing roller should be located 1-2 cm above the ankle, and the front of the thighs should be pressed against the bench. Bringing the position of the roller closer to the knee joint, the amplitude will decrease and the efficiency will decrease. But this technique is ideal for beginners or during post-traumatic rehabilitation.
The load and, consequently, the effectiveness of the complex can be varied not only by shifting the position of the roller, but also by directing the socks in or out. By alternating lying, sitting and standing bending in the simulator, you can achieve a full and high-quality study of all thigh muscles. After completing the workout, it is recommended to stretch, it will increase blood circulation and help relax the biceps and quadriceps.
-
1576 points of issue of orders
throughout the Russian Federation -
1 356 450
satisfied customers -
We work
7 days a week -
50,000 items
in stock -
12 years
online market
Your cart is loading. ..
..
4 steps to perfect dancer's legs
- Dec 16, 2014
- DANCE-mania, Blog, Video, Health, Exercise
Dancer's feet. They are not just long and thin. They are strong. They are flexible. And they do not appear easily by themselves.
This article contains four basic exercises that work your legs from top to bottom, with which you can achieve the perfect dancer's legs.
Trust the experts!
1. Glutes and hamstrings - Marching leg raises, leaning on the ball.
Strong buttocks not only allow you to move faster and more vigorously, but also help prevent injuries to your knees and lower back.
Lie on your back face up with your knees bent and your feet on a large ball. Raise your hips so that your body forms a straight line from your shoulders to your knees (A). Raise one knee to your chest (B). Then lower back, lift the other knee. Continue the exercise by changing legs.
2. Inner thigh - squats (Standing Plié Squat).
The muscles of the inner thigh, like all other muscles of the upper leg, help stabilize the knee joint. And when it comes to turnout, many dancers try to work from the knee. Strong inner thigh muscles will help you turn your legs exactly where you want them to.
Begin the plie exercise in wide second position, hands in second position with palms up.
Create the buttocks and muscles of the inner surface of the thigh, getting up and raising your hands over your head.
Return to starting position and do 3 sets of 10 reps at a fast pace.
5
Let's make it harder! At the end of each rep, hold the plié and do 20 small up and down pulsating movements.
For maximum effect, stay in plie and pulse forward with 20 knees.
For advanced ones: at the end of each series, rub the heel from the floor and squeeze the hip muscles, go up to the half -packages and linger in 10 accounts.
During the exercise, make sure that the muscles of the lower body are involved and that the hips are always kept directly under the shoulders.
For some, this exercise is old hat, but for us it is a classic. The toe raise strengthens both parts of the calf - the calf (the one you usually see on the back of the leg below the knee) and the soleus (which is under it). The next time you're balancing on your toes in a dance studio and trying to reach something on the top shelf, thank your strong calves.