How to do a body wave dance
Arm Wave Tutorial - Hip hop dance lesson
Here is a great breakdown of how to do an Arm Wave dance move:
Want More? Get Sean’s Course:
5X Hip Hop Course For Beginners
Learn basic hip hop moves with 25 step by step video lessons. This course is broken down into 5 modules that focus on different types of moves: Footwork, Upper Body, Waving, Step Touch and Iconic Moves. You will love this 2+ hours of detailed instruction for beginners.
LEARN MORE & BUY IT (CLICK HERE)
[Transcript]
So to start our arm wave, I put both my arms straight out like this and my arms are locked right now and I’m going to bring them in just a little bit. When we start the arm wave, there’s quite a few different parts just in your hand alone, which we want hit. And waving is all about the details.
So starting with our fingertips, we’ll go fingers or digits and then we’ll point down to knuckles and you can even emphasize this as the fist is kind of high or low. And then we want to go to my wrist. Now, this is one part we really have to pay attention. I’m going to slide this arm down.
My wrist is creating high low than my elbow. So with fingers, knuckles, wrists and my elbow went low, my wrist went high. When I’m going to switch to my elbow where my wave is going to be at the elbow right here, I’m going to be turning my elbow up and then my wrist down flattening my hand out like that where we just call it blade as opposed to open. We’re having a blade hand just for this slope. And so now, my elbow is sticking out. My wrist is low.
So we try again from the top. We got this knuckles, wrist, elbow low, and all I’m doing is turning my elbow. And so right here, I will turn. My elbow sticks out and then my arm and wrist are at the lower level forward.
So as we get this elbow, I’ll stick my other arm back up and I’m going to pop my shoulder and I’m going to go to my right shoulder and pop that. Notice my left arm is straight again.
Now, I’m going to go to the elbow this time. So again, make sure it’s popped out and I’ll switch to my wrist at the higher level. And then I’ll go to my knuckles, my digits and fingertips.
One more slope right down. We got the digits, the knuckles and the wrist. We got the elbow, the shoulder, the shoulder, the elbow, your wrist at a high level, knuckles, fingertips.
So using that same base clap, we’re going to break down our arms like this. And you can do it with me and then you can practice on your own afterwards. So we go boom clap, boom clap, boom clap, boom clap, boom clap, boom clap, boom clap, boom clap, boom clap, boom clap, boom clap, boom clap, boom-boom clap, boom clap, boom clap, boom clap, boom clap, boom-boom clap, boom clap, boom clap, boom-boom clap, boom clap.
So once you start to break down the steps then you got to go onward. You’re going to try to do a whole wave throughout your body without stopping. All you got to do is keep your mind as the order of the body parts that you’re moving.
Obviously, if I’m on my wrist here, I don’t want to start this elbow, that’s my shoulder, this shoulder out because I’ll be missing my elbow and the shoulder. It’s all about going in sequential order.
So try really slowly left side. Come one. Do it with me, guys. Ready. Set. Go. I’m breaking down each body part in order. You can go as slow as you can to get it.
Why don’t you take a couple of minutes? First, practice with a song using the base clap to break down the steps then give it a shot. Go for it. Follow this video. I’ll see you guys out.
[End of transcript]
Want more?
Hip Hop moves (click here)
How To Learn Popping – The Ultimate Popping Training Guide
Want a clear, easy-to-follow guide to learn Popping? This 8-week Popping Training Guide is the perfect way for beginners to cover all the major Popping techniques.
The Popping training guide is divided up like this:
Week 1: Hitting, Arm Waves
Week 2: Body Waves, Glides
Week 3: Review, Freestyle
Week 4: Isolation, Animation
Week 5: Fresno, Flexes Week
6: Review, Freestyle Week
7: Walk out / Boogaloo, Twist, Tuts
Week 8: Review, Freestyle
Follow this Popping Training Guide to learn and practice all the basic Popping moves you need to know.
You can also download this Popping Training Calendar PDF to custom-plan your schedule:
Download Your 8 Week Training Calendar To Follow Along!
Popping Technique 1: Hitting
Learn how to hit:
Hitting (or popping) is when you flex and release your muscles as quickly and as powerfully as possible. Hitting is done to the beats in music.
For more in-depth instruction, read: Learn How To Pop, Or Hit With Your Body!
Drill Popping hits:
Practice by hitting one body part at a time (arms, legs, chest/torso, neck), in different positions.
Play this song:
- 4 8-counts: Hit with your arms extended straight in front of you, parallel to each other
- 4 8-counts: Hit with your arms extended straight out, perpendicular to the ground
- 1 8-count: From this position, hit as your arm rises up in increments until they are straight up above your head, parallel to each other.
- 1 8-count: Then bring them back down, still hitting on beat. (repeat this up-down motion as many times as you wish)
- 4 8-counts: Hit with your torso/chest
- 4 8-counts: Sit in a chair, and hit with your neck
- 4 8-counts: Stay in the chair, and hit with your legs
- 2 8-counts: Stand on one leg, and hit with the other leg slightly extended out
- 2 8 counts: Stand on the other leg, and hit with the other leg slightly extended out
OR,
Just take Clay's 7 Days of Hits Program on STEEZY Studio!
Things to remember:
You want your hits to pack in as much power as possible, in the shortest amount of time possible.
You can hit on the 1 (boom), or the 2 (ka), both, or “ride through” the 1 beat to the 2.
Popping Technique 2: Arm Waves
Learn how to do the Arm Wave:
The 12-point arm wave can be broken down like this
Drill Popping Arm Waves:
Practice the 12-Point Arm Wave with Boogie Frantick
More practice:
- Practice the 12-point arm wave with your arms straight out, reversing directions each 8 count. Do this 4 8 counts slowly, 4 8 counts tempo.
- Then, do it with one arm only for 4 8 counts.
- Switch arms, repeat for 4 8 counts.
- Wave both arms inward towards your chest for 4 8 counts, then reverse it out toward your fingertips for 4 8 counts
- Wave any or both arms in any direction for 4 8 counts. Get creative! You want your arms to “memorize” the pathway of the wave in as many positions as possible.
Things to remember:
It’s important to break down each point of the 12-point wave before blending it all together to create a smooth movement.
This builds your arm’s muscle memory. Keep your hands loose and fluid, and rotate your elbows to create a smoother wave.
Practice facing a mirror; how the wave looks from your POV might not be how it looks to someone watching!
You can practice waving your arms in any / all positions, not just the angles given.
Popping Technique 3: Body Waves
Learn how to body wave:
The 8-point body wave: move in one direction, starting with your head, shoulders, hip, knee, other knee, back to your hip, shoulders, up to your head.
The wave should move down one side of your body, then back up the other.
Drill Popping body waves:
Wave down one side of your body for 4 counts, then back up for 4 counts.
Do this for this entire song:
Things to remember:
It’s important to start and complete your full body waves.
Drill how to isolate the different parts of the wave, but incorporate it into your grooves.
You can start the full body wave from different body parts (like from the ground-up).
Technique 4: Glides
Learn how to Glide:
Do the step-glide by stepping out with one foot, then sliding it back.
Do the over-under/under-over glide by lifting the heel of one foot, and sliding the other foot in front of it. Take that same foot, and slide it behind the other foot.
Drill Popping glides:
Practice the Step Glide with Boogie Frantick with this free YouTube drill:
More practice:
- Do the over-under/under-over glide 4 times in one direction, then 4 times in the opposite direction
Things to remember:
Footwork doesn’t mean your upper body isn’t doing anything! Add your own flavor with grooves or head looks, etc.
Gliding is all about shifting your weight on your feet. Pay attention to which foot and where (heel/toe) your weight is.
Review: Hitting, Arm Waves, Body Waves, Glides
Re-visit the techniques from weeks 1 and 2. Combine all the techniques that you learned in a guided freestyle.
Play this song:
- 2 8-counts: Hit with your arms in any position
- 2 8-counts: Wave both arms in any angle
- 2 8-counts: Do the body wave
- 2 8-counts: Do the step-glide in any direction
- 2 8-counts: Hit with your chest
- 1 8-count: Wave only 1 arm, in our out
- 1 8-counts: Wave with the other arm, in our out
- 2 8-counts: Body wave as you step out with your feet
- 2 8-counts: Do the over-under glide
- Remainder of the song: Combine any of the techniques in your own freestyle
Popping Technique 5: Isolations / Fixed Points
Learn how to do isolations and fixed points:
Isolate one body part and move it while the rest of your body stays still, or
Keep one body part at a fixed point as the rest of your body moves around it.
Drill Popping isolations and fixed points:
Play this song:
- 4 8-counts: Isolate your head by moving it front and back
- 4 8-counts: Isolate your head by moving it side to side
- 4 8-counts: Isolate your head by moving it in a circular motion, like you’re making a letter “O”
- 4 8-counts: Extend your arms straight in front of you, and create circles with your hands
- 4 8-counts: Keep the same position, then start bending/moving at your wrists and elbows
- 4 8-counts: Isolate your legs by doing an “in-place” glide – keeping one leg planted while the other glides in front of it and back
- 8 8-counts: Fix point different things, like putting your hand on a “wall” and dancing around it, or holding a “ball” and only moving the ball
Things to remember:
Isolations and fixed points are great tools to create concepts, imagery, and stories.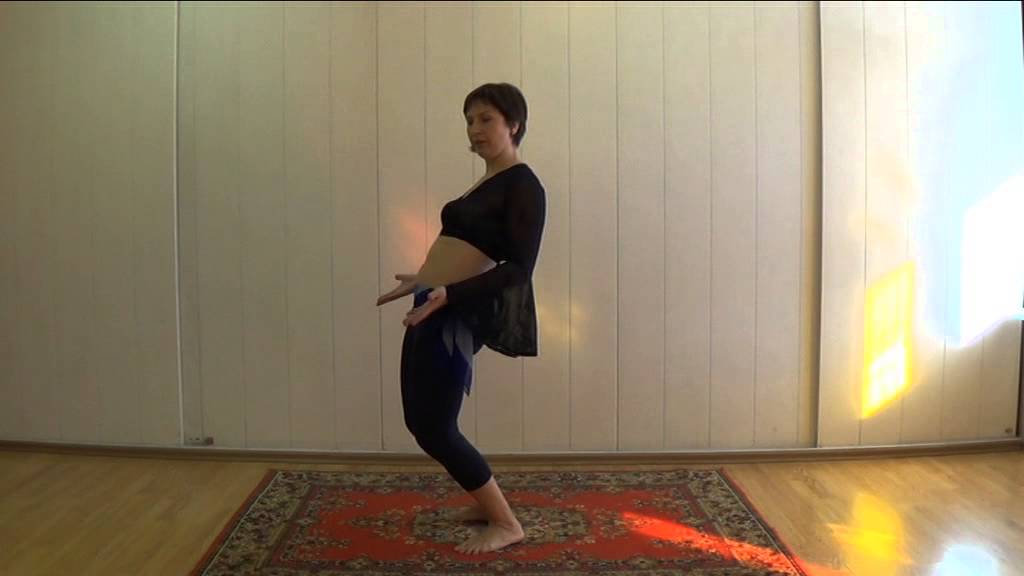 Solid balance is key when fix pointing your leg(s) and moving your upper body.
Popping Technique 6: Animation
Learn Popping animation:
Ticking is when you snap into a position with your joints.
Strobing is a faster pace of dime stops; it creates this illusion of leaving a trail of movement (like you’re dancing under a strobe light).
Poppers often strobe in pedestrian movements like walking.
Botting is when you create a “Robot” effect with your whole body using parts of these techniques. It makes your body/movements look “fake.”
Drill Popping animation:
Start this mixtape:
- Tick through the entire 12-point arm wave for 5 minutes straight
- Do the 4-point tick walk: stepping forward with one foot, and ticking the other leg in 4 points as you complete the step
- Strobe as you arm wave, walk, and complete other pedestrian movements (cooking, brushing your teeth)
Things to remember:
Keep your core nice and firm when you’re ticking your limbs and make your dime stops as clean as possible when you strobe.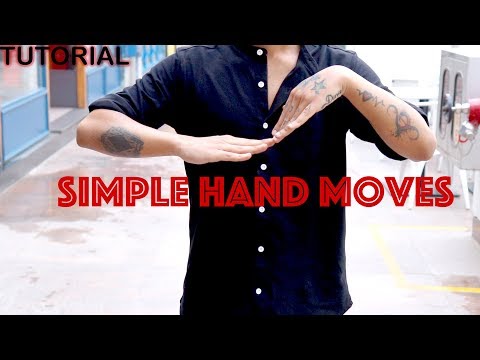
Popping Technique 7: Fresno
Learn how to do the Fresno:
The Fresno is a part of Popping / Boogaloo technique. Shift your weight from side to side as you hit with each leg and arm.
Drill the Popping Fresno:
Play this mixtape:
- 4 8-counts: Do the Fresno (1 hit makes you move, the 2nd makes you stop)
- 4 8-counts: Hit your bottom right diagonal, bottom mid position, then bottom left diagonal
- 4 8-counts: Do the Fresno in a “single single double double,” AKA your arms hitting right left right right, left right left left
- 8 8-counts: Do the Fresno with variations with your steps (walk outs)
Things to remember:
The Fresno is important because it really teaches you how to stay with the pace of the music. Use your weight to keep balance as you pivot your feet.
Your whole body turns, not just your hip!
Never snap your legs all the way back; use your ankles to buffer the hits.
Popping Technique 8: Flexes
Learn how to do flexes:
The Twist-o-flex is when you put your hands on either side of your hips, then pivot your arms so that your chin is touching one shoulder.
Turn your upper torso to meet the plane of your hand placements there, then step forward to your base position.
The Neck-o-flex is when you touch your chin to a shoulder as you extend it out, then pivot your lower body around your arms as your head stays facing that direction.
Then, turn your upper body and head to the opposite arm.
Drill Popping flexes:
Play this:
- 8 8-counts: Twist-o-flex
- 8 8-counts: Neck-o-flex
- 8 8-counts: combine both flexes in your own freestyle
Review: Isolations, Animation, Fresno, Flexes
Re-visit the techniques from weeks 4 and 5. Combine all the techniques that you learned in a guided freestyle. Play any song you like.
- 2 8-counts: Isolate any body part
- 2 8-counts: Isolate another body part
- 2 8-counts: Fixed point one body part
- 2 8-counts: Fixed point another body part
- 2 8-counts: Tick the 12-point arm wave
- 2 8-counts: Tick while walking
- 2 8-counts: Strobe from/to any position
- 2 8-counts: Do the Fresno
- 2 8-counts: Do the Twist-o-flex
- 2 8-counts: Do the Neck-o-flex
- Remainder of the song: combine any of the techniques in your own freestyle
Popping Technique 9: Walk Out and Boogaloo
Learn the Walk Out and Boogaloo:
Do the Walk Out by crossing one leg in front and across from you. With that some foot, step toward the other diagonal.
Twist to that direction, then step forward with the back foot. Use the same foot to step behind yourself, then pivot to the front, and bring both feet in.
The Boogaloo is when you do a full body wave, starting from your head rolling all the way around, rolling your shoulders in opposite directions, pushing your chest out, then bringing your hips and knees out and around.
Drill the Walk Out and Boogaloo:
Play this:
- 14 8-counts: Hit all the 7 points of the walk out 4 times each.
- 14 8-counts: Use your opposite foot to start and hit all the 7 points of the walk out 4 times each.
- Repeat hitting during the walk out on each side, but 2 times in each position.
- Repeat again, 1 hit in each position, in tempo with the music.
- Draw a “figure 8” with your knees to prepare to do the Boogaloo roll.
- 8 8-counts: do slow Boogaloo rolls - fill up the full 8-count per roll
- 8 8-counts: medium Boogaloo rolls - 4 counts per roll
- 4 8-counts: fast Boogaloo rolls - 2 counts per roll
Things to remember:
For the walk out, use your opposite arm when you step forward with a leg.
Stay loose with your body as you do the Boogaloo roll.
Popping Technique 10: Twists
Learn Popping twists:
Do the Egyptian Twist by making angular pictures with your arms as you pivot your focus and toes toward different directions.
Drill Popping twists:
Play this:
- 1 8-count of Egyptian twist to your right.
- 1 8-count of Egyptian to your left.
- 2 Egyptian twists to your right, 2 steps to your right.
- 2 Egyptian twists to your left, 2 steps to your left.
Things to remember:
Keep your upper body and shoulders squared to the front, with your face following your toes. Hit with each time you pivot or step.
Popping Technique 11: Tutting
Learn how to Tut:
Tut by creating different lines and shapes with your arms. Bend from the elbows, wrists, and fingers.
Drill tutting exercises:
- Play any song
- From a resting position, bend at your elbow to raise one arm to chest level
- From there, extend it straight up
- Go through this same pathway to bring your arm down
- 8 8-counts: Drill your arms in this up-up-down-down pattern, alternating between arms
- Now raise both arms by the elbows in front of your face, and bend in a 90 degree angle at the wrist
- 8 8-counts: Alternate bending each side
- 4 8-counts: Extend your arms straight out on each side, and bend at the the elbows and wrists at 90 degree angles to create a “Z” then rotate them inward to create a box
Things to remember:
Keep your angles clean! 90, 180 degrees
Review: Boogaloo, Twists, Tutting
Combine all the techniques that you learned in a guided freestyle.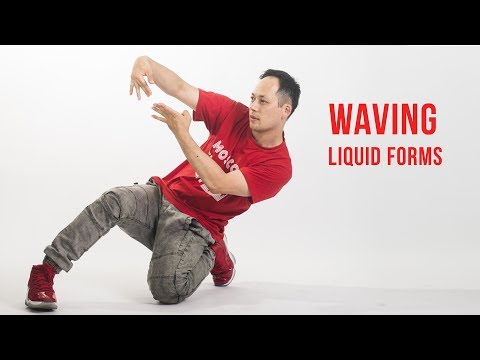
- 2 8-counts: Boogaloo rolls
- 2 8-counts: Egyptian twist
- 2 8-counts: Tut with just your arms
- 2 8-counts: Tut while traveling with footwork (you can just step, or glide)
- 2 8-counts: Walk out and Boogaloo rolls
- 2 8-counts: Egyptian twist in different variations
- Remainder of the song: combine any of the techniques in your own freestyle
Use this guide to train your basic Popping technique within 2 months.
If you want to follow along with a tutorial, STEEZY Studio’s Popping Program (taught by renowned Poppers Boogie Frantick, Kid Boogie, and Slim Boogie) is a much easier way to train.
All you have to do is plan out your schedule and follow along with the videos. Sign up here to try it out for free!
Waves (arm wave, body wave): VIEW ALL LESSONS >>>
Wave / Waving
The offered online video lessons on wave will help you significantly expand your dance base and develop your body. There are several points on which we should dwell more closely.
First. Despite the fact that waves in nature are smooth, when studying, we break them into parts (points). And we also learn point by point! Only after you have confidently begun to perform the basic technique, add additional softness or malleability to your waves.
Second. Wave dance is not a chaotic set of waves and slides. With the help of them you draw a picture in space with your body. The wave flows out of the wave and goes to the glide, and then back to the wave, telling the viewer an endless illusory story. This way of dancing is called “endless wave”
Wave demonstration (wave dance style)
if it doesn't work "live" and correctly show - then come to us at the School of the Dragon (Moscow). Feel the thrill of good training and your quick results!
Basic technique
1. Hand wave. How to make a wave with your hand - training base.
To make a wave with your hands correctly and beautifully, first of all, it must be disassembled into points. Only 5 points. They grip your joints in your hand. It is conditionally possible to break the wave by hand into two parts: into the wave in the cyst and into the wave in the shoulder and elbow. It is reasonable to work out all this separately, and only then combine it together. Learning to wave with your hand allows you to develop plasticity in your hands and teach you how to control body parts and joints separately. This is what will give you a little later the illusion of flow, magical, bewitching movement. Yes, I will remind you again. First we teach by points, and only then do it smoothly.
2. Body wave: how to learn how to make a body wave quickly
The general principle of body wave training is the same as in the previous exercise.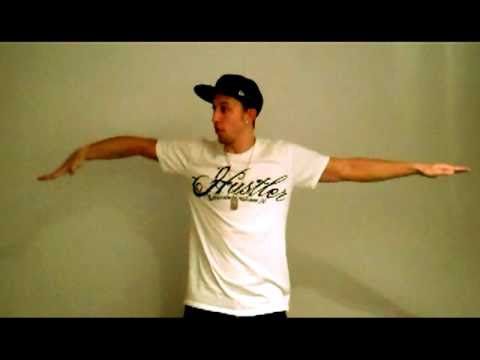 First you need to thoroughly understand the points, make a wave through the body from top to bottom and from bottom to top in parts and counting. After that, begin to "glue" the points, that is, slowly reduce the pause between individual points. I recommend doing this at least on the second workout, so that the lesson of the wave of the body steadily "donkey" in your memory.
3. Body wave to the side: how to learn how to dance waves in a variety of ways
Another important wave with which you will improve the plasticity of your body and become cool to dance is the body wave to the side. As you may have guessed from the title, now you will learn the side wave. I also sometimes call her "snake". Why? Watch this lesson on teaching a wave through the body and you will understand.
It takes a little time to learn how to dance the waves. The main thing is not to run ahead of the locomotive. It is necessary to carefully hone the points, and slowly move on to a smooth performance. If you live in Moscow, then it's easier for you - you can come to me at the Dragon School, where our teachers carefully monitor that the students get everything right.
4. Tracing. Connection of a wave with a hand and a wave with a body + "pointer"
Here we come to the most popular connection of waves in dance. In order for your tracing to turn out correctly, pay attention to the fact that the "pointing" hand must be strictly at those points in the wave with the hand or body where the wave is going. Hard rule - you should only point to a point in a wave! And again I conjure: do it slowly and clearly, understanding at every moment where you have the wave and where the hand is pointing at it.
5. Glide. How to do the side moonwalk. Glide tutorial.
Very often body and hand waves are used in conjunction with slides. You probably know or heard them: Michael Jackson's moonwalk (moon walk), slides or glides (whatever they call it). In general, in this video tutorial you will learn how to do one of the coolest slides - side glide. And, as always, a word of advice. It is very important to keep the whole body correctly. He should be on only one leg at a time. This is actually the whole secret.
6. Circular wave with hands. We connect and loop the waves with our hands.
It's time to reach a new level in teaching your body to waves! And in this online wave lesson, we will learn the circular wave with our hands. Learning a circle wave with your hands is not so difficult if you have already learned the basic wave with your hands. In this case, the question "How to make a circular wave with your hands" quickly dissolves in the air and no longer bothers.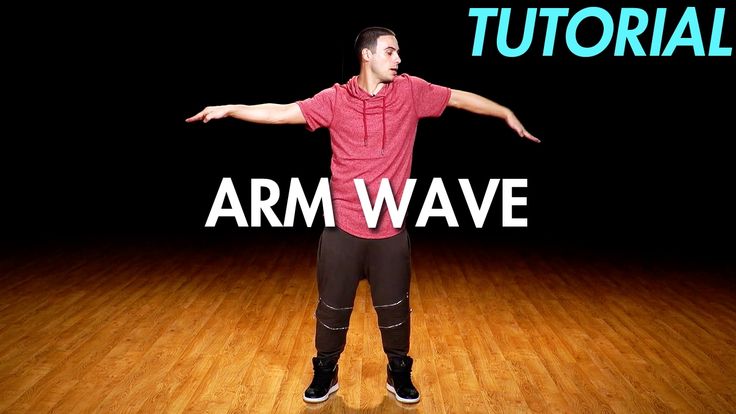 When learning the circular wave movement, pay attention to how the wave passes from one hand to another. It's all about finger movements. Work it out carefully. It depends on him whether your waves with your hands are really cool.
Routines: How to make a dance out of waves. How to do it yourself.
1. Link in waving dance style
In this online waving dance lesson we use all the powerful potential of the wave dance technique we have learned. We will make waves with arms, and body waves to the side, and just a wave with the body, and a circular wave! So turn on the video tutorial and be inspired by your success!
2. Online lesson on how to combine waves with hands, body and glide (gliding) in one dance.
I don't even know what else to add to the title. Only one. You must first learn any dance sequence slowly and without music, and then do it at full strength, filling every wave that you make with meaning and beauty!
You have now completed a short online course on how to make waves. Of course, this is not all that you can learn if you want to dance the waves and use them in your dance. If you are doing it yourself, then often visit this site and my YouTube channel. I post updates there all the time. If you live in Moscow - come to me at the School of the Dragon. Together it will be more fun to learn and develop!
Training, development of skills in illusory styles (practice)
Exemplary team Dance and sports club AJAX #RedPAntherscrew
Illusory dance techniques
- Dime stop - a clear stop of movement with muscle tension and retention of this tension.
- Pop ( hit) - muscular impact
- Explosion - explosion - acceleration and deceleration of movement.
- Start / stop - pop at the beginning of the movement with a given direction and a sharp stop at the end.
- Double dime stop - stop with reflection.
- Gradient - movement with adjustable speeds, acceleration and deceleration.
- Pixel / strobing - small and frequent stopping of movements.
- Teleport - abrupt change of position
- Ticking - combination of pop and pixels in rhythm and 1 and 2 and 3 …
Important in execution: isolation, muscle control of body parts and in the whole body in general, control and regulation of speed!
Elements and training exercises Waving (Waves)
- Shoulders - shoulder rotations. Move shoulders forward and backward.
- Diaphragm - forward, backward. Up (rise up).
- Thighs.
 Serve forward (legs straight) and back with upper body isolation.
 - Body wave to the side. The body is vertical (the line of the spine is preserved), the wave is made forward along the body. Forward in turn shoulders - chest - hips (legs straight) - bend of the knees, the thigh goes into place and is drawn. For 8 accounts.
- Body Wave - example
- CROSS LIQUID WAVE (hand wave: "going uphill") - training
- Leg wave ) muscles (on an even count). You need to learn how to manage muscle tone, different levels of muscle tension.
Pop (triceps, hand, neck, chest, upper back(wings), upper core, abs, thigh (light leg bend)) and shoulders are isolated) - raising the shoulder, rotation, the arm does not move to the side - wave from top to bottom from the shoulders - turn - return from bottom to top. The arms are bent at the elbows in front of us, we alternately glue the arm from below to the arm from above: fingers - hand-elbow and back, then vice versa. Then the wave and the transfer of momentum from hand to hand.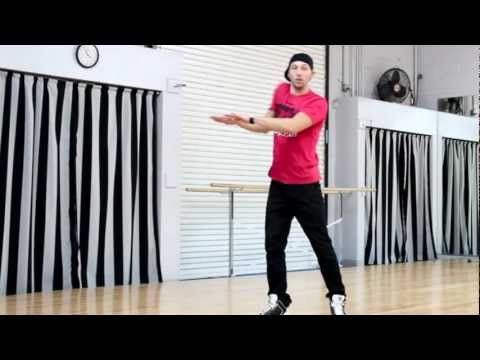
- Bounce
- pulling rope
- Popping Drills
- Robot Combo. Popping
- Arms & Legs Popping. Leg Popping
- PERFECT ISOLATION + WAVES
Popping Dance Tutorial with Dey Dey
Elements and training exercises Tutting (dance with hands)
- Main: isolations, technique, mechanism, iron stop possible
Wave with hands for beginners training.
Tutting combo tutorial for beginnersElements and training exercises Robot
- Main points: isolations, mechanism technique, "iron stop", it is possible to use "trembling" at the end of the action, at the start a muscle impulse is used.
- Pixels - fragmentation into small movements
- Teleport - fast large change of position
- Work in isolation with small separate parts of the body.
- Exercise for practicing: 1-2 counts of impulse action with fixation, 3-4 freeze, then 1-2 action.