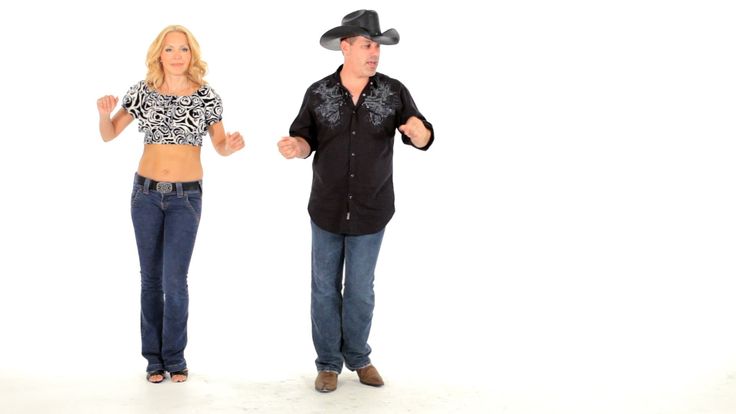
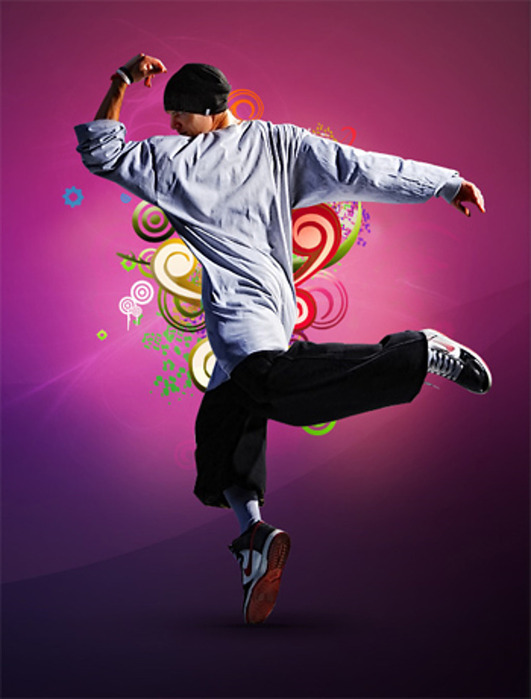
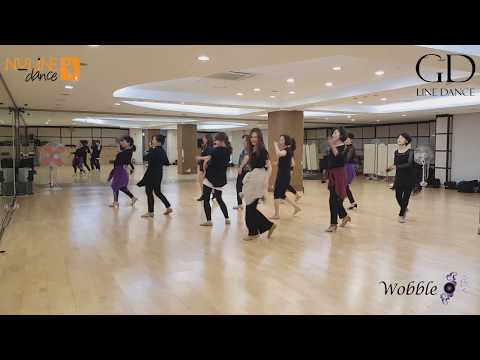
Learn how to wobble line dance
Easy Instructions for Beginners to Learn the Wobble Line Dance
Love watching the wobble line dance? Now you will love doing it as well! All the beginners out there, we at DancePoise bring step-by-step instructions of the wobble for you. Have fun, and do the wobble!
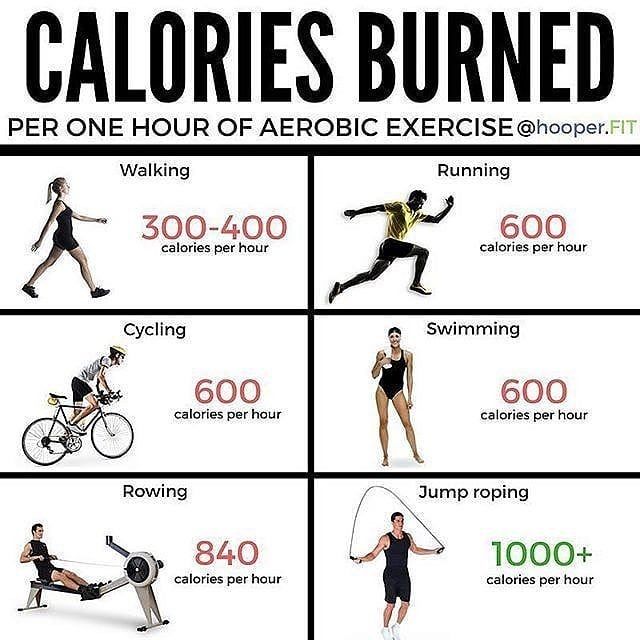
Burn that fat with some wobble!
Wobble line dance not only burns lots of calories, but also is a very fun group activity. If you are looking for some offbeat idea for exercising, include this dance form in your workout.
Unconventional dances are a craze nowadays. All we want is another excuse to go crazy. In the ever expanding list of these quirky dances, like the “Gangnam style” or the “Harlem shake”, comes another worthy addition―the wobble line dance.
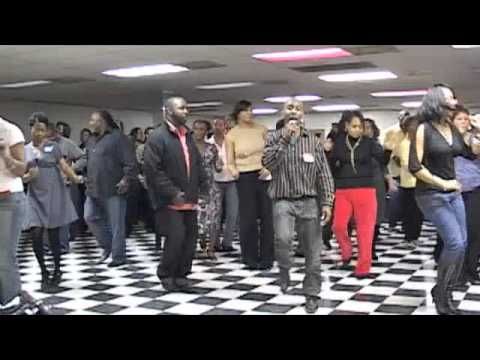
Line dances have been very popular since the 1950s. The wobble has become famous in the last couple of years. Today, you can see people doing the wobble everywhere, right from parties to weddings to reunions. In these dances, a group of people stand in one or two lines and do similar steps. The best thing is that anybody can wobble; yes, it’s very simple and super fun. No need to worry even if you are a beginner or haven’t heard of this dance as we come to your rescue with these step-by-step instructions. So ladies and gentlemen, young and old alike, it’s time to do the wobble.
Do not immediately start the steps; get into the groove first, feel the music, loosen your body, and then begin.
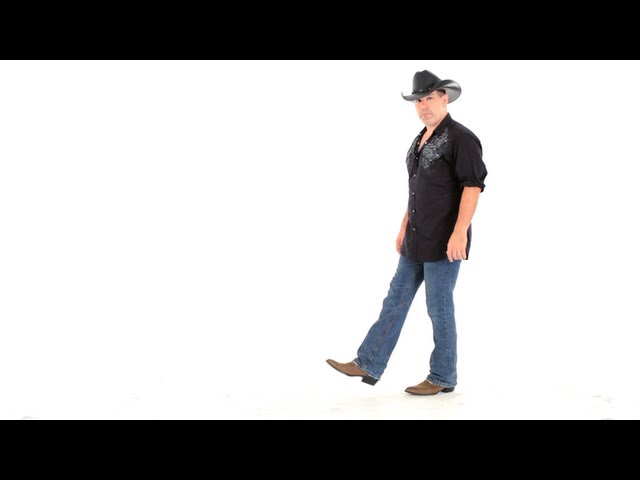
Step 1: Jump Forward
Jump forward (one-step distance) in such a way that both your feet touch the ground simultaneously. This is the first step of the four-count step.
Step 2: Wobble your hips
As soon as you jump, start swaying your hips from right to left. This is called wobbling your hips. Don’t forget to cross your arms to the beat. Wobble your hips for four counts.
Step 3: Jump back
Jump back to your original position to start the four-count step again.
Step 4: Wobble them again!
Now repeat the wobble again. Sway your hips from side to side, and move your hands as well.
Step 5: Twist to the right
Now it’s time to wobble your entire body. Twist to the right in such a way that you are facing left. Now sway your shoulders and hips alternatively for a four-count step.
Step 6: Twist to the left
Twist to the left, and repeat the wobble of the shoulders and hips. You can do the hand roll at chest level or cross them as well according to the beat.
Step 7: Wobble and wobble more!
Enjoy the dance by wobbling your body like a waving flag. When your shoulders are in front, your hips should be at the back and vice versa. You can try a variety of movements with your hands.
Step 8: Do the step
Now, it’s time to “do the step.” It’s a four-count step, and your hands should sway as well. Take a step with your right leg, and then bring the left leg in front as well. Take a step with your right leg again returning to the original position followed by your left leg.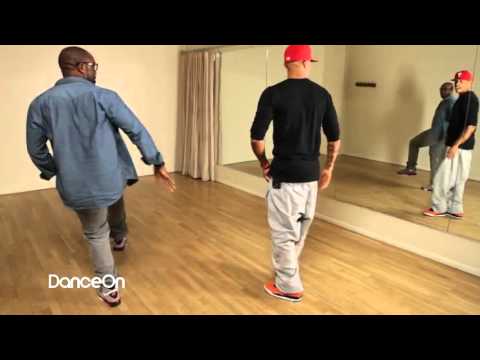
Step 9: Step forward and do the cha-cha
You can also go forward normally and come back by doing the cha-cha step. Step your right leg in front, followed by the left. Now, do the cha-cha; that is step back with your right foot, left foot, and right foot again. But this should be quicker with more swaying of the hips.
Step 10: Cha-cha step
Now do the cha-cha step in your place. Take a forward step with your right leg, followed by a backward step with the left one. Quickly step in place with your right foot, left foot, and right foot again.
Step 11: Swing to the right
Now start swaying your body from side-to-side and cross your arms to the beat. Continue wobbling your shoulders and hips alternatively.
Step 12: Swing to the left
Gradually turn your body to the left and continue the wobble. Turn very slowly and naturally, continuously swaying your body.
Now, you will be facing left. Repeat all the above steps, complete the entire circle, or continue this pattern till the song ends.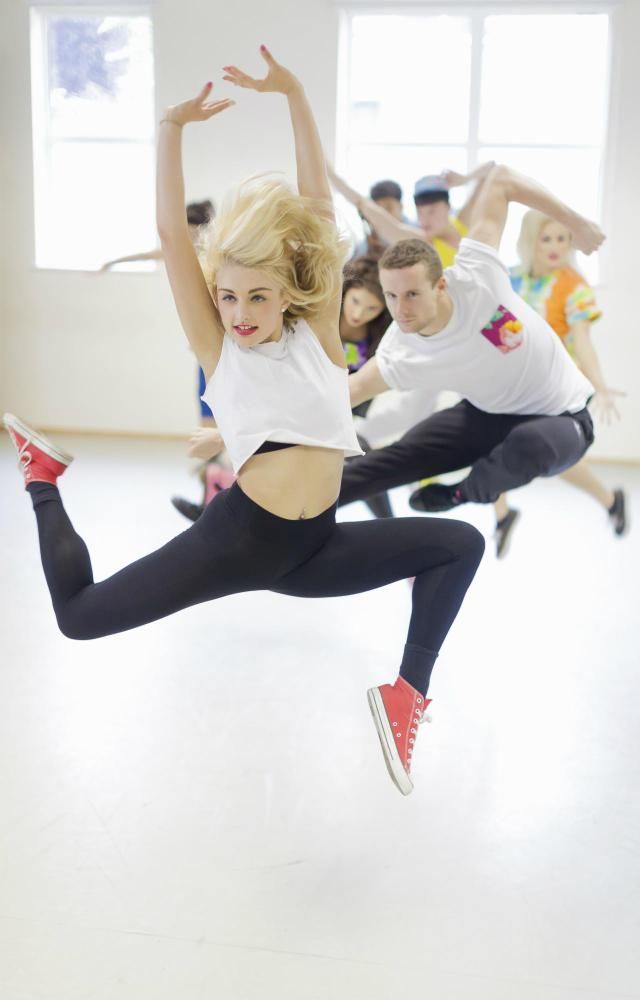 The above steps are the basics; you can combine them or try out different variations as well.
Dance is about losing all your inhibitions and having fun, so just relax and let yourself loose. Don’t get too mechanical with the steps; feel the music and do the wobble!
Line dancing lessons online - How to line dance steps
Line dancing is one of the most fun county dances out there because you can do it anywhere, and you do not need a partner! Line dance steps can vary greatly as there are a million of combinations that you can learn. Here is a video that will help you learn how to line dance online. This is a great combo you can do at events, parties and other functions. Below we included a few line dance video lessons to help you learn.
Line dancing Lessons – Mini video series
Move #1: The cupid shuffle move:
Text summary of the move:
The cupid shuffle is one the easiest line dance steps that you can learn.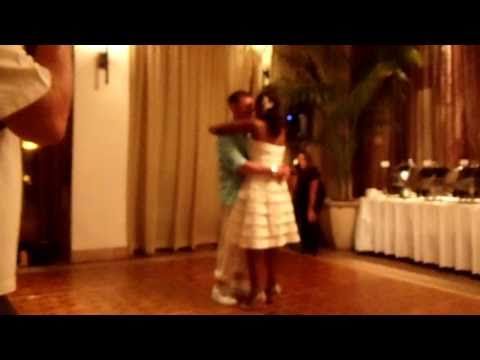 It starts with 8 counts of side steps to the right, with the last step being a touch (no weight change). Then repeat the same 8 counts to the left. Then you do 8 counts of “heel steps” in place. Lastly, you do 8 counts of stepping in place to turn 1/4 to the left. Now repeat the same steps all over facing the new wall.
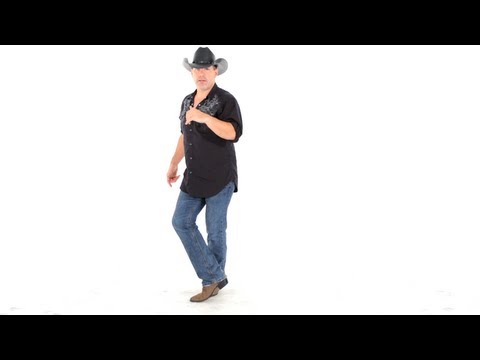
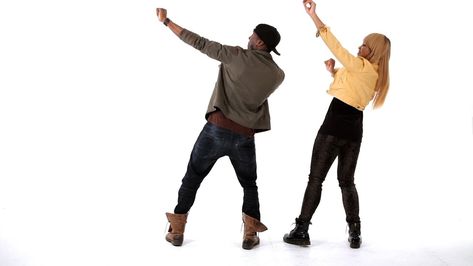
Move #2: “The wobble” line dance move:
Text summary of the move:
This move starts with a jump forward and wigling/grooving then you jump back and again wigling/grooving in place. Then you wobble your hands to the left and then wobble your hands – you can put your own style into it! Then you will do a simple cha cha step where you fowrwad, back and cha cha cha in place, Again – forward, back and cha cha cha in place. From there you are just going to do rhythmical steps in place to turn and face another wall. Then you start all over again.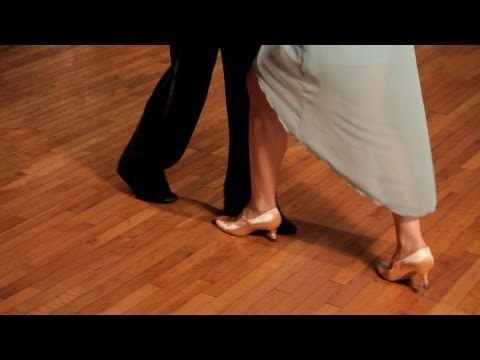
Move #3: The cowboy boogie
Text summary of the move:
This line dancing step starts with a “grapevine” step to the right (side, behind and side) with a “hitch” (knee up) at the end. Then repeat the same “grapevine” step to the left and do the hitch again. Then 1 step forward and hitch, 1 step foward and hitch. Now you step back for 3 counts and hitch at the end. Then you going to “boogie” with the hips, which just means you going to do a small hip movement forward and back, then you turn 1/4 turn to face the new wall and hitch. Then do the same steps facing the new wall.
To help your line dancing, you may also want to learn how to country dance. Furthermore, Ballroom dance lessons will also help you to develop balance and coordination.
Tips for getting better better in Line dancing:
1. Learn the counts. Line dancing is not hard when you can count the entire choreography as you do it.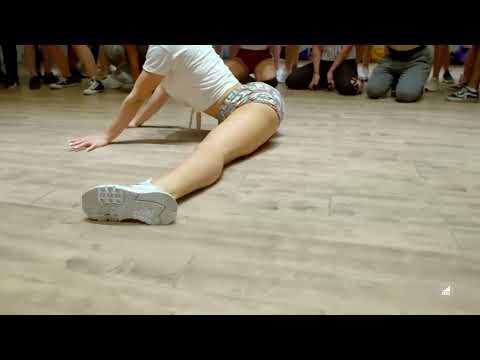 Each single step, hip movement, or wobble has to be timed to the music.
2. Distinguish between a “step” and a “touch”. A step is when you change your weight on the foot and a touch is when you do not change weight on the foot. Touches are very commonly used to switch directions so make sure you know when its a touch versus a step.
3. The magic is in between the steps. While the steps and the counts are set, the way you dance in between is what counts. Put your own style into the steps. You can do many different things with your hips, upper torso and arms to stand out.
Want to learn more dancing?
Visit Learntodance.com for other dance lessons.
Other Dance styles:
Tap Dance Steps
How to Salsa dance
Ballet dance terms
Ballroom dance lessons
How to dance at a club
Belly dancing lessons
How to dance hip hop
Tango Terminology - International Federation of Argentine Tango
February 17, 2014 Adornos
Decorations.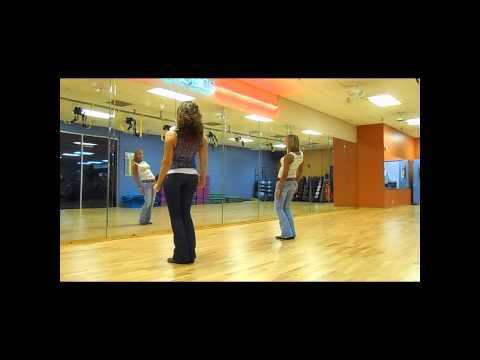 Graceful small movements of the legs, which, as a rule, are not shown by stamps. Partners are usually decorated more than partners. Adornos often enable dancers to express the music in a more subtle and sensual way than with simple steps.
Amague (Amague)
Fraudulent movement. Movement when the partner beckoned the lady, and he went the other way.
Arrastre
Hook, displacement of the foot along the floor.
Barrida
Shifting the foot of the partner's leg (or vice versa) along the floor, like sweeping with a broom. It can be performed in a straight line or in an arc, forcing the partner to rotate on one leg around her axis.
Base
Steps called "Foundation" include step forward, side, side
Boleo (Boleo)
A movement in which the partner changes direction creates an impulse that causes the partner's free leg to oscillate along the floor (low boleo) or, if the impulse is given with more energy, upwards (high boleo).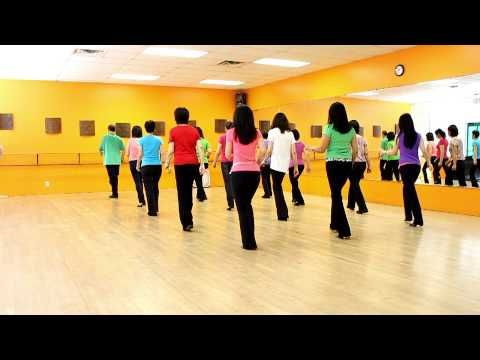 The change of direction can be done during a normal walk (resulting in a linear boleo) or with twisting of the body (circular boleo).
Cabeceo
In traditional milongas, men invite women to dance by catching their eye and nodding towards the dance floor. If the woman nods in response, the man crosses the hall and approaches her. The woman remains in place, waiting for her partner to approach her. See also Codigos.
Cadena
A chain of steps forward-to-side-back-to-side, usually performed sideways along the line of dance.
Calecita
Steps in the partner's circle around the lady and vice versa
Caminada
Walk. Steps along the line of dance.
Corrida (Corrida)
Run, Jog, Short Sequence Forward
Corte
Interrupted traffic in any direction
Colgada
Off-axis movement of two partners with one axis in the middle. Partners, as it were, form the letter "V".
Comme Il Faut
In addition to being the name of a tango composition, it is also a brand of expensive, and, of course, beautiful women's tango shoes. Known for their dizzying heel heights (8 and 9cm), which have since been adopted by most other brands of tango shoes.
Cortina
See Tanda.
Cruze
Cross. Basic figure in tango. One leg crosses the other
Сunita (Kunita)
Swing. It is performed according to the principle of rocking, a step is taken with a return back
Dissociation (Dissociation)
The conditional division of the dancer's body into two parts, upper and lower, which move independently of each other, and the movement is not transmitted from one part of the body to another. While in classical dance ballerinas often spin as a unit, in tango dancers almost never spin as a single block. Instead, the dancer will initiate the turn by first twisting the torso and then allowing the lower body to follow, turning the hips and finally pivoting on the floor.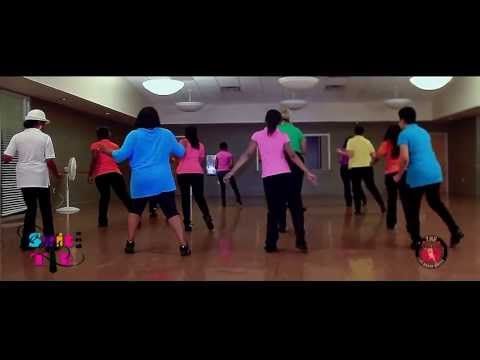 This spiral movement is very characteristic of tango. The movement begins in the upper body, passing through the embrace from partner to partner.
Embrace
The partner hugs the partner with her left hand. Her left hand either "holds" her partner's shoulder blade or (usually in an open embrace) holds him by the upper part of his right hand. Her left arm can be anywhere from her neck to her lower back. The partner hugs the partner with his right hand. The breasts may touch. Most tangueros dance and perform simple steps in a close embrace, maintaining chest contact, but may also open their arms with giros and other similar steps. In milonguero style, both sides of the partner's chest touch the partner. In other styles, typically only one side of the chest makes contact. The choice of hugs is primarily a matter of personal preference and a sense of comfort, all this is individual for each couple. Ideally, a tango hug should feel like a real hug while still allowing freedom of movement.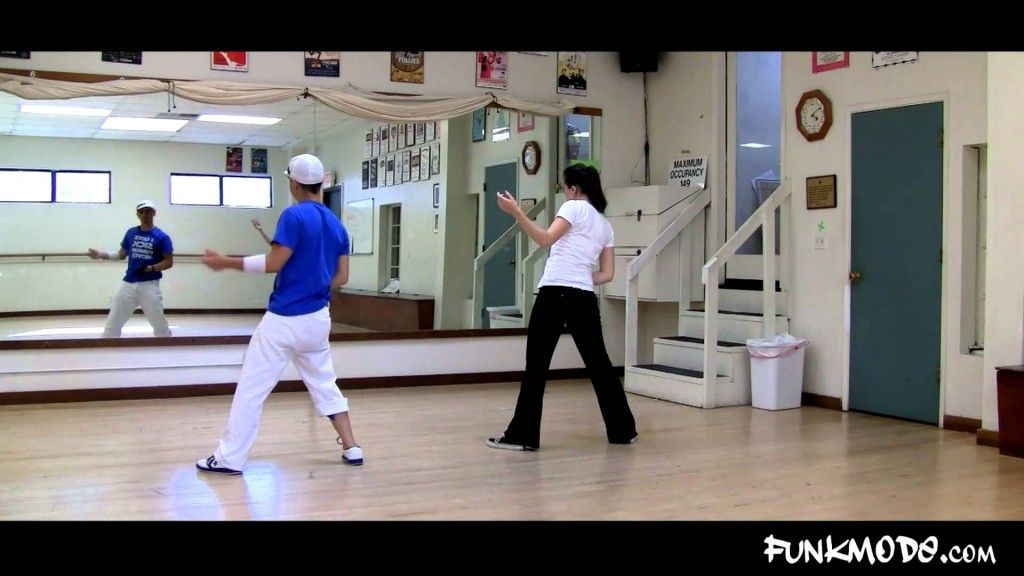
Enrosque
A movement in which the legs rotate around each other. Usually performed as a decoration on partners when performing Giro.
Exhibición
Performances of the maestro at the milonga. Couples usually dance two dances, followed almost always by at least one, rarely two, encores. Performances can be both staged and improvised. Tango performances at milongas usually have nothing to do with the escenario tangos shown on stage.
Gancho
A movement in which one of the dancer's legs strikes the partner's leg and bends into a hook. This usually only happens when the dancer steps into the other partner's interior space. Some teachers believe that Gancho should not be marked by a partner, but should be performed when the position of the foot allows him to comfortably perform the figure (although this is extremely rare). This step is not often seen in milongas, but it is a common feature in tango escenario and in tango shows in milongas.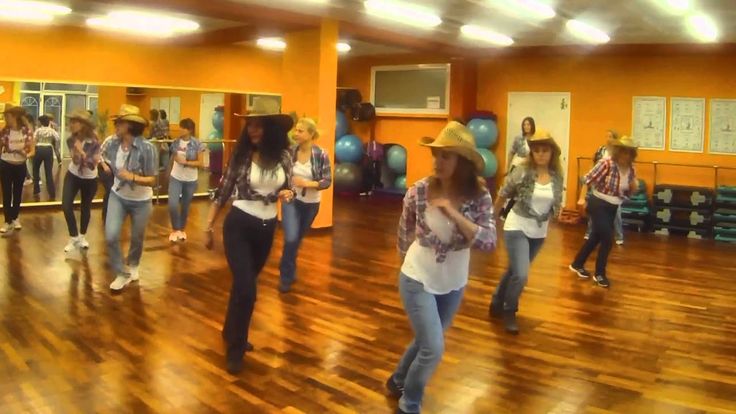
Giro (Hiro)
A spin in which the lady goes around the partner who, in turn, forms the center of rotation. However, the partner can also walk around the partner, or they can both walk around the common center.
Lápiz
Decoration in which the free leg describes a circle on the floor.
Llevada
Figure when the partner on the thigh "carries" the partner's leg
Media giro (Media giro)
Half turn around the partner (partner)
Mordida (Mordida)
The foot of one partner is between the two feet of the other. If his feet are crossed, then this is an upside down sandwich.
Miolonga
Meaning 1. A dance evening where tango, tango waltz and milonga are danced. Meaning 2. A style of music related to the tango, but with a more discontinuous main rhythm and usually (though not always) a faster tempo. It is believed that the milonga dance is the progenitor of tango. Almost everyone who dances the tango also dances the milonga, although usually with slightly different step variations.
Milonguero
Meaning 1. A person whose life is entirely devoted to tango and its philosophy; carrier of authentic Argentine tango. Mealing frequenter. Meaning 2. Dance style. See tango milonguero.
Ocho
Steps with a turn similar to 8. Ocho forward and backward. Step to the side with turning the torso towards the partner and turning the hips in the direction of the step (see Dissociation). In the performance of both partners, it is one of the most characteristic movements in tango.
Ocho cortado (Ocho Cortado)
Interrupted eye. Stopping the ocho and leading back through the cross.
Orquesta Tipica
Traditional tango orchestra consisting of four bandoneons, four violins, piano and double bass. In tango, music is usually distinguished not by the composer, but by the orchestras that perform it. Different orchestras have different, special manners of performance. Each orchestra is named after its conductor. Thus, the tango "according to Biaggi" is the music played by the orchestra of Rodolfo Biaggi (and Biaggi himself was their pianist). Many tangos are performed by singers, and it is also customary to define the singer when defining music. Tanturi-Campos, for example, is the orchestra of Rodrigo Tanturi and singer Enrique Campos, while Tanturi-Castillo is the same orchestra, and the voice of Alberto Castillo.
Parada
Stopping the partner's leg with the partner's leg. Often used at the end of a Giro. As a rule, the partner gives the mark to the partner when to resume the movement. The parade may often enable the woman to wear adornos (decorations).
Piernazos
A high gancho that is done around the partner's back or thighs with the free leg.
Planeo (Planeo)
Circular movement of the partner with a free leg gliding along the floor or slightly in the air
Practice
An informal lesson in which students work out the studied figures in the presence of teachers.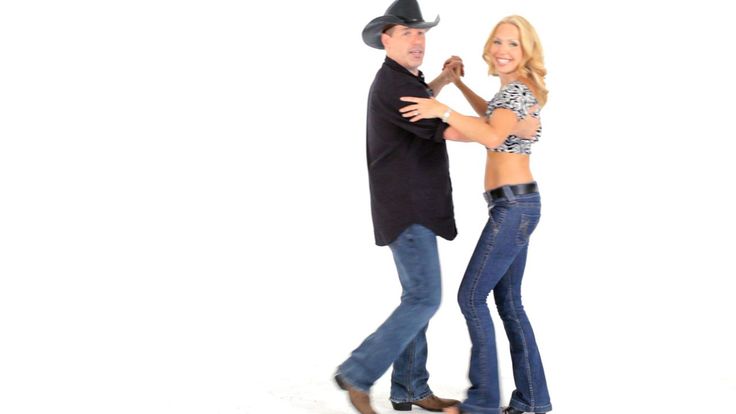 Designed for independent work. Teachers only correct, suggest and give advice on working out the studied material.
Sacada
Steps in which one of the partners invades the space of the other, thereby displacing his leg. This often results in the partner's free leg making an arc along the floor.
Salida
Basic step, first steps in tango, from "Salimosa bailar" - "Shall we dance?" Eight basic steps.
Soltadas
Breaking hugs.
Tanda (Tanda)
In a milonga, music is usually played in sets of three to five compositions, separated by short cortinas. Tracks in tanda are almost always joined by the same orchestra, from the same period of composition (if the orchestra covers different periods and styles) or by the same singer. As a rule, dancers leave the dance floor during Cortina and change partners at the beginning of the next tanda.
Tango Escenario (Stage tango)
As the name suggests, tango, designed for stage shows, is characterized by large, flamboyant figures. Often includes acrobatic moves, lifts and jumps, and sometimes blends tango with other genres such as classical ballet and modern dance. Some movements adapt to the space of the stage as social tango is danced counterclockwise around the dance floor. May also include a degree of theatricality. It is very different from traditional tango in milongas. Tango escenario, as a rule, is staged, while social tango is improvisation.
Tango Milonguero
Style in which partners dance in a very close embrace
Tango Nuevo (Tango Nuevo)
A style characteristic of the dancers Gustavo Naveira and Chicho Frumboli. As a rule, they dance in open arms, and often with more elastic movements. Some steps are especially popular among nuevo dancers: movement features in which the partner is off-axis, leaning against each other (volcada) or away from each other (colgada).
Tango Salon
A style in which the couple smoothly opens and closes their arms as they dance.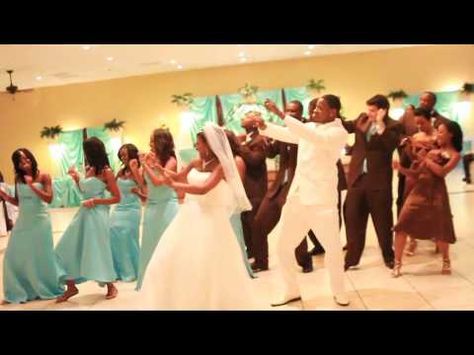 One hallmark of a tango salon is the pivot. A striking example is Giro, in which the partner walks around the partner in an open embrace, and he remains in place, often adorned with enrosques and planeos.
Tangotonin (Tangonin)
A hormonal neurotransmitter that dancers release in large quantities when performing a particularly beautiful tango. Although scientists have not yet been able to determine its chemical structure and find its receptors in the brain, empirical evidence shows that its action is powerful, dangerous and addictive.
Tango Vals
Based on the Italian waltz. This is a style of tango music with a 3/4 rhythm (the tango itself is traditionally written in 2/4 and is often called Dos por Cuatro for this reason).
Tango show
Maestro performances. As a rule, the tango dance is escenario. The cost of such performances is high, but the level of tango performance is also inimitably high.
Traspié
From a word that literally means "to stumble. " Traspié is widely used in milongas and can also be used as a decoration.
Volcada
The movement of the partner is off axis, the weight is given to the partner. Partners, as it were, form the letter V.
| 15.01.2012, 18:51 So far, in articles about algorithms used when moving along a line, such a method was considered when the light sensor, as it were, followed the left or its right border: a little bit the robot will move to the white part of the field - the regulator returned the robot to the border, the sensor will move deep into the black line - the regulator straightened it back. 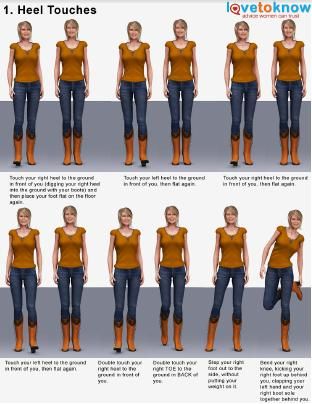 Now it is necessary to determine how such a design change will affect program. For simplicity, you should again start with the simplest relay controller and therefore, first of all, we are interested in the possible positions of the sensors relative to line: In fact, one more acceptable state can be distinguished - on complex tracks it will be the intersection of an intersection or some thickening on the way.
 If the left sensor is still above the light surface, and the right sensor is already above the dark one, then the robot drove its right side onto the line , which means it needs to turn to the right so that the line is again between the sensors. If the left sensor is above the dark surface, and the right one is still above the light one, then the robot needs to turn left to align. If both sensors are above the dark surface, then in general, the robot keeps going straight again. If the left sensor is still above the light surface, and the right sensor is already above the dark one, then the robot drove its right side onto the line , which means it needs to turn to the right so that the line is again between the sensors. If the left sensor is above the dark surface, and the right one is still above the light one, then the robot needs to turn left to align. If both sensors are above the dark surface, then in general, the robot keeps going straight again. The diagram above immediately shows how exactly the program should change behavior of the motors. Now, writing a program should not be a big deal. labor. It’s worth starting with choosing which sensor will be polled first. It doesn't really matter, so let it be left. Necessary determine whether it is above a light or dark surface: This action does not yet allow you to say in which direction the robot should go. But it will divide the states listed above into two groups: (I, II) for the upper branch and (III, IV) for the bottom. 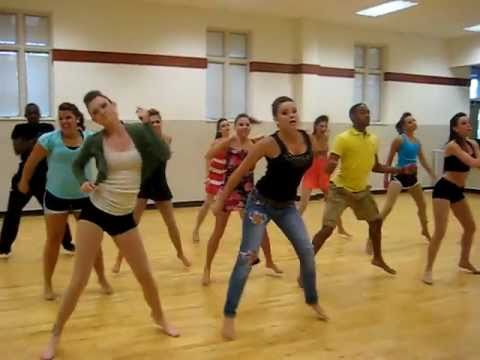 Each group now has two states, so you must select one of them. Looking closely at the first two states I and II, they differ in the position of the right sensor - in one case it is above a light surface, in the other - above a dark one. This is what will determine choice what action to take: Each group now has two states, so you must select one of them. Looking closely at the first two states I and II, they differ in the position of the right sensor - in one case it is above a light surface, in the other - above a dark one. This is what will determine choice what action to take: Now you can insert blocks that define the behavior of the motors according to the tables above: the upper branch of the nested condition defines the combination "both sensors on light", top - "left on light, right on dark": The lower branch of the main condition is responsible for another group of states III and IV. These the two states also differ from each other in the level of illumination, which picks up the right sensor. So it will determine the choice of each of them: The resulting two branches are filled with movement blocks. The top branch is responsible for for the state "left on dark, right on light", and the lower one - for "both sensors on dark." It should be noted that this construct only defines how to include motors depending on the readings of sensors in a certain place of the field, Naturally, in a moment the program should check whether the readings to adjust the behavior of the motors accordingly, and through a moment again, again, and so on. 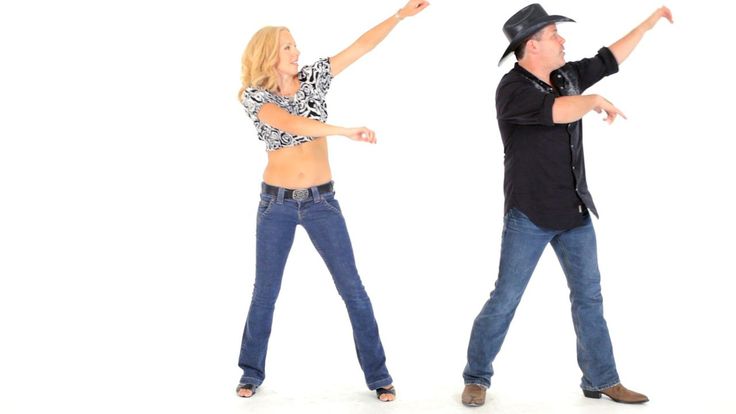 Therefore, it must be placed in a loop that will provide this repeated check: Therefore, it must be placed in a loop that will provide this repeated check: Such a fairly simple program will provide fairly high speed. movement of the robot along the line without leaving it, if correct how to set the maximum speed when driving in states I and IV, and also set the optimal braking method in states II and III - the steeper turns on the track, the "harder" the braking should be - the speed should drop faster, and vice versa - with smooth turns it is quite possible to use braking through a power outage or even through a slight reset altogether speed. A few things should also be said about the placement of sensors on the robot individual words. Obviously, according to the location of these two sensors relative to wheels, the same recommendations apply as for a single sensor, only for the vertex of the triangle is taken the middle of the segment connecting the two sensor. The very same distance between the sensor should also be selected from characteristics of the track: the closer the sensors are located to each other, the more often the robot will level out (perform relatively slow turns), but if spread the sensors wide enough, that is, there is a risk of departure from the track, therefore you will have to perform more "hard" turns and reduce the speed of movement by straight sections.
|


 The dance involves the artistic imitation of the movements of a robot or mannequin, elements of which are popular in nightclubs, on stage and on the street. From our article you will learn how to dance like a job.
 When turning to the left, similar actions with the right foot. Turn your shoulders along with your legs.
  Come up with your own dance elements.
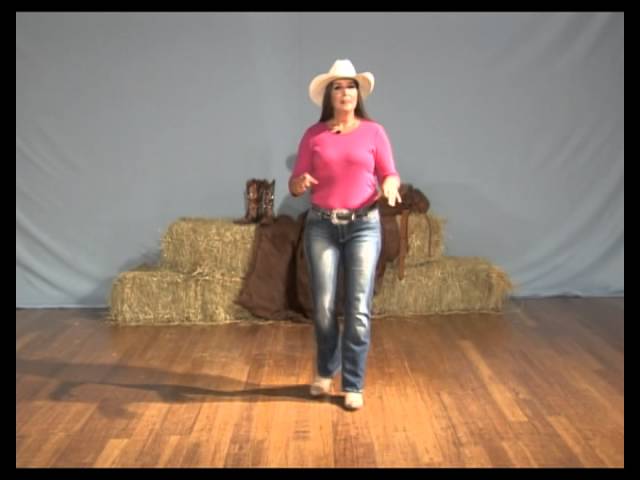
 Consider a variant in which serious turns will occur on the path of movement, up to right angles. It will be necessary to make modifications to both the design and the program.
  When starting the robot, it will need to be directed by the sensor directly to the wall so that the process of reading the initial value goes smoothly.
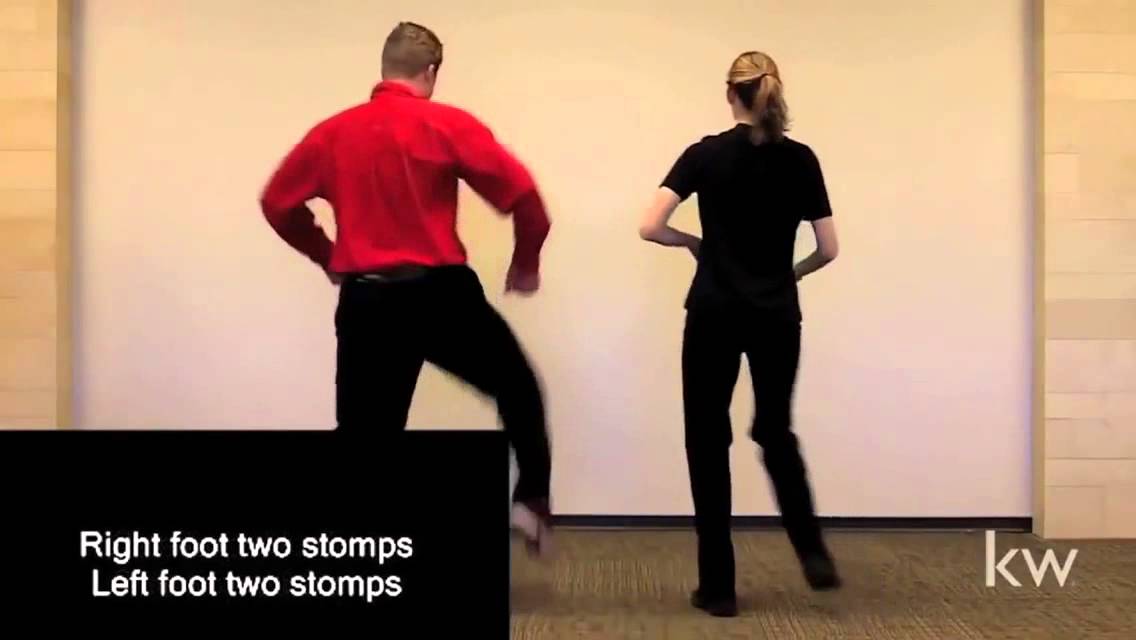
 In dance, these "shudders" are performed continuously, combined with different movements and postures.
 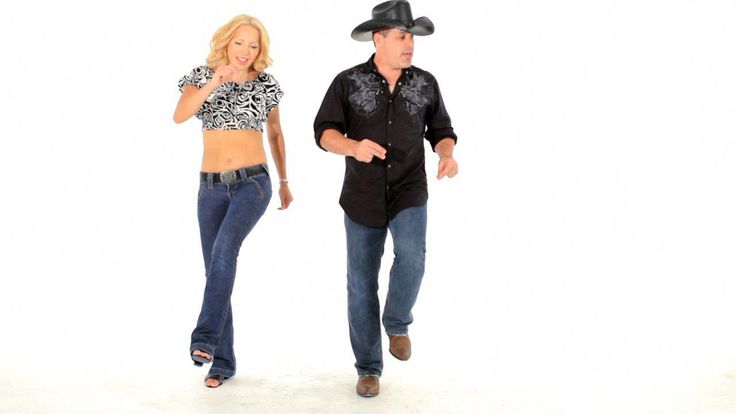 You can perform elements that create the illusion that you are sliding or floating across the floor in various directions. "Launching" waves on the arms and body. Learn to slide your feet on the floor, as if creating the effect of sliding through the air, using the rolling of the foot from toe to heel.