How to cover a bra for belly dance
|
Ask the Costume Goddess:by Dina Lydia
The QuestionDear Costume Goddess: So how in the world does one go about covering a bra with fabric? I have created several gorgeous skirts and harem pants, but haven't got a clue how to make the matching tops! Where should the darts go, and all that mess? Your instructions are an excellent! I especially love your
drawings. ---Muddled In Mississippi
The Costume Goddess RespondsDear Muddled, A lingerie bra goes through some dramatic changes to transform it into a well-constructed costume piece. It must be covered with costume fabric, reinforced, and ornamented. A ready-made velvet-covered or satin-covered bra such as those made by Victoria’s Secret is a suitable substitute for those who find the following instructions too much of a challenge, but it may still need reinforcement. You will need:
This method uses a two-piece cover for the bra cups, which is easier than attempting to cover cups using a single fabric piece. Purchasing The Foundation BraStart with a well-fitting, well-made underwire bra. If you
plan to add padding, you may start with a cup that is one size
larger than you normally wear. If cups seem slightly too close
together or too far apart, make a seam or extension in center
front to correct the problem. The cups should be as
sturdy as possible, to support the weight of any fringe or coins
you add. If the cup seems too soft, it needs to be lined with
a stiff bra cup such as those made for swimsuits, or interfaced
on the inside. If your breast seems to ooze out of the bottom
when you raise your arms, either the band is too loose or the
center strip is sewn too high up between the cups. Adding a second
lower center strip between the cups may fix this problem. If
your breast bulges out of the top or sides, the cup is too small. Add Bra Pads If DesiredAdd bra pads, if you wish more fullness and have allowed for a slightly larger cup size. The pads are usually placed at outside or bottom half of bra for push-together or push-up effect. Pin to bra lining and adjust (they may be removed while you are covering bra). Do not overpad bra: this will cause it to stand away from the body. Click on the image below to see it in more detail: Replace Shoulder StrapsReplace elastic shoulder straps with grosgrain ribbon or a double layer of heavy woven interfacing. The ribbon or interfacing will be covered with costume fabric or decorative trim. Try on bra, with ribbon safety-pinned in place front and back. Make sure the straps are tight enough to be supportive. (A second set of straps, or wider straps, may have to be added if finished bra is particularly heavy with decoration, or bust larger than average. Cover Shoulder StrapsCover shoulder straps with costume fabric or matching trim, tucking under seam allowances neatly so no raw edge is visible underneath. Lining straps with felt will add comfort. If you are beading straps or attaching jewels, it’s convenient to do it before attaching straps. Attach StrapsSew straps to cups securely with heavy button thread, through all layers. If using halter straps, cut to proper length, and sew hooks to back neck. Leave straps unattached at back, until midriff band is completed. Reinforce Midriff BandIf you prefer no stretch at all in your midriff band, like many large busted dancers, reinforce (or replace) entire band with ribbon at top and bottom edge. If you prefer a degree of stretch for comfort in the sides, reinforce band only across back for with ribbon to provide strength for closure and shoulder straps. Either way will make the strap tighter, so try on again and adjust fit. Leave two or more inches of overlap at center back. Cover Back and Side StrapCover back and side strap. If you have opted for no stretch, use instructions below using straight instead of zigzag stitches, disregarding references to stretch. If you have opted for stretch in the sides, they can be covered several ways, as illustrated:
Hooks and EyesSew skirt hooks and eyes to back closure with heavy thread, after trying on again and adjusting fit. Do not leave flimsy lingerie hooks. Do not secure with safety pins! Attach Straps to BandAttach straps to midriff band with heavy thread, after adjusting fit once more. Cover Bottom Half of CupsCover cups, starting with bottom half. Cut a generous oval bigger than bottom half of cup. Top edge of this piece should be slightly higher than apex of cup. Pin, folding and adjusting dart (or two darts, for large size cups) until piece fits smoothly over cup. Trim, leaving a ¼ ” seam allowance all around. Baste raw edge flat across top (this will be covered by upper piece). On the underwired edge, tuck under seam allowance (clipping, if necessary, to flatten it) and sew, using small stitches. Cover Top Half of CupsCover top half with a rectangular strip cut on bias (if using woven fabric) or stretchy grain (if using a knit) to allow some give.The seamline should be at apex of cup. Pin to fit, trim and tuck seam allowances under, and sew as above. If sewn properly, the cup should be smoothly covered with unobtrusive seams and nearly invisible stitches. Cover Center of BraCover center of bra with costume fabric, if it will be visible under ornament. Decorate!Your bra is now ready to be decorated. --The Costume Goddess
Note from ShiraNote from Shira: although my usual web site policy is to
not recommend specific vendors, I will sometimes do so for products
that are very difficult to find.
Related ArticlesOther articles on this web site related to making belly dance costume bras include:
About the Costume Goddess
Costume Goddess PhotosTo view a photo gallery featuring pictures of Dina, costumes she has designed, and her friends, either click on the choices below or visit her web site:
The contents of this page are copyrighted 2009 by Dina Lydia. All rights reserved. Unauthorized duplication is forbidden.
Copyright NoticeThis entire web site is copyrighted. All articles, images, forms, scripts, directories, and product reviews on this web site are the property of Shira unless a different author/artist is identified. Material from this web site may not be posted on any other web site unless permission is first obtained from Shira. Academic papers for school purposes may use information from this site only if the paper properly identifies the original article on Shira.net using appropriate citations (footnotes, end notes, etc.) and bibliography. Consult your instructor for instructions on how to do this. If you wish to translate articles from Shira.net into a language other than English, Shira will be happy to post your translation here on Shira.net along with a note identifying you as the translator. This could include your photo and biography if you want it to. Contact Shira for more information. You may not post translations of Shira's articles on anybody else's web site, not even your own. If you are a teacher, performer, or student of Middle Eastern dance, you may link directly to any page on this web site from either your blog or your own web site without first obtaining Shira's permission. Click here for link buttons and other information on how to link.
|
 ) Mark attachment point on cup, midriff band, and strap with safety pins; add an inch to front of strap and an inch to back for underlap. Remove straps. Hand or machine sew a reinforcing 1” square of folded interfacing on backside of cup at attachment point, through all layers, to avoid future strap disasters. If converting to halter, mark center back of neck on straps; add an inch on each strap for overlap and a half-inch to turn under for extra strength.
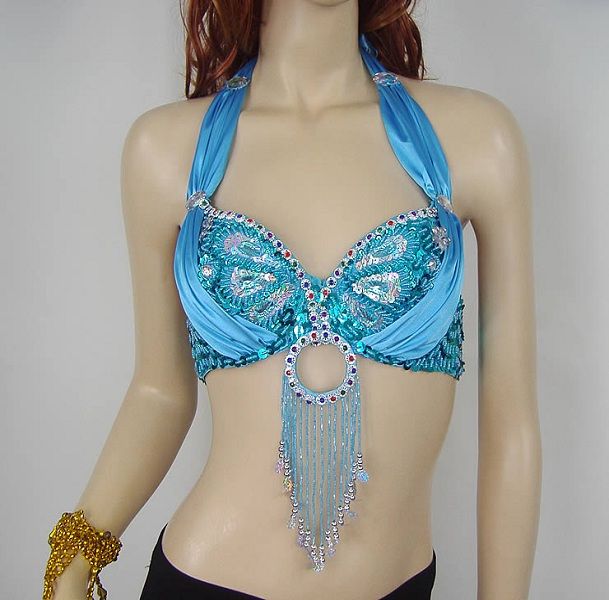
 Seam allowance should be tucked under between outer surface and elastic, so no messy edge shows on the inside of bra. (That way, you need not line bra to cover raw edges.) Hand sew fabric to midriff strap with zigzag stitches, which expand and contract with elastic. (Straight stitches will prevent elastic from stretching and result in a too-tight fit.) The stitches should appear long and slanted on the inside of bra and small on outside. If sewn properly, the finished strap will appear slightly puckered on the side and will expand smoothly when worn.
 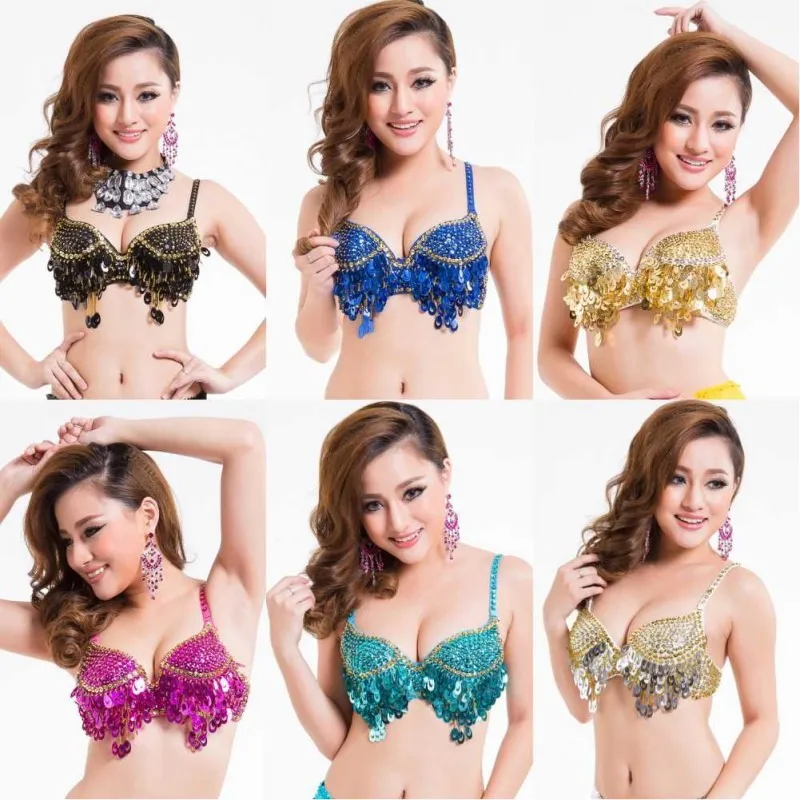 Overlap the trim where the straps converge and continue across back.
 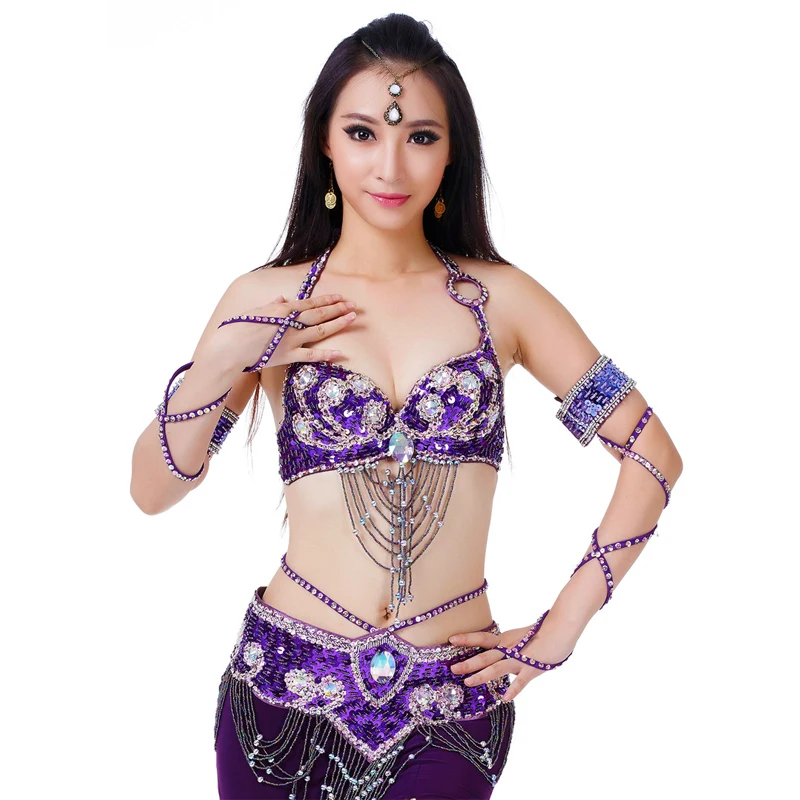 Again, don’t leave a messy raw edge on underside of cup, unless you plan to line it.
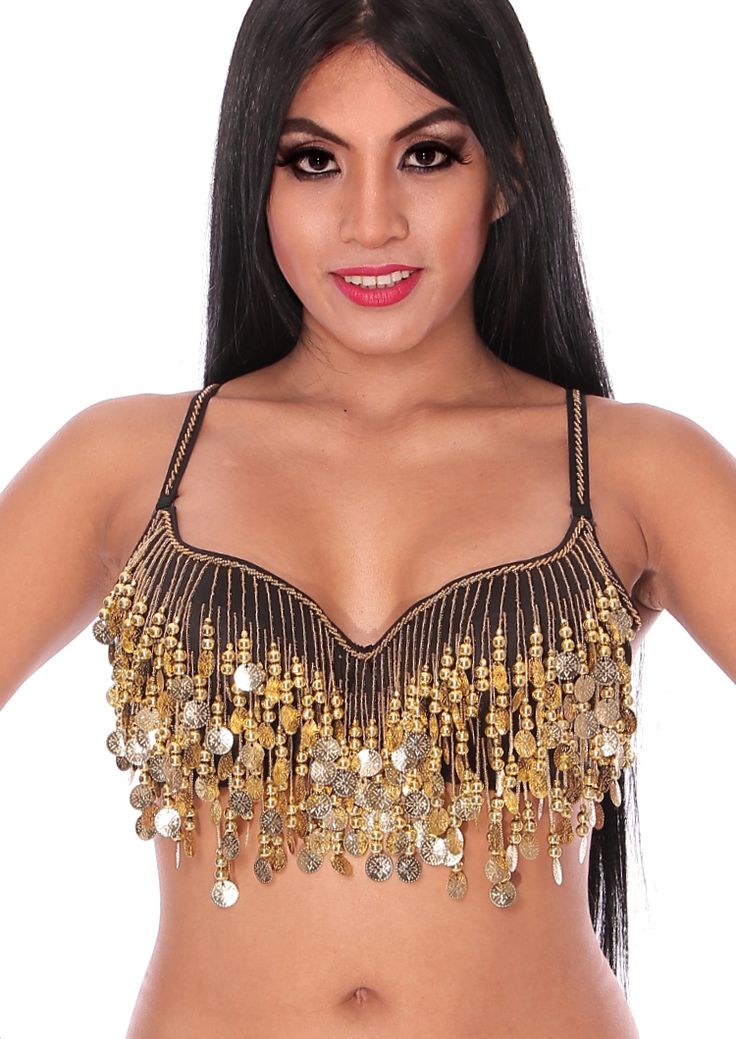 It's extremely difficult to
find bras in the extra-large sizes that are suitable as a base
for costume construction, so I've made an exception to that rule
to bring you two web sites that The Costume Goddess found which
sell them:
It's extremely difficult to
find bras in the extra-large sizes that are suitable as a base
for costume construction, so I've made an exception to that rule
to bring you two web sites that The Costume Goddess found which
sell them: Tips on selecting fabrics that work well for belly
dancing costumes.
Tips on selecting fabrics that work well for belly
dancing costumes.
 Now the pleasure of wearing her own designs, and
seeing others wear them, offers as much pleasure as dancing. She's
become expert as well in altering those troublesome ready-made
Egyptian costumes, and modifying designs to flatter individual
figures.
Now the pleasure of wearing her own designs, and
seeing others wear them, offers as much pleasure as dancing. She's
become expert as well in altering those troublesome ready-made
Egyptian costumes, and modifying designs to flatter individual
figures.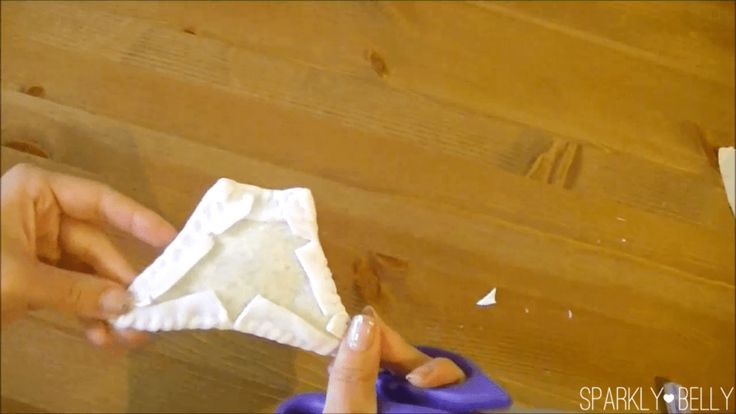 costumegoddess.com.
For reviews here on Shira.net of some of her books, see:
costumegoddess.com.
For reviews here on Shira.net of some of her books, see: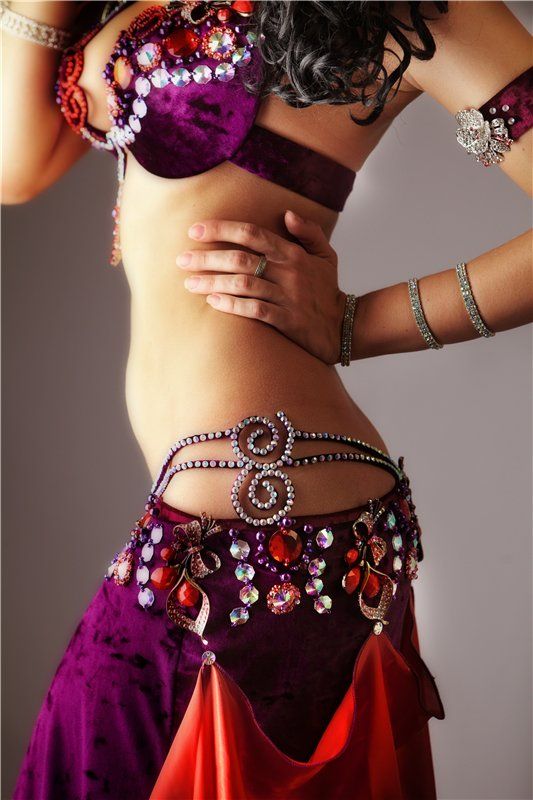 S. Tribal costuming.
 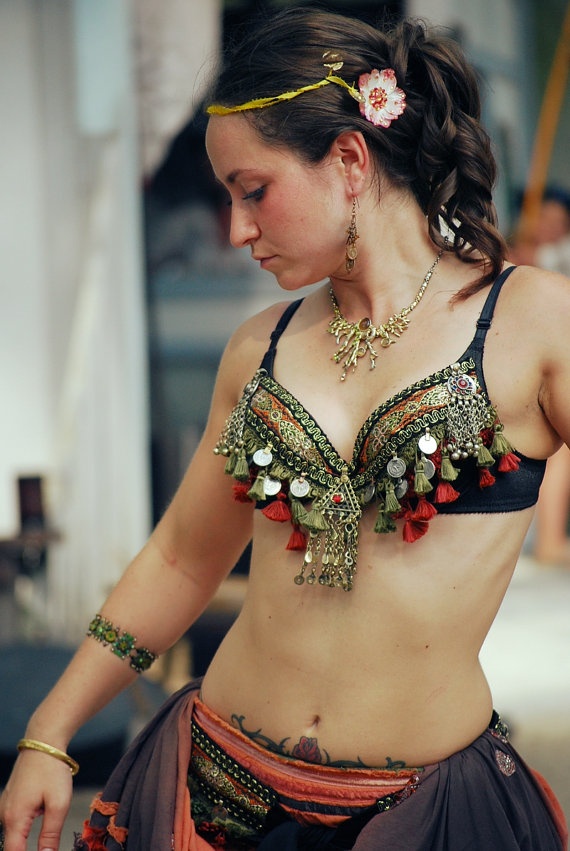 All rights reserved.
How to Make a Belly Dance Bra Pt 1: Materials
by Mao on in DIY Belly Dance Costume Blog, Uncategorized • 0 Comments
Want to make a belly dance bra that fits you perfectly on a budget?
In this series of articles and videos, you can see how to make a belly dance bra that looks beautiful, fits you well and lasts a long time.
The Ultimate Guide will show you the following topics:
Part 1: Materials you need (this article)
Part 2: What to measure, how to cut a bra base, how to make side & shoulder straps
Part 3: How to cover your bra base with fabric
Part 4: How to decorate your belly dance bra
*This Ultimate Guide is pretty long, so if you want to download the PDF version of the entire 4-part series, you can! Download it for free from here.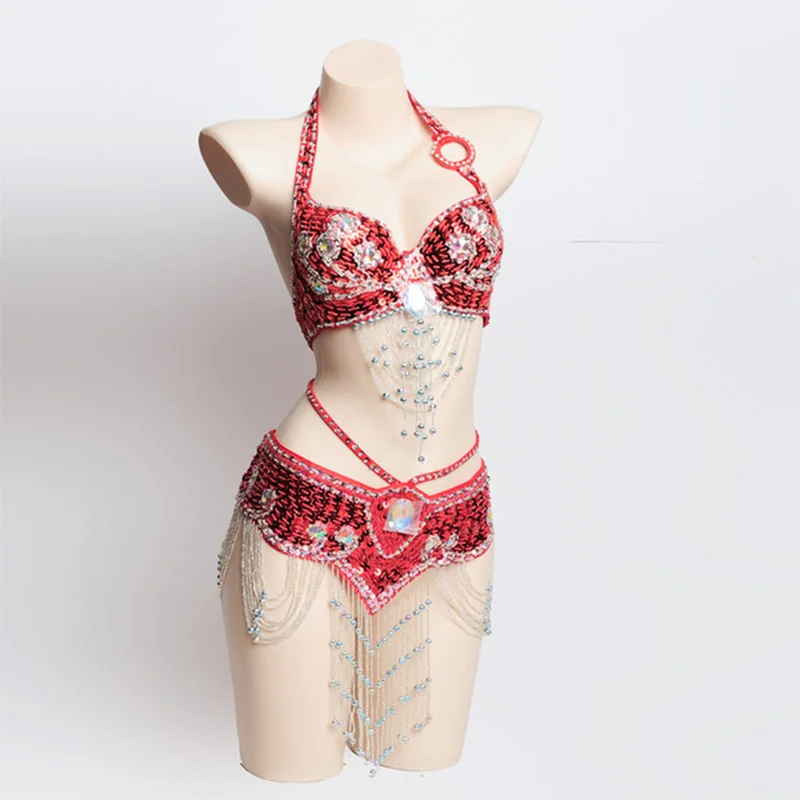
So let’s get started!
How to pick the correct type of bra
First, you need a bra that serves as a base for your costume bra. You can use your own old bra or new, but the important thing is that the bra is firm. This is going to be a costume bra, so you want to make sure the bra is firm enough to hold its shape and most importantly, you feel safe and comfortable while you move around and dazzle your audience.
An appropriate bra base should have cups made from foam and keeps the shape without being help up.
If you are still not sure, try the smartphone test. If you can put your smartphone on the cups, and the cups don’t sink in, the bra passes the test!
What type of fabric to use for strap bases
Your bras are most likely made from stretch straps, but belly dance costume bras should have no stretchy parts. Some costume bras may have stretch straps, but it is this type of straps that scream underwear.
So we will make straps to replace these bra straps. To make straps, you will need interfacing. Interfacing is a type of material that is often used to give structure to clothing or hat or costumes. Your local fabric stores would probably have a section dedicated to interfacing. It comes in different thickness and fusible or non-fusible. I tend to use medium weight for bra straps and strengthen it with other materials for added texture and security.
Fusible one saves you time of sewing, as you can just use the heat of an iron for it to stick to other fabric. For bra making, I use fusible one, because it will be all covered, so I don’t worry about it coming off. But you can use sew-on interfacing by all means. When I didn’t know about the existence of fusible interfacing, I used sew-on all the time.
The other materials include felt. I don’t recommend using just felt, since fragile felt can stretch and rip. This should be used to add thickness when you use interfacing as a base.
Also, you can use canvas, denim, or even non-stretchy old cotton shirt. You can use anything that is non-stretchy and sturdy, and gives some thickness. If these fabrics have printed patterns on them, be careful because the patterns can show through even after they are covered with another layer of fabric.
For shoulder straps, I recommend grosgrain ribbons. Grosgrain ribbons are relatively thick and strong, and have horizontal stripes. It doesn’t matter if you use grosgrain ribbon or interfacing, because these will be covered with fabric later, but some interfacing can rip when it is cut thin, so be careful!
What type of fabric to use for bra covering
Based on my own experience, the easiest material to work with is stretch velvet! Velvet gives nice, rich colour and texture, and the fuzzy finish hides small imperfections. The stretch helps too, when it is time to cover the bra with the fabric. So I recommend stretch velvet as your first choice, if you are trying this for the first time.
Once you have tried velvet, you may want to venture out to other types of fabric. You can try satin – stretch or non-stretch – or metallic lycra is nice and shines nicely on the stage. The key thing here is to pick opaque material. If you want to use see-through material like chiffon, then you will need to somehow cover the bra base first with a different material or the bra and strap bases will show.
Tools and other materials you need
So other materials you will need to make a belly dance bra is pants hooks and eyes and snap buttons. I like to use a combination of pants hook and eyes and a set of snap buttons for belly dance bra, because just having one or the other is simply not secure enough. You can use small hooks and eyes like your ordinary bras, but professional costumes use pants hooks and eyes and not only are they sturdy, but they hide well too.
And of course, you need your sewing kit. That includes needles, matching colour threads, lots of pins, scissors, measuring tape, marking pens. If you are extra cautious with your bra hooks and buttons, use button & carpet thread for sewing these.
Alright, so now you are ready to get to work. If you find this article useful, please share it with your classmates, and check out the part 2 of this series for how to measure, cut the bra and make straps!
Oh, and before you go, did you know you can get all of the How to Make a Belly Dance Bra series in one PDF document?
Click here to get the PDF version of the entire Bra Making Ultimate Guide for free!
Making a belly dance costume with your own hands
Bodice
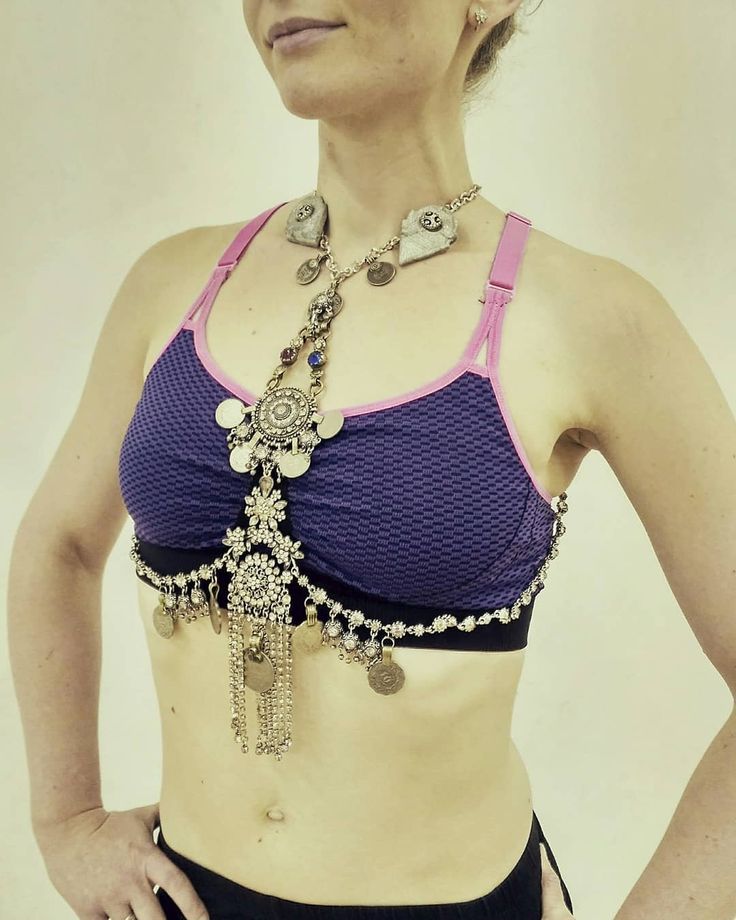
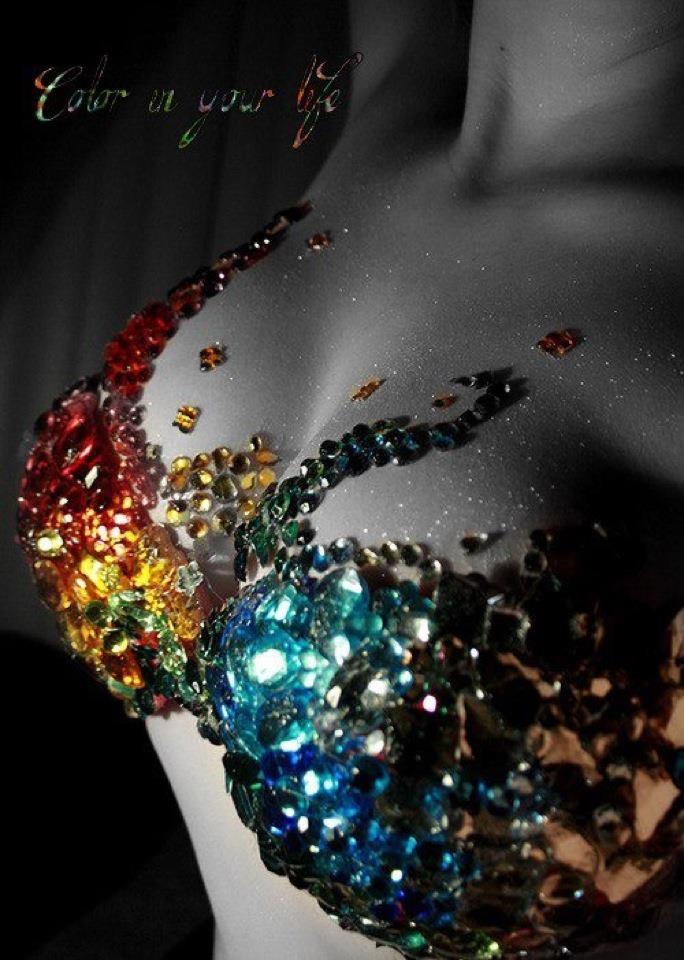
If a woman is going to make a belly dance costume with her own hands, the work can be started by preparing the bodice. For this, an ordinary opaque bra (preferably foam rubber) may be suitable. If it is already the right color, it will only need to be decorated. However, it is better to pre-sheathe it with the desired fabric so that it does not look ordinary.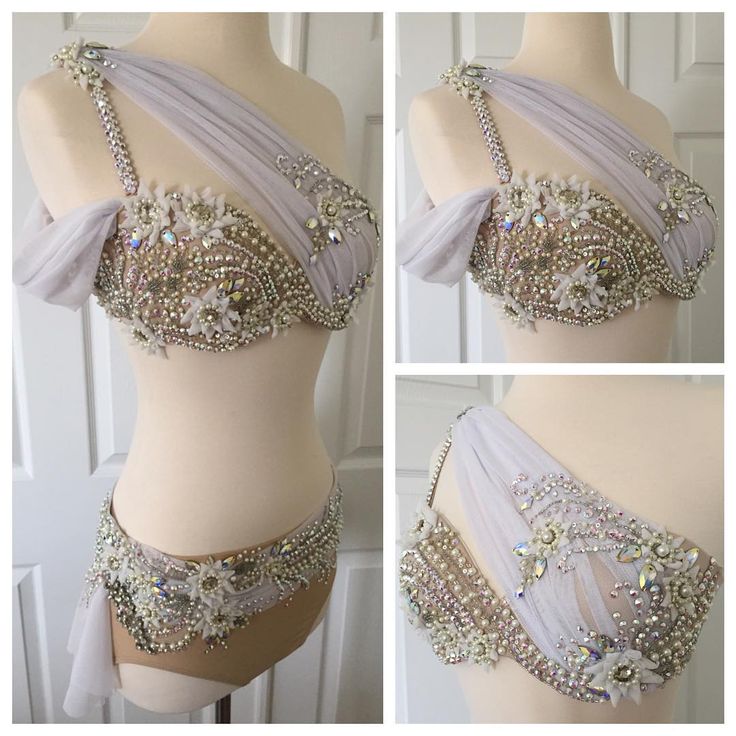 It will be impossible to create a single piece of skin, so it will consist of several parts. The first is a detail for cups. It is cut out in a rectangular shape and bent over the finished product. To do this, you will need to make several folds of fabric according to the principle of creating a tuck. You will also need fabric for the straps. To do this, cut out long rectangles that simply wrap these parts on all sides. The pieces are already sewn on the bra, you can even sew them on with a decorative stitch. "Ponytails" are hidden under the details for the cups of the bodice, which are sewn on last. We go further, creating individual details for a belly dance costume with our own hands. When the bra is completely wrapped in new fabric, you need to start decorating the product. Everything that the lady likes will come in handy here. It can be just beautiful embroidery with threads or beads, or it can be glued sequins in the form of fish scales, etc. Here the woman herself decides what she wants to get as a result.
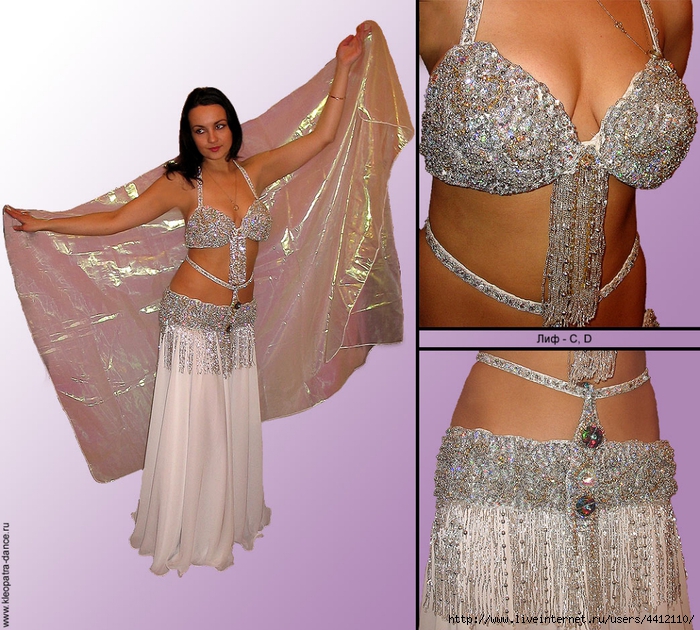 However, you need to remember that everything should be fairly securely attached, because in this costume you will have to dance, that is, actively move.
Step by step making beautiful oriental costumes for girls with our own hands
Bodice.
There are two easiest options for creating a bodice.
The first one is more suitable for very young girls. For tailoring the bodice, a children's top is taken. The color must match the color of future bloomers, or be flesh-colored. The top is sheathed with fabric (chiffon, satin) so that folds are formed at the bottom and on the side. Lay the folds with pins, then attach the fabric on a typewriter. The straps of the top and the resulting bodice are densely decorated with beads, coins, beads, glass beads, strings of pearls. You can cut a strip of fabric 1 cm wider than the top strap, sew decorations on it, and sew the strap itself to the top over the one that was before.
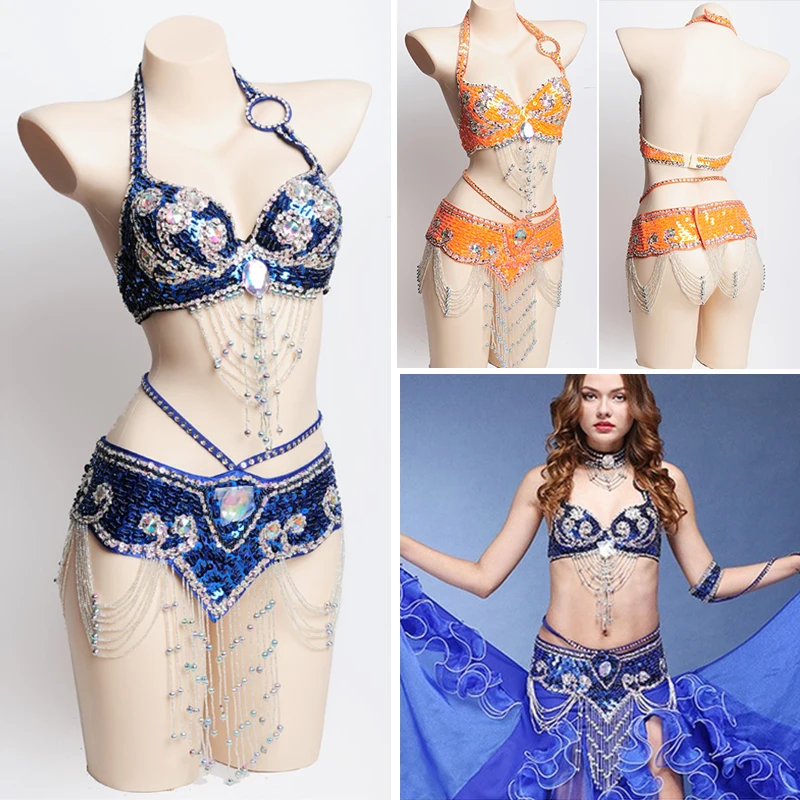
The second option is suitable for girls aged 10 and over.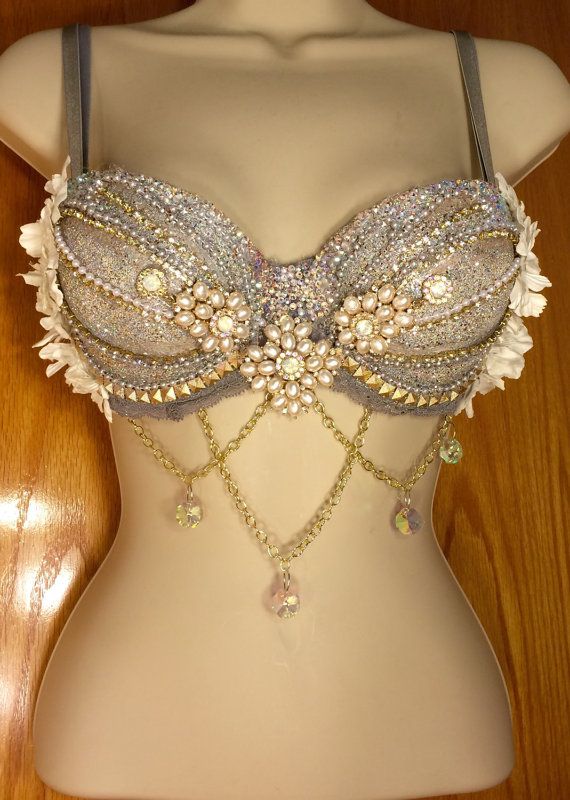 For tailoring, a bra or swimsuit is used a couple of sizes larger. This is necessary in order for the size to fit, since after decoration and sheathing, the size of the cup decreases. The base is wrapped in a fabric of the corresponding color.
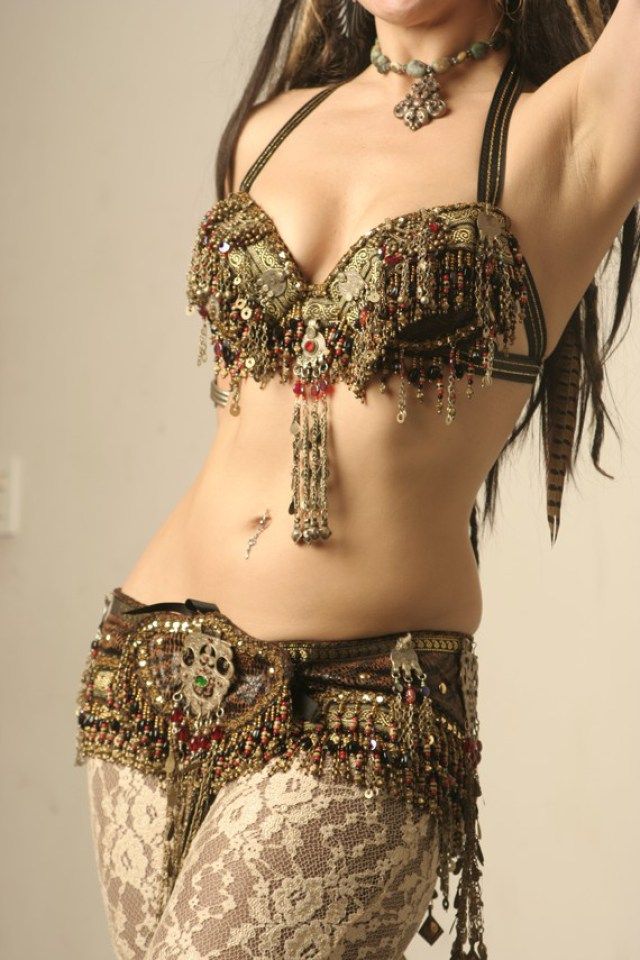
The shoulder straps are cut off, facing fabric is applied to the bodice and pinned with pins. The fabric should be pulled very tight.
Both cups are covered separately, then on the chest the fabric is connected with a neat blind seam (hand basted or sewn on a machine).
For the side bands of the bodice, the fabric should be with a margin so that it is enough to form the ties.
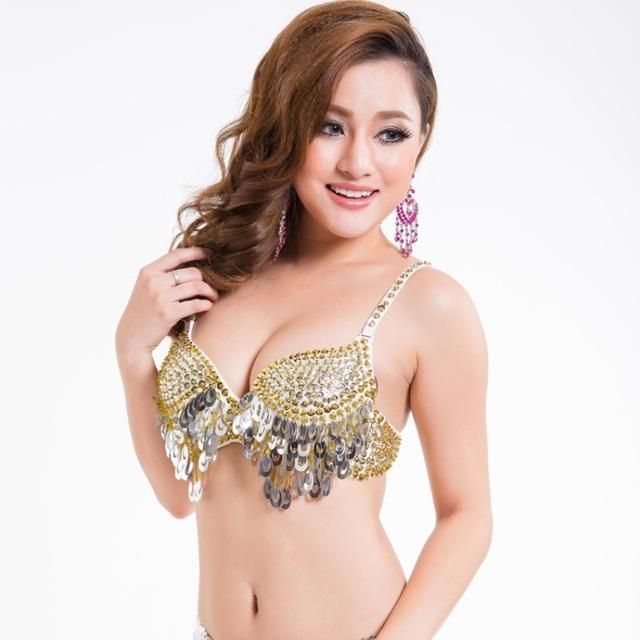
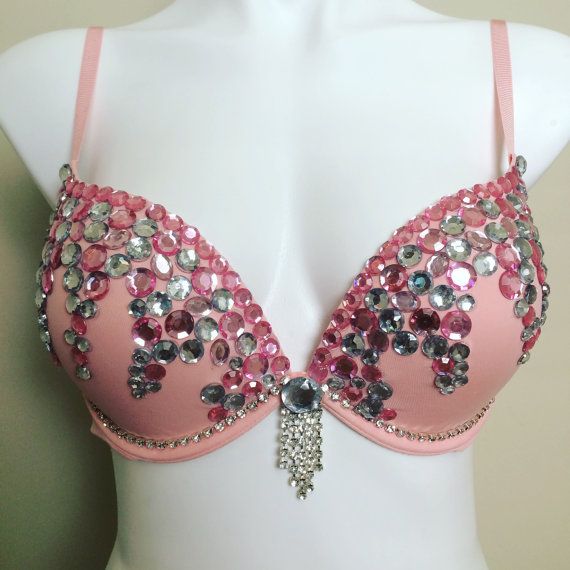
The finished sheathed bodice is decorated with sequins, beads, or any decor that suits the style.
Bloomers.
Harem pants require a lot of fabric. To calculate the correct footage, the length of the leg is measured from the sacrum to the ankle. Width plays a secondary role - the more fabric - the airier and lighter the bloomers.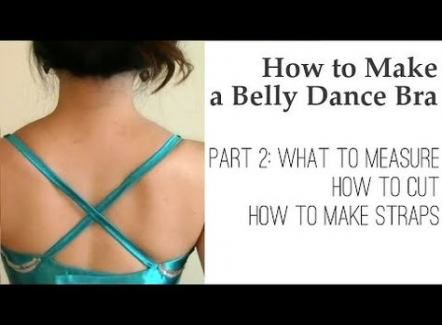
The photo shows how to cut out bloomers. To do this, the fabric is folded in half, with the front part inward. On the side where the fold of the fabric is, a semicircle is cut out. You need two such blanks - on the left and right legs.
The fabric is unfolded and folded with the right part inside. A semicircle is sewn, parts A, B, C, D are sewn in pairs. Pants with unsewn side stitching are obtained. This line can be grabbed a couple of times, decorating the stitching points with hanging beads or sequins. The legs will look beautiful through the slots, and for belly dancing it is very beautiful.
Bloomers sit on an elastic band, the volume of which is the size of the hips. The elastic band is taken wide and very elastic, so that the folds that are laid when sweeping trousers with fabric fit beautifully on the buttocks.
Monisto and belt.
The monisto is a neck ornament that emits a characteristic tinkle when danced and harmonizes in color and style with the costume.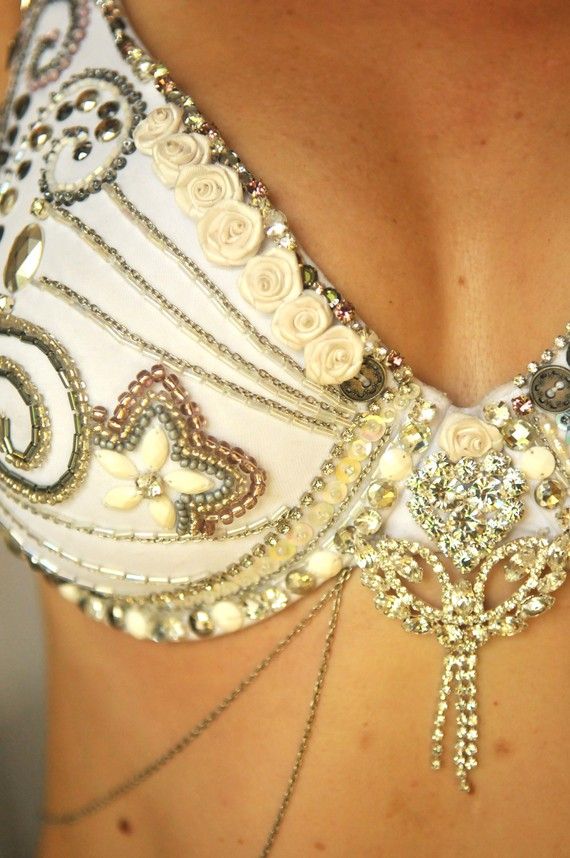 Maybe from beads, beads, glass beads, coins.
Like the belt, you can make your own monisto. To do this, the selected decorations are sewn onto a crescent-shaped blank. When sewing, you should leave a large supply of thread and sew on decorations so that they hang freely. Beads and other accessories are sewn in layers, but at the same time a pattern can be formed from them.
Monistos can be made from factory-made coins - they are light and have holes for sewing on. You can go the other way and use small real coins. To do this, holes are punched in them and coins are sewn to the workpiece with a strong thread through them. Real coins are heavier, but they ring better when moved.
The belt is made of chiffon or organza. The color of the material can be any - to match the bodice, harem pants, individual accessories of the costume.
The simplest belt pattern is a rectangular strip of fabric on which decorations are sewn.
There are many ready-made belts for dancing, but if the costume is made by hand, then the belt should be made by yourself.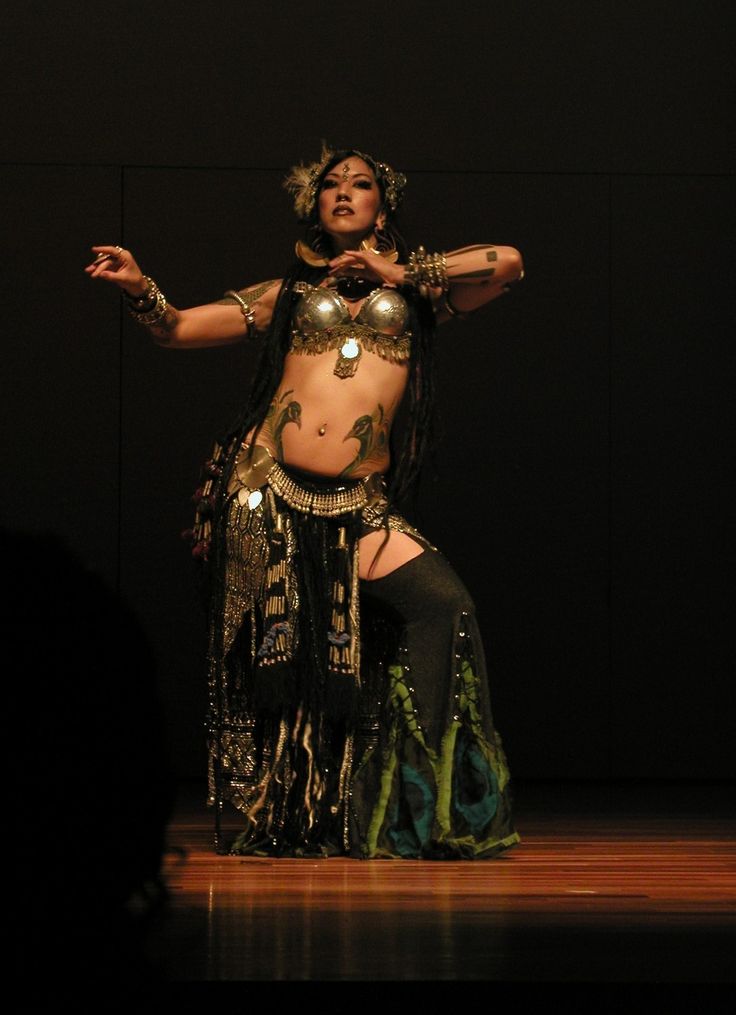
Head ornaments.
A beautiful decoration will be obtained if you use a large piece of organza, as on bloomers. It is fixed with a hair hoop decorated with beads and coins. You can sew a bandage. To do this, you need an elastic band, the length of which is equal to the girth of the head. Decorations are beautifully sewn on it, a pattern is formed from them. The finished elastic band is attached to the chiffon around the circumference so that the resulting design is firmly held on the head.
Sleeves.
For sewing armlets, measure the circumference of the arm above the elbow and the length of the arm from the elbow to the wrist. An allowance is made for width and seams. 1.5 cm is added to the seam, as much as necessary to the width.
A rectangle is cut out of the fabric and sewn along the vertical seam. You can not close the seam completely, but, like bloomers, grab it in several places, decorating it with decorative elements. Elastic bands equal to the girth of the wrist and forearm are sewn to the fabric.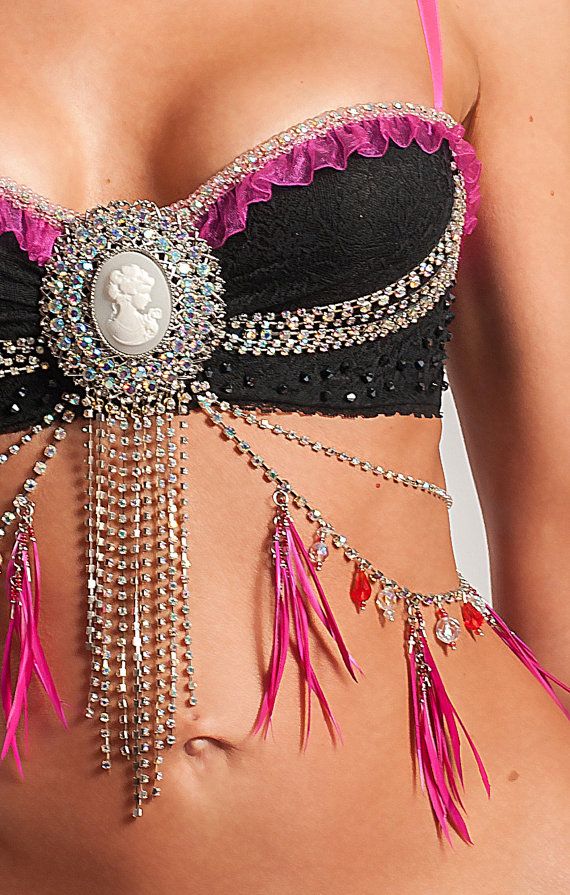 They are also decorated with accessories.
The larger the sleeves, the lighter the fabric should be.
Recommendations.
Starting to sew a costume, you should take into account that different fabrics behave differently in the dance. Organza, chiffon, silk are light and almost transparent fabrics, they are well suited for a suit. Satin is denser, it is good to use it for finishing the bodice or belt.
When forming a pattern, pay attention to how many folds there will be on trousers and sleeves. If a dense fabric is chosen, then too much fabric will prevent the suit from playing and swaying, but will look bulky and awkward.
When decorating a suit, use the same fittings and follow the same chosen style. It is not allowed to decorate the belt, head, bodice in different styles and themes. If different techniques are used, then the general concept should be traced throughout the costume.
Skirt
Tailoring of the belly dance costume includes making a long skirt. To do this, you need to take a fairly thin transparent fabric that drapes well, such as chiffon or crepe chiffon. Now you need to decide what kind of skirt you want to make. Two options can be considered. The first is an ordinary straight skirt with slits on the sides, the second is a sun skirt.
In any case, belly dance costume patterns must be prepared beforehand. So, for a straight skirt, you will need to take two pieces of fabric that will be sewn along the sides to about the end of the thigh. Unsewn sections and the bottom are simply hemmed. From above, you can provide the usual wide belt, which must be made of elastic fabric, because it will most likely be on the hips, and not on the waist. To do this, you need a piece of fabric twice as wide as the belt itself. The fabric for the belt is bent in width with the wrong side inward. Next, the belt is sewn to the skirt. To do this, first the inner part of the belt (which is adjacent to the body) is sewn with a skirt, then the fabric allowances are tucked in, covered with the front of the belt, and everything is overcast.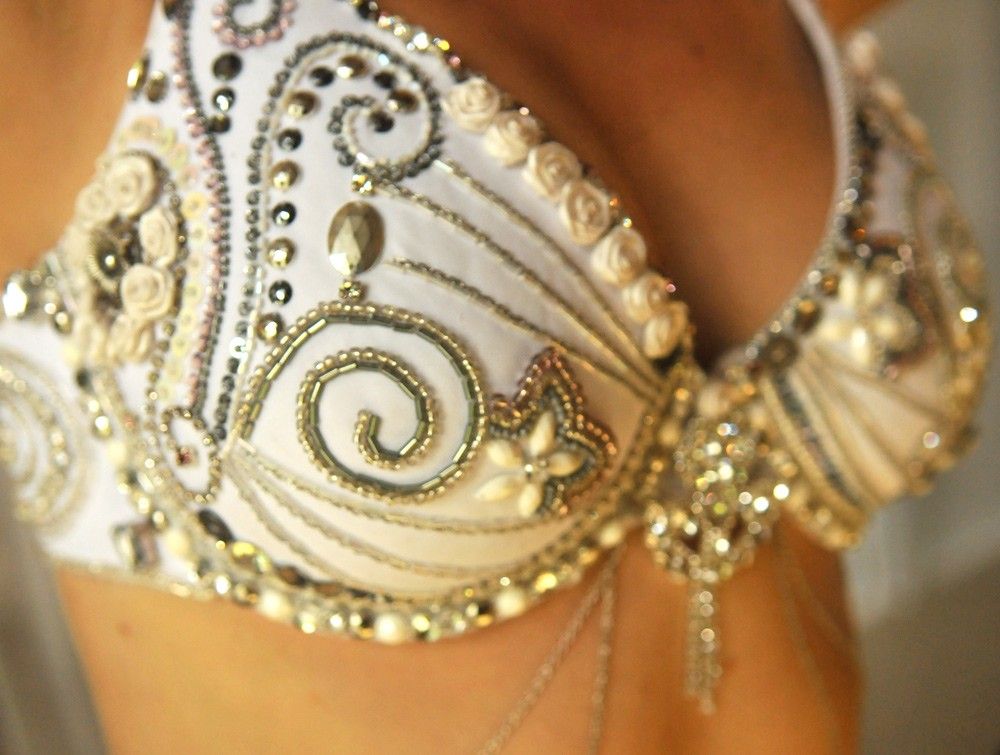 If everything went out neatly, a decorative stitch is started along the front of the belt. Oriental belly dance costumes also suggest the possibility of creating a sun skirt. You can sew it in the same way as the previous one, but the fabric will take a little more, about 2.5 times. After all, the sun skirt is a circle with a cutout for the waist in the center. The top of the skirt, along the waistline, can be gathered. The bottom is hemmed with a narrow scar, a wide belt is sewn to the top. That's all, the skirt is ready.
How to sew a belly dance costume at home
Of course, nowadays you can buy a ready-made costume, but firstly, it is more expensive, and secondly, it is so nice to realize that you created such beauty with your own hands.
- Contents:
- Contents:
0093
This is interesting: pieces of your belt costume.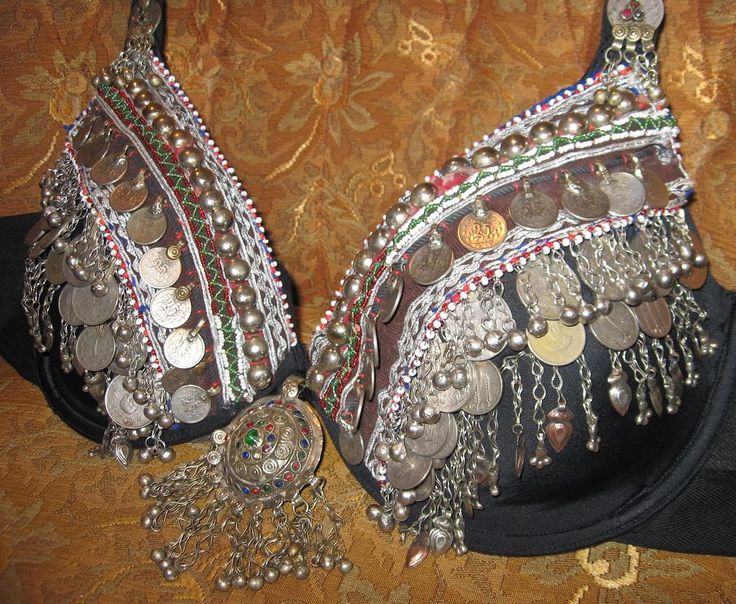 It should be hard enough, but not squeeze the stomach. Sewing a belt is also the most painstaking work that requires perseverance and imagination. You will need to make a base, embroider the belt with beads, glass beads, sequins, but what a beautiful result you get!
- making the base and sewing the belt
- how to “fit” the belt
The bodice and belt are the main part of the costume, which requires 80% of financial and labor costs. It is better to choose the color of the bra in the color of the suit, but you can take any and close it with embroidery material - sequins, beads, appliqués, braid. After sewing the bodice and belt, you can change skirts and you will have several options for your costume.
- Making a belly dance bodice
- Lif from the bra
- Patterns and shawl models
There are several extensions and you can choose both the simplest, most convenient for you and the most beautiful
- Different options for extensions and stitches
Belly Dance
Book
This book is not just a textbook.
A personal story told by the author with such taste and temperament convinces: for a woman who has managed to express herself in dance, there is nothing.
This book is not just a textbook. A personal story told by the author with such taste and temperament convinces: for a woman who has managed to express herself in dance, nothing is impossible.
Belly Dance - the most feminine dance of all time - will allow you to reveal your sexuality, to feel like a woman who has no equal. In the book "Belly Dance": Myths and realities of belly dance. Unique author's technique. Live dance training.
Sewing yourself? Easily!
Book
The book gives simple and clear advice to anyone who wants to learn how to sew on their own. Using the detailed recommendations of the authors, you can learn the rules of individual �.
The book gives simple and clear advice to anyone who wants to learn how to sew on their own.
Using the detailed recommendations of the authors, you can learn the rules of individual modeling, cutting and sewing clothes of any complexity, choosing the most appropriate style and finish. For greater clarity, the text is accompanied by numerous illustrations, pattern drawings and options for fashionable clothing models.
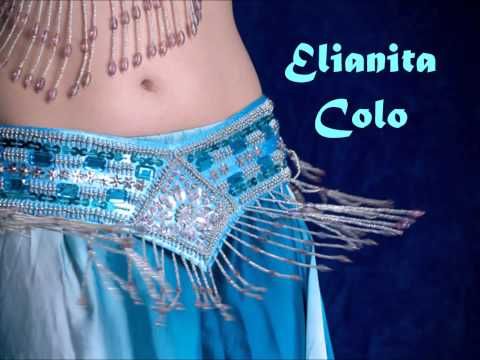
Belt
When preparing a belly dance costume with your own hands, it is important not to forget about such a moment as the design of the belt. It is this detail that gives the costume a special appeal. How to make it? To do this, it is better to pre-prepare a full-size pattern. The top must be straight, and the bottom of the belt can be triangular, figured, rounded - whatever you like. The length of the product is calculated: this is the waist circumference plus approximately 4 cm for the fastener. You can make tucks so that the product sits perfectly on the figure.
The fabric is also selected: for the base of the belt - dense, cotton can be used, and for the top - something light and beautiful, for example, supplex, satin, crepe-satin.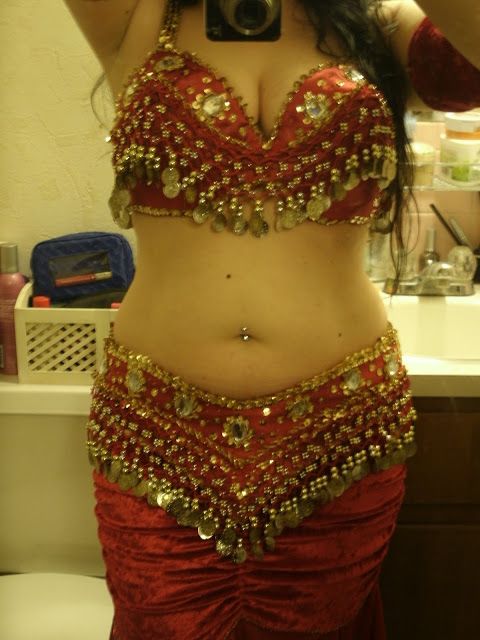 You will also need a dense interlining for gluing the product, it will be attached from the inside to the front of the product. When the parts are ready, they need to be folded with the right sides inward, sewn, turned inside out, through the hole left, baste and insert the fastener (the belt can simply be tied). Now it remains to decorate it in the same way as the bodice.
Accessories
What other details can oriental belly dance costumes suggest? Of course, these are special decorations. Earrings, bracelets for hands and ankles are definitely needed - the more the better, because when a woman dances, they ring pleasantly. By the way, they can also be made independently from beads or beads. It is necessary to decorate the neck with chains or coarse beads, and fingers with rings. However, it is important not to overdo it with decorations so that the figure is not too bulky. Of course, we must not forget about bright makeup, where the eyes should stand out especially.
Oriental Beauty carnival costume: ideas, photos
If you know how to sew well, then you just need to look at the thing and you will already understand how it can be created. Here are the ideas of the carnival costume Oriental beauty with a photo - choose, repeat and sew:
Oriental beauty cosplay costume Oriental beauty cosplay costume Oriental beauty cosplay costume Oriental beauty cosplay costume Oriental beauty cosplay costume » Carnival costume "Oriental beauty" Carnival costume "Oriental beauty"
Making a belly dance costume with your own hands
Bodice
If a woman is going to make a belly dance costume with her own hands, the work can be started by preparing the bodice. For this, an ordinary opaque bra (preferably foam rubber) may be suitable. If it is already the right color, it will only need to be decorated. However, it is better to pre-sheathe it with the desired fabric so that it does not look ordinary. It will be impossible to create a single piece of skin, so it will consist of several parts. The first is a detail for cups. It is cut out in a rectangular shape and bent over the finished product.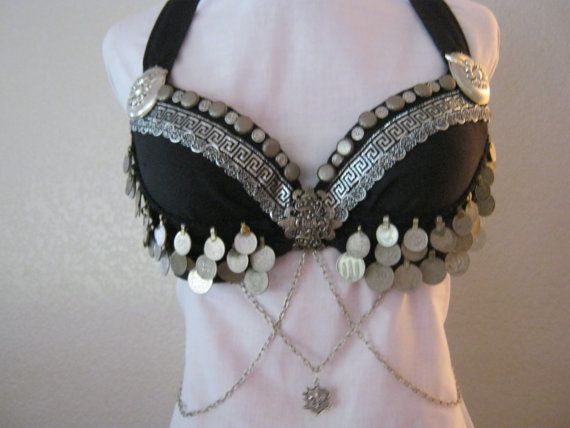 To do this, you will need to make several folds of fabric according to the principle of creating a tuck. You will also need fabric for the straps. To do this, cut out long rectangles that simply wrap these parts on all sides. The pieces are already sewn on the bra, you can even sew them on with a decorative stitch. "Ponytails" are hidden under the details for the cups of the bodice, which are sewn on last. We go further, creating individual details for a belly dance costume with our own hands. When the bra is completely wrapped in new fabric, you need to start decorating the product. Everything that the lady likes will come in handy here. It can be just beautiful embroidery with threads or beads, or it can be glued sequins in the form of fish scales, etc. Here the woman herself decides what she wants to get as a result. However, you need to remember that everything should be fairly securely attached, because in this costume you will have to dance, that is, actively move.
Master class for making a belly dance costume with your own hands.
Before tailoring any suit, you need to make the necessary measurements as clearly as possible. Then comes the selection of fabric for the suit. The fabric should be as pleasant to the body as possible, not cause allergic reactions (most often this happens when there are non-natural components in the composition) and not hinder movement (be as elastic as possible). For belly dancing, brighter fabric colors are needed, and one of the best options is silk as a material for tailoring a costume. In addition to the material for such a costume, you may need various decorations - stones, rhinestones, beads, etc. As soon as the purchase of the necessary components is over, you can proceed directly to tailoring.
The costume consists of 3 elements:
- Bodice.
- Skirt or bloomers.
- Dressing. Over the skirt on the hips.
First you need to choose a bodice, it is best to buy a ready-made bodice, which can be transformed into a part of the costume with the help of simple manipulations.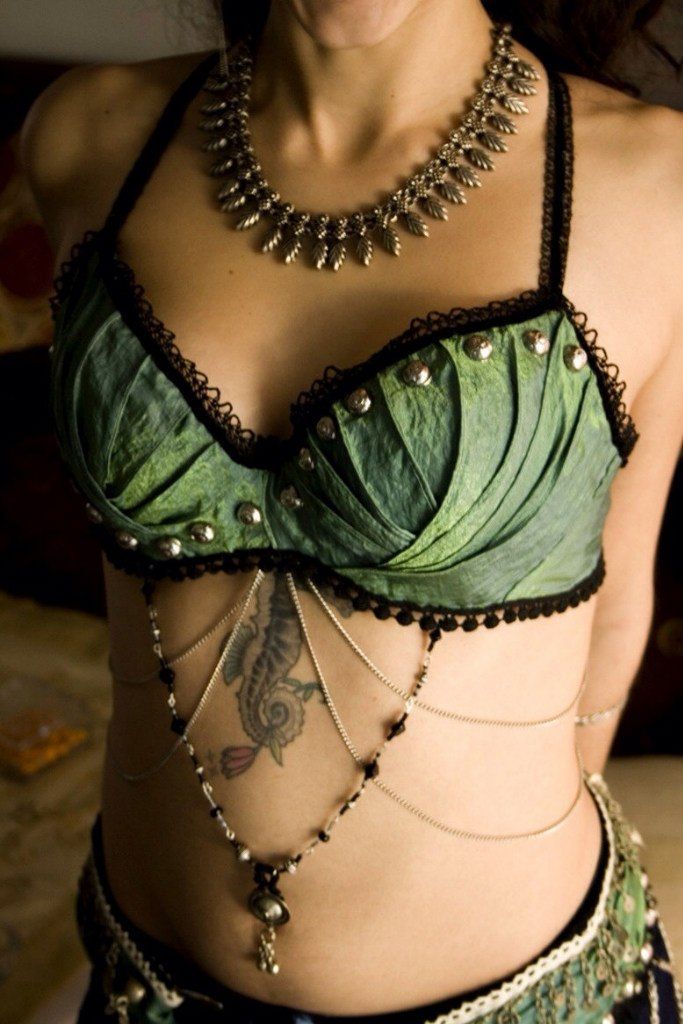 The bodice is better to choose, as shown in the figure without any patterns and decor, the usual solid color.
After you have found the most suitable bodice, many get rid of the internal filling of the cup. This should not always be done, but only if you naturally have your own large breasts and the push-up increases it even more and does not support it, as it is necessary for dancing. Many instead of push-up insert shreds of fabric, which gives rigidity and better fixes the chest.
Interesting: Role Play with Husband
It is very important to change the hooks to this kind of rivet, as shown in the photo below. It is they who will support the chest more favorably during belly dancing.
And the last most favorite and most interesting item in the preparation of the bodice will be decoration. You can decorate it with absolutely any materials and according to your design.
After the bodice, we proceed directly to the skirt of the suit.
First, measure the desired material size. Then we cut off the desired piece.
No lining needed. Elastic, threads and fabric - all you need for a skirt.
The elastic must be sewn to the waistband.
The hem of the skirt also needs to be processed so that everything looks as beautiful as possible and there are no protruding threads or uneven cut edges.
After the work done, we will get just such a skirt. Everyone chooses the right color and material from which to sew this skirt. It is also worth remembering that it should not be as long as possible and it is better to make one or two cuts on the sides. Then you can embroider and decorate this skirt with all possible beads, rhinestones, shreds from other materials.
The bodice and skirt are ready, only the belt remains to be sewn. The size and width of the belt can be different and vary only from personal wishes.
Using a sewing meter, measure the hips and transfer it to a piece of material. Next, we make a cardboard sketch of the belt itself.
After we circle the edges of the sketch and cut out the desired section of the fabric. This fabric needs to be stitched along all the edges so that the belt turns out to be even and beautiful.
Belt ready. It also needs to be decorated and the image will be complemented.
Skirt
Tailoring of the belly dance costume includes making a long skirt. To do this, you need to take a fairly thin transparent fabric that drapes well, such as chiffon or crepe chiffon. Now you need to decide what kind of skirt you want to make. Two options can be considered. The first is an ordinary straight skirt with slits on the sides, the second is a sun skirt.
In any case, you must first prepare the patterns for the belly dance costume. So, for a straight skirt, you will need to take two pieces of fabric that will be sewn along the sides to about the end of the thigh. Unsewn sections and the bottom are simply hemmed. From above, you can provide the usual wide belt, which must be made of elastic fabric, because it will most likely be on the hips, and not on the waist. To do this, you need a piece of fabric twice as wide as the belt itself. The fabric for the belt is bent in width with the wrong side inward. Next, the belt is sewn to the skirt. To do this, first the inner part of the belt (which is adjacent to the body) is sewn with a skirt, then the fabric allowances are tucked in, covered with the front of the belt, and everything is overcast. If everything went out neatly, a decorative stitch is started along the front of the belt. Oriental belly dance costumes also suggest the possibility of creating a sun skirt. You can sew it in the same way as the previous one, but the fabric will take a little more, about 2.5 times. After all, the sun skirt is a circle with a cutout for the waist in the center. The top of the skirt, along the waistline, can be gathered. The bottom is hemmed with a narrow scar, a wide belt is sewn to the top.
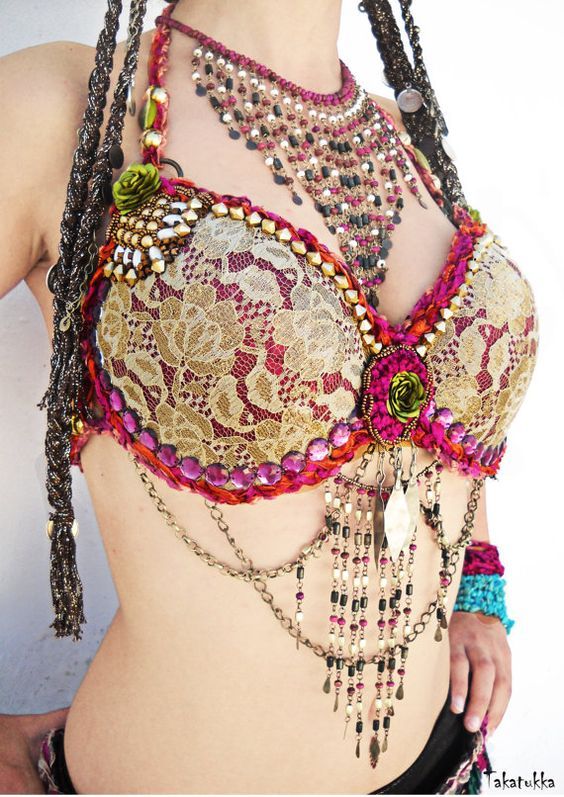 That's all, the skirt is ready.
How to sew a belly dance costume at home
Of course, nowadays you can buy a ready-made costume, but firstly, it is more expensive, and secondly, it is so nice to realize that you created such beauty with your own hands.
- Contents:
- Contents:
3
This is interesting: A bedroom in turquoise tones
belt suit. It should be hard enough, but not squeeze the stomach. Sewing a belt is also the most painstaking work that requires perseverance and imagination. You will need to make a base, embroider the belt with beads, glass beads, sequins, but what a beautiful result you get!
- making the base and sewing the belt
- how to “fit” the belt
The bodice and belt are the main part of the costume, which requires 80% of financial and labor costs.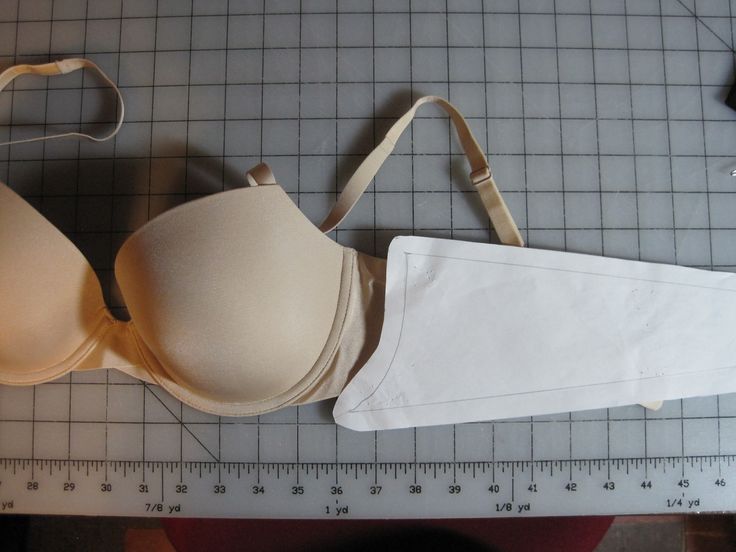 It is better to choose the color of the bra in the color of the suit, but you can take any and close it with embroidery material - sequins, beads, appliqués, braid. After sewing the bodice and belt, you can change skirts and you will have several options for your costume.
- Making a belly dance bodice
- Lif from the bra
- Patterns and shawl models
There are several extensions and you can choose both the simplest, most convenient for you and the most beautiful
- Different options for extensions and stitches
Belly Dance
Book
This book is not just a textbook. A personal story told by the author with such taste and temperament convinces: for a woman who has managed to express herself in dance, there is nothing.
This book is not just a textbook. A personal story told by the author with such taste and temperament convinces: for a woman who has managed to express herself in dance, nothing is impossible.

Belly Dance - the most feminine dance of all time - will allow you to reveal your sexuality, to feel like a woman who has no equal. In the book "Belly Dance": Myths and realities of belly dance. Unique author's technique. Live dance training.
Sewing yourself? Easily!
Book
The book gives simple and clear advice to anyone who wants to learn how to sew on their own. Using the detailed recommendations of the authors, you can learn the rules of individual �.
The book gives simple and clear advice to anyone who wants to learn how to sew on their own. Using the detailed recommendations of the authors, you can learn the rules of individual modeling, cutting and sewing clothes of any complexity, choosing the most appropriate style and finish. For greater clarity, the text is accompanied by numerous illustrations, pattern drawings and options for fashionable clothing models.
Belt
When preparing a belly dance costume with your own hands, it is important not to forget about such a moment as the design of the belt.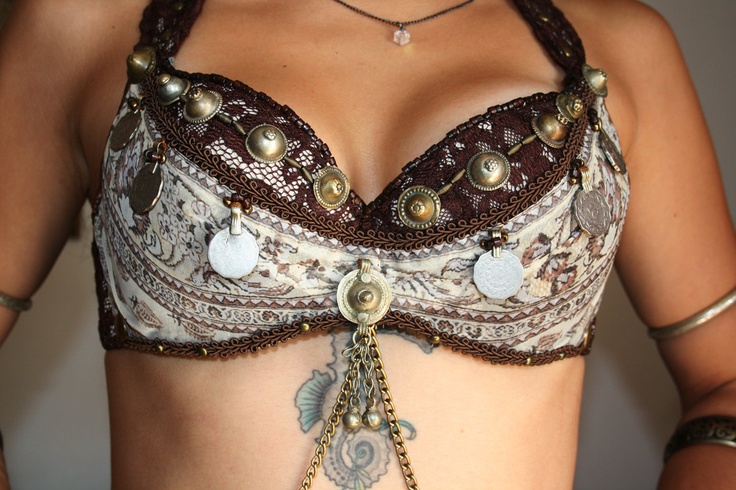 It is this detail that gives the costume a special appeal. How to make it? To do this, it is better to pre-prepare a full-size pattern. The top must be straight, and the bottom of the belt can be triangular, figured, rounded - whatever you like. The length of the product is calculated: this is the waist circumference plus approximately 4 cm for the fastener. You can make tucks so that the product sits perfectly on the figure.
The fabric is also selected: for the base of the belt - dense, cotton can be used, and for the top - something light and beautiful, for example, supplex, satin, crepe-satin. You will also need a dense interlining for gluing the product, it will be attached from the inside to the front of the product. When the parts are ready, they need to be folded with the right sides inward, sewn, turned inside out, through the hole left, baste and insert the fastener (the belt can simply be tied). Now it remains to decorate it in the same way as the bodice.
How to sew trousers (skirt)?
If you decide to sew a children's costume of an oriental beauty with harem pants, then you need to make measurements of their length, waist and leg circumference in its wide part.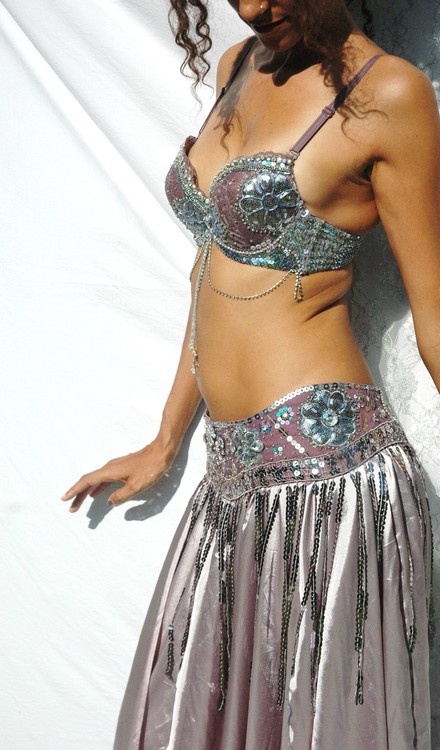 You can take the girl's trousers and make a pattern using them, increasing the width of the bloomers. To prevent the material from crumbling, the side seams of the product should be processed. It can be a zigzag, and a regular trimming seam.
After that, the outer side seams of the bloomers are sewn from the hip a few centimeters down and at the very bottom of the leg. In several places, along the side seam, you need to grab and sew on beads. The side seam itself can also be decorated, like the topic: with sequins, beads and rhinestones. Below, in the ankle area, an elastic band should be threaded. A wide elastic band is also threaded into the harem pants.
If you decide to make the lower part of the children's costume of an oriental beauty with a skirt, you need to sew this element from a light flowing fabric. If the skirt is made of chiffon, then it should be all of this material. But hard shiny organza can be combined with silk.
You can also use pareo to make a skirt.