How to change background in dance video
The Easiest Way To Remove or Change The Background Of Your Video
Spread the love
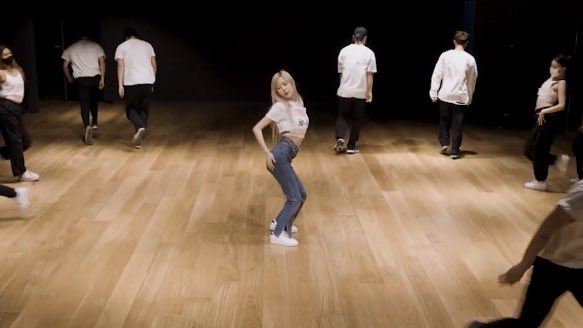
You are amazing. That’s a given. Unfortunately, the world will often fail to meet the highest standard so, more often than not, your very presence will be outshining the background of the video you are shooting.
That said, you can always change the background color of a video or replace it entirely (with the right tools). Sure, the task seems challenging and many content creators – even professional youtubers – often fear working with professional movie making software. Luckily, Animotica can help change video background on Windows 10 in but a handful of simple clicks.
Contents
How to remove a background in a video on Windows 10?
More often than not, people edit their videos to fit the certain screen size. If, for example, you have shot a vertical video but feel like it would be a nice fit for a wide-screen platform, such as YouTube, you can easily add blur and another effect instead of making an upload with the dreaded black frame.
If you are on Windows 10, start with downloading Animotica from Microsoft Store. The app is free and super lightweight. We will talk about the alternatives to other operating systems in a bit, but for now, let’s focus on a single interface. Click on the button to download it or launch it, if you already have it.?
Step #1. Create a new project and upload your files.
Install the application, double-click on the icon, and choose to create a new project.
Create a new project in AnimoticaThen upload the video where you’d like to change the background.
Step #2. Adjust the background.
Click on the video you have uploaded and then choose the “Transform” option from the menu below.
If the original dimensions of your video are different from your final video frame dimensions you expect to get, and you want your original video be fully visible on the screen, select ‘Fit’ option.
Transform your video or image In case if you don’t want background to be seen and your image or video to feel full screen instead, select ‘Fill’ option.
Step #3. Scale, apply offset, or horizon.
You will see a new menu with four slide bars. Typically, you will use the scale slider, but feel free to play around with the remaining three for some eye-catching effects.
Once you are done, click on the go back button at the bottom corner of your screen. Then click on the project settings button and the fill/fit button. You’ll see a wide selection of amazing effects to enhance the background of your video. Do note that you can either add blur or color to your video background.
Step #4. Download your video to your PC or YouTube directly
After you finished editing your video, click ‘Save Video’. It might take a few minutes to render it. After that, you will see the option to share your video directly to YouTube using your Google account.
Video rendering in AnimoticaHow to change the background of a video with a green screen?
If you are looking for something going outside the box of blur and colors, Animotica lets you create amazing green screen-based videos with its built-in Chroma Key feature.
We already have a detailed guide on using Chroma Key on our blog, but here is just a quick example to follow.
Note: You can also use the Chroma Key feature on any background color (blue, red, pink, etc.) if you don’t have a green screen. Try as much as possible to ensure that the background has just one, uniform color.
Step #1. Upload your background video.
Upload a video you’d like to use as a background.
Add files to Animotica project.For the sake of the example, we’ll be using GIPHY library of animated images.
Add GIF file.Step #2. Add video overlay.
Click ‘+’ and select one of the overlay options. After that select the video that will be overlaying our background. Classically, green screen background is used for videos that meant to be edited with Chroma Key feature. That is because the green color is easier to delete due to the contrast aspect.
In Animotica, you can actually remove any background color.
Pro-tip. Make sure the background of your video is a contrast color comparing the other colors of your video, otherwise, you might get more pieces of the video deleted than you want in case if contrast is bad.
Add GIF overlay to your video.Step #3. Adjust the size and apply Chroma.
Upload your video with the green screen (or any other color), which will be the main video of your masterpiece.
Click ‘Chroma’ to proceed to the Chroma Key feature.
Select Chroma feature.Turn on the Chroma Key and adjust the tolerance.
Switch on Chroma Key and select color.Select color (if other than green).Step #4. Save your video or download it to YouTube.
Here is the result we got from this video. Your background space video and a funny walking alien as a main video.
How to add another video as a background to your video?
Step #1. Upload video that you want to use as a background.
For this example we selected free videos from pexels.com.
Add video backgroundStep #2. Add video overlay.
Upload the video overlays, which you want to be on top of your background video. In our case, we will use two videos, one per each frame on the wall.
Add video overlay.Step #3. Adjust and crop if required.
Use ‘Transform’ feature to place your videos on the background video properly.
Transform video overlaysUse ‘Crop’ feature, to delete some parts of your video if needed. In our case, we want to make sure these two video overlays fit the frames on the wall.
Transform your video to change its position.
On this step, you can also adjust the color of your background video, add some text to it, change aspect ratio and more. Check the bottom menu to see all features.
Step #4. Save or share to YouTube.
Once you’re done with your video, click ‘Save’.
You will also see an option to share it directly to your YouTube channel.
How to blur a video background
If you want to Blur the background, click on ‘Background’ tab in the menu and select one of the ‘Blur Background’ options available in Animotica.
That’s it, you are done. Some even say that this simplicity in a moderately impactful feature makes Animotica one of the best apps on the market to add blur effects.
Important! If you don’t see the changes in the background, go to the ‘Transform’ tab and try to change the scale of your video/photo frame.
How to change color of the video background
Change color of the video backgroundHow to change video backgrounds on other platforms?
While Animotica is primarily a Windows 10 product, it is compatible with Microsoft’s entire lineup including the X-Box. We don’t go too far beyond our scope of expertise though. You know what they say about Jacks-Of-All-Trades.
Still, there are many viable alternatives for Android and iOS users out there.
- iOS: Erase & Change Video Background
- Android: Video Background Changer
Ready to change the background of your video? Launch Animotica and create your next masterpiece!
Spread the love
Top 10 Video Background Removers to Change Video Background[2021]
Benjamin Arango
Sep 29, 2022• Proven solutions
Videos are often shot with different backgrounds and later on the video background doesn’t fit with the theme. Then you can change the video background, and add transitions to make it more attractive and bring in virtual reality to do the job. There are certain tools available today to remove video background but many of them would have some restrictions and limitations.
So, did you capture a great video on the Chroma screen but are unsure which software to use to change the background? Don’t lose hope because this article intends to teach you video background removal through the top 10 video background removers to change video backgrounds. You can use these apps on your computers and smartphones and even do the work online .
So let’s roll!
You may also like:
- The Step-by-Step Guide to Remove Video Background
- How to Remove Image Background
Top 10 Video Background Removers to Change Video Background
Here I listed the top 10 video background removers for you to remove your video background (they are listed in no particular order):
- 1. Wondershare Filmora
- 2.
 VSDC Video Editor
 - 3. Final Cut Pro
- 4. Photoshop Premiere Pro
- 5. Camtasia Studio
- 6. Kapwing
- 7. Movavi Video Editor
- 8. Unscreen (Online)
- 9. KineMaster
- 10. Chromavid
1. Wondershare Filmora
Wondershare Filmora video editor is a great video editing software that can help you remove video background easily. It not only provides a variety of video effects and templates but also enables you to share your video to social media platforms such as YouTube and Vimeo.
Unlike any software that will be mentioned afterward, with its new feature AI portrait, Filmora V10.5 can remove your unwanted background even without a green screen in just one click. You heard it right, don't need to put any effort into cutting out the background manually or using greenscreen. Just one click and you would be satisfied with the outcome!
Also, You can easily remove the video background with Filmora by simply uploading the video and the picture that you want to use as your background. Add your video to the timeline, right-click it, and select Green Screen. And then, you can enable Chroma Key and adjust the background to black or your requirement with the help of layers given there. Finally, drop the new background image on the timeline, which will be applied to your video background.
Free Download
For Win 7 or later (64-bit)
Secure Download
Free Download
For macOS 10.12 or later
Secure Download
Features:
- Edit videos in 4K
- Advanced chroma key settings
- Flexible audio keyframing
- A large collection of video effects
- Fast video rendering
- Screen recording and scene detection
System requirements:
- Windows: Windows 7 and later versions (64-bit)
- macOS: 10.
 14 and later versions
Price: Freemium/$49.99 for annual plan/$79.99 for perpetual, AI Portrait Add-on needs to be paid separately.
You can join the Wondershare Video Community to get more inspiration.
2.VSDC Video Editor
VSDC is a video editing software that has amazing features to edit videos and presentations with amazing features like background remover, merge video file, cut, zoom, effects, audio, and much more. The tool includes a multi-color chroma key to give a professional look to your video. Just go to the timeline and click the Scene 0 tab click the green button that says Add object on the top section. Now, select the image or video file that would be used to replace the background. Now, when you select the new file there will be a new frame on the scene and to adust this, as the background, you need to right-click and select Choose order- One layer down to adjust the background that you selected.
Features:
- Supports non-linear video editing
- HD and 4K enabled
- Video stabilization tool
- Video file converter
- Share and export to YouTube and social media channels
- Built-in Visual and audio effects
System requirements:
- Microsoft Windows2000/XP/2003/Vista/Win7/Win8 (all of the last updates installed are recommended)
- Intel or AMD or compatible processors at 800 MHz minimum
- Display graphics minimum resolution of 800x600x16-bit color
- RAM 128megabytes (MB)
Price: Freemium/ $19. 99 for Pro version
3.Final Cut Pro
Final Cut Pro is a video editing software developed by Apple with amazing features. Final Cut Pro comes with a lot of built-in tools to add effects, remove background noise, add audio, and much more. Although this tool is a great help in removing the background of your video and replace it with the best possible alternate image or clip. You can go to the option on the left of the Camera sign that is Effects and select Keying to add a black background on your video. Now, upload a new photo or video on the timeline that you want to replace the background with and you will see your video background removed.
Features:
- Moving and trimming clips
- 360 degree VR editing
- Effects and multi-cam editing
- Motion graphics templates
- HD video support
System requirements:
- Microsoft Windows 10, Windows 8 and Windows 7 (64-bit only)
- macOS 10.
 11 or later (64-bit only)
Price: $299.99
4.Adobe Premiere Pro
Adobe premiere pro is a leading video editing tool in the industry that is widely used by film, TV and web-based organizations. Adobe helps in creating normal footage into highly professional and polished videos and films. On premiere pro, create a new sequence and drag the background into the sequence and place it below the green screen footage. Now, use the ultra key effect and place it over the green screen footage, clean the matte and edges, and spill the suppression. Crop and scale according to the adjustments in the final video.
Features:
- Multiple video types
- Video titling & graphics
- Multiple formats supported
- VR audio editing
- Effects & motion graphics templates
System requirements: Microsoft Windows 10 (64-bit) version 1803 or later
Price: $239. 88/year
5.Camtasia Studio
Camtasia Studio is a great tool if you are looking for professional-looking video demonstrations and online lessons and presentations recording. You can record your screen, add video footage, or import your PowerPoint presentations to it and edit your videos without having any video editing experience. On the Camtasia platform, go to dimensions and select the area dimensions and color you want to display on the background of your video. You can also add a text in your background with the text editor tool.
Features:
- The recording and presentation feature would allow you to project a recording in a presentation.
- You can edit your video background and screencasts.
- Share the creativity on social media platforms.
System requirements:
Microsoft Windows 10 (64-bit) 1607 version or later
Price: $289. 54 one-time fee
6.Kapwing (Online)
Kapwing is a web-based video editing tool that can work on both Windows and Mac OS. This tool is the fastest tool available online that changes the video background with simple steps. The video background removal is very easy. Go to Kapwing and upload your video. Now select the layer and click on the “Effects” tab. Now, click on the “Remove Background” option. Kapwing’s AI will analyze the background and automatically remove it. </p >
Features:
- It can detect the object in a video automatically.
- Edit video clips online.
- Replace the background of the video clip easily with any image.
System requirements: Windows or macOS, and internet connection required
Price: Free to use with $192 annual charges
7.Movavi Video Editor
Movavi video editor is a great video editing tool that allows you to create great videos for a birthday, house parties, travel logs, etc. You can easily master the art of video editing with Movavi even if you are a complete beginner. Import your videos and open the background tab to select a picture and click on the Add icon to add a video track and move your video along the track on the timeline. Now, go to properties and click on Picture in Picture to adjust the background on the video. Once done you can apply the changes and export the final video.
Features:
- Inbuilt titles and transitions.
- Chroma key to tweak background image.
- Video stabilization to avoid errors like shaky movements occurred during the recording.
System requirements: Windows 10, 8, 7, Vista, XP, 2000 (either 32-bit or 64-bit)
Price: $39.95
8.Unscreen (Online)
Unscreen is a great tool that would remove your video background automatically without even a single click. You only need to upload the clip that should be in mp4, WebM, Ogg, MOV, and gif format to get started with the editing. Upload the clip and select from the cool backgrounds that you want to put on your video and download your file, it's as simple as sipping a coffee and get the job done.
Features:
- Online and easy to access.
- No registration needed
- Remove video background with just several clicks
System requirements: Online tool
Price: $4.99 per video
9.KineMaster (Android and iOS)
KineMaster is a great tool for mobile video makers and editors where they can create an awesome video with KineMaster and edit the clips. Record your video using a green wall as a background and then run KineMaster on your mobile phone and in the media section upload the background that you want to apply. Now, click on the layer, upload your video, and enable the chroma key. Finally, use the slider along with the clip to match the background color.
Features:
- Play multiple videos at a time.
- Blending modes to allow videos and images to go magical with effects.
- Chroma key to change or replace the video background.
System requirements:
- Android 4.0 and above.
- iOS 11.4 or later.
Price: $4.99/month & $39.99/year
10. Chromavid (Android and iOS)
Chromavid is a mobile app that you can use to shoot awesome videos and photos and edit them using the chroma key with real- time effects. This powerful app enables you to create professional videos just with the help of a mobile phone. Launch the app from Play Store and click on images to choose for background and click on Continue. Now, choose a background color and start recording your video, and when you are done shooting your video the chroma effect will be applied automatically.
Features:
- Social sharing buttons to share creativity online.
- Record a clip while chroma key in action.
- Merge and tweak images with unlimited recording time.
System requirements:
- Android 4.0 and above
- iOS 12.0 or later
Price: $2.99/year
Conclusion
This article is an in-depth guide on how you can change video background on your PC and mobile phones too. There are different tools available online and on app stores that would certainly help you in editing your videos and removing the background too. If you have learned to remove video background after reading this guide then let us know in the comment and don’t forget to share this guide with your friends who might be struggling to change the video backgrounds.
FAQs
Q1. Which app is best for changing video background?
You will find hundreds of recommendations online for video background changing apps. However, only a few can maintain the video quality after the background change. Movavi Video Editor, VSDC, Photoshop Premiere Pro, and Final Cut Pro are the most popular tools to change the background. But, remember, these programs require experience. On the contrary, most beginners and professionals love using Filmora to remove or change backgrounds because it is fast and easy and always provides high-quality results.
Q2. How can I remove the background from a video manually?
You can download Filmora, VSDC, or any other video editor of your choice that offers a background removal feature. Install the app on your PC and import your video captured in front of a solid background. Next, import a new background (image or video) on the timeline that you want to keep. Then, apply the Chroma effect and choose the effect color similar to the video's background color. For example, select the ‘green’ color from the Chroma effect if your original background is shot on a green screen. Lastly, proceed with the effect to remove the background and make adjustments until the object from the original video is clear and visible on the new background.
Q3. How can I change video background in mobile?
You can change the video background through your smartphone (Android or iOS) by downloading apps like Kinemaster. After opening the app, import the new background image by clicking the “media” folder. Then, tap on the “layer” option to import the video captured on a green screen. Next, tap on the green screen video on the timeline to view the options and “enable’ the Chroma Key option.
Q4. Can Filmora remove background?
Filmora helps you remove video backgrounds with and without a green screen. The software offers a “human segmentation effect” that allows you to change the background without needing a green screen.
Benjamin Arango
Benjamin Arango is a writer and a lover of all things video.
Follow @Benjamin Arango
Change the video background in iMovie
Use the green studio effect in iMovie to change the video background on your iPhone, iPad, or Mac.
Use iMovie's green studio effect to superimpose a video over a background video, photo, or other image. First shoot the subject in green or blue studio. Then add this video above the background video in the iMovie timeline. Then use iMovie's green studio effect to display a background video behind the subject.
Record video in green or blue studio
Record video with iPhone, iPad, iPod touch or other camera in green or blue studio. If the main subject in the video is green or the person wearing green clothes, record the video with a blue background. If the main subject in the video is blue or the actor is wearing blue clothes, record the video with a green background.
Use the green studio effect in iMovie on iPhone or iPad
- Open a project and add a background video clip or still image to the timeline.
- Scroll the timeline so that the playhead (white vertical line) is above the background video.
- Click the Add Media button, select a category from the list, and then tap the green studio video.
- Tap the More button and then tap Green/Blue Studio. The green studio footage is added to the timeline above the background video.
- In the viewer, tap Auto to automatically remove the green or blue background from the recording. Or tap the corresponding color on the entry in the viewer to remove it.
- Trim and move the background video to match the length of the green background video. Since both records are interconnected, they will move at the same time when either of them is moved on the timeline.
or iPod touch
After adding the green studio effect, you can make further adjustments. In the timeline, tap the green studio video you want to adjust and use the green color controls:
- To change the amount of green or blue removed from the video, click the Adjust button, and then drag the Strength slider left or right.

- To crop parts of the video in the green studio, click the Set Mask button and drag the corners.
Use the green studio effect in iMovie on Mac
- Open a project and add a background video clip or still image to the timeline.
- Add video footage in the green studio above the background video on the timeline.
- Trim and move the background video to match the length of the green background video. Since both records are interconnected, they will move at the same time when either of them is moved on the timeline.
- If the video overlay controls do not appear, click the Video Overlay Settings button above the viewer, and then select Green/Blue Studio from the drop-down menu.
The iMovie viewer removes the green or blue background from the green studio video and displays the background video behind the subject instead. Since the two records are interconnected, they will move at the same time if either of them is moved on the timeline.
iMovie removes color based on the dominant color in the frame where the playhead is located when you select Studio Green/Blue from the drop-down menu. If the frame under the playhead is very different from the rest of the video, move the playhead and apply the effect again.
Adjusting the Green Studio effect on a Mac
After adding the Green Studio effect, you can make further adjustments. In the timeline, select the green studio video, click the Video Overlay Settings button, and use the green color controls to make adjustments.
- To adjust the transition between video footage in green studio, drag the Softness control.
- To separate video areas in the green studio, click the Crop button , then drag the corners of the frame to the viewer.
- To add a mask to the parts of the video in the green studio, click the Arrange button, then drag an area on the video in the viewer.
Additional information
Publication date:
How to change the background of a video
Chroma Key is widely used in science fiction films. In the studio there are only actors and a green background, and as a result, the characters fly on dragons and fight fantastical creatures. It is enough to learn how to replace the background on a video in one editor or another, some of which we will look at here.
| Program | OS | Key Features | Disadvantages |
|---|---|---|---|
| 2 easy background replacement, videophone collection service | Paid after trial | ||
| Adobe ® After Effects ® | Windows, macOS | ||
| Apple iMovie | macOS, iOS | Intuitive interface, high video quality | Removes only blue and green background, resource intensive |
| Lightworks | Many fine-tuning tools for Windows, Linux, | 903 with color | Complex interface, limited functionality of the free version |
| OBS Studio | Windows, Linux, macOS | Free, video capture included Free Download Free Download Download Download This video editor is both advanced in terms of functionality and very easy to use. Benefits
Disadvantages
To replace the background on the footage :
Adobe® After Effects ®The editor can be used on PCs running Windows and macOS. With this program you can create professional video of very high quality. Advantages
Disadvantages
Background replacement algorithm :
A black and white image will appear in the preview window. The black background corresponds to the removed background, the white one corresponds to the remaining image. If the black area is not uniform (it has gray areas), this means that the background has not been removed correctly. Import a video or image to serve as a background and drag it into the composition window.
VSDC Free Video EditorA free video editor with a simple interface designed for video editing on Windows devices. The program is especially convenient for those who make videos for YouTube and other hosting sites. Benefits
Disadvantages
Video processing algorithm :
Sony Vegas ProThe program is designed to process video on a PC running Windows. The professional editor is widely used in many film studios around the world. Advantages
Disocations
Apple iMovie Free video editor for macOS PCs and iOS mobile devices. Benefits Disadvantages Background Replacement Algorithm :
Lightworks Lightworks professional editor can be used for Windows, Linux, macOS. The program is suitable for both amateurs and professionals. Benefits
OBS StudioFree program designed to capture and record video from the screen in Windows, Linux, macOS. OBS Studio is often used to broadcast on YouTube. Advantages 116 9000 9000 9000 9000 9000 9000 9000 9000 9000 9000 9000 9000 9000 9000 9000 9000 9000 9000 9000 9000 9000 9000 9000 9000 9000 9000 9000 9000 9000 9000 9000 9000 2 Resource intensity Algorithm for creating video with a solid background :
ShotcutFree open source video editor designed for video editing on Windows, macOS, Linux systems. The program has a fairly wide functionality. Advantages Disadvantages0015 Background replacement algorithm :
|
 It is suitable for both beginners and professionals. There are versions for Windows and macOS.
  The background video should stay at the bottom, on the main Video Track .
  If blurring is needed in some area, it is recommended to first cut out the background (perform keying)
  You can experiment with black and white balance to improve image quality ( Clip Black and Clip White ), clean up the base color (Simple Choker), use the smoothing tool along the contour ( Screen Pre-blur ).
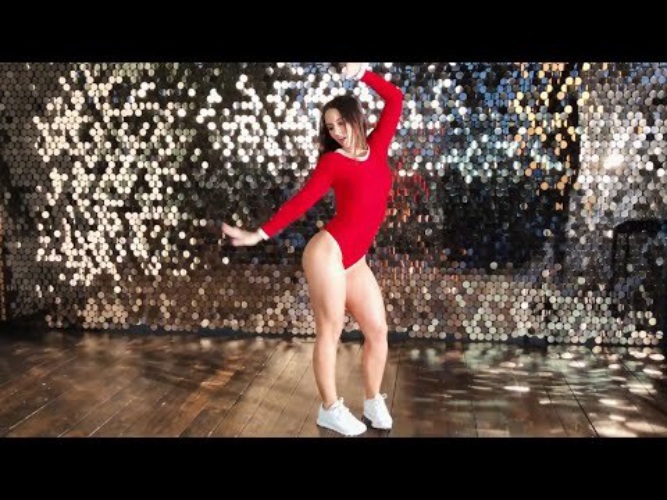
 On the timeline, the video with the solid color background should be placed above the video with the new background.
  The program with a simple interface and extensive functionality is popular among travelers and video bloggers.