How to animate default dance
Official Super Animal Royale Wiki
in: Needs console controls, Citation needed, Verify,
and 2 more
English
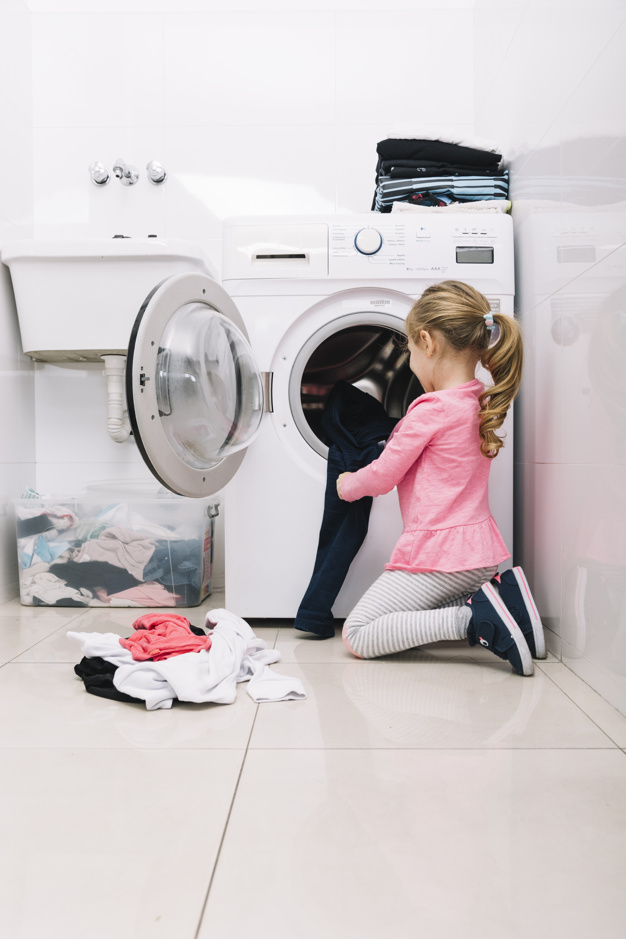
Emotes are customizations allowing animals to perform recognizable taunts/dances by pressing the Emote key (default V). Most Emotes require the player to stand still, and moving too far will cancel the animation.
Emotes can also be used within the main menu, where everyone in the same party will see your animal perform the Emote. When performing certain emotes, Mini Animal Pets will dance along to the beat of the music.
Emote Wheel[]
Selecting an Emote from the Emote Wheel. (pre-1.6)
Players can equip up to 8 emotes within the inventory screen into slots on the first page of the player's Emote Wheel. The rest of the emotes that the player owns will be available on the other pages of the Emote Wheel, which can be accessed by scrolling with the mouse wheel. To select an emote from the Emote Wheel, hold the Emote key (default V) key, put your cursor over any emote and release the key. Pressing the Emote key once allows to perform the latest selected Emote.
Emotes[]
Currently there are 33 emotes, 7 of which are obtainable via drops.
| Name | Icon | Emote | Obtaining | Sound |
|---|---|---|---|---|
| Default Dance Common | Common | Available to all players. | https://animalroyale.fandom.com/wiki/File:Default_dance_song.wav | |
| Simple Wave Common | Common | Level-Up Random Drop | https://animalroyale.fandom.com/wiki/File:Wave_emote.wav | |
| Clap Uncommon | Uncommon | Level-Up Random Drop | https://animalroyale.fandom.com/wiki/File:Clap_emote.wav | |
| Dab Uncommon | Uncommon | Level-Up Random Drop | https://animalroyale. fandom.com/wiki/File:Dab_emote.wav fandom.com/wiki/File:Dab_emote.wav | |
| Gem Reveal Uncommon | Uncommon | Reach Level 10 Note: When using this emote, it'll show your highest level prestige gem which might be the one shown in the example. | https://animalroyale.fandom.com/wiki/File:Gem_reveal_emote.wav | |
| Yawn Uncommon | Uncommon | Cackling Carl's Cart 300 Note: Inspired by H-Fits. Click the GIF to view the original fan-made emote! | https://animalroyale.fandom.com/wiki/File:Yawn_emote.wav | |
| Cheer! Rare | Rare | Cackling Carl's Cart 750 | https://animalroyale.fandom.com/wiki/File:Cheer_emote.wav | |
| Laughing Rare | Rare | Level-Up Random Drop | https://animalroyale.fandom.com/wiki/File:Dance_Laugh.wav | |
| PBJT! Rare | Rare | Level-Up Random Drop | https://animalroyale.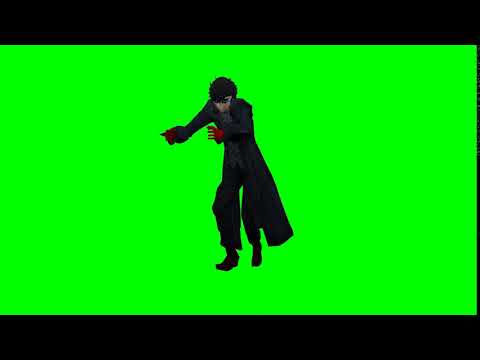 fandom.com/wiki/File:SAR_EmotePBJT.wav fandom.com/wiki/File:SAR_EmotePBJT.wav | |
| Blow a Kiss Rare | Rare | 10 Team Wins | https://animalroyale.fandom.com/wiki/File:Blow_kiss_emote.wav | |
| Hungry Rare | Rare | S.A.W. Shop 600 Note: This emote does not restrict your movement. | https://animalroyale.fandom.com/wiki/File:Hungry_emote.wav | |
| Selfie! Rare | Rare | S.A.W. Shop 600 A part of the Selfie Bundle | https://animalroyale.fandom.com/wiki/File:Selfie_audio.wav | |
| Floss Dance Epic | Epic | Cackling Carl's Cart 1,500 | https://animalroyale.fandom.com/wiki/File:Floss_dance_song.wav | |
| Heel Click Epic | Epic | Cackling Carl's Cart 1,500 | https://animalroyale.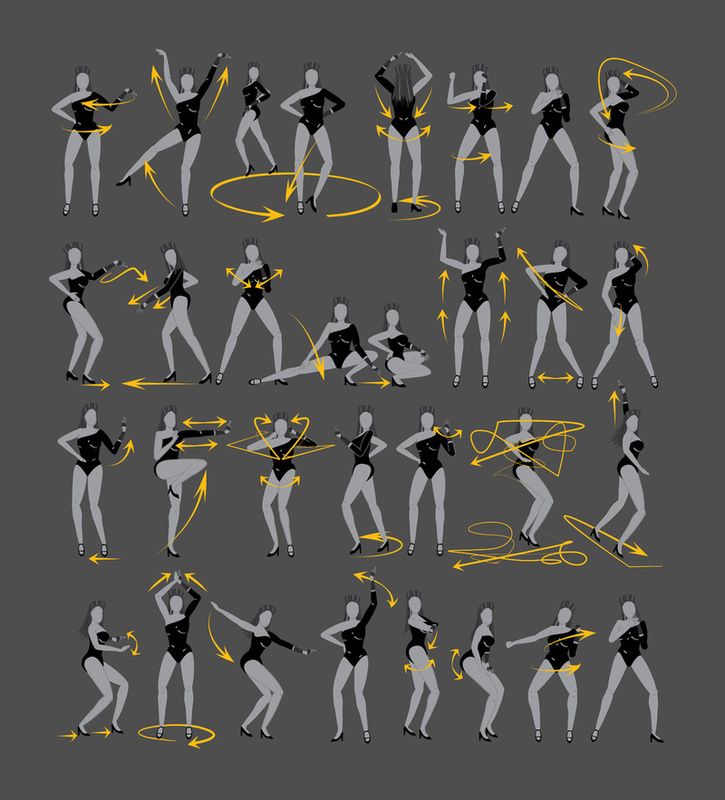 fandom.com/wiki/File:Heelclick_emote.wav fandom.com/wiki/File:Heelclick_emote.wav(Styled after the Windows 3.1 'Tada', truncated.) | |
| Hand Stand Epic | Epic | Cackling Carl's Cart 1,500 | https://animalroyale.fandom.com/wiki/File:Handstand_emote.wav | |
| Russian Dance Epic | Epic | Cackling Carl's Cart 1,500 | https://animalroyale.fandom.com/wiki/File:Russian_dance_song.wav | |
| Praise Banan Epic | Epic |
Written instructions: | https://animalroyale.fandom.com/wiki/File:Praise_Banan_Emote.wav | |
| Banan Pew Pew Epic | Epic | 100 Banana Slips | https://animalroyale. fandom.com/wiki/File:Banana_pew_pew_emote.wav fandom.com/wiki/File:Banana_pew_pew_emote.wav | |
| Tap Dance Epic | Epic | Level-Up Random Drop | https://animalroyale.fandom.com/wiki/File:SAR_EmoteTapdance.wav | |
| Stretching Routine Epic | Epic | 500km Travelled | https://animalroyale.fandom.com/wiki/File:SAR_EmoteStretch.wav | |
| Point Epic | Epic | Only obtainable from Super Animal Pass Season 0.5. Note: This emote does not restrict your movement. | Silent emote. Does not make any sounds when using this emote. | |
| CRISPRmas Carol Epic | Epic | S.A.W. Shop 800 | https://animalroyale.fandom.com/wiki/File:SAR_EmoteCaroling.wav | |
| Rap Epic | Epic | S.A.W. Shop 800 | https://animalroyale. fandom.com/wiki/File:SAR_EmoteRap.wav fandom.com/wiki/File:SAR_EmoteRap.wav | |
| Country Dance Epic | Epic | S.A.W. Shop 800 | https://animalroyale.fandom.com/wiki/File:SAR_EmoteCountry.wav | |
| Sit in Peace Epic | Epic | Only obtainable from Super Animal Pass Season 3. | Silent emote. Does not make any sounds when using this emote. | |
| Splits Epic | Epic | Only obtainable from Super Animal Pass Season 5. | https://animalroyale.fandom.com/wiki/File:SAR_EmoteSplits.wav https://animalroyale.fandom.com/wiki/File:SAR_EmoteSplitsRare.wav | |
| Juggling Roulette Legendary | Legendary | Only obtainable through purchase of Founder's Edition. Note: This emote is an Early Access exclusive. | https://animalroyale. fandom.com/wiki/File:Juggling_emote.wav fandom.com/wiki/File:Juggling_emote.wav | |
| Hole in One! Legendary | Legendary | Level-Up Random Drop | https://animalroyale.fandom.com/wiki/File:Golf_emote.wav | |
| SARturday Night Fever Legendary | Legendary | Only obtainable through purchase of Super Edition DLC. | https://animalroyale.fandom.com/wiki/File:SAR_EmoteSARturdayNightV1.wav | |
| I Surrender! Legendary | Legendary | Only obtainable from Animal Pass Season 0. | https://animalroyale.fandom.com/wiki/File:SAR_EmoteSurrenderV1.wav | |
| Party Horn Legendary | Legendary | Only obtainable from Animal Pass Season 1. | https://animalroyale.fandom.com/wiki/File:PartyHorn_emote.mp3 | |
| Clipboard Legendary | Legendary | Only obtainable from Animal Pass Season 2. | https://animalroyale.fandom.com/wiki/File:SAR_EmoteClipboard.wav | |
| T-pose Legendary | Legendary | Only obtainable from Animal Pass Season 4. Note: This emote does not restrict your movement. | Silent emote. Does not make any sounds when using this emote. | |
| Plush Emote Special | Special | Only obtainable by preordering during the Super Fox campaign on MAKESHIP. Note: This emote does not restrict your movement. | Silent emote. Does not make any sounds when using this emote. |
Trivia[]
- The "PBJT" emote is a reference to the old meme, Peanut Butter Jelly Time.
- The "Tap Dance" emote music is inspired by Maple Leaf Rag.
- The "Hungry", "Point", "T-pose", and "Plush" emotes are the only emotes that allow movement whenever they are being used.
- Originally, the "Point" emote didn't have an arrow, but Pixile later added it to prevent any misused act of using this emote.
- Originally, the "Point" emote didn't have an arrow, but Pixile later added it to prevent any misused act of using this emote.
- The "Russian Dance" emote is inspired by Team Fortress Two's Katozsky kick.[citation needed][verify]
- The emote is also inspired by the classic Cossack dance from Russia.[citation needed]
- The "CRISPRmas Carol" emote music is both a reference to and was also used in SART S02E02 How the Finch Stole CRISPRmas.
- The Clipboard color from the "Clipboard" emote is different from the one that Dr. Jennifer Dogna uses.
- There's a green variant of the clipboard that only appears in one of their announcements from Twitter.
| Customizations | |
|---|---|
Weapon Skins |
|
Apparel |
|
Customizations |
|
Community content is available under CC BY-NC-SA 3. 0 unless otherwise noted.
Animating 3D Objects
In this tutorial you'll learn how to animate a 3D object, without using scripting.
First you'll learn how to play an animation that's included in a 3D object's file - this is known as a baked keyframe animation.
Then we’ll show you how to use the Patch Editor to animate an object's skeleton. This is known as procedural animation, and you can use this technique to animate all kinds of objects in Meta Spark Studio.
You can download the sample content content to follow along. It includes the objects and assets you'll need to build the effect.
Setting Up
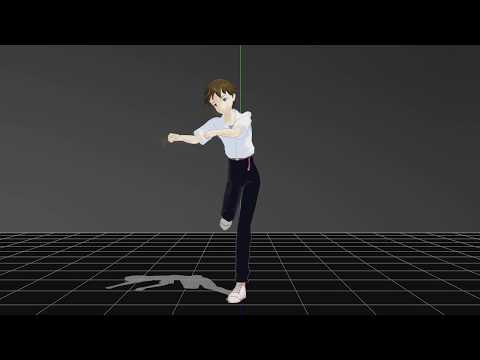
If you open the unfinished effect in the sample content folder, you'll see a 3D object in the Viewport that looks like a teddy springing out of a box:
This 3D object is a child of a plane-tracker , which means it will appear when someone points the back camera at a real-life surface, like a table or the floor.
In the Assets panel, this object is listed under 3D Objects, as teddy.
Creating an animation playback controller
Using an asset included in Meta Spark Studio called an animation playback controller is an easy way to play a baked animation.
The animation playback controller allows you to control when an animation plays, pauses and stops. You can also use it to edit the speed of the animation.
To create an animation playback controller:
- Click Add Asset at the bottom of the Assets panel.
- Select Animation Playback Controller:
You'll see the animation playback controller listed in the Assets panel as animationPlaybackController0.
Next you'll need to connect the animation itself to the animation playback controller. You can see the animation listed in the Assets panel under 3D Animations - it's called Dance.
Select the animation playback controller in the Assets panel. You'll see its properties have opened in the Inspector.
Click the dropdown next to Animation Clip, and select Dance:
Finally, to show the animation in the scene, we need to go back to the 3D object:
- Select teddy in the Scene panel.
- In the Inspector, click the dropdown next to Animation.
- Select AnimationPlaybackController0.
Editing the animation playback controller
If you make sure the animation playback controller is selected in Assets panel, you can play with its speed.
Over in the Inspector, use the slider to edit the speed:
There are a couple of other options here too. You can:
- Use the box next to Play on Start to control whether or not the animation plays as soon as the effect is opened.
- Clear the box next to Loop, to make the animation play once, and then stop.
Using patches to animate an object
Before you start the next part this tutorial, delete the animation playback controller:
- Select it in the Assets panel.
- Press delete on your keyboard.
Instead of animating the teddy by playing the baked animation, you're going to use patches to set the exact movement of the objects that make up the teddy.
You'll do this by using the Loop Animation and Transition patches to control the movement of these objects through their position and rotation properties.
For this effect you're going to animate joint objects, but you could use the same technique to animate all kinds of objects in your scene.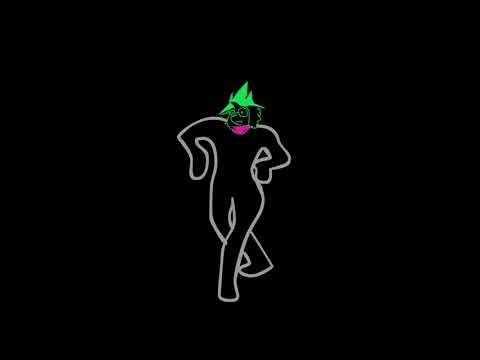
If you expand the teddy object in the Scene panel, you'll see two objects nested underneath it. Model_group contains a series of mesh that define the shape of the object.
The second object, skel_root, contains the joints. You're going to animate four joints - to make the teddy wave and bounce up and down.
To find the joints you'll need, expand the skeleton in the Scene panel. The joints you'll need to make the teddy wave are called arm_r and wrist_r:
Select them both at the same time by holding down command on your keyboard.
Next create patches to represent their Rotation property. We're using the rotation property so we can rotate the joints slightly, which will make the teddy appear to wave.
To create these patches, click the arrow next to Rotation in the Inspector:
The Loop Animation and Transition patches
Create the Loop Animation and Transition patches in the Patch Editor:
- Right-click in the Patch Editor.

- Select a Loop Animation patch, then right-click again and select a Transition patch.
The Loop Animation patch and Transition patches are usually used together. This is because the Loop Animation patch controls the progress of an animation, and the Transition patch can be configured to control how and where the object moves.
To see this in practice, connect the Progress output in the Loop Animation patch to the Progress input in the Transition patch - when a patch is selected, you'll see a label to indicate which port is which.
Then connect the output of the transition patch to the 3D Rotation input in both arm_r and wrist_r.
Here's how the graph will look:
And if you look closely, you can see the arm is moving very slightly:
This is because the End values in the Transition patch are set to 1 by default. This means the arm is moving very slightly, from the Start values of 0, to the end values of 1.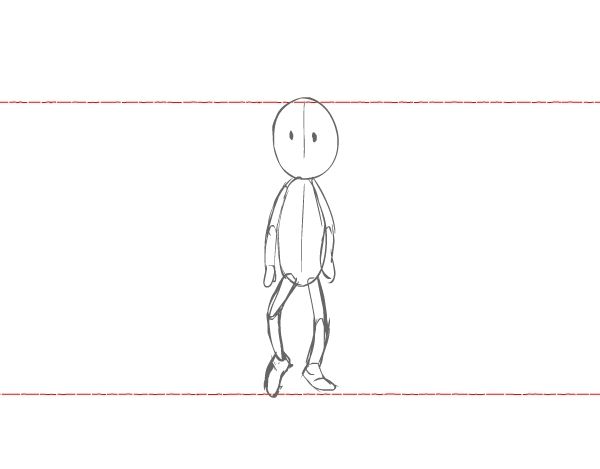
Let's make this movement more dramatic. It's really a matter of testing different options when working out the best values here, but let's start by changing the three End values to 20.
As you can see, the arm is moving more dramatically:
Next change all three of the Start co-ordinates to -10.
So the teddy is clearly waving now - but obviously in real life the arm would move back and forth.
To achieve this effect, select the box next to Mirrored in the Loop Animation patch. Selecting this box will play the animation forward, then in reverse. While you're there, change the duration to 0.75. This will speed the animation up.
The finished graph, with all the correct values, will look like this:
Next let's make the teddy move up and down. Again, we'll be using the Loop Animation and Transition patches.
In the Patch Editor, create another Loop Animation patch, and 2 Transition patches.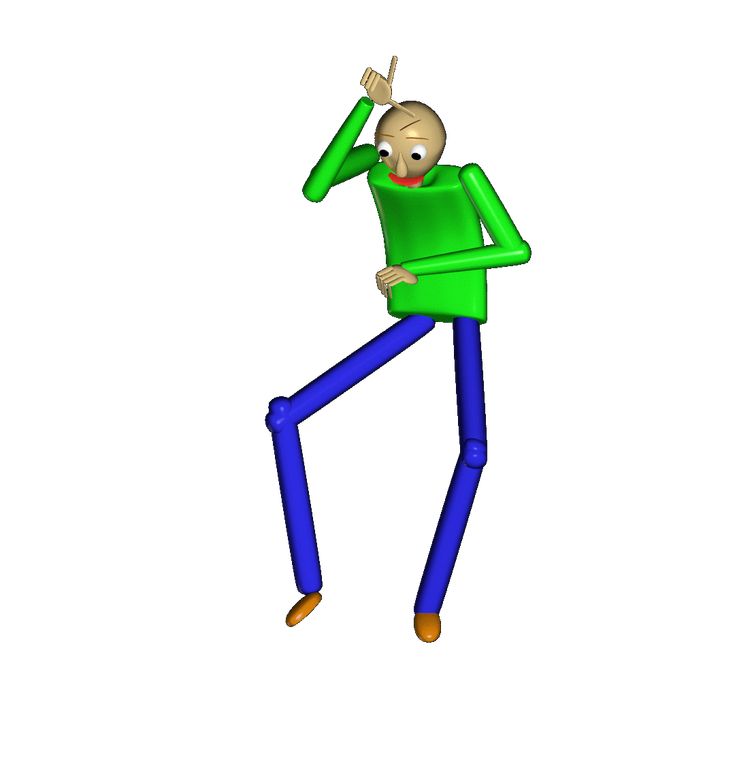
Next, return to the object in the Scene panel, to create patches to represent the joints in the middle of the skeleton. These joints are called spring_mid, and jack_base. So, select spring_mid and jack_base. Again, you can select them both at the same time by holding down command on your keyboard.
This time, click the arrows next to Position over in the Inspector.
Connect:
- The Progress output in the Loop Animation patch to the Progress input in both Transition patches.
- The output of one Transition patch to the spring_mid patch.
- The output of the other Transition patch to the jack_base patch.
Ok, so the teddy is moving, but obviously you'll need to make some adjustments to the positions it's moving between!
Like before, you can do this in the Transition patches.
Start with the Transition patch connected to jack_base. So the joints move up and down - and not to the side - change the X and Z values to 0 next to both Start and Finish. Then:
- Next to Start, change Y to 0.1.
- Next to End, change Y to 0.15.
In the other Transition patch:
- Next to Start, change Y to 0.1.
- Next to End, change Y to 0.12.
Again, in the Loop Animation patch select the box next to Mirrored. Let's speed it up a bit too - set the Duration value to 0.25.
Here's how the final graph should look:
Just one last tweak now. Let's take a look at the Curve value in the Transition patch. You can adjust this to set the pacing of the movement. It's worth experimenting with this option in your own effects.
For this tutorial, set the Curve to Sinusoidal In-Out in both Transition patches.
How to Dance in Roblox
Roblox is a social game by its very nature, and luckily the developers have added a few ways to physically express themselves. In Roblox, you have a variety of different emotes that you can use to communicate with other players. One of these emotions is dance. Depending on which server you are on, you may have several different dances to choose from. So, if you want to learn how to dance in Roblox, this is what you need to do.
Content
- Enable chat
- How to dance in Roblox
- How to use your own emoji from the Roblox Avatar Store
Enable chat
To use emotes in Roblox, you must first enable emotes in Roblox. Chat may be disabled for some accounts. If your chat is disabled, here's what you need to do to enable it.
- Log in to the official Roblox website.
- Click the gear icon in the top right corner of the page. Select "Settings".
- Click the "Privacy" tab and scroll down to the "Communication" section.
- Search Who can chat with me? on the page and change the setting to All. .
How to dance in Roblox
After turning on the chat, you will need to enter the Roblox game. Once you enter the game, all you have to do to dance is open chat and type /e followed by the command you want to type. For example, if you want to dance, type /e dance into chat and then press Enter. There are three dances on default servers in Roblox. To use other dance animations, put 2 or 3 at the end of /e dance and press Enter. Below is a list of all emotes available by default in Roblox:
- Hello : /e hello
- Dance: /e dance or /e dance2 or /e dance 3
- laugh : /e laugh
- Dot: /e dot
- Wave: /e wave
Be aware that custom Roblox servers may have more emotes than listed. To find out which emotes are used in each game, it is best to join the game's Discord server if they have one and chat with other players about emotes. You can also search to see if that particular game has any custom emotes.
How to use your own emoji from the Roblox Avatar Store
There are also many emotes that you can purchase from the Avatar Store using Robux. You can find emotes in the Animation tab. If you end up buying any emotes from the shop, you will have to equip them. To do this, navigate to your avatar, which will open the avatar editor. Select one of the slots you want to add an emote to. During the game, you can trigger the emote wheel by clicking on the three dots in the top right corner. Then click or tap on any emote you want to use on the emote wheel.
Behavior: body (auto-animation)
User manual Cancel
Search
Last update Oct 18, 2022 05:20:41 PM GMT
- Character Animator User Manual
- Introduction
- What's New in Adobe Character Animator
- System requirements for Character Animator
- Release Notes
- Overview of Adobe Character Animator
- Animating puppets using start mode
- Fundamentals of working environments
- Projects
- Keyboard Shortcuts for Character Animator
- Creating and managing puppets
- Preparing a graphic object
- Creating a puppet with the character wizard
- Creating puppets with Puppet Builder
- Creating puppets from a graphic object
- Collection of puppets in the scene
- Changing graphic objects using autoswitch
- Controlling puppets and launching their triggers
- Equipping
- Using the Puppet Panel
- Working with layers
- Grid, attachments and labels
- Identify equipment problems
- Behaviors
- Adding tags and behaviors
- Behaviors in Character Animator
- More about behaviors
- Body: direct control
- Body: automatic animation
- Layer switching
- Physical simulation
- Utility
- Body: direct control
- Recording and playback
- Recording and playback
- Editing a recorded performance
- Stage cameras
- Using Keyframes in Character Animator
- Project export
- Scene or puppet export
- Live scene streaming
- Tips and tricks for streaming
The new starter mode is now available!
Character Animator 22. 5 (June 2022 release) adds Beginner Mode, allowing you to start animating without any prior experience. Update now to the latest version to have a try.
Motion Library: Full Body Character Animation Library
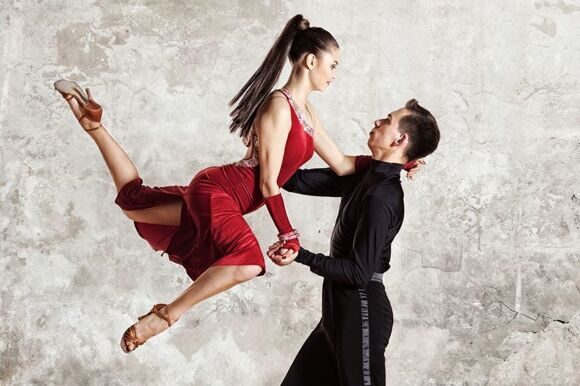
The Character Animator Motion Library is a collection of over 350 full body character animations recorded by experienced motion actors. An easy option would be to apply dance moves from ballet to hip hop. Sports moves from basketball to bowling are easy. In addition, various walking, running and jumping activities are available. Movements that used to be a difficult task in animation are now available to everyone.
Setup
- Open the puppet in the Equip workspace.
- In the Properties panel, under the puppet track behavior, select the Motion Library behavior.
- Click Motion Library to select different puppet motions, such as Idle, Walk, Run, Dance, Fight, Jump, Sport, and Gesture.
- Choose from a variety of presets below each movement.
Controls
- Motion is used to animate the puppet with any of over 350 motions. There are eight categories of movements. Select a category, and then press the < > buttons to listen to the movements.
- Speed control changes the playback speed of the entire motion. The speed value is recorded in any take created using the Single Motion Record button. The default value is 100% (no change in speed). The minimum value is 10% (ten times slower). The maximum value is 1000% (ten times faster).
The "Speed" parameter cannot be animated. To change the speed during animations, use the manual playback controls in the Advanced section.
- Orientation helps you change the angle of view for 3D motion capture data when applied to 2D artwork. For example, a front-facing puppet might need to be offset 90º from the default left-to-right walking. If the motion applied doesn't look right (for example, too much head or wrist rotation), adjusting this setting can help improve results.
- Mirroring reverses horizontal movement.
- Button Record One Motion creates a take on the timeline for one cycle of the selected motion while capturing the basic parameters of the motion. The name of the new take will match the name of the recorded movement. View the tooltip to see additional parameters captured during recording. Extend or trim the motion in the timeline to change the duration. Create multiple overlapping takes with new moves and blend them.
- The Reset Position button resets the puppet's location to its original start point. This is useful if the puppet has moved off stage during the dance.
- Home Position defines the overall position behavior of the puppet during the animation cycle. Reset in Loop resets the puppet to its original position. "Continuous" loops the local movement and the puppet's global position continues where it left off. This is useful when using continuous animation loops such as off-screen walking (or dancing).
 Treadmill leaves the puppet in place and cycles through the animation as if it were walking on a treadmill.
Advanced Controls
- Manual Playback is used to manually control the playback of all movements on the timeline. The PlayDisk value cycles through the entire animation for every 360°. For example, you can set a keyframe for a manual playback disk to make it easier for the loop to enter and exit the animation.
- Orientation setting is used to further change the 3D viewing angle. This is especially useful when sharing existing take sequences for different side-facing puppets.
- Control Mirror override replaces the mirror option. With this option, takes created for left-facing puppets can be reused for right-facing puppets, and vice versa.
- Tracked Handles specifies the handles to which motion capture is applied. You can overlay your own Drag or Body Tracker animation on the motion library by deselecting some of the handles here.
 For example, to animate the right arm yourself while keeping other body parts from the Motion Library, deselect the Right Wrist, Right Wrist Rotation, and Right Elbow labels.
Automatic Blink: Eyelid Blink Simulation or Light Flicker
This behavior automatically triggers layers, such as an eyelid layer for blinking or a light layer for blinking. Blinking can occur at regular intervals or have some random character. You can use this behavior to make your character blink randomly, but it can also be combined with the Face and Triggers behaviors if you want additional control over blinking via the webcam or keyboard.
Setup
- Add the Auto Blink behavior to a puppet or group within it. (This default behavior does not apply to new puppets.)
- Assign the Left Eye Blink or Right Eye Blink tag to the layer to automatically blink.
Controls
(* = Only visible if a puppet or group to which this behavior applies is selected in the Project or Puppet panel. )
)
- Blinks per minute controls the frequency at which the layer is displayed.
- Blink Duration specifies the number of milliseconds (1/1000 of a second) that the layer is displayed before disappearing.
- Free selection of controls the uniformity of the blink rate. A value of 0% corresponds to blinking at regular intervals, and the larger the value, the more the frequency changes.
- * Blink Layers : Number and list of layers with Left Eye Blink or Right Eye Blink layer tags applied.
"Breath": breathing simulation.
This behavior scales the character's chest as if they were breathing in and out. For example, try animating a Wendigo puppet in the Run workspace, which demonstrates breathing and head and body rotation.
This behavior looks for a label with the "Breath" tag. You can use "Breath" or the older name "Chest" to manage artwork files - the files will be imported with the "Breath" tag.
Setting
To specify which part of the puppet should expand and contract, assign the Breath tag to a specific descriptor, or groups, to affect its source. If the imported image contains a layer with the word "Breath" in its title, the layer's source is automatically tagged Breath
This default behavior does not apply to puppets, so add it first to see its effect on the puppet.
Control elements
Number of breaths per minute
Controls the breath (zoom) rate between the minimum and maximum zoom values.
Maximum scale and minimum scale
Controls the zoom range around the Breath handle. If there are no other descriptors near the Breath descriptor, you may need to reduce this range (for example, from 95% to 110%).
Offset and Direction
Controls the distance and angle of the straight line along which the Breath handle moves during scaling.