How to sew a dance leotard
How to Make a Leotard at Home
Dancing is all about expressing yourself, so you (or your little one) need a leotard to help show off your punchy personality. Whether you want a funky pattern or prefer to go with a more traditional color, making your own means you get to customize the design, the fabric, the fit, the whole vibe.
The leotard you’ll make in this tutorial works perfectly for ballet, gymnastics and all kinds of other dance and fitness classes. You can use the same instructions to make a kids’ leotard or an adult bodysuit. The best part? There’s absolutely no pattern needed.
Leotard
Level: Intermediate
What You Need
Good to Know: If you want a longer sleeve than the one shown in this tutorial, you can trace a long-sleeve T-shirt during the drafting process. Or you can make a sleeveless leotard (or even a bathing suit) by finishing the sleeve openings the same way as the neckline.
Instructions
1. Draft the Leotard Front
Fold your bathing suit in half along the side seams, with the front side out. Align the suit’s fold with the straight edge of your paper. Trace around the suit.
Turn the T-shirt inside out and fold it in half. Fold the sleeve back inside the bodice so the sleeve seam is exposed. Line the shoulder up with the bathing suit shoulder, and the side seam with the side of the bathing suit line you just traced. Trace the sleeve from where it meets the side seam to the bathing suit marking at the shoulder.
Pro Tip: For tracing these two garments, it might help to use different pen colors so you can easily tell what markings you’re looking at.
Move the T-shirt so the fold is along the edge of the paper, with the shoulder still aligned with the bathing suit markings. Trace the neckline.
When you’re done, the paper should look like the image above.
2. Add the Seam Allowance
Using a seam gauge, add ½” seam allowance to the crotch seam, sides and shoulders. Add a ¼” seam allowance at the neckline and leg openings.
Mark the pattern piece with a fold notation and add any other important info (like a label that this piece is the front). Cut it out — you can use it to draft the back of your leotard.
3. Draft the Leotard Back
Trace the pattern for the leotard front on another edge of the paper to use as a reference.
Refold the bathing suit, this time with the back side out. Align it with the tracing of your front piece and trace any portion that’s different (like the leg openings).
Make sure to add a ¼” seam allowance along the leg opening to account for the previously added seam allowance from the traced leotard front. Make sure the crotch and side lines still match up.
Draw in a lower back opening to allow for easy dressing without closures. The bottom of the new curve should be at least as low as the bottom of the sleeve opening. Add a ¼” seam allowance to the new back opening (the black line in the photo above).
Mark the pattern piece with a fold notation and any other important details.
4. Draft the Sleeves
With the T-shirt still inside out, fold it into the sleeve and lay the folded edge along the straight edge of your paper. Trace the curve and bottom edge of your sleeve.
Draw a 90-degree line from the paper edge to the end of the sleeve.
Add a ½” seam allowance around the entire sleeve. Mark the pattern piece with a fold notation and any other important info.
5. Cut the Fabric
Use the pattern pieces to cut your fabric. Cut one front, one back and two sleeves on the fold. Mark the top center of each sleeve once it’s cut out.
6. Sew the Neckline
Align the front and back shoulders, right sides together. Pin and sew the shoulders with a ½” seam allowance. Trim the seam allowance to ¼” and press open or to the back.
Measure out a piece of ¼” elastic so it’s the length of the entire neck opening.
Baste the elastic to the neck opening with a wide, long zigzag stitch. Line up the edges of the neckline and elastic as you sew, making sure to not stretch the elastic or the fabric.
Turn the elastic under and all the way along the wrong side of the neckline. Topstitch about ¼” away from the edge with a stretch or zigzag stitch.
7. Add the Sleeves
Press the sleeve hem under ½”.
Match the top center sleeve marking with the leotard’s shoulder seam, right sides together. Pin the sleeves to the leotard sleeve opening.
Stitch each sleeve in with a ½” seam allowance.
Pro Tip: Stitch with the sleeve fabric next to your machine’s feed dogs to help ease the sleeve in.
Trim the seam allowance to ¼” or press it toward the bodice.
8. Stitch the Sides
Place the leotard front, back and sleeves right sides together, aligning the side seams. Unfold the pressed sleeve hem and stitch the side seams from the leg opening to the end of the sleeves with a ½” seam allowance. Trim the seam allowance to ¼” or press it toward the back.
9. Hem
Refold each sleeve along the pressed line. Hem the sleeves about ⅜” from the fold, using a zigzag stitch, stretch stitch or twin needle.
Stitch the crotch seam with a ½” seam allowance. Trim to ¼” and press it open or toward the back.
Baste and stitch more elastic into each leg opening, the same way you did with the neckline.
And there’s your snazzy new custom leotard, ready to bust a move at the dance studio or gym!
Sewing Leotards & Swimwear - The Ultimate Guide
Sharing is caring!
Sewing leotards can save you a lot of money particularly if your kids are regularly competing in dance, skating or gymnastics. It is also extremely rewarding and really is much easier than you think. Once you have made a couple of leotards or swimsuits and learned some simple techniques, you will be confident enough to start creating unique costumes you will be proud of. If you are looking to sew some leotard or swimsuit patterns, here is a guide to get you started.
Contents
- Sewing Leotards and Swimwear
- Patterns
- Buying Spandex and Lycra
- Sewing Leotards with a Regular Sewing Machine
- Sewing Leotards & Swimwear
- Sewing Leotards Elastic
- Sewing Leotards Binding
- Sewing Leotards Straps
- Decorating Your Leotards
- Sewing Leotards - In Conclusion
Sewing Leotards and Swimwear
Patterns
First, you are going to need a leotard pattern. Once you have the basics mastered you will slowly get confident enough to hack patterns to make your own custom creations. If you are a first-time leotard sewer I recommend #4 for a leotard or #1 for swimwear as they are a great basic pattern with nothing tricky.
There are more to choose from in my pattern shop. Shop ALL leotard sewing patterns.
Sewing LeotardsBuying Spandex and Lycra
If you are stuck where to buy Spandex and Lycra for your leotards and swimwear then why not buy online. Here is a guide to some great online shops selling stretch fabrics.
When starting, try and choose matt or satin finishes of fabric as these are easier to sew. Thicker fabrics are also better as they won't need lining and don't overstretch in your machine.
Further Reading: Buying guide for Lycra and Spandex
Always check that the fabric has a stretch factor that is suitable for your leotard pattern. The Treasurie leotard patterns use a stretch factor of 75%. This means that 4 inches of fabric will stretch out to 7 inches.
Sewing Leotards with a Regular Sewing Machine
STITCHES - You don't need a fancy serger or cover stitch machine for sewing leotards. Leotard seams can need the same amount of stretch as the fabric so that the stitches don't break with active bodies. A simple zig-zag stitch on a narrow width setting can create durable leotard seams.
Learn all the tricks and tips and best machine settings to get great results with just a simple zig-zag stitch and your regular machine.
Further Reading: How to sew Lycra with a regular machine
MACHINE FOOT - If you have a fabric that is a bit sticky, a Teflon Foot can prevent skipped or uneven stitches.
NEEDLES - You will also need stretch needles rather than your regular universal needles. For Lycra with lower stretch factor, ballpoint or jersey needles can sometimes be used but you will get the best results with a stretch needle.
Sewing Leotards - NeedlesSewing Leotards & Swimwear
If you are ready to start sewing leotards or swimwear then read this basic guide to construction. This article will lead you step by step through the process and includes a sew-along video for leotard #4 pictured below.
Further Reading: How to Make a Leotard
Sewing LeotardsSewing Leotards Elastic
After you have constructed your leotard you will need to attach elastic to the legs and neck area.
Further Read: How to sew elastic in leotards to get a professional result.
Fold over elastic is also a great way to finish necklines and can be used for thin straps. My easy tutorial also has a video.
Read: How to sew fold over elastic
How to Sew Fold Over ElasticSewing Leotards Binding
Binding is great for a pop of color on leotards and gym wear.
Read: How to sew binding in just a few easy steps.
How to Sew BindingSewing Leotards Straps
Learn how to sew Spandex straps 3 ways - turned, folded with a zig-zag and folded with a twin needle.
How to Sew StrapsDecorating Your Leotards
Once you have finished it is time to decorate! Here are some fun decorating techniques to experiment with.
- How to Sew Sequins – Hand Sewing Sequins
- How to Sew Sequin Trim on your machine
- How to Sew on Sequins – Scattered Effects
- Sewing Sequins by Hand: Overlap Method
- How to Sew Tulle
Sewing Leotards - In Conclusion
Good luck in your quest for sewing leotards and swimwear! I look forward to hearing about what you have been sewing.
Bestselling Sewing Patterns
Reader Interactions
How to sew a rhythmic gymnastics leotard: instructions
Contents
- 1 Sewing a rhythmic gymnastics leotard: step by step instructions
- 1.1 How to build a pattern.
- 1.1.1 What measurements should be taken to build the leotard template
- 1.1.2 The front and back template of the gymnastic leotard.
- 1.1.3 Construction of a sleeve pattern.
- 1.1.4 Construction of a skirt pattern.
- 1.1.5 We mark the darts.
- 1.2 Material
- 1.3 Colors
- 1.4 What and how to sew a leotard for rhythmic gymnastics.
- 1.1 How to build a pattern.
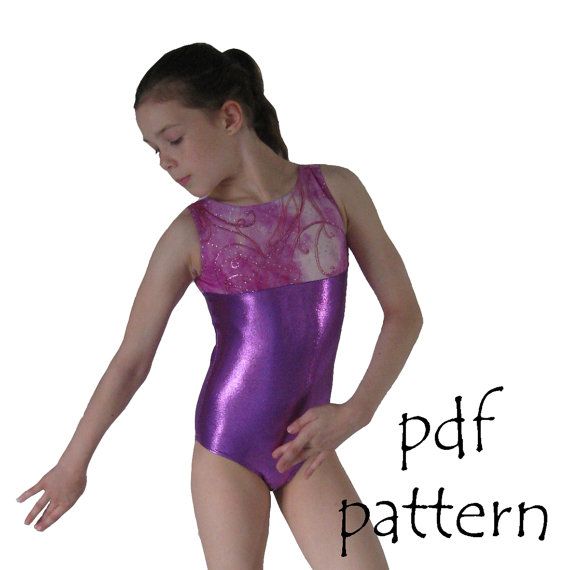
Looking at the performance of rhythmic gymnasts, we automatically focus on the bright and shiny costumes of girls. A gymnastic leotard in this sport is the hallmark of athletes. It is impossible to imagine their performance in costumes without colorful feathers, rhinestones, guipure and velvet inserts.
The main condition for a good result is a correctly selected and constructed pattern.
Despite the wide range of swimsuits on the sportswear market, it is very difficult to choose a suit that will fit the number in all respects and will be able to accurately characterize the heroine of the number. Often, mothers have to adjust the size of the leotard, rip off some details and applications, and re-decorate the gymnast's costume for performances. This is a very labor intensive and costly process. After all, in addition to the standard swimsuit, you need to purchase more individual elements for decoration.
Many mothers come to the conclusion that self-tailoring of leotards for rhythmic gymnastics is the best option. It is more economical, takes less time and the suit sits exactly on the figure. The main condition for a good result is a correctly selected and constructed pattern. How to build a pattern and how to sew a leotard for rhythmic gymnastics with your own hands, read on. The given step-by-step instruction describes step by step the process of building model drawings and sewing swimsuits.
How to make a pattern.
Creating a swimsuit pattern is an important step. It will be more convenient for beginner craftswomen to use ready-made patterns. To do this, you need to select a model on the Internet and print the finished template. It is not difficult to determine the size, children's swimwear go to the size of the clothes. Separate, printed elements are glued together.
An easy way to build a pattern is to trace the girl's underwear. When making a swimsuit pattern, take the girl's panties, turning them inside out, circle their outline. This will be the bottom of the item. You can take a T-shirt as the basis for the top. In the process of constructing a pattern, it is necessary to clearly observe the height of the product.
The most accurate leotard template for a girl can be drawn by taking all individual measurements of an athlete. This is not the fastest way to build a drawing, and you also need to learn how to take measurements correctly, but the result is worth it. The fit of the product will be perfect, which is very important for a gymnast during a performance.
The gymnastic leotard in this sport is the calling card of female athletes.
What measurements should be taken to build a swimsuit template
Tie an elastic band around the girl's waist, prepare a piece of paper and a pen and start measuring.
- We measure the width of the shoulders at the extreme points. To do this, we lay the centimeter tape from the lowest point of the left shoulder to the lowest point of the right shoulder.
- Measure the shoulder length. From the neck we lower the tape to the extreme point of the shoulder. If the sketch of the suit does not include a neck, then here you can remove 1.5 cm for a loose fit.
- Next, measure the circumference of the neck. The measurement is not taken close to the neck.
 It is important that the neck allows you to breathe freely. Add centimeters in volume as needed according to the sketch.
 - We measure the width of the backrest at the points of the armpits.
- We measure the width of the chest (front) by placing a centimeter above the convex part of the chest along the armpits.
- Chest circumference is measured while inhaling along the chest and shoulder blades.
- Measuring the circumference of the pelvis at the points where the opening for the legs begins. This is not the girth of the hips, but a little lower, where the lowest point of the side seam of the panties is usually located.
- Remove the waist circumference using an elastic band.
- Measure the girth of the body. The tape is passed between the legs and connected at the transition point of the shoulder to the neck.
- Measure the circumference of the arm opposite the armpit.
- Measure the circumference of the wrist.
- Sleeve length is measured from the wrist to the bottom of the shoulder.
- We measure the length of the back. The centimeter is directed from the waist line to the highest point of the shoulders.
- Measure the length of the front from the shoulder to the waist. This and the previous measurements may coincide.
- We measure the panty width from behind. From the bottom of the side seam of the panties, measure the distance to the side of the bottom of the panties.
- Similarly, we measure the width of the panties in front.
- We measure the circumference of the hips along the buttocks. The tape should not press the buttocks.
- Now remove the length of the side seam up to the waist. We measure with a centimeter from the armpit to the gum.
- The height of the panties is measured from the elastic to the bottom of the side seam of the panties.
- The length of the skirt from the front is measured from the elastic to the bottom of the panties.
- Behind the back, measure the length of the skirt from the elastic band of the fold of the buttocks.
 The butt must be covered.
 - The chest height is measured from the top of the shoulder to the convex point of the chest.
- For an even location of the pattern, we need such a measure as the width of the center of the chest. It is measured between the protruding points of the chest or along the nipples.
- We measure the second waist circumference. We lower the centimeter below the elastic by 5 cm. We need this measure to determine the line along which we will sew the skirt.
- Sleeve height. In the armpit, you need to tightly put the ruler and measure the height from the top edge of the ruler to the bottom of the shoulder.
It is more convenient to draw a pattern on graph paper.
So, all the necessary measurements have been taken. You can take on the construction of a pattern drawing.
Gymnastic leotard front and back template .
You will need two large sheets to build. It is more convenient to draw a pattern on graph paper.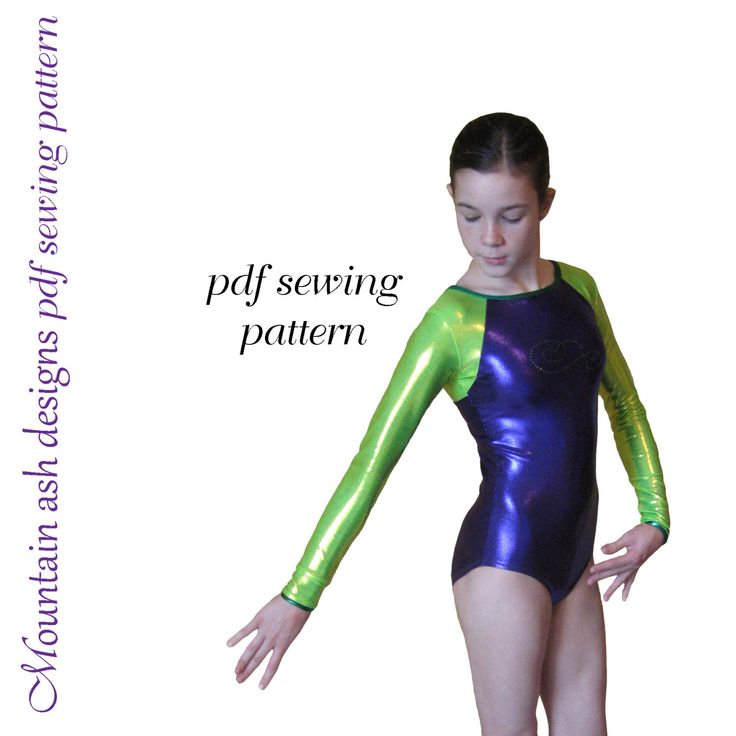 The sheets are stacked on top of each other. You can hook the edges with paper clips so that they do not move out when building and cutting the template. Sheets are bent perpendicularly, in the middle. Stepping back 2 cm from the top of the sheet, you need to draw a horizontal line. From the fold at a distance equal to half the width of the shoulder minus 1 cm, set point A. From point A, at a distance equal to the width of the shoulder, mark point B. We retreat 3-5 cm down from it, set point b. From point A, towards b, draw a segment equal to the width of the shoulder - this will be C.
From the top of the template down the fold, lay off: the vertical girth of the body - 5 cm and divided by 2. Draw a horizontal line. We put etc. D at a distance of 2.5 cm for children's swimsuits and 3 cm for adults from the fold.
The neck is easier to build by eye. From the side of the back, from the upper point of the shoulder, you need to retreat, about 1.5 cm for small, 2 cm for adult girls.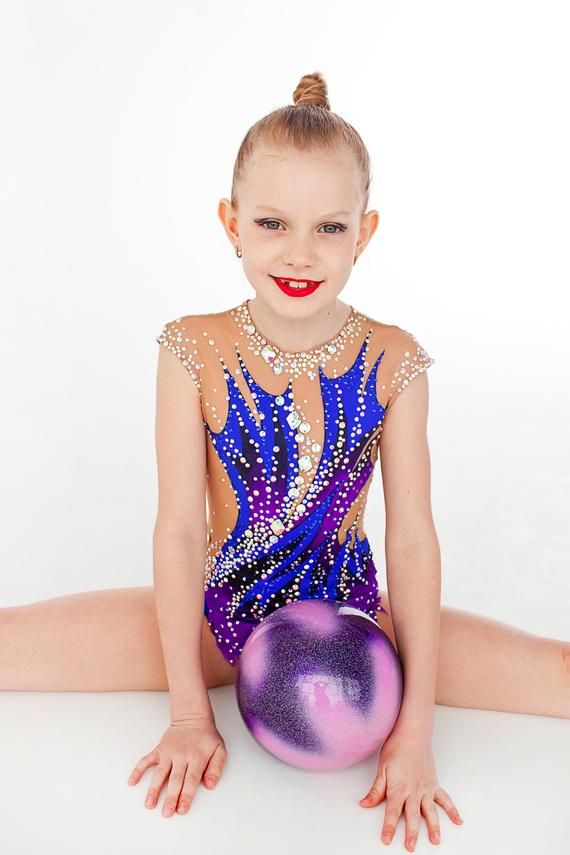 This will be E, marked from the top horizontal down the fold. E and A are connected by a smooth line, forming a neckline. In front, the cutout point is postponed, retreating from the upper horizontal 3 cm for the baby and 5 cm for older girls. E1 and A join to form the front of the neck.
From A we lower the perpendicular equal to: the length of the back to the waist minus 1 cm. From it we draw a line perpendicular to the fold (i.e. one more horizontal, relative to the pattern). On it, from the fold, we put off the segment: (waist circumference - 5 cm): 4. Mark i. If the length of the back differs from the length of the front to the waist, then it is necessary to build the waistline of the front of the swimsuit. From point A we lower the perpendicular equal to the length of the front to the waist minus 1 cm. We draw a horizontal line to the fold, set point i1. We connect points i and i1 with a smooth line.
From point i draw up a line, horizontal to the fold, equal to the length of the side seam to the waist. We draw a horizontal line. On it we mark the segment: (girth of the piles - 5 cm) / 4. We put the point i2. Connect i and i2 with a segment.
Visually divide the segment b and i2 in half, mark a point and draw another horizontal line through it. From the fold, along it we set aside 1/2 of the width of the back and 1/2 of the front, put down points c and d. We draw the armhole through the points b-c-i2 and b-d-i2. The armhole is ready.
Let's take care of panties under a swimsuit. From point I, lay down a segment equal to the height of the panties from the waist along the side seam. We draw a horizontal line. On the horizontal, from the fold, we measure the segment: (girth of the figure along the bottom edge of the panties from the side - 5 cm) / 4. We put the point i3. From point i to i3 we will draw a segment equal to the height of the panties to the waist from the bottom point of the side seam. Visually divide the i3-D segment in half, draw a horizontal line. We mark two points on it d1 and d2: the width of the panties at the back / 2 and the width of the panties at the front / 2. From point D, upwards, we retreat 2 cm for small and 3.5 cm for large gymnasts, and put d3. We draw an eye on the points D-d3-d1-i3 and D-d3-d2-i3. We make sure that the leg roll goes smoothly, for example, you can look at the panties and repeat the roll over them.
Down from the waist line, at the back, we retreat the length “skirt height from the waist at the back”, outline the line for attaching the skirt at the back. From the waist line in front, we retreat the length “skirt height from the waist in front” and draw a line for the inflow of the skirt in front. That's all! We did it. It remains to cut the patterns.
It will be more convenient for beginner craftswomen to use ready-made patterns.
Cut out the backrest pattern first. Set the template aside and cut out the front pattern. Be careful when cutting necks. Here, on the horizontal line of the chest, mark the protruding points of the chest according to the measurement of the "width of the center of the chest."
Construction of a sleeve pattern.
Take a sheet and fold it in half. Lay down the length of the sleeve along the fold, adding 1 cm. Draw a horizontal line in the lower part and set aside the segment: (wrist girth - 1.5 cm) / 2. From the upper part of the future sleeve, measure down a segment equal to the height of the eyelet - 1.5 cm. through this point a horizontal line. On it we set aside half the measurement of the girth of the arm at the armpit. We draw a line from the point of the armpit to the point of the wrist. Visually divide the sleeve into three parts. In the lower section (1/3) it is necessary to deepen the seam line by 1 cm.
We connect the top point of the sleeve with the point of the armpit. This segment is divided into 4 parts. In the upper segment, we raise the perpendicular by 1. 5 cm, and in the lower segment we also lower it inward by 1.5 cm. Through the points obtained, we smoothly draw the sleeve's okon.
Making a skirt pattern.
You can build a skirt for a gymnastic leotard in almost any style that allows the athlete to move freely. Consider an example of building a classic skirt, loose at the bottom and tight at the waist.
Draw a horizontal line on the sheet, put a measurement on it - half the circumference of the hips with the addition of 0.5 cm. Lower down the perpendicular, equal to half the length of the back to the waist. Draw a horizontal line through it.
We mark the darts.
To calculate the darts, we need to calculate the K number:
(half of the hip circumference + 1 cm) - half of the waist circumference = K.
Dart formulas:
- back tuck: K x 0.3;
- tuck in the front of the skirt: K x 0.25;
- lateral: K x 0.45.
Unfold the sheet. The side tuck is laid exactly along the fold. We retreat from the fold line in different directions along half the width of the tuck. We mark two points. We connect them to the point of intersection of the horizontal with the fold.
The front tuck is built at a height of 10-12 cm from the horizontal. To do this, divide half of the front of the skirt equally and draw a perpendicular to the intersection with the horizontal. We step back 10-12 cm from it and draw a tuck in the same way. The back tuck is built in the same way, the height from the horizontal is 3 cm. After that, from the waist of the skirt, we set aside the required length in front and behind. Here it all depends on the chosen style of the suit. Cut out the patterns.
Everything is ready. It remains to choose the material.
Material
Fabrics for rhythmic gymnastics leotards should not wrinkle during active movement. They should stretch well and quickly take the reverse shape. The body of athletes in them should breathe well and, in no case, should not sweat.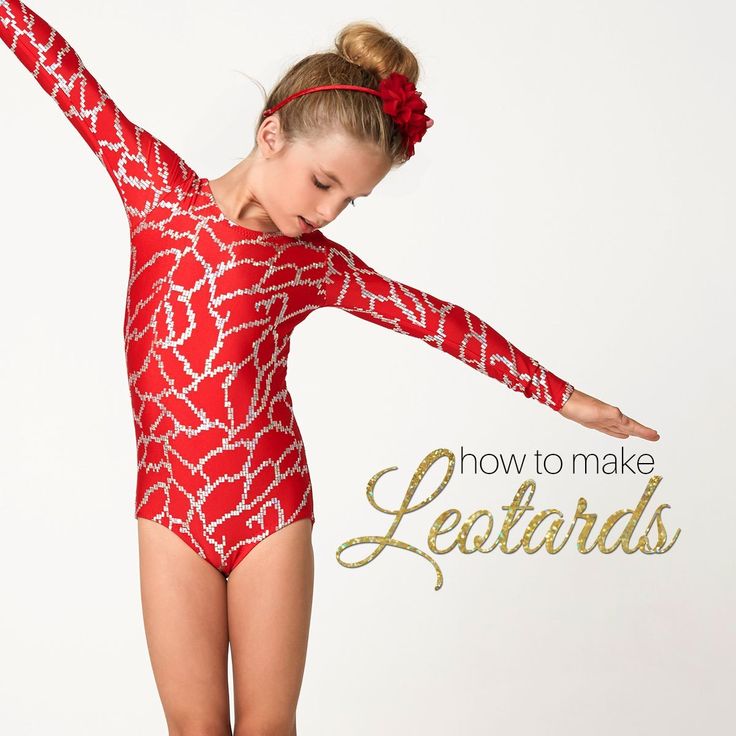
The most popular fabrics for gymnastic leotards are:
- stretch mesh;
- guipure;
- georgette;
- supplex;
- velvet;
- microfibre;
- stretch satin;
- stretch velvet;
- thermal cloth.
The body of athletes in them should breathe well and, in no case, should not sweat.
These fabrics have good stretch. They are practical and durable. They endure washing, ironing well and do not deteriorate under the influence of salts excreted from the body with sweat during training. They have a beautiful sheen and come in a wide range of colors.
These types of fabrics are securely attached to swimwear jewelry, they do not fall off after washing the product.
A variety of elements are used for finishing costumes; rhinestones, appliqués, beads, feathers, bows and other decoration materials. How to decorate a swimsuit with your own hands is briefly described below.
Colors
First, special sketches for rhythmic gymnastics leotards are drawn. To do this, you need to make a copy of the pattern according to the finished template. Draw sketches of patterns on it with pencils and paint them with the appropriate colors. For an individual costume, a painting is used that matches the number of the gymnast. For the national team, folk patterns, traditional colors of the state are more often used, for example: red, blue and white.
Decorating the product, a very exciting process that allows you to realize the most vivid fantasies
All elements of different colors are cut out separately. After the parts are ready, they are folded again on a paper sketch and checked for matching colors and sizes. Next, all the elements need to be baited together and look at the location of the pattern on the front side. It should be symmetrical about the center of the swimsuit. After all the checks, you can start sewing a gymnastic leotard.
What and how to sew a leotard for rhythmic gymnastics.
Swimsuits are sewn on machines that are designed to work with fabrics such as supplex, stretch mesh and other stretch fabrics. Such materials are very capricious in work and simple machines can collect them, tear and skip stitches on details. It is very difficult to notice gaps on shiny fabrics. And it’s impossible to allow a swimsuit to burst, tear or completely tear during a performance. For such active movements and dances, the stitching of parts must be strong and reliable.
Tip: Even when using a modern sewing machine to sew a gymnastic leotard, always follow the golden rule: “Sew and test!”.
Each stitched piece must not have gaps in the stitches and must not be pulled together with threads.
Gymnasts in hand-sewn leotards, following the correct manufacturing technology, will feel much more comfortable than in a purchased suit. Swimsuits, tailored to individual measurements, have a good fit, they will not need to be sutured, violating the cutting technology.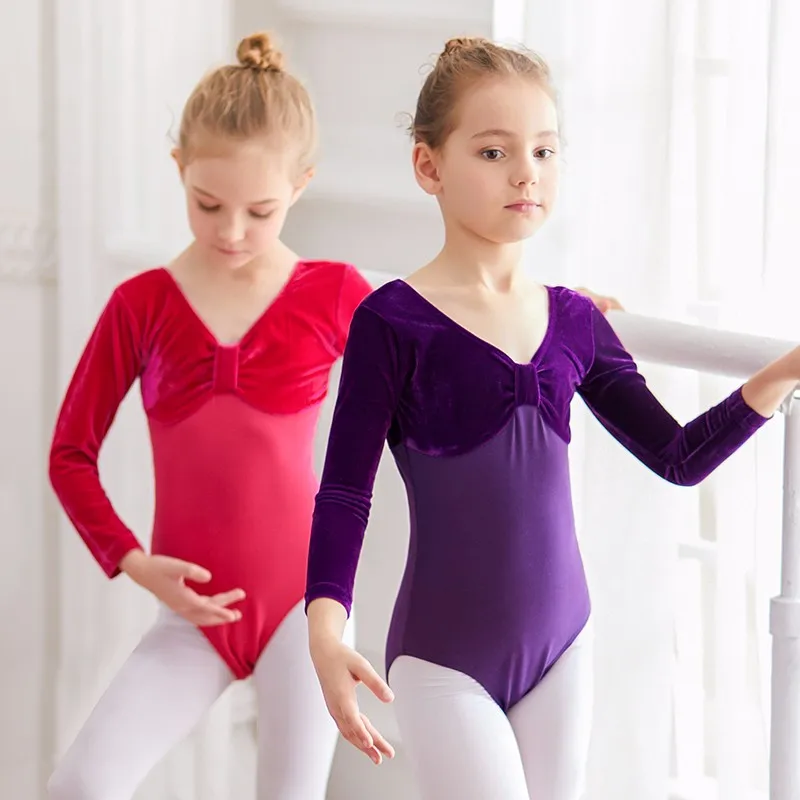 In addition, athletes themselves can determine such piquant moments as the depth of the cutout of panties, neckline and other details that affect the comfort in the process of wearing things. Of course, the first pancake can be lumpy, not without it, but over time, chic swimsuits will turn out, in which your girl will show off on the highest pedestals.
You now know how to sew a leotard for rhythmic gymnastics on your own. It's not difficult and much faster than altering and customizing a store-bought suit. And decorating a product is a very exciting process that allows you to realize the most vivid fantasies associated with the image of your little heroine.
How to sew a leotard for rhythmic gymnastics
A gymnastic leotard, or gymnastic leotard, as it is often said, is an indispensable attribute of a gymnast's wardrobe. This applies to both rhythmic and artistic gymnastics. But outfits for artistic gymnastics are easier to sew, you can create them without any problems by learning how to sew an elegant uniform for rhythmic gymnastics. Professional swimsuits are quite expensive, not everyone can afford them, so many mothers prefer hand-made swimsuits. Moreover, you may not like the purchased product and want to finish it, also with your own hands. Leotards are created both for everyday training and for performances, for beginners and for the master of sports. Often you need several identical leotards, for example, for a demonstration choreographic performance or for team competitions. In such cases, tailoring is indispensable, but a small master class is needed for success.
Designing and taking measurements
Contents
- 1 Designing and taking measurements
- 2 Pattern
- 3 Sewing
- 4 Designing
Be sure to color the sketch of the rhythmic gymnastics costume so that you can select the desired material from it. If you don’t have enough ideas of your own, don’t make up nonsense, look at the best competitive swimsuits on the Internet and change them to your liking.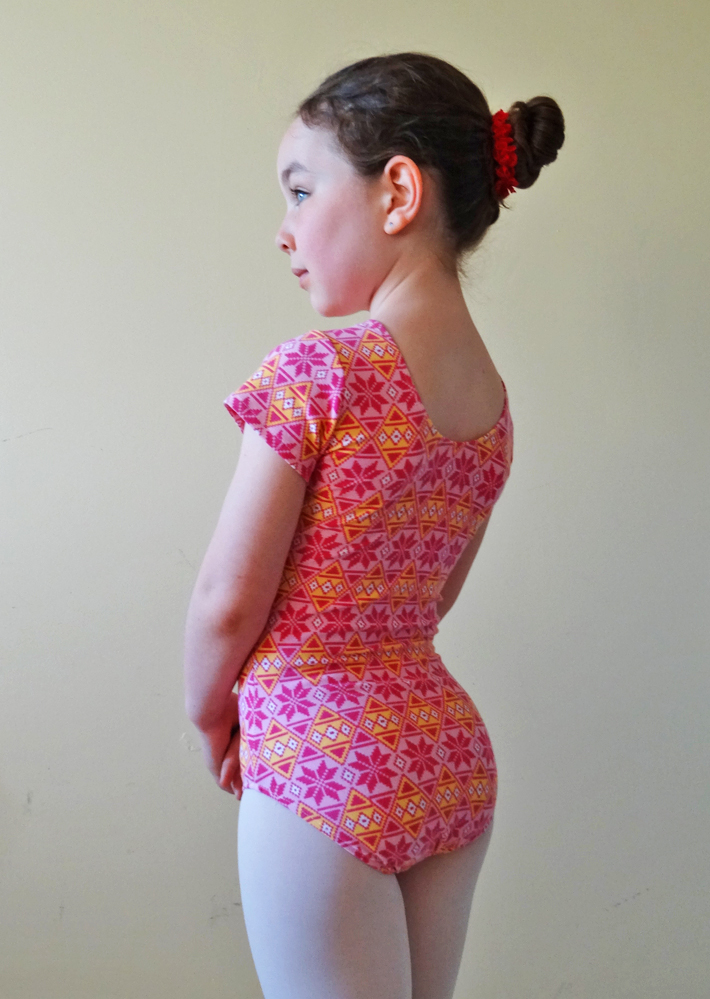
First, re-read this master class in full to sew a costume with your own hands, prepare:
- sewing machine,
- scissors,
- pattern chalk (you can use a bar of soap),
- needles,
- select the desired material (supplex,
- Prepare embellishments such as rhinestones, sequins, glittery appliqué material, rhinestone glue
- Invisible zip
- elastic band.
Pattern
Take a large sheet of whatman paper and draw a pattern on it in actual size. As a basis, you can take the child's underpants, which need to be circled, slightly increasing the cutout on the hips, which should not restrict movement during performances.
A small master class - to draw the upper part of the swimsuit, the daughter's t-shirt will help, which needs to be circled on top of the panties and lengthen the sleeves. The armhole for the sleeve should be small so that it fits snugly under the arm. The front pattern should be slightly shorter than the back, the difference will go to the formation of panties.
Sewing
Having fastened the leotard with temporary seams, the master tries on the suit on the athlete. Circle the neck according to your requirements, but do not make a deep cut.
It is necessary to cut out strips from the material five centimeters wide and equal to the circumference of the neckline, with its help we sew an undercut later.
The swimsuit should be sewn in the stitching mode, first the side part, then the bottom part and the shoulders.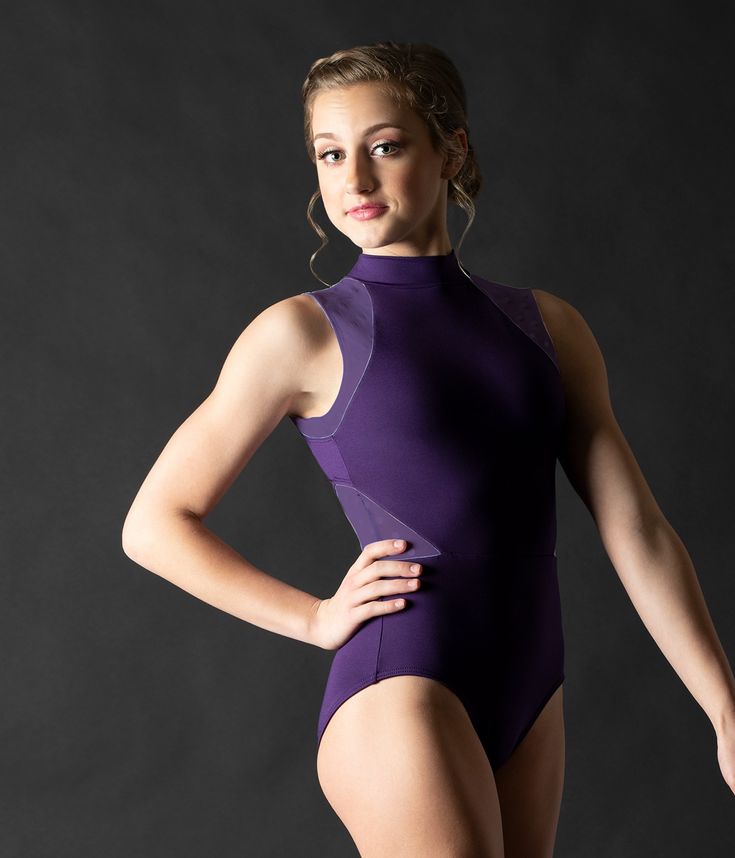 Make only the necessary seams, as additional seams and undercuts hinder movement. Try to keep your swimsuit tight but not tight.
Trim the neckline with the strip cut earlier, first bast it on the front side, then on the inside, machine stitching from the front.
Finish seaming the panties (insert cotton gusset) and sleeves.
Decoration
Glue sequins and rhinestones with special glue according to a previously invented pattern. But do this only after the final tailoring, because it is much harder to redo with pasted decorations. You do not need to completely shower the swimsuit with rhinestones, this reduces the elasticity of the fabric, it is better to make a small pattern, such as a flower. Stones can also be glued at the seams, they hide them somewhat. Sometimes a swimsuit strewn with pebbles looks ridiculous, but it all depends on the design of the product and compliance with the design features.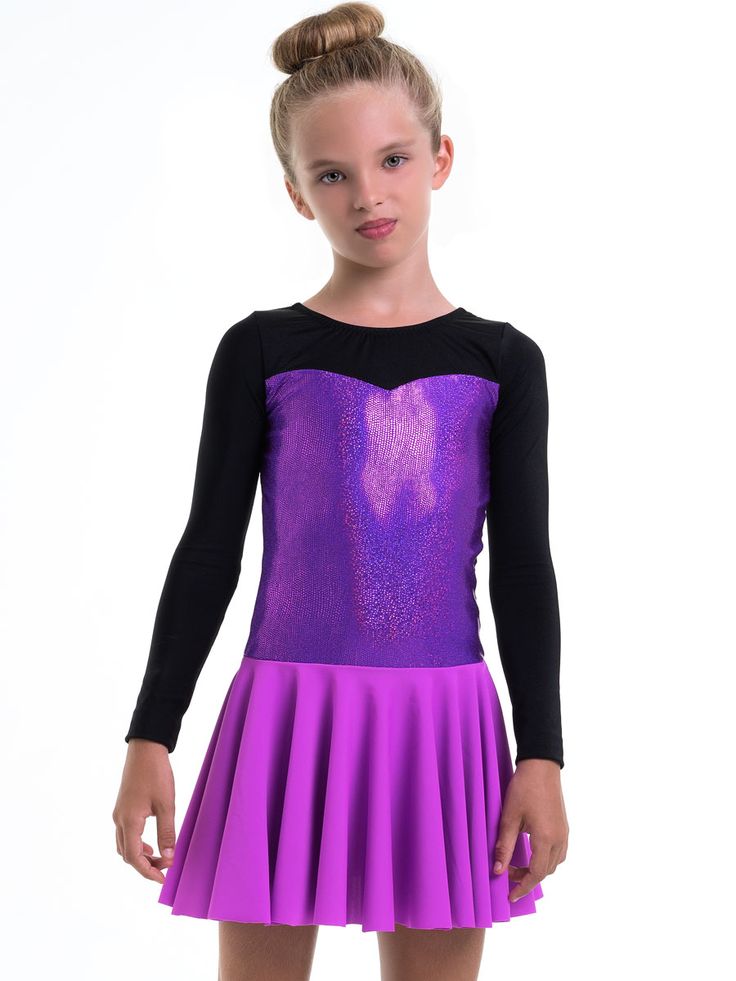 The class and size of the pebbles may be different, but the main decor should be about two millimeters.
Painting workshop - if you are thinking about painting or drawing, you need to do it at this stage, before stitching. Please note that stick the colored pebbles at the very end. The coloring is done with acrylic paint, after choosing the color, make a test on a small piece of fabric. The paint is applied to a slightly damp cloth and immediately dried with a hair dryer. The pattern can be changed if the fabric is washed immediately. To prevent the pattern from being erased, iron it with a hot iron, preferably through two layers of gauze or a thin cloth.
Sometimes a simple design is compensated by an abundance of pebbles, but it is better to make the design better, only emphasizing the elements with rhinestones, such a swimsuit does not look like a Christmas tree. True, if you make a patchwork pattern or an appliqué, the work becomes much more complicated.
If you spoiled something during the sewing process, you don’t need to panic, because sometimes swimsuits are sewn from fabric patches and you can always add something to the sketch to hide the flaws, the product can even benefit from a small alteration.