How to mix dance
Mixing Dance Music - A Comprehensive Guide To Nailing Your Mixdowns Every Time!
Getting the perfect mixdown can be a tricky task for even the most seasoned of producers and mix engineers.
So whether you’re a pro or just starting out, this article is here to deliver a quick and easy step-by-step guide to ensure your mixing is up to a high standard.
We here at Studio Slave understand that there are literally hundreds of self-help sources and articles teaching a wide range of mixing techniques, however, what most producers struggle with, is putting it all together. You might understand complimentary EQ and Parallel compression, but there’s no point having the building blocks if you don’t know how to build a house!
So to that end, Here it is, our step-by-step guide to the mixing process…
STEP-BY-STEP GUIDE TO THE MIX PROCESS
We have written this article in a checklist style format. Feel free to print it off and stick it somewhere useful so you have something to refer to whilst mixing. This is a brilliant way of getting positive, realistic outcomes!
A quick couple of points to mention is that as previously mentioned, we have written this as a linear step-by-step guide to getting your from an unmixed track to a finished mix-down.
In reality, mixing is far from linear. Once you get better at mixing you will find a workflow that works for you, and often find yourself jumping back and forth from one task to another. For the new guys amongst you, stick to our guide until you feel safe to try your own methods. Our guide has been written in this particular order because it works!
“Remember, mixing electronic music is fun. Learn the rules then break them. always use your ears!”
Treat Your Room Acoustics
Before we dive head first into the nitty gritty stuff, we need to tackle the things outside of the DAW (digital audio workstation).
Namely, your ears and your room.
Room acoustics is one of those things that always seems to be last on producers to do list when in reality it should be one of the main priorities before buying any new plugins or hardware. But why?
Every single decision you make is based on the sound that travels out your speakers, around your room, and into your ears. So considering that treating your room acoustics is fairly cheap to do, there really is no excuse for not doing it. Plus, its the most logical thing to improve between your ears and the speakers.
If you would like to learn more about setting up your room and speaker placement, check out this article.
We can guarantee that once your room is treated, you’ll notice a vast improvement in your mixing abilities.
A room can cost as little as £50 – £100 to treat if you do it yourself, and without going too deep into acoustics, the reason it’s so important is to do with how sounds bounce around in a room, either reflecting, absorbing or diffusing. The most troublesome frequencies are the lower ones below 300Hz as they can tend to cumulatively add up or cancel each other out altogether!
If your room is sounding really bad then you may have multiple frequencies that cancel out. These are known as room modes or standing waves, and can cause you to make drastic EQ changes on parts that don’t require them at all!
If you would like to learn more about monitoring and how to treat your room, check out this youtube video that explains it all in good detail!
Sorry, there was a YouTube API error: API key not valid. Please pass a valid API key. Please make sure you performed the steps in this video to create and save a proper server API key..jpg)
Now that we have got the boring stuff out the way, let’s dive into the mixing process!
SET YOUR MONITORING LEVELS
Set your monitoring levels so you can still talk at a conversational level over the mix. The only times you should turn up the levels are:
- At the end of the day
- before having an extended break
- to check the low-end balance
Other than these occasions there is very little reason to need to have the level any louder, all this will serve to do is fatigue your ears and potentially contribute to hearing loss. It has been proven that the human ear is much better at being able to balance parts at quieter levels anyway. Louder listening levels trick the brain into thinking there is more bass and treble than there actually is, which makes the track feel louder. To be specific, the ideal listening level is 83dB SPL. If you want to know more about this then check out this very useful explanation of Bob Katz K system.
To learn more about using Psychoacoustics to get more out of your mixdown, check out this article:
StudioSlaves guide to Psychoacoustics
LISTEN TO THE REFERENCE TRACKS
If you supply a rough mix of any given track to 10 different mix engineers, It is highly likely that you will receive a very wide variation of final mixes back. – This is because each mix engineer hears differently, or subconsciously imparts their own mixing style on the track.
In most cases, we can assume you will be mixing your own music. So you know exactly what direction you will be taking the mix-down in. If however, you are mixing someone else’s music, then always have an unmixed version of the track at hand in your DAW that can be referenced to ensure you are staying on the right track. This also gives you the opportunity to listen to parts of the track which may be worth accentuating, or possibly even searching for the parts that may be sloppy from the recording process that you may wish to rectify later on.
REFERENCE TRACKS
It’s common practice to import one or two tracks alongside your project in the DAW, these need to be well produced and mixed tracks that are in the same genre as the track you are producing.
Always refer back to these tracks when making comparative mix decisions. They will tell you a lot about the balance, tonality, width, and dynamics of your track.
Why are they so important I hear you say? Well, think of these reference tracks as your compass. It can be very easy for your ears to get fatigued when mixing for long periods, causing you to ‘drift off course’. These references are there for making objective comparisons.
Us humans work predominantly on relativity. If we have nothing to compare our own project to, then, of course, we are going to lose track and inevitably end up with a car crash of a mix-down.
MIX PREPARATION
“Failing to prepare is preparing to fail”
Whilst it is extremely helpful to segregate the separate production phases such as production, mixing and mastering. It’s equally important to prepare yourself for the mix stage from the very second you open your DAW.
Things that may seem irrelevant actually have an extreme knock-on effect by the time it comes to the mix stage, such as:
Sample Selection
Arrangement
Key signature & Choice of notes
These may seem trivial but bad or clashing samples can make a project almost impossible to mix right from the get-go.
Arranging can be used to your advantage to give each element in your mix its own space and bit of limelight at certain times within the track. This can significantly reduce issues with loudness and muddiness as parts fight for space.
To learn more about mix preparation, check out our Mix Fundamentals & Preparation eBook
Using arrangement to allow each instrument to have its own space and to create a sense of energy using tension and resolution.
Another example of a common mistake, is working in a key such as G minor, and placing every single element on that root key of G.
Not only does this make for a boring track but it also means that all your parts will be stacking up on the frequencies that relate to G and their harmonics. knowing how to spread your instruments out evenly across the frequency spectrum is a skill that acquires a lot of practice. However, once this is mastered you will be well on the way to getting mixes which are clear and loud!
Now that we have mentioned some of the production prep stuff, let’s mention some of the technical and workflow preparation.
Getting your DAW project organised at the start of the mixing phase will allow you to shut off the technical side of your brain, this, in turn, is proven to help you be more creative, as you are no longer getting bogged down with mundane tasks such as colour coding or ordering tracks.
Heres’ a list of important things to do for the mix preparation stage:
- Remove any unused or unwanted tracks
- Rename all tracks
- Colour code tracks
- Order tracks
- Remove silence from any clips
- Setup any routing, groups, buses & FX returns
- HPF everything
We have kept this section pretty vague because we go into great detail into mix preparation in our new Tech House 2017 course.
GAIN STAGING
Gain what?
To keep it short, gain staging is the act of ensuring that the levels of your parts are correct at every stage of the mixdown process. This was essential for hardware to ensure there was a good signal to noise ratio. It’s less important now with digital audio but you still need to be mindful to leave plenty of headroom to avoid digital distortion.
The rules are simple, Never clip your meters at any stage and you are unlikely to have any problems with digital distortion.
The second reason for gain staging properly is that some VST plugins have been designed to very closely emulate their hardware counterparts. This means they will have an optimum voltage where the plugin works best (+4dBu or 0VU for hardware).
By ramming a high gain level into a plugin, you are forcing it to crunch numbers that it isn’t capable of crunching properly, thus causing distortion or unwanted artifacts.
So, you have been warned. Gain staging is very simple to do if you are aware of it from the start. However, ignoring it will result in mixes that will lack clarity and may show signs of audible distortion.
THE ART OF BALANCING
Balancing is one of the single most fundamental concepts for mixing a track. It only takes one or two instruments to be out of whack and it can make or break the record. Almost all the other aspects of mixing will relate to how the track is balanced in some shape or form.
The fader balance – this is the balance of each track against one another
EQ, or tonal balance – If the ‘fader balance’ is controlling all of the projects individual channel faders relative to one another, the tonal balance can be thought of as lots of miniature faders, each controlling different frequencies of a single track. It’s the microscopic version of your fader balance and allows you to control all the frequencies that make up the tone of a sound relative to one another.
A good way of understanding this concept is by looking at a graphic equaliser. These hardware units usually have up to 30 faders, each hard-wired to a set frequency which can be used to adjust the tonal balance of a sound.
Compression – This is a tool that can help us control the dynamics of a track. some parts may have a transient hit which is some magnitude louder than the sustain portion. Compression can help us even that out and find a more comfortable static level for our part.
So in the case of compression being used as a balance tool, we are using compression to reduce the difference between the attack and sustain portion of the sound. Yes, yet another form of balance!
being able to hear the nuances of a sound and understanding what needs to be done to achieve a good balance takes a long time to get good at. but my advice to you is to do as much work as you can first with nothing but your channel faders. Only once you have exhausted all your options with the faders should you move to other things such as panning, EQ, and compressors.
If you are new to mixing, all these extra devices and concepts will only serve to confuse you before you are ready to learn them. We guarantee that with a little bit of time and effort you will be able to get the majority of the balancing done with nothing more than your faders, some patience, and a good set of ears.
A quick tip with balancing is to set a level for the most important part first, then work all of the other parts levels around this part in priority order. once again this goes back to what we said about comparisons and relativity earlier. This method is a good way to prevent you from chasing your tail and ending up with a lot of digitally clipped tracks and sore ears.
Balancing really is a massive subject in itself, which can’t possibly be covered in a few paragraphs. Check out these articles for tips and techniques on achieving a good balance.
The Pink Noise Mix Balance Technique Explained
Balancing In Mono
Striking The Perfect Balance – Static Fader Levels
Also, check out our eBook series which looks at all aspects of the mix in much more detail.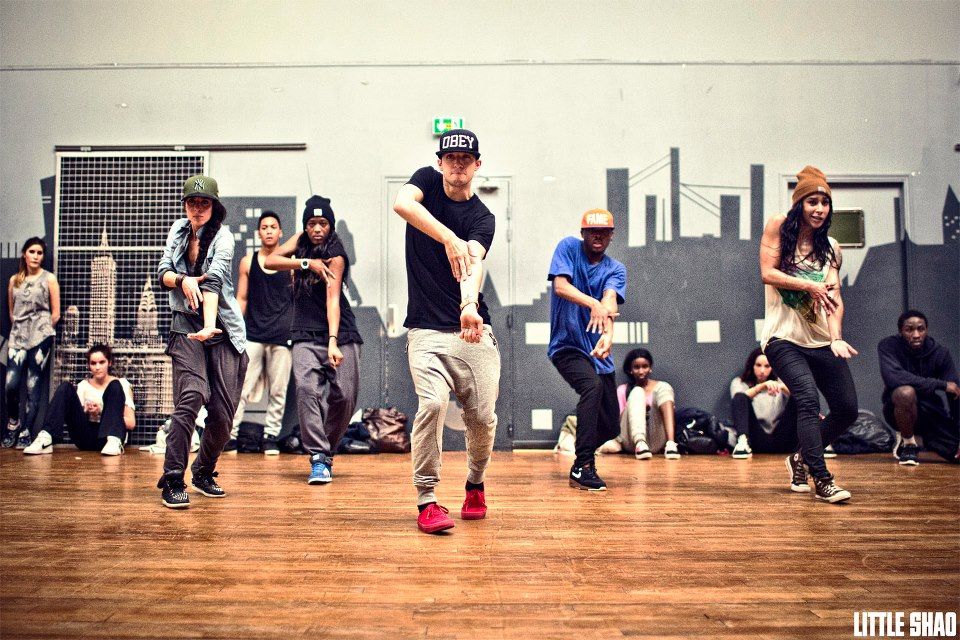
PANNING
Panning gives you a chance to create a bit of space in the mix at a fairly early stage and allows you to start to build your track visually across the horizontal width of your track also known as the stereo spectrum or stereo image.
Much of panning is down to your creativity but a few top tips are:
Keep things balanced – if you pan something hard left, then look for a similar sound to pan hard right. this will prevent your mix sounding lopsided
keep like instruments apart like naughty children – Parts with a similar frequency spectrum will clash if they are played at the same time in the same area of the spectrum (such as straight down the middle) and parts that clash will very quickly muddy up your carefully balanced mix. Avoid this by panning these parts in separate directions. This doesn’t have to be hard pan positions, just enough to give them each space and separation they deserve.
keep your power elements central – parts such as the kick, snare/clap, lead vocal and bass are best kept in the centre of the mix where their energy can be equally distributed between the two speaker cones for maximum power and effect. This also keeps the stereo image nicely balanced.
Higher parts can be panned more than lower parts because phasing becomes less of an issue as we go higher up the frequency spectrum. So hi-hats and high-end percussion can be panned fairly hard. whereas stuff below around 2-300Hz such as bass parts are best kept in the centre of the mix.
Bass parts being in the centre is not only important to reduce phasing, but also because we want our bass to be big, bad and powerful. so it must be central for this to happen. Finally, the human ear is very bad at being able to spatially locate bass parts anyway, so doing fancy panning on low instruments is unlikely to be noticed.
For more information on panning check this article out.
EQUALISATION
Now that we have our track nicely balanced using the faders, we can now go into the individual tracks and start to make some tonal balancing decisions. This can be broken down into a few smaller stages.
To achieve a loud and clear mix the first stage is to remove any parts that don’t contribute to the sound or tone you desire.
BAND PASS FILTER EVERYTHING – AKA BRACKETING
If you haven’t done this at the mix preparation phase, then now is the time to remove anything that doesn’t need to be there. If you’re already fairly mix savvy you may be wondering why this stage is named band pass filtering instead of high-pass filtering?
The reason that we high pass filter everything is to remove any cumulative low end rumbly noises which only serve to muddy up our mix and take up valuable space. So with that in mind, the exact same concept should apply to the high end.
If you have a part which has an excessive high end, then get rid of it and save this airiness for more important parts such as hats, reverb tails and cymbals.
A prime suspect for this issue are parts such as buzzy electric guitars. Sometimes they may have a whole load of static or white noise above a certain frequency, which doesn’t contribute to the sound other than to waste headroom.
Choose your filter slopes wisely as they can drastically effect the sound of the signal. Also try to refrain from making the newcomers mistake of high pass filtering the life and soul out of your track.
Alternatives to HPF AND LPFs (high and low pass filters) are shelving filters, which can achieve similar results in a slightly more subtle way.
SUBTRACTIVE EQ
At this point you’ve balanced, panned and band-pass filtered any tracks that require it, but some of your elements are still sounding a little bit lumpy, all over the place and on top of one another. This can be sorted using subtractive EQ.
This is the bulk of the EQ phase where you are essentially just adjusting all of those micro faders we mentioned earlier. This needs to be done for each and every track in the mix, not to make each sound as big as possible, but to get each sound balanced and to sit well together in harmony!
doing this will help your tracks gain clarity. especially parts such as vocals which will sit more comfortably in the mix and become more intelligible once they are EQed.
Tonal balances can also be improved by reducing any resonances within a recording or sample. Think of a resonance as a lump that is awkwardly sticking out of your nice balance. simply use EQ to knock it back down into place.
TIP – Just because something is resonating doesn’t necessarily mean it needs to be cut. If you decide to cut it, don’t assume you need to hack at it with a butcher’s knife. sometimes a cut of a few dBs (decibels) is all that’s required.
The most important area for subtractive EQ is the low mids (around 120 – 500Hz) as this is the area where almost every instrument will be present, be it the fundamental frequency or its harmonics.
Here are some problematic EQ ranges and what you can expect to listen out for:
- 0Hz to 80Hz = Sub, bass, boom and rumble
- 80Hz to 250Hz = Bass boom and boxiness
- 250Hz to 500Hz = Muddiness and boxiness
- 500Hz to 900Hz = Honky or nasal
This chart shouldn’t be taken for gospel because everyone hears differently. However, these problem areas are widely agreed upon by experts within the electronic music industry.
For more info on EQ check out our articles & ebooks.
EQ Fundamentals Understanding Sound
Mixing In Live – Equalisation
Compression is a mammoth subject. And can get very complicated because it can be used to achieve a vast array of very different results such as:
Reduce the dynamic range – loud parts compared to quieter parts
Make parts sound louder – either by increasing the sustain portion of a signal or by increasing the RMS of a signal with parallel or standard compression
Even out a performance – make a drummer or vocalists notes of a more consistent level
Control the dynamics of a part – make the attack or sustain either louder or quieter
Make parts groove to the beat – side-chain compression
Make a group of parts sound more coherent – glue compression
Stop signals going above a certain threshold – limiting and brick wall compression
Some, or potentially even all of these types of compression could be implemented into a single mix. so you can begin to see why it is such a confusing subject for a new producer. To add to the confusion there’s also a multitude of saturation, distortion, and tonal characteristics that certain vintage compressors are famous for.
If you would like to learn about different types of compressors, and uses of compression then check out these articles.
Compression Explained
Parallel Compression
Multiband Dynamics Explained
Or alternatively, check out our Ebook covering compression.
ADDITIVE EQ
Whilst subtractive EQ is commonly used to get rid of problematic frequencies, additive EQ can be used to highlight the nice parts of your mix.
At this stage, you should have a good idea of where the good tonal areas are of each sound. For example, if you have a piano sample you should know which areas to boost to make it sound more “piano’ey”.
Likewise, If you have vocals you should sweep a peaking filter through the spectrum and you will hear parts that may become present, crisp and warm – these are the areas worth boosting.
Additive plugin EQ’s are generally models of older hardware vintage EQs. This is because the analog circuitry has a more exciting and musical sound to it. Many EQ’s will impart a distinctive tone or colour on a sound. Which is why EQ’s such as Neve, Manley and Pultec EQs are so highly sought after.
Try not to go too overboard here. It’s very easy to get carried away so keep the boosts gentle and use wider, more natural Q settings. Don’t accidentally unbalance the mix at this late stage in the game.
ADD SPACE/DEPTH
Many of you will work on the ‘space and depth’ of your track during the production phase, using devices such as reverbs and delays.
This space & depth phase is here just to remind you to re-address your settings, particularly on devices such as reverbs.
Whilst in the production phase you may have quickly grabbed the first reverb preset you tried, just so you could quickly get an idea down. This reverb may no longer work now that all the rest of the parts are in the mix.
You have two main choices at this stage, you can either salvage the situation and tweak the spatial effects you are already using, or, in most cases, I suggest starting from scratch now that your decisions will be more informed with all of the elements present in the mix.
Reverb strategies are covered at length in our reverb and depth ebook, but to get you started here’s some ideas:
Use three reverbs – one small reverb for percussion parts and to create a glued drum room, one larger one to create some distance, and a final one for special effects or splashes.
Use a single reverb – this emulates how older studios only had a single hardware reverb unit to work with, so it would get used on nearly all the parts of the track. This can help to cement a certain level of coherence but the danger of doing this is that the same reverb can quickly cause your parts to lose their sense of separation and form into one muddy mess if you don’t EQ everything carefully.
Use multiple reverbs for set tasks: Have a small reverb set up with minimal tone. this is the blending reverb for gluing parts together. A second reverb can be used for creating sustain and tone, plates are brilliant for this because they are very dense. Finally, a third reverb can be used for space & size, such as a large hall.
Don’t use reverb at all: If you have a mix which is already very busy, then use a tight set of delays as your reverb instead. they can get the job done just as well without taking up half as much space in the mix.
SATURATION & DISTORTION
Many people disregard distortion as something that is only relevant for rock producers to use on guitars. Saturation and distortion are something I use on the majority of my tracks within a project. It can be used mildly, just to help things pop out a bit if they feel a bit bland, or on the other hand, amps, pedals, cabinets and overdrive devices can be used to absolutely obliterate a signal from all recognition.
These effects really do come down to your creativity but as long as you understand that distortion will add harmonics and generally brighten things up, then you can figure out when and where it may come in use in a mixing environment.
CREATIVE EFFECTS
This stage is where a lot of the technicalities go out the window. The goal here is to liven up your parts and give them a bit of uniqueness, motion, and character. Common effects for this sort of task are:
Phasers
Flangers
Chorus
Ring Modulators
Autopanners
Autofilters
The only thing that really needs to be said on this section is that it’s vital to spend plenty of time experimenting, break all the rules and to be truly unique, try to create an FX combination or sound that hasn’t been heard before.
A caveat to this is to remember that some devices will cause collateral damage in the form of side effects. For example, a chorus may make a sound really wide and give it some subtle modulation, but it will also cause it to lose focus and have a much softer attack transient. This may be the effect you are going for, but is something to always bear in mind. There are many single devices that can achieve multiple results.
Sometimes referred to as playing the mix. The concept is simple, Your track is 6 minutes long; yet you have mixed the entire track using an 8 bar section.
Tracks are not 8 bar sections, they are supposed to flow and sound organic. This is achieved by keeping things moving between sections and constantly ensuring your track is evolving.
As each section of the arrangement is played instruments will come and go from the mix. This is where you can choose to highlight them or pull them back a bit. making the most out of the potential loudness of any given section and also creating something that’s much more interesting to listen to than a static mix.
ACHIEVING LOUDNESS
This is the stage where the project should be exported down to a single stereo track then sent to a professional mastering engineer to give it that extra 10% and get it commercially loud as ****!
Recently this is happening less and less. Producers and mix engineers are choosing to master their own tracks. Whether they are for labels, club play or SoundCloud, there’s one or two things you will need to bear in mind:
How loud?
If you’re doing this for a streaming service such as iTunes or Beatport you may wish to check the normalisation. Otherwise your super loud track with no dynamics will end up being turned down by the streaming service. resulting in a quiet track with no dynamics (not cool)
Once you have an idea of the loudness you want to achieve, a basic mastering chain can be thought of as a condensed down version of the mix stage, however, its only being performed on a single track and the adjustments are much more gentle.
Here’s a very simple mastering chain which should make your mix that little bit better.
Gain
To control the input gain. If you have gain staged properly up till this point you probably won’t need this plugin. A good mix-down should have maximum peaks of around -6dBs, allowing 6dBs of headroom to play with during mastering.
Stereo Widening
This is usually very gentle. standard practice for stereo width in a mastering situation is to push up the sides of the mix by a few dBs to make it sound wider and to make sure everything below around 150 – 200Hz is in mono.
EQ: This is the last chance saloon for any minor tonal balance changes. a standard thing to do here is to pull out a dB or so around 300Hz and to push up around 100Hz and 10KHz to create the upward down smiley face EQ shape which gives the psychoacoustic impression of sounding louder and clearer. For the more experienced guys, research into mid-side EQ and plugins such as Brainworx which are absolute game changers for mid-side mixing and mastering.
Compression: This is used as a final stage of very gentle mix glue. long attacks of 30ms and above and low ratios are common.
Limiting: The aim of the game here is to get your track peaking as close to 0 dBFS as possible. Remember that when you limit a signal you are going to be doing it at the cost of dynamic range which carries a lot of the `bounce’, ‘groove’ or ‘energy’ or a track. So think carefully when you have to weigh up the Loudness Versus Dynamics ultimatum.
Loudness may sound better at first but after a few listens it is very often the case that your ears will begin to fatigue and you will favour the more dynamic version.
So that is the entire mix process. I imagine a few of you may have read this article with a bit of a puzzled look on your faces.
DO NOT WORRY!
Mixing takes a long time to learn, some people’s ears take a while to develop, but one thing is for sure – all the blog reading and knowledge in the world isn’t going to make you a better mix engineer without a lot of practice.
I really can’t stress this enough. Get as much practice as you possibly can, even if it means offering to mix your friends tracks for them. The more time spent mixing, the more you will be able to experiment with different mix concepts and train your ears.
If you found this article useful then check out our latest course – Tech House Tutorial 17. This course takes you from a blank canvas to a finished Tech House track over the course of 59 videos, and also includes the project and sample files..
For an instant 10% discount for the Tech House Tutorial 2017 course or any of the other products mentioned in this post, simply spread the love by sharing this blog using the button at the bottom of the screen. You will receive your discount coupon as soon as the share button is pressed.
Click share for an instant 10% coupon code
Share
Quick View
£15.00
Add to basket
Quick View
£15.00
Add to basket
Quick View
£15.00
Add to basket
Quick View
£15.00
Add to basket
Quick View
£15.00
Add to basket
Quick View
£10.00
Add to basket
Quick View
£10. 00
00
Add to basket
Quick View
£10.00
Add to basket
30 Mixdown Tips & Techniques for Instantly Improving Your Electronic Dance Music
In this post we’re going to delve into my top 30 techniques for mixing EDM – although really the principals apply to mixing any genre of music.
Mixing is the blending together of all the elements of a track to make it sound cohesive and balanced. It’s the phase in music production before mastering. There’s a lot to learn – and it takes practise – but with some fundamentals under your belt you’ll be crafting better mixes in no time. Here are some of the very best techniques I’ve picked up over the years…
Caveat: Not all of these tips should be applied to every mix. In fact, some of them will detract from some mixes. They are a tool kit from which to draw, but always let your ears be the final judge. If there are any terms that are confusing, check out my EDM glossary here and it should help clear things up.
1. The mix starts before choosing your first sound!
Even in the planning stage of your project, you should develop an idea of which elements will be needed, and which frequencies you’ll need to include. Don’t worry, it’s simpler than it sounds! For instance, if you’re creating a Trance track, you’ll know that you want a kick drum, a clap or snare, some hi hats, a bass line, chords and a synth or vocal top-line. If you have an idea of what you want to achieve, it will make achieving it much easier.
2. Sound design and sample selection
Before even touching the mixer controls, the most important stage of the mix is choosing samples and sounds that work well together and hit many of the right frequencies. Remember, the only thing that matters is how good it sounds together – not as individual parts. You might have a killer synth lead that melts your brain when played on its own, but in the mix it might muddy your drums. Spend time getting your sounds right BEFORE the mix down.
3. Tune your drums
Almost every drum sound has a predominant “note”. If you can tweak the pitch of each of your drums sounds to match the key of your track (particularly the kick drum), it will help avoid a muddy, dissonant mix. Try it…you might be surprised at the difference it makes!
4. Use automation
The overall mix should sound spot on BEFORE automating, but then you can use it to help really accentuate certain parts of the track, for example, when a DJ slowly filters out the bass during a build-up, then brings it back in on the drop. You could also take the whole track’s volume down a little in a break, and bring it back to 0dB on the drop.
5. Cut EQ rather than boost
As a general rule, it’s better to cut frequencies with an equaliser rather than boost. This helps prevent a build up of frequencies that can make your mix clip. E.g. If you want a piano to sound brighter, try taking out some of the bass and mid frequencies and increasing the channel volume, or, try the tip below…
(Here are 5 of the best EQ plugins available).
6. Use distortion as EQ
By adding some slight distortion to the upper frequencies of a sound, you can help it cut through the mix a bit more without boosting the EQ. Used sparingly it can work wonders. A tried and tested technique used by Calvin Harris.
7. Starting fader levels
Leave the master fader on 0dB, but pull all the other faders to the bottom before starting your mix. Bring what will be the loudest track (usually the kick drum in EDM) up so it’s peaking at about -11dB*. By doing this, you are mixing at lower levels, so as you bring the rest of the tracks up in the mix, the master fader should be peaking at around -6dB (important for mastering later on). You’ll probably need to turn up your audio interface to hear properly. *Remember, this number isn’t definitive…it will depend on the project.
8. Check the mix on different speakers / headphones
This is über-important! Think about where your audience will be hearing your music; it almost certainly won’t be in a perfect studio environment. It’ll more likely be from their headphones, car stereo, or (God forbid) even directly from their smartphone speaker! This is why it’s important to listen to your mix on different systems. Just bounce it down and play it from your smartphone or listen to it in the car and make mental notes of what to tweak.
9. Check the mix at different volumes
I suggest mixing at lower levels to prevent ear fatigue, but turn the volume up now and then, too. Humans hear different frequencies better at different levels (see this response chart), and checking your mix at different levels will give you a better idea of the overall truth. Mixes generally sound more pleasing at louder levels, so it’s important not to be fooled by your ears.
10. Don’t mix with mastering effects on the master channel!
There is so much about this online, and – as a heavy practitioner of both – I can confirm that mixing WITHOUT mastering effects on the master channel is definitely the way to go! For years, I started by adding compressors and limiters to get my kicks sounding as phat as Deadmau5’s, and – whilst I achieved it – by the time I brought everything else into the mix it was a horrible, squashed, distorted mess with no dynamics. A mastering engineer will want to receive your mix peaking at -6dB (and if you’re doing the mastering, you’ll want the same) so sending them a completely squashed 0dB brick will not allow them to do their job properly.
11. Use parallel processing to “fatten” the sound
So, how do you get a phat sound without slapping effects on the master channel? Ah, the million-dollar question. In a nutshell, by using the techniques in this list, as well as advanced techniques such as parallel processing. Parallel processing is basically mixing an affected signal into a dry signal to maintain transients, and compression works really well in this way. You get the in-your-face compressed signal, but the transients of the dry signal cut through and maintain the dynamics.
12. Check your mix in mono (or mix in mono completely)
This was a game changer for me. I remember I had just finished a hot new track, and was DJing later that night. I dropped it at peak time, and the vocals were completely missing! This was before I knew about phase cancellation. Some stereo sounds will cancel themselves out in mono, so always mix (or at least check your mix) in mono before working on the stereo field. You can do this easily in Ableton Live by adding a “Utility” plugin on the master chain, and assigning a keyboard shortcut to toggle the stereo width between 0% and 100%. All DAW’s will have a similar capability.
13. Treat mixing and mastering as the separate beasts they are
Further to number 10, treat the two processes as separate. Eric Prydz says his mastering engineer basically makes his tracks sound a little bit louder, but all the “fatness” is there in the mix beforehand.
14. Use side-chain compression
Create space in your mix by side-chaining certain sounds with others. For instance, use the kick to slightly compress the bass, or use the vocals to sightly compress the synth’s higher frequencies.
15. Make any bass under 130Hz monophonic
This is done for three reasons:
1. to avoid phase cancellation in the bass frequencies (see number 12).
2. Because club and venue sound-systems have the bass in mono anyway.
3. Because sub bass is omni-directional, meaning you can’t really determine where it’s coming from anyway.
16. Create a radio edit in the same DAW project
This is a pro tip for those who need to provide two mix-lengths of a track (e.g. a 5 minute version for club DJs, and a 3 minute version for radio). If you have two separate sessions, tweaking the main mix in one means you then have to open the radio edit project and manually repeat the same changes. Keeping the radio edit in the same project as the club mix (just further along the timeline) means that any mix tweaks are automatically applied to both versions.
17. Make use of grouping and bussing
Try grouping (or bussing) similar tracks together and processing them as one channel, e. g. group all the drums into one channel, then apply compression and EQ to that whole group to get a cohesive “gelled” sound.
18. Keep a copy of your arrangement session before starting the mix down
You’ll naturally mix anyway as you compose and arrange, and once or twice my dedicated mix down hasn’t sounded as good as when I was arranging! In these cases, you can always open the original session and work out what was better.
19. Highpass filter “almost” everything
This is because bass frequencies take up a lot of headroom in the mix, and can very easily make a mix “muddy”. Most recorded sounds have some bass information – even hi-hats and claps. If you add a high-pass filter to pretty much every channel, you can raise the EQ frequency threshold until only the information you want remains. Quite often, rogue bass information won’t be audible, but it DOES effect the final mix (a good way to check is to use a spectrum analyser).
20. Use a reference track
This is über important. Your ears trick you. They get used to a mix and tell you it’s great, even if it’s not. Pick a professionally released track you like (of the same genre you’re mixing), and use it as a reference to compare yours to. The reference track WILL sound louder than yours (as it’s been mastered), so make sure to bring its volume down to a similar level as your mix.
21. Test and ask for feedback
This is an extension of number 8. Play your mix on as many speakers as you can access, and play it to friends, family, fellow-producers and mentors, then ask for feedback.
ProEDMtip: DON’T ASK THEM IF THEY LIKE IT! Almost everyone will say “yes” to avoid hurting your feelings. It’s better to say something like “I’d really appreciate it if you could have a listen to my track and give some critical feedback”. Then, when they’ve listened to it, ask “What could be stronger? What doesn’t work as well as it could?” This gives them a comfortable invitation to be honest, which is vital for development.
22. Mix the next day
After you’re happy with the composition and arrangement leave it a day or two before mixing. You’re ears will have had a rest, and you’ll be able to be more objective when mixing. Also, if you ARE going to do your own mastering, leave it a day or two after mixing for the same reason.
23. Bounce to audio
Bouncing your tracks to separate audio stems has two distinct benefits: 1. It saves computer power as your effects are all bounced to audio, and 2. It allows you to “see” the audio track, and trim unwanted reverb and delay tails. The negative (and sometimes, positive) side of this technique is that you then can’t go back in and tweak the sounds (over and above your mixing effects), so make sure you’re happy with the sound design and arrangement before bouncing.
24. Don’t over-compress everything
When I first got the ability to apply compressors, I compressed EVERYTHING. It might make that one instrument sound phat on its own, but a whole mix of compressed sounds gives a dull, flat result that tires the ears. Dynamics are key – even in EDM – so don’t kill them before they’ve even had a chance to flourish *SNIFF* (wipes away tear).
25. Use a spectrum analyser
These can be useful plugins for checking your mix’s frequencies against your reference track (see number 20). Don’t rely TOO much on this visual representation, but you’ll be able to see if you’re way off the mark.
26. Give your ears rest
Don’t mix for more than a couple of hours at a time, tops. You’ll get used to your mix and lose objectivity, so take a break, get some air and get back to it a bit later when your ears have recalibrated.
27. Don’t keep going if it sounds great
As I wrote at the beginning of this post, not all of these tips need to be applied to every mix. If it sounds good, don’t worry about adding parallel processing or tuning your drums. When it sounds right, it sounds right.
28. Mix the kick and bass first
For EDM particularly, you’ll want to balance the bass and the kick as early as possible. The lower end is SO important in dance music, and if these elements aren’t working at the very beginning, your mix will suffer as a result.
29. The less going on in the low end, the better
As mentioned before, bass frequencies take up a lot of headroom in the mix. If you have a particular bass line, see if you can cut out any notes not needed. This is a general rule of thumb for the whole mix. James Wiltshire from The Freemasons once told me that every single element should be fulfilling a specific role, and if it’s not it should be removed. You’ll get a louder, cleaner mix in the end.
30. Apply effects to auxiliary channels
If you have a Reverb, Delay or other effects assigned auxiliary sends, make sure there aren’t rogue frequencies on these channels by using an EQ. You can even side-chain your aux channels slightly to create space in the mix (see number 14).
1. Do the right things in the right order
Getting your audio signals travelling through the correct effects in the correct order is essential. Experiment with their order to achieve the results you want.
2. Assign keyboard shortcuts
Toggling from mono to stereo on the master channel, or solo-ing the reference track are two examples where keyboard shortcuts will save you a ton of time. Take the time to set some up that work for you.
3. Take breaks often
Music is subjective and you need to be as objective as possible, so let your ears have a rest as often as you need, as they WILL tire throughout a mixing session and be less reliable.
Do you have any mixing tips I’ve missed that others could benefit from? If so, please share with the community in the comments section below! Similarly, if you have any questions, drop them below and I’ll do my best to answer. Cheers, and happy mixing! 🙂
- Mixing & Mastering
Waking: the story of the birth of style | Useful articles and tips from the 🕺dance studio - Under Stand (Anderstend)💃 in Voronezh.
Waaking is an African-American street dance that organically merged into club culture, first in the United States, and in the 1990s throughout the world. Then it was performed under disco, now there are no rigid musical frameworks.
History
The Garbo dance is the backstory of waking. Garbo danced in the underground clubs of Los Angeles to funk and then to disco. He received his name in honor of the Swedish actress Greta Garbo, who is famous for her unusual stage poses. In the late 60s, garbo mixed with locking - one of the directions of hip-hop, which was dominated by jumps and leg movements with a large amplitude. And so it turned out waking, which at 1972-73 years got its name from the English word waack - “to wave hands”.
The evolution of waking took place simultaneously in the clubs of two major American cities: Los Angeles and New York. Even constant meetings at festivals could not erase the deepening differences between the two styles of waking: in their homeland, the dance was replete with broken hand movements, and in New York, jumping out and vog elements came forward (voging is a dance parody of a model gait and movement, which appeared even in the middle of the 20th century).
Technique
Waking is characterized by the fact that most of the work is done with the arms, not the legs. The execution looks like ingenious broken movements of the hands (mainly with the hands), combined with a parody-podium gait and exaggerated classic poses for photo shoots. The dancer makes sharp movements with his arms and body, stopping for a second as if for a picture in one of, in his opinion, the most successful poses.
Most often, waking is a complete improvisation to rhythmic cheerful music. But there are a few basic movements from which all performers are repelled. They then learn in dance studios.
Waking attracts people from all over the world to its ranks through its expressiveness, brightness and relative simplicity of execution.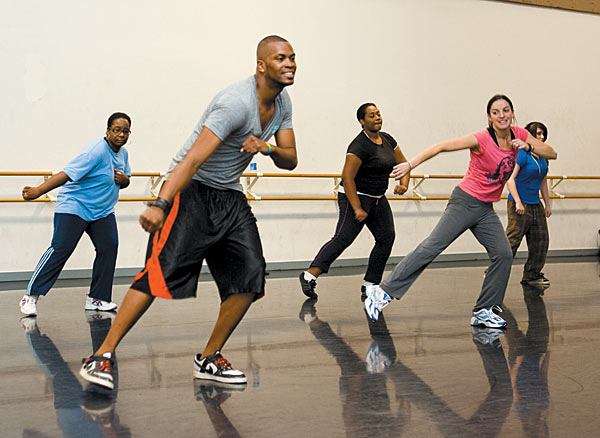 Today, the dance has gone far beyond parody and rather sets the fashion itself than tries to “shovel” it in its own way.
Style
If you decide to immediately start dancing waking, then take care of the clothes, because they have always been the most important part of it as a continuation of the parody of Vogue. Leggings and fluffy skirts are recommended for girls, emphasizing the thinness of the waist, colorful bright jewelry, and heels. Guys - silk shirts and trousers. For both sexes, hats and vests are used.
Fathers, great-grandparents
The Outrageous Waacking Dancers are the world's most famous waacking team, having grown up on the hit TV show Soul Train. The founder of the team - Tyrone Proctor - is considered the "father" of waking, although the style does not have a creator as such, as it should be for any street dance. But it was he who mixed in his speeches the movements characteristic of Los Angeles and New York.
Tyrone Proctor has another achievement: in 2008 he founded the "Imperial House of Waking", which brought together style representatives from all over the world. In fact, it has become the base for numerous schools, festivals, championships. In 2010, its branch was opened in Russia.
Solo dancer Shabba Du is considered the “grandfather” of dance. It was he who for the first time, during one of the major battles between locking and voging performers, mixed elements of both dances, demonstrating to the world something similar to modern waking.
The dance even has a set of great-grandfathers: these are performers Lamont Peterson, Mikey Lord and Blinky, who were the first to use sharp movements of arms and hands in their performances.
Sons, grandchildren and great-grandchildren should be next on this list, but there are too many of them - thousands in every country. And we will just silently be surprised and rejoice at the popularity of waking in the world.
Author:
More articles:
ice dancing, schedule, favorites, broadcasts
dance duets will compete for awards at the Olympic Games on February 12 and 14 (Photo © Justin Setterfield)
124 February at the Olympic Games Beijing in figure skating dance duets competition will begin.
23 couples will perform a rhythm dance. The rhythm this season for dancers is "Street Dancing". Those. According to the rules of the International Skating Union, skaters must use at least two different rhythms from the following examples: hip-hop, disco, swing, crump, funk, jazz, reggae and blues. Part of the dance as a pattern is the midnight blues.
The main contenders for the 2022 ice dancing gold are Gabriela Papadakis and Guillaume Sizeron . Since the 2015 World Cup, in which the French became the best on the planet for the first time, they took not first, but second place only twice. At the 2018 Olympics, they lost to Canadians Tessa Virtue and Scott Moir , and at the European Championship 2020 - Victoria Sinitsina and Nikita Katsalapov (ROC).
As a rhythm dance, the silver medalists of the 2018 Olympic Games this season presented waking, and free skate to a fragment from Gabriel Fauré's Elegy.
Guillaume Sizeron: We like to mix styles. In this dance we do waking and hip hop in the middle. It seemed to us that it would be interesting to ride under John Legend. We love this performer. It's not the kind of music that immediately comes to mind when thinking about waking, but in our opinion, his music matches the rhythm and message of the dance.
Gabriela Papadakis: We experimented with different styles and types of dancing, we did vogue. And Marie-France ( Marie-France Dubreuil - couples coach - approx. Olympics) told us about waking. These styles are like brother and sister. We liked it, and we began to work with waking specialists. We were told about the history, all aspects of the dance, the aesthetics of the movements. We studied the movements and when we achieved results, we began to do choreography off the ice and on the ice.
Since January 2020, Papadakis - Sizeron and Sinitsina - Katsalapov have never met. In the absence of four-time world champions, Alexander Zhulin's students won the titles at the 2021 planetary championship and the 2022 continental championship. For the rhythm dance, Victoria and Nikita chose the hit "You can leave your hat on" by Joe Cocker and "Brick house" from the group "The Commodores", for the free dance - the 2nd concert of Rachmaninoff and his own "Variations on a Theme of Paganini".
Among the medal favorites are two duets from the USA. Silver medalists of the World Cup 2021 Madison Hubbell - Zachary Donoghue and medalists of the World Championships 2015, 2016 Madison Chock - Evan Bates .
Champions of Russia-2021, 2022, silver medalists of the European Championship-2022 from the ROC team Alexandra Stepanova - Ivan Bukin will also try to intervene in the fight for awards, as well as the bronze medalists of the World Championship-2021 Piper Gilles - Paul Poirier (Canada) and bronze medalists of the European Championship 2022 Charlene Gignard - Marco Fabbri (Italy).


