How to make dancing ghosts around a tree
16+ Easy & Awesome Homemade Halloween Decorations
Last Updated on October 31, 2022
Easy homemade Halloween decoration ideas
It's already that time of year! You know, when we decorate our homes with ugly, terrifying homemade Halloween decorations. Ah, Halloween house decor, I love it! I try not to be too distasteful, but there is just something strangely fun about having creepy things dressing up my home; even if I only get one month!
My kids enjoy the projects more than anything, so I try to make a few things every year from home. Although I enjoy being all artsy and stuff, I also like quick and easy. It should be FUN, right!? I've rounded up a few of my favorite DIY Homemade Halloween decorations that the adults and kids will love even a Halloween Doll house! They are all pretty painless but also very effective.
Easy to Assemble Homemade Halloween Decorations
1.
Toilet paper rolls and glow sticks? Well, yes, if you want to scare all of the cute little trick-or-treaters. Of course you do. Just hide them in your bushes, shrubs and trees, and watch as your glowing eyes terrorize the neighborhood. Keep this idea in mind as you scroll to idea 22 the Halloween doll house.
Source: Rust & Sunshine2. Eyeballs in a Tree
What better way to give your trees a little personality? The hardest part of this project is getting them up in the tree (that's what husbands are for), but the rest is quick and easy! Just go check out Anna's Instructions (you can buy the plain white beach balls here), or even buy these giant eyeball beach balls if you'd rather take the easy way out. 🙂
Source: The Princess & The Frog3. Bloody Handprint Clings
What's Halloween without bloody handprints all over your windows and mirrors? Make them yourself with Elmer's glue and red food coloring! They cling to just about any smooth surface. I like this idea for the inside of a glass front door and surrounding windows. Creepy!
4. Wall Spider Web
Quite impressive, I must say! Yarn, double sided tape and Karen's hilarious instructions are all you will need to pull off this faux spider web. Oh, and maybe a few spiders, too.
Source: The Art of Doing Stuff5. Silhouette Lamp Shade
You've already got the lamp, so why not add a few silhouettes to spruce up your Halloween decor? It really doesn't get much easier or cheaper than this! And, you probably already have the supplies on hand. Check out the full details for this project over at Young House Love.
Source: Young House Love6. Illuminated Ghost Garland
Adorable in the day AND night! These mini ghost lights are constructed with a strand of white lantern lights covered in white fabric. They almost look like something you could buy at Pottery Barn. I love the way they turned out! You will find the full instructions here.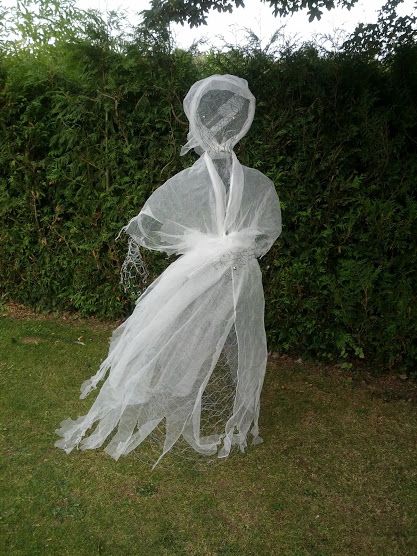
7. Monster Face Archway
Now, THIS is an entrance fit for Halloween. This project is fairly simple with very few supplies, but just look at how effective it is! When attached to an archway, it gives the appearance that you're entering a monster's mouth. Very cool!
Source: Nifty Thrifty Living8. Dancing Lawn Ghosts
For this project, simply poke a styrofoam ball through the top of a white or green, tall garden/fence stake or spray-painted dowel, and then cover it with white fabric or cheesecloth. Lightweight fabric will pick up in the wind more, giving them the illusion that they're dancing. If your fabric is on the sheer side, you might want to use a couple of layers.
Make several of them and place them in a circle with the fabric corners tied together. You can secure the fabric over the styrofoam with hot glue and a few white push pins in the very top for extra security. They look really cool dancing around a tree or faux fire pit!
9.
 Hanging Bats
These are made from black craft foam and fishing line so that they'll withstand even the wettest of weather! Hang several of them in a tree for a spooky little bat colony in your front or back yard. It's simple enough that the kids can do most of the project themselves. Read the full instructions and get the bat template over at HGTV.
Source: HGTV10. Halloween Luminaries
Grab your mason jars because this Halloween Décor craft is a great way to upcycle those old mason jars just sitting around the house. Create Halloween Luminaries out of your recycled mason jars and some festive paint. Simply add a tea light and light the way for trick or treaters with your homemade Halloween luminaries. These would look great in your Halloween house See the step-by-step tutorial for making this easy Homemade Halloween décor here.
Source: Most CraftPLUS, MORE Homemade Halloween Decorations!
11. DIY Halloween Door Mat
Customize your own Halloween door mat with just about any stencil! You can spruce up an old door mat or buy one with a blank canvas. Just surround it with a few pumpkins, and you've added a touch of subtle festivity to your front porch. Check out the full instructions here.
12. Huge Black Spider
Start Halloween night off right by greeting your trick-or-treaters with a huge black spider! It's an easy, terrifying homemade Halloween decoration. I like this idea for a large shrub or bush covered in spider webbing. A milk jug (with the top cut off and cleaned thoroughly), black Duct tape and black pipe insulation is all you will need to make this eight-legged friend.
Tips:
- You can also use spray painted styrofoam balls in place of the milk jug (one large for the body and one a little smaller for the head).
- Glue feathers from a black boa all over the body to make it hairy!
- Cut small triangles out of the pipe insulation where you want the legs to bend, and then use duct tape to secure it in a bent position.
- Use ping pong balls or large googley eyes for the eyes, and add detail to the body with paint if you'd like.
13. Frankenstein Door
I'm not suggesting that you paint your door green, but this Frankenstein door is too cool! The project itself will cost you under a buck, and for the ease and low cost, it sure does create a big impact! Check out how it was done here.
Source: East Coast Creative14. Trash Bag Spider Webs
You don't even have to bother leaving the house for this super cute and thrifty Halloween craft. A few black trash bags and scissors will do the trick! They look really cool hanging in front of the window, and they create a nice silhouette in the window at night. Check out the instructions over at Fast Forward Fun.
Source: Fast Forward Fun15. Mice Silhouettes
Place these little critters running along your baseboards, adorning your staircase, and running up the walls! Just black paper and double-sided tape! It's super easy with this free template from Martha Stewart.
Source: Martha Stewart16. Halloween Window Decor
If you want something that really stands out this Halloween, then I have a suggestion for you! Yep, window silhouettes because they are easy and really impressive! You can purchase them at party stores or make your own cut-outs on black paper or cardboard. There is also a large selection to choose from on Amazon. I purchased a few of these a couple of years ago. After it's attached to the window with a bit of tape, then all you have to do is turn your lights on! I'm going to do some experimenting on the windows by my front door this year with blackbirds and tree branches.
17. Movable Mummies
These creepy yet adorable little mummies are made with just 2 simple materials! They're so easy to make, even the kids will have fun putting them together. You can assemble these homemade Halloween decorations as little or as big as you would like, and then add them to your Halloween decor. They're fun to play with too! Check out the full instructions over at Fabbri Designs!
Source: Fabbri Designs18. Pumpkin Porch Light Covers
It's doesn't get much cheaper than this! Head on over to the Dollar Store. Then, pick up a few plastic pumpkin pails, do a little bit of creative cutting, and voila! You've got yourself an easy Halloween decoration for your front porch.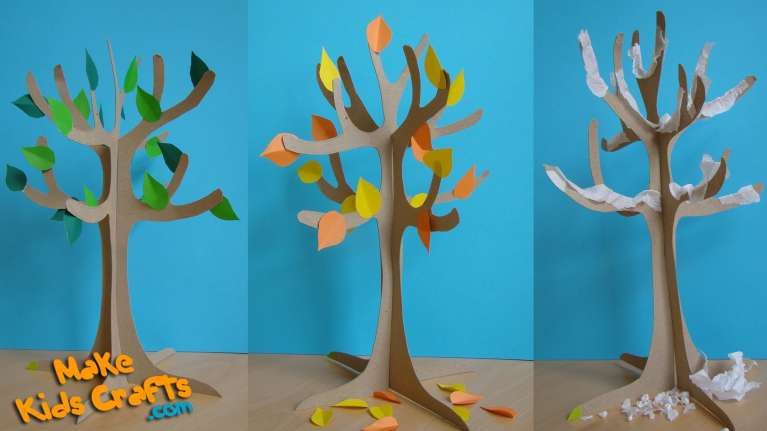 So, head on over to Instructables to see the full instructions.
19. DIY Eyeball String Lights
These eyeball string lights are a super fun way to decorate your porch for Halloween! Simply get the family together then be creative drawing creepy eyeballs onto ping pong balls. Check out more pictures and the full instructions over at Landee See Landee Do! She has a clever way of easily getting the ping pong balls onto each light without them falling off.
Source: Landee See Landee Do20. Illuminated Ghosts
Light up your porch with these easy DIY illuminated ghosts! Unfortunately, the source for this (craftymisadventures.com) has let their domain expire, but the instructions seem self-explanatory. Simply wrap string lights around a tomato cage, then top it with something round such as a styrofoam ball, cover it with a sheet (or any thin white material), glue on felt eye cut-outs, and voila! What an easy homemade Halloween decoration!
21.
 Floating Witches
What a wicked party idea! Floating witch hats for your Halloween party décor is such a creative idea. I knew as soon as I saw this awesome DIY idea from R & R At Home I need to share it here. I cannot believe how easy this is but what a fun impact it makes to your Halloween home décor. The floating witch hats make it feel like you are being surrounded by an especially witchy crowd for this creepy holiday. See the full instructions at randrathome.
Source: R & R at Home22. Halloween Doll House
I might be a little obsessed over this DIY Halloween Doll House. What a transformation! I think I love it so much because it is so unique and has an eerie Halloween feel when it is done. The creativity from Samantha Browning for her Haunted Halloween dollhouse is something to be majorly impressed with. She even detailed the tiny creature's eyes red on this Halloween dollhouse. Turn your old dollhouse into a featured Halloween decoration in your home.
Source: Samantha Browning23.
 Halloween Centerpiece
What a lovely way to dress up your party tables. Such a simple and inexpensive Halloween flower arrangement! Just take some ghost marshmallow peeps, candy corn, and some fresh or fake flowers. You can put a small vase inside a large vase. Then fill around it with the candy so your flowers and candy do not mix. We love this idea from Pockets filled with posies because it is so easy, inexpensive, and super fun to make too!
Source: Pockets Filled with PosiesSo we hope you were inspired and intrigued by these Halloween decor ideas. Because we sure had a great time sharing them with you! Be sure to join our email list and get new creative ideas every month!
Easy Lighted Hanging Ghosts (A Dollar Tree DIY)
Hanging ghosts are a cheap & easy dollar store Halloween DIY that look awesome without breaking the bank. Add some lights, and they’re even better!
So my wife has been acting like a ghost lately.
Not the Dickens-style apparition with dragging chains and ominous warnings.
Neither the Poltergeist type that floats and snarls and startles.
Nor is she partially see-through, prone to floating through walls nor causing any mischief and mayhem at all.
But ever since I made her a bunch of pom pom ghosts, every time she walks by them, she throws her hands in the air, waves them around and lets out a great wavering, “WooOOOooo! WoooOOOOOoooo!”
And then she breaks up into laughter and carries on with whatever the heck it was she was doing before she passed the ghosts.
At first I figured she’d just gone nuts, and that was okay – I could live with a nut.
But then I realized that the cute little ghosts just made her happy, and she’s never shy about showing her enthusiasm for things that make her happy.
So then I started to look forward to her little ghostly arm wavings and wavering “woooos.”
If I didn’t hear “woooOOOOooooo!” at least once each day, I’d ask her to give me one, and she’d toss her arms in the air and do her best ghost impression, and then I’d start cracking up, and she’d start laughing, and the dogs would start howling and Barish would roll his eyes and start counting the days until college when he could escape this loony bin.
Ghosts make my babes happy. [Only cute ghosts! I don’t like those jerk scary ones! -Handan]
And if something makes my babes happy, it has been my long-standing belief that we need to have more of it!
In other words – if my babes wants ghosts, my babes is gonna get ghosts!
Fortunately for everyone, Handan already had a plan for more ghosts – lighted hanging ghosts for our front yard, to be precise – and she’d been collecting the materials from the dollar store since summer!
I must admit, though, when she told me the plan, I didn’t think they would turn out nearly as good as they did!
She tells me a lot of ideas, and usually I’m all in from the start, but this one made me raise my brow and give her a little side eye.
Dollar store hanging ghosts made from paper lanterns and table covers?
The idea didn’t sound very promising.
Actually, it sounded kinda lame.
It also sounded like the whole thing would disintegrate in the first rain.
But I kept my suspicions to myself. It wasn’t the first time I’d doubted my wife’s sanity, only to learn that she was right all along.
There was that time I thought she was a certified crackpot for suggesting that I document and write about a shed cleanout and reorganization.
(You guys loved it.)
Then there was that time way back in 2015 that I thought she’d gone bananas for insisting I photograph and write about how to make a cutting board.
(Our 11th best post of all time.)
And even for Halloween, there was that time I nearly called the paddy wagon when she insisted that I make a hanging cage Halloween prop out of some dollar store laundry baskets!
(Not only is it our 10th best post of all time, but it was one of my top 5 most enjoyable posts to write, and it is one of my favorite posts to revisit and re-read.)
JOIN OUR COMMUNITY AND GET THE LATEST CREATIVE IDEAS AND DIY TUTORIALS RIGHT TO YOUR INBOX!
So, yeah, I have a long history of thinking my wife is nuttier than a half-baked fruitcake, when in fact she’s a creative genius who is so far ahead of me that I may as well be a thumb-sucking toddler in a playpen.
And I’ll tell you, these hanging ghosts are awesome, and dammit, as much as I hate to say it, they’re “cute!“
GAH!
And they’re cheap—only a few bucks per ghost!
But the best part of all is that every time we leave the house or return home, and every time Handan walks by the front door, she throws her arms up high, waves them around and goes, “WoooooooooooOOOOOOOOOOOooooooooo!”
And wherever I am…I laugh.
Then she laughs.
And the dogs howl and The Boy smiles and shakes his head and wonders how in the world he wound up in a family like ours.
Lighted Hanging Ghost SUPPLIES LIST
Affiliate links are provided below. Full disclosure here.
- Dollar Tree paper lanterns (Amazon and Party City also sells them) or Dollar Tree Plastic Bell Cloche (pictured below)
- Dollar Tree round plastic table covers (also on Amazon)
- Packing tape (Dollar Tree has the Jot brand)
- Scissors
- String or twine
- Black adhesive vinyl (Dollar Tree carries adhesive vinyl, but you could also use a black garbage bag or color in the eyes and mouth with a Sharpie)
- Double-sided tape (if using a black garbage bag for eyes and mouth)
- LED remote controlled tea light candles or Paper lantern lights (optional)
- Garden shepherd’s hooks or a tree with branches you can reach (or you can hang them indoors)
Easy Lighted Hanging Ghosts VIDEO TUTORIAL
You may want to watch our short video below for an overview of our easy lighted hanging ghosts before you read the detailed step-by-step tutorial.
View this post on Instagram
A post shared by The Navage Patch (@thenavagepatch)
Easy Lighted Hanging Ghosts TUTORIAL
Okay, are you ready? Look I wasn’t joking when I said these were easy, so don’t blink, or you might miss the tutorial!
Believe it or not, Handan had to show me how to do this first step of assembling the lanterns.
What? Don’t judge! I’ve never built a damn paper lantern before, okay? It’s not exactly intuitive for dumbos like me!
So anyway, the wire thingy goes into the paper thingy and…oh what’s the point? I’m sure you’ve built a paper lantern before! You don’t need me telling you how to do it!
…And then those round wire things go over the….ah, forget it! Just build it, already!
If you can’t find paper lanterns dollar store also carried bell cloches. That might be easier since all you need to do is cut the rim of cloches.
Okay, now that that’s out of the way….
If you’d like to light your ghost, now’s the time to put in the lantern light. First let me model it for you.
I know, I know, I missed my true calling. I should have been a hand model.
Look, full disclosure here – the lantern lights pictured above don’t last long. I mean, if you leave it on overnight and all the next day, you may—may—get one more night out of the thing. If you’d like to enjoy them throughout October you can use these battery operated remote controlled tea light candles which will last longer and they are only about 2 dollars each.
They work so much better than those cruddy old ones back in the stone ages when we first did this post! Just check out the Instagram Reel below to see them in action! They are amazing!
View this post on Instagram
A post shared by The Navage Patch (@thenavagepatch)
But, hey, these guys look great in the daytime, too, so it’s not all bad if you don’t want to light them!
Okay, now that we’ve all agreed that you will be adding lantern lights, you’ll hang it from the middle of the wire support.
Next, open the table cover package. This is complicated. Lemme show you how to do it.
There’s a more advanced method involving teeth that I won’t get into today.
Unfold the table cover until you find the middle. Doesn’t my body language just scream enthusiasm in this picture? I was doing my best teenager impression.
I’m holding it along the midline. The center of the table cover is halfway between my hands. I’m clearly so excited in this picture. I was barely able to contain myself!
Get yourself a couple of inches of packing tape and fold it around the center point. This is going to make your hanging ghost stronger, so the wind won’t tear him apart.
Fold the taped part over and cut off just a tiny bit of the corner.
Now fully open the table cover and find the center.
Hey, look! There it is!
Hook the top of the lantern through the hole you made in the table cover. Stay with me, now! We’re almost there!
Congratulations! You’ve built your hanging ghost body!
Next, tie a piece of string to hang your ghost.
The last step is to stick on the adhesive vinyl eyes and mouth. Choose any or all of the designs at the end of this post. You can cut them out with a Cricut if you have one, or trace them and cut out with scissors. If you’d rather not buy a roll of adhesive vinyl just for this project, you can also cut the eyes and mouth from a black garbage bag and stick them on with double-sided tape. Alternatively, you could draw them right onto the hanging ghost with a Sharpie. There are solutions for every budget!
Update October 2021: Dollar Tree now carries adhesive vinyl! 12″ x 48″ for a dollar!
And that’s it! Your hanging ghosts are ready for action!
I told you that these came out much better than I ever would have guessed. Just have a look at these pics!
They’re pretty damn cute, I have to admit.
And yes, these little guys can handle almost anything Mother Nature throws at them. They’ve already survived two rainstorms and non-stop windy days with absolutely no issues.
Can you hear it?
Can you hear my babes?
WoooooooooOOOOOOOOOOOOooooooooOOOOOOOOOooooo!
*******
As promised, here are the ghost faces. Just right click on each image and select “Save Image As” to save the ghost faces full size. Or CLICK HERE to download the PDF versions of them!
We love it when you share our posts on Pinterest!
7 Simple Techniques for Quick Meditation
July 26, 2021Life
If you can't sit still, try these meditation techniques. They will not take much time, but will relieve you of stress and anxiety.
Share
0Children, work, meetings... Sometimes it's hard for us to find time to relax and be alone with ourselves. However, short rest breaks have a beneficial effect on our health and prevent the occurrence of many diseases.
1. Walk
When you're walking in a park or forest, it's hard not to start meditating. Nature gives us strength and energizes us. You feel the scent of trees and flowers, listen to the birds singing. You are focused on the beauty that surrounds you, so you live in the present moment.
Meditation technique
Take a walk in a nearby park. If time permits, move away from civilization.
Breathe deeply, feel the fresh air fill your lungs. Listen to the rustle of leaves. Feel your own muscles. Feel your body. This is how you practice mindfulness.
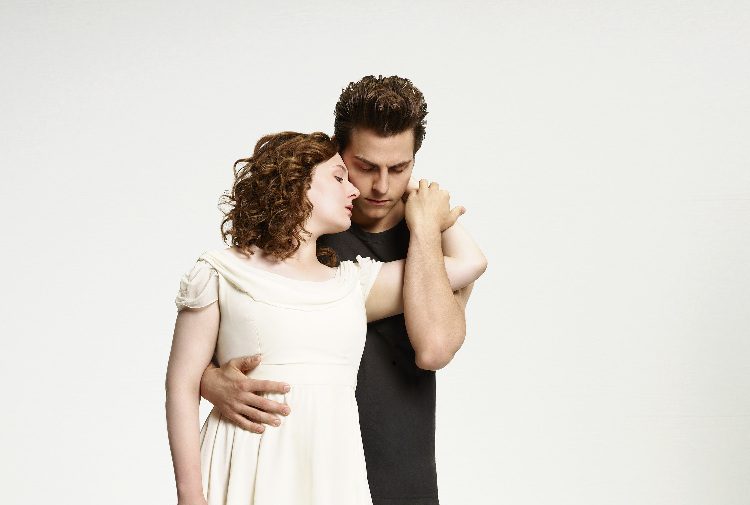
2. Dance
Dance is active meditation. Fast movements liberate a person both physically and spiritually. You focus on feelings and emotions rather than your thoughts. An example of a dance-meditation is the Sufi ritual "sama". The dancers spin around their axis to special music and enter the state of flow.
Meditation Technique
Any kind of dance will do for quick meditation.
Stand for a couple of minutes with your eyes closed. Breathe slowly through your nose. Turn on upbeat instrumental music. You need to discard unnecessary thoughts, and the words in the songs will only distract.
Don't be afraid to improvise and dance the way you want at the moment. You can even scream and sing loudly. Let yourself be completely lost in the music and dance.
Then lie down, close your eyes and be quiet for a few minutes.
3. Stretching
Sitting in front of the computer, we stretch our neck and stretch our back. This eases the feeling of heaviness. Stretching will allow you to feel the moment and feel your body.
Meditation Technique
Find a quiet place where no one will disturb you. Turn on calm instrumental music or nature sounds.
Start by stretching your upper body. Pay attention to each muscle group.
Watch your breath. Feel your muscles stretch. Improvise according to your own feelings. Stretch slowly, moving like an animal.
Finish the stretch by warming up the toes. Lie down for a couple of minutes.
4.
 Mindful eating
 When we eat, we often get distracted by something else. For example, we watch TV or sit in social networks.
Conscious eating not only calms, but also helps to lose weight. Focusing on taste sensations gives pleasure even from a small portion. If you eat slowly, your body becomes full faster.
Meditation technique
Try a simple exercise.
Take a raisin and study its texture in detail. Take a look at its color and shape. Feel her scent.
Put a raisin in your mouth, then slowly bite into it. Feel its taste and aroma. Chew and swallow it, paying attention to what your teeth, tongue and throat feel at this moment.
Repeat this exercise twice more. You will be surprised when you feel that you have had enough of just three raisins.
5. Drawing
In fact, everyone can draw. Any creativity is a great way to better understand yourself. Drawing engages our senses and allows us to free ourselves from everyday problems.
Meditation technique
Take some coloring book and turn it upside down. Cover it with a sheet of paper, leaving only a few lower centimeters uncovered. On another sheet of paper, draw what you see.
Then open the coloring page a few more centimeters. Keep drawing until you're done drawing.
Many imagine what a drawing should look like. By simply copying random lines, you are concentrating on the process of drawing. This is what meditation is.
6. Alternate breathing
An adult breathes alternately through two nostrils. The transition typically occurs every 75–200 minutes. Alternate breathing through the nostrils calms the mind and increases awareness.
Meditation technique
Take a comfortable position.
Close the right nostril with the thumb of the right hand and inhale deeply through the left. Drop your thumb. Close the left nostril with the little and ring fingers and inhale through the right. Then repeat the first step.
Repeat this round 3-5 times.
7. Daily activities
We don't even realize that we meditate every day. When washing dishes, brushing teeth or taking a shower. If you approach these activities more consciously, you can learn to enjoy them.
Meditation Technique
When taking a shower in the morning, don't think about upcoming things. Focus on the sounds of running water. Feel the drops running down your body. Take a deep breath in the scent of the soap.
Try this technique in all your daily activities.
Read also 🧐
- How yoga helps to become calmer and happier
- Scientific meditation: how mantras and deep breathing really help
- How to think in order to benefit from meditation: advice from a Buddhist monk
- Military meditation that will allow you to fall asleep even when bombed
- Why do people practice holotropic breathing and is it worth starting
Why dream 😴 A ghost in a dream - 9 each0 dream books! If you see a ghost in a dream, what does it mean?
Below you can find out for free the interpretation of the Ghost symbol from 9 online dream books.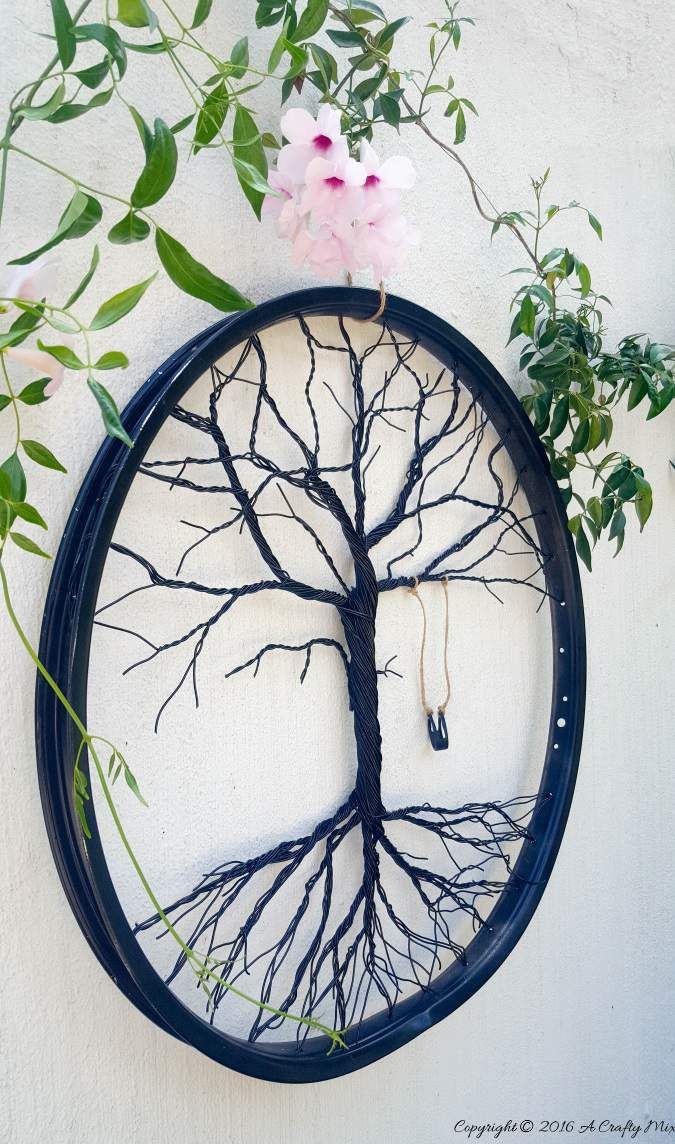 If you did not find the desired interpretation on this page, use the search form in all the dream books of our site. You can also order a personal interpretation of sleep by an expert.
American dream book
↑ to content
Ghost - you have not yet decided on your relationship with someone. You have not completed any business with the person who has passed away.
English dream book
↑ to content
Seeing a ghost in a dream is a sign of disappointment: your plans may not come true. Outwardly favorable circumstances will not bring long-awaited success. You think that you have achieved the affection of your beloved, but a rival will appear who will confidently take your place. Oh, you will soon be convinced of the randomness of human passions! This dream can predict a quarrel with your best friend, which will bring you great grief. It promises danger on the journey and the loss of money if you trustfully lend it to someone.
Mythological dream book
↑ to content
Ghost (in the folklore of different peoples, the disembodied spirits of the dead, the dead, appear, more often, in a field, obscure, cloudy form, or reflect the appearance of a familiar deceased person) - discomfort, fears, anxieties; weather change; the need to remember deceased loved ones.
An illusory, indistinct figure is a feeling, a circumstance, an influence, which are manifested implicitly so far, gradually, are only just approaching and are not realized.
Psychoanalytic dream book
↑ to content
A ghost is the spiritual nature of a dream, which may refer to the internal state of an individual.
Dream Interpretation of the XXI century
What did the Ghost dream about in a dream?
↑ to content
To see a ghost, ghost, phantom in a dream means that you yourself do not know what you want; talking to them means that you have to make a good impression on someone.
Running away from them means that you are trying to solve some problems, and because of this, others arise. Better think about your position, perhaps you are going the wrong way.
To see in a dream how a poltergeist moves objects is a warning: your mistakes and blunders today will create problems and obstacles for you for a long time.
If in a dream you saw a brownie, it means that soon some events will spoil your mood, to drive him out of the house - to quarrels, disagreements, scandals in the family.
Cheerful brownie in a dream - can promise well-being, good relationships in the family; angry or formidable - portends you a change of residence or work.
To see a scarecrow or a scarecrow in a dream means that someone is trying to deceive you or harm you in some way.
Dream Interpretation Denise Lynn
↑ to content
Do you still have unformed feelings for a certain person? Have you noticed that your perception of the world has not acquired clarity and clarity? - this may be a sign that you did not agree with the person who died. Take the time to tell him what you wanted to say.
The deceased is able to hear you - this may also indicate that a ghost has actually settled near you. Remember, ghosts are to be sympathized with, not feared. Treat them with ease and sympathy, and gently guide them towards the Light.
Dream Interpretation of Dmitry and Hope of Winter
↑ to content
If in your dream objects or figures appear before you in an unclear ghostly light, this is a hint that in reality you are inadequately assessing some situation. Such dreams are often a signal that you might have overlooked some important detail that could play a significant role in your destiny.
If in a dream a ghost appeared to you with whom you somehow communicate, such a dream says that in reality you are under the influence of some kind of false illusion or harmful delusion.
Medieval dream book
↑ to content
Seeing ghosts - to anxiety.
Online dream book
The meaning of sleep: A ghost from a dream book?
↑ to contents
If you dreamed of a ghost, it means that you have not yet decided on your goals.
More interpretations
If you spoke with him, this is a warning that you will try to impress someone.
Hiding from him is a reflection of the fact that you are not able to fully resolve your problems.