How to make cheer dance pom poms
DIY Cheerleading Pom Poms - Makes and Munchies
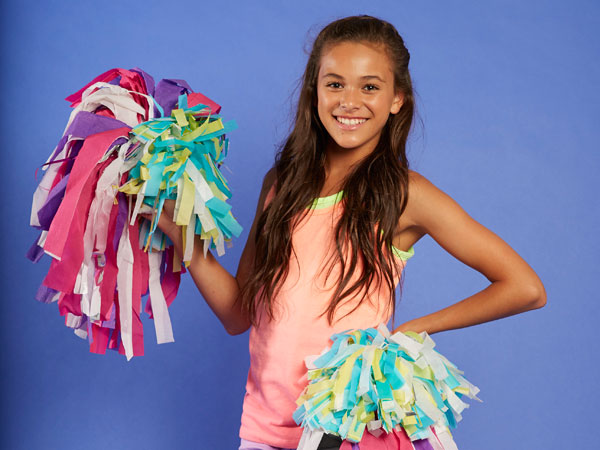
Hi Friends! Are you looking for an easy way to make DIY Cheerleading pom pom’s in just a few steps? Look no further, I’ve got your back! You’ll have your very own cheerleading poms in no time at all!
The DIY cheerleading pom pom’s are so fun to use for sports games or at home to watch your favorite game.
And, the GLOW IN THE DARK handles is so fun for kids!
There is a local volleyball team here in San Antonio for kids to join, and little Jozel was signed up on the all-girls Strikers Team.
Jozel loved playing volleyball so much, she continued playing volleyball on several teams for a couple of years after that.
CONTENT
[hide]
- SUPPLIES
- STEPS 1-4 POM POM’S
- STEPS 5-8 POM POM’S
- STEPS 9-11 Pom Pom’s
- TAKEAWAY
Check out how I made DIY Cheerleading pom pom’s to show team spirit, in just a few steps. It’s super easy! Which team colors are you going to choose?
Click to Tweet
Jozel’s volleyball games were every Saturday for a couple of months, and our family were there cheering on her team, with our pom pom’s, of course!
The Strikers volleyball team colors were black, blue, and white, so, to show our team spirit for her team, we made this DIY Cheerleading pom pom shown below.
Ready to make your DIY Cheerleading Pom Pom’s? It’s super easy, I promise! And, It cost me only $5.00 to make these! Outstanding, right!?
Choose your team colors, and LET’S GO!
SUPPLIES
- 6 Large pieces of Blue Tissue Paper
- 6 Large pieces of Black Tissue Paper
- 6 Large pieces of White Tissue Paper
- 1 36 inch piece of Blue Yarn
- 1 Glow in the Dark Bracelet
- Scissors
- Hot Glue Gun
- Glue Sticks
STEPS 1-4 POM POM’S
STEP 1: Gather your supplies needed for the pom pom’s. For the Strikers Team. We’re using blue, black, and white tissue paper for this tutorial.
STEP 2: Layer the multiple colors of tissue paper on top of each other as shown in #2 above. Each color will have two sheets of tissue paper.
For example, the layers above have 2 blues, 2 whites, 2 blacks, again 2 blues, 2 whites, 2 blacks and so on.
It’s up to you how many layers you want. The more layers you have, the more fullness you’ll have.
STEP 3: Now, fold the tissue paper in half.
STEP 4: String the yarn in between the folded tissue paper. The yarn is going to be used as a guide for step #7 below.
STEPS 5-8 POM POM’S
STEP 5: Cut your desired width of strips, then grip the bottom edge of the layered tissue paper with your fingers, then cut your strips, leaving at least one inch uncut from the folded edge.
STEP 6: Continue cutting strips from one end to the other.
STEP 7: Carefully, unfold the tissue paper.
At one end, start opening up the tissue paper by separating the strips. The string will help guide you to the center. Simply grab each end of the yarn and slowly separate the strips to unfold.
Now, gather and fold all of the layers from one end to the other, kind of like rolling a pig in a blanket.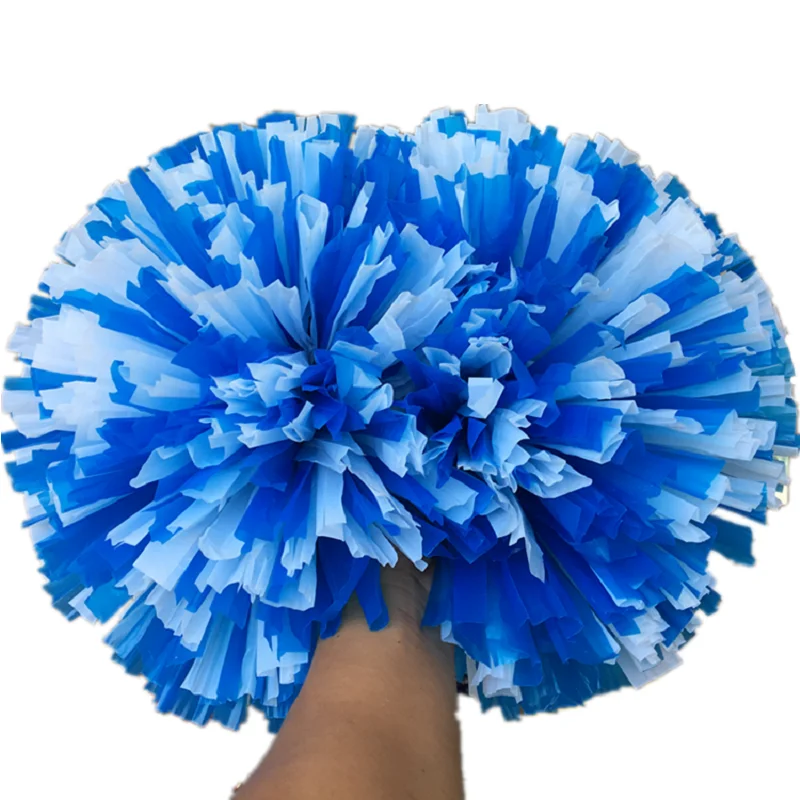 Ha!
Ha!
STEP 8: Tie yarn around the gathered up tissue paper and tie several knots to keep it secure.
STEPS 9-11 Pom Pom’s
STEP 9: Assemble the handle. Place one Glow Stick underneath the knotted yarn.
STEP 10: Place a small amount of hot glue on one end of the glow stick and place one side of the glow stick fitting onto the glued tip. Repeat on the opposite end.
Your glow stick bracelet is now a pom pom handle!
STEP 11: Fluff up your Pom Pom’s and shake to active the glow in the dark handles.
To fluff the pom pom’s, start separating and scrunching the strips in small sections. The more you scrunch and squeeze the strips, the more fullness you’ll have.
That’s it, you’re done!
I’m going to have more pom pom projects in the near future, so, keep a lookout!
If you haven’t signed up to receive M&M updates, be sure to do so. That way, you can be notified of future Pom Pom Ideas I post here on my blog. Sign up here, so you won’t miss a thing!
Or you can simply fill out the form below.
First name *
Your valid email here *
PIN ME!See, I told you it was easy making DIY cheerleading pom pom’s. All that’s left to do is to go spread that team spirit for your favorite team using your very own DIY Cheerleading Pom Pom’s!
GO TEAM!TAKEAWAY
PIN ME!These pom pom’s were easy and fun to make.
To make these pom pom’s, the supplies were inexpensive, and only cost $5.00, can you believe it?
You can add any color you desire, and make them as full as you’d like.
Let me know in the comments below, your thoughts on the DIY Cheerleading Pom Pom project, and which colors you’re going to choose for your team spirit!
Also, I’d love it if you shared this project so someone may benefit from this. 🙂
Don’t forget, keep a lookout, I’ll be creating different styles of pom pom’s in the near future for you Pom Pom lovers!
Your ideas are more than welcome.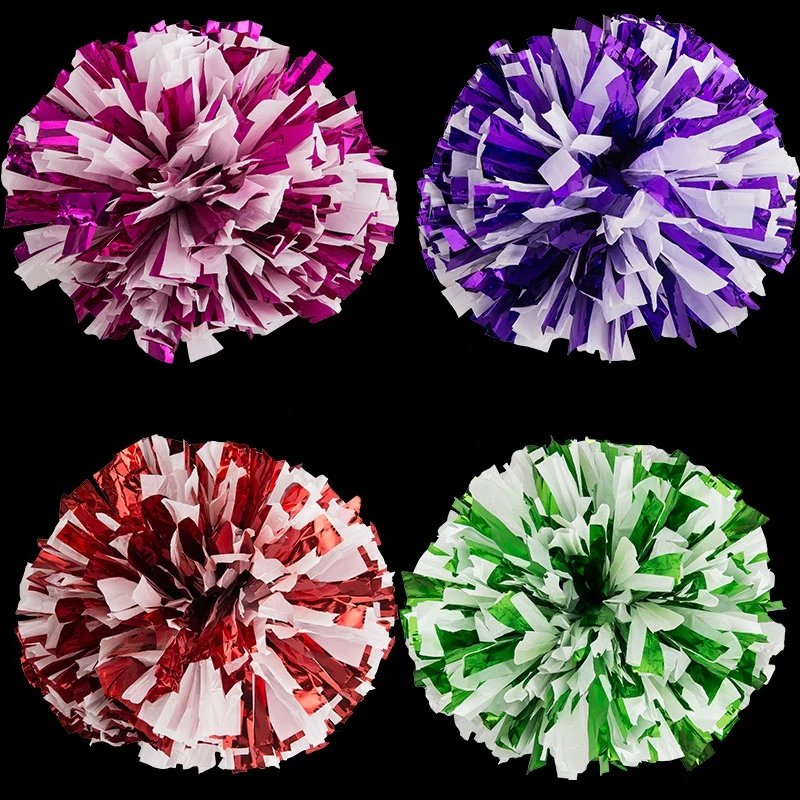
You may also like
How to Make DIY Decorated Orbs
DIY Decorated Charger Plates
13 Easy Kitchen DIY Projects on a Budget
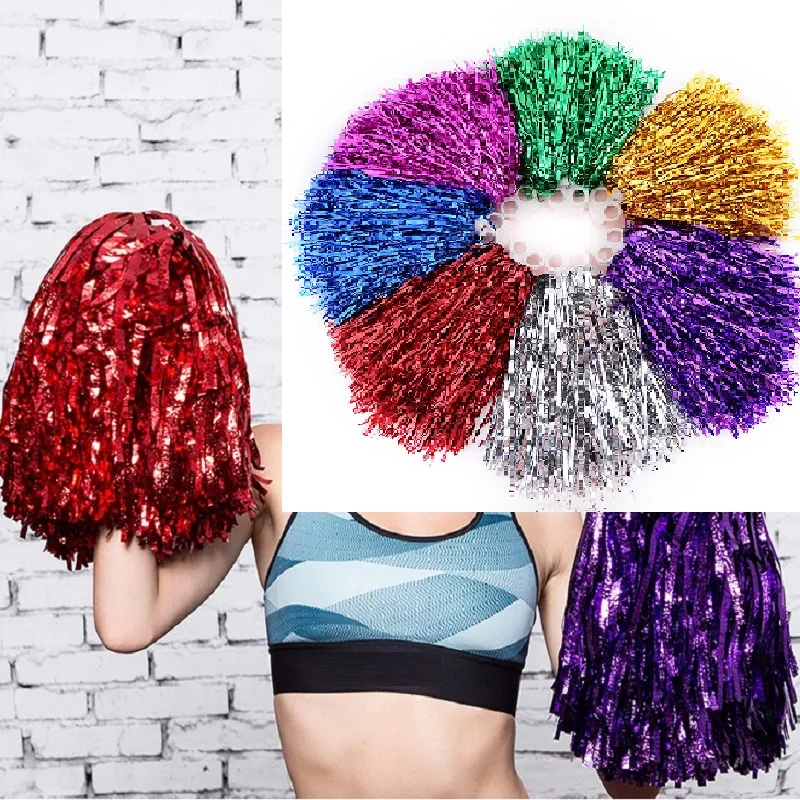
Pom Poms: Find Top Cheer Pom Poms for Less
Adult and Youth Poms For Cheerleaders
One of the most spirited things at a cheerleader’s disposal is a perfect pair of cheer pom poms. Whether you cheer on the sidelines, for pop warner, pee wee, college sports games, varsity cheer teams, junior varsity teams, or all star cheer, pom poms are a big part of your performance. They are bright, they are fun, and they are truly iconic. When you think cheerleading, many people think pom poms! A great cheerleading warm ups, and uniform wouldn’t be complete without the perfect pom poms. Our vast selection of in-stock cheerleading poms and custom cheerleading poms are made of the highest quality materials and are available in a variety of styles and popular team colors, so you always look your best on the field.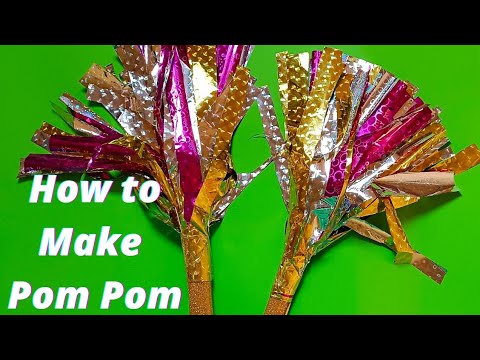 Add some sparkle to your team look with cheerleading pom poms available from Omni Cheer!
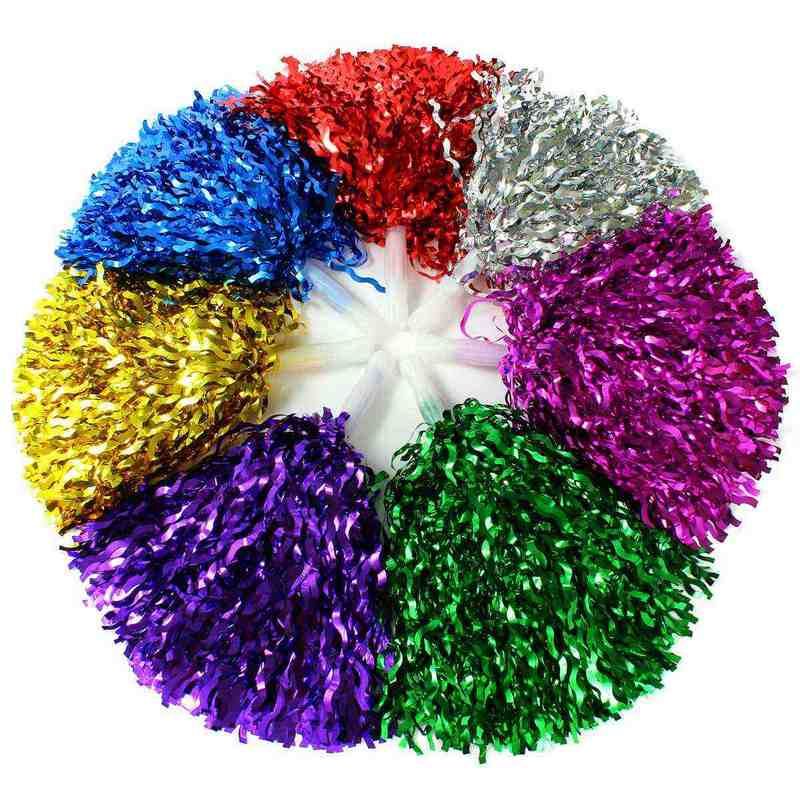
We offer cheerleader pom poms in a number of different in-stock styles, like in-stock plastic pom poms, youth cheer pom poms, metallic cheer poms, and holographic pom poms. We also offer custom options like custom youth pom poms, custom metallic pom poms, custom plastic pom poms, custom wet look poms, and custom flash & holographic cheer poms to make sure you have the perfect match for your team’s warm ups, and uniform. We even offer multiple different styles in youth sizes, so no matter your team’s age range, everyone is sure to look and feel spirited!
(First 3 lines of existing content to open, plus existing title)
You want your cheerleaders to run out on any stage or field shining like stars. The magic starts with months of practice to get every crisp move and dance sequence down perfectly. The next step is to select or design a cheer uniform that expresses your style and turns heads. Finally, you need to add accessories that will pump up the crowd and get the screams rolling.
That's where cheer pom poms come into the picture. The right poms become a part of the uniform and will even turn up the pep for your squad when wearing team warm-ups. Whether you're waving them in the air, tossing them high, or laying them on the ground to highlight your tumbling skills, you can't underestimate the importance of a great set of poms.
Complete the Look with Ready-to-Ship Cheer Pom Poms
When you think cheerleading, many people think poms! No cheerleading warm-up or uniform is complete without the perfect pom. Our vast selection of in-stock cheerleading poms are made of the highest quality materials and are available in a variety of styles and popular team colors. We make sure you always look your best on the field.
Add some sparkle to your team look with poms available from Omni Cheer!
We offer cheerleader poms in a variety of in-stock styles, including:
- Plastic pom poms
- Youth cheer poms
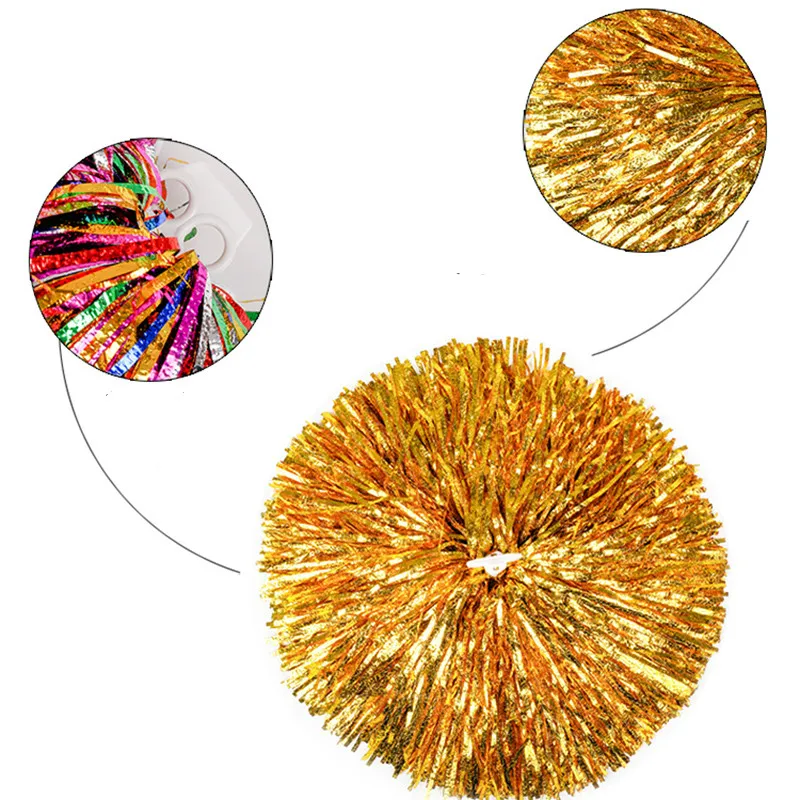
- Metallic poms
- Holographic pom
In-stock means we're ready to pack and ship your poms quickly. It's always best to order in advance to make sure your pre-designed poms are in stock, but we do last-minute shipments as well. If the first big game, competition, or event is on the horizon and you just now realized you need to update the poms, don't panic. Omni Cheer will help you get what you need on time.
Do You Need Custom Pom Poms?
We also offer custom options to make sure you have the perfect match for your team's warm-ups and uniforms. Have some fun designing your own wet look for poms that rattle with pizazz. Get creative with holographic materials with amazing flash. You can also create a unique look by mixing your team's colors for a multi-colored pom your squad will love.
Custom cheerleading pom poms are a great option if your poms will take center stage in some of your performances. If you want to use them as a statement piece rather than just something to throw in the air at games, then you need a unique design that stands out and leaves an impression.
Omni Cheer has the resources to make the design process fast and simple. We carry poms for adults as well as youth, so you can get the perfect size for every team. Look at our selection to see what works best for your needs this season, or contact us if you don't see what you envision.
The right set of poms can take your cheer season to the next level. Once you select your uniform, spend some time browsing our pom inventory. You'll find just what you need, or we'll help you create the perfect pom for your squad. Let's get the poms fired up and bring the team to a win.
Setting the Standard!
- Sign in
- Register
How to make pompoms with your own hands - step by step master classes
Pompoms. These fluffy things make you want to touch your hand. They are an interior decoration, an accessory for cheerleading, a piece of clothing or an object for creativity. They are made from various materials:
- Thread;
- Papers;
- Polyethylene;
- Strips of fabric;
- Foamiran;
- Braid;
- Cord;
- Real or artificial fur;
- Lace;
- Tulle.

Making your own pom poms is quick and easy. And also - fun. Children can do this together with adults.
Yarn pom-poms
They are often used to decorate knitwear (hats, scarves, mittens). They can be used for crafts with children. They make cozy rugs, blankets, bedding for chairs.
There are four ways to make it:
- On a round base;
- With plug;
- On the arm;
- Fast way.
Making buboes using the two-donut template
Step-by-step instructions:
- Two rigid blanks are wrapped together with yarn. The more layers of strands on the templates, the more magnificent the bubo will turn out.
- The thread must be cut along the outer edge.
- Between the layers of the workpiece, stretch a piece of thread and tightly tie the resulting pieces of yarn.
- Carefully remove the template.
- Fluff the "ball", trim it with scissors.
How to make a pom-pom on a fork
It can be an ordinary table fork, or a horseshoe-shaped cardboard blank.
- Wind the yarn around the tines of the fork.
- Pull across the middle, tie tightly.
- Remove from plug.
- Cut the formed loops.
- Fluff the product.
- Trim with scissors.
How to make a small bubo
Fluffy pompoms of the smallest size can be obtained if the thread is wound not on four, but on two prongs of the fork.
On cardboard rectangle
This method is easy to implement. With the help of such cardboard rectangles, it is easy to make even, lush buboes of different sizes.
How to make a large, fluffy bubo
A large bubo can be made using household tools. For example: two plastic bottles or cardboard tubes.
How to make a pom-pom on your hand
By winding a strip of yarn around your hand, you can quickly create this fluffy miracle without any additional tools.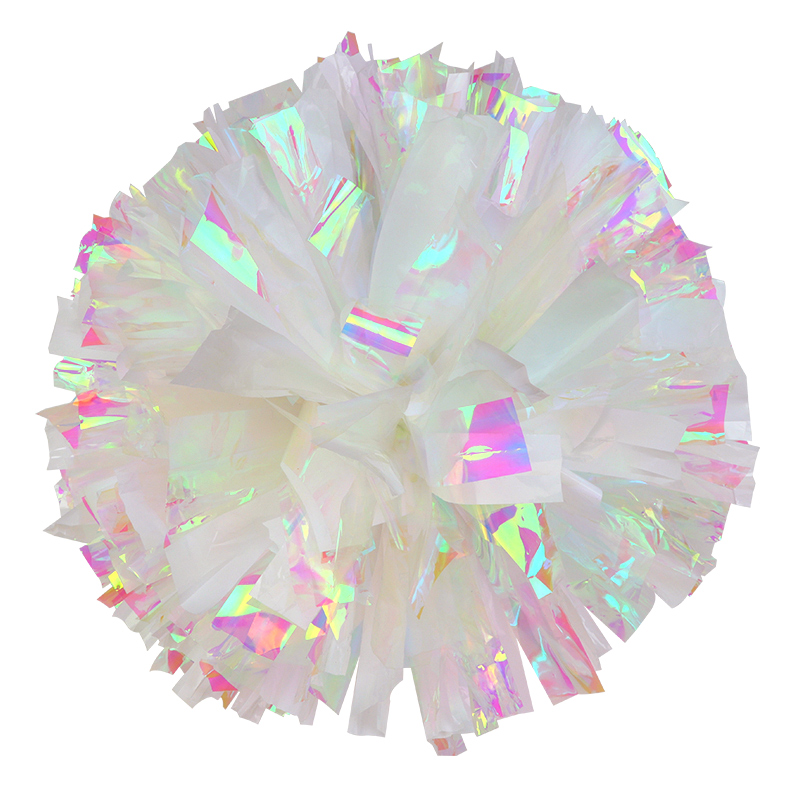
- Wrap the thread around four or two fingers in the palm of your hand.
- Bandage the winding in the middle.
- Remove workpiece from hand.
- Cut the loops.
- Fluff and trim.
Quick way to make pom poms
Sometimes you need to make a lot of buboes. For example, in order to make a rug or a cape on a chair out of them.
To quickly make a pompom, it is best to use this method:
- Turn a stool or coffee table upside down.
- Having tied the thread to one of them, wind it between two supports, trying to place it horizontally and pull it evenly.
- Using a tape measure, divide the entire strip into sections.
- Tie the wound threads across, tying them tightly in the marked places.
- Remove the yarn from the support and cut between the ties.
- Fluff "balls".
- Trim with scissors.
When making pom-poms, it is important to follow a few rules.
- Wavy yarn must be moistened after unraveling, then dried in a straightened state.
- Wind as much thread around the template or fork as possible to keep the bubo dense and fluffy.
- Make sure that each element is securely tied across at the time of manufacture. You need to fasten with several knots. Use strong thread for this.
Tutorial: Flower Buboes
These soft, fluffy flower balls look unusual and are a little more difficult to make than simple solid colors.
You can use leftover thread in bright colors. You will also need cardboard blanks shaped like horseshoes (4 pieces) and four metal stationery clips.
- It is necessary to visually divide the ornament into two parts from the center to the edges and in layers, successively wind yarn of different colors onto the templates.
- First - the middle of the yellow.
- After - a wide layer of pink.
- Then a thin layer of green.

- White locks cover everything
- Now we take the second pair of horseshoes and make another exactly the same blank.
- Using stationery clips, we connect them to each other.
- Next, cut the yarn along the outer edge of the template.
- Tie the bubo crosswise with a fixing thread.
- Carefully remove the cardboard.
- Fluff, trim.
Based on the techniques shown in this master class, you can make buboes in the form of other flowers, as well as fruits, vegetables, berries.
Fur pompom
Natural or artificial fur can be used to decorate a hat - a fluffy bubo.
Materials and tools:
- small piece of fur,
- scissors,
- some synthetic filling,
- hand needle,
- strong thread (preferably lavsan or kapron).
Production:
- Cut out a circle from the fur.
- Sew straight stitches around the edge of the workpiece.

- Slightly pull off the future bubo, put the filler inside.
- Tighten the hole to the end, sew it up.
- Fur pompom is ready.
Cheerleading Pompoms
Cheerleading is a dance show that accompanies sports competitions. It is organized by dedicated fans in support of their favorite team. These are incendiary dances of slender girls, in whose hands they have an invariable accessory: bright rustling pompoms.
You can make them yourself. The material for this, as a rule, is polyethylene or corrugated paper. In addition, you will need:
- Sharp scissors,
- Clear tape or duct tape,
- Plastic or wooden stick for handle.
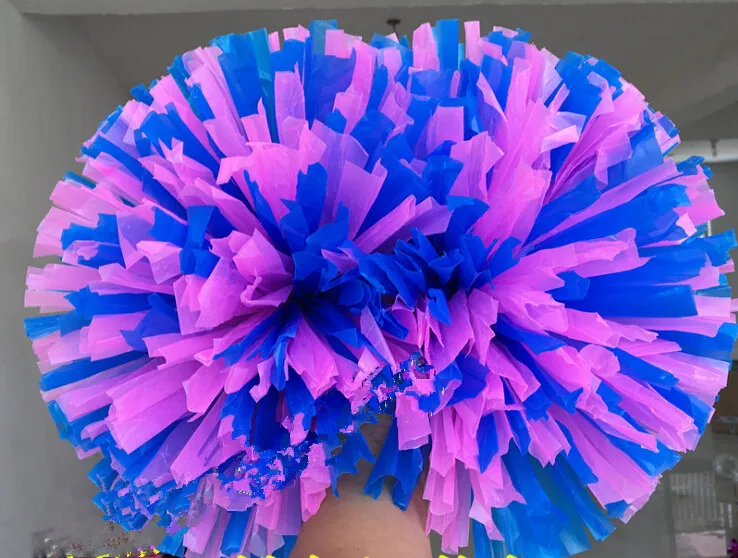
Manufacturing process:
- Remove sharp corners from bags, cut off handles and seams.
- Bend the resulting stack of polyethylene blanks in half, cut in the middle (thus, the number of layers will double).
- On both sides, cut polyethylene into narrow strips, not reaching the middle.
 The thinner each strip will be. The more magnificent the decoration will be.
 - Carefully fold everything in half, twist around the stick, secure with tape.
- It is better to wrap the handle with electrical tape to prevent it from slipping in your hands during the performance.
Corrugated paper cheerleading pom-poms are made in the same way.
Large party pompoms
Large pompoms to decorate, for example, a children's party, are most easily made from corrugated paper or tulle. These materials come in all sorts of colors and shades: bright, neon and calm nude.
Tulle pom pom
These tulle elements are easy to make using the same techniques as for yarn. A large pompom is made using a larger cardboard template, and the tulle itself should be wider.
Paper pompom
Ordinary table napkins are suitable for paper “fluffies”, and it is most convenient to make large paper balls from corrugated paper (this is usually sold in stationery stores).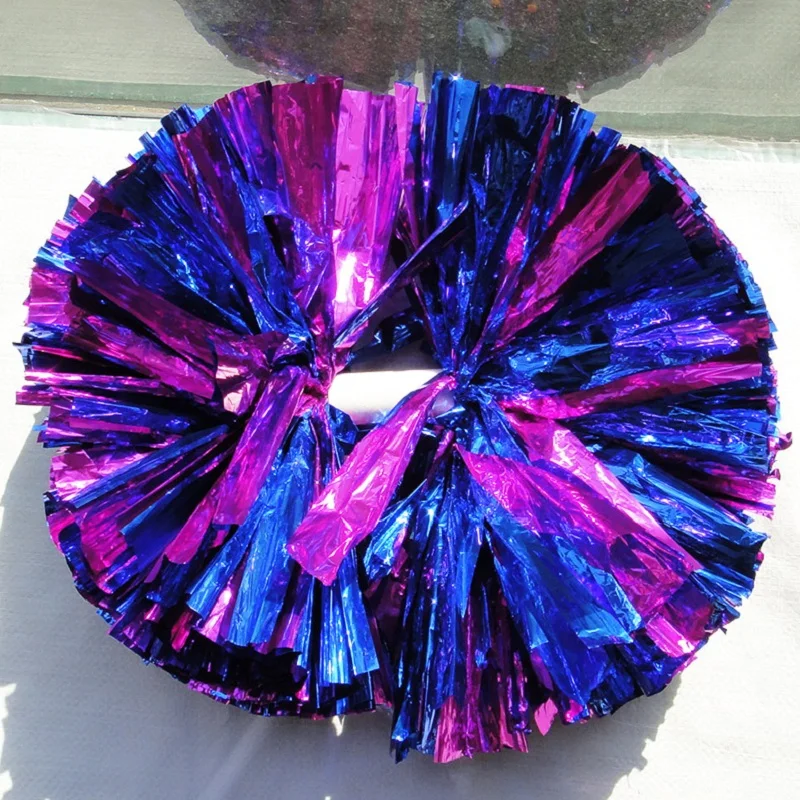
Step-by-step instructions for making napkin pom-poms:
- Unfold five three-layer napkins and stack one on top of the other. They can be one color or several. In the second case, the "balls" will turn out to be colorful.
- We need to fold these napkins all together like an accordion. Fasten in the middle with a strong thread, decorative braid or wire.
- Trim off the resulting multi-layer strip. Having decorated the edges as desired with a corner or rounding them.
- Carefully separate the paper layers from each other and etch each, shake, holding the middle, to fluff the product and give it a round shape.
- "Fluffy" is ready. Now it can be hung on a braid or fishing line, fixed to a horizontal support, used as an element of table setting, decorate a carnival costume.
Video: “How to make a lot of pompoms at once. DIY Bicolor and Tricolor»
8 ways to make a neat pom-pom
March 14, 2020Do-it-yourself educational program
You will need cardboard, a fork, a straw or a chair.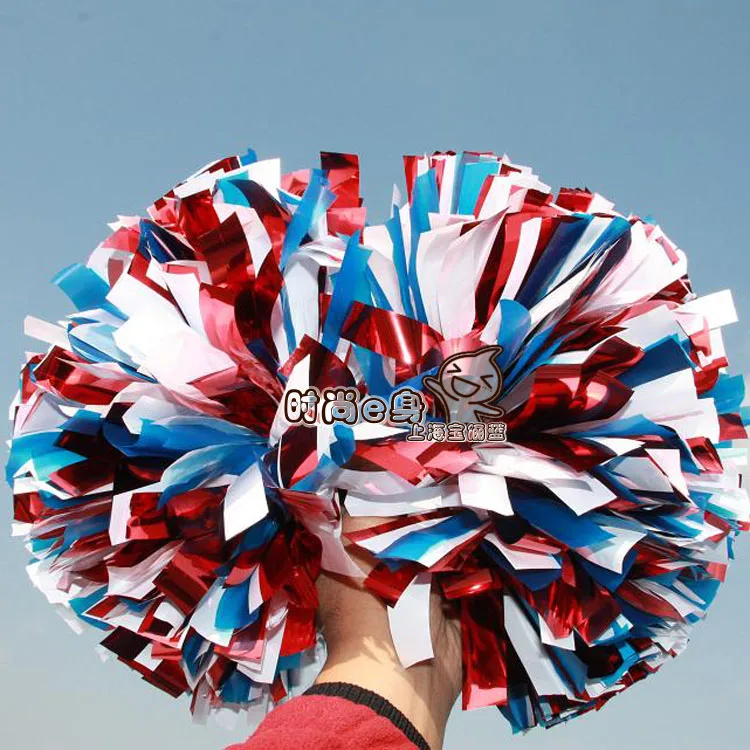
Share
0How to make a pom-pom using a round cardboard template
Frame: @Sheep & Stitch / YouTubeAdjust the size of the template to your liking. The smaller the blank, the smaller the pompom will turn out.
What you need
- Cardboard;
- glass, jar or similar object;
- pencil, pen or marker;
- scissors;
- coin or other similar object;
- thick threads.
How to make a pom pom
Trace a glass, jar, or something on the cardboard twice. Cut out the drawn circles.
Frame: @Sheep & Stitch / YouTubeIn the center of each, circle a coin or other small object of the same shape. Cut the cardboard to the drawn line and remove the circle from the middle.
Frame: @Sheep & Stitch / YouTubeLay the blanks on top of each other and separate a small section of cardboard with scissors.
Frame: @Sheep & Stitch / YouTube Without separating the template, start wrapping it with thread from one end.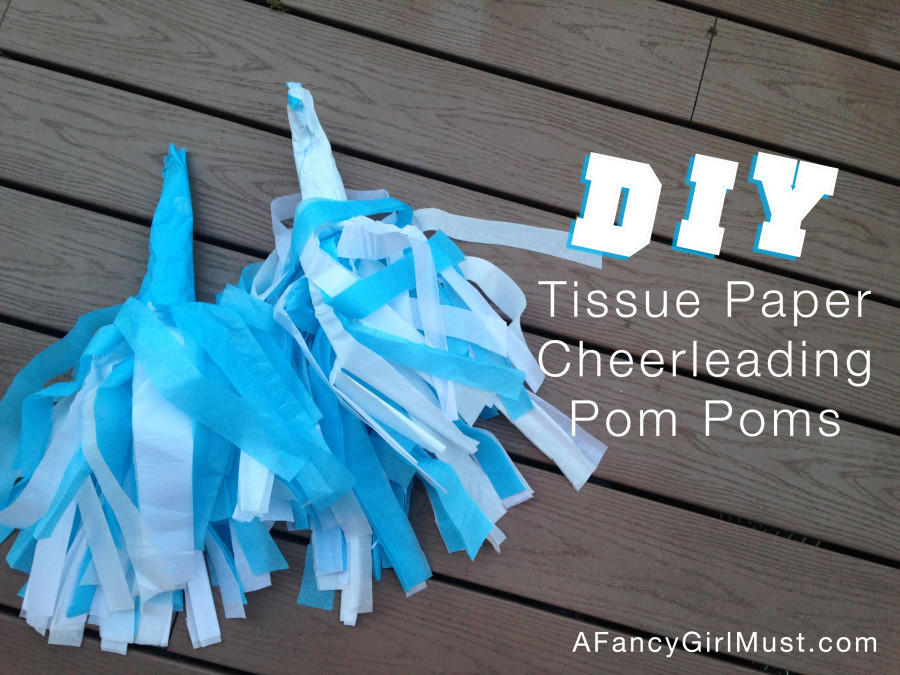
Finish the entire piece like this. The more yarn you wind, the fluffier the pom pom will come out. Cut off the rest of the thread.
Frame: @Sheep & Stitch / YouTubeDivide the wound yarn with scissors along the fold line between two cardboard blanks.
Frame: @Sheep & Stitch / YouTubePass a piece of thread between the cardboard parts and tie the resulting bundle tightly.
Frame: @Sheep & Stitch / YouTubeRemove the template.
Frame: @Sheep & Stitch / YouTubeShake the pom-pom to straighten it. Then squeeze it between the cardboard blanks and trim the protruding edges of the threads along them.
Frame: @Sheep & Stitch / YouTubeRemove the template, flatten the pom-pom on the other side and press down again with cardboard. Straighten the edges again.
Reading Now 🔥
- 15 Ways to Make a Beautiful DIY Candy Bouquet
How to Make a Pompom Using a Rectangular Cardboard Template
Frame: @HD Tutorial / YouTube This template is completely different, but also very easy to work with.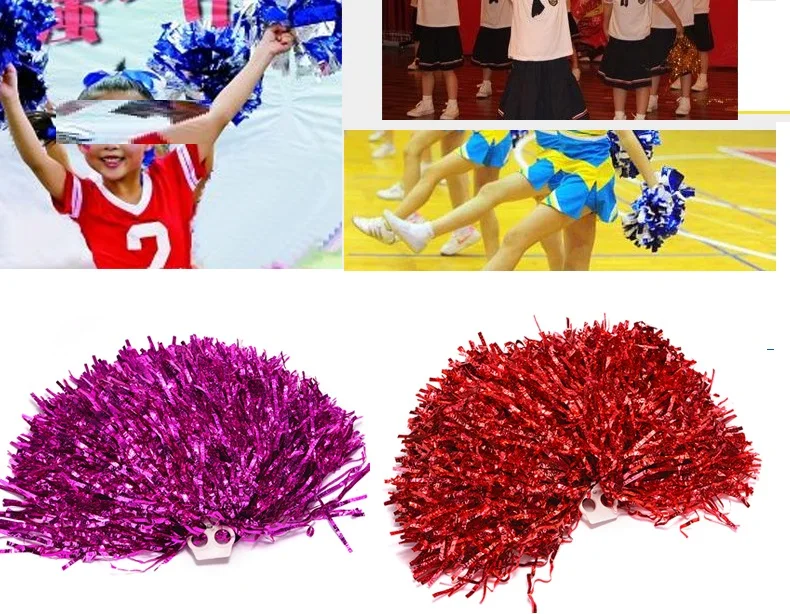 The smaller it is, the smaller the pompom will turn out.
What you need
- Cardboard;
- scissors;
- thick threads.
How to make a pompom
Cut out a rectangle from cardboard. The author of the video rounded one of the sides of the figure, but this is not necessary. Cut a small strip in the middle, not reaching the edge.
Frame: @HD Tutorial / YouTubeWrap the template with thread so that there are cuts on the sides. The more yarn, the fluffier the pom-pom will be.
Frame: @HD Tutorial / YouTubePass the rest of the thread through the cuts on both sides. From a solid edge, push the threads with scissors. Tie the wound yarn tightly.
Frame: @HD Tutorial / YouTubeFold the template in half lengthwise and remove the threads from it.
Frame: @HD Tutorial / YouTubeCut off the excess. Divide the threads along the folds with scissors in two on all sides.
Frame: @HD Tutorial / YouTube Trim the pom-pom along the edges, removing all unnecessary.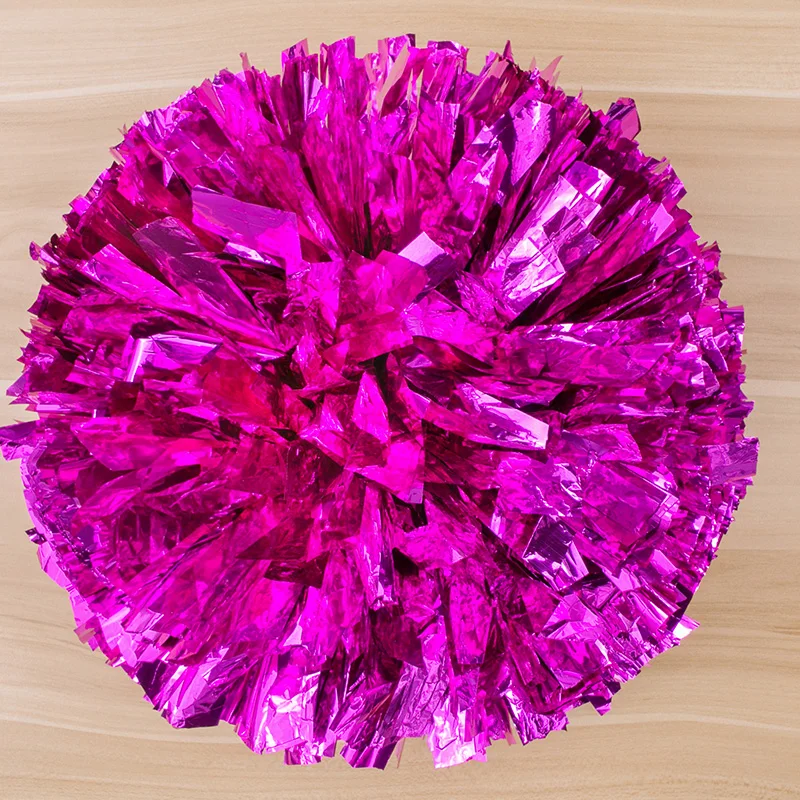
Make sure the piece is perfectly round.
How to make a finger pom pom
Frame: @Fiber Flux / YouTubeThis method can be used to make pom poms of various sizes. If you wind the threads around three or two fingers, the product will be smaller than if you use the whole palm.
What you need
- Thick thread;
- scissors.
How to make a pom pom
Place the end of the thread on the inside of your hand so that it hangs down.
Frame: @Fiber Flux / YouTubeHolding the tip, start wrapping the yarn around your palm. Do not make it too tight so that it is easy to remove later.
Frame: @Fiber Flux / YouTubeKeep winding the thread until the workpiece is quite thick. Cut off the rest.
Frame: @Fiber Flux / YouTube Carefully remove the blank from your hand.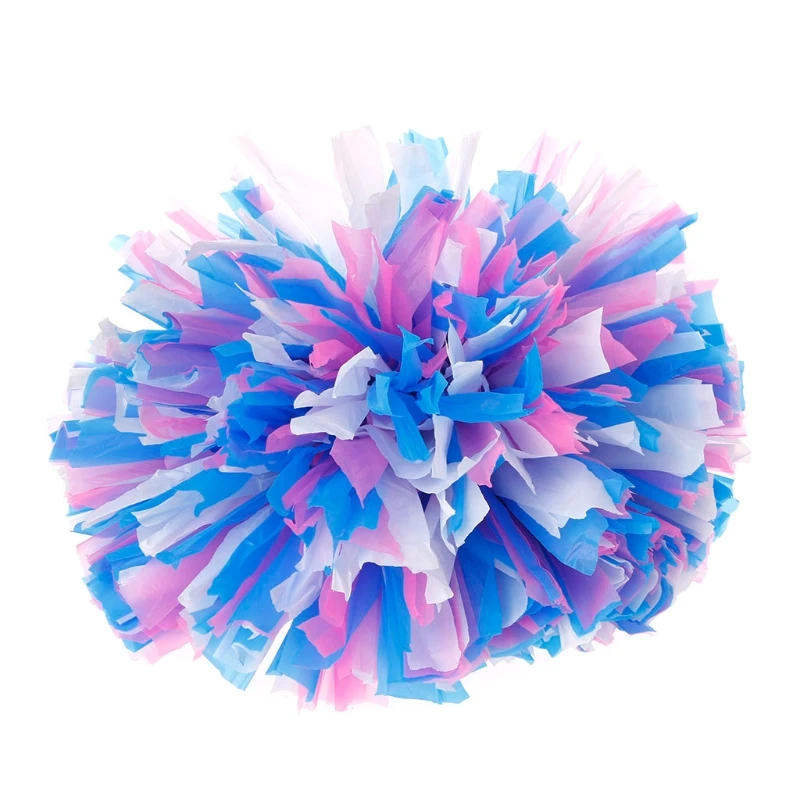
Cut a long thread from the ball. Place it horizontally under the workpiece and tie it tightly in the middle with a double knot.
Frame: @Fiber Flux / YouTubeCut the threads on one side along the fold.
Frame: @Fiber Flux / YouTubeDo the same for the second side.
Frame: @Fiber Flux / YouTubeStart trimming the threads of the resulting blank, trimming the edges and forming a rounded shape.
Frame: @Fiber Flux / YouTubeGive the whole pom-pom a perfect look this way.
How to make a pompom using the
pom-pom tool Frame: @CreaCrafts Videos / YouTubeStore-bought tools may vary in appearance. But the principle of their use is the same. Such devices are variable in size, so you can easily make different pompoms.
What you need
- Pompom maker;
- thick thread;
- scissors.
How to make a pompom
Open the tool. Wrap one half with thread. The more layer, the more magnificent the pompom will be. If the device is designed so that the halves are not next to each other, as in the photo, but from above and below, then it is better to cut the thread.
Frame: @CreaCrafts Videos / YouTubeWrap the second element in the same way. In this master class, the thread is immediately thrown to the other half. When you're done, cut off the rest.
Frame: @CreaCrafts Videos / YouTubeConnect the halves and secure with a retainer.
Frame: @CreaCrafts Videos / YouTubeCut the threads at the folds around the perimeter.
Frame: @CreaCrafts Videos / YouTubeWith a piece of yarn of suitable length, tie the workpiece in the middle, stretching it between the parts of the fixture.
Frame: @CreaCrafts Videos / YouTubeRemove the device from the pompom and trim the edges with scissors, giving a neat shape.
How to make a pom-pom using a sheet of paper
Frame: @Lyza Walters / YouTubeYou can adjust the size of the pom-pom using a paper blank. The narrower it is, the smaller the ball will turn out.
What you need
- Paper;
- thick thread;
- scissors;
- hook;
- adhesive - optional.
How to make a pom pom
Fold the paper several times into a strip. This tutorial uses an A4 paper and a strip width of about 9 cm.
Image: @Lyza Walters / YouTubePlace the end of the thread over one side of the paper. In the master class, two pieces of yarn from different balls were used at once to make the pompom come out multi-colored. But this is not at all necessary.
Frame: @Lyza Walters / YouTubeDon't wrap the strip too tightly in several layers. Separate the tip with scissors.
Shot: @Lyza Walters / YouTube Using the crochet hook, pull a piece of thread from the front through the wound turns.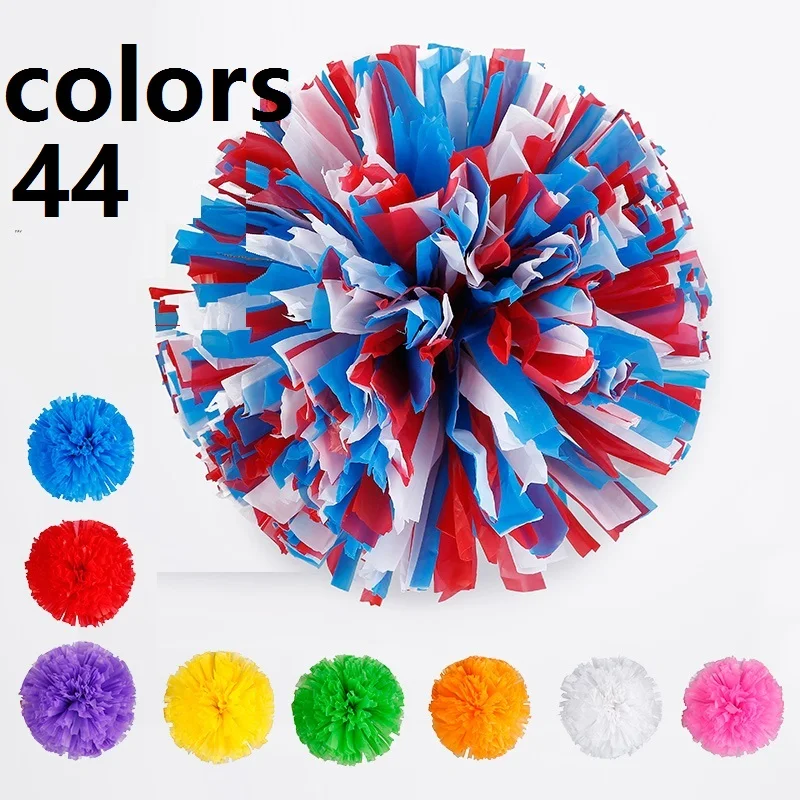 Tie them with several strong knots. For reliability, glue can be applied between the knots. Cut off the excess.
Do the same on the other side, but take a longer piece of thread.
Frame: @Lyza Walters / YouTubeCarefully remove the blank from the paper. Wrap the long ends of the thread around it in the middle and tie it tightly again.
Frame: @Lyza Walters / YouTubeCut the loops along the fold on all sides.
Frame: @Lyza Walters / YouTubeAt this point, the workpiece will be flat. Trim the edges on both sides so that it resembles a donut in shape. Details are in the video below.
Frame: @Lyza Walters / YouTubeFrom one side, spread the yarn and flatten the workpiece so that the threads are already oriented in the other direction. Trim the edges again.
Frame: @Lyza Walters / YouTube Hold the pom-pom by the remaining long threads and shake it. This will make it round. If there are threads sticking out, cut them off, trimming the pompom.
How to make a pom pom with a fork
Image: @Red Ted Art / YouTubeThis device is sure to be found in any home. A pompom made this way will be small.
What you need
- Plug;
- thick thread;
- scissors.
How to make a pompom
Thread a piece of thread through the middle hole of the fork. Position it vertically as shown in the photo.
Frame: @Red Ted Art / YouTubePlace the end of the ball of thread horizontally on the fork. Holding the yarn, start wrapping it around the device.
Frame: @Red Ted Art / YouTubeMake the coils about 2-2.5 cm wide.
Frame: @Red Ted Art / YouTubeContinue winding the threads in layers on top of each other. The thicker, the fluffier the pom-pom will be.
Frame: @Red Ted Art / YouTube Cut off the rest of the thread with scissors. Throw the back end of the segment from the first step over the top onto the wound layer of yarn. Tie the ends with a strong double knot.
Remove the blank from the fork. Cut the wound threads along the folds on both sides.
Frame: @Red Ted Art / YouTubeStart trimming the pom pom, removing excess tips from all sides.
Frame: @Red Ted Art / YouTubeGive the figure a perfect round shape.
How to make a pom-pom with a straw
Frame: @HelenaDaydreamer / YouTubeIn this way, you can easily and quickly make a neat little pom-pom.
What you need
- Drinking straw;
- thick thread;
- scissors.
How to make a pompom
Start winding the thread around the end of the pom-pom.
Frame: @HelenaDaydreamer / YouTubeContinue winding the yarn in several layers.
Frame: @HelenaDaydreamer / YouTube Make sure that there are more threads in the middle than at the edges. Cut off the rest.
Separate a thread longer than a straw from the ball and thread it inside.
Frame: @HelenaDaydreamer / YouTubeCarefully remove the wound yarn from the tube. The straw is no longer needed.
Frame: @HelenaDaydreamer / YouTubeTie the ends of the thread that passed through the tube with a strong double knot, fixing the future pompom.
Frame: @HelenaDaydreamer / YouTubeOn the other side, cut the loops of yarn down the middle.
Frame: @HelenaDaydreamer / YouTubeStart trimming the threads, forming an even ball.
Frame: @HelenaDaydreamer / YouTubeTrim the elements on all sides until you get the perfect pom pom.
How to make pompoms with a chair
Frame: @Stay Fikl / YouTube This method is suitable if you need to make several pompoms at once. It will save a lot of time.
What you need
- Chair;
- thick thread;
- scissors.
How to make a pom-pom
Place the chair upside down. Tie the end of the thread to one of the legs.
Frame: @Stay Fikl / YouTubeStart wrapping yarn around this and opposite chair legs. Make it not too tight.
Shot: @Stay Fikl / YouTubeKeep winding the threads - the more you have, the more fluffy the pompoms will turn out. At the end, cut off the rest and tie a leg around it.
Frame: @Stay Fikl / YouTubeSeparate a long thread from the ball. Fold it in half and tie the wound coils very tightly next to the leg.
Frame: @Stay Fikl / YouTubeMake a few more of these nodes at the same distance from each other. For accuracy, you can even measure this distance with a ruler if it is very important for you that the pom-poms come out the same size.
Frame: @Stay Fikl / YouTube Cut the wound threads between the first two knots in the middle.