How to make a dancing robot at home
Make a Dancing Robot
ARROW_LEFTARROW_LEFTUnit PlanLesson 1 of 15
ARROW_RIGHTWeDo 2.0 Core Set
Design and program a robot that performs a cultural dance, tells a story through dance, or dances in pairs or groups.
CLOCK45-90 min.
BRICKIntermed.
GRADUATEGrades 1-5
Introduction
This Maker lesson includes a whole range of possible Dancing Robot designs and performances. Students can explore a cultural dance, tell a story through dance, dance in pairs or groups, or even plan a dance party where WeDo 2.0 robots are more than just dancers!
Preparation
Ensure that each student has a copy of the Student Worksheet for recording their design process. They will also need the LEGO® Education WeDo 2.0 Core Set (one set for every two students is recommended).
Discussion
Hand out the Student Worksheets and allow the students to interpret the lesson themselves, or read the Maker Connect text aloud to set the scene.
2. Find a Problem
As students look at the “connect” images and questions, facilitate a discussion to steer them toward a problem or new design opportunity. Once they have decided upon a problem to solve, ensure that they record this in some way. They can use the worksheet to help structure their project documentation or use their own preferred method to record their design journey.
3. Brainstorm
Students should initially work independently or in pairs, spending a few minutes to generate as many ideas as they can to solve the problem. They can use the bricks from the LEGO® set during the brainstorming process, or sketch out their ideas in the space provided on the worksheet.
It is important for students to spend time tinkering with the LEGO® bricks in order to generate ideas. The goal of tinkering is to explore as many solutions as possible. You can use the tinkering examples at the end of these materials for inspiration, or as a means for getting started.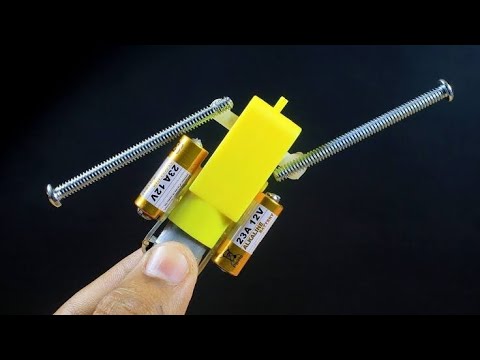
Students can now take turns sharing their ideas within their groups. Once all of the ideas have been shared, each group should select the best idea(s) to make. Be prepared to help facilitate this process, ensuring that the students choose an idea that is possible to make. Encourage diversity, not all groups have to make the same thing.
4. Choose the Best Idea
Students should record up to three design criteria on their worksheets. They will refer to this again as they review and revise their solutions.
5. Go MAKE
Let the students carry out one of their group’s ideas using WeDo 2.0 and other materials as needed. Reinforce that students do not have to come up with the whole solution from the start.
During the making process, remind students to test and analyze their idea as they go, making improvements where necessary. If you want students to submit their documentation at the end of the lesson, ensure that they use sketches and photos of their models to record their design journey during the making stage of the lesson.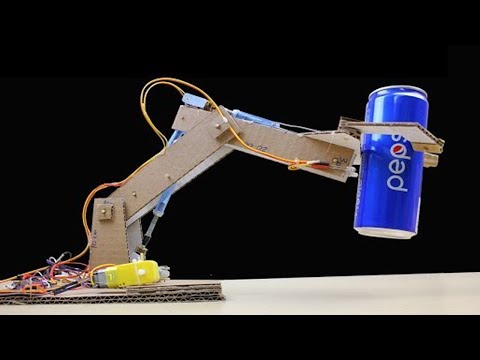
Tinkering Examples
Some students may need a little inspiration and scaffolding to help them get started.
Students can explore the Model Library to find inspiration for the different types of dances they can do. By asking questions (e.g., Do you want to make a dancing robot that spins? That walks? ), you can help lead the students to relevant models based on their ideas. Students can remix their models by adding or removing LEGO® elements and “costume” pieces.
Remixed from #13. Sweep
Remixed from #1. Wobble
6. Evaluate What You Have Made
Students will test and evaluate their designs against the design criteria they recorded before they started making their solutions. They can record notes on their Student Worksheets.
7. Present Your Model
Allow time for each student or student group to present what they have made to the class. A good way to do this is to set out a table large enough to display all of the models. If time is short, pair off the groups and have them present to each other.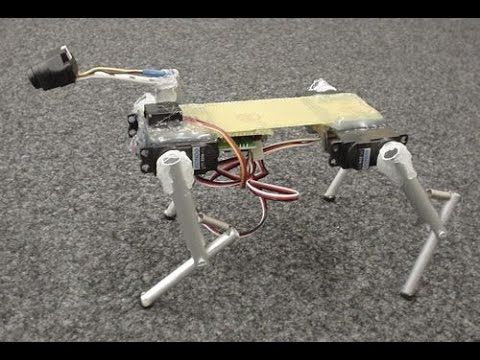
8. Assessment
Students will use the Student Worksheet assessment rubric to evaluate their design work according to the ‘Four Bricks Scale’.
9. Tidy Up
Ensure that you leave approximately 10-15 minutes at the end of the lesson to break down the models and sort them back into the LEGO® boxes.
Teacher Support
After completing this lesson, students will have:
Defined a clear design need
Developed their ability to iterate and improve design solutions
Developed their problem-solving and communication skills
Used and understood the design process
LEGO® Education WeDo 2.0 Core Set
WeDo 2.0 Software or Programming App
Optional
Use craft materials that you already have in your classroom to add another dimension to this lesson. Some materials could be:
Plastic or paper cups
Cardboard boxes
Egg cartons
Fabric or felt
Foam, pom-poms, or beads
Pipe cleaners
Introduction to the Maker LessonsMaker ConnectStudent Self-AssessmentClassroom Poster of the LEGO® Education Maker (Design) Process
NGSS
Science and Engineering Practices
3-5-ETS1. 1, 3-5-ETS1-2, 3-5-ETS1-3
Disciplinary Core Ideas
ETS1.A, (3-5-ETS1-1)
ETS1.B, (3-5-ETS1-2), (3-5-ETS1-3)
ETS1.C, (3-5-ETS1-3)
Common Core State Standards
ELA/Literacy
RI.5.1, RI.5.7, W.5.8
Mathematics
MP.2, MP.4
Student Material
Student Worksheet
Download to view and share the student worksheet.
Download pdf
Share with:
Google Classroom
How To Make A Dancing Robot Without Arduino/#smartcreativity
Hardware components
| Alkaline Aa Battery 4 Pack | x 1 | ||
| Compute Modules 3+ | x 1 | ||
| Tiny Breadboard | x 1 | ||
| Raspberry Pi 4 Model B 1gb, 2gb, 4gb Or 8gb Ram | x 1 | ||
| Getting Started With Adafruit Circuit Playground Express - By Anne Barela | x 1 |
Software apps and online services
| Microsoft MakeCode |
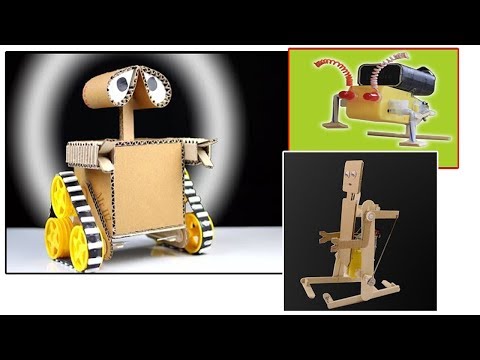
Hello friends, in this tutorial I will show you to how to make a dancing robot at home without 3D printer and without Arduino.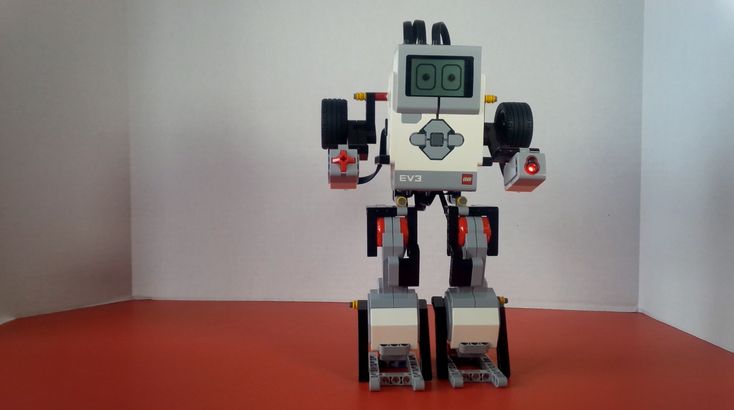 This robot is able to dance, auto balancing, music producing and walking. And the design of Robot is also looking so cool....
I always tried to make cute robots so I make this one.
To make this robot see full tutorial here. All instructions provided in this tutorial. If you want to save time then watch below video in which I explained each and every process of it.
For more information - https://smartcreativityofficial.blogspot.com
Watch it....To save time...
All instructions provided in this tutorial -
How to make -
I am using circuit playground express as micro-controller. I am using servo motor in the place of leg to move the robot. Code is also given below in this tutorial.
First of all make the robot body by the help of some basic components. See video to make robot body design. After making robot body upload given code in circuit playground.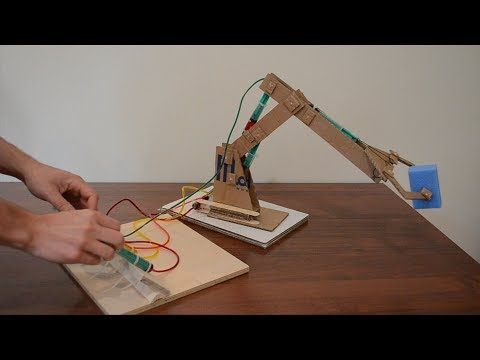
Step by step-
Step 1 -
These are the required components in which I am using circuit playground, servo motor, jumper wire, servo attacher, cardboard paper and a plastic cylindrical box.
we will use plastic box to make the head part of robot and we also put all wires and micro-controller in it.
Step 2 -
I make two holes in the bottom part of box to attach the servo motor. Attach both servo tightly in the hole and then adjust servo wire.
1 / 3
see image to attach servo
Step 3 -
After attaching the servo motor we have to make a Leg design of robot. We will use a thick cardboard paper to make this. We will cut two small piece of cardboard and make a simple leg design as shown in image.
After making leg design we will set a servo attacher to the leg to connect the servo with his leg as shown in below image.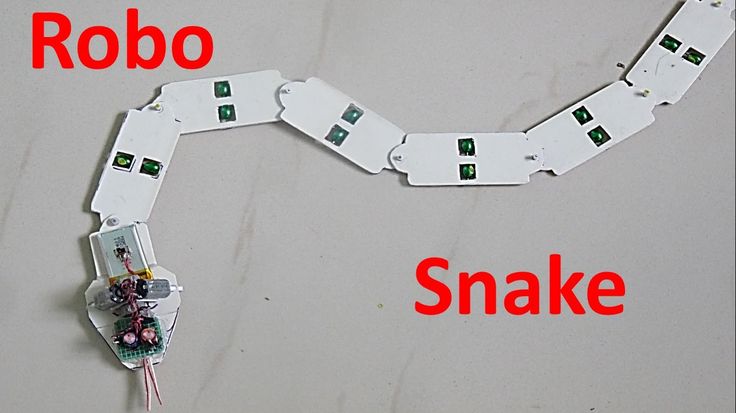
Step 4 -
Now attach the Leg to the servo motor one by one. Attach both leg tightly to make a good body. See below image to do this.
We can also use 4 servo motor in place of these two. Because if we will use 4 servo we can add many other movements in this robot. In two servo motor robot we can only programmed it for walking, simple dancing and some activity like moon walking, vibrating like etc.
So, connect all parts correctly as shown in image.
Step5 -
Now we have to connect jumper wires with servo motor. See below image to connect jumper wires with servo. Connect all wires with its matching color.
After connecting all wires and attaching all parts our Robot body is ready.
Let's jump to our next and important step to how to connect with micro-controller.
Step6 -
Before connecting the jumper with micro-controller first take a look on Circuit playground express.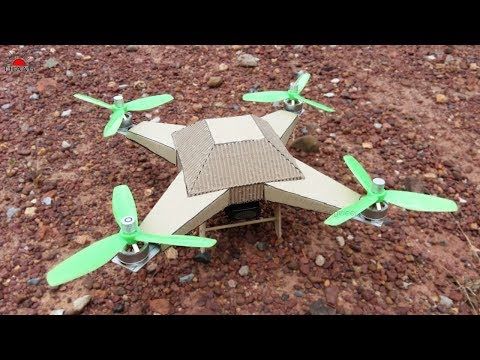 Because circuit playground express is a new type of micro-controller and totally different from Arduino so we should have to know some about circuit playground.
This is our micro-controller circuit playground express. In this micro-controller there are many sensors, 3 function-able buttons, 10 multicolored LED and many input and output pins. Many features is available in this micro controller so I am using this in my projects.
After looking about this let's connect the jumper wires with circuit playground express.
Connect wires as-
Yellow jumper - PinA1,
Red jumper - Pin3.3v(i)
Black jumper - Pin gnd(gnd)
Blue jumper - Pin3.3v(ii)
White Jumper - Pin gnd(ii)
Green jumper - PinA2
After connecting all wires and Jumper, adjust all wire and put all jumper and micro-controller in the box. Put all thing very carefully as no one wire should have to disconnect. That's it............
So our cute and DIY amazing dancing robot is ready.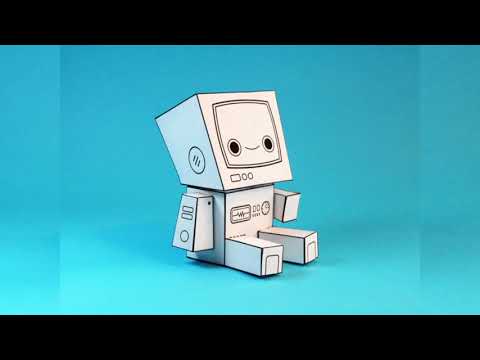
Step 7 -
Let's make the code. To code the micro-controller we can use make code Adafruit editor app or makecode Adafruit browser to program it.
We have simply make a drag and drop programming by dragging the blocks. And it's so easy.....
See code screenshot below. I also uploaded the robot code in this tutorial.
1 / 4 • code
code
After that you can enjoy with your robot.
Robot is ready:
1 / 3 • looking very cool
looking very cool
So, I hope that you all enjoy in this project and also like this.
NextPCB-
NextPCB is a high quality PCB manufacturer with professional PCB manufacturing capabilities. PCB materials are certified by IATF16949, ISO9001, ISO14001, UL, CQC, RoHS and REACH. NextPCB uses very accelerate method to deliver the PCB within just 6-8 days. I have been also using there service for past two years and I always get good results.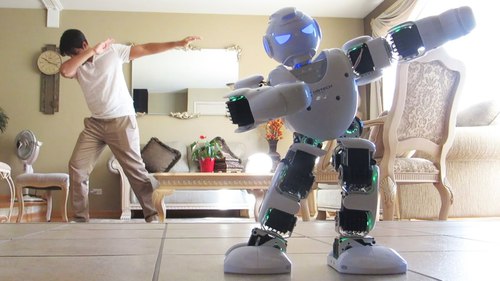 So, I suggest all mechanical creator should have to buy PCB from NextPCB.
NextPCB provides up to 4-12 layer PCB. The PCB quality is also very good. For only 10$ you can get 10 PCB of any color that you want. For ordering the PCB you have to go the website of NextPCB. Just go to the website Upload your gerber file, select PCB setting and order 10 high quality PCB now.
For more information - https://nextpcb.com
If you Like this project then please support me by "subscribing" my YouTube channel.
Subscribe now - Click here
You can also share new projects idea with me by commenting here.
Facebook- @circuitjamer , Instagram- @circuitjamer
So, bye guys ..............see you in next projects..
Thanks for visiting in this tutorial......
#smartcreativity , #circuitjamer , #robotics
Robot code
upload it
input. onLoudSound(function () { for (let i = 0; i < 4; i++) { if (input.soundLevel() >= 130) { for (let i = 0; i < 4; i++) { pins.A1.servoWrite(155) pins.A2.servoWrite(25) pause(500) pins.A1.servoWrite(130) pins.A2.servoWrite(50) pause(500) } pins.A1.servoWrite(130) pins.A2.servoWrite(50) } light.showAnimation(light.rainbowAnimation, 500) pins.A1.servoWrite(130) pins.A2.servoWrite(50) for (let i = 0; i < 6; i++) { pause(200) pins.A1.servoWrite(170) pause(100) pins.A2.servoWrite(10) pause(200) pins.A1.servoWrite(130) pause(100) pins.A2.servoWrite(50) pause(200) } pins.A1.servoWrite(130) pins.A2.servoWrite(50) for (let i = 0; i < 6; i++) { pause(200) pins.
 A2.servoWrite(10) pause(200) pins.A1.servoWrite(170) pause(100) pins.A2.servoWrite(50) pause(200) pins.A1.servoWrite(130) pause(100) } pins.A1.servoWrite(130) pins.A2.servoWrite(50) for (let i = 0; i < 4; i++) { pause(100) pins.A1.servoWrite(180) pause(100) pins.A1.servoWrite(130) pause(200) } for (let i = 0; i < 4; i++) { pause(100) pins.A2.servoWrite(80) pause(100) pins.A2.servoWrite(50) pause(200) } pins.A1.servoWrite(130) pins.A2.servoWrite(50) } }) pins.A1.servoWrite(130) pins.A2.servoWrite(50) forever(function () { light.setBrightness(255) light.showAnimation(light.rainbowAnimation, 2000) pause(2000) light.showAnimation(light.runningLightsAnimation, 500) pause(2500) light.showAnimation(light.
 colorWipeAnimation, 2000) pause(2500) }) forever(function () { music.playMelody("C5 B A G F E D C ", 120) music.playMelody("C D E F G A B C5 ", 120) music.playMelody("E B C5 A B G A F ", 120) music.playMelody("C5 A B G A F G E ", 120) })
How to make a robot with your own hands / Schemes, drawings, videos, instructions for assembling robots at home
In this section of the site you will find detailed instructions for assembling robots with your own hands in the workshop or even at home. See photo and video instructions to help you create various models of robots at home with your own hands. Attached are simple and understandable to the layman diagrams and drawings in order to independently master this exciting and useful activity. Thanks to our photo and video tutorials, you will learn how to design and construct a variety of robotics models, including controlled robots and more. All this in a section with step-by-step instructions for designing and building DIY robots.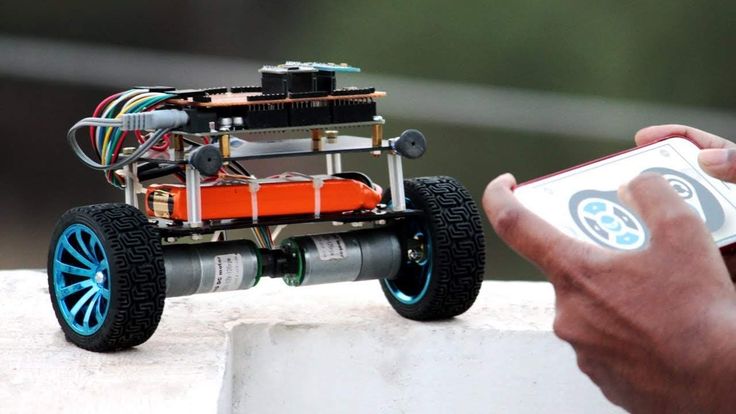
Collections:
Make a StarWars robot
DIY: Do-it-yourself underwater drone with a video camera. Step-by-step instructions
This instruction shows how to make an underwater drone from pvc pipes with a remote control and a video camera on board. A fairly easy-to-make robot that does not require any expensive components. Try to make such a robot yourself. See details...
DIY: Real robot droid BB-8 for Arduino.
step by step instructionsIs it possible to build a BB8 droid at home from scrap materials? Use our step-by-step instructions to create your own stellar robot. In this tutorial, we'll show you how to build the iconic BB-8 life-size droid with your own hands...
DIY: Realistic pvc pipe fish robot for Arduino.
This instruction shows in detail how to make a DIY robotic fish out of an ordinary water pipe, which can swim in water and even be used for industrial purposes. To create it, you will need not so many materials and time ...
DIY: A robot with voice control and vision based on MakeBlock and Android.
Step-by-Step InstructionsIn this tutorial, we'll show you how to equip a simple crawler robot from MakeBlock with computer vision and voice commands. It may seem like a daunting task to you, but it's actually very simple...
DIY: Mouse pusher on LEGO Mindstorms. Step by step instructions for making
In this manual, we want to share with you the skills of building robot based on the Mindstorm kit that moves your computer mouse. You are probably wondering why you need to use such an expensive item for such a simple task? The purpose of this robot is to protect your computer .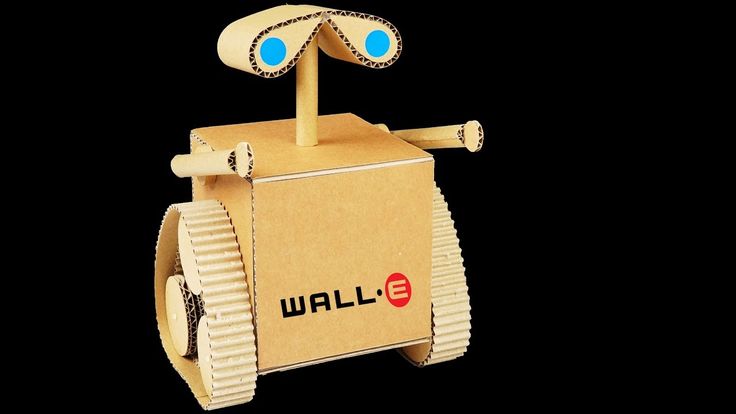 ..
..
DIY: A simple do-it-yourself robot vacuum cleaner for Arduino. Step by step instructions for making
The popularity of automated home cleaners is increasing day by day. No exception, dry cleaning robots that can keep the floor clean without your intervention. If you want to know how it works and build it with your own hands, we present to your attention in...
DIY: A self-switching box controlled by Arduino. Step by step instructions for creating
This guide is how to build another useless robot that is more for fun than for solving logic puzzles. Toy in the form of a box with a toggle switch and an opening sash, contains a number of mechanical elements and an Arduino-based control unit. For convenience...
DIY: Robotic arm based on LEGO Mindstorm NXT. Step by step instructions for creating
In this manual, we will tell you how you can build your own robotic arm with Lego Mindstorms NXT set. In fact, in In this manual, the author wanted to make a tripod for his camera. But this turned out to be a difficult task. After several experiments, the author succeeded with...
DIY: A simple spider robot on Arduino and Fischertechnik. Step by step instructions for creating
If you need a project that will use all of its servos and motion mechanisms, you can create a simple spider robot. If you have Fischertechnik, LEGO and K'NEX skills and extra servos, this project is for you. Indeed, this spider with ridiculous movements...
DIY: Sneel is a floating snake robot for Arduino. Step by step instructions for creating
Sneel is a snake robot that is built to study the living, sinuous movements of robots in an aquatic environment.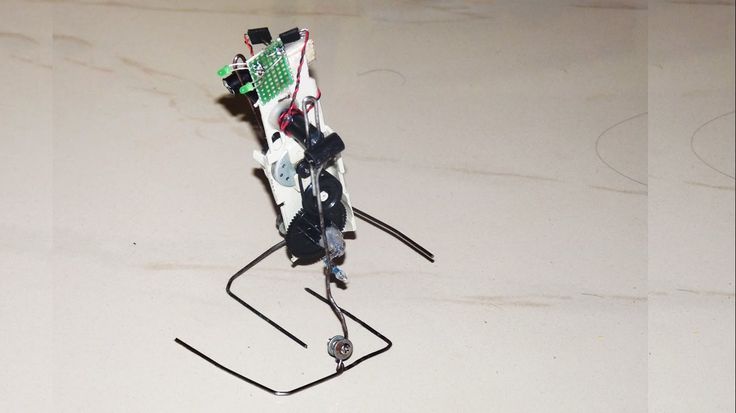 It is designed to move in unknown territory and extreme terrain. Sneel is an open source, biomimetic, mobile, aquatic robot. Electromechanical...
DIY: Arduino controlled ping pong robot. Step by step instructions for creating
This ping pong launcher is controlled by Arduino. The design uses a servo to distribute the balls and two motors with wheels for speed and agility of pushing...
DIY: Giant cardboard robotic arm.
Step by Step InstructionsIntroducing a computer controlled cardboard giant robot with an arm that reaches 6 feet. It consists of two configurations: 1) Grip Hand - A three-fingered grip that allows you to pick up toys and dirty socks off the floor without having to bend down. Possibility to save a...
The section is devoted to schemes for creating and manufacturing robots with your own hands.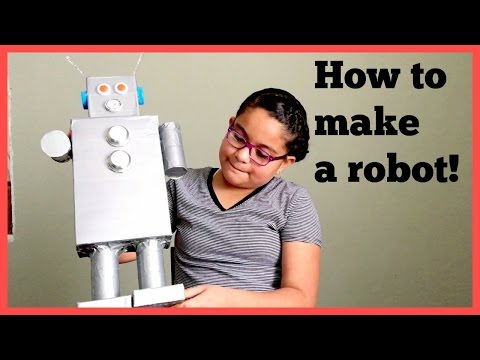 Everything is described in detail, step by step, the whole process of creating a robot or drone. Would you like to know how to make a quadrocopter with your own hands? Here you will find photo and video instructions for this process with a detailed description of each step. Each user, with enough effort and patience, with our help will be able to create a project for assembling a drone (drone), assemble it with his own hands from improvised materials, and program it. Watch helpful videos of milestones of these processes, read our tips and tricks, and create robots yourself with your own hands!
Could you imagine until recently that it would be possible in principle to make a robot at home? And that it will turn out to be so accessible and simply described that the assembly process will be something exciting and fun? Today we will prove to you that it is easy. You will find all detailed instructions, photo and video materials for creating quadcopters / drones / drones and robots in the DIY section of our website.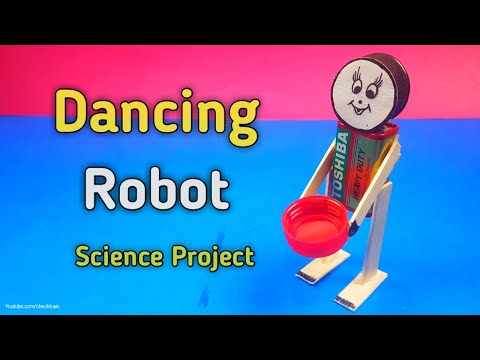
Fill in one of the fields of your choice
Fill in one of the fields of your choice
or
one
UAH
Checkout
Add consumables for this item to your order
This product will be saved in the shopping cart, you select the consumables and accessories you need.
Continue shopping
This item will be saved in your shopping cart.If you would like to contact us:
Product SKU:
(067) 103 90 70
(099) 103 90 70
(063) 103 90 70
Assembly and programming of the robot from the age of 7.
 Lesson notes
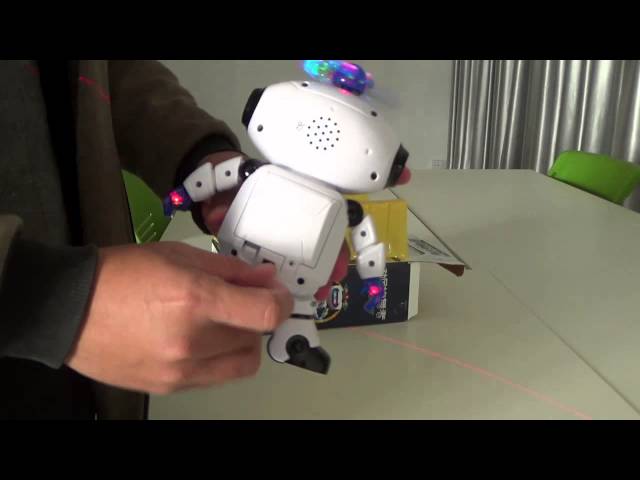
Many children dream of building a real humanoid robot that could walk, talk and smile. However, often in robotics circles they deal only with robots on wheels.
The Dancing Robot Otto project will help children fulfill their dream!
The project consists of 8 one and a half hour lessons and one master class. This course can be conducted in the format of a vacation intensive or included in the plan of the annual program as a separate educational module.
Otto can be programmed by children from the age of 7.
Otto is programmed using the Scratch block programming language. The whole program is made up of building blocks, as from the details of a constructor.
While programming the robot, children will learn about linear algorithms, loops and branches. "Teach" Otto to walk, turn, bend over, make sounds, smile and, of course, dance!
It is interesting for children to assemble a real robot, not a model from a constructor
During the assembly process, project participants will get acquainted with many electronic components: Arduino Nano microcontroller, servo motors, ultrasonic distance sensor, LED matrix and speaker.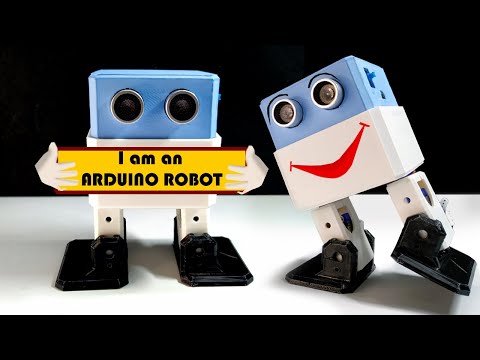
Students will connect all of the robot's electronics by themselves using wires and connectors.
Thanks to this, the project has a great educational value and at the same time is very attractive for children.
List of necessary equipment and accessories
- Computers by number of students
- Accessories for each robot: Arduino Nano microcontroller, Nano Shield, 4 servos, distance sensor, LED matrix, piezo speaker, wires (we will provide a complete list with part numbers for ordering)
- Tool for each student: Phillips screwdriver.
It is desirable to have a 3D printer so that you can print the plastic parts of the robot yourself.
If the 3D printer is not available, a kit of pre-made plastic parts can be purchased (they are not included in the price shown below on this page).
A detailed specification of all required accessories is included in the package we provide.
What else needs to be prepared in advance
- 3D print all parts for robots (or buy the required number of ready-made kits)
- Buy all components according to the list, check their serviceability
- Install software on all computers mug
- Download firmware to all microcontrollers
- Build a test instance of the robot and test it in action
- Prepare for the program by reviewing the detailed course notes.
The entire preparation may take one to two weeks.
Required teacher qualification level
- Confident knowledge of the Arduino microcontroller: the ability to correctly connect electronic components to the microcontroller board, upload firmware to the microcontroller.
- Good knowledge of the Scratch programming language.
- The ability to quickly find possible malfunctions or errors in the connection of components.
You can purchase a package to start the Otto Dancing Robot project
Includes:
- Detailed notes 8 lessons and one master class.
 The duration of each lesson is 1.5 hours
 - illustrative material for teaching lessons: pictures of components, wiring diagrams and assembly
- Ready-made programs in the Scratch programming language to illustrate learning tasks for programming the Otto robot.
In addition, you will receive everything you need to directly program the robot as part of the objectives of this course. Namely:
- Firmware for the Arduino microcontroller required to connect the robot to the mBlock program.
- Extension module for mBlock software that adds Otto robot control blocks to it
- A suitable version of the mBlock program with high-quality Russification.
We will also provide:
- Detailed specification of all required accessories
- Stl-models of all plastic parts of the robot for printing on a 3D printer.