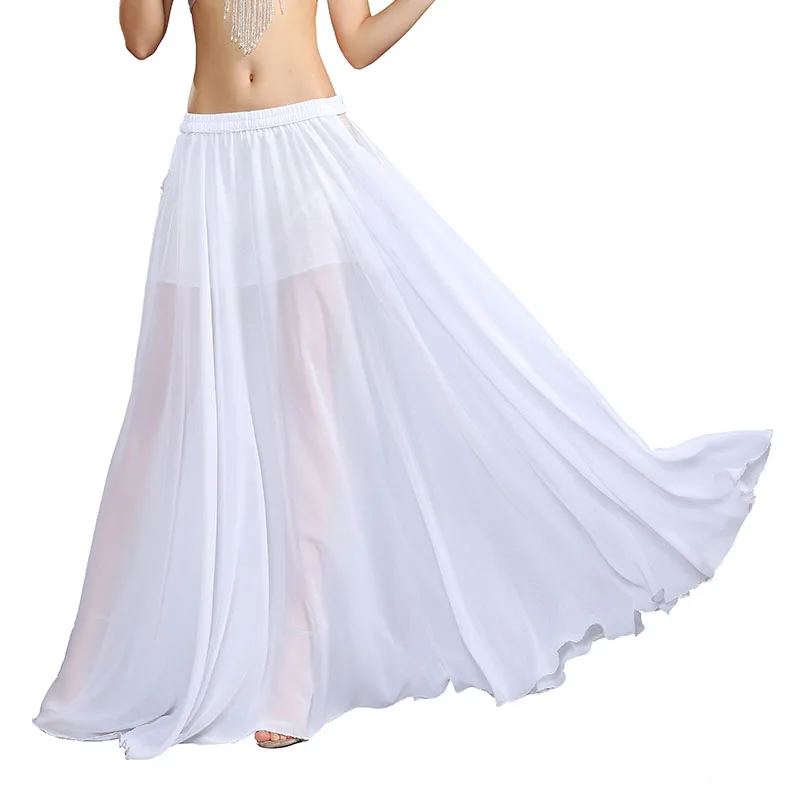
How to make a 25 yard belly dance skirt
DIY 25 Yard Skirt - Easiest & Cheapest! FCBD/Belly Dancing Tiered Skirt
by Mao on in DIY Belly Dance Costume Blog, Uncategorized • 26 Comments
I have to admit, I’ve been putting off making a 25-yard skirt for a long time even though I love the skirt and many people requested this tutorial.
That’s because this skirt has too many hurdles:
- Lots of sewing
- Lots of fabric = expensive
- Too much calculating and planning (how many tiers? how long for each tier?)
- You need a serger or ruffler foot
I know these hurdles are stopping many people from making 25 yard skirts. 🙁
But the summer weather made me want to twirl in one of these skirts! 😀 So I sat down and revised my ideas over and over again to make a doable and economical tiered skirt without compromising the drama of the 25 yard hem. Specifically, my version is
- 60% less sewing
- Up to 40% less fabric
- You’ll get a free calculator to skip math & planning
- Don’t need a serger or ruffler foot
Too good to be true? 😉
I think it’s the easiest & cheapest 25 yard skirt to make! In this video, you’ll see how I made this 25-yard skirt. Let’s get started!
Click here to get the free calculator!
To make a 25-yard skirt, you need:
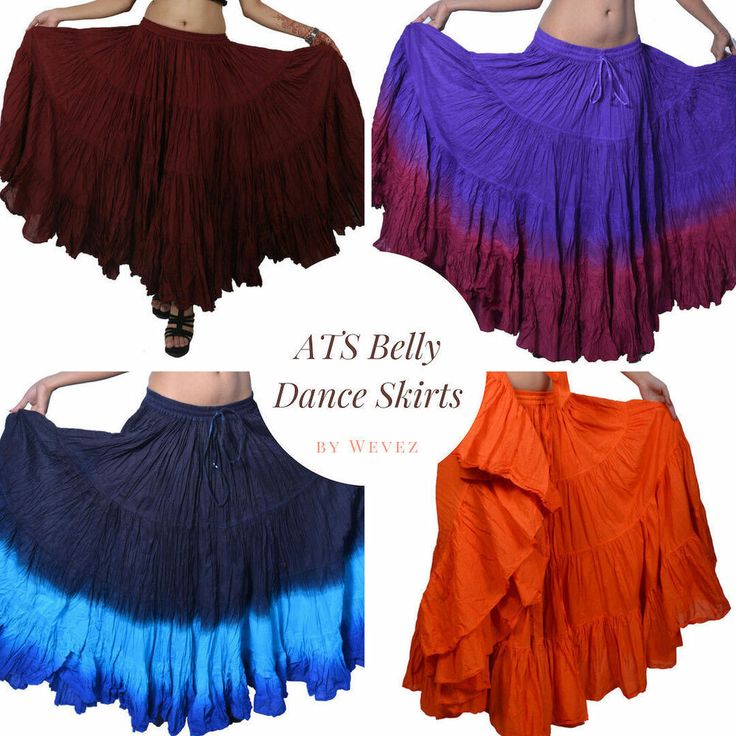
Lightweight cotton / cotton blend fabric – something very light like sheeting or broadcloth would be perfect. I am using 45in wide cotton poly blend broadcloth here, and it was the most inexpensive option at my local fabric store. The fabric is somewhat see-through, but when you have so much fabric gathered around, your finished skirt won’t be see-through. How much fabric you need depends on your skirt length and fabric width. Download the free calculator to find out exactly how much fabric you need.
Matching colour thread – I used this 500m/547yd spool of thread, and I had a plenty left when I finished the project.
1yd (1m) of 2in (5cm) wide elastic
2 1/4yd (2m) of 1/4in (5mm) wide matching colour cord
DIY 25 yard skirt
How is a 25 yard skirt made?The construction of a 25 yard skirt is simple. It usually consists of a few tiers. I’ll use 4 tiers here. The bottom tier is – you guessed it – 25 yards long, and as you go above, each tier becomes shorter. The top of each tier is ruffled so that it matches the length of the tier above. And there’s a waistband at the top.
You can adjust the number of tiers and length of each tier to your liking, but in this tutorial, I’ll share with you the simplest and most economical way which is 25yds for the bottom layer, 12.5yds for the 3rd layer, 6.25yds for the 2nd layer, and 3.1 yds for the top layer. As you can see each layer is a half of the below layer, so it’s easy to remember.
So let’s start by measuring your skirt length.
MathTake your skirt length then add 3in (8cm) (for seam allowances for each tier) and minus 2in (5cm) (for waistband). Divide it by 4, and that’s the height of each tier.
For me, the skirt length is 85cm, add 8cm and subtract 5cm and I get 88cm. Divide it by 4, and the height of each tier for me is 22cm or 8 3/4in.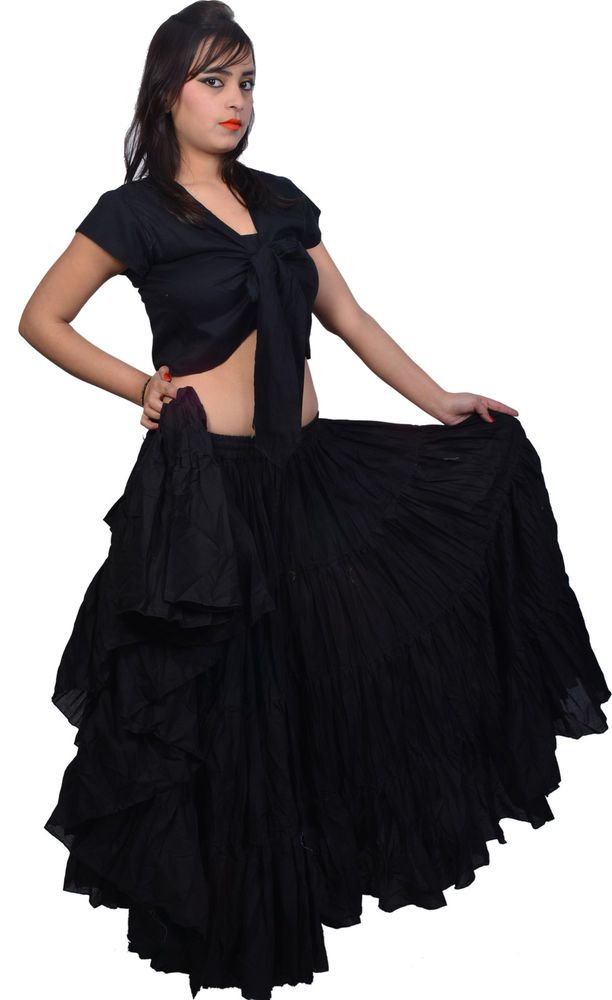
In this post, I’ll show you how to make a 25-yard skirt using 45in wide fabric. But you could be using 52in, 55in, or 60in wide fabric. So I’ve created a calculator to lay out exactly how much fabric you need, how wide each tier should be, and how many strips per tier you need etc. You can get it by clicking the link below and sign up for Sparkly Belly newsletter 🙂
Click here to get the free calculator!
Cut fabricNow there are 2 ways of cutting fabric for making a tiered skirt. The popular way is to get 12.5yd of fabric, and cut 2 strips for the bottom layer (because 2 of 12.5yd strips makes 25yds), and 1 strip for the 3rd layer, then ½ strip for the 2nd layer and ¼ strip for the 1st layer. This method is nice because you can get the longest strips from selvage edges and skip the hemming for those edges. But this leaves a lot of wasted fabric.
I was interested in spending less money on this project and minimizing waste, so this is how I went about it.
I folded the fabric in half lengthwise, which is the way the fabric came on the bolt, and first cut a 5.5in (14cm) wide strip using the whole width of the fabric. This will be the waistband later.
Then again, using the whole width of the fabric, I cut 39 strips that are 8 3/4in (22cm) wide which is the height of each tier for my skirt that I calculated earlier.
But here I thought cutting all these strips mean almost 100 yards of raw edges to be sewn and finished…. To reduce sewing I decided to skip that and used pinking shears. (affiliate link – I earn a little commission if you click this link and make a purchase, which helps keep this website free.)
Pinking shears cut fabric in a zigzag pattern and prevent fraying. Most of these edges will be on the inside, so the look wasn’t important to me. Of course, if you have patience, you can go ahead and do a rolled hem or use a serger.
By cutting fabric this way, I only needed 9.7 yards of 45in wide fabric, which is about 3 yards less than the other method and I have much less waste. Also, the grain of the fabric will be vertical on the skirt, which means your skirt is less likely to stretch out over time. If you use wider fabric, you’ll use even less yardage. Again, check the free calculator to see how much fabric you’ll need.
So we’ll start assembling these 39 strips. We’ll prepare long strips for each one of the tiers, then sew them together.
Let’s start from the top tier. Take 3 strips. Place 2 strips right sides together, and do a straight stitch at a 3/8in (1cm) seam allowance. Do the same with the other strip to connect the 3 strips.
Then at one end, cut off 24in (60cm) from the last seam with pinking shears so it won’t unravel. You don’t have to worry about other short edges, because we cut the strips from selvage to selvage.
Then bring the beginning and end of this long strip, place them right sides together and sew the ends together to make a whole circle. Here you have a 3 yd top tier.
Moving on to the second tier. Connect 5 strips plus the leftover piece from the first tier together at ends, and cut off 4in (10cm) from the last seam. Sew the beginning and the end of this 6.25 yard long strip, right sides together.
I’m showing this on a table in above pictures, but you can just sit at your sewing machine and have all strips by your side and match up ends there. It looks like a lot, but it’s really a simple process. 🙂
Next connect 10 strips plus leftover piece from 2nd tier, and cut off 8in (20cm) from the last seam and sew the ends together.
Finally connect 21 strips, and cut off 20in (50cm) from the last seam, and sew the ends together.
This section was easy, and it only took me about 30 minutes. Moving on!
Sew a 25 yard skirtNow hem just one of the long edges of the 25 yard tier. This edge shows when the skirt is finished, so it’s best to finish it nicely by sewing a rolled hem.
I used a rolled hem foot (affiliate link – I earn a little commission if you click this link and make a purchase, which helps keep this website free.) here, and if you don’t have one, I recommend you get one since it’s very useful for making dance costumes! I use it all the time when I make circle skirts or hem lightweight fabrics. It makes a professional-looking hem! 🙂
Sewing a 25-yard long rolled hem wasn’t too bad either!
Now we’ll sew adjacent tiers together to make a skirt. Normally, before you sew adjacent tiers together, you’d have to gather the longer edge with a ruffling foot or by hand, which is another 50 yards of extra sewing. So I skipped this extra sewing like this. 😀
First, take the longest 25-yard tier and the second longest tier. Find those strips that you cut shorter in each tier, and match up the seam right sides together. And then try to match 1 whole strip of the longer tier into 1/2 of a strip of the shorter tier. So basically matching up the end of the strip from the longer tier to the fold line of the shorter tier.
Then take a roughly half way point of each strip and match them up. Then match up quarter points. You can just eyeball it.
Take it to the sewing machine, and start making about 1in (2.5cm) wide folds with your hands and as many folds as you need so that all the loose fabric of the longer tier disappears into neat pleats by the next pin.
Again, I just eyeballed these since even if the pleats are inconsistent, there’s just so much fabric going into this skirt and you won’t even notice that the pleats are inconsistent. Just make sure the edges of the right are aligned well. And simply do a straight stitch with a 3/8in (1cm) seam allowance.
Repeat this until you reach the end of the strips. Once you reach the end of the strip, match up a strip from the longer tier and ½ strip from the shorter tier again. Then make folds and keep stitching.
For the short strips, match them up exactly the same way.
This is the most time consuming part of this project, so put on good music or an audiobook and keep stitching. It may feel awkward to fold and sew at first, but you’ll get used to it and by matching fabric and folding pleats while you’re sitting at your sewing machine really saves time.
Once you get through this stretch of sewing, the rest will feel easy. Take the second tier, match it up with the third tier at the short strips, right sides together. Match up a strip from the third tier and ½ strip from the second tier, then halfway point and quarter points. Fold pleats and keep sewing.
Once that’s done, take the first tier and match up with the second tier. Sew them together by matching a strip from the second tier with ½ strip from the top tier and folding pleats.
Professional-looking waistbandFinally, take the waistband strip that we put aside earlier. Cut it down to your hip measurement plus 2in (5cm).
Here, you can make a simple elastic casing by simply attaching this waistband strip and inserting elastic and call it a day. But since we saved a lot of sewing time already, I want to show you how to take it up a notch and create an elastic waistband with drawstrings – a more professional look and non-roll, sturdy waistband 😀
At the centre of the waistband strip, mark 3/8in (1cm) tall slits that are about 1in (2.5cm) apart, from 1.5in (3.5cm) from the edge.
And sew button holes around them. It’s basically a narrow zigzag stitch with the shortest stitch length around the lines. And open up the button holes.
Fold 3/8in (1cm) from the top edge towards the wrong side and press. Do the same from the bottom edge. Then fold it in half and press again.
Then sew the short ends right sides together with a 3/8in (1cm) seam allowance to make a circle.
Take the bottom side of the waistband which is the side with the button holes, and mark halfway points, then quarter points and ⅛ points.
Take the top tier of the skirt and also mark 8 points.
Match up those 8 points right sides together, and just like we did for other tiers, stitch them together while creating pleats. Pleats here are likely narrower than the rest of the skirt, so make narrower and more pleats so the loose fabric disappears nicely.
Then fold the top edge of the waistband 1cm and fold it over to cover the stitches on the wrong side. Do a top stitch with a 1/8in (2mm) seam allowance and leave a few inch gap open at the back.
Take your elastic and figure out how much you need for it to be snug around your belt line. Add 1in (2.5cm) to it, and cut.
Insert the elastic through the casing using a safety pin. Once it’s gone through the entire casing, overlap the ends 1in (2.5cm) and sew the ends together, and close the waistband by doing a top stitch.
Now using a straight stitch, do a top stitch over the elastic waistband from 3/8in (1cm) from the top and another one from 3/8in (1cm) from the bottom.
Pull and stretch out the waistband while you sew. This keeps the elastic from rolling around inside the casing, AND creates a channel for you to add a drawstring in.
Take your string, and insert it through the channel using a safety pin.
Once it comes out, try it on and trim the string to your preferred length, and tie a knot at each end of the string. The drawstring makes the waistband sturdier and helps hold up this skirt that’s made up of yards of fabric!
And now enjoy your 25 yard skirt! It’s so exciting to wear your very own 25 yard skirt, and the volume and flow is amazing! It’s perfect for FCBD style of belly dancing or Bohemian style festivals. 😀
😀
Complete the look! Here are the shrug tutorial and the hip scarf tutorial 🙂
With all the shortcuts combined, the sewing was less than half of what it could’ve been had I done it the conventional way. Plus I saved about 3 yards for fabric and only spent $36 CAD ($29 USD) on fabric.
If you can find even cheaper fabric at thrift stores, that would make this project even more economical for you!
You can also mix and match different fabrics for this skirt. If you want to mix and match, you’ll need to know how many strips go into each tier, and my free calculator will tell you exactly how much fabric you need! Download the calculator for free by signing up for my newsletter from the link below!
The calculator looks like this:
Click here to get the free 25-yard skirt calculator!
Hope you liked this 25-yard tier skirt DIY, and if you did, please share it with your dancer friends!
And if you want to make more belly dance costumes, sign up for my free email course, Belly Dance Costume Making 101 .
Thanks for reading, and keep sparkling! 😀
P.S. Thanks to all these tutorials for inspiration!
India Bazaar
Craftster
Royah – she’s got lots of lovely belly dance costume projects going!
Adventures of a Craftaholic
Indiesew
P.P.S Pin this image for quick access!
Like what you read? Want to make more costuming bits yourself?
Sign up for my newsletter here and get my free email course, Belly Dance Costume Making 101!
25 Yard Skirt - Etsy.de
Etsy is no longer supporting older versions of your web browser in order to ensure that user data remains secure. Please update to the latest version.
Take full advantage of our site features by enabling JavaScript.
Find something memorable, join a community doing good.
(1,000+ relevant results)
Oriental dance skirt: patterns
Skirt is one of the main elements of the costume for oriental dance . We bring to your attention several models of skirts that are used for oriental dance by the dancers of our school.
Half skirt
Reduced pattern drawing:
Sizes 40-60
-2.15-2.20-2.20-2.25-2.30-2.35-2.35-2.40-2.45 m; zipper 20cm long.
Details:
1. front panel - 1 piece
2. back panel - 1 piece
3. belt - rectangle length according to the following table (including 3 cm for the clasp) and a width of 6 cm (finished 3 cm) .
Radii R1, R2 and belt length:
| size | radius R1 cm | radius R2 cm | belt, see |
| 40 | 20.4 | 123.4 | 67 |
| 42 | 21. 6 6 | 124.6 | 71 |
| 44 | 22.9 | 125.9 | 75 |
| 46 | 24.2 | 127.2 | 79 |
| 48 | 25.5 | 128.5 | 83 |
| 50 | 26.7 | 129.7 | 87 |
| 52 | 28. 0 0 | 131.0 | 91 |
| 54 | 29.9 | 132.9 | 97 |
| 56 | 31.8 | 134.8 | 103 |
| 58 | 33.7 | 136.7 | 109 |
| 60 | 35.6 | 138.6 | 115 |
Lay out plan on fabric 150 cm wide:
Cutting:
Lay the pieces out on the fabric in one layer, right side up. Cut out with the same seam allowances ~ 1.5 cm. For large sizes, cut the belt out of two parts.
Sewing technique
1. Sew the side seams of the front and back panels, leaving an unstitched section in the left seam, approx. 20 cm for the zipper. Overcast seam allowances and iron. Sew on a zipper. Please note: if you use a hidden zipper, then the procedure will be reversed: first, the fastener braids are sewn to the side cuts, and only then the rest of the seam is grinded.
2. Fold the padded waistband in half lengthwise and iron, while ironing the waistband allowances inwards.
3. Attach the skirt by the top edge to the hanger and let it hang for a couple of days. During this time, the slanting threads will stretch, and the bottom of the skirt will take on an oval shape - the middle lines will be longer than the side seams. On the fitting, align the bottom line with scissors. Hem the skirt.
4. Finish the top edge with the prepared belt. Overcast the buttonhole and sew on the button.
Sun skirt
Pattern shape
Sun skirt - is a circle with a hole for the waist. In this regard, the creation of such a model is reduced to the calculation of two radii - the radius for the circumference of the waist R1 and the radius for the circumference of the bottom of the skirt R2 . The name of the derivative skirts from the "sun" shows what part of the circle is used for cutting. The figure shows patterns for the full "sun" and its main derivatives - 1/2 and 3/4.
First you need to decide on the desired skirt length (e.g. 95cm), then measure the waist circumference (for example, 70cm) and remember a simple formula from the school geometry course that connects the circumference L with the radius R and the mysterious number Pi equal to 3.14.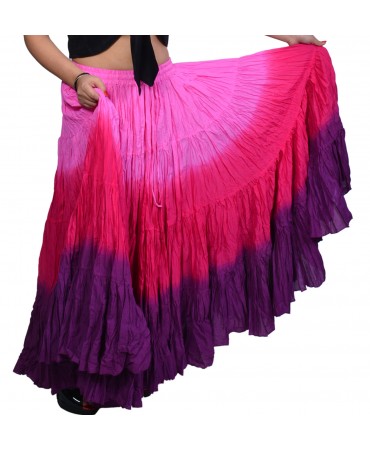
| skirt options | k | s |
| *double sun* | 2 | 0.0796 |
| *sun* | 1 | 0.1592 |
| *three quarters* | 0.75 | 0.2123 |
| *half sun* | 0.5 | 0.3185 |
| *bell (3/8)* | 0.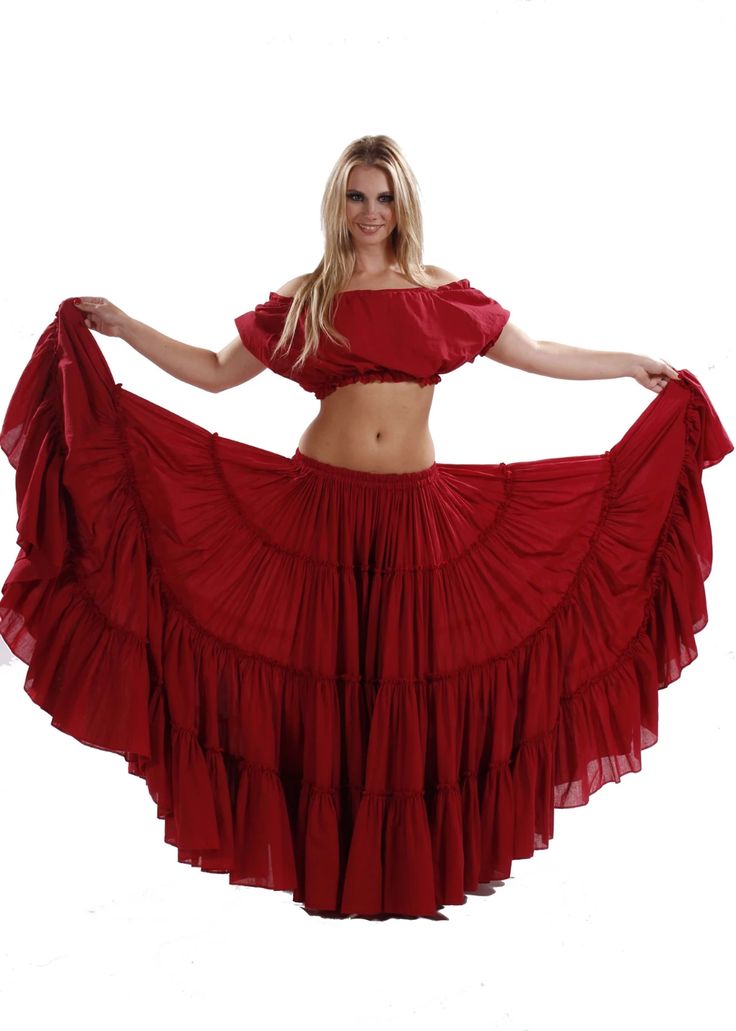 38 38 | 0.4190 |
Calculations use a full waist measurement without additional allowance for freedom of the fit, as the oblique cut formed by the circumference is elastic enough so that the skirt is not narrow at the waist.
Radius calculation for bottom circle R2 is not particularly difficult - it is equal to the sum of the length of the skirt and the radius for the waist circumference. But the radius for the waist R1 depends on which part of the circle will be used for cutting - after all, this also changes the length of that part of the inner circle that should converge at the waist. In the case of a whole circle (sun skirt), the waist circumference should be equal to the full length of the inner circumference, and in the case of cutting half a circle (semi-sun skirt), only half the circumference remains to wrap the waist, so the radius should be larger. If the share of the circle is denoted by the coefficient k ( k =1 for a circle; k =0.5 for a semicircle; k =0.75 for a 3/4 circle, etc.), then in general the described ratio can be written as follows:
waist girth = k * L ,
where L is the length of the full circumference. And from here it is already easy to find the radius by substituting the right side of the formula for calculating the circumference of a circle instead of L . An example of such calculations for a skirt *three quarters* is shown in fig. 2. In fact, the final radius depends only on the waist circumference and the span of the skirt. Therefore, there are tables (see Fig. 3) with ready-made coefficients s , by which you need to multiply your waist size to get the radius of the inner circle R1 . That is:
radius R1 = s * waist circumference
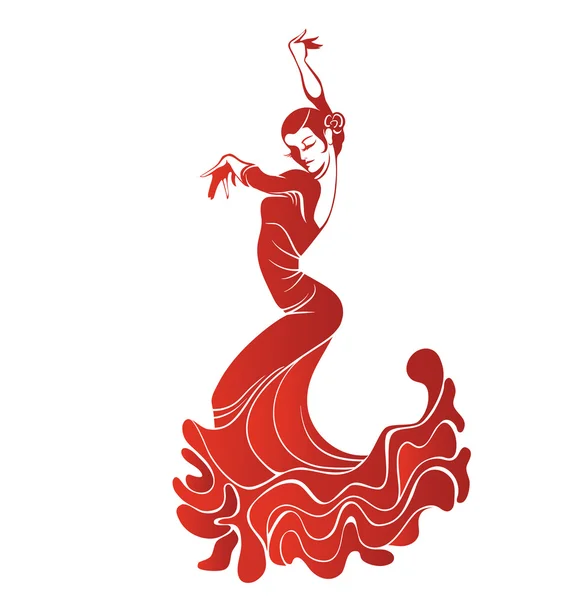
If you want to get a particularly fluffy skirt, for example for flamenco, use double or triple waist circumference (sun with gathers at the waist) in your calculations. A huge number of folds along the bottom with a tight waist can be achieved by cutting out a skirt *double sun* with a coefficient of k = 2. In this case, both the front and back panels will be in a full circle.
Pattern drawing.
Having calculated both required radii, you can start building. To do this, we need a centimeter tape or a long ruler and fabric chalk. In most cases, to save time and paper, the drawing for *sun* cut skirts is done immediately on the fabric.
Construct a right angle with vertex at point A . If you are making a drawing directly on the fabric, make sure that on both sides of the corner (along the cut of the fabric and along the edge) 1.5 cm is left for future seams. To minimize the number of seams for *sun* and *half-sun* skirts, place one of the sides of the corner on the transverse fold of the fabric. Now, holding the beginning of the centimeter tape at point 9 with your finger0031 A , rotate it tensely around this point, outlining an arc of radius R1 and setting periodic serifs in chalk. Draw a smooth curve through the resulting serifs (= waistline). To get the bottom line, you need to draw an arc of radius R2 from the same corner vertex. The difference between these two radii is, by definition, equal to the planned length of the skirt. These constructions for a quarter circle are shown in Figure 3.
All the differences between the tapered skirts, as mentioned above, lie in how much of the circle is used for cutting. The figure on the right shows the halves of the patterns for various versions of the conical skirts (that is, you need to cut out two of these parts). As you can see, in each case, the construction angle is different - 135 degrees for the skirt * 3/4 of the sun *, 90 - for a semi-sun skirt and only - 67.5 degrees - for a bell skirt.
Skirts with ruffles
Flounce #1, obtained by simulation " to the waistline.
For modeling, transfer the straight skirt pattern to a new sheet of paper (see Fig. 1 below) so that the lines of the side cuts match. Since the back panel of the skirt is symmetrical about the middle line, only half of the back pattern is needed for modeling. The front panel has a smell, so for modeling it is necessary to draw the front pattern in a turn.
From the waist line, lay down the desired length of the skirt and draw a horizontal line - a new bottom line. For example, in the picture the skirt has a length of 100 cm.
Now that the base for modeling is ready, you need to draw the cut lines. In this case, this is the line for attaching the shuttlecock and the line that determines its shape. On the line of the middle of the back panel, mark the desired level of the beginning of the shuttlecock - point A . In this model, the shuttlecock runs at the level of the knees, that is, at a distance of approximately 55-60 cm from the waistline.
Draw a vertical line on the front panel to limit the smell. In the picture, it goes through the top of the waist tuck and crosses the waistline at B . Connect point B with the marked level of the flounce on the back panel (point A ) with a smooth curve. In this model, the frill stitching line runs almost horizontally at the back, slightly rises in the area of the side seams and wraps up steeply to the waist line of the front panel.
fig. 1
By the way, the easiest way to determine where the shuttlecock should go is by placing the pattern against yourself in front of a mirror. Mark the line for attaching the shuttlecock with a marker, then lay out the patterns on the table and carefully align it.
Before starting to model the shuttlecock, it is necessary to mark its width in the same way as we just drew the stitching line, with the only difference that the lower and upper points of the shuttlecock width line have already been marked. In the middle of the back panel is point C , lying at the level of the bottom line of the original pattern, and on the wraparound line of the front panel - this is the same point B , since, according to the game condition, the frill descends to the waist line to "no".
Cut the patterns along the marked lines, dividing the drawing into a straight part of the skirt and the future flounce. (The rest of the front panel shaded in the figure is not needed for cutting.) Also cut the upper part of the skirt along the side seam line to get patterns for the front and back panels.
Starting to model the shuttlecock, draw parallel lines of the back middle of the vertical, passing from each other at a distance of 5-10 cm and dividing the shuttlecock detail into quadrangular parts. When choosing the distance between the stakeout lines S , be guided by your hip circumference ( OB ). For example, such options are possible - 0.1 * OB, 0.075 * OB, 0.05 * OB (with OB \u003d 100 cm, it will turn out, respectively, S \u003d 10, S \u003d 7.5 and S \u003d 5 cm ). The more often the breaking lines are drawn, the more magnificent the shuttlecock will turn out.
In the figure, the parts of the shuttlecock are numbered for the convenience of further explanations: the number 1 corresponds to the part containing the back line of the middle, the last number is the part adjacent to the waist line.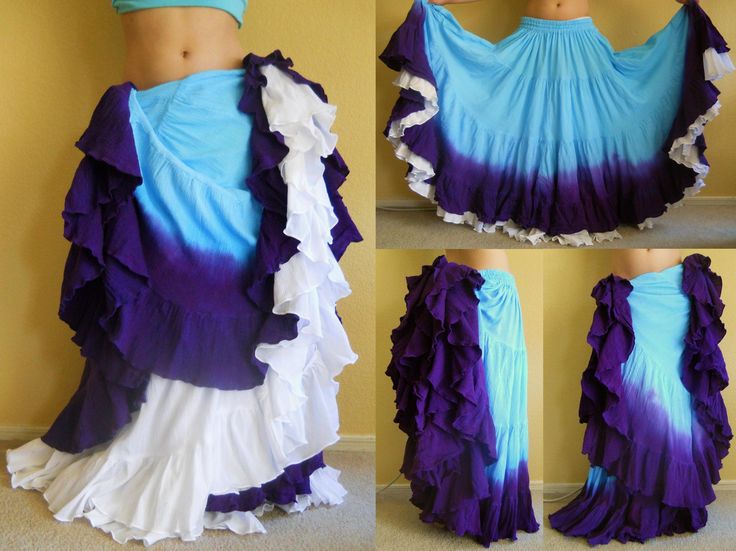
Make cuts along the breaking lines, not reaching a couple of millimeters from the line of attaching the shuttlecock. Transfer the resulting garland to a large sheet of paper and fasten with pins at the bottom of the sheet the part numbered 1 . The line of the back middle when cutting will serve as a guide for the direction of the shared thread.
To form a fold on the frill, it is necessary to increase the length of its bottom line, while maintaining the original length of the stitching line. To achieve this effect, the notched parts of the shuttlecock must be moved apart along the bottom line, making sure that they remain connected along the top line.
In sequence, the process of forming a new shuttlecock shape looks like this: first, you need to move the bottom of the part 2 from the fixed part 1 to the selected distance X and fix it in a new position, then you can move the bottom of part 3 away from part 2 by the same distance X , etc. to the last part. The spreading value X , as a rule, is a multiple of the distance between the stakeout lines S . For example, X=0.5*S, X=S, X=1.5*S, X=2*S. The farther the parts of the frill are moved apart, the larger the tails will be in the finished skirt. In the figure on the left, the spreading value X is the same as S .
The slightly angled piece created by pulling apart is a rough frill shape that needs a little smoothing with smooth stroke lines.
Flounce No. 2, cut on the base of the skirt
The picture on the left shows a slightly flared skirt with two stitched ruffles. Similar models can be made in two ways: 1. both flounces are sewn in one seam, 2. the second frill is sewn to the top of the skirt a little lower than the first.
In the picture you can see that the tails of the lower shuttlecock start below the bottom line of the upper shuttlecock. Therefore, the second option takes place here - both flounces are sewn to the main skirt along parallel lines.
Taking advantage of the fact that this skirt is symmetrical about the lines of the midpoints of the front and back panels, we make modeling for half of the product. Transfer the patterns of a straight skirt onto a sheet of paper so that the line of the hips in the drawings of the front and back panels runs at the same level.
Determine the desired width of the top ( S1 ) and bottom ( S2 ) ruffles and the levels of their sewing lines, marking the latter with horizontal lines. In this model, the width of the upper frill is 15 cm, the width of the lower one is 20 cm. The first line of the frill runs at a distance of 25 cm from the waist, and the second one - at a distance of 10 cm from the first. Thus, the full length of the skirt consists of three elements: the distance from the waist line to the first frill, the distance between the lines of attaching the frills and the width of the lower frill. That is, in our case, the length of the skirt is 25 cm + 10 cm + 20 cm = 55 cm.
Cut the patterns of the front and back panels along the sewing line of the bottom ruffle. For further modeling and cutting, only the upper part of the skirt (above the line of the second frill) is required, which needs to be flared.
Drop perpendiculars from the tops of the waist darts to the line of the second flounce. Make cuts along one of the sides of the darts and perpendiculars, not reaching a couple of millimeters to the tops of the darts. Dart points, dots Z1 and Z2 will serve as centers of rotation for the formation of flare along the bottom line due to the simultaneous closing of the darts.
Make sure that the front and back flares are the same. Depending on the solution and the length of the original darts, with the same flare along the bottom line, both darts can close completely, or one of them will have a small residual solution.
Transfer the flared parts of the skirt to a new sheet of paper (or glue small pieces under the slits) and outline the contours with smooth lines, smoothing the waist and bottom line. Also draw a line for attaching the first shuttlecock with a smooth curve. This completes the modeling of the upper part of the skirt. When cutting, it is necessary to provide for the location of the zipper - either in the side seam or in the middle seam of the back panel.
To create patterns for frills, you need to measure the length of the sewing line. Measurements of curved curves are most conveniently carried out using a centimeter tape placed on edge, laying it out in the shape of a curve. Record the length of the first line ( L1 ), the length of the second ( L2 ) and multiply these measurements by 2 (because the drawing was made for half of the figure) to get the full lengths of the frill stitching lines.
Flounces for this model are small sun skirts sewn onto the base of the skirt along marked lines.
The inner radius of the circle depends on the total length of the sewing line 2*L1 or 2*L2 .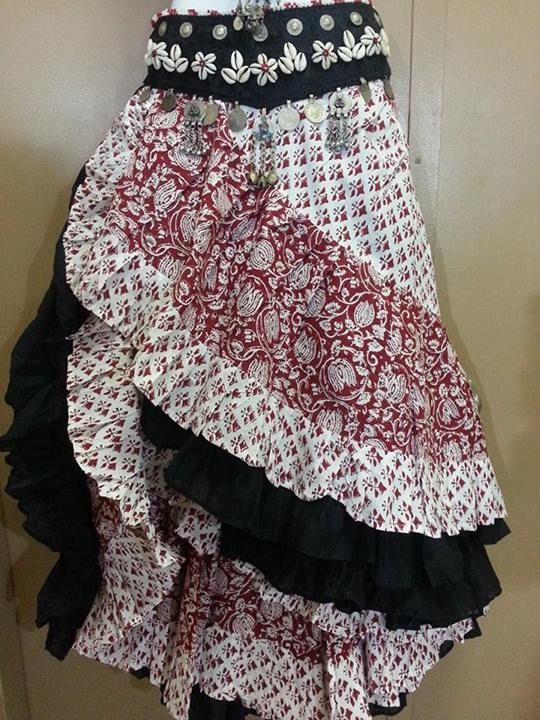 From the formula for the circumference L = 2 * 3.14 * R , replacing L with the lengths 2*L1 and 2*L2 , calculate the inner radii R1-in and R2-in for the first and the second shuttlecock. The outer radius of the circle for the shuttlecock R-out is determined by the sum of the inner radius R-in and the width of this particular shuttlecock S.
R-out = R-in + S
as in the construction of the drawing of the upper part. In the latter case, when cutting, the middle of the circle (that is, a straight cut of its half) must be combined with the fold of the fabric, so that in the end you get a round shuttlecock without side seams.
Shuttle No. 3, cut on the basis of an elliptical figure
The shape of patterns for this type of shuttlecocks is a geometric figure - ellipse , a special case of which is the same circle that we used to cut the shuttlecock according to the type of sun skirt in the previous parts of the article. However, despite the change in the outer contour of the shuttlecock from a circle to an ellipse, the inner one remains the same - that is, a circle, the radius of which depends on the length of the line of attaching the shuttlecock.
Generally speaking, the whole variety of frills obtained on the basis of geometric figures is determined exclusively by the external contour. Therefore, design work always begins with drawing a base circle, which is the inner contour of the shuttlecock and its stitching line. After that, you can draw any external contour around it - a circle, an ellipse, a square, or, for example, a triangle. Several similar options are shown in fig. 2.
fig. 2
So, the process of designing a shuttlecock can be divided into several stages:
- measuring the length of the stitching line
- calculation of the radius of the inner circle
- drawing the inner circle
- construction of the outer contour of the shuttlecock
Returning to our model Shuttle No. 3 , let's transfer the drawings for the front and back panels of a straight skirt to a sheet of paper. Since the skirt is symmetrical, constructions can be carried out for half of the figure. This skirt model has a length to the knees (55 -60 cm) and a slight narrowing along the bottom line - 1.5 - 2 cm.
Mark the location of the frill stitching line and its starting point. In our case, this line runs at the level of the hip line, not reaching the mid-front line by about 1/3 of the width of the front pattern.
Measure the length of the line of the shuttlecock (the sum of the front and back measurements) and multiply by 2 to get the total length of this line in the finished product ( Led = line length on the product). In the model drawing ( fig. 1 ) the shuttlecock has gathers along the entire length of the stitching line. Therefore, in order to correctly calculate the radius of the inner circle of the shuttlecock, you must first calculate its new length ( Lvol = length of the line on the shuttlecock), taking into account the coefficient of tightness of the gathers k according to the formula Lvol = k * Led, where the coefficient k depends on the fabric used. In our case, for a light fabric k=2.5 .
Now we can calculate the inner radius of the shuttle:
Rin = Lvol / 6.28
Calculations for our drawing . Led \u003d 2 * (23.05 + 15.2) \u003d 76.5; Lvol \u003d 76.5 * 2.5 \u003d 191.25; Rin =191.25/6.28=30.5 cm.
3
Draw two mutually perpendicular lines A and B intersecting at the point O , which will serve as axes for constructing the inner and outer contours of the shuttlecock. Build a semicircle (because the drawing is being built for half of the shuttlecock) with the calculated radius Rin with the center at the point O , while the line A will be the line of the middle of the shuttlecock (= fold line when cutting), and line B - shuttlecock sideline (see fig.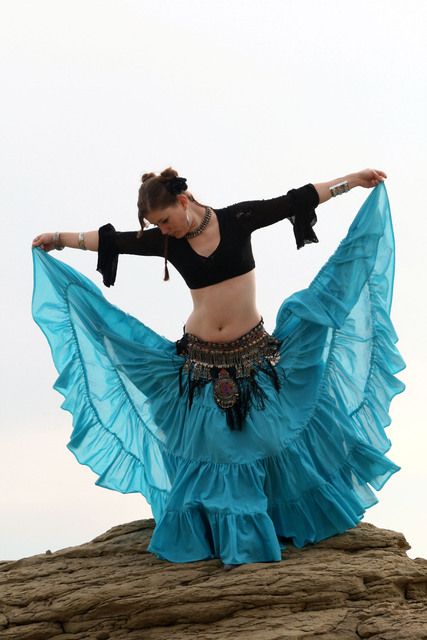 4 ). Let's agree that below line B is the front part of the shuttlecock, and above it is the back part.
Determine the width of the shuttlecock in three directions - along the side line Sside , along the lines of the front Sper and the back middle Srear . If such a frill were attached to the bottom of the skirt along the entire perimeter (as in Fig. 3 ), then the side lines of the frill would correspond to the side seams of the skirt, and the middle of the front of the frill would correspond to the middle of the front panel of the skirt.
In our model the frill is folded halfway along the side line B , and therefore the middle of the front of the frill is aligned with the back, and the side lines of the frill "left" forward, to the starting point of the frill line on the skirt. Thus, after the fold along the side lines in the finished product, the front part of the frill plays the role of the upper layer in the double decorative frill of the skirt.
For our model, the side width of the shuttlecock Sside has the smallest value, the width of the shuttlecock in the back middle is Srear 20% more than in the middle of the front Sfr . In our example, Sp = 25 cm, S side = 20 cm, S rear = 30 cm. 5 gathering density coefficient k=1 (that is, there are no gatherings, and Lvol = Lizd ), the width of the shuttlecock in front Sper is two and a half times less than in the back Srear , and the side width Sside = ( Srear + Sper) / 2. Numerically it looks like this: Sp = 12 cm, S side = 21 cm, S rear = 30 cm. to the right, down and up, respectively, and connect the obtained points with a smooth curve forming the outer elliptical contour of the shuttlecock ( fig. 4 ).
Note . The construction of such large flounces is conveniently carried out immediately on the fabric, drawing lines in chalk and using a centimeter tape as a compass.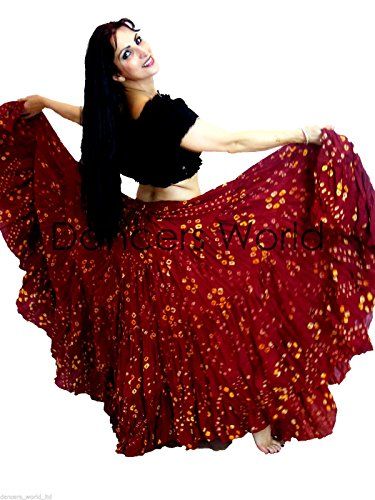
fig. 4
Materials from the website www.osinka.ru
| konsuelo Reg. | If anyone knows, please tell me where you can find a pattern and technique for performing a costume for Arabic dances. With a bustier, in principle, everything is clear, but about a skirt with a belt ... Thank you in advance for any information provided! |
| Lara Reg. Awards: 2 | http://www.bellydance.ru/costumes/sew.shtml In my opinion, there were more links in the topic of belly dancing classes. |
| Lara Reg. Awards: 2 | If you read in English: http://www. http://gray-duck.com/eli-nati/eli/sewing/archives/cat_belly_dancing_costumes.html |
| Ria Reg. Awards: 1 | Lara, wonderful links!! Thanks a lot! I began to think about how to sew a costume for dancing, but I work out in a sports club and I doubt that it will look normal. But our teacher keeps asking why we don't want to make a suit. She herself dances in a costume. |
| Ataner Reg. Awards: 2 | and I like this site http://www.zilltech.com/FAQCostumeHP.html |
| Luna plus Reg. | A belt in a belly dance costume is something impressive: studded with stones, beads, fringes, pearls - it captivates the audience! Sincerely, Alexandra! |
| Chenille Reg. Awards: 2 | Lunaplus, |
| Viktori Reg. | Yes, I had the same one |
| Lunaplus Reg. | Yes, coquette is understandable, of course. But there are belts for professional costumes, where exactly we are talking about a single unit - a belt embroidered with expensive stones, beads, artificial pearls, etc. There are some features of tailoring such belts! |
| Marusya Reg. Awards: 1 | Belly dance costumes have a belt, not a coquette. All the belts that I saw weighed, probably, a kilogram - heavy and very rigid. It seems to me that with such a weight they do not spin and, moreover, they do not crawl up)) |
| Justy Reg. | hmm, it seems to me that you can put a belt on Velcro. after all, anyway, the skirt-harem pants will not be worn separately without a belt, and the belt will sit in the place where it is supposed to. |
| Alexis Reg. | See also here: http://www.nadyas-naehtipps.de/ Here the author quite generously shares his experience in creating oriental costumes - however, in German and English. There are quite a few photographs and drawings attached. |
| Ataner Reg. Awards: 2 | Alexis, cool link, thanks! |
| Lunaplus Reg. | Alexis thank you so much for the link. I know German very well, so this is what you need! maybe I'll try to translate something into Russian, then I'll send aspens to the club !!!!!!! |
Learn more
| |
 visionarydance.com/bellydanceSkirts.html
  HE jumps up and spins while dancing. And how to fix it in such a way that it would reunite with the body and repeat its movement!
 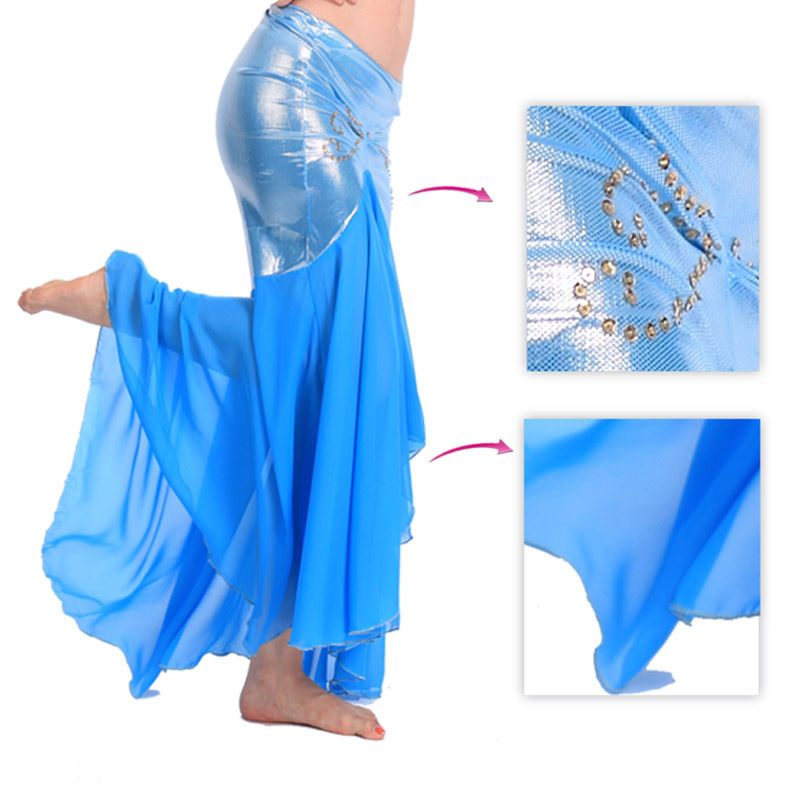 e. it's not even a belt, but a coquette.
 .
.