How to do the 2 step dance move
How To Do The Two Step
Video Transcript:
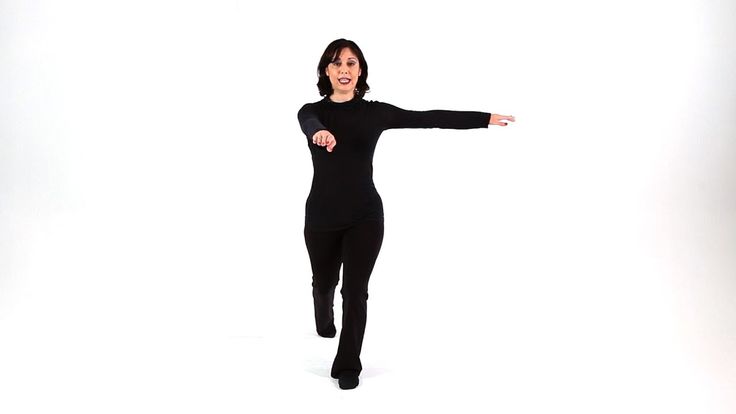
Alright guys, the next move we’re about to jump into is another basic hip hop move. It’s called the Two Step. Alright and once you get this move down, you’ll be able to use it with any style of music that comes on in any situation. So take a look at t first and then we’ll break it down step by step for you. Six, five, six, seven, eight. And five, six, five, six, seven, eight. Alright so let’s break it down step by step. Now the name is just how is sounds, it’s Two Steps.
So you’re going to start with your feet together and then you’re going to step out one with this foot. And then you’re going to step back in two with the other foot. Alright and different than a Step Touch, you’re not going to touch, you’re going to actually step it together. Stepping back out again, step, together, step, together, step, together and step, together. Alright. Now we’ve got the step down, we’re going to add the bounce into this.
So what I want you guys to do is start from a bent knee and every time you step you’re going to rock up, down, up, down, up, down, up and bounce it, up, up, and up, good. Now all I’m doing here is I’m just bending my torso forward, bending my knees slightly and bringing it up straight. Coming from down low to bouncing up. Alright so let’s try that bounce and we step side to side. Starting with your feet together, nice and slow, five, six, seven, eight and one, two, three, four, five, six, seven, again, and one, two, three, four, five, six, one more time, eight and one, two, three, four, five, six, seven and eight, good. Now what you do with your hands.
There’s a couple of different things you can do with your hands with this move. Anything that feels comfortable for you guys to do is fine. I’m going to give you a couple different things to try it out. Number one, we’re going to have our hands opening and closing.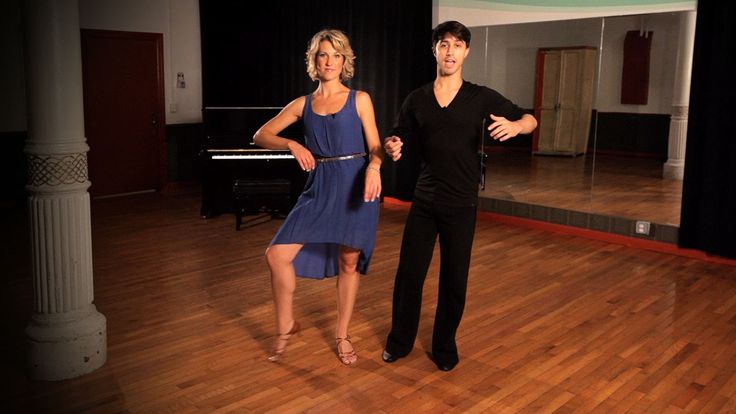 Open and close. Now when you close them, you’re hands are going to cross but it doesn’t matter which hand you put on top. It’s up to you. Open, close, open, close, open, close, open and close. So let’s give that a try with the same two steps using that bounce up as we step. Five, six, seven, eight, we go open, close, open, close, open, close, open and close, keep it up. Open, close, open, close, just like that, one more time through, and open, close, open, close, open, close, open, close. Nice job guys.
So a couple of things to remember before we try it with music. Just remember your body position, you’re going to be bent over slightly and then you’re going to be rocking up with your body. So not down, you want to start from the low position and rock up. And remember that basic step, just stepping from the side together, side, together. Alright so let’s give it a shot with music, just have some fun with it, groove it out to the song, you hear the beat it goes one, two, three, four, five, six, seven, eight, so you’ll step together, step together, step together. Just like that. Let’s give it a shot. Five, six, seven, eight and step. Good, keeping that bounce going with your body, nice guys, keep it up. Good, you got this basic in and out in a motion, keep that step going, try something different with your hands now, burry it up, hey, nice, you see what your mouth is doing, you can try that as well, Kyle and KC is doing the same thing, just give it a shot, make it your own, that’s the biggest thing. You can have your own personal style for you. Good, a couple more times, keep it going, and five, six, five, six, seven, eight.
Back to hip hop dance moves
Learning the Basic Country Two-Step Dance – Country Dancing Tonight
I started country dancing about 3 years ago and was able to learn how to do the basic Two-Step country dance after a few private lessons. Looking back I realized it wasn’t as hard as I thought and since then have shown many people the basics to get them going and remove some of the mystery about it.
If you are going out for the evening to a country bar to do some dancing, there will most likely be lots of line dancing interspersed with couples partner dancing. Far and away the most popular partner dancing in the United States is the two-step. Drawing from what I’ve learned, this post will give you the basics to prepare you to be ready when you venture out to your local country bar or dance club.
Basic Positions for the Two-Step
In country two-step there is a leader and follower.
Leader: facing your partner, place your right hand under your follower’s left arm and on their shoulder blade.
Follower: facing your partner, place your left hand on your leader’s shoulder seam.
Both: Join your free hands on the other side and hold up and out at about shoulder height.
Notes:
1. After creating this closed position, the leader should position their feet to the left slightly so your toes aren’t pointing directly at each other, but offset slightly.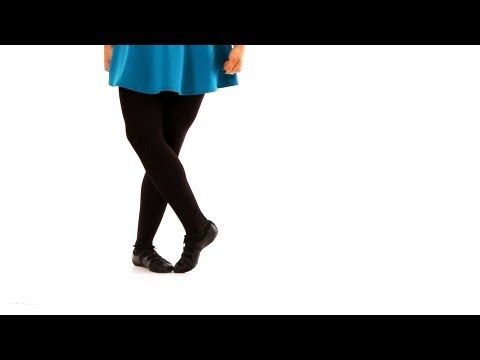 This way you’re less likely to bang your feet together while dancing.
2. It’s important for the follower to lean back slightly into their leader’s right hand and also to put a little pressure with both their left hand (on the leader’s shoulder seam) and with their right clasped hand.
The idea is to keep a fixed amount of space between each other and with this pressure, the lead can push and pull their partner easily. This is known as a good “dance-frame.”
Understanding the Basic Steps for the Two-Step
Two-step dancing consists of two “quick” steps and then two “slow” steps. Knowing when to do these steps is about finding the bass beat of the music being danced to. To get comfortable finding this beat listen to your favorite country songs with this intent. You’ll notice a main beat that you naturally can tap your hand or foot to. In music there is also the “&” beat in-between each basic beat. 1-&-2-&-3-&-4. The Quicksteps are quick because the second one happens on one of these “&” beats. Then you pause or stop for the next “&” and step on the 2nd main beat. This stepping on the “&” beat sometimes and skipping to step on the main beat creates the quick-quick, slow-slow that country two-step is known for.
For me, as a lead this was the hardest and most intimidating part to getting into country Two-Step. I would ask a lady to dance we would go out onto the floor, assume the correct dance frame and then with other dancers already going I would freeze! I couldn’t hear the beat! I couldn’t start! Honestly, there was no immediate fix to this. It just took some time getting used to hearing and feeling that beat almost subconsciously and naturally so that now I can begin right away.
Tip: I did learn to listen for that beat even before asking someone to dance! This way I was almost already dancing before we started!
Beginning the Two-Step Dance
So, as the lead, there is no absolute beat to start on (like there is with line dancing). You just pick a beat and begin. As the leader, you do signal your partner that you are beginning by leaning in and pushing.
The lead begins with their left foot and consequently, the follower steps backward with their right foot.
Then the 2nd (quick) step is taken by your right foot and the follower steps back with their left.
Then you pause for the “&” and step on the main beat, with your left again, followed by a 2nd “slow” step on your right after skipping another “&” beat.
The diagram above illustrates this.
Line of Dance for Two-Step and Partner Dancing
When you go to any country bar to see partner dancing or any ballroom for that matter you will notice that the direction of traffic on the dance floor is always moving counter-clockwise. This is a big part of dance floor etiquette and is very important!
Notes:
Along with the counter-clockwise line of dance, generally it is understood that the outer lanes are going to be used by the more experienced dancers and (unlike a freeway) is the “fast-lane. ” The inside lanes of the dance floor are meant for the slower or beginner dancers. And the more toward the middle of the floor the more it is free of traffic. Occasionally there is a really great couple that wants to do some fancy tricks right in the middle open area—so just keep your head up and watch out! It is also pretty common for country bars to allow for line dancing to a given song to happen in the middle while the Two-Step dancers go around them.The Two-Step is known as a “Progressive” or “Traveling” dance and is always danced in a counter-clockwise direction around any dance floor. This graphic illustrates this as well as where to dance as a beginner dancer (inside lane) or more advanced dancer (outside lane).
Two-Step Dancing Leader & Follower Roles
Leader: As a leader, it is your job on the dance floor to watch and steer your partner safely around the dance floor. After getting a good grasp on the basic two-step, a good next level is to turn your partner and lead backward. However, this doesn’t switch the responsibly to the follower to watch out. The leader now must look over their shoulder and see the traffic and continue to steer the two of you safely around the dance floor.
But of course, if the follower sees a collision about to happen they can try to give a heads up! But its really not their job. The leader is to be aware of the space and try to see all the dancers around.
Follower: As the follower, it is important to help maintain that pressure between you and your leader. This is how you will know what they’re doing. If you are getting your feet stepped on by your lead you may be collapsing in and not keeping that pressure.
Different Styles of Two-Step Dancing
While the timing for the Two-Step is agreed on universally, there are some differing thoughts about style. This observation of style has to do with timing and is really a discussion for the leader. The main one I’ve heard is how big your steps should be and if your speed is constant or variant.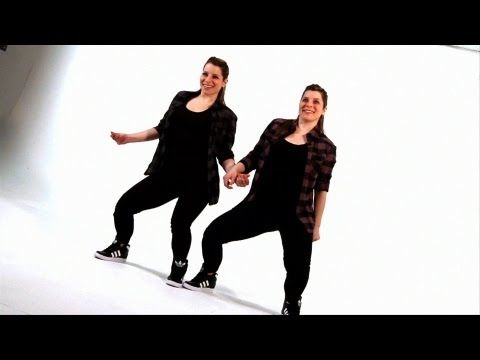 It stands to reason that maybe for a “quick” step you can’t step as far, but for a “slow” step you can take a bigger longer step. But some would say, no, just take longer to make the step! So, all steps are the same distance. I’ve also heard when you do the quick step it should be as if someone “pushes you from behind” hence you’re speeding up at that moment, to then slow down at the “slow-slow.” I don’t think it matters much! The main thing is that as the leader, whatever style feels right for you, you are a good lead and your follow can feel it and pick it up.
Two-Step Dance Routines
The Basic dance frame “closed” position, the steps, timing, how to start and understanding the leader and follower roles is all you need to get out on the dance floor and begin! At this point, you are ready to go out dancing and move around the dance floor – in a counter-clockwise direction!
This all provides the foundation for Two-Step and can be built upon throughout years of dancing enjoyment. The following are a few added dance moves and routines to add to your growing repertoire.
180º Turn – This is a simple turn of the both of you initiated by the lead. The turn is accomplished by the lead using the first slow to move his partner to the right out of the “track” and then completing the full turn of both partners on the second slow. Then the next quick-quick is the lead walking backward, pulling the follower who is now walking forward.
Outside Turn – Possibly more common than turning around might be just turning or spinning the follower. This is accomplished by a small “prep” or signal to the follower with the left hand and turning them around by pulling their hand away from you so they turn clockwise. They will follow their right shoulder. As they come around the leader will reposition their right hand back under the shoulder blade.
Sweetheart Position – This not necessarily a dance move, but another way to progress around the dance floor beside the “closed position.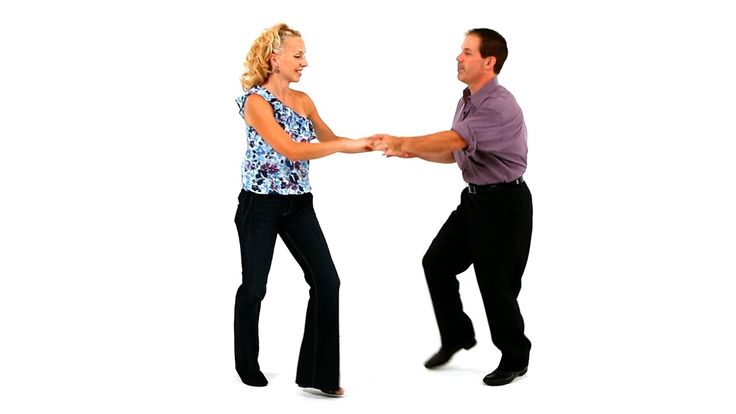 ” When in “closed position” the leader just pulls the follower in for a 1/2 inside turn switching hands. Both partners look forward, both holding right hands in front and left hands held above the follower’s shoulder. The Sweetheart Position gives the follower a nice break from always traveling backward.
Extra: Once you have this down, try moving to it while the leader is traveling backwards! This forces the lead to be the one turning to walk forward.
Two-Step Dancing Tutorials
This post obviously isn’t intended to turn you into a world-class Two-Stepper overnight! There are many other intermediate and after that advanced routines or patterns to learn! The ones explained above will be a great start and allow you to blend in pretty well with a typical night of Two-Stepping at your local country bar. Below are some great video tutorials showing some of the basics covered above. These videos also add additional tips and will take you farther. Enjoy!
https://youtu.be/xoscqzFdwB0Video can’t be loaded because JavaScript is disabled: How to Do the 2-Step | Line Dancing (https://youtu.be/xoscqzFdwB0)
To begin with, this brief tutorial from Robert Royston, a 5-time country dance world champion goes over the basics!https://youtu.be/2NPdOQyqCkcVideo can’t be loaded because JavaScript is disabled: HOW TO DANCE TWO STEP – Country Two Step Dancing For Dummies (https://youtu.be/2NPdOQyqCkc)
In this tutorial Anthony and Rose of Country Dance X seek to settle the debate of how to dance the Two-Step once and for all and take a look cause they are legit dance pros!https://youtu.be/4-2MHaNny8gVideo can’t be loaded because JavaScript is disabled: Beginner Country Two Step Dance Tutorial | Basic Two Step Patterns (https://youtu.be/4-2MHaNny8g)
Lastly, here is a more lengthy and equally reliable tutorial from another equally qualified couple going through several patterns for the Two-Step.Dance resource: Dances, dance.
 Dancing and about dancing
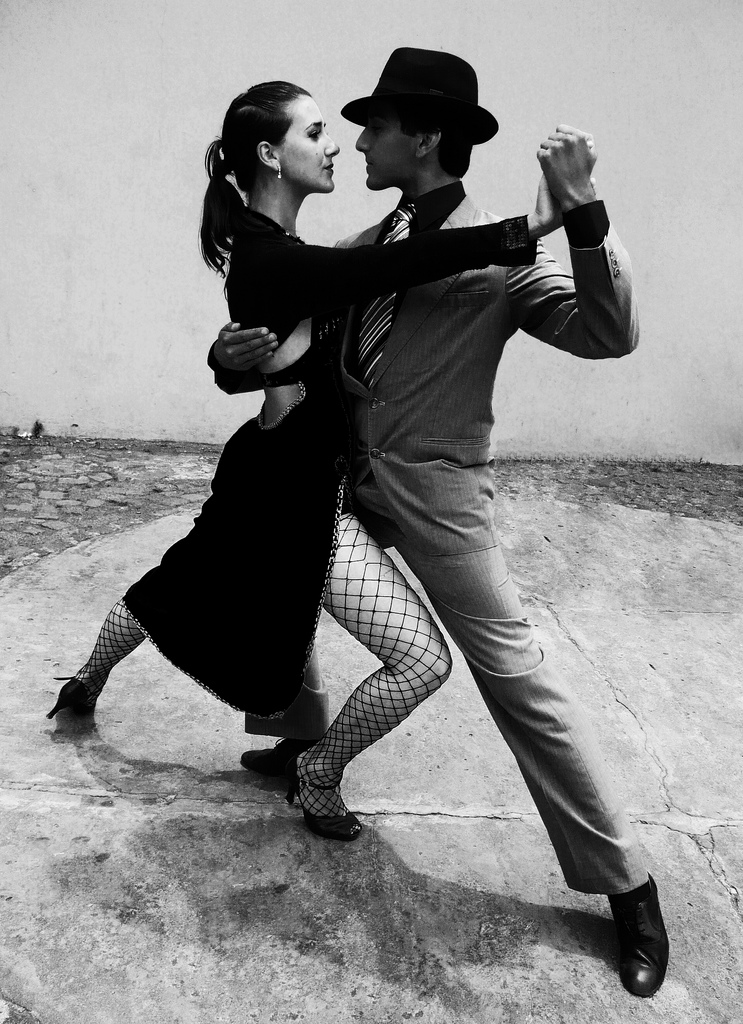
 Argentine tango
Terminology (mostly from the tango federation website http://www.tango-federation.com. Terms from other sources are in small print or italics)
Adornos
Jewelry. Graceful small movements of the legs, which, as a rule, are not shown by stamps. Partners are usually decorated more than partners. Adornos often enable dancers to express their music in a more subtle and sensual way than with simple steps.
Amague (Amague)
Fraudulent movement. Movement when the partner beckoned the lady, and he went the other way.
Arrastre
Hold, foot displacement on the floor.
Baldosa /Ceramic tiles/ Square figure
Barrida
Foot shift of partner's leg (or vice versa) along the floor, like sweeping with a broom. It can be performed in a straight line or in an arc, forcing the partner to rotate on one leg around her axis.
Base (Base)
Steps called "Foundation" include step forward, side, side
Boleo (Boleo)
A movement in which the partner, by changing direction, creates an impulse that causes the partner's free leg to oscillate along the floor (low boleo) or, if the impulse is given with more energy, upwards (high boleo). The change of direction can be done during a normal walk (resulting in a linear boleo) or with twisting of the body (circular boleo).
Cabeceo
In traditional milongas, men invite women to dance by catching their eye and nodding towards the dance floor. If the woman nods back, the man crosses the hall and approaches her. The woman remains in place, waiting for her partner to approach her. See also Codigos.
Cadena
A chain of steps forward-side-back-side, usually performed sideways along the line of dance.
Calecita
Steps in a partner's circle around a lady and vice versa
Caminada (Caminada)
Walk.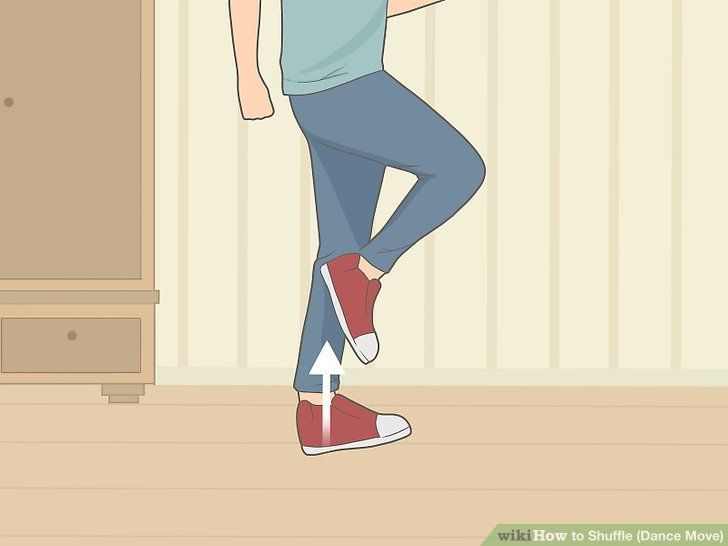 Steps along the line of dance.
Corrida (Corrida)
Run, jog, short forward step sequence
Corte (Korte)
Interrupted movement in any direction
Colgada
Off-axis movement of two partners with one axis in the middle. Partners, as it were, form the letter "V".
Comme Il Faut
In addition to being the name of a tango song, it is also a brand of expensive and, of course, beautiful women's tango shoes. Known for their dizzying heel heights (8 and 9cm), which has since been adopted by most other brands of tango shoes.
Cortina (Cortina)
See Tanda.
Cruze (Kruse) also Cruzada
Cross. Basic figure in tango. One leg crosses the other
Сunita (Kunita)
Swing. It is carried out according to the principle of a rocking chair, a step is taken with a return back
Dissociation
Conditional division of the dancer's body into two parts, upper and lower, which move independently of each other, and the movement is not transmitted from one part of the body to another.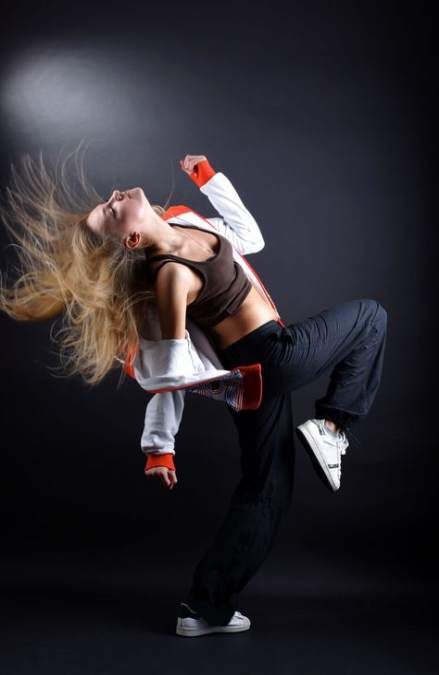 Whereas in classical dance ballerinas often spin as a unit, in tango dancers almost never spin as a unit. Instead, the dancer will initiate the turn by first twisting the torso and then allowing the lower body to follow, turning the hips and finally pivoting on the floor. This spiral movement is very characteristic of tango. The movement begins in the upper body, passing through the embrace from partner to partner.
Embrace
The partner hugs the partner with the left hand. Her left hand either "holds" her partner's shoulder blade or (usually in an open embrace) holds her partner's upper right arm. Her left arm can be anywhere from her neck to her lower back. The partner hugs the partner with his right hand. The breasts may touch. Most tangueros dance and perform simple steps in a close embrace, maintaining chest contact, but can also open their arms with giros and other similar steps. In the milonguero style, both sides of the partner's chest touch the partner. In other styles, typically only one side of the chest makes contact. The choice of hugs is primarily a matter of personal preference and comfort, all this is individual for each couple. Ideally, a tango hug should feel like a real hug, while still allowing freedom of movement.
Enrosque
A movement in which the legs rotate around each other. Usually held as a decoration on partners when performing a Giro.
Entrada
"Intrusion" into partner/ra territory
Firulete (Decoration)
Small foot movements that enhance the dance
Exhibition
Performances of the maestro at the milonga. Couples usually dance two dances, followed almost always by at least one, rarely two, encores. Performances can be staged or improvised. Tango performances at milongas usually have nothing to do with escenario tangos performed on stage.
Gancho (Gancho)
A movement in which one of the dancer's legs strikes the partner's leg and bends into a hook. This usually only happens when the dancer steps into the other partner's interior space. Some teachers feel that Gancho should not be marked by the partner, but should be performed when the leg position allows him to comfortably execute the figure (although this is extremely rare). This step is not often seen in milongas, but it is a common feature in tango escenario and in tango shows in milongas.
Giro (Hiro)
A spin in which the lady goes around the partner who, in turn, forms the center of the spin. However, the partner can also walk around the partner, or both of them can walk around the common center.
Golpes /Kick/ Decoration, tapping the toe on the floor
Golpecitos /Gentle blow/decoration tapping with the base of the shoe on the floor
Lápiz (Lapis)
An ornament in which the free leg describes a circle on the floor.
Llevada
Figure, when the partner on the thigh "carries" the partner's leg
Media giro
Half turn around partner (lady)
Mordida (Mordida) or Sandwich
Sandwich. The foot of one partner is between the two feet of the other. If his feet are crossed, then this is an upside down sandwich.
Miolonga
Meaning 1. Dance evening where tango, tango waltz and milonga are danced. Meaning 2. A style of music related to the tango, but with a more discontinuous main rhythm and usually (though not always) a faster tempo. It is believed that the milonga dance is the progenitor of tango. Almost everyone who dances the tango also dances the milonga, although usually with slightly different steps.
Milonguero
Meaning 1. A person whose life is entirely devoted to tango and its philosophy; carrier of authentic Argentine tango. Mealing frequenter. Meaning 2. Dance style. See tango milonguero.
Ocho (Ocho)
Turn steps similar to 8. Ocho back and forth. Step to the side with turning the torso towards the partner and turning the hips in the direction of the step (see Dissociation). Performed by both partners, it is one of the most characteristic movements in tango.
Ocho cortado (Ocho Cortado)
Interrupted eye. Stopping the ocho and leading back through the cross.
Orquesta Tipica (Orchestra Tipica)
Traditional tango orchestra, consisting of four bandoneons, four violins, piano and double bass. In tango, music is usually distinguished not by the composer, but by the orchestras that perform it. Different orchestras have different, special manners of performance. Each orchestra is named after its conductor. Thus, the tango “according to Biaggi” is the music played by the Rodolfo Biaggi orchestra (and Biaggi himself was their pianist). Many tangos are performed by singers, and it is also customary to determine the singer when defining the music. Tanturi-Campos, for example, is the orchestra of Rodrigo Tanturi and the singer Enrique Campos, while Tanturi-Castillo is the same orchestra, and the voice of Alberto Castillo.
Parada
Stopping the lady's leg with the man's leg. Often used at the end of a Giro. As a rule, the partner gives the mark to the partner when to resume the movement. The parade may often enable the woman to wear adornos (decorations).
Piernazos (Piernasos)
A high gancho done around the partner's back or thighs with the free leg.
Planeo (Planeo)
Circular movement of lady with free leg gliding along the floor or slightly in the air
Practice
Informal class in which students work out the learned figures in the presence of teachers. Designed for independent work. Teachers only correct, prompt and give advice on working out the studied material.
Sacada
Steps in which one of the partners invades the space of the other, thereby displacing his leg. This often results in the partner's free leg making an arc along the floor.
Salida (Salida)
Basic step, first steps in tango, from "Salimosa bailar" - "Shall we dance?" Eight basic steps.
Soltadas
The breaking of the embrace.
Tanda (Tanda)
In the milonga, the music is usually played in sets of three to five pieces, separated by short Cortinas. Tracks in tanda are almost always joined by the same orchestra, from the same period of composition (if the orchestra covers different periods and styles) or by the same singer. As a rule, dancers leave the dance floor during Cortina and change partners at the beginning of the next tanda.
Tango Escenario (Stage tango)
As the name suggests, the stage show tango is characterized by large, bright figures. Often includes acrobatic moves, lifts and jumps, and sometimes blends tango with other genres such as classical ballet and modern dance. Some of the movements are adapted to the space of the stage as the social tango is danced counterclockwise around the dance floor. May also include a degree of theatricality. Very different from the traditional tango in the milongas. Tango escenario, as a rule, was staged, while social tango was improvisation.
Tango Milonguero (Tango milonguero)
A style in which partners dance in a very close embrace
Tango Nuevo (Tango Nuevo)
Style characteristic of the dancers Gustavo Naveira and Chicho Frumboli. As a rule, they dance in open arms, and often with more elastic movements. Some steps are especially popular among nuevo dancers: movement features in which the partner is off-axis, leaning against each other (volcada) or away from each other (colgada).
Tango Salon (Tango Salon)
A style in which the couple gently opens and closes their arms as they dance. One hallmark of a tango salon is the pivot. A striking example is the Giro, in which the lady walks around her partner in an open embrace while he stays in place, often adorned with enrosques and planeos.
Tangotonin (Tangonin)
A hormonal neurotransmitter that dancers release in large quantities when performing a particularly beautiful tango. Although scientists have not yet been able to determine its chemical structure and find its receptors in the brain, empirical evidence shows that its action is powerful, dangerous and addictive.
Tango Vals (Tango Waltz)
Based on an Italian waltz. This is a style of tango music with a 3/4 rhythm (the tango itself is traditionally written in 2/4 and is often called Dos por Cuatro for this reason).
Tango show
Performances by the maestro. As a rule, the tango dance is escenario. The cost of such performances is high, but the level of tango performance is also inimitably high.
Traspie (Traspi)
From a word that literally means "to stumble." Traspié is widely used in milongas and can also serve as a decoration.
Volcada (Volkada)
Lady moving off axis, weight given to partner. Partners, as it were, form the letter V.
Lesson one
Music
Every dance has its own music, and you can't become a good dancer without developing a feel for that music. Other pages have enough information about what kind of music is suitable for Argentine tango and where to find it.
But you can start learning tango right now with the music you have. Choose something with a slow and steady rhythm. Listen to the music and count the beats: ONE two THREE four ONE two THREE four. The ONE and THREE counts mark the strong beats of the music and should be about a second apart.
You can use American tango, slow foxtrot, rumba, and even slow rock or symphonic music if their characteristic rhythm is subtle enough to be ignored in relation to Argentine tango.
Steps
Steps are the basis of most tango figures. Therefore, it is quite simple to start dancing right away, although behind this simplicity lies an unexpected complexity.
First, turn on the music, close your eyes and mark each main beat. Then start stepping in place on each main beat. When you feel the natural movement in this rhythm, open your eyes and walk along the perimeter of the room, trying to step on each main beat. Don't worry about anything else, just try this SLOW SLOW rhythm for a few minutes.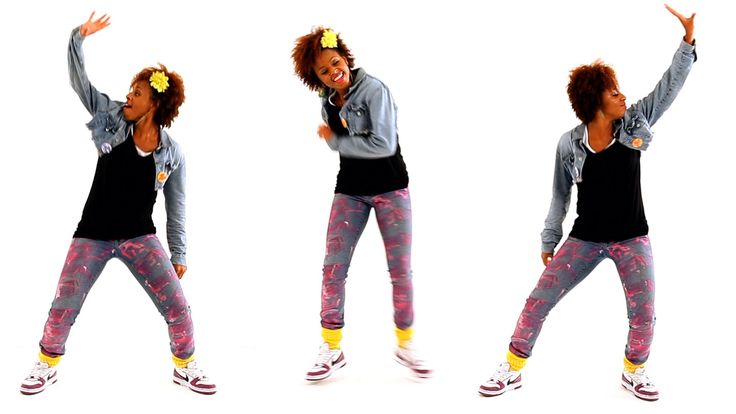 This rhythm is the basis for tango, although as you learn you will learn how to diversify your dance by changing this basic rhythm.
Now walk a little more. This time, move counterclockwise along the edge of the dance floor. This is called a "line dance"; she helps the dancers avoid collisions. (If other couples make it impossible or dangerous to move along the dance line, you can briefly move against it or even cross the free center of the dance floor and then continue along the dance line.) Place obstacles in your path representing other couples (or imagine them ), and change your direction left or right to avoid them.
Style
Argentine tango uses some of the step patterns found in other dances, such as free foxtrot, paso doble, quickstep and even the Texas two step! But you can instantly tell these dances from tango by the way the dancers move and interact with their partners.
Try to walk around the room without music, starting from the front of the foot, and not from the heel, as is usually the case when walking and in other dances. This will make you feel like a big jungle cat. Imagine this cat while working on various aspects of the tango style, and soon your body will automatically move correctly as soon as you remember this image.
Now try to move BACK along the dance line. Turn your head to the side so you can see where you are going. Women should look to the right, men to the left. Straighten your leg a little more than you normally would and move back a little further than seems natural at first glance. This will help you avoid hitting your partner's knees while dancing. It will also add "cat-like" to your steps.
Whether you're walking forward or backward, keep your weight over the front of your feet. You can try walking on your toes to develop the stabilizing muscles in your fingers, feet, and ankles more quickly. It will also help you develop the habit of dancing so that your weight is shifted forward. But when you're actually dancing, don't do it on your toes, it's too tiring and won't let you get used to using heels, which is necessary when doing the more difficult parts of tango.
Hug
No other dance brings people closer than the Argentine Tango, both emotionally and physically. Part of that is the dance position. Your faces are turned in the same direction (female to the right, male to the left), so that you are dancing almost cheek to cheek. You hug each other throughout the dance.
Stand with your partner (real or imaginary) in standard dance position. Keeping your body straight, shift your weight to the front of your feet. This one will bring you slightly closer to your partner, helping to pair you up.
The partner pulls the partner towards him with his right hand embracing her back. The partner lowers her left hand to the upper part of the partner's arm above his biceps and pushes away from him. Both attraction and repulsion should be as gentle as possible, while remaining tangible.
Extend the other hand (for women - right, for men - left) to the side, as is usually done in ballroom dancing.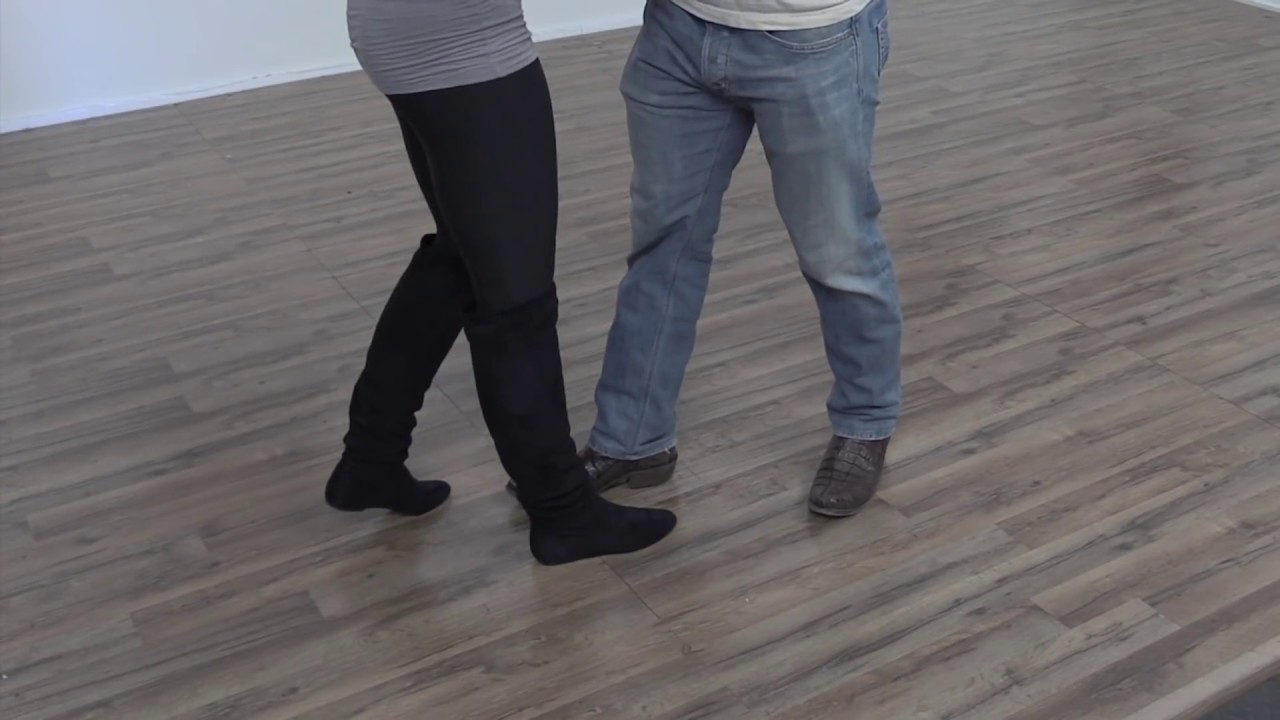 Don't let your hand "drain" like it's filled with lead, or dangle like wet pasta. Instead, apply very light pressure to your partner's arm. During practice, you can keep the palm of your "balance" hand flat against your partner's palm, rather than squeezing it. Then each loss of pressure will cause your hands to move relative to each other, giving you the opportunity to instantly feel the problem and correct it.
Try to dance with an imaginary partner with your hands and palms correctly positioned. This will strengthen your muscles and create the habit of holding a good hug without thinking about it.
Now try to move along the line of dance with your (real or imaginary) partner, the man forward, the woman back. Try it without music first, trying to keep a good connection with your partner. Keep your head up and slightly turned to the side, paying attention to your surroundings and to your partner. Now turn around so that the man is moving backward and the woman is moving forward, and practice some more.
Finally, turn on the music and move to the beat. Try to do everything the way you've learned, but don't push yourself too hard. Instead, try to have fun. The fact is that you dance, and learning to have fun is also part of learning to dance.
Figure elements
If you study with several teachers and go to tango evenings in a big city, you see literally hundreds of figures. It can be daunting if you don't realize that these complex shapes are made up of simple combinations of just a few simple shapes.
The simplest and most basic tango figure is la Caminata (Step), you have already done it. Now you will see how it enters the system of dance figures. Knowing this system, you can quickly learn new shapes and create your own.
| Element "Walking" - two-step passage. It has several versions; the most widely used is el Paseo ("The Walk"). To perform this element, stand in the starting position. Do not leave your feet unconnected after the second step. Instead, bring your free leg (right for ladies and left for partners) to the leg you are standing on. Don't put your weight on your free leg. This will bring you back to the starting position, balancing you so that you can do another two-step pass or some other piece. |
| ||||||
 This means that your feet are pressed against each other, and the bulk of your weight is transferred to one of the feet, allowing the other to start moving. The partner takes a step back with her right foot, then back with her left. The partner goes forward with the left foot, then again forward with the right.
 Shapes can be modified in many ways.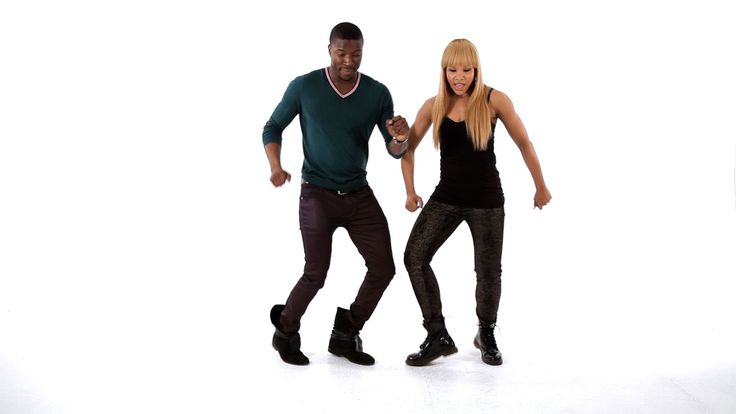 One of them is by changing the length of each step.
| For example, if you take both steps of the previous figure in place, without moving anywhere, you will get la Cadencia ("Cadence step"). This is an important figure, although it may not seem so now. Do not forget her, in the next lessons we will devote more time to her. |
| ||||||
| If you take the second step of the two-step walk in place, near the other leg, you get la Caza ("Pursuit" or "Chasse"). If you change the direction of the second step, thus returning to the starting position, you get la Cunita ("Lullaby" or "Swinging" step). |
| ||||||||||||
 In ballroom dancing, this is called Chasse ("pursuit" in French), because one foot follows the other.
 Try each of the four two-step walks for a minute or two, taking breaks between the moves to make sure each is done correctly.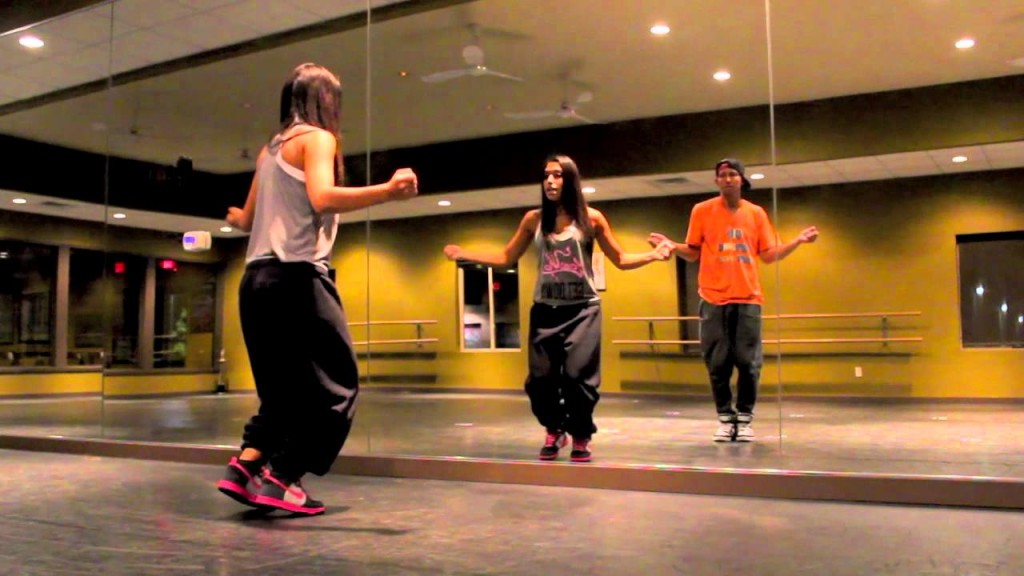 Concentrating each time on some one option, you can quickly master them.
Improvisation
In Argentine tango you don't have to do the standard figures in the standard sequence. Instead, you create new shapes and combine them in ways that are new to you. Creativity and improvisation are more important to good dancers than getting the figures right. (At the beginning of learning tango, only the partner, i.e. the one who leads, improvises, but when the partner becomes more skillful, she can also begin to improvise)
Because all two-step variations start and end with the weight on the same foot, you can combine them in any number and in any order. Try to do it. For example, two "walks", a "chasse", a "walk" with a 90 degree turn to the left (as if following the turn of the dance floor boundary) and another "walk".
End with three or four or five "rocking" steps, turning left on each step to make a total 360 degree counterclockwise turn.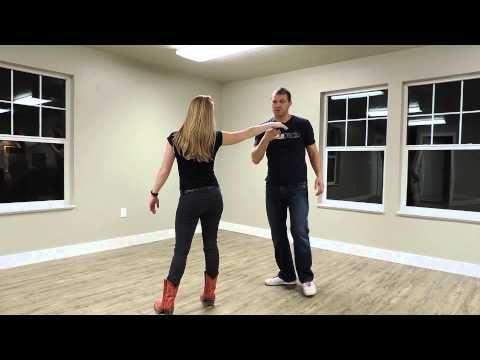 This figure is called las Cunitas ("cradle rocking" step). It can be used when other dancers are blocking your path (you can also rotate clockwise, turning right at each step).
Note the feeling each shape creates. "Walking" allows you to move smoothly and creates a feeling of fluidity. "Chasse" creates a harsher feel. It can be used to mark the end of a musical phrase, just like you use a comma or space when writing. The "rocking the cradle" figure can express tenderness, as it gives the gentle sensation of rocking the baby in the cradle.
El Circulo ("Circle") is another simple figure made up of two steps. Just do two (or three or four) "walks", turning to the left after each step, thus completing the circle where you started it. (You can also turn right). Like the "swinging" figures, the "circle" allows you to continue dancing if you are blocked in all directions, but it gives you a different physical and emotional experience.
Dance
So far you have been learning to understand tango better and have practiced the technique. But tango is not only a mental or physical activity. It also has an aesthetic, emotional and social side. To understand this, you must dance, at least alone with yourself, even if you only have an imaginary partner.
So put on some music that you and your partner like, or wait for it if you're in a milonga. Hug your partner, but don't move right away and don't wait for the movement to start. Open up the space within you and let the music fill it up so that it becomes part of you. Let your body bounce very slightly to the beat of the music. Enjoy the melody and singing, if any.
Also focus on your partner and your connection with him. Try, but not too hard, to create a good hug. Listen to his body language and imagine how he might be feeling right now. Enjoy the feeling of your arms around him and his arms around you.
If you are leading a dance, start moving when you feel it is time to do so, not before. If you are a wingman, don't worry about getting started. Resist (as weakly and gently as possible) the leader's efforts. This will actually help him lead you and make it easier for you to follow him.
Keep your head straight and pay attention to obstacles and others, but do not concentrate too much on this. You've trained all your life to protect yourself and others. If you happen to run into another couple or partner, say "Sorry!", but don't make too much of it - after all, you didn't kill or maim anyone!
When you or someone else makes a mistake - and it happens to everyone, regardless of skill - do not try to analyze or correct it. You came to dance, not to analyze or practice technique. Just get out of the situation as discreetly and beautifully as possible, and continue to dance. When you get better at getting out of erroneous situations, you will be less afraid of them. At the same time, you may even find new steps for yourself.
In the process of dancing, imagine yourself as a big cat, and your body will automatically begin to move in the correct style for tango.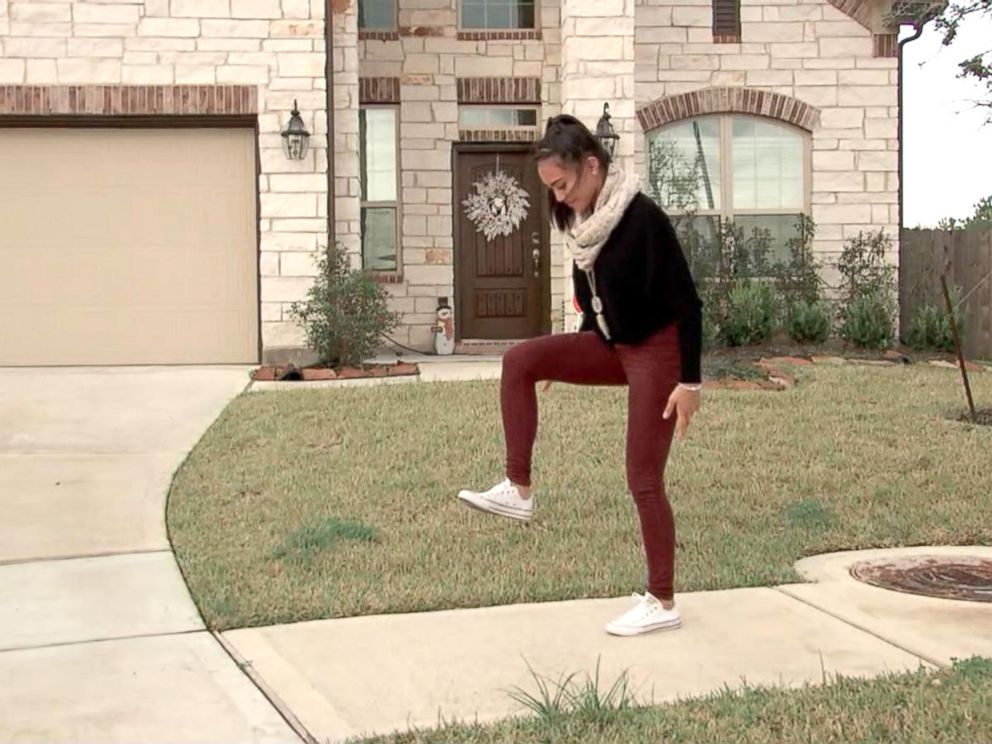 Imagine yourself as strong, graceful and beautiful as a cat. Often people begin to feel, move and even look the way they imagine it to be.
Soul of tango
Each dance has its own unique taste. Over time, as you learn, practice and dance tango, things will become easier and more automatic. Then you can feel better el alma del tango - the soul of tango.
It is a mixture of several essences: the flow of creativity that comes from the extraordinary freedom of improvisation in tango, the fluidity and precision cultivated by the style of tango, the almost operatic intensity of tango music and the emotional intimacy with a partner.
These sensations, more than the mastery of the movements, are the essence of the Argentine tango dancer. And when you start feeling it, you will become it.
Second lesson
Music
At the beginning of its popularity in Argentina, tango orchestras played with a very pronounced, unchanging rhythm.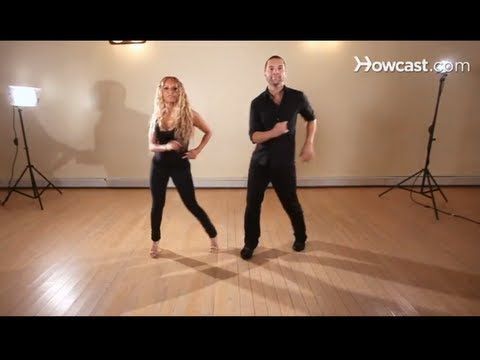 To this music, for example, you can dance all the time only la Caminata , a tango step. By the 1940s, the "Golden Age" of tango, when this music and this dance became very popular in Argentina, orchestras began to play more complex versions.
For example, musicians can mark the beginning and end of a piece of music by changing the volume or tempo. You can respond to this in a variety of ways. One of them is to use basic figures that convey the feeling of beginning and ending.
Salida
The figure marking the beginning is called Salida . The commonly used Salida is a two-part U-shaped figure.
Start in a neutral position (feet connected) with weight on BOTH feet. In tango, you can start a new figure on any foot and in any direction. Distributing the weight on both feet will help you do this.
| First part Salida - single step back - one step in the direction against the line of dance. The second part is a double L step. If you are the partner, step to the side with your right foot, bring your left foot to your right, and step back with your left. If you are a partner, step to the side with your left foot, bring your right foot to your left, and step forward with your right. Complete the movement with your free leg, bringing it to the supporting leg. |
| ||||||
 The partner steps forward with the left foot, the partner steps back with the right. Then - as it should be in every figure - make a "completion" with your free foot (right for the lady, left for the partner), bringing it to the other leg. Don't put any weight on your free leg at all.
 Tango ending
After Salida you can make several other shapes. Then, when necessary in accordance with the music, complete the series of figures you are performing with the final one.
The most commonly used three-step figure is called la Resolucion (Resolution). It is also often referred to as "the Tango Close" because it is similar to the European Tango figure of that name.
| The lady walks back with her right foot, brings her left foot to her right and walks towards her left, then brings her right foot to her left and completes the figure, distributing the weight on both feet. The partner walks forward with the left foot, brings the right foot to the left and walks towards the right, then brings the left foot to the right and completes the figure, distributing the weight on both feet. |
| ||||||
It is very important to complete the figure so that the weight is distributed on BOTH legs. This prepares you for the next series of figures, which can start on any foot and in any direction.
Practice and variations
Now start practicing these figures. Do a U-shaped Salida , stopping for a moment in a neutral position after the back step and after the L-shaped step. This will help you remember that these are two different figures. Then do Resolution and stop again. Now repeat this several times without stopping inside Salida . Do a few more repetitions, this time stopping only after Resolution . Do not forget that you need to start and finish the figures by distributing the weight on both legs.
Now repeat the figures several times without any pause at all. You will start to approach the edge of the dance floor and other obstacles, so you will have to change direction to avoid collisions. You can do this by turning left or right. You can turn before or after any step (as well as AND before AND after).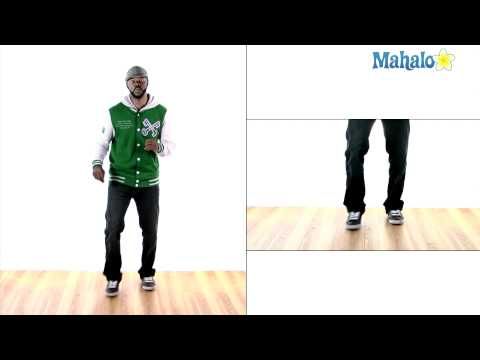
Practice with the following example. Before the first step Resolucion Turn 45 degrees (an eighth of a full turn) to the left (counterclockwise). Immediately after the first step, turn another 45 degrees to the left. In general, you will turn 90 degrees. Now do the last two steps Resolution . This variation can be useful, for example, when you come to the right corner of the dance floor.
Experiment with the Salida and Resolucion turns at different moments, and with different turning angles. You may find that turning more than 45 degrees is more difficult and requires extra effort to stay connected with your partner. Don't let that stop you from trying big angles, just be prepared to put in more effort to do it well.
Other variations
In addition to rotations, you can modify complex shapes by adding or deleting some of the simpler ones that make them up. For example, when you start dancing at the start of a new piece of music, you usually don't feel like taking a step back in a U-shape Salida because other couples are already dancing and may not notice your movement against the dance line.
Try also to eliminate L-pacing by only stepping back and Resolution . Turn 45 degrees to the left after stepping back and another 45 degrees when starting the first step Resolucion . This will rotate you 90 degrees, making a U-shaped rectangular shape. This figure is needed for rounding corners. You can also make several of these shapes if you want to turn at large angles.
You can also add shapes to complex compositions. For example, between Salida and Resolucion , you can add any number and combination of two-step passes, since they all start and end on the same foot. These include L-shaped pacing, "Walk" ( Paseo ), "Cadencia Counting Step" ( Cadencia ), "Chasse" ( Caza ) and "Swinging" Step ( Cunita ) that you learned in the first lesson.
Dangerous step back
It is dangerous for the leader to take a step back, especially against the line of the dance. There are several ways to neutralize this danger. One of them is to be especially attentive when the host takes a step back and be ready for a collision. This applies to both women and men. Following the leader should not be passive, and if you see that the leader may collide with someone or something, you must resist. The leader, if he understands anything, will appreciate your help.
Sometimes you may not step back into Salida , but not always; it is too widespread. And besides, it is useful for performing complex figures in the small space left to you when many couples are dancing. As you already know, often when starting a movement with a new piece of music, this step is skipped. You can also change it to a single step forward, with the partner walking back with the left foot and the partner walking forward with the right. Try this now a few times, changing the start Salida - from one step back to one step forward and vice versa.
Another way to take a safe step back is to start from a position where the partner is turned against the line of dance.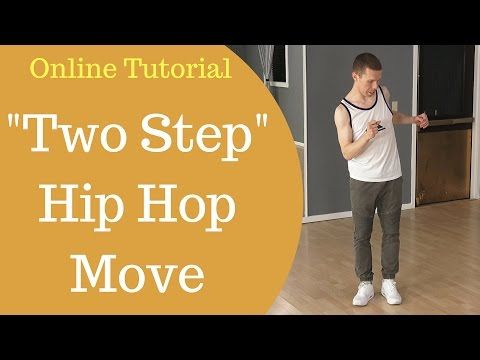 Then stepping back will move both of you in the direction of the line of dance, which is usually safer than against the line. This will also help the man see the approaching couples (but the lady should not lose sight of the fact that some couple moving in front of you may stop).
Try this: turn one eighth (45 degrees) to the left (counterclockwise). The partner goes forward with her left foot (shifting diagonally to the center of the dance floor) and turns to the left for another eighth. The partner goes back with his right foot (also diagonally to the center) and turns to the left one eighth. Now you're turned 90 degrees counterclockwise, so the next step Salida is to the side along the dance line. Complete the figure by turning one eighth before and after the last step Salida . Thus, you will turn another 90 degrees and the partner will be deployed in the direction of the line of dance.
Continued
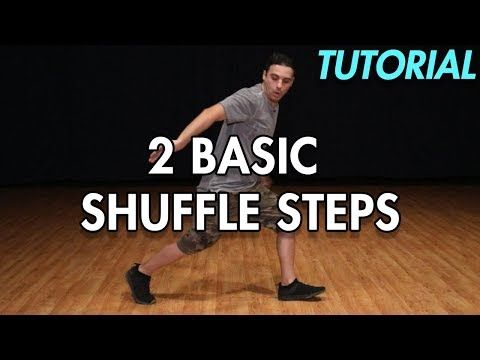
How to learn to dance shuffle - Lifehacker
December 15, 2019LikbezSport and fitness
Master the basic moves, then improvise and have fun.
Iya Zorina
Author Lifehacker, athlete, CCM
Share
0This dance style includes a lot of freedom and improvisation. That is why he is so good. You can master the basic movements in a couple of hours, and then complicate them to infinity and combine them with each other, create your own combinations and spy on others.
Dance in sneakers, socks or barefoot, in any outfit, anywhere.
Master the basic movements of the shuffle
In this style, you do all the basic movements with your feet, your arms most often move freely - according to your heart.
Running man
This is the most basic and essential shuffle movement. You can do it in three different ways.
Full foot
The movement begins by bending your knee and lifting one leg. Next, you need to simultaneously put both legs - supporting and raised - at a distance of one step from each other.
The raised leg is placed forward on a full foot, the standing one behind slips back on the ball of the foot and remains on it - the heel is not placed on the floor. The weight is evenly distributed between the two legs.
After that, it remains to return to the starting position. To do this, the front leg slides back, and at the same time, the back leg is pulled up. You find yourself in the starting position and repeat the cycle. The movement itself is soft and springy: do not stick into the floor, keep your legs relaxed.
Heel
This is a lighter and faster running man look that may be needed for some combinations. Here you put your foot not on the whole foot, but on the heel. At the same time, the one standing behind remains on the toe.
On pads
In this variation, the foot is placed forward on the pad. At the same time, the one standing behind also remains on the ball of the foot, and the body leans slightly back.
T-step
In this movement, one foot constantly makes a “herringbone” - turns the heel in and out - and the second touches the floor and immediately rises back.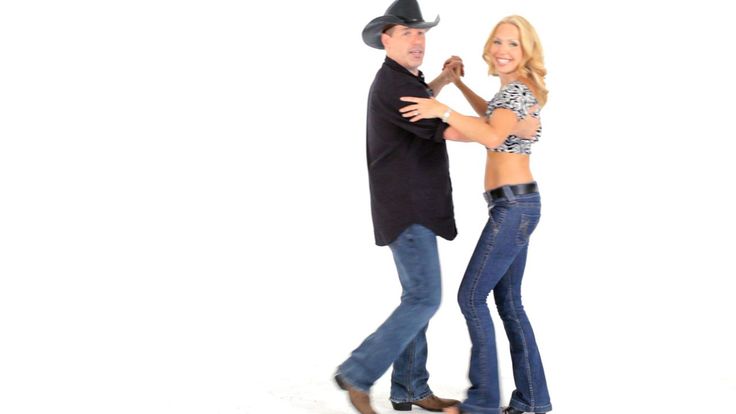
When the heel of the skating leg turns inward, the toe of the other leg touches the floor; when outward, the other leg rises, turning the knee inward.
It turns out two positions: closed - when the legs are wrapped with the knees inward, and one leg is raised, and open - when the legs are turned out with the knees outward, and the toe touches the floor. Practice doing the T-step in both directions: slowly at first, then with acceleration.
Rocking
You jump on one foot, and the other touches the floor in different places: on the side of the supporting leg, across, behind - anywhere you want. You can put your foot on the toe or on the heel - the latter is called a kick. The supporting leg can simply rise low or perform a T-step - move the heel out and in.
Charleston
To begin, you turn your knees and toes inward and lift one leg. Then turn your toes and knees outward, and put your raised leg forward crosswise. Repeat the same with the other leg.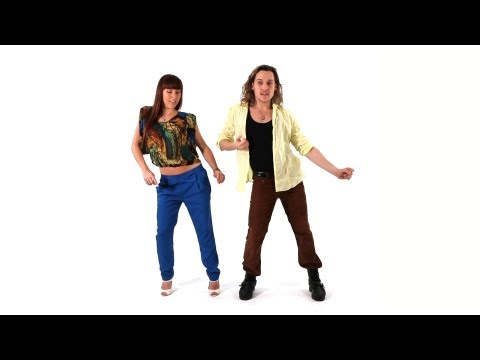
All movement occurs on the balls of the feet, the heels do not fall to the floor. You can move both forward and backward.
Diamond
First you put your feet crosswise with your toes outward with a jump, then you also spread your legs apart with a jump.
Slides
One leg is straight, stands on the whole foot, the other is with a bent knee on the pad. Leaning on the pad, you slip the foot of a straight leg back, as if wiping the sole on the floor.
Immediately after the slip, you turn around. In the turn, the straight leg bends and goes to the pad, and the one that was on the pad, on the contrary, turns on the heel. After that, it remains only to change legs and move in the same way in the other direction.
Scissors
From the starting position - standing with a raised leg, as in Running man - you turn your hips to the side with a jump and put your legs crosswise.
The front foot is on the heel, the back foot is on the ball. Then you jump back to the starting position and do the same on the other side.
Sidekick
From the starting position, you turn your hips to the side with a jump and spread your legs a step apart from each other. The standing foot in front is placed on the heel, the standing one behind remains on the pillow. Then, with a jump, you collect your legs and do the same on the other side.
Try other variations of the basic shuffle movements
You can perform the basic movements in different directions: forward and backward, turning around. This will give you more freedom to improvise.
Running man variations
Do several times in place and then turn around. You can also try walking this way to the side. Each time the leg will need to be placed slightly crossed in order to slowly move to the side.
Variations T‑step
You can lower your foot on the toe, on the whole foot, touch the floor to the side of the supporting leg or forward and behind it.
You can also keep the other leg on the floor at all - leave it on the toe and turn the knee in and out.
Variations Diamond
Here one more element is added to the movement – the heel strike. In the starting position, you wrap the toes of the feet and knees inward, and then jump on the heels, turning the socks to the sides.
From this position, without jumping, you turn your toes and knees inward, cross your legs with a jump, turning your feet with your toes outward, and then return to the starting position.
Charleston Variations
After three turns of the Charleston, turn both toes in one direction and then in the other. At the end, you can turn the knee to the side.
Connect familiar shuffle moves
While you lack the skills to move freely and come up with something of your own, learn a few combinations. They contain interesting movements that will replenish your dance vocabulary.
Combination 1
This is a simple combination of two basic movements - Running man and T-step.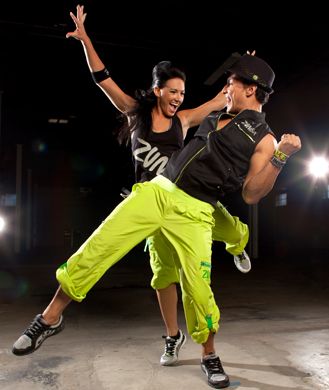 First take five Running man steps, then four T-steps to the side and repeat the same in the opposite direction.
Combination 2
Another combination of two basic movements. Here you do three Running mans, then one T‑step with a back foot touch, and two front heel touch kicks. The same on the other side.
Combination 3
There are no standard steps here, but there are already familiar Sidekick and transition from heels to toes.
Learn more difficult combinations
We will add some videos with good combinations.
1. Cool video for beginners: movements are repeated in slow motion to make it easier to dance to the music.
2. And here the combination is analyzed step by step in slow motion, dividing it into three parts. Very comfortably. Look for more on this channel, there are several such analyzes.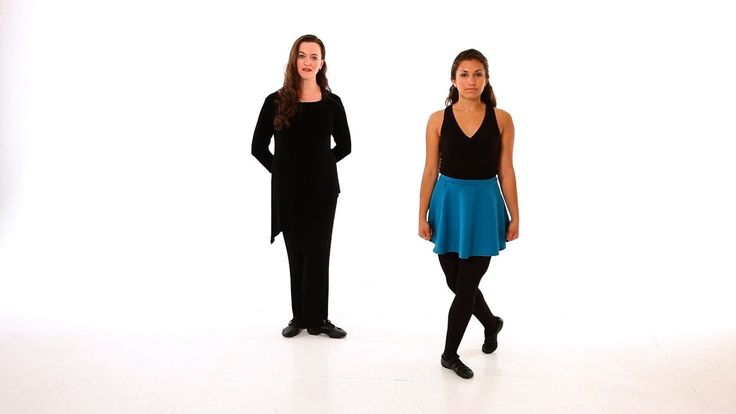
3. There is no slowdown here, just a great combination. But you already know almost all the movements, so you can figure it out. If something is not clear, watch the video at a speed of 0.25.
Pick up the music and improvise
Surely you have favorite songs to shuffle to. Include them and start with basic movements: just do the Running man and periodically add different elements when you want. Move in different directions, relax and have fun.
If you don't have favorite tracks, try our selection.
I must say that the shuffle is an amazing cardio workout. In just a couple of tracks, you will be out of breath and sweat, like after a run, but you will feel absolutely happy!
What's more, if you have to force yourself to keep going while running, shuffle requires you to have the willpower to stop and not dance.