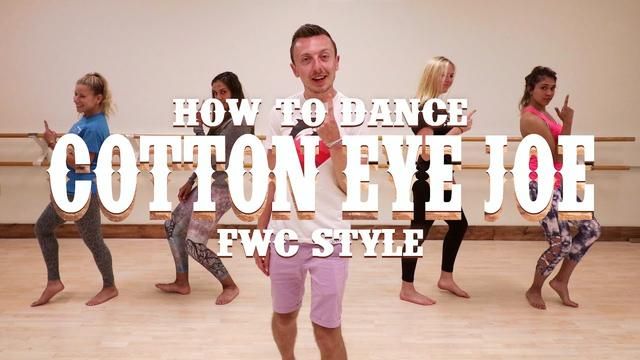
How to dance with your arms
out.
Power, facials, energy – everything .You probably can name a few dancers who “go awff.” You’re blown away by them every time they perform.
Well, we’re here to tell you that YOU can train to dance bigger, stronger, and more full-out, too! Follow these 9 tips to take your energy from 0 to 100!
Strengthen up!
You don’t necessarily have to get HUGE in order to dance huge.
Size is not a determining factor in how powerfully you can execute. (I mean, have you seen Sorah dance?!)
What is necessary is strength.
Work out to give yourself more power and control when you dance. #Gainz, breh.
You don’t dance big by being big. You dance big by being strong.
So lift some weights, do some push-ups, hold some planks, and build your strength!
Stretch it out
You can dance bigger by filling out each movement completely.
This means using your body’s full range of motion.
Make this easier by stretching regularly.
It’s best to warm up your body with some cardio before you dance, then do a longer stretching routine afterwards.
Being more flexible will set start and end points of your movements further apart, making your movements larger.
See Related Video: Stretching For Dancers | Dancers IRL | STEEZY Original
Practice like you’re performing
“Under pressure, you don’t rise to the occasion, you sink to the level of your training. That’s why we train so hard.”
– U.S. Navy
What the U.S. Navy is saying is – practice like you’re performing.
Once you get on stage (or even in groups) there is no magic dance God that takes over, making you kill the piece...
If you’ve been half-@$$ing it the whole time while learning.
So when you mark a piece, still maintain the execution that you want.
The only reason you’re not giving full power would be to pay more attention to something else, like watching the choreographer, listening to the music, or looking around to set formations.
But if you’re doing a run-through of the piece, take advantage of each chance you have to do it exactly how you want it to look.
Use your core!
It may surprise you, but movement starts from your core.
Even if it’s your arm or neck – it all comes from the tumtumz.
For example, when you're reaching with your arm, you can extend that reach by reaching from the shoulder.
And you can extend that reach by shifting your torso toward the direction of the reach.
So if you want to dance bigger and more powerfully without looking sloppy, tighten your core!
Not only will it make your movements bigger, but they will also be more strong because the base of your movement is so firmly rooted.
See Related Article: How To Execute Choreography Better By Using Your Body
Don’t flick da wrists
Even if you are dancing super big and strong, the effect can get lost by something really really small. .. like limp wrists.
This is a habit that a lot of dancers have. Their arms make clean pictures… then it breaks right at the wrists! Ughh.
To combat this, channel your energy allll way through your fingertips!
This will ensure that your strength is being distributed in your whole arm without interruption.
And this will make your movements look bigger and more complete.
Focus on focus
Your head and eyes are a part of the picture you’re making with your body, too! Really important parts!
Not only can it look awkward if you’re constantly looking down or at the mirror, but it will also cut off your projection.
And dancing BIG is all about projecting UP AND OUT.
Lift your chin up – especially if you’re performing for a bigger audience.
And if the movements in a piece call for you to look a certain direction, commit to it!
This doesn’t mean “look with your eyeballs.” It means “look with your whole face.”
It will make the move looks more natural, and it will help guide whoever’s watching.
The audience looks at what you look at.
If you’re reaching to the right and looking right at your arm, their focus will follow yours instead of watching you from straight ahead and noticing a single arm sticking out.
Wear loose-fitting clothes
Although it has been consistently over 80 degrees in Los Angeles, you’ll never see me dancing in a tank top.
I prefer to dance in loose-fitting long sleeves.
It’s not because I enjoy sweating, but because it really does help create the illusion of bigger movement.
Our fashion trends have evolved over the years. We went from Wal-Mart sweats and giant cut-out tees to compression pants, leggings, and sports bras.
And there’s nothing wrong with that!
But it still feels so good to just put on a huge sweater or baggy sweats and go HAM with all that extra fabric to add extra effect. HIP HOP.
Remember your dead limbs
When you’re dancing, your entire body is dancing. What does that mean?
Even if you’re isolating one body part and the rest of your body is stationary, that doesn’t mean you just forget about it your “unmoving” parts of your body.
For example, for a “right arm iso” move, I find myself putting all my strength into my right arm, while my left arm just flippity flops all over the darn place.
Dead and floppy limbs can distract people from what you actually want them to see.
Instead of paying attention to select body parts, create a whole picture with your whole body – including the “dead” parts of it!
This will make your movements look bigger and be more impactful!
Commit to your moves
Committing to your movements makes a huge difference in your performance. It makes everything more purposeful, effective, and entertaining.
But commitment is hard without confidence. Killin’ a piece first requires for you to believe that you can!
See Related Article: How To Dance With More Confidence
Put on your game face, crack your knuckles, give yourself a pep talk, and KILL IT!
We hope this helped you get an edge on your full-out training grind! We can’t wait to see you go awff in the next class.
|
by Shira
Many belly dance teachers do their students a disservice by failing to teach how to use the arms gracefully. Here are some thoughts on how to add graceful arm moves to your dance.
The FoundationFirst, it's helpful to consider a couple of concepts:
Avoiding the Western Accent
Role Models
Suggested Drills
Drill #2: Synchronizing Drill #1 to Music
Do this drill daily for a week, for 15 minutes per day or longer, before moving on to the next drill below.
Drill #3: Making It GracefulDo Drill #2. However, by now you should be able to synchronize the arms with the musical phrasing, focus on making the arms feel soft and fluid while doing the hip movement. Keep the arm movement continuous. Don't pause at hip level, and don't pause at the top when crossing the wrists. Focus the attention on keeping the arms flowing continuously. If possible, videotape yourself doing this drill and critique your arms. Do they flow continuously? Are they soft and fluid? Practice this drill until your arms flow gracefully. This may take 2-3 days of daily practice or more to reach this stage.
Drill #4: Add BreathingHere's where you begin to make the transition from merely exercising to dancing! As you do Drill #2, breathe with your arms. As you raise them think about slowly taking a luscious deep breath. As you bring them down, think about exhaling slowly. At first, you might not be able to continue the inhale/exhale the full four counts, unless you're accustomed to a discipline such as yoga, singing, or playing trumpet where breath control is required. But keep doing the drill, and eventually you will reach a point where you can do this. Practice this for a week, 15 minutes or more per day.
Drill #6: Vary the ArmsBy now, you must be rather weary of Drill #2. Now it's time to try some variations. Spend a full week or more experimenting with these, a minimum of 15 minutes per day. Variation A
Inhale on Counts 1 through 4, exhale on Counts 5 through 8. If you want to use a more faith-oriented way to visualize this, try this:
Drill the above until you can do it naturally. Then, alternate it with the original arm move. Do one set of 8 counts with Drill #2, then do another set of 8 counts with this drill. Variation B
Inhale on Counts 1 through 4, exhale on Counts 5 through 8. Repeat this variation until it becomes automatic, then alternate with the original Drill #2 and Variation A. Variation CReverse Drill #2. In other words:
Repeat this variation enough times until it becomes automatic. Then add it to your practice, alternating with Drill #2, Variation A, and Variation B. Finally...Just dance. Remember to incorporate breathing. Remember to think about how you are managing energy.
Match Arms to Step Combinations
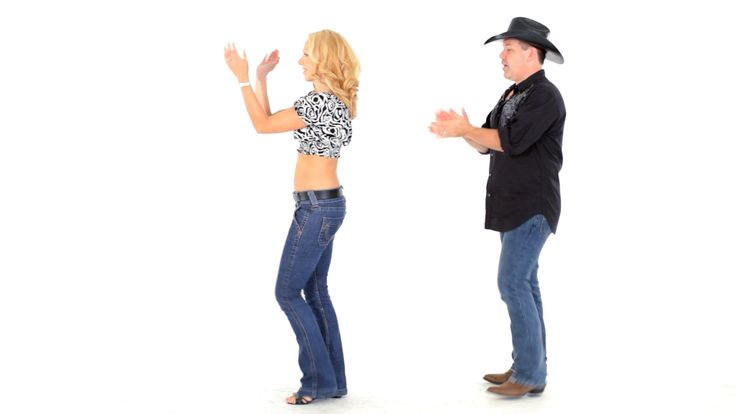
Add the ArmsFor the grapevine:
For the hip drops: Hold the arms in this pose. Plan OthersThink about other step combinations that you know. Perhaps you have been taught arm movements that are designed to work with them. Using what you learned from the above drills, think about how you would add breathing and energy management to the arm moves.
Other Tips to Try
Did You Enjoy This Lesson?If you enjoyed this lesson in dance technique, please consider asking dancers in your city who sponsor events to bring me to your town for a full-length dance workshop! --Shira
Related Articles
Copyright NoticeThis entire web site is copyrighted. All rights reserved. All articles, images, forms, scripts, directories, and product reviews on this web site are the property of Shira unless a different author/artist is identified. Material from this web site may not be posted on any other web site unless permission is first obtained from Shira. Academic papers for school purposes may use information from this site only if the paper properly identifies the original article on Shira.net using appropriate citations (footnotes, end notes, etc. If you wish to translate articles from Shira.net into a language other than English, Shira will be happy to post your translation here on Shira.net along with a note identifying you as the translator. This could include your photo and biography if you want it to. Contact Shira for more information. You may not post translations of Shira's articles on anybody else's web site, not even your own. If you are a teacher, performer, or student of Middle Eastern dance, you may link directly to any page on this web site from either your blog or your own web site without first obtaining Shira's permission. Click here for link buttons and other information on how to link.
|

 Try to find videos of them on youtube or DVD and study how they use their arms:
 Someone not familiar with her work may need assistance determining which clips are useful for studying Oriental technique versus which represent a more Western aesthetic.

 As you do this, imagine you are drawing that earth energy into yourself, to warm your heart.
 Release the energy, giving of it freely to those around you.
 Alternate your hips between hip circles, horizontal figure 8's, vertical figure 8's, and shimmies as you see fit. Experiment with different ways of expressing arm movements. Experiment with the ones in the exercises above and make up your own variations. Immerse yourself in the music and allow your arms to express what the music is doing.
 If you don't know how to do a grapevine, it is:
 By Saqra. How to hold your hands attractively when you dance.
 ) and bibliography. Consult your instructor for instructions on how to do this.
 Dance movements with hands
To move well in a disco, it is enough to have a sense of rhythm. Add to this dance movements with your hands and now you are already rocking to an unfamiliar melody, in an interesting company. To make all this a reality, it is enough to spend half an hour and rehearse a couple of “chips” in front of the mirror.
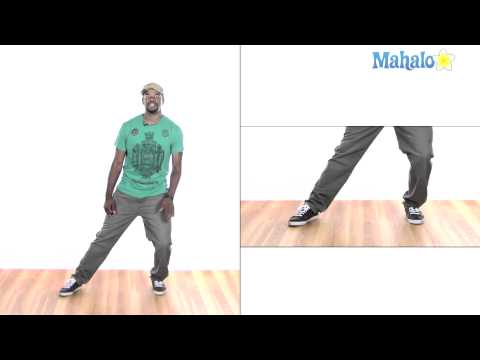
Waves with hands
Waving remains out of time and out of fashion, it is the ability to imitate wave movements with hands. We start with the right hand. Bend your elbow and bring your palm upside down in front of you, so that the palm is parallel to the floor, and you look at it a little from above - down. The elbow and shoulder are relaxed, the tension is only in the fingers. Now try to repeat the movement of the wave, smoothly raising your palm up and describing an arc, lowering it down. Focus on the palm of the hand, fingers, forearm, elbow and shoulder are in a relaxed state and move inertly behind the hand. Start with a large amplitude and gradually reduce it to learn how to make a wave quickly. It will take 10 minutes to master this movement. Wave with both hands at the same time, pointing the palms towards each other, and when they cross, let the crossed wave go up, this is a full-fledged dance movement that looks good even without connecting the legs.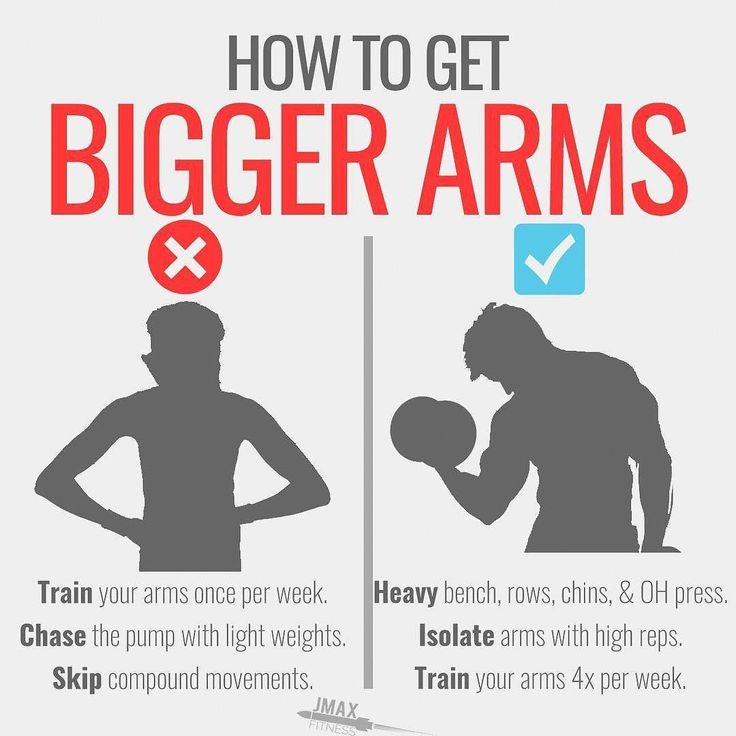
Criss-cross
To occupy hands during the dance, you can perform cross-cross movements. Extend your left hand, clenched into a fist, in front of you, but not evenly, but slightly at an angle, so that the hand goes slightly to the right. Now extend your right hand, clenched into a fist, so that the letter X is formed. To make this movement work, you need to add a little dynamics. For example, crossing the right hand with the left, return it several times to its original position (to the beat of the music), then raise the crossed arms above the head and open the cross, lowering and pulling the hands to the belt with clenched fists, as is done in karate. Or you can open your arms and lower them through the sides, describing an arc, performing tactile movements with your legs.
Women's hand dance moves
Girls will definitely want more smooth hand dance moves, we have some recommendations for them too.
Yula
The movement is performed when there is enough space around, as it involves rotation. Raise your arms above your head, leaving your elbows "soft", which means they can be slightly bent so that the arm is relaxed and supple. The palm is collected in a weak fist with index fingers released, which look up. At the same time, the left and right wrists begin to rotate from right to left along a small radius. After the second circle, the amplitude increases, and the forearm begins to rotate after the wrist, after 2 turns, both hands, rotating in the same direction, describe a circle above the head. Such a movement requires practice and self-confidence. It is ideal for breaks or slow songs where the footwork is constrained by a slow rhythm.
Look at me
The simplest and most popular movement that girls love to do to any music is stroking. A straightened palm is placed, for example, on the neck and led down, through the center of the chest and from the solar plexus to the side, leaving the arm bent at the elbow at the waist. In this performance, the movement will be called “look at my chest”, if you do the same with both hands from the waist, rising along the sides to the chest, from there to the neck, change direction there, slightly return to the sides, go to the back and finish the movement with your hands on pope, then it will turn out "look at my figure.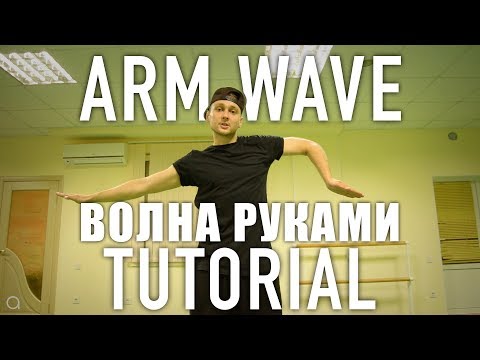 " Such options are quite frank, and it is better to use them either in a purely female company, or for a personal dance for your man. If you run your hands only over your neck and play with your hair at the same time, then you get the “look at my hair” movement, which can be performed at any disco, with any leg movements. By the way, “look at my hair” is included in the female style of many social dances, for example, salsa and bachata.
12 life hacks, to quickly learn how to dance from Mamita Dance
Dancing
Author: Pavel Collect
Psychologist, teacher of Salsa and Tango
Dances
Author: Pavel Pavel Pavel Pavel Pavel, Teacher of Salce and Tango At the start, you always want to get a quick result. When it doesn't happen, the hypothesis arises that everything takes time. After a conditionally acceptable time, humility comes to mastering pair dances, which, perhaps, is not given, and I will just do what I learned somehow. This is the most common story of those who believe that the mere act of attending a pair dance class is enough to learn how to dance. 1. Listen to music The most common and accessible advice that is given already in the first lessons. And it definitely works. Music creates a certain atmosphere of the dance and intuitively you want to move to it. It doesn't matter where you listen to music - in the car, on headphones while walking or doing household chores. An addition that will help you dance better is your active participation in the music. Sing along, dance or simply beat musical accents with any free parts of the body. In the subway, for example, it is enough to tap out bright moments with your fingers, in the car to sing along with sounds, and at home you can jump for pleasure. 2. Watch videos of good dancers It's complicated, but also obvious. It’s more difficult, because without recommendations from more experienced dancers, unfortunately, it’s not so easy to find a good quality video on the net (I mean not the resolution quality, but the content itself). Meaningful video viewing is about building an understanding of HOW dancers make a particular impression on a partner or viewer. Technology is at the heart of everything. Understanding how the pros do it is a big step forward. It is important to distinguish a show from a disco dance, a staged performance from an improvisation, a stylized dance from an authentic one, etc. Ask for recommendations and dance teachers will always throw off a couple of videos of worthy landmarks. Tango Z. Showreel. Online modern tango courses Tango nuevo is the most advanced version of tango. We can quickly learn to dance from zero to a steep level. 
Absolutely not. If you want to really dance well, you have to make an effort outside of the dance class. A good teacher will definitely be needed, but the initiative should be on your side.
View details
3. Dance in salsatecas/milongas/discotheques
A very delicate moment when it is worth coming to the first party. From a technical point of view, most students in 1-3 months have a sufficient set of figures and techniques to come and dance calmly. Psychologically, the same moment can be stretched out for an indefinite time. After all, it is imperative to “not lose face”, “learn more figures” and be sure what to do in case “there is an unfamiliar movement”.
In fact, the partygoers don't really care (except for a small layer of non-professional teachers who want to help inexperienced dancers by treating them as customers in the future). It is important to come and try dancing after a month of classes. You can only with friends or guys from your group. This will be enough to feel the adrenaline and inspiration from the dance.
4. Dance with partners or partners not of your level
The conventional wisdom that you need to practice in groups of your level does not stand up to the test of experience. Perhaps now your eyes widened in surprise, and you want to meaningfully read the phrase again. Yes, you saw everything correctly: when you dance with a partner of your level, you don’t grow anywhere.
It's important to understand that not only does it work one way and you have to dance with cooler dancers, but it works even more effectively the other way. It is no coincidence that teaching pair dances dramatically raises the level of the teacher himself. You have an endless stream of very beginner dancers.
How it works. A more experienced partner needs to be "stretched". It's easy and obvious. With beginners, you need to take more initiative on yourself, see the general pattern of the dance more widely, turn on and insure more, try to be an example and be more careful. The quality of interaction begins to grow significantly. And wonderful partners too.
Dancing with partners of your level doesn't make you grow. Dance with beginners and more advanced dancers
Dominican Bachata Women's Style Online Course
Want to learn how to hypnotize those around you with the most appetizing part of your body? On the course we will tell you all the secrets.
| Interesting |
5. Learn to dance for a partner and for a partner
Turks and Argentines are one of the best partners in the world. In Russia, partners are highly valued. Why? The answer is simple. In Argentina and Turkey, it is not questionable for men to ask another man to lead in one piece or another and give feedback on the quality of the lead. For them, it will be a great shame to hear moralizing from a partner, or even more so to be known in the community as an insecure partner.
In Russia, due to the constant, often far-fetched, opinion that there are more women in pair dances, partners calmly get up and study their partner's part. Such partners then grow into very cool dancers and teachers. In no case do this at parties, only in class. Here we are talking only about the learning strategy. At parties, be yourself.
6. Do not memorize links
Always try to look deeper and understand the through principle and idea of movement. Understanding what and how is done will make it possible to independently generate any sequences and chips.
Human memory is limited and there will always be a moment when something will escape and your repertoire will be limited by the size of RAM.
In Argentine tango, for example, there are seven levels of movement construction that, when mastered, will allow you to make millions of combinations. And how many dance sequences can you really remember? In rueda, more than 150 figures dance in a rare circle. It's hard to keep more in mind.
7. Develop your body
Many years of experience in teaching partner dance shows that as soon as everyone pairs up in a class, any progress in individual style ends. But it is the individual style that distinguishes everyone at the disco: partners change, and style is always with you.
The body as the main instrument of dance must be very plastic, responsive and emotional. Surprisingly, not all pair dance schools have a general physical warm-up. It is vital to tune the body and understand how it works.
You can always train extra and concentrate more on the basic steps, as their true value is as body work. The sequence of steps is, in fact, the simplest thing that can be in pair dancing. The quality of individual performance determines the craftsmanship.
8. Try on the images of inspiring dancers
A psychological life hack for those who have already mastered the steps, but still feel that there is not enough brightness and drive. Most are terribly afraid of being someone else's "clone". Here the action is the same as under the influence of hypnosis - the more you resist, the more you plunge into an altered state of consciousness.
With a high degree of probability, you are already dancing like someone else's "clone". A meaningful fitting of someone else's image is that you mentally take the image of the one who inspires you (inspiration is critical in this case) and "put on" yourself. Then you start dancing and trying to feel in general how it is to be able, for example, to be the best partner or the sexiest partner in a disco. This is much more difficult than it seems. But it works extremely efficiently.
9. Dance to offbeat music
Habitual rhythms keep you tight. Tango salon or speedy timba leave little room for experimentation and fantasy. Pattern dancing is always noticeable and is reserved for beginners.
The truly new is born outside of the usual. Look for places to experiment. If there is no place, organize self-training. The main thing is not to get carried away, because music determines the style. We bring something new to pair dances, rather than trying to change them.
Search, improvise, do not be afraid to go beyond, develop in different directions, be inspired by music atypical for style
10. Try your hand at basic dance directions
dances exist according to their own non-choreographic laws.
This is the deepest delusion, which has turned into a ceiling for the qualitative development of partner dances. After all, all professional dancers, for example, in salsa or bachata, build their ideas on the basic choreographic principles.
Do not think that choreography is only applicable on stage. Any meaningful movement of the body can be choreographic. In general, try classical or modern choreography. Basically, hip-hop can work too.
11. Look for battle sensations
Pair dances return us to an active position of manifestation of our body. As in the days of our ancient ancestors, we impress the members of the opposite sex by how dexterous, hardy, sexy, etc. we are. Modern laws of the jungle in the entourage of large cities.
If you look around the dance floor, it becomes clear that the majority are clearly herbivores (not in the sense of vegetarians, but in relation to those around them). I am sure that predators are always more interesting in terms of the attractiveness of the image - try to find a counterbalance among herbivores, for example, a cat woman or a lion man.
The conversation is about an internal position, not about aggressiveness. Lability and lack of control are inherent in adolescents, and not in adult self-sufficient people.
Accordingly, even a training or friendly battle gives, on the one hand, practical skills - to make a bright sequence of movements, bring an idea to a climax, show a spectacular feature, on the other hand, develops the psychological basis of the dance - self-confidence, resistance to extraneous attention, self-control and self-control in complex elements.
12. Communicate with professionals
The environment shapes the internal position. Basically, real passionaries of the dance community are ready to openly talk, discuss and support the development of dance in every possible way. Universal principles and the ideas they articulate have a much longer and more practical perspective than meets the eye.
Accept that, for example, behind the words "listen to your partner" is not only a beautiful metaphor, but also a practical skill to literally listen to your partner. At the same time, always treat every thought, even the most respected teacher, as a private opinion.
Your skill will lie in finding the scope of the idea even in conflicting opinions. Most often, the contradiction is speculative and the truth lies in the angle of perception or situationality.
Your dancing growth will stop sooner or later. This can happen at the level of three basic steps or years of experience in teaching and show performances. Regardless of your level, the suggested 12 life hacks can get you off the ground and greatly accelerate your dance growth. There is no way here without your motivation and activity. Take your dance development into your own hands.
share an article with friends
| Salsa |
| Bcharatas |
Lessons of Argentine tango in Moscow - dance school of dance
School Dangerous sexuality
Salsa: destroyers of stereotypes
Couple dancing as a source of strength.