How to dance in black ops 4
Concerns raised over Black Ops 4 emotes putting players into third person
❘ Published: 2018-10-11T12:15:36
❘ Updated: 2018-10-18T10:01:38
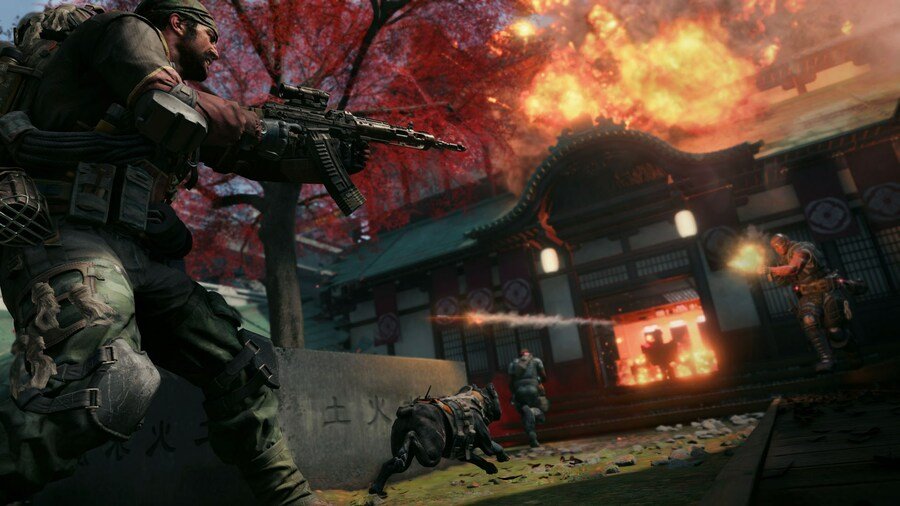
Black Ops 4 is strictly first person shoot, whether in multiplayer, Zombies or Blackout – except you will now be able to view your character in third person at any time, thanks to the new emote system.
[ad name=”article1″]
Dances, sprays and taunts are will all be featured in multiplayer, but unlike Black Ops III, these emotes can be used mid game, rather than only at the end of a match.
A user with an early copy of the game showed exactly how the system works, using a selector wheel similar to that in Fortnite’s battle royale mode, or a weapon wheel from GTA games.
Article continues after ad
[ad name=”article2″]
Once you have selected the emote, dance or taunt, the camera will then pan to third person, letting you see the action in all its glory, plus a full view of your character.
- More: Black Ops 4 finally features on Twitch as game launches in New Zealand
This is significant for a number of reasons, but mainly because it seriously elevates the importance of character skins and outfits.
In Black Ops III, there was a wide array of outfits for each specialist character, but they were only viewable by the player using them in the lobby or in the ‘winners circle’.
Subscribe to our newsletter for the latest updates on Esports, Gaming and more.
Now players will be able to see their outfits fully, at any point during a match, which makes much more sense and should increase players’ interest in cosmetics generally.
Article continues after ad
[ad name=”article3″]
But, the ability to see in third person is more than just an aesthetic improvement – it’s a viable game mechanic. Players will be able to use emotes to see around corners without exposing their character, and use the free cam to pan round.
It throws up a serious problem for competitive play, where this kind of visual advantage is potentially game breaking for both Search and Destroy and Capture the Flag. It remains to be seen if this feature will be adjusted, or will have to be removed for competitive.
Treyarch have expressed that they have lots and lots of post launch content planned, and with the new emotes and sprays, they have exponentially more options for character customizations.
Article continues after ad
- More: Blackout will feature major changes at launch – Level 3 Armor, audio fixes, player counts, and more
The system of supply drops or direct purchases for cosmetic items and DLC weapons isn’t entirely set out yet, but should become clear over the coming months, as Treyarch release more content.
Call Of Duty: Black Ops 4 Zombies Dead of the Night map Easter eggs
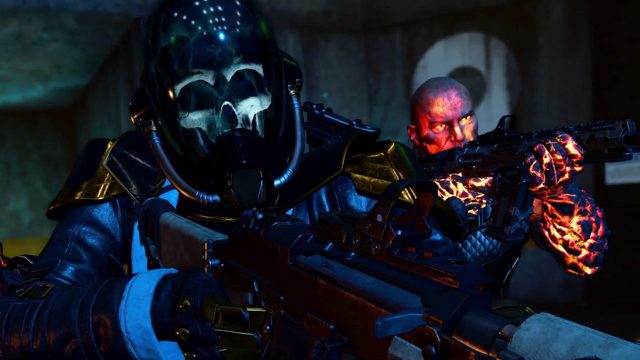
The Black Ops 4 Zombies Dead of the Night Easter egg is the first DLC map for the undead mode, introducing a brand new cast of characters: Gideon Jones (Kiefer Sutherland), Christina Fowler (Helena Bonham Carter), Jonathan Warwick (Brian Blessed), and Godfrey (Charles Dance). This Black Ops 4 Zombies map throws our star-studded lineup into an English mansion when zombies, vampires, and werewolves start to attack.
As is the case with all Zombies maps, Black Ops 4 Dead of the Night has a number of unlockable weapons and items, along with a lengthy easter egg consisting of multiple obscure objectives to complete. If you’ve played a Zombies map before this, you’ll know that you have to truly think outside of the box and you may even need to take some notes down, so make sure you have a pen and paper to hand - Dead of the Night isn’t easy!
- Black Ops 4 Zombies IX Easter eggs
- Black Ops 4 Zombies Voyage of Despair Easter eggs
- Black Ops 4 Zombies Blood of the Dead Easter eggs
Finding the Sentinel Artifact
Remember that Sentinel Artifact that you have to interact with at the very start of Voyage of Despair? Yeah… it’s back again, and it’s the first thing you need to find and interact with in Dead of the Night. Thankfully, it’s super easy to get and you can actually see it as soon as you spawn. Look over to the Grand Staircase and you’ll be able to see it floating.
Move through either the east or west side of the mansion depending on where you spawned - don’t worry about doors on the other side, when you open one door it automatically opens the opposite one - and head over to the Grand Staircase. You should only need to open two doors so when you get there in the second round or so, interact with the Sentinel Artifact to unlock the rest of the map.
Crafting Silver Bullets
From the get-go, there are two objectives you need to have in mind on Dead of the Night: Unlocking Pack A Punch and crafting Silver Bullets. You really want to be doing these simultaneously, so if you’re playing with more than just yourself, have one person focus on this while the other has their attention on Pack A Punch.
For the Silver Bullets, you first need to find three silver objects that are all inside the mansion.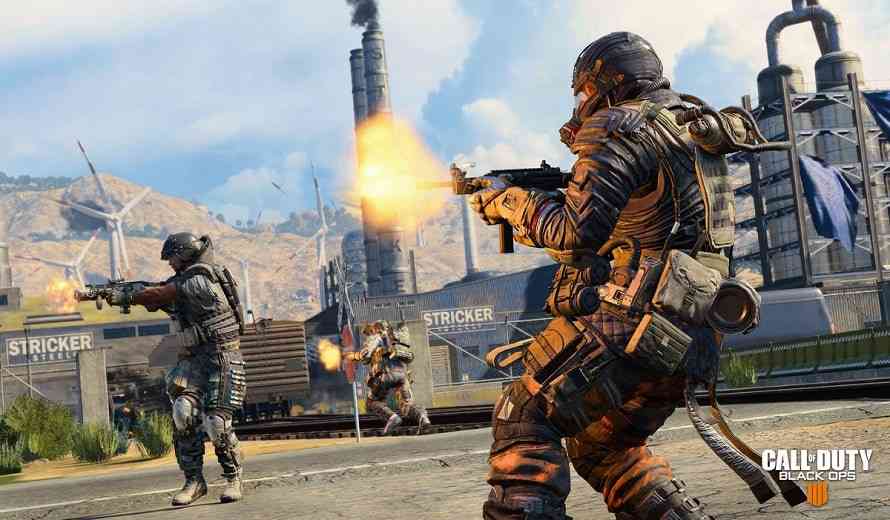 Here are each of the silver objects you need, along with all of the possible spawn locations.
Candle Holder
- Entrance Hall - On the first circular table to your left as you enter
- Billiards Room - Lying on the floor, as it’s fallen off of the small square table with two chairs
- Main Hall - On the altar next to the Mozu wall-buy
Silver Trophy
- Dining Room - On the rectangular coffee table, in front of the large sofa with the painting
- Dining Room - On the corner of the enormous banquet table in the middle of the room
- West Hallway - On the floor at the end of another sofa, by a small circular coffee table.
Silver Plate
- Wine Cellar - On the edge of the table with a tall chair, by the wooden pillar.
- Wine Cellar - On the stone pillar next to the MX-9 wall-buy, underneath a candle.

- Wine Cellar - On the other side of the wall to the previous location, inside the cabinet.
When you have all three silver objects, you need to melt them down so they can be turned into Silver Bullets. Stay in the Wine Cellar and use the crafting bench in the corner to melt them.
Now you need to go and find another three items to make gunpowder. Here are the required items and all of their possible spawn locations.
Charcoal
- Main Hall - Inside one of the fireplaces
- Billiards Room - Inside the fireplace on the right-hand side of the room
- Master Bedroom - Inside the fireplace underneath the painting
Poop
- Cemetery - At the base of the tall tree next to the Mausoleum steps
- Cemetery - On the right-hand side of the Cemetery, it can be found against the fence railing by a statue of a small boy
- Cemetery - Against the fence railing that leads round to the left after you enter the Cemetery from the right-hand side.
 It’s just after the bend in the railing
Sulphur
- Greenhouse Laboratory - On the desk to your right as you go in through the main entrance
- Greenhouse Laboratory - On the desk to your left as you go in through the main entrance
- Greenhouse Laboratory - On the desk at the back of the Greenhouse Laboratory, on the left-hand side
When you’ve got all three gunpowder items, you’re ready to combine them and make the Silver Bullets! Head to the Library and use the crafting bench at the base of the stairs to the Study to do so. Make sure you have the right weapon that you want the Silver Bullets in equipped; you’ll have to spend points if you want them in both weapons.
Unlocking Pack A Punch
Now while someone is crafting the Silver Bullets, ideally you want someone else looking for all of these objects to unlock Pack A Punch. The concept is simple; you need to find three glowing stones hidden inside vases throughout the mansion. When you find each vase, shoot it open to see if the stone is inside. Here are all of the possible locations for each of the glowing stones.
Green Perk Challenge Stone
- Study - On the rectangular table between two armchairs
- Library - On the larger table surrounded by chairs, next to the wooden pillar
- Library - On the end of a rectangular cabinet, next to some statues and a dilapidated bookshelf
Purple Clock Challenge Stone
- Bedroom Hallway - On a small table in front of a green sofa, next to a zombie window and potted plant
- Master Bedroom - On the clothing trunk at the foot of the four poster bed
- Trophy Room - On the small circular coffee table with one overturned chair
Blue Ghost Challenge Stone
- Wine Cellar - On the small brown crate with a candle, at the end of a huge barrel on its side and two normal barrels by a wooden pillar
- Wine Cellar - On the table in the middle of the room, next to a chair
When you’ve found all three stones, you need to kill some zombies near each of them. We’re not sure of the exact number, but four or five should do the trick. When you’ve killed enough and their souls have been absorbed, you can gaze into each of the stones to see an image. The green stone will show you a Perk Machine, the purple stone will show a clock, and the blue stone will show an object. None of the challenges are too difficult, thankfully.
Perk Challenge
Depending on which Perk Machine you saw in the vision, you need to head to that specific Perk Machine in game. Of course, your Perk Machines are unique to you depending on your loadout before the game, so we can’t tell you which perk to go to specifically. Here are all of the random Perk Machine spawn locations:
- Mausoleum
- Gardens
- Forest Terrace
- Grand Staircase
- Wine Cellar
- Entrance Hall
When you approach the correct Perk Machine that you saw in the vision, your screen will go monochrome and vampires will start to spawn. All you need to do is kill enough of them until your screen goes back to normal and you receive a Tuning Fork.
Clock Challenge
For this one, you’ll simply see an image of a clock when you gaze into the challenge stone. You have to find this clock on the map, then stand inside the circle it spawns for 60 seconds. Faster and more powerful zombies will spawn and start coming for you, so if possible, have your teammates outside of the circle killing them before they reach you. Once complete, you’ll receive another Tuning Fork. Here are the three clock locations:
- Billiards Room
- Main Hall
- Dining Room
Ghost Challenge
With the blue stone, you will see an image of an object. This can be several different things, ranging from a rope or a doll, to a scroll or one of three types of painting. Here are all of the objects with their spawn locations:
- [Rope] Wine Cellar - On the back of the tall chair, by the same place as the Silver Plate spawn.
- [Creepy Girl Painting] East Gallery - On the wall in the East Gallery.

- [Old Man & Girl Painting] Smoking Room - On the wall in the Smoking Room.
- [Woman Painting] Music Room - On the wall in the Music Room.
- [Doll] Entrance Hall - Along the left-hand wall, next to a tall vase.
- [Scroll] Study - Inside a lockbox on a bookshelf, right next to the debris unlock for the room.
When you’ve interacted with the object you saw in the vision, a ghost will spawn. Follow her to wherever she takes you - it’s usually the Cemetery but she may go elsewhere. When you get to the final destination, she will spawn you a third Tuning Fork.
Opening the Forest
Now, with all three Tuning Forks acquired, you need to go out to the Forest Terrace. There’s a huge black and orange barrier blocking the entrance, but if you interact with it with the Tuning Forks, it will disappear. This will spawn a Werewolf though, which you need to kill.
Silver Bullets come in handy here for two reasons: it makes it easier to kill, and if you finish it off with Silver Bullets, you’ll also acquire the Werewolf Chaos Material that you need for a later objective. When you’ve killed it, head into the Forest but watch out because a second Werewolf can often spawn deeper into the Forest. Follow the Forest path all the way to the end to find the Pack A Punch machine, which as always, costs 5,000 points to use and upgrade your weapon.
Building the Ballistic Shield
The next step is to build the Ballistic Shield. This is a weapon that can be found on basically every single Zombies map in the game, so by now you should be familiar with it. As usual, there’s a series of parts you need to find, each with random spawn locations. Here are all the places you need to check:
Handle
- East Balcony - Leant against the balcony stone railing, left of the Saug 9mm wall-buy
- Grand Staircase - Leant against the pillar, right of the Sentinel Artifact location
- West Balcony - Leant against the wall at the end of the balcony, under the left-most of three tall windows
Window
- Study - On a square table to the right of the entrance from the Billiards Room
- Library - On a broken bookshelf in the far corner, next to a huge vase
- Library - On the sofa blocking the inaccessible staircase
Counter
- East Hallway - On a chair in the corner of the hallway, by a table with a lamp
- Dining Room - Underneath a double candle on the wall, on the right-hand side of the bar
- Dining Room - On the floor to the left of the doorway to the Greenhouse Terrace, next to the marble pillar
When you’ve found all three parts, head to the Smoking Room and interact with the crafting bench to build the Ballistic Shield.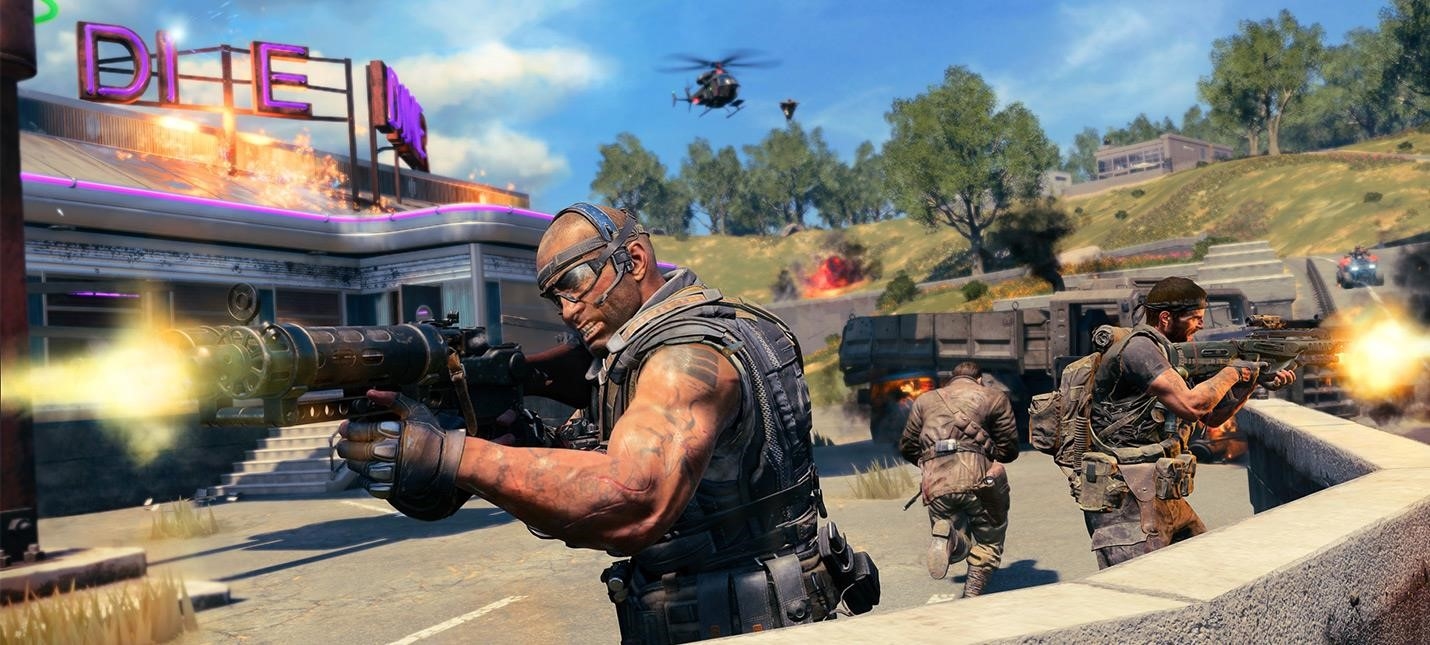 Throughout the game, your Ballistic Shield will take damage and eventually break, so just head back to this crafting bench to grab another one.
Obtaining the Alistair’s Folly wonder weapon
In Dead of the Night, the wonder weapon is Alistair’s Folly; a revolver that shoots green projectiles that have a splash damage effect. You can actually obtain the gun through the Mystery Box, but at 950 points per attempt and a very slim chance of getting it, you could be there for a long while. Instead, you can also get the gun for free by finding four hidden symbols throughout the map. You may need a pen and paper for this stage to note down which colour goes with which symbol. Of course, there’s multiple locations again for each symbol so make sure you check them all.
Blue Symbol
- Cemetery - Near the Cemetery exit, behind a tree and a fence at the same spot as one of the Poop spawns for the Silver Bullets
- Cemetery - On the right-hand stairs up to the Mausoleum, it can spawn on the first small pillar on the right-hand side handrail
- Mausoleum - On the base of the lion statue that is outside of the playable area, to the back left
- Mausoleum - On the top of the crypt on the right-hand side, outside of the playable area
Green Symbol
- Gardens - Inside the gazebo, to the left of the door frame
- Gardens - Right of the Perk Machine, through a locked gate
- Gardens - Left of the Perk Machine, through a locked gate, by a bench
- Greenhouse Terrace - On the left pillar by the water fountain
Red Symbol
- Dining Room - Above the painting to the left of the bar area
- Master Bedroom - To the right of the painting above the fireplace
- East Gallery - Above the small circular table with two chairs, at the top of the stairs
- Wine Cellar - Through the barrier in front of the right-hand staircase, at the bottom of some wooden barrels
Yellow Symbol
- Forest Terrace - Through the gate on the left, on the side of the left-hand wall
- Forest Terrace - At the end of the right-hand side gate, on a wall
- Forest Terrace - On the wall to the right-hand side of the GKS wall-buy
- Forest Terrace - On the wall to the left-hand side of the Bowie Knife wall-buy
When you’ve taken note of all four symbols, head to the Library. At the back of the Library is Alistair’s Folly inside a locked case. Input the four symbols then enter the code and the case should open, giving one player Alistair’s Folly. If anybody else wants it in your game, they’ll need to use the Mystery Box.
Upgrading Alistair’s Folly to Chaos Theory
When you have Alistair’s Folly, you can upgrade it twice. The first time is to Chaos Theory, which has a charged shot that creates a tornado effect that can kill multiple enemies simultaneously.
The first step to upgrading Alistair’s Folly to Chaos Theory is to obtain the Chaos Material, which is achieved by killing a Werewolf with Silver Bullets. If you did this the first time you fought a Werewolf then you can skip this step since you should already have Chaos Material, but if not, head back to the Forest and there should be another Werewolf prowling. If you can’t find one, spend some time there and one will eventually spawn.
With the Chaos Material in your inventory, head to the Greenhouse Laboratory. On the ground floor is a large machine - the only one you can interact with. Place the Chaos Material inside then after a few seconds of chugging and churning, the machine will output Prima Materia on the left-hand side of the machine. Now you may need to complete this a few times; we had to do it four times before it wouldn’t let us place any more Chaos Material inside, but it’s unconfirmed whether that’s a bug or not. Either way, if you still have the option to place Chaos Material inside and collect Prima Materia, then make sure you do it.
Once you have the Prima Materia, go to the Library and find a bookshelf that looks slightly different from the other bookshelves. This is a hidden door; melee it with your Ballistic Shield equipped to open it. This will reveal another part used in the upgrade; pick it up and head back to the Greenhouse Laboratory.
Approach the crafting bench at the back-right side of the Greenhouse Laboratory and interact with it to create the Chaos Theory upgrade.
Upgrading Chaos Theory to Alistair’s Annihilator
The third and final upgrade for the wonder weapon is to Alistair’s Annihilator. This version of the weapon has a charged shot that can deal a multitude of different effects including shrinking any enemies you shoot with it. It also has a scope on it, if you need to be shooting any zombies at range for some reason.
The first thing you need is the Bat Chaos Material. Unfortunately, this is more complicated than shooting a Vampire with Silver Bullets. You need to head outside to the Mausoleum, where there will be eight lamps at the front, on the wall and also at the bottom of each of the stairs. A few of these will be lit already, but one of them will feature an orange tint rather than a yellow one. Shoot the orange one with the Chaos Theory and it will go out. One of the other eight lamps will have turned on. You have a few seconds to get to it and shoot the next one. Do this a total of five times and when you shoot the last one, a huge bat will fly out of the lamp. Shoot this bat once with a charged shot of the Chaos Theory and the bat will die, dropping the Bat Chaos Material.
Now you need the Nosferatu Chaos Material. For this one, you need to kill Vampires with the charged tornado shot of the Chaos Theory. Kill four in total and they will drop piles of bile. Pick up four bile piles then head to the Cemetery, where you’ll see a tomb glowing red. Interact with it to summon a Nosferatu. Kill this Nosferatu and it will drop the Nosferatu Chaos Material.
For the third part of the Alistair’s Annihilator upgrade, head out to the Forest. On the floor are multiple mounds with glowing mushrooms on. As zombies get close to these mounds, shoot them with charged shots from the Chaos Theory and rather than sending them spinning into a tornado, they should turn green and start digging at the mounds. Do this several times on different mounds of mushrooms and eventually, the zombies will dig up a part needed for Alistair’s Annihilator.
To complete the upgrade, head back to the Greenhouse Laboratory and go to the same machine you used before. Place the Bat Chaos Material inside then collect the Prima Materia from the other side, then do the same with the Nosferatu Chaos Material. With all of the Prima Materia collected, use the workbench on the other side of the Greenhouse Laboratory to create Alistair’s Annihilator.
Revisiting the Challenge Stones
Now you can crack on with the main easter egg! For this part, you need to revisit each of the same challenge stones you gazed into before unlocking Pack A Punch. Interact with them again and you’ll receive a new vision of either a knight, a telescope, or an effigy. The one you receive determines which challenge you have to tackle first and they’re not specifically assigned to a specific stone.
Knight Challenge
If you see an image of a Knight’s helmet, you need to go and find yourself a Fire Gate Energy Core. These are pretty easy to find and there’s a good chance you’ll have picked up a few already, as they tend to just be lying about. When you have one, go to the Entrance Hall and use one to turn on the Fire Trap in the doorway. Spend 1000 points to activate the trap, then charge up Alistair’s Annihilator and shoot at the fire to turn the fire blue.
When the fire is blue, equip your Ballistic Shield and run through the fire. Your shield will now have blue flames on it. You have to visit a series of fireplaces across the map and melee them in order with the Ballistic Shield, while it’s flaming blue.
The first set of fireplaces you need to head to and melee is in this order:
- Smoking Room
- Library (right side of the door)
- Library (left side of the door)
- Billiards Room
If you sprint and melee each one within the allotted time limit, the final fireplace in the Billiards Room should make a high pitched noise and it will drop an Energy Core. Pick up the Energy Core, then head back to the Entrance Hall because you need to do it twice more for different sets of fireplaces. Here is the second set of fireplaces you need to light then grab an Energy Core from:
- Main Hall (east side)
- East Gallery
- Main Hall (west side)
- West Gallery
And here is the third and final set of fireplaces:
- Trophy Room
- Master Bedroom
- Music Room
- Dining Room
If you’re struggling to do them within the time limit, make sure you’ve bought Stamin-Up so you move slightly faster and don’t run out of sprint.
With all three Energy Cores obtained, you now need to visit three Knight statues throughout the map. When you find them, interact with the Knights and an Energy Core will be placed into their chest. The suit will crumble, and the Energy Core will then float and follow you. Here are the three Knight locations:
- Cemetery - To the right of the Cemetery entrance
- Gardens - Follow the path to the right of the gazebo
- Main Hall - By the East Hallway entrance
As you interact with each of them one by one, the Energy Cores will follow you. Escort them individually out to the Forest, where you’ll find three coloured ritual symbols in the floor. Take them to their respective coloured ritual symbol, where they will stay in place. When you’ve escorted all three Energy Cores, interact with them to spawn three Ghost Knights. You need to fuel these Ghost Knights with zombie souls, so stand near them and kill as many zombies as you possibly can by each one. The Ghost Knights will start to move down toward the Pack A Punch machine. When all three Ghost Knights make it to the Pack A Punch machine, they’ll form a triangle. Your goal is to simply kill a Werewolf inside this triangle.
When you’ve killed a Werewolf inside the triangle, a stone slab will spawn. Have everyone in the game interact with the stone slab at the same time to kick off another wave of Werewolves, Vampires and Zombies. When you’ve killed all of the enemies, you can pick up the stone slab.
Telescope Challenge
If you seen an image of a telescope when you gaze into one of the stones, strap in because this one is a lot of searching random spawn locations. Before that though, you need to ensure you have Silver Bullets equipped then head out to the Cemetery. Look to the top of the Mausoleum and you’ll see a metal rod.
Have everyone in the game shoot at the rod with Silver Bullets and eventually, a beam of light will appear and point toward the enormous Atlas statue in the Main Hall. Head into the Main hall and go to the North Atrium Bridge, the same place you spawn at the very start of the game.
(Image credit: MrDalekJD/YouTube)Interact with the wheel to align the coloured lights above Atlas’ head. The quickest way to do this is to turn the middle wheel all the way left until the green is set, followed by turning the left wheel left until the blue is set. Then do the same with the right wheel until red is set, and rinse and repeat until the puzzle is complete. When it’s done correctly, Atlas’ head will be destroyed and the beam will point to the Greenhouse Laboratory telescope.
Now the searching begins. You need to find three glowing Zodiac Symbols across the map, along with scratch marks that will tell you the order you need to input the symbols. Here are all of the Zodiac Symbols spawn locations, along with the potential locations of the scratches that you’ll need to count.
Entrance Hall Zodiac Symbol
(Image credit: MrDalekJD/YouTube)You’ll find the Zodiac Symbol for the Entrance Hall underneath the table in the back left corner of the room, left of the Perk Machine.
Entrance Hall Scratch Marks
- On the shield to the right of the Perk Machine
- To the right of the Portal on the wall
- On the wall next to the painting on your left when you walk in the room
Billiards Room Zodiac Symbol
(Image credit: MrDalekJD/YouTube)- Underneath the chess table with a painting
Billiards Room Scratch Marks
- To the left of the bookshelf
- Above the left side of the cabinet near the door to the Smoking Room
- Under the table on your right when you enter from the Smoking Room
Trophy Room Zodiac Symbol
(Image credit: MrDalekJD/YouTube)- In the far back left corner, next to the zombie window and behind a standing lamp
Trophy Room Scratch Marks
- On the left-hand side of the fireplace
- On the desk to the left of the bed, next to the mask
- Through the zombie window, above the bath and between two lamps
Main Hall Zodiac Symbol
(Image credit: MrDalekJD/YouTube)- Between two marble pillars and behind a gold candle holder, on the right-hand side of the stairs that lead up to the West areas
Main Hall Scratch Marks
- Above the water to the right of the Grand Staircase, by the statue of a woman
- Above the fireplace, to the right of the clock
- In the top left corner of the room when entering from the Forest
Library Zodiac Symbol
(Image credit: MrDalekJD/YouTube)- Inside the broken cabinet to the left of the gun cabinet
Library Scratch Marks
- Left of the Zodiac Symbol, to the top right of the zombie window
- Turn around when facing the Zodiac Symbol and the scratch mark is on the side of a box by a sofa
- By the dinosaur’s left foot
Wine Cellar Zodiac Symbol
(Image credit: MrDalekJD/YouTube)- Bottom right side of the wine rack near the Perk Machine
Wine Cellar Scratch Marks
- On the enormous barrel near the right-hand side stairs, behind a broken barrel
- On the door to the cabinet between the left-hand side stairs and the Perk Machine
- On the top of a regular sized barrel behind the crafting bench
Dining Room Zodiac Symbol
- To the right-hand side of the door leading outside, next to the broken marble pillar and red curtain
Dining Room Scratch Marks
- On the ceiling in front of the stairs
- On the corner of the banquet table, near the Silver Trophy spawn
- On the wall opposite the East Hallway entrance, left of two light fixtures and a small table with a large vase
- On the ceiling near the Main Hall entrance, by a painting
Add together the scratch marks from each room, and the total will tell you the ascending order you need to put the Zodiac Symbols in. Go to the Greenhouse Laboratory and up the stairs till you reach the telescope. Enter the Zodiac Symbols into the telescope in the correct order and melee attack it after each one to confirm your input. You’ll know you’ve done it correctly when all three symbols remain in place.
Equip the Ballistic Shield and interact with the Dome Crank. When the dome is open, melee attack the Dome Crank to keep it open. Head downstairs and activate the Electric Trap, then equip your Ballistic Shield again and run through the Electric Trap. Your shield will become blue and electrified, similar to the Fire Trap in the Knight challenge. Head back up to the telescope and start melee attacking it with your shield. It’s best if as many people in the match do this step at the same time. When you’ve done it correctly, a beam of light will emit and your screen will flash white.
(Image credit: MrDalekJD/YouTube)Again, at this stage, another stone slab will appear. Have everyone interact with it simultaneously and another wave of zombies, Vampires and Werewolves will begin. When you survive the wave, pick up the stone slab.
Effigy Challenge
(Image credit: MrDalekJD/YouTube)For the final challenge, you need to go out to the Cemetery. There’s five birch trees with falling leaves. Each one has a branch that you can shoot down with Alistair’s Annihilator, then collect them as they fall. When you have all five, search the Cemetery for a gravestone that has 1912 as the date of death. There will be one of the four playable characters depicted on the gravestone - whoever is playing as the character depicted is the one who needs to come along and interact with the gravestone.
When that player interacts with it, make sure they have Alistair’s Annihilator equipped. A scarecrow will form nearby, made out of the branches you collected from the tree. Shoot at the ground at the foot of the scarecrow with a charged Alistair’s Annihilator shot to light it on fire. The player who interacted with the gravestone must now step inside the fire and enter the Afterlife, where they are invisible to all other players, but NOT to enemies.
Head inside and search the mansion for a ghost. When you find her, follow/escort her until she starts to burn near the effigy. When she does, a stone slab will appear on the ground. Once again - for the final time - have everyone interact with it to spawn another wave full of Vampires, Werewolves and zombies. Survive this round and pick up the final stone slab.
Final Boss Fight
(Image credit: MrDalekJD/YouTube)With all three stone slabs connected, you’re ready for the final boss fight. Make sure you prepare and grab all the perks you need. To start the boss fight, head to the enormous stone wheel in the Forest and interact with it all at the same time.
Do note that in one corner of the boss arena is a Max Ammo power up, with a Carpenter power up in another corner. Make sure you grab them both during the first phase of the fight because more will spawn in the following phases, but only if the first ones have been collected.
Everyone will spawn into an arena, facing off against an enormous Werewolf as the final boss.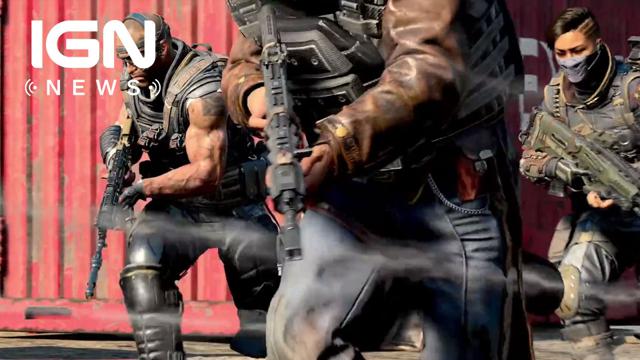 The only issue is… the Werewolf is invisible. During the first phase, a green area will be highlighted on the ground. Interact with all of the statue lights to point at the green area, then stand inside the area and lure the invisible Werewolf into it. When it’s there, it will become visible and everyone can shoot at it to deal damage. When you’ve done this a couple of times and dealt enough damage, phase two will begin.
The second phase of the fight is essentially just one long wave of tough enemies. There’s no tricks to complete it, you just need to survive for long enough until the invisible Werewolf leaps back into the arena. Make sure you keep grabbing the Max Ammo power ups as they spawn.
For the final phase, you essentially have to do the same as the first phase, but the green area isn’t highlighted. You need to interact with the statue lights until it eventually appears and you can aim all of the statue lights at it, at which point you need to lure the Werewolf back in.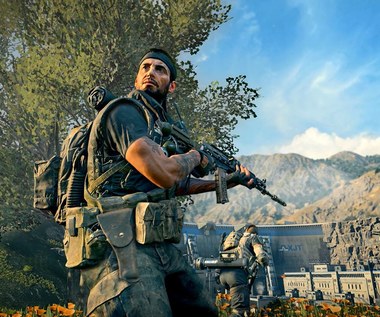 Again, do this a couple of times and keep dealing damage. Eventually the boss Werewolf will die and the final cutscene will begin. Congratulations! You’ve beaten the first of the Black Ops 4 Zombies DLC maps.
Give me a game and I will write every "how to" I possibly can or die trying. When I'm not knee-deep in a game to write guides on, you'll find me hurtling round the track in F1, flinging balls on my phone in Pokemon Go, pretending to know what I'm doing in Football Manager, or clicking on heads in Valorant.
Black Ops 4 - how to win the Eclipse? Action Guide / Games
| Genre | Shooter |
| Publisher | Activision |
| Publisher in Russia | Activision |
| Developer | Treyarch |
| Minimum requirements | Intel Core i5-2400 3. 1 GHz/AMD FX 6300 3.8 GHz, 8 GB RAM, DirectX 11 graphics card, 2 GB memory such as NVIDIA GeForce GTX 660/AMD Radeon R9285, 46 GB hard drive, internet connection and Uplay account 1 GHz/AMD FX 6300 3.8 GHz, 8 GB RAM, DirectX 11 graphics card, 2 GB memory such as NVIDIA GeForce GTX 660/AMD Radeon R9285, 46 GB hard drive, internet connection and Uplay account |
| Recommended requirements | Intel Core i7-3770 3.5 GHz/AMD FX-8350 4.0 GHz, 8 GB RAM, DirectX 11 graphics card, 4 GB memory such as NVIDIA GeForce GTX 970/AMD Radeon R9 290 |
| Release date | October 12, 2018 |
| Age requirement | from 18 years old |
| Platforms | PC, PlayStation 4, Xbox One |
| Official site | |
In all battle royales, the basic rules are the same: the last surviving participant in the match (or group of comrades, if we are talking about deuces or squads) is declared the winner. It doesn't matter if you take second place, thirtieth or hundredth, it's all a defeat. In this regard, Blackout in Call of Duty: Black Ops 4 is no different from similar modes in other games. Therefore, not every player will be able to win on an ongoing basis, and someone will get to the first line for the first time only weeks or months later. But there are a few rules and tips that will help you win sooner or later, and I will try to talk about them in detail.
⇡#
Where to land? The map in Eclipse is not as big as in PlayerUnknown's Battlegrounds, but it's still eye-opening at first glance. 14 locations with their own names and a lot of houses, barns and other smaller objects outside of them. There is one trick associated with dropping: after jumping out of the plane, you must immediately tilt the camera and fly perpendicular to the ground until your speed is 69 or 70 m / s, and then return the camera to its previous position. After that, you will be able to fly literally to any point on the map - the gained speed will decrease very slowly.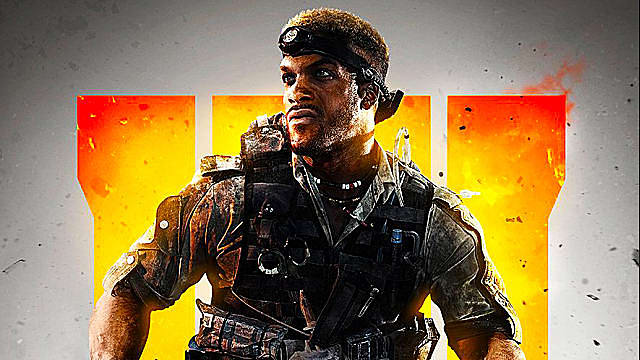
Knowing the trick with falling speed, you can get to any place
In this regard, Black Ops 4 does not have any popular zones in the manner of Fortnite's "Abandoned Towers". Sometimes a lot of players can be found at the Shooting Range, but often you will land there alone. Nuketown Island is also not always bypassed, but there are matches in which some kind of loner is found there. If you just want to explore the features, gadgets, weapons and attachments in a quiet environment, you can go to the area south of the Windmills - there are not many trophies there, but in most cases the place is very quiet.
To learn how to quickly react to danger, I recommend starting landing at named locations as soon as possible, memorizing the buildings with the most junk inside (and their layout) and trying to find weapons as soon as possible. Of course, nothing prevents you from falling away from everyone and hiding every time, but at some point this tactic will not work and you will have to join the battle. And without understanding how to behave in such situations, success will not be achieved. It’s better to start with some Rivertown or Cargo Port, kill a couple of competitors, warm up and after that be careful.
⇡#
In search of preyBefore landing, it is advisable to look around and find out if there is someone near you, or if you are completely alone. In any case, the first thing you need to find three things: normal weapons, armor and a couple of first aid kits. Problems will definitely arise with something - situations are possible when there are not a single weapon in two neighboring buildings, but the enemy found both armor and a machine gun in half a minute. Almighty random, what to do, treat it philosophically.
Console players should learn how to use the quick menu - often saves
What can be called a "normal" weapon? Everything is subjective here, but there are still favorites in the game. Among automatic rifles, Maddox is considered the best - it has low recoil, a capacious clip and excellent damage. The ICR-7 is also good for its accuracy, but at long range it will be as worthless as the Swordfish and ABR 233, which are difficult to praise even in close combat. The VAPR-XKG is good for any firefight, and the most accurate players can carry the Rampart-17 with them (just don't miss, the slow rate of fire will punish you for this). A little easier to cope with the KN-57, which also rarely fails.
By the middle of the match, it is highly recommended to find a good machine, without it it will become more difficult to play. Submachine guns and regular machine guns are good at close and medium distances, and shotguns are only good at close range, but it is likely that you will not face most opponents ten minutes later. These types of weapons can be taken in the second slot, the main thing is not to carry rocket launchers with you when playing alone. They are only relevant in squads, after all, people there are much more likely to use helicopters and trucks.
In the Eclipse, it's hard to find a better machine gun than the Titan, and a more reliable submachine gun than the GKS with its high rate of fire, minimal recoil, and sufficient damage. There are only two shotguns in the game, and both of them are so-so, but the SG12 is still better than the MOG 12. Pistols are not worth considering at all - they are not very good even in the first minute of the match, let alone the rest of the time. There are still sniper rifles, and among them the favorites were found during the beta testing - "Cat" and "Paladin" will become your best friends in the middle and at the end of the match, if you learn how to use them.
If you have a normal weapon and enough first-aid kits, it's better not to risk it and not touch the duffel bags
⇡#
Subtleties and details A good weapon can be made even better with the help of body kits. Pick up and equip everything you see, with a focus on larger clips. Perhaps you will seriously injure your opponent, and then he will hide and begin to heal. It will take a couple of precious seconds to reload, which the owner of the enlarged magazine can use for a decisive assault.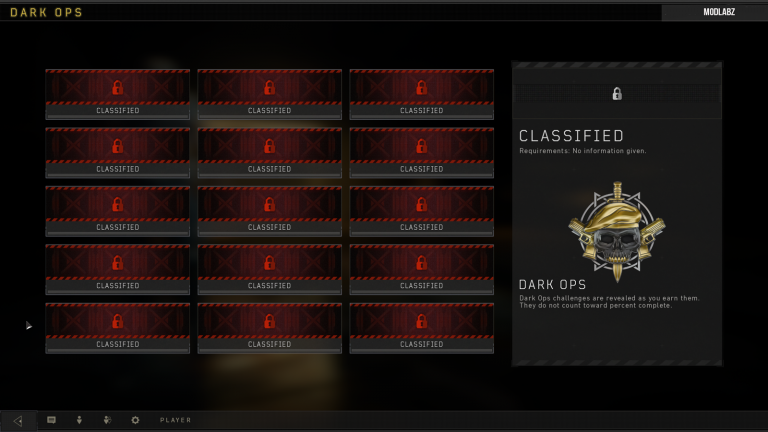 Or, conversely, your health stock will drop to a critical level, and you will need to use a first-aid kit and recharge in a split second. With larger clips, there will be less to worry about - the Maddox, for example, with an external magazine, will have as many as 60 rounds in the clip instead of 40.
But the sights should be studied independently, choosing the most suitable and convenient for yourself. But you should not put 2X and 4X on both weapons at once - it will be uncomfortable to shoot at close range. It is better to have guns in your inventory for all occasions, and do not forget to switch between them while exploring the area. In an open field, it is advisable to take a weapon with a sniper scope (or its likeness), and there is no need to enter a house with one.
An interesting feature of the "Eclipse" is that it has not only live players, but also zombies. They can appear in five places (look for vertical rays directed to the sky), but at the same time they crawl out of the “graves” in only two. Often they leave behind valuable trophies like first-aid kits or even unique weapons. Only from them, for example, will it be possible to “knock out” a beam pistol, which destroys the enemy with one shot. But it is extremely rare. But after killing all the zombies in the area (they are usually less than a dozen), a chest with prizes will open, and valuable things often lie there. Among them is armor of the third level, the only one that protects against hits in the head, so it’s clearly worth fighting for it. You can immediately land next to the chest if you like to take risks, or you can fall nearby, collect weapons and other equipment and be ready to meet both zombies and other players.
Zombies aren't all that dangerous, but players who hear the gunfire...
⇡#
Almost everything will come in handy Weapons aren't the only thing to deal with - Eclipse is full of other items whose value is difficult to determine at first. Among them are all kinds of grenades and other disposable items for an additional slot.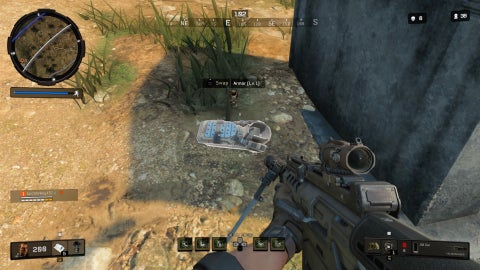 Molotov cocktails are not bad, but it's too easy to run away from them, the same applies to ordinary grenades. But clustered and blinding ones are definitely worth taking - if you throw such a gift behind the stone where the enemy is sitting, it will make him absolutely defenseless for a few seconds.
A smoke screen can also come in handy when you need to quickly retreat, but at first it is better to limit yourself to more useful items. A hatchet can instantly kill an opponent, a portable fence and barbed wire will protect the house where you hid, but in most cases there is no need to carry all this with you. The sensor dart can be called situationally useful: it is especially useful in the final, when you can find out exactly where the last opponent is and how he moves in a second.
⇡#
Perks save lives (and take them too) Now about perks - green boxes that come across on every corner. There is usually no time to sit and read their descriptions, so it’s better to remember the names of the most useful bonuses right away.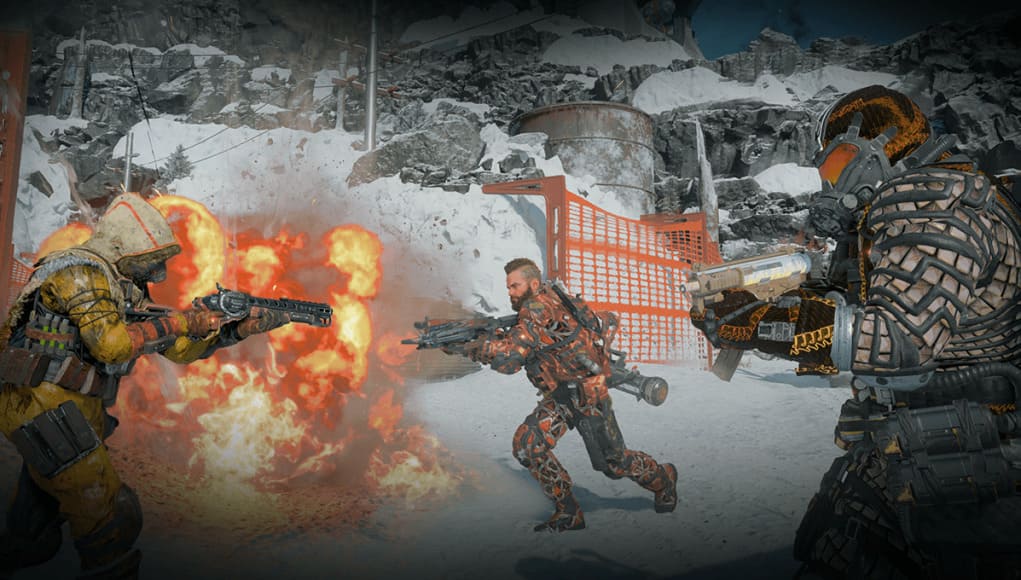
- "Dead Silence" - reduces the volume of your steps, which allows you to quietly get close to the enemy. Especially useful in the middle and end of a match.
- Rogue - When crouching and crawling, the speed will be almost the same as during normal running, and the volume of steps will decrease. A good thing for imperceptibly reducing the distance or a sudden change of position.
- "Awareness" - enemy footsteps become louder. If you're worried about people being around, the perk is indispensable, but it's only active for two minutes.
- Rugged Hide is a great perk for the final loops when there's a good chance you'll get a stun or cluster grenade thrown in your direction. This perk increases resistance to such explosions.
- Paranoia - Makes an eerie sound when an enemy aims at you. Convenient if you ride in a vehicle or know that a sniper is nearby.
These five perks are the most useful in the mid and late game. There are many other suitcases, but it is better not to clog up your inventory space with them. "Iron Lungs" will be useful only for snipers and will increase the duration of holding your breath when aiming, "Engineer" will allow you to quickly find equipment and show enemy equipment (including sensor darts), but this is not needed so often. Without the "Collector", showing the location of all the nearest caches and trophies, you can also do without.
Used perks continue to take up inventory space until they expire
⇡#
Rules of Conduct Speaking of "rules of conduct" during a match, the same laws apply in Eclipse as in others shooters and battle royales. Always try to take a high position, whether it be a hill, a rock, or the roof of a building. Black Ops 4 is not Fortnite, here it is impossible to build a ladder in five seconds, so the enemy will have to look for workarounds.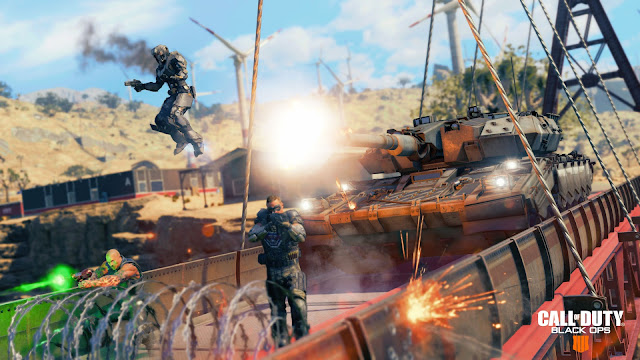 Also, don't run across open fields, always move from cover to cover - this can give you a few precious moments when they open fire on you.
In the middle and at the end of the match, it's hard to deny yourself the opportunity to open a supply box falling from the sky and get an item to unlock a new character - in the vast majority of cases it's not worth it, because a couple more players have probably advanced to the cargo . The same can be said about the desire to collect trophies from a freshly killed enemy - do not relax, others have most likely heard your shootout with him, and now they will come to see who is making noise there. By the way, you also don’t need to run to the sounds of shots if you are not confident in your abilities. When you are in a high position and your opponent is obviously badly hurt, you can try to hit him a couple of times, but usually asking for trouble is not recommended.
If a firefight does start, try to aim for the head. The level 1 and 2 armor worn by most of the participants does not cover this important part of the body. So you will not only kill your opponent more quickly, but also “do not spoil the skin”, which you can then put on yourself. Vehicles are a great way to get to the point, but they are too noisy and can attract the attention of brave (and well-aimed) shooters. It is better to stop near the destination and continue on foot. Just don't jump out at full speed.
Not very festive, but still a victory!
***
That, in principle, is all the main advice. Ultimately, you yourself will become the main teacher if you practice as often as possible and try your hand at different situations. You can sit in the toilet the whole game, or you can constantly attract attention and finish the match with 15 kills. Although in the latter case, you definitely don't need this material anymore...
Be that as it may, winning the Eclipse is not so difficult - practice, master the map and don't get hung up on one tactic, and then the coveted first line will submit to you. Good luck!
Video:
Black Ops 4, which was cut before the release - DTF games
{"id":3967,"url":"\/distributions\/3967\/click?bit= 1&hash=788cf18a5834b2680a8bb42b0862107b029f3c0e5148b5181a62c785142c214b","title":"\u041f\u043e\u0441\u043c\u043e\u0442\u0440\u0435\u0442\u044c \u0432 \u043f\u0435\u0440\u0435\u0440\u044b\u0432\u0435: \ u043a\u0430\u043a \u0443\u0441\u0442\u0440\u043e\u0435\u043d\u0430 \u0442\u0435\u0445\u0441\u0442\u0440\u0430\u0442\u0435\u0433\u0438\u044f \u00ab\u0412\ u041a\u043e\u043d\u0442\u0430\u043a\u0442\u0435\u00bb","buttonText":"\u0427\u0438\u0442\u0430\u0442\u044c","imageUuid":"77789898-6cc1-569c-9363-53804fabee8d","isPaidAndBannersEnabled":false}
The leak was shared by Purpletoaster from reddit, who also clarified that all images date back to 2017.
2300 views
Naturally, most of the assets are at the initial level, and the UI is completely absent somewhere, also Purpletoaster himself promises to release a 30-minute video with a full analysis of all the information that he managed to collect about the Call of Duty: Black Ops 4 campaign.
Interestingly, among the leaked materials (about 400 images), there is a lot of information about how the campaign was built and how directors / game designers worked with it.
Initially, the main game mode was Career, in which two teams of 2 people competed against the clock - who will complete one of the missions faster.
The mode itself was canceled in 2018 due to technical problems and a game loop, it was felt by the developers to be too repetitive (quickly bored).
So what was the idea?
- The idea was to take the campaign format and evolve it into a co-op live service that would transition into multiplayer.
- Thus, build a common narrative about specialists, history and all the components.
- Even if you didn't plan to play the Career co-op with anyone, you could still play it with the AI.
- Your actions would affect the entire story, depending on whether your team (faction, can be seen in the screenshots above) won or lost.
What was the engine of history?
- The Career is set in 2070, after the events of Black Ops 3.
- A global pandemic (sic!) and climate change have depleted the earth's resources leading to the "Year of Chaos".
- Most weapons in the world were made before all the events previously described, while everything that was in Black Ops 4 was a prototype of the future (before the "Year of Chaos").
- Most of the cards that were at the launch of the game were made with this story as a narrative.
About the idea of 2v2, there would be 2 factions in the game:
- Free People's Army (FPA) - supported by most of the impoverished countries of the world.
- World United Nations (WUN) - controlled by a central government body, which was opposed by the FPA.
- The player had to choose one of the factions and complete tasks in co-op, depending on the chosen faction - the narrative, characters and other aspects of the game changed.
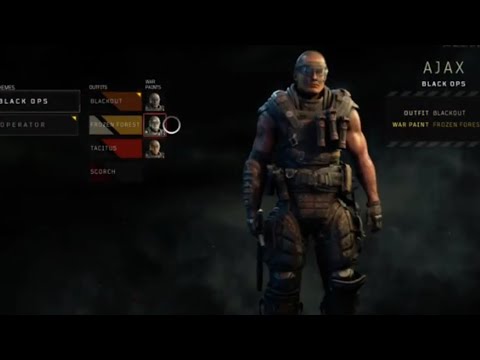
Faction Choice
Faction Choice
Allowing the player to choose one of the factions - the game created the opportunity to go through two independent campaigns, unless of course you were interested in a 2v2 mode.
The design of the missions was as follows:
- Each mission was no more than 15-20 minutes long.
- There were 6 locations in total (related to the story), but each location was 2 times larger than the story missions in Black Ops 3.
- Actually in the career mode, you did not go through the entire location at once, and the locations were also divided into some parts.
It doesn't make much sense to talk about the gameplay itself - the plot + battles against AI, interspersed with PVP sections between 2 factions, as well as vehicle management (not in all missions, only in some).
Next, Purpletoasta has a description of 4 story missions directly, but I recommend waiting for his full-fledged video, for 30 minutes.