How to avoid knee pain while dancing
5 ways to prevent common knee and hip injuries for dancers
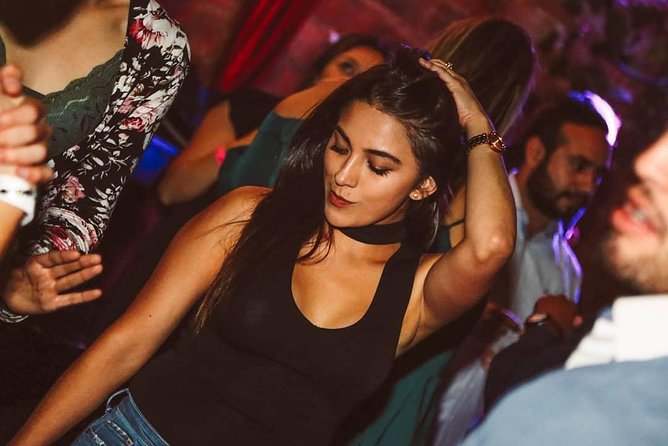
Beautiful lines. Extreme flexibility. These are some phrases we associate with dancers, along with extraordinary hand-eye coordination. It’s not uncommon to see pictures of dancers stretching in the most nonhuman way possible.
You might think that one way to be a better dancer is to stretch more often. So unsurprisingly, when the Australian Ballet shared that they would stop stretching and focus on strengthening to prevent dance injuries, it caused quite a sensation in the dance world. Yet, the ANB is not wrong in refocusing their techniques to focus on strengthening and cross-training for Ballet. Cross-training is one way of preventing knee and hip pain.
You might be wondering, how else do I lessen my chance of being injured so I can enjoy full mobility and dance?
We have shared some common knee and hip injuries in our previous post and what you should do if you are experiencing pain.
This article will highlight five ways you can prevent knee and hip injuries.
Why do dance injuries happen?
Dancing is physically demanding, and dancers perform repetitive movements for several hours a day. Studies have shown that dancers tend to injure their lower bodies more often. Additionally, as an art form and a sport, dancers do not just dance, they also attend techniques and choreography classes, leaving no ‘offseason’ in between.
Dancers also like to ‘dance through their pain’, further aggravating the injury. Restrictive diets and improper training can also lead to dance injuries.
5 ways to prevent dance injuries
- Cross-train to build strength and endurance in all parts of your body
- Warming up properly
- Always wear proper shoes
- Practise with proper technique
- Eat well and hydrate regularly
1. Cross-train to build strength and endurance in all parts of your body.
As mentioned earlier, cross-training to strengthen your leg muscles is a good way to prevent injuries.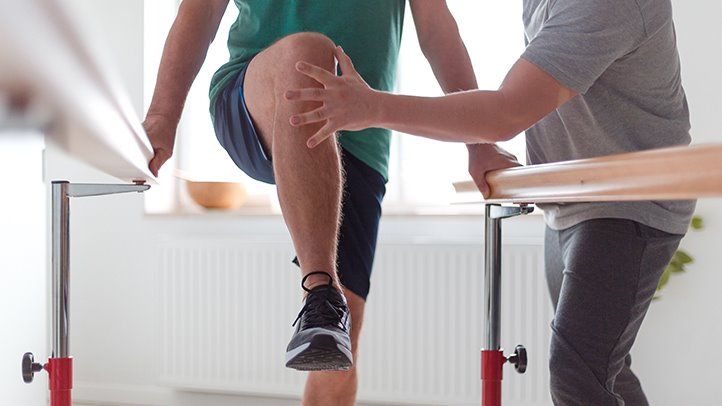
Cross-training for dancing involves varying your fitness program by combining different types of exercise activities such as cardiovascular exercise, strength training, and flexibility exercises like yoga or Pilates.
When you cross-train, you strengthen your leg muscles. These exercises will help stabilize your knee joint to protect it from injury. Strengthening your muscles can help to prevent meniscus tears. The meniscus is a cartilage that protects the knee joint from impact by absorbing shocks. Meniscal tears, are common injuries in dance. It often occurs after landing a jump or a sudden twist of the knee. Wear and tear from loading the joint and twisting your lower leg to improve turnout can also damage knee cartilage.
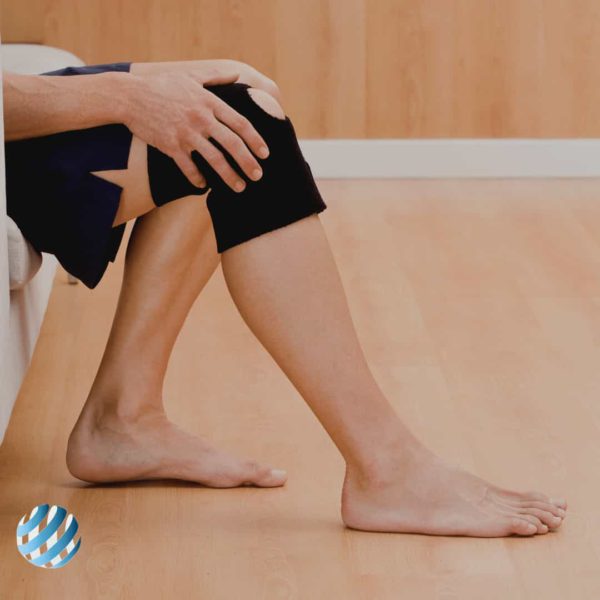
Symptoms that have damaged your meniscus include pain and swelling. You might also experience a locking feeling caused by a piece of meniscus coming loose and getting caught in the joint. You may recover from minor meniscal tears when you rest, but serious injuries require surgery.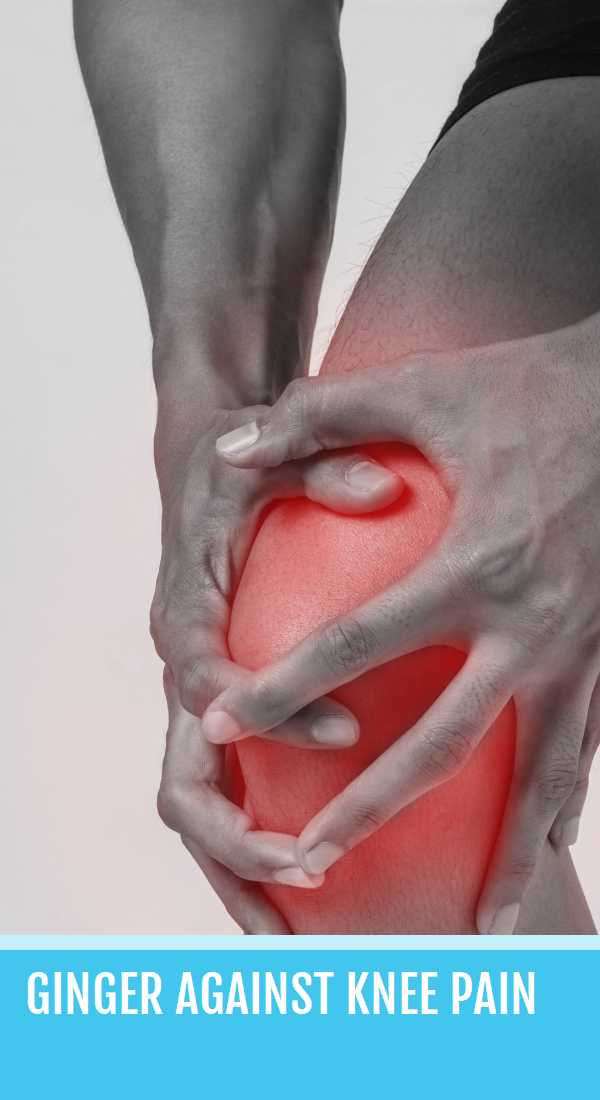
If you experience sudden knee pain during a class or rehearsal, you should stop immediately.
Another way is to wear protective knee gear during sports to support your knee during activities that may increase your risk of injury. If you are on the floor a lot for floorwork, it is a good idea to invest in a knee guard to protect your knee from the hard impact of the floor.
Apart from cross-training, you can try specific exercises to strengthen your lower leg muscles so your meniscus does not absorb the full impact of your landing.
2. Warming up properly
Before any physical activity, you must adequately warm up your muscles. Dancers often neglect this step as they want to literally jump straight into action.
This is the first step to prevent injuries. Many hip flexor injuries usually occur from a lack of warm-up before a dance class. Since we use our hips in nearly all movements, you should spend time on a proper warm up which will help to reduce hip flexor irritation.
Hip injuries in dancers can happen suddenly or result from gradual overuse. Constant excess rotation on the hip and repetitive extension of the legs put extra stress on the joint.
If you often feel pain in your hips, you might have overused your hip joint and surrounding muscles, resulting in hip flexor tendonitis. This can cause bouts of frustrating pain while dancing or sitting for extended periods. Apart from that, a lousy landing or fall can cause a hip flexor injury that, if not tended to, can develop into a lifelong struggle.
As a dancer, you might yearn for extreme flexibility and stretch your muscles further to reach your flexibility goals. But it is important to remember that stretching and warming up are not the same. Static stretching involves holding a position for a length of time to elongate the muscle, while a dynamic warmup involves stretching through a range of motion.
Dynamic warm up stretches that involve active movements to stretch the muscles to their full range of movements, such as side-to-side lunges and walking lunges, will help you warm up your hip flexors. Warming up helps to prevent hip injury and it is extremely important.
For dancers with hip flexor injuries consult a doctor or physiotherapist. They may recommend specific hip flexor exercises for you to warm up the joint and prevent further injury.
3. Always wear proper shoes
Your knees and hips are the largest joints in your body and support your weight. The type of shoes you wear impacts the position and movement of your feet, and your knees. When you wear shoes that properly support your feet, you can move naturally, maintain regular leg and knee alignment, and reduce damaging stress on your knees.
Different dance styles may have other shoes required for that style. Always check with your dance teacher what is needed and buy the proper footwear. Below, we have a few tips on shoe choice based on dance styles to prevent knee injury.
Many dancers like to train barefoot, especially in contemporary dance. Without shoes to cushion the impact of a bad landing, it’s easy to injure yourself.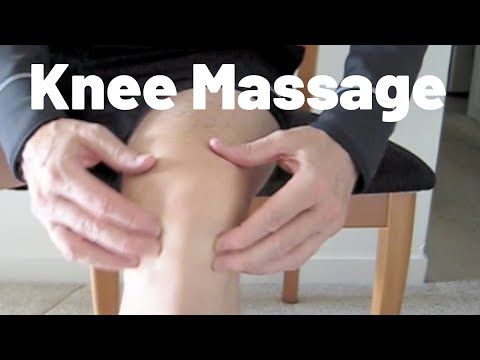 Wearing flat ballet shoes to offer some level of protection can help to cushion your jumps.
Some cardio-intensive dances such as hip-hop or K-pop require fast and sharp movements. Wearing shoes that can cushion the impact of a sudden turn and keep your knees aligned will prevent the occurrence of knee injuries.
Ballroom dances require high heels and increase pressure on the front part of your foot. When you put constant pressure on the front part of your foot, the shin muscles and the foot are strained, possibly leading to knee pain. The height of the heels can also cause your calf muscles to shorten, leading to foot and knee pain. If you constantly wear heels, do:
- Vary your footwear if you wear heels often in and out of dance class.
- Choose shoes with firm midsoles and good soles to keep your foot forward and prevent knee pain.
- Look out for wear and tear and change shoes when you need them.
Knee strain can affect the tendons, which contributes to many knee conditions.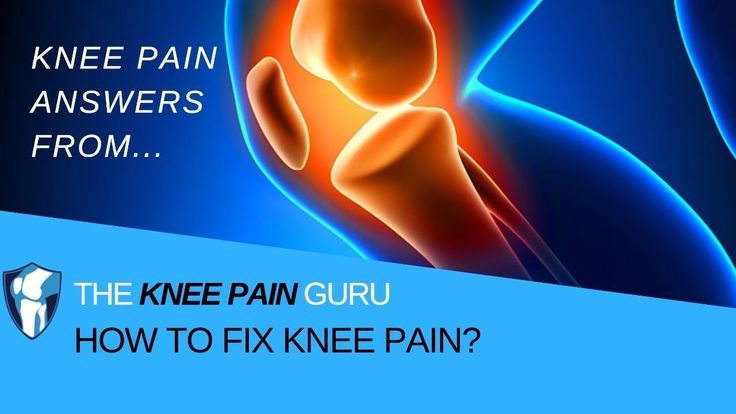 Any shoe that forces your foot into an unusual position can cause tendon strain.
If your knee hurts, consider your shoes first, especially if you lead an active lifestyle or work for long hours on your feet.
4. Practise with proper technique
Dancers often perform hundreds of jumps in a class, which puts a lot of impact on the knee pain. Many dancers assume pain and injury are part of the job but knee problems are neither inevitable nor untreatable.
Symptoms of patellofemoral pain syndrome (runner’s knee) can develop gradually. You might first feel soreness around the edge or underneath the kneecap, which gets worse when you dance or sit for long periods.
What happens is that the patella does not track properly as the knee goes through a range of movement. You might also hear popping or cracking sounds under the patella when bending or straightening the knee.
Incorrect technique, muscle imbalance, and a lack of flexibility are all factors that contribute to knee pain.
These are also the reasons why so many young dancers get injured is because they tend to force their turnout, which puts abnormal stress on their joints, particularly the inner knee.
The meaning of turnout in ballet is to rotate the leg at the hips. Then, turn the feet (and knees) outward, away from the body. A turnout is an essential part of classical ballet technique. A 180° turnout where both heels are touching, and your feet are in a straight line from the front is considered a “complete turnout” and is not possible without conditioning. Even with exercise, your body places some limitations on your turnout potential.
To prevent injuries, you have to turn out with technique and control. You need strong core muscles, strong hip abductors, quadriceps, and flexible hamstrings to turn out correctly.
5. Eat well, hydrate regularly
Water and electrolytes are essential to delivering nutrients that help cartilage repair itself when injured.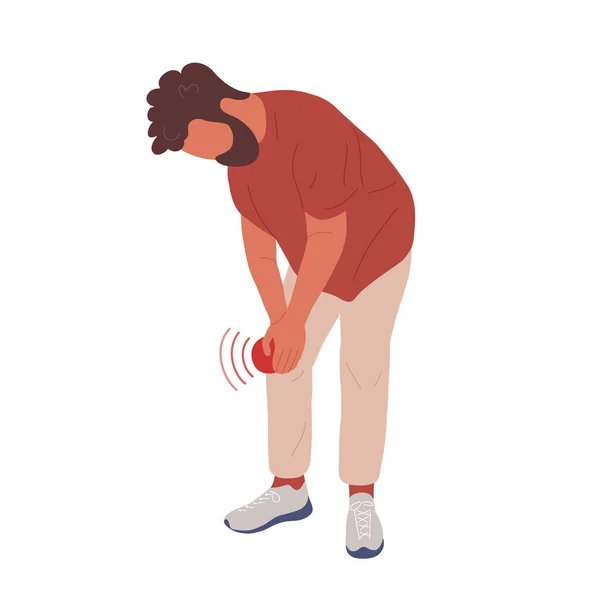 When you stop drinking water, the wear and tear on your cartilage (especially your knees) outpace the body’s ability to generate new cells. Injuries like cartilage tears and meniscus tears can result.
Our joints have cartilage which is made up of 60% water. This cartilage acts like a cushion or a shock absorber that reduces the friction between the bones in the joint with the help of gel-like lubrication called synovial fluids.
When you do not drink enough water, cartilage loses its sponginess. Drinking more water may not heal joint pain directly, but it can keep your joints healthy. Proper hydration improves synovial fluid production, reduces inflammation, and maintains the shock-absorbing properties of cartilage.
A recommended intake of water for adults daily is 3.7 liters of fluids a day for men and 2.7 liters for women. Of course, if you perspire more and workout more often, you should increase your water intake.
Conclusion
While it is easy to think ‘mind over matter’, and try to grit your teeth through pain, minor aches can lead to major injuries.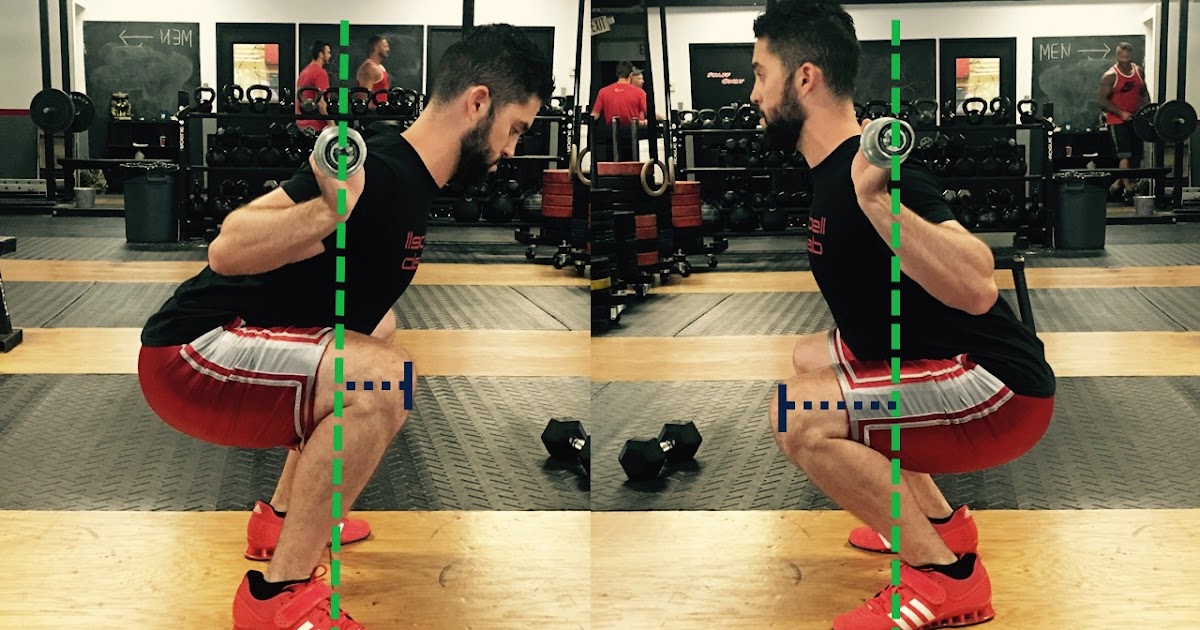 If you do experience pain around your hip and knees, you should seek a doctor’s advice before you continue dancing or any form of exercising.
At Hip and Knee Orthopaedics, we believe that every patient deserves to receive comprehensive and efficient care for their musculoskeletal conditions so that they can gain back their independence in mobility and enjoy quality time with their loved ones.
With a passion for treating hip and knee conditions, our doctors aim to provide you with quality care by thoroughly assessing your condition and personalising your treatments to meet your needs and goals.
The 3 Best Exercises to Help Dancers Prevent Knee Injuries
When it comes to injury-prone body parts, knees reign supreme for dancers. But a little strengthening can go a long way in preventing painful outcomes. We turned to Dirk Hartog, a physical therapist with Westside Dance Physical Therapy in NYC, for three exercises that’ll support and stabilize your knees.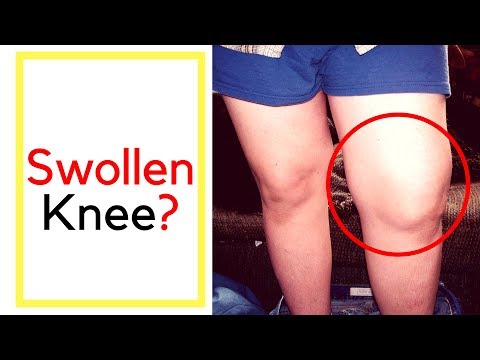
Photography by Erin Baiano. Hair and makeup by Angela Huff for Mark Edward Inc. Modeled by Nellie Licul.
Your browser does not support the video tag.
Exercise #1: Knee Rotation Control
NOTE: This exercise encourages proper rotation and control of your lower
leg, which, if incorrectly turned out, can strain around and below your knee.
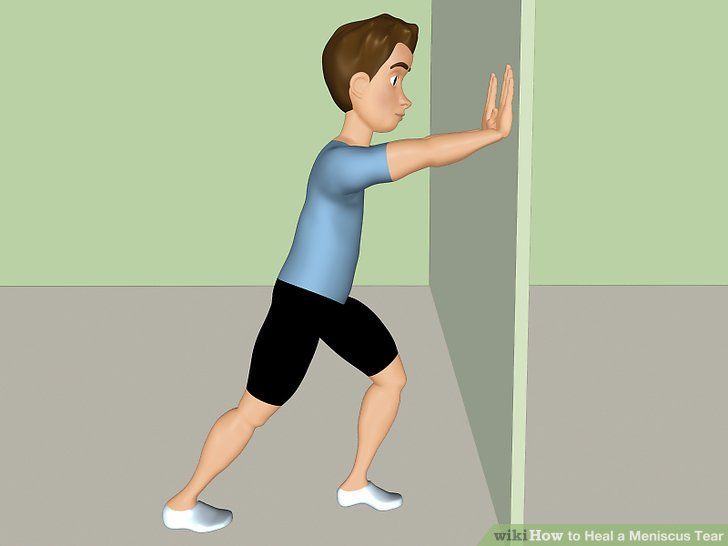
1. Put a sock on your right foot. Lie on your back with your hips and knees bent at about 90 degrees and your feet hip-width apart and planted firmly against a stable wall. The front of your tibia should be in line with the space between your second and third toes.
{“adCodes”: [], “adsOrder”: [3]}
{“product_info”: {“caption”: “Buy Now”, “product_price”: 0, “product_vendor”: false, “linkout_url”: false, “product_compare_at_price”: 0}, “headline”: “Exercise #1: Knee Rotation Control”, “credit”: “”, “description”: “u003cpu003eu003cstrongu003eNOTE: This exercise encourages proper rotation and control of your lower u003c/strongu003eu003cstrongu003eleg, which, if incorrectly turned out, can strain around and below your knee.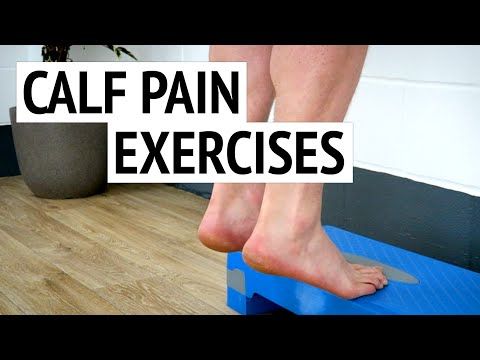 u003c/strongu003eu003c/pu003eu003cpu003eu003cspanu003eu003c/spanu003e1. Put a sock on your right foot. Lie on your back with your hips and knees bent at about 90 degrees and your feet hip-width apart and planted firmly against a stable wall. The front of your tibia should be in line with the space between your second and third toes.u003c/pu003e”, “caption”: “”}
{“product_info”: {“caption”: “Buy Now”, “product_price”: 0, “product_vendor”: false, “linkout_url”: false, “product_compare_at_price”: 0}, “headline”: “Exercise #1: Knee Rotation Control”, “credit”: “”, “description”: “u003cpu003e2. Slide your right foot up, stopping just before your heel or ball of your big toe comes off the wall.u003c/pu003e”, “caption”: “”}
{“product_info”: {“caption”: “Buy Now”, “product_price”: 0, “product_vendor”: false, “linkout_url”: false, “product_compare_at_price”: 0}, “headline”: “Exercise #1: Knee Rotation Control”, “credit”: “”, “description”: “u003cpu003e3. Leading with your heel, slowly slide your foot back down the wall, until your tibia internally rotatesu2014 you’ll know if it has because your right foot will be slightly turned in and pointing to your left foot. u003c/pu003e”, “caption”: “”}
{“product_info”: {“caption”: “Buy Now”, “product_price”: 0, “product_vendor”: false, “linkout_url”: false, “product_compare_at_price”: 0}, “headline”: “Exercise #1: Knee Rotation Control”, “credit”: “”, “description”: “u003cpu003e4. Slide your foot back up the wall, which will encourage your tibia to return to its neutral position. Repeat this exercise 10u201315 times with your right foot, then switch legs.u003c/pu003e”, “caption”: “”}
Exercise #2: Body-Weight Squats
NOTE: This exercise helps strengthen your quads, so they can absorb the shock of jumps and floorwork, protecting the soft-tissue
structures of your knees.
1. Begin with your feet hip-width apart and your toes slightly turned out. Find your neutral lumbar spine position.
{“adCodes”: [], “adsOrder”: [3]}
{“product_info”: {“caption”: “Buy Now”, “product_price”: 0, “product_vendor”: false, “linkout_url”: false, “product_compare_at_price”: 0}, “headline”: “Exercise #2: Body-Weight Squats”, “credit”: “”, “description”: “u003cpu003eu003cstrongu003eNOTE: This exercise helps strengthen your quads, so they can absorb the shock of jumps and floorwork, protecting the soft-tissue u003c/strongu003eu003cstrongu003estructures of your knees. u003c/strongu003eu003c/pu003eu003cpu003eu003cstrongu003eu003c/strongu003e1. Begin with your feet hip-width apart and your toes slightly turned out. Find your neutral lumbar spine position.u003c/pu003e”, “caption”: “”}
{“product_info”: {“caption”: “Buy Now”, “product_price”: 0, “product_vendor”: false, “linkout_url”: false, “product_compare_at_price”: 0}, “headline”: “Exercise #2: Body-Weight Squats”, “credit”: “”, “description”: “u003cpu003e2. Extend your arms in front of you and slowly sink into a squat until your thighs are parallel to the floor.u003cspanu003eu003c/spanu003eu003c/pu003e”, “caption”: “”}
{“product_info”: {“caption”: “Buy Now”, “product_price”: 0, “product_vendor”: false, “linkout_url”: false, “product_compare_at_price”: 0}, “headline”: “Exercise #2: Body-Weight Squats”, “credit”: “”, “description”: “u003cpu003e3. As you squat, imagine that you’re easing into a chair, so that your knees pass over your toesu2014this will encourage your upper body and hips to remain properly positioned throughout.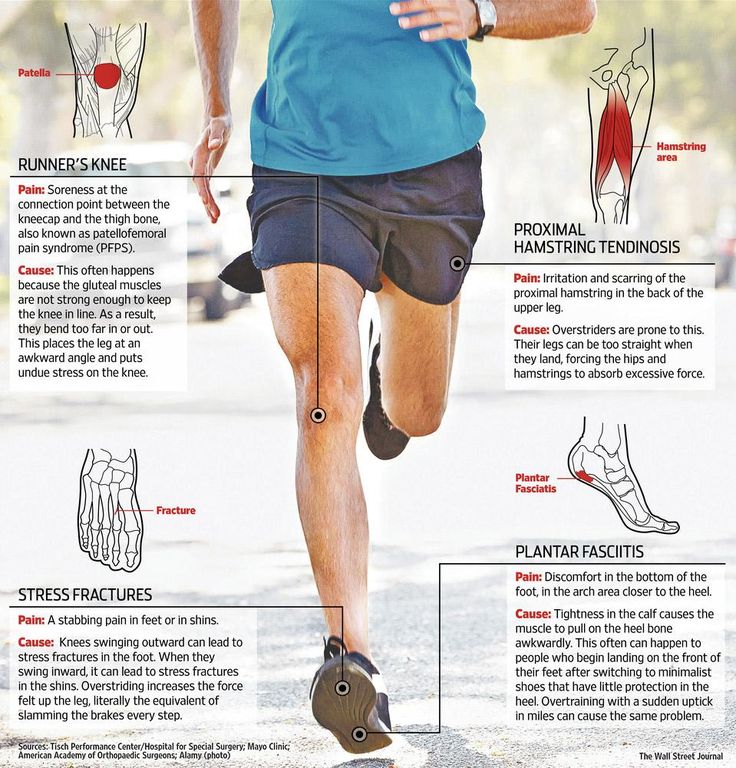 u003cspanu003eu003c/spanu003eu003c/pu003e”, “caption”: “”}
{“product_info”: {“caption”: “Buy Now”, “product_price”: 0, “product_vendor”: false, “linkout_url”: false, “product_compare_at_price”: 0}, “headline”: “Exercise #2: Body-Weight Squats”, “credit”: “”, “description”: “u003cpu003e4. Return to the starting position and repeat the exercise 10u201315 times for 2u20133 rounds with 30-second rests in between.u003c/pu003e”, “caption”: “”}
Exercise #3: Turnout Stabilization
NOTE: This exercise promotes proper use of your glutes and external hip rotation to control turnout, which takes pressure off your knees.
1. Begin standing with feet hip-width apart. Soften the backs of your knees so your quads are relaxed and you’re not hyperextended. Find a neutral position for your lumbar spine by tucking your pelvis under, then arching your back—the midpoint between the two is where you should be. Place your left hand on your chest and your right hand over your belly button.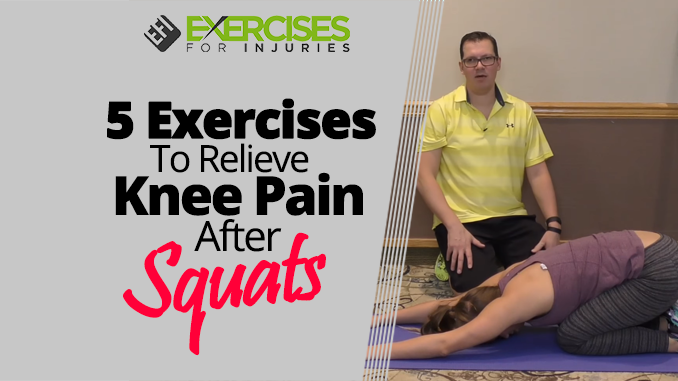
{“adCodes”: [], “adsOrder”: [3]}
{“product_info”: {“caption”: “Buy Now”, “product_price”: 0, “product_vendor”: false, “linkout_url”: false, “product_compare_at_price”: 0}, “headline”: “Exercise #3: Turnout Stabilization”, “credit”: “”, “description”: “u003cpu003eu003cstrongu003eNOTE: This exercise promotes proper use of your glutes and external hip rotation to control turnout, which takes pressure off your knees.u003cspanu003eu003c/spanu003eu003c/strongu003eu003c/pu003eu003cpu003eu003cspanu003eu003c/spanu003e1. Begin standing with feet hip-width apart. Soften the backs of your knees so your quads are relaxed and you’re not hyperextended. Find a neutral position for your lumbar spine by tucking your pelvis under, then arching your backu2014the midpoint between the two is where you should be. Place your left hand on your chest and your right hand over your belly button.u003c/pu003e”, “caption”: “”}
{“product_info”: {“caption”: “Buy Now”, “product_price”: 0, “product_vendor”: false, “linkout_url”: false, “product_compare_at_price”: 0}, “headline”: “Exercise #3: Turnout Stabilization”, “credit”: “”, “description”: “u003cpu003e2. Slowly sink into a pliu00e9 (about 50 percent of the way down) and shift your weight onto your left leg. Make sure to keep both knees in parallel, and distribute the weight slightly more onto the heel of your left foot.u003c/pu003e”, “caption”: “”}
{“product_info”: {“caption”: “Buy Now”, “product_price”: 0, “product_vendor”: false, “linkout_url”: false, “product_compare_at_price”: 0}, “headline”: “Exercise #3: Turnout Stabilization”, “credit”: “”, “description”: “u003cpu003e3. Keeping your pelvis square, bend your right knee so that your foot lifts off the ground. Swivel your right leg to the right, away from your standing leg. Activate your deep hip external rotators by keeping your kneecap aligned with your second toe as you rotate. Make sure to keep your left knee facing forward, and your rib cage and pelvis aligned. Hold for 10 seconds, then return to the starting position.u003c/pu003e”, “caption”: “”}
{“product_info”: {“caption”: “Buy Now”, “product_price”: 0, “product_vendor”: false, “linkout_url”: false, “product_compare_at_price”: 0}, “headline”: “Exercise #3: Turnout Stabilization”, “credit”: “”, “description”: “u003cpu003e4. Repeat this exercise 8u201310 times, then switch legs.u003c/pu003e”, “caption”: “”}
A version of this story appeared in the April 2019 issue of
Dance Spirit with the title “The Bee’s Knees.”
causes and methods of dealing with them
Contents
Dancing is a traumatic art, and it is pointless to deny it. The intricate elements of the ballet , the exciting breakdance tricks, the dynamics of the latin and long workouts put the body of the dancers to the test, and the knees are the most commonly affected. Luckily, dancers' knee injuries can be prevented by taking the right precautions.
Causes of knee injuries in dancers
If knee injuries in professional dancers tend to occur due to excessive loads during intense rehearsals, then amateur legs often suffer for another reason. Doctors note that the risk of injury increases significantly if the dancer neglects the warm-up before classes and stretching. Or because of a muscle imbalance. Uneven development of the muscles leads to a violation of the symmetry of the joints, which is why the knees quickly “give up”. That is why professional dancers always pay great attention to the development of all the muscles of the body, strengthening weak points and preventing imbalances.
Sign up for a trial lesson
Common knee injuries among dancers
- Patellofemoral syndrome - the same crunch in the patella during jumping and squatting, as well as pain when sitting for a long time. Indicates a displacement of the patella. During loads, the cup begins to erase the cartilaginous tissue of the femur, which is fraught with unpleasant sensations and possible complications. The appearance of the disease requires a visit to a specialist and the necessary treatment.
- Patellar tendonitis - inflammation of the tendon in the knee joint. Makes itself felt aching pain and swelling. The problem is temporary, but during the healing period, rest, special ointments for inflammation and application of cold will be required.
- Pre-patellar bursitis - appears after hitting the knee on the floor, resulting in inflammation of the bursae - sacs with joint fluid. In the case of a simple injury, conventional anti-inflammatory drugs will help, but in case of a complication, surgical intervention will be required.
- Damage to the minisci - cartilaginous disks of the knee joints, which act as shock absorbers. Miniscus tear is a very serious injury, and one of the most common. If the miniscus is damaged, the help of doctors is required: they block the joint, use anti-inflammatory and painkillers. In case of repeated injury, an operation is prescribed.
- Ligament injury. Sharp turns and unsuccessful landings threaten to rupture the lateral ligaments of the knee joint. Such damage cannot be cured without qualified help. Rupture of the cruciate ligament, which can occur with unnatural eversion of the knee, requires surgical intervention and long-term rehabilitation.
How to avoid injury
There are accidents when injury cannot be foreseen and avoided, but more often, knee injuries can be prevented if you approach classes wisely, namely, follow a number of recommendations from professionals:
- Choose qualified teachers.
 An experienced choreographer will not give wards tasks that do not correspond to their level. Complex elements, jumps and supports require the necessary physical preparation, which is developed gradually.
 - Do not neglect your warm-up. Light movements before the main lesson are important to prepare the body for stress. "Warm" feet and knees will be less prone to sprains and sprains.
- Don't forget about stretching, which makes the ligaments elastic and the muscles flexible.
- Develop the muscles of the whole body so that muscle imbalances do not occur. In addition to classes in a dance studio, regular physical education in the gym or at home will not be superfluous.
- Wear comfortable clothes for dancing. Many dancers use leg warmers to keep their joints warm. And, of course, special shoes. Whether ballet slippers or ballroom shoes, they are designed specifically to reduce the risk of injury during rehearsals and performances.
5 Common Dance and Sports Injuries and How to Avoid Them
In the summer months, a healthy lifestyle awakens in many people.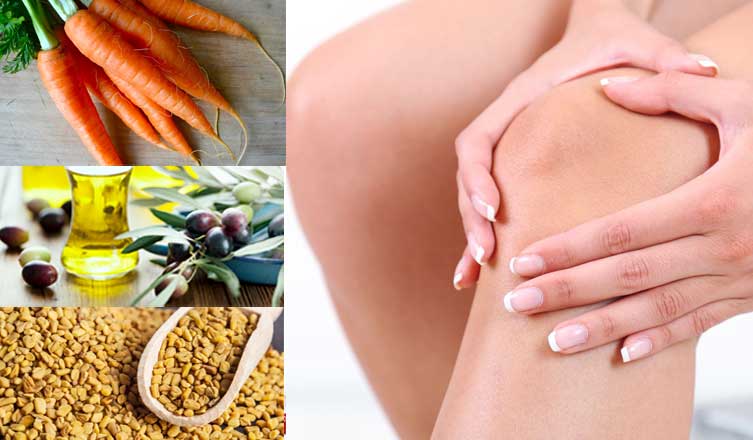 Some do it for the sake of the perfect “beach body”, for others the sport turns into a real hobby. In recent years, dances have become increasingly popular, ranging from classical ballet to modern forms. However, dancers often perform hundreds of jumps in each session - it is not surprising that knee pain is a frequent companion. Many assume that pain and even injury are part of the process, but knee problems are neither inevitable nor incurable. Here are five of the most common knee injuries and how to prevent them.
1 Patellofemoral pain syndrome
Pain in the kneecap is perhaps the most common problem among dancers. Symptoms of patellofemoral pain syndrome develop gradually, causing pain along the edge of the joint or under the kneecap. The pain is aggravated by dancing or sitting for a long time, often with a distinct crackling sound when bending and straightening the knee. Muscle imbalances, lack of flexibility, and improper technique can all lead to knee problems.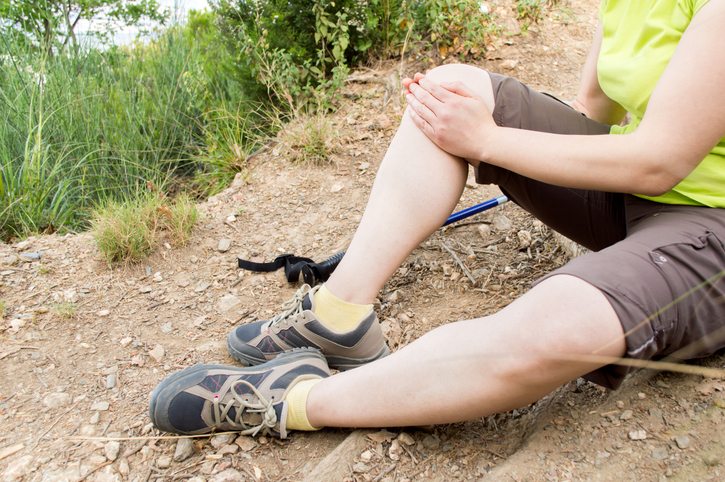 “Many novice dancers get injured because, through inexperience, they place undue stress on the joints, especially the inner knee,” doctors say. It is important to maintain control of the movement to prevent increased stress. When exiting a turn, doctors recommend using the muscles of the abdomen, lower back, hips, and buttocks, avoiding a strong twist of the hip.
2 Torn meniscus
The meniscus is a kind of shock absorber that protects the knee joint from impact. A torn meniscus or cartilage is a common injury in sports, often occurring after a bad landing after a jump or during a sudden twist of the knee. Increased stress on the knee joint also causes wear and tear on the joint and can damage cartilage. Cross-country running and choreography with sudden jumps and deep turns is the most common cause of a torn meniscus. Symptoms include pain and swelling, and fragments of cartilage may become lodged in the joint.
“If you experience sudden knee pain during class or rehearsal, stop immediately,” says physical therapist Dr. Susan Martin, founder of Pilates Therapeutics in Alameda. If the injury is minor, it is recommended to sit on a raised platform and actively swing your legs, causing a kind of “reboot” of the knee joint. With a strong more, it is recommended to immediately consult a doctor: serious tears require a full-fledged surgical intervention.
3 Patellar tendinitis
Patellar tendonitis or inflammation of the patella is characterized by pain in the lower part of the kneecap, which is aggravated by running or jumping. A sharp increase in the load on the muscles around the knee (in particular, due to improper operation of the foot) is the main cause of inflammation. In a special risk group are dancers with “impact knees”, the so-called “bowlegs”, as well as people with weak thigh muscles.
Doctors recommend not to strain the muscles, forcing them into an uncomfortable or painful movement, but to try to turn the leg outward from the hip. This is especially true for the ballet class: in no case should you force yourself to endure pain in order to achieve the ideal first position.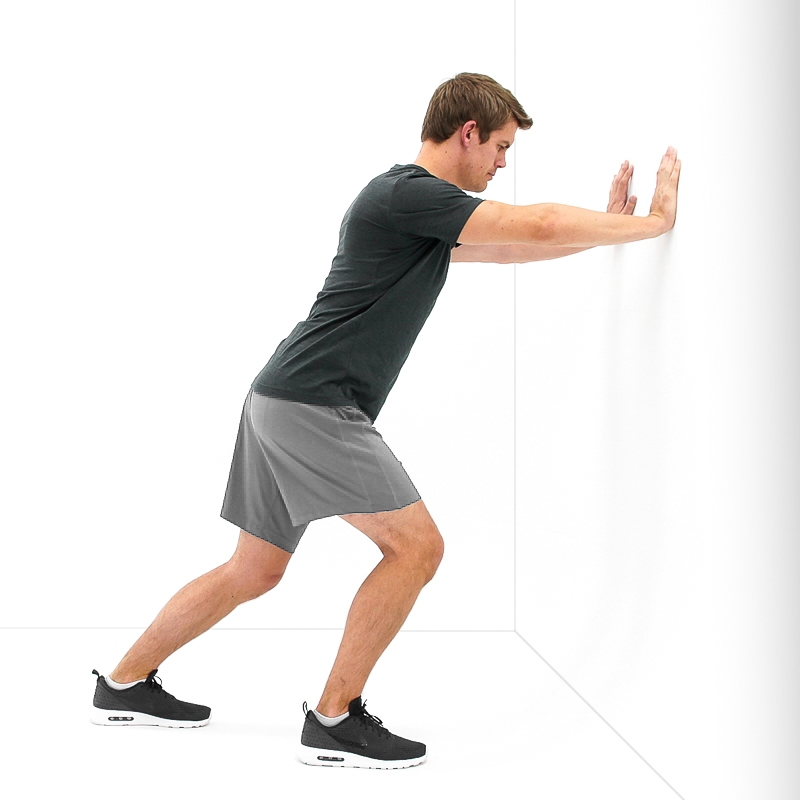 In controlling your muscles, it is important to maintain natural rotation, making sure that the knee aligns with the foot as you do the demi-plié.
It is important to understand that assessing the severity of an injury is not always easy. Doctors recommend the RICE procedure: rest, ice, lift and compression). “Ice should be applied to both the back and front,” doctors say, “use gel packs from the refrigerator instead of the freezer.”
4 Osgood-Schlatter disease
Aspiring dancers may develop Osgood-Schlatter disease (OSH), characterized by pain below the knee and on the front of the tibia (lower leg). Symptoms begin with increasing pain during physical activity. Later, a visible tubercle appears on the lower leg, kneeling is also uncomfortable due to swelling of the lower leg. BOSH develops due to overuse of the quadriceps muscle, which straightens the knee, putting stress on the patellar tendon. BOSCH often occurs in beginner dancers because the bone is not yet strong enough to withstand the tension of the quadriceps.
Osgood-Schlatter disease usually heals after growth stops. However, dancers should not endure the pain and force themselves to overcome it, this can cause inflammation and significantly lengthen the rehabilitation process.
5 Anterior cruciate ligament tear
Anterior cruciate ligament (ACL) injury is rare in dancers, but the consequences of such an injury can be extremely serious. The ACL is one of the four ligaments needed to stabilize the knee. A partial tear does not necessarily require surgery, but even then, recovery can take many months.
Bad landings are a major cause of ACL injuries. An important factor may be the general fatigue of the dancer: injuries often occur at the end of the day or after a long season. Physicians emphasize the importance of strength training to prevent knee injuries.
Dancers are accustomed to dancing in spite of pain, but trying to “endure” pain can lead to serious consequences. If the examination ruled out serious injury, try reducing activity and engaging in physical therapy.