How do they train horses to dance
Charro Riding: Cruelty Behind The "Dancing"
Ulysses was so severely abused by his previous owners that the shelter was going to euthanize him.
Ulysses is one of our Hanaeleh Horse Ambassadors and we point to him as one of several examples of the the horses we’ve rescued who have been abused and suffered in “Charro” riding. Ulysses came to Hanaeleh from the Riverside Animal Shelter, where he had been picked up as a stray, wandering around the riverbed, starving to death.
Ulysses had cuts and scars across his legs, back, chest, neck, and face; there was not one part of him that was not either hurt or had a scar from being hurt in the past. His front legs show multiple bowed tendons as well as scarring from being hit repeatedly with a blunt object. He still, three years later, has scars across his hips, back and flank. His eyesight is minimal, and, unfortunately, he is neurological as well, which is a result of the Charro training method, not a natural condition.
Please donate to help us save more horses from Charro abusers (no amount is too small).
What is a Charro?
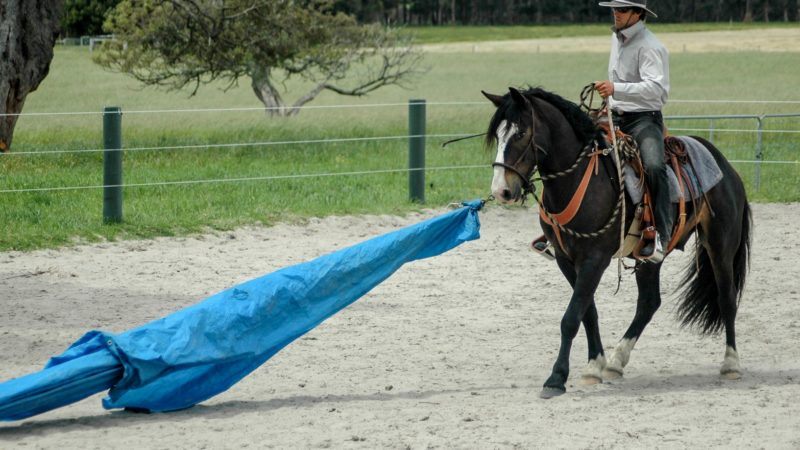
A Charro is a Mexican cowboy, and the discipline today is rooted in the concept of needing a horse to move large groups of cattle. Today, however, the riders practice in an arena and there are rarely cows involved. The saddle is a throwback to the saddles used when roping and herding cattle and are often quite heavy with large pommels. They are now decorated with silver and can often be quite colorful. Unfortunately, there is a great deal of abuse in Charro riding.
In California we often see the result of horses who have been “charroed” or put through the abuses that are quite common to the discipline.
NOTE: At Hanaeleh, our credo is to keep all equine abuse information palatable without whitewashing. We want you to have all the facts and the following descriptions may cause uneasiness or upset.
Charro Riding is Horse Abuse
Ulysses was cut up and scarred across his face and entire body when he came to Hanaeleh.
In Charro riding, the horse is made to “dance,” or prance about while the rider sits comfortably on his back. The horse is agitated while “dancing,” and often downright terrified.
To train the horses to “dance” (which is often a bastardization of a piaffe or passage), the horses are cross-tied and stand on wooden planks. They are cross-tied so they cannot move forward, and as one person stands behind the horse with a whip, two other individuals stand at the horse’s front, alternately hitting the horse’s legs with a stick or a whip. The horse quickly learns to pick his feet up instead of being hurt. These continual beatings are most likely how Ulysses got to be so scarred across his legs and back today.
Very much like the Tennessee Walking Horses who are trained for saddleseat, the Charros attach chains to the horse’s legs in an attempt to make the horses throw their legs out in an unnatural manner. The visual effect is that the horse is “dancing” and is more dramatic.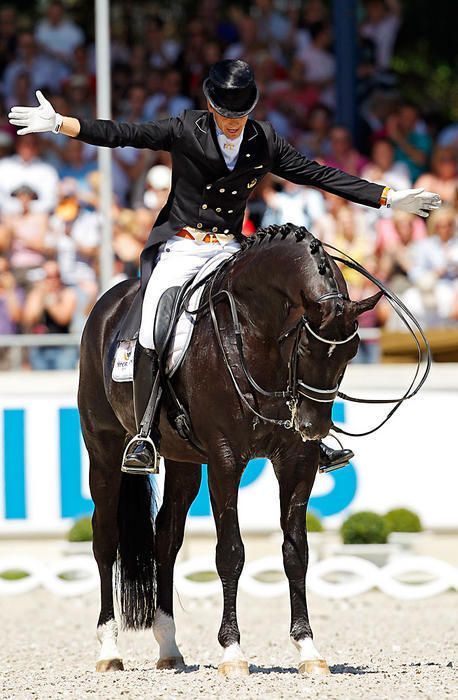 The reality, however, is that the horse is terrified of being hurt by the chain smashing against his legs.
Charro “Dancing” in Action
Below is a short video that shows horses being trained in the Charro method of dancing. Please note that Hanaeleh did not create this video, but it gives you an idea of the abuse that Ulysses and other Charro horses go through (there are several typos in the video, but please look past that to see the message itself):
Charro Cruel Practice of Tying Horse’s Head for Hours
Charros don’t like a lot of head and neck action from their horses; they want the feet to be moving, but not the head and neck. In order to prevent the horse from flailing about and trying to escape the rider’s spurs, the Charro will tie the horse’s head up very high (often to the roof of the stall), or tie the horse’s head to his chest in an attempt to fatigue the neck. The horse’s neck muscles are so tight and exhausted that the horse is unable to fight his rider.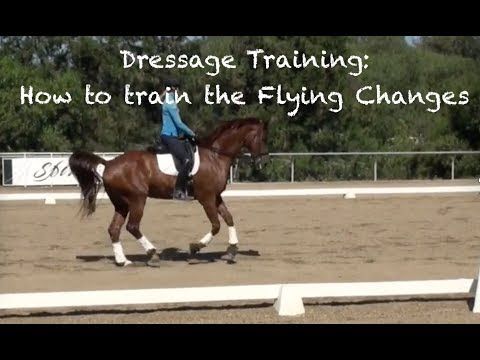
Charro Riding is Why Ulysses is Neurological
Our vet surmises that there are several pinched nerves throughout his neck that have caused his neurological issues. Unfortunately we did not get to Ulysses in time to repair the damage that these riders did to him, and his neurological issues cannot be reversed to the point where he would be considered “normal.” Instead, we try to massage his neck area and give him high doses of supplements like Vitamin E that help improve circulation.
Horse “Tripping” (Charro Riding’s Heinous Sibling)
Charros, like American cowboys, will also rope horses and throw them to the ground for sport or to try to prove their dominance over the horse. This is also known as tripping. This causes an extreme amount of damage to the horse’s legs and joints, sometimes causing permanent damage. We have worked with other individuals who have rescued a pony or smaller horse only to discover that their horse was both physically and emotionally traumatized from being used for tripping or trained by Charros.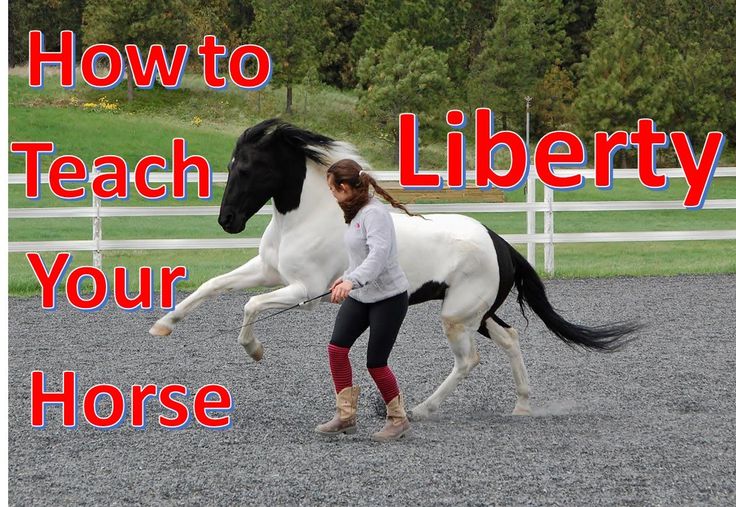 The horse ends up experiencing a complete mental breakdown or is so scared that he is unsafe to be ridden.
Nevada was severely traumatized by the Charros who owned him, then left him to starve to death.
Not all Charro Riders Adhere to These Abusive Practices
Indeed, there are likely many who are kind and take their time in training their horses. Unfortunately, we see the result of the abuse. We see the horse who was taken to auction after the Charros hurt the horse so badly that he will never be safe for riding again.
We see an amazing horse like Ulysses deal with the aftermath of the abuse that he suffered, and know that if it were not for our intervention, that he would be dead. He would have been euthanized, not because he was a bad horse, and not because he had any physical issues to begin with, but because people deliberately set out to hurt him because they either did not know how to train him humanely, or just didn’t care to do so.
Hanaeleh urges that instead of defending the entire group of Charro riders, those who do not resort to abusive practices will call out those who do! They will help prevent more horses like Ulysses from being tortured in an undisguised attempt to show off.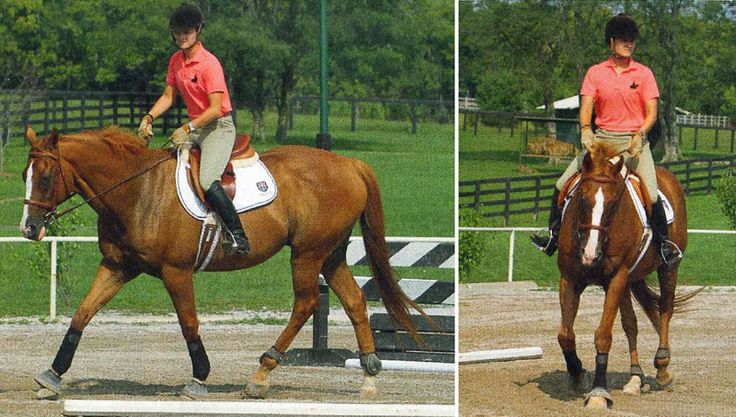
Please click the DONATE button below so we can spread this message further and save more horses!
Hanaeleh is a 501(c)(3) (Tax ID 20-3255341) Nonprofit horse rescue operating in Southern California since 2004 and every penny donated goes to the horses.
We are 100% volunteer-run and we’re a Verified Rescue with Global Federation of Animal Sanctuaries.
We rescue all breeds and ages of horses, and after we rehabilitate them, we work to find them new loving homes. When horses are not adoptable due to severe neglect or abuse, we provide sanctuary for them to live out their days knowing they’ll always be loved and cared for.
How Are Dressage Horses Trained?
A pet peeve of dressage riders is when people ask ‘but do the horses just do it all naturally?’ If you want to see a dressage rider getting angry, just say that it doesn’t look too hard! We guarantee you’ll get a response out of them almost straight away.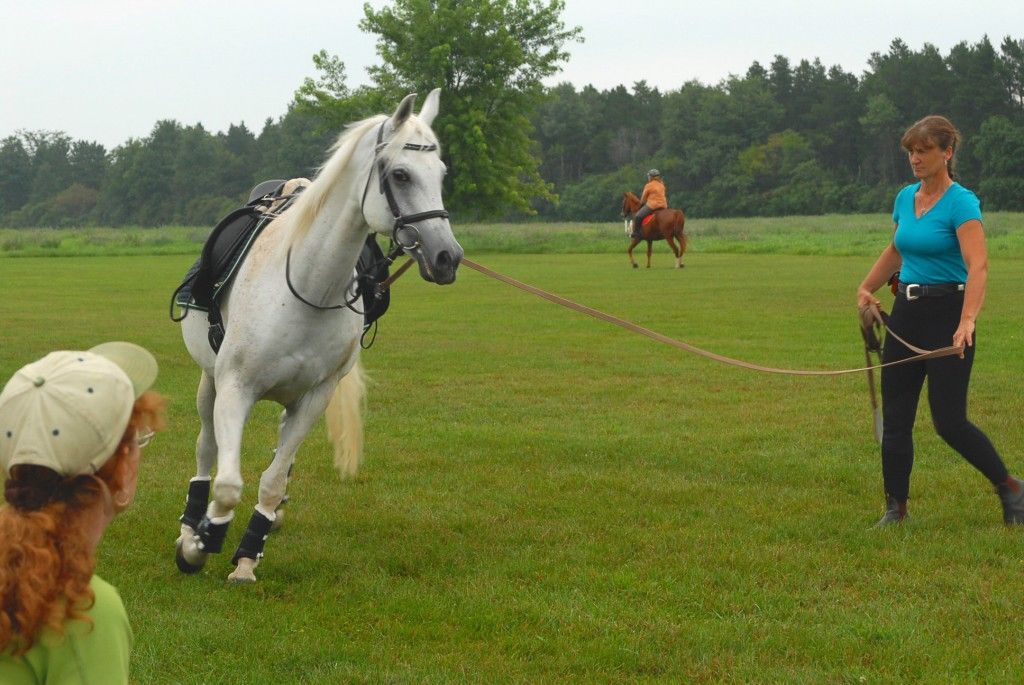 The reality is that training a horse to ‘dance’ at the level that you see at the Olympics takes years and years of hard work and dedication – and even with that, most horses and a lot of riders will never ever reach the upper echelons of the sport. Dressage training is a really long process, and there is always something else to be working on, which is partly where the attraction lies.
How long does it take to train a horse? Consider that most horses at the Olympics or World Equestrian Games are around 12-14 or so, and they probably started being ridden at around 3 under the world’s best riders and trainers. That means it takes roughly ten years to school a dressage horse to the top levels, even for the most talented horses and riders.
There is some truth to the fact that horses do these things by themselves. All the movements you see being performed in a dressage arena are movements that horses are capable of doing at liberty.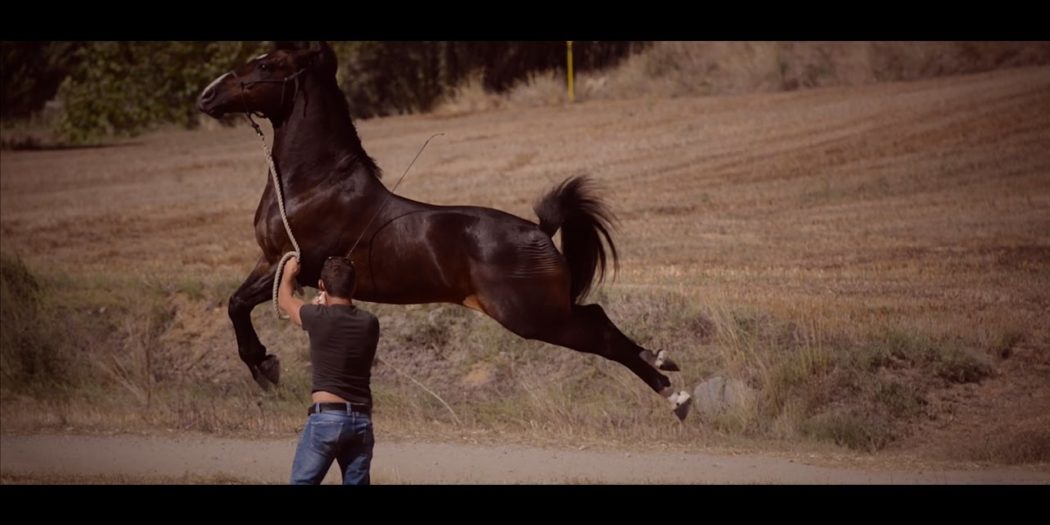 However, teaching a horse to do them on command from a tiny cue and in balance with a rider is where the skill lies. Very good riders can even develop the ability that a horse has naturally – he may be able to do a pretty trot in the field, but a good rider can improve the way the horse moves his shoulders and lifts his back, for instance.
There are lots and lots of different training methods that riders use. Sometimes it will depend on the horse’s personality, on the skill of the rider, on the training system they follow. Generally, though, the process follows a few basic steps- first teaching the horse to walk, trot and canter, then working on lateral movements, transitions, extension, and collection. Dressage for beginners will focus on learning how to make the horse lift his back and go ‘on the bit’ by taking a contact and learning to create and release pressure at the correct time. For more advanced riders, the focus might be on increasing the engagement in collected movements.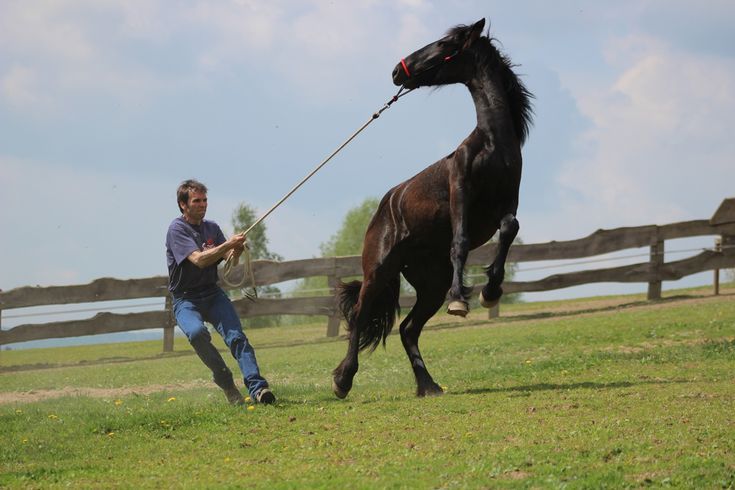
Normally, negative reinforcement is used. This doesn’t mean that the horse is beaten or anything! Instead, it means that a stimulus is removed once the right reaction has been given. So a horse might be asked to move away from the riders’ legs. If the rider applies pressure with the legs and the horse doesn’t move, the pressure will be increased. When the horse reacts correctly, the pressure is released and the horse is usually patted or scratched too to indicate that the response was the correct one. These cues can come from both legs, one leg, the position of your body or your seat bones, the way you weight your body, momentary increase or release of pressure from the hands or the core muscles…the list of possible aids goes on and on, and teaching the horse to respond to every single one reliably and in a relaxed way is all part of dressage training for a horse.
It’s also important to realise that dressage isn’t just the stuff you see at the Olympics. Put simply, ‘dressage’ means training. Anytime you are training a horse, you are doing dressage. The ultimate aim is to make the horse easy to ride, responsive, and supple in his muscles. This is why the riders at the very top levels look like they’re doing nothing at all – years and years of training have developed the horse and the partnership to a point where they react to an aid or cue which is imperceptible to people on the ground. The idea is to be able to influence every part of the horse’s body and movement while making it look like you’re doing nothing at all!
How are dancing horses trained? | Noti Horses
During festivities and equestrian events, you can't help but stop to watch the dancing horses. The trust that animals have in their trainers, the respect that both often show each other. This is a real spectacle that everyone should see at least once in a lifetime.
But how do you teach a horse to dance? What does it take to make her dance? If you want to teach a friend how to move to the rhythm of the music, don't stop reading.
Index
- 1 What is piaffe?
- 2 How are dancing horses formed?
- 3 Dancing horses of Spain
What is piaffe?
To teach a horse to dance, the first thing to do is to find out what a piaffe is. Also. This movement is similar to the trot of a horse moving over a point. . Based on years of training, the horse naturally lowers the hips, transfers weight to the hindquarters, and raises the right side to follow the music. This way they can compete in the best piaffe competitions in the world.
But this does not mean that only some horses can dance. In fact, anyone can learn the piaffe by learning a trick that must always end with the animal prize . Similarly, respect and patience are key to making the horse feel eager to learn and not afraid of possible reprisals. We must never forget that they are animals, that they have feelings and therefore deserve our respect.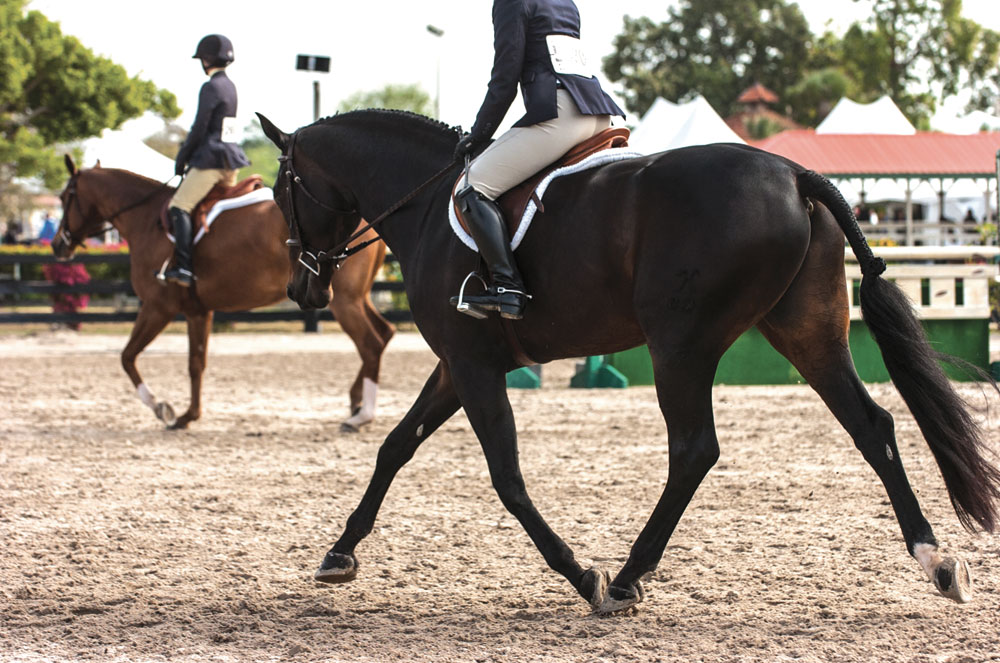
How are dancing horses formed?
As soon as this is known, it's time to get to work, or rather, sit on our horse 🙂. So we will follow this step by step:
- The first thing we do is take him for a walk . Short walk. The point is not to tire him, but to relax him a little. It is known that it is much easier to work with a calm animal than with a nervous one. The first will pay attention to us; the other chooses not to.
- Then, We will fit it and pull out . We will move his shoulders and hips and ask him to raise and lower his head. We will do this several times, giving you a few seconds of rest between exercise and exercise.
In the event that he does not do this, or if it is difficult for him to do so, instead of asking him so much, we can ask him to stand up and just shake his head; then we put him down and then ask him again to stand up and move his hips. Thus, if you ask him one thing at a time, he will probably have a much easier time learning what we are teaching him.
- Now put a halter on the horse and tie a rope . In the beginning, a simple halter and leash will do; later we can use the bridle and saddle to connect one side of the rein to the right side of the horse. To make it easier for us, we can use both side reins, which we will connect from the loin ring to the circumference of the same side about 23 cm below the back of the animal. We will tie his tail with an elastic band so that he does not interfere with us.
- After that, stop the horse so that the wall or fence is on the right. We will put it on the left side . With the help of a dressage whip, we must reach his hind legs. We touch the left hind leg until it stands up, and then we offer it a prize. Repeat the same with the right hind leg.
- Next, we put on a bridle or saddle, as well as side reins. We will ask you to move left, right, left and reward you with . The answer should be fast, but the same, if we see that it costs you, we will come back and slow down.
 It's not about making the horse perfect: perfection doesn't exist. It's about teaching him something while trying to have fun, and he won't do it if we ask him for more than he is capable of doing at the moment.
 - Finally, what we will do is touch his front legs . If you are nervous, we will let you lower your head or lower yourself; so calm down. On the contrary, if we see him animated, we will lift him up to make him feel proud. If he behaves well and, above all, takes a step like a dance, we will give him the prize he deserves and let him rest.
Lessons should last about ten minutes. , no longer needed. Don't let your horse feel frustrated as it will lose interest in learning to dance. In addition, I insist, we must be very patient. It may be weeks before we see an animal learning this.
Spain's Dancing Horses
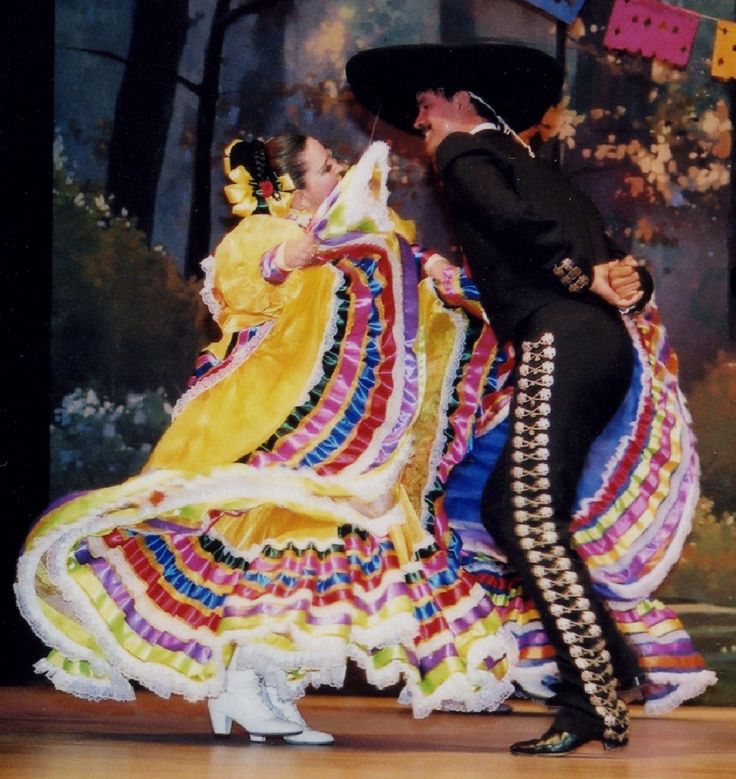
In Spain we are very fortunate to be able to enjoy a show of dancing horses.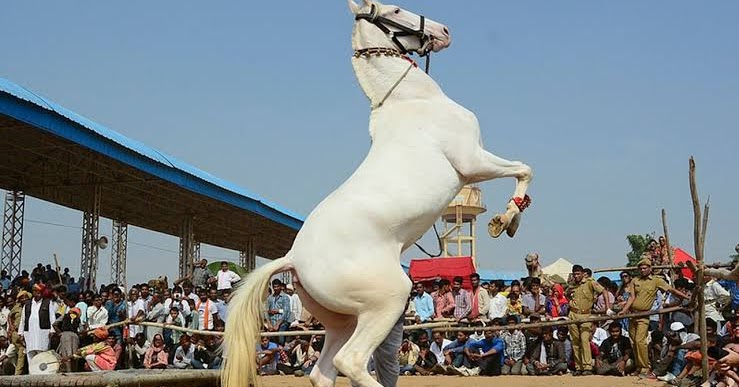 These animals are the real stars of many festivals and events, especially in Andalusia. , for example, the Festival of Horses, which is celebrated in Jerez, or in my city of Ses Salines (Mallorca) during the festival of San Bartomeu (end of August).
With Spanish music and costumes typical of the eighteenth century, dancing horses and their riders dance their wonderful equestrian ballet using dressage and cowgirl techniques, hooks, handwork and carousels.
Did you know how dancing horses were trained? Do you dare to teach a friend to move to the rhythm of the music? 🙂
The content of the article complies with our principles of editorial ethics. To report a bug, click here.
You may be interested
3 ways to teach your horse to bow at the wrist. Execution technique.
What you and your horse need to know and be able to do to start learning the bow at the wrist we have discussed in detail in the article “How to teach a horse to bow at the wrist? Preparation” I ask you to take the first article very seriously and do not start working with a horse until you are absolutely sure that you and the horse are ready.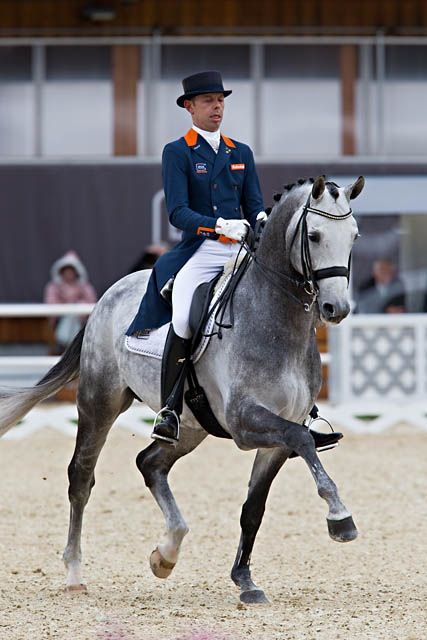
I will make a reservation in advance that it is easier for the horse to perform this exercise from the “Trapezoid” position (not necessary).
So, if you're already eager to get started, let's look at 3 ways to train your horse to bow at the wrist.
- 100% mechanical
- 100% clicker method
- Mix between mechanical and click prompts.
I personally use the third method. The pure clicker method can be very effective, but sometimes it takes quite a lot of time to create a situation for a click - "in the right place at the right time." I just don't have the patience and I give the horse a little hint. As our training experience shows, horses readily pick up these cues and continue to learn with ease without our superfluous control.
In order to understand the “kitchen” of performing the element, we will start from the basics, from the classics of teaching a horse to bow on the wrist.
So:
100% mechanical
1. We teach the horse to balance on 3 legs while holding the horse's front leg slightly bent at the wrist. It has already been said in Article 1 that the Chapp team will help a lot in this exercise. How it works - you stand facing the horse's shoulder - the main thing is that it is convenient for you to support the horse's leg just below the fetlock joint. That is, if you are facing the left shoulder of the horse, then with your right hand you support the horse's leg. At this stage, your goal is to teach the horse to get used to calmly balancing on three legs.
2. You may not require the horse to hold its own leg (as in a chappé), hold on to the leg and aim for the horse to stand still on three legs while you lightly rock the leg in your hands. Thus, you prepare the horse for the start of the movement. Swing the horse's leg a little, on which in the future it should stand on the wrist. Do circular motions, a little back, a little down. Don't force the horse. Wait for the horse to relax the leg muscles, distributing the balance to the rest of the legs.
3. While holding the leg, slightly show the direction down and back . This is very important: as soon as the horse yields to your pressure - your lightest prompt - release the leg. To understand how the principle of pressure relief works and how to really effectively explain something to a horse, please read the book “The ABC of the Horse Language”, as well as the article “Plasticine Horse. Concessions to pressure «
4. Then the balancing act begins. For if you physically continue to hold the horse's leg and guide his wrist towards the ground (down-back) You must take full responsibility for the horse's balance and, moreover, some very tangible weight too. That is why beginners are not recommended to start learning this exercise - when the horse loses balance, it falls. How will it fall and how dangerous is it for the person holding the horse under the wrist? This is not an easy scheme - of course, we must know that if the horse's head is directed away from us, the horse will land on its shoulder so that all its legs will also be on the opposite side from us, that is, the person will be safe when the horse falls (if we lose balance). Therefore, when a horse is taught to bow mechanically, it is done in a halter and the lead (rope) is thrown so that the head is away from the person when you hold the lead. But don't load! These are only fact-finding facts, and the article is not about that))
5. A wide ribbon is also used for mechanical training of the horse - a knot is tied over the pastern, the ribbon is intercepted around the horse's body. First, the horse keeps its leg in the air, held by this tape, and then the balancing act begins again, when the horse is literally knocked to the ground on the wrist .
So, it was a mechanical way. He has his own advantages. And its cons. The disadvantages are that it is difficult to explain to the horse to continue to act and perform the exercise without our help and rather rough control. Not to mention the insecurity of such "control". The advantages of this method, however, are very important. Using the “ABC of horse language” and the horse’s ability to give in to physical pressure, we explain to the horse the essence of the exercise, the direction of movement, and this is more than enough if your horse is set to listen to you, you have contact with it, and most importantly, trust in your actions.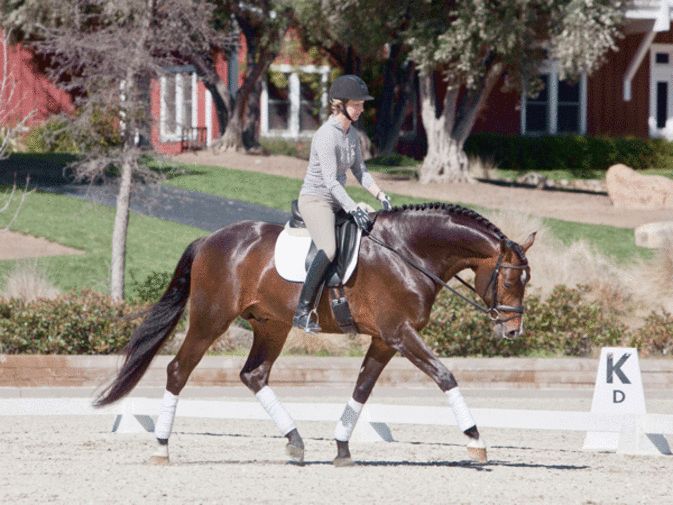
However, before proceeding to practice, let's briefly consider the pure clicker method.
So:
100% clicker method
1. We must divide the problem into a set of smallest . Our goal is one horse's wrist on the ground (roughly speaking). Therefore, we will encourage all correct attempts by the horse to move his leg in that direction. And starting with a simple separation of the legs from the ground.
2. To give a horse a hint, you can use "marker" . But for this you need to teach the horse, again with the help of a clicker, to touch this “marker” with your wrist. A whip can also serve as a marker. You need to teach the horse to touch the whip with his wrist and then gradually change the position of the “marker” to lying on the ground at the point of lowering the wrist, that is, lower the whip lower and lower until it is on the ground and the horse, in order to touch it with the wrist, will need to put wrist to the ground (on the marker).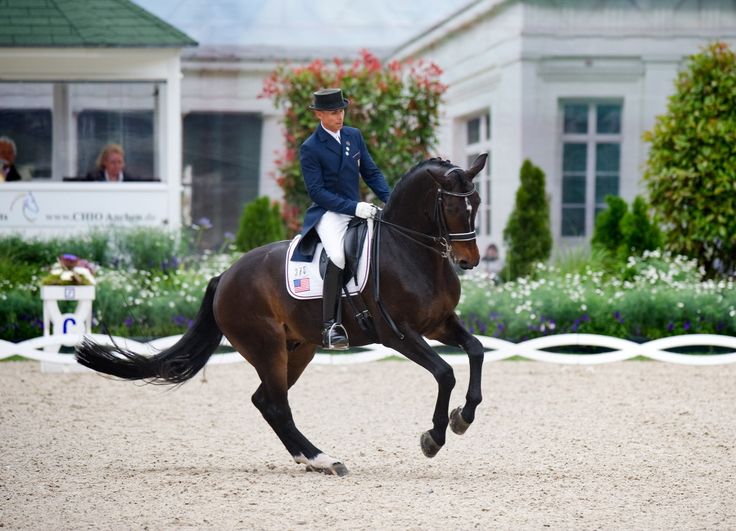
3. You can simply catch the horse on the lay, but at the moment when the horse lies down, click strictly when only one wrist touches the ground. The difficulty lies in the fact that when laying horses lean on both wrists - gently, but immediately on both (as a rule).
Do you find it difficult? Then let's look for the laziest and safest ways!
So:
Mix of mechanical prompts and clicker method.
1. We really take the horse's leg under the fetlock to hold, shake, , let the horse get used to the balance on three legs. Then let go and praise. If the horse already knows how to execute the “shup” command, then we take its leg and proceed to the next point:
2. Soft, very light direct the horse's leg down and back . Important: this should be such a subtle work, as if it were only a hint of our desire. In a word, it's a hint. But such that the horse understands it. That is, as soon as the horse "yields" to our hint, we remove the pressure right there.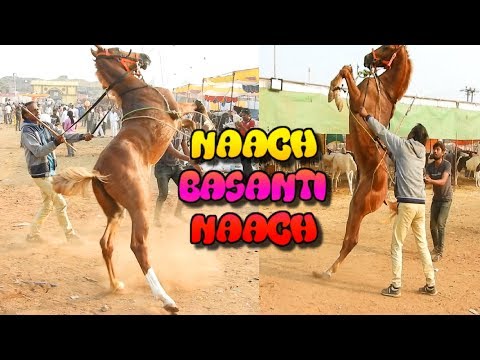 We lower-give the leg back and praise the horse very much.
3. If the horse, following the ledge of our prompts, began to take his leg back down by himself (and we give him this chance without holding the leg for even a second), that is, if the horse continued to move his leg along the prompt vector, we can not let go of the leg, but and not hold, but just follow with it. So we will feel how the horse works itself. And at the same time, we teach the horse to independently continue the movement we proposed.
4. It is important at the moment when the horse began to give in to our pressure and moved his leg back and down - click . So, put your foot down, give a treat and praise. I. Start again. Don't skimp on clicks and treats. Do not regret pauses for these "tendernesses". Your clicks are a detailed map-instruction for the horse. At this moment, the horse not only learns by relieving pressure, he also understands that he has caught exactly the very principle you need - take the leg back and down.
5. When you've done dozens of reps, your horse may already be showing you a few bows at the wrist. But it will be either barely touching the ground, or a very quick return to the starting position. Don't rush. And by the way, if you see that the horse is tired, do not be stubborn and do not force him to do the exercise again and again. Remember, this is a very complex element. And the fact that a horse is trying very hard for you does not mean that you can use it to the last drop of its strength. Remember that each training session should end in a way that leaves the horse wanting to do more exercise.
6. Now your task is to teach the horse to bend its own leg and take it down and back, without your physical support . The importance of this step in the safety of you and your horse . Because if you invite the horse to find the balance himself, it will be easier for the horse to figure out the search for the point of balance.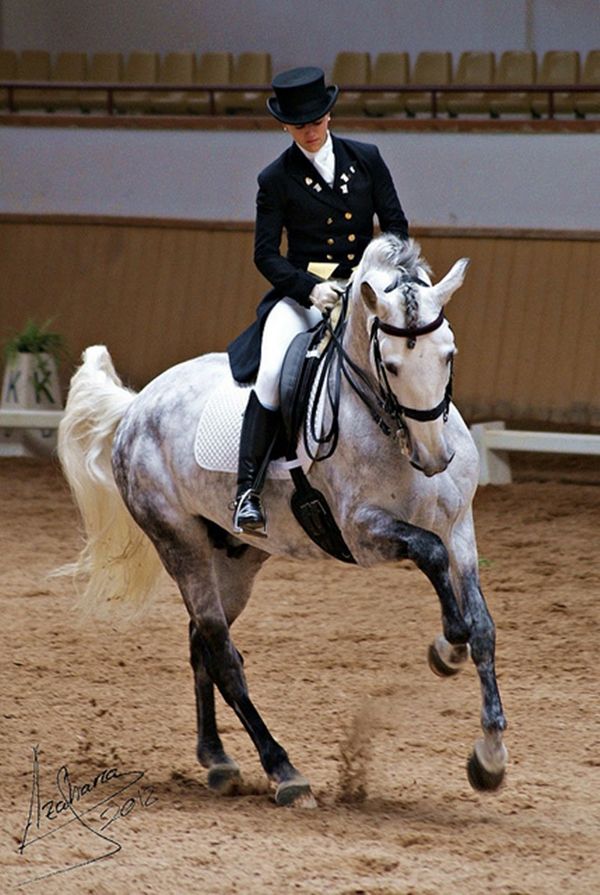 Remember or observe when horses lay down to wallow, they put their hind legs under their belly and gently stand on both wrists. Thus, when I ask the horse to bend his leg and continue to push him with the whip, signaling that the exercise should be continued until the horse is on the wrist, the horse itself rearranges its hind legs so that it is comfortable to bend over. So, you understand - we do not take the horse's leg with our hands, and we do not take part in supporting the horse. We only resemble a horse with a whip - by lightly tapping (tapping) on which part of the body it is necessary to start the exercise. And do not remove the whip until the horse makes the correct movement back and down.
The horse is working in the right direction with the foot on the fetlock, so I click this step.
7. At this stage, it is also important not to rush. Take the clicker and to start click only for the first impulse of the right movement , for example, at first the horse can put a hoof on the toe or lean on the pastern - this is already one of the small intervals on the way to success, so reward this with a click (and a treat, respectively) ). But next time, ask the horse to take the leg back a little more. A little more.
8. If the horse has forgotten what to do, you can remind him , for the exception, supporting his leg with your hand (returning a few steps back, to an easier level) and slightly indicating the direction down and back. After this reminder, the horse will repeat the movement itself. Be ready with a clicker, a tidbit and your delights of diligence and elegance of your student))
9. In the next step we keep the whip on the horse's leg for at least a few seconds in position on the wrist. You can not extinguish with a whip, but simply touch the horse's leg below the wrist, as if explaining to the horse to wait in this position for a bit. And then, after this pause, we click and remove the whip.
10. Now that the horse has already understood the meaning of the exercise, you can take a long whip and move away from the horse. Having touched the whip, we can already implement a voice command or a gesture from the ground .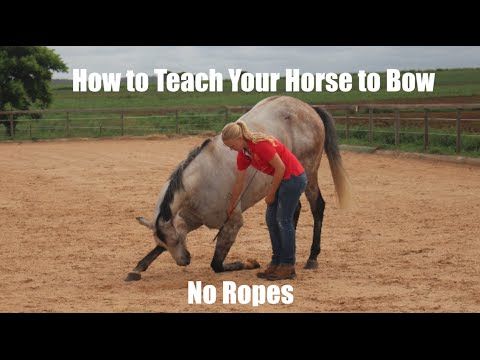 I must say that when you are on horseback, this command can be given either by voice, or by touching the horse's wrist with the whip, or even by a light gesture of the whip next to the wrist - how carefully you accustom the horse to a light signal depends on your patience. Many stop at the usual tushing with a whip. Thus, using a long whip, we train the horse to perform the exercise at a distance from us, and then, by increasing the distance between us and the horse, using a voice command and only a small wave of the whip (using it as a pointer), we bring the bow to perfection.
The video below shows the entire process, no cuts. The horse already knows the meaning of the exercise through physical pressure and support. But I ask Legalos to do the exercise on his own, without my help. He gets a little distracted - I just don't stop tapping with the whip. At some stage, I still tell him the direction of movement, supporting his leg with my hands and directing it down and back. After that, the horse perfectly performs the movement itself.