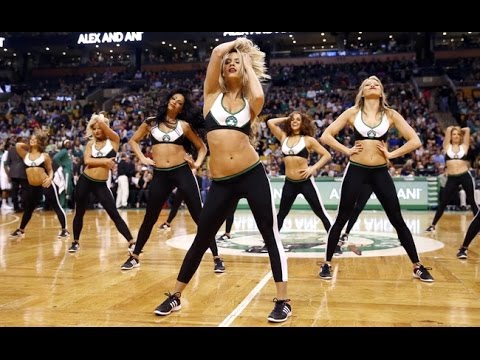
How to two step line dance
Learning the Basic Country Two-Step Dance – Country Dancing Tonight
The Slappin' Leather Line Dance
Please enable JavaScript
The Slappin' Leather Line Dance
I started country dancing about 3 years ago and was able to learn how to do the basic Two-Step country dance after a few private lessons. Looking back I realized it wasn’t as hard as I thought and since then have shown many people the basics to get them going and remove some of the mystery about it.
If you are going out for the evening to a country bar to do some dancing, there will most likely be lots of line dancing interspersed with couples partner dancing. Far and away the most popular partner dancing in the United States is the two-step. Drawing from what I’ve learned, this post will give you the basics to prepare you to be ready when you venture out to your local country bar or dance club.
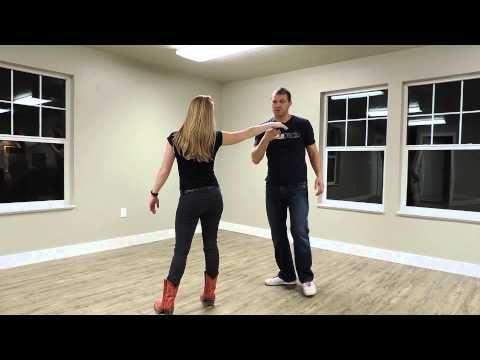
Basic Positions for the Two-Step
In country two-step there is a leader and follower.
Leader: facing your partner, place your right hand under your follower’s left arm and on their shoulder blade.
Follower: facing your partner, place your left hand on your leader’s shoulder seam.
Both: Join your free hands on the other side and hold up and out at about shoulder height.
Notes:
1. After creating this closed position, the leader should position their feet to the left slightly so your toes aren’t pointing directly at each other, but offset slightly. This way you’re less likely to bang your feet together while dancing.
2. It’s important for the follower to lean back slightly into their leader’s right hand and also to put a little pressure with both their left hand (on the leader’s shoulder seam) and with their right clasped hand.
The idea is to keep a fixed amount of space between each other and with this pressure, the lead can push and pull their partner easily. This is known as a good “dance-frame.”
Understanding the Basic Steps for the Two-Step
Two-step dancing consists of two “quick” steps and then two “slow” steps. Knowing when to do these steps is about finding the bass beat of the music being danced to. To get comfortable finding this beat listen to your favorite country songs with this intent. You’ll notice a main beat that you naturally can tap your hand or foot to. In music there is also the “&” beat in-between each basic beat. 1-&-2-&-3-&-4. The Quicksteps are quick because the second one happens on one of these “&” beats. Then you pause or stop for the next “&” and step on the 2nd main beat. This stepping on the “&” beat sometimes and skipping to step on the main beat creates the quick-quick, slow-slow that country two-step is known for.
In this diagram the “bouncing ball” represents steps to either the main beat or 1/2 beat of the music. The wait in between the steps or timing is the key.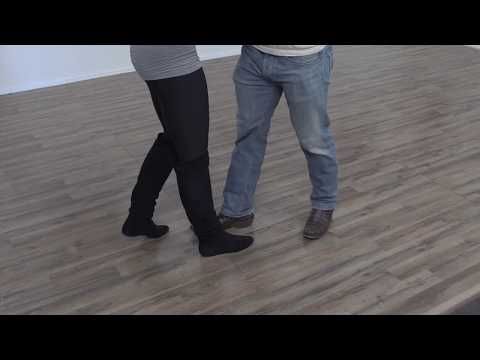
For me, as a lead this was the hardest and most intimidating part to getting into country Two-Step. I would ask a lady to dance we would go out onto the floor, assume the correct dance frame and then with other dancers already going I would freeze! I couldn’t hear the beat! I couldn’t start! Honestly, there was no immediate fix to this. It just took some time getting used to hearing and feeling that beat almost subconsciously and naturally so that now I can begin right away.
Tip: I did learn to listen for that beat even before asking someone to dance! This way I was almost already dancing before we started!
Beginning the Two-Step Dance
So, as the lead, there is no absolute beat to start on (like there is with line dancing). You just pick a beat and begin. As the leader, you do signal your partner that you are beginning by leaning in and pushing.
The lead begins with their left foot and consequently, the follower steps backward with their right foot.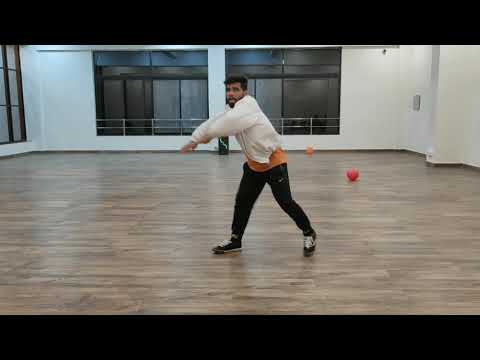
Then the 2nd (quick) step is taken by your right foot and the follower steps back with their left.
Then you pause for the “&” and step on the main beat, with your left again, followed by a 2nd “slow” step on your right after skipping another “&” beat.
The diagram above illustrates this.
Line of Dance for Two-Step and Partner Dancing
When you go to any country bar to see partner dancing or any ballroom for that matter you will notice that the direction of traffic on the dance floor is always moving counter-clockwise. This is a big part of dance floor etiquette and is very important!
Notes:
Along with the counter-clockwise line of dance, generally it is understood that the outer lanes are going to be used by the more experienced dancers and (unlike a freeway) is the “fast-lane.” The inside lanes of the dance floor are meant for the slower or beginner dancers. And the more toward the middle of the floor the more it is free of traffic.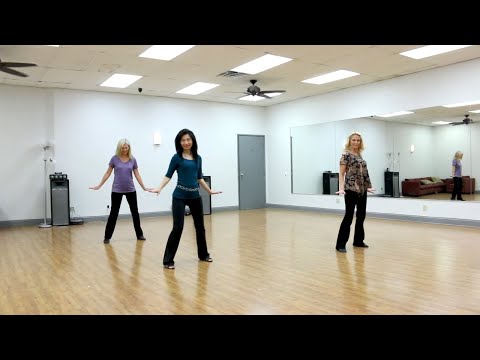 Occasionally there is a really great couple that wants to do some fancy tricks right in the middle open area—so just keep your head up and watch out! It is also pretty common for country bars to allow for line dancing to a given song to happen in the middle while the Two-Step dancers go around them.The Two-Step is known as a “Progressive” or “Traveling” dance and is always danced in a counter-clockwise direction around any dance floor. This graphic illustrates this as well as where to dance as a beginner dancer (inside lane) or more advanced dancer (outside lane).
Two-Step Dancing Leader & Follower Roles
Leader: As a leader, it is your job on the dance floor to watch and steer your partner safely around the dance floor. After getting a good grasp on the basic two-step, a good next level is to turn your partner and lead backward. However, this doesn’t switch the responsibly to the follower to watch out. The leader now must look over their shoulder and see the traffic and continue to steer the two of you safely around the dance floor.
But of course, if the follower sees a collision about to happen they can try to give a heads up! But its really not their job. The leader is to be aware of the space and try to see all the dancers around.
Follower: As the follower, it is important to help maintain that pressure between you and your leader. This is how you will know what they’re doing. If you are getting your feet stepped on by your lead you may be collapsing in and not keeping that pressure.
Different Styles of Two-Step Dancing
While the timing for the Two-Step is agreed on universally, there are some differing thoughts about style. This observation of style has to do with timing and is really a discussion for the leader. The main one I’ve heard is how big your steps should be and if your speed is constant or variant. It stands to reason that maybe for a “quick” step you can’t step as far, but for a “slow” step you can take a bigger longer step. But some would say, no, just take longer to make the step! So, all steps are the same distance. I’ve also heard when you do the quick step it should be as if someone “pushes you from behind” hence you’re speeding up at that moment, to then slow down at the “slow-slow.” I don’t think it matters much! The main thing is that as the leader, whatever style feels right for you, you are a good lead and your follow can feel it and pick it up.
Two-Step Dance Routines
The Basic dance frame “closed” position, the steps, timing, how to start and understanding the leader and follower roles is all you need to get out on the dance floor and begin! At this point, you are ready to go out dancing and move around the dance floor – in a counter-clockwise direction!
This all provides the foundation for Two-Step and can be built upon throughout years of dancing enjoyment. The following are a few added dance moves and routines to add to your growing repertoire.
180º Turn – This is a simple turn of the both of you initiated by the lead. The turn is accomplished by the lead using the first slow to move his partner to the right out of the “track” and then completing the full turn of both partners on the second slow. Then the next quick-quick is the lead walking backward, pulling the follower who is now walking forward.
Outside Turn – Possibly more common than turning around might be just turning or spinning the follower. This is accomplished by a small “prep” or signal to the follower with the left hand and turning them around by pulling their hand away from you so they turn clockwise. They will follow their right shoulder. As they come around the leader will reposition their right hand back under the shoulder blade.
Sweetheart Position – This not necessarily a dance move, but another way to progress around the dance floor beside the “closed position.” When in “closed position” the leader just pulls the follower in for a 1/2 inside turn switching hands. Both partners look forward, both holding right hands in front and left hands held above the follower’s shoulder. The Sweetheart Position gives the follower a nice break from always traveling backward.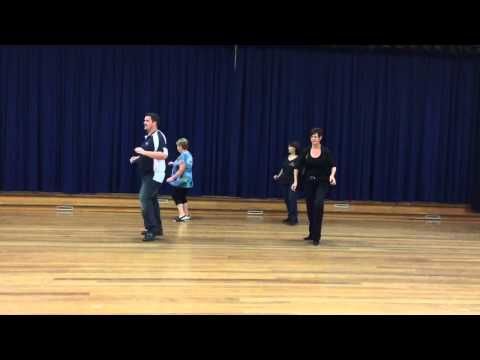
Extra: Once you have this down, try moving to it while the leader is traveling backwards! This forces the lead to be the one turning to walk forward.
Two-Step Dancing Tutorials
This post obviously isn’t intended to turn you into a world-class Two-Stepper overnight! There are many other intermediate and after that advanced routines or patterns to learn! The ones explained above will be a great start and allow you to blend in pretty well with a typical night of Two-Stepping at your local country bar. Below are some great video tutorials showing some of the basics covered above. These videos also add additional tips and will take you farther. Enjoy!
https://youtu.be/xoscqzFdwB0Video can’t be loaded because JavaScript is disabled: How to Do the 2-Step | Line Dancing (https://youtu.be/xoscqzFdwB0)
To begin with, this brief tutorial from Robert Royston, a 5-time country dance world champion goes over the basics!https://youtu.be/2NPdOQyqCkcVideo can’t be loaded because JavaScript is disabled: HOW TO DANCE TWO STEP – Country Two Step Dancing For Dummies (https://youtu.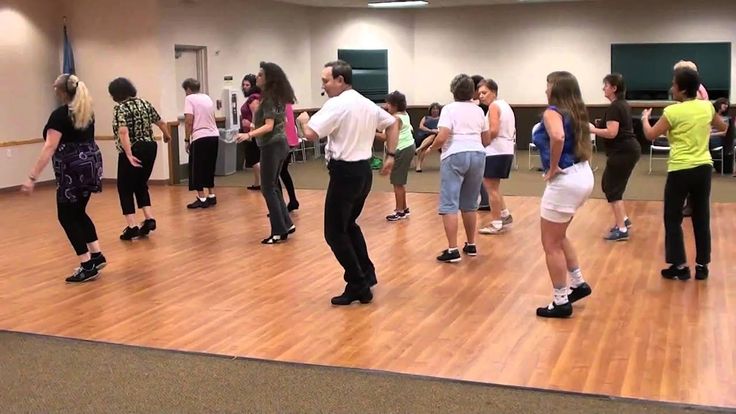 be/2NPdOQyqCkc)
https://youtu.be/4-2MHaNny8gVideo can’t be loaded because JavaScript is disabled: Beginner Country Two Step Dance Tutorial | Basic Two Step Patterns (https://youtu.be/4-2MHaNny8g)
Lastly, here is a more lengthy and equally reliable tutorial from another equally qualified couple going through several patterns for the Two-Step.How to Line Dance | Beginner’s Guide for 2023
Learning how to line dance is a fun endeavor for you and a friend or group of friends. According to Stanford University, “the health benefits of dancing include stress reduction, increased cognitive acuity and the ability to ward off the onset of Alzheimer’s disease and dementia.” Along with lifting moods, easing anxiety and improving balance and flexibility, it’s just plain fun! You don’t even need a partner.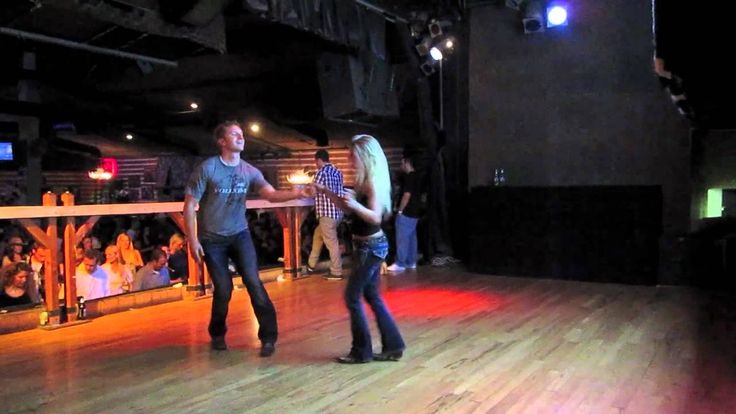
Movies like Sweet Home Alabama, Cool Runnings, Thelma and Louise and even Shrek Forever After feature the fun of learning how to line dance. Who wouldn’t want to get in on this social and energetic dance movement?
So what is line dancing and how do beginners get started? From stepping left to turning right, to staying in your own row, learning how to line dance can appear to be an intimidating concept to master. We’ve compiled an introduction to learning how to line dance that includes its basic steps and what it's all about to help you get on the right foot (pun intended)!
Jump to Section
- Line Dancing Lessons
- What is Line Dancing?
- Five Basic Line Dance Steps
- Popular Line Dances
- Line Dance Songs
Line Dancing Lessons
Dance Classes
Line dancing for beginners is easy when you book classes with professional dancers. With dance classes in NYC, dance classes Las Vegas or dance classes in Colorado Springs, you can join a group of like-minded beginners for a fun and energetic evening as you learn how to line dance.
Not ready to show off your skills? You can also sign up for online dance classes to attend from the comfort of your own living room. Check out dance classes near you to find the perfect class to learn how to line dance at your own comfort level.
Social Settings
Another way to learn how to line dance is to jump right in there — figuratively and literally! Bars, dance clubs and group gathering places across the country are one of the best ways to learn how to line dance. Line dancing is even done at weddings. While Texas and Tennessee offer a plethora of dance halls, you’ll find places all over the U.S. to learn how to line dance. Here are a few:
- Wildhorse Saloon in Nashville, Tennessee
- The Grizzly Rose in Denver, Colorado
- Billy Bob’s in Fort Worth, Texas
- Ponderosa Lounge and Grill in Portland, Oregon
- Robert’s Western World in Nashville, Tennessee
- Cowboy Country Saloon in Long Beach, California
- The Bowery in Myrtle Beach, South Carolina
- Pop’s Tavern in Baltimore, Maryland
- Gilley’s Saloon in Las Vegas, Nevada (Sound familiar? The original Gilley’s was in Pasadena, Texas and the film site for Urban Cowboy.
 )
) - Coyote Joe’s in Charlotte, North Carolina
via Canva
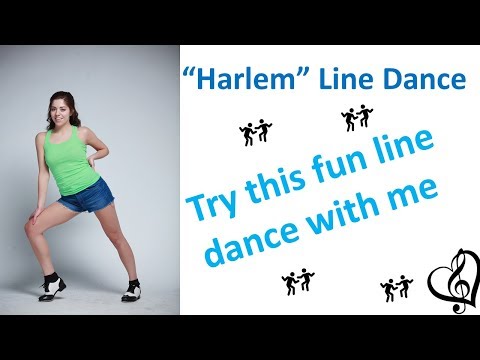
What is Line Dancing?
Line dancing involves synchronized movements done in unison to choreographed steps. Dancers line up in rows facing in the same direction (though it can also be done facing each other). Each movement (whether it’s a step, hip movement or a wobble) is timed to the music.
Line Dancing History
Line dancing may seem like a fairly new dance, but it goes back to the 1920s with the Shim Sham. In fact, African, Native American and European cultures have histories of dance styles like line dancing. New generations add movements, steps, songs and style to add on to the genre, making learning how to line dance an ever-evolving sport.
Country Line Dancing
The style became more mainstream and widely popular in 1992 with Billy Ray Cyrus’ “Achy Breaky Heart.” Everybody and their brother wanted to learn how to line dance to country music! The song filled up country line dance saloons and bars with cowboy hat, boot and denim-wearing dancers of all ages.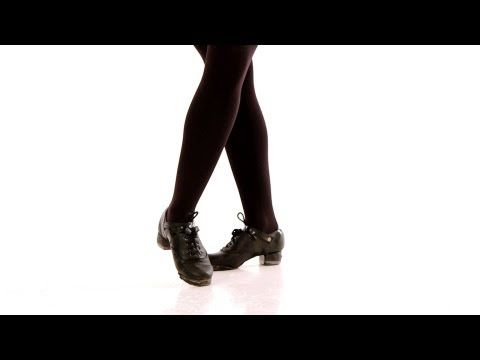
This is probably the scene most visualize when they think of line dancing. And, while it has evolved from traditional country line dances like square, round and folk, the wonderful thing about the genre is that anybody can learn how to line dance.
Line dancing has millions of combinations of steps, combined with walls, so this is one dance where you can grow skills and movements the more you practice learning how to line dance.
Steps and Touches
As you get started learning how to line dance, the most important aspect is figuring out steps. A step is when you change your weight. A touch is when you don’t change the weight (this is mainly used to change directions).
Put basically, there’s a step for each beat in 4/4 time (four steps over four music beats). To time your steps, count from one to eight or do a count of 1, 2, 3, 4 – 1, 2, 3, 4.
Walls
When learning how to line dance, keep in mind that formations have either one, two or four walls.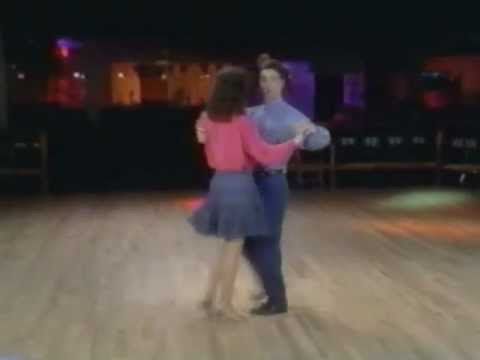 A wall refers to the direction that the dancers are facing (think of it like they’re forming a wall/barrier). With one and two wall versions, dancers are always facing the front and back walls.
One-wall means everyone faces the same direction when performing steps. Two-wall is when, at the end of each dance sequence, everyone turns 180 degrees. Then, they begin again facing the back.
Four-wall is the most difficult, especially when you’re just beginning to learn how to line dance. At the end of the steps, everyone turns 90 degrees and proceeds facing one of the side walls.
Throughout the dance, dancers finish and start again by facing a new wall. When you’re first learning how to line dance, it’s best to stick to the basics and add on as you get accustomed.
via CanvaFive Basic Line Dance Steps
While it’s seen as a group effort, you can learn how to line dance alone, which makes it terrific for line dancing for beginners to practice right at home.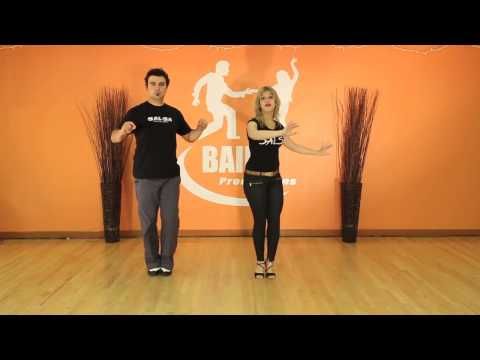 You just have to learn some basic counting, combined with the steps and you’re ready to go. Accurate timing and the proper foot placement are the key things to remember when you learn how to line dance.
So, what are the five basic steps in line dancing and how do you do them? By becoming familiar with the five basic line dance step names listed below, you'll have a great headstart for your first official line dancing lesson.
1. Grapevine
The grapevine is a continuous traveling step that goes to the side with crossing behind and/or in front. It involves a three count move to either side. On the fourth count, you have the option of a brush, kick or scoot.
2. Weave
A weave is the same as a grapevine but with four counts.
3. Scoot
A scoot, as the name implies, is a slide of the weighted foot in a forward, backward or sideways motion. The opposite leg is raised with a bent knee.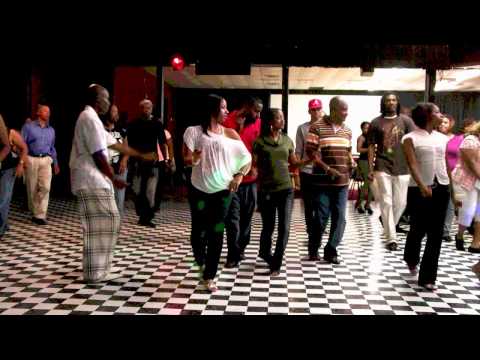 A scoot can also be done with weight on both feet.
4. Brush
A brush is when the free leg swings forward or back as the sole of the foot brushes the floor.
5. Kick
A kick is a leg lift movement in any direction. Don’t completely straighten the knee.
via CanvaPopular Line Dances
When it comes to learning how to line dance as a beginner, it is best to start with some of the easiest line dances. You may be familiar with popular dances, such as the Cupid Shuffle or the Electric Slide, which often play at weddings or other dance events. You can learn how to line dance these hit numbers in no time!
The Cupid Shuffle
The Cupid Shuffle is one of the easiest line dances for beginners learning how to line dance for the first time. The song tells you just what to do! “To the right, to the right, to the right…to the left, to the left, to the left...“
- Take eight side steps to the right (last step is a touch step)
- Next take eight counts to the left
- Then eight heel steps in place
- Last, do eight counts of stepping in place and turn ¼ to the left
- You’ll now be facing a different wall and you’ll then repeat the same steps
Cowboy Boogie
- Take a grapevine step (step to the side, step behind, step to the side) to the right
- Do a hitch (knee up) move at the end
- Repeat this same step and hitch to the left
- Next, a step forward with a hitch
- Another step forward and hitch
- Step back for three counts with a hitch at the end
- Then “boogie” with hips (this means to do a small hip movement forward and back)
- Then turn ¼ to face new wall
- Repeat steps facing the new wall
Line Dance Songs
There are a variety of different choreographed songs within the line dancing genre.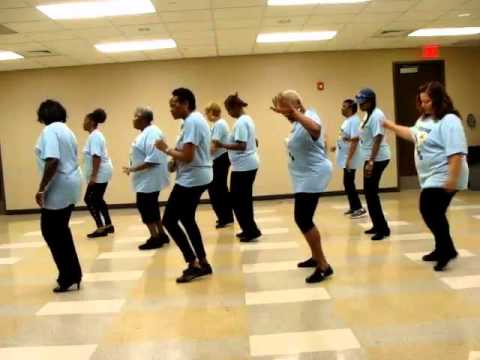 Not all songs are performed to the same steps, which may make it more difficult, but certainly gives it a unique advantage and lots of fun steps to learn.
Steps are usually choreographed to a specific song, which then becomes the name of that routine. Some popular ones include: The Stroll, the Cowboy Boogie, the Electric Slide, the Achy Breaky Heart, the Macarena, the Cha-Cha Slide, the Cupid Shuffle and the Wobble.
When learning how to line dance for beginners, try “Two-Step” (by Laura Bell Bundy featuring Colt Ford). This is not to be confused with the two-step partner dance.
The Electric Slide and Cowboy Hustle (done to Vince Gill’s “What the Cowgirls Do”) are beginner line dances to try. “Watermelon Crawl” (Tracy Byrd), “My Maria” (Brooks & Dunn), “Cha Cha Caliente” (Jennifer Lopez) and "Rockin’ the Wagon Wheel" (Darius Rucker) are more on the beginner-moving-into-immediate side.
Popular Line Dance Songs
- “Boot Scootin’ Boogie” (Brooks & Dunn)
- “Achy Breaky Heart” (Billy Ray Cyrus)
- “Watermelon Crawl” (Tracy Byrd)
- “Any Man of Mine” (Shania Twain)
- “Man! I Feel Like a Woman!” (Shania Twain)
- “Macarena” (Los Del Rio)
- “The Loco-Motion” (Little Eva)
- “Gangnam Style” (PSI)
- “Old Town Road” (Lil Nas X featuring Billy Ray Cyrus)
- “Cupid Shuffle” (Cupid)
- Electric Slide (done to the song “Electric Boogie” by Bunny Wailer)
- “Hoedown Throwdown” (Miley Cyrus)
When it comes to learning how to line dance, the best piece of advice is to just have a good time. You don’t even have to be a country music fan with all the pop, salsa and jazz-inspired line dances out there! Once you’ve gotten the steps down, you can put your own spin on what you do in between. Add some funky hip, torso or hand movements to shake it up!
Whether you’re learning how to line dance by taking line dancing lessons or joining a dance at a club, party, wedding reception or other event, you’ll be among like-minded dance enthusiasts as you learn how to line dance. You’ll be line dancing like a pro in no time!
For even more creative ideas and inspiration, check out other experiences happening on Classpop!
Related Articles
A Beginner's Guide to Bachata DancingA Beginner's Guide to Cumbia Dancing
How to Belly Dance (With Confidence!)
How to Slow Dance With Style
How to Salsa Dance Beginner’s Guide
How to Swing Dance: A Beginner’s Guide
How to learn to dance shuffle - Lifehacker
December 15, 2019LikbezSports and Fitness
Master the basic movements, and then improvise and get high.
Iya Zorina
Author of Lifehacker, athlete, CCM
Share
0This dance style includes a lot of freedom and improvisation. That is why he is so good. You can master the basic movements in a couple of hours, and then complicate them to infinity and combine them with each other, create your own combinations and spy on others.
Dance in sneakers, socks or barefoot, in any outfit, anywhere.
Master the basic movements of the shuffle
In this style, you do all the basic movements with your feet, the hands most often move freely - according to the heart.
Running man
This is the most basic and essential shuffle movement. You can do it in three different ways.
Full foot
The movement begins by bending the knee and lifting one leg. Next, you need to simultaneously put both legs - supporting and raised - at a distance of one step from each other.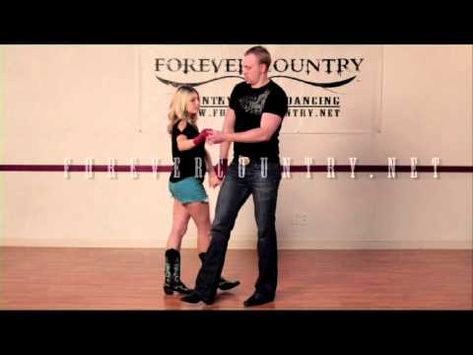
The raised leg is placed forward on a full foot, the standing one behind slips back on the ball of the foot and remains on it - the heel is not placed on the floor. The weight is evenly distributed between the two legs.
After that, it remains to return to the starting position. To do this, the front leg slides back, and at the same time, the back leg is pulled up. You find yourself in the starting position and repeat the cycle. The movement itself is soft and springy: do not stick into the floor, keep your legs relaxed.
Heel
This is a lighter and faster running man look that may be needed for some combinations. Here you put your foot not on the whole foot, but on the heel. At the same time, the one standing behind remains on the toe.
On pads
In this variation, the foot is placed forward on the pad. At the same time, the one standing behind also remains on the ball of the foot, and the body leans slightly back.
T‑step
In this movement, one foot constantly makes a “herringbone” - turns the heel in and out - and the second touches the floor and immediately rises back.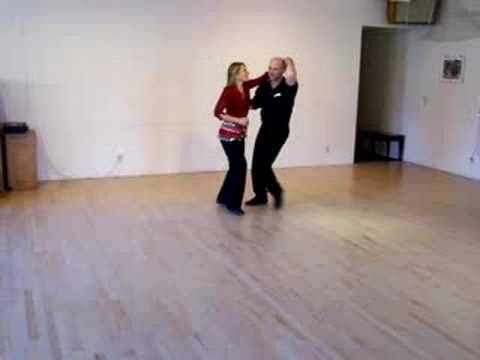
When the heel of the skating leg turns inward, the toe of the other leg touches the floor; when outward, the other leg rises, turning the knee inward.
It turns out two positions: closed - when the legs are wrapped with the knees inward, and one leg is raised, and open - when the legs are turned out with the knees outward, and the toe touches the floor. Practice doing the T-step in both directions: slowly at first, then with acceleration.
Rocking
You jump on one foot, and the other touches the floor in different places: on the side of the supporting leg, across, behind - anywhere you want. You can put your foot on the toe or on the heel - the latter is called a kick. The supporting leg can simply rise low or perform a T-step - move the heel out and in.
Charleston
To begin, you turn your knees and toes inward and lift one leg. Then turn your toes and knees outward, and put your raised leg forward crosswise. Repeat the same with the other leg.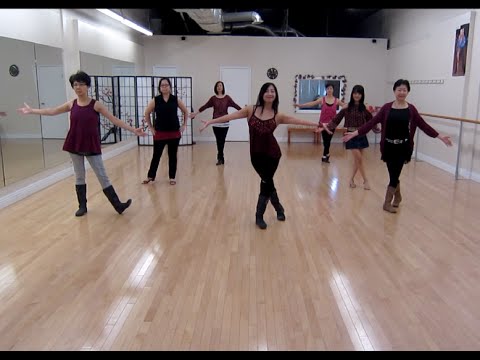
All movement occurs on the balls of the feet, the heels do not fall to the floor. You can move both forward and backward.
Diamond
First you put your feet crosswise with your toes outward with a jump, then you also spread your legs apart with a jump.
Slides
One leg is straight, stands on the whole foot, the other is with a bent knee on the pad. Leaning on the pad, you slip the foot of a straight leg back, as if wiping the sole on the floor.
Immediately after the slip, you turn around. In the turn, the straight leg bends and goes to the pad, and the one that was on the pad, on the contrary, turns on the heel. After that, it remains only to change legs and move in the same way in the other direction.
Scissors
From the starting position - standing with a raised leg, as in Running man - you turn your hips to the side with a jump and put your legs crosswise.
The front foot is on the heel, the back foot is on the ball.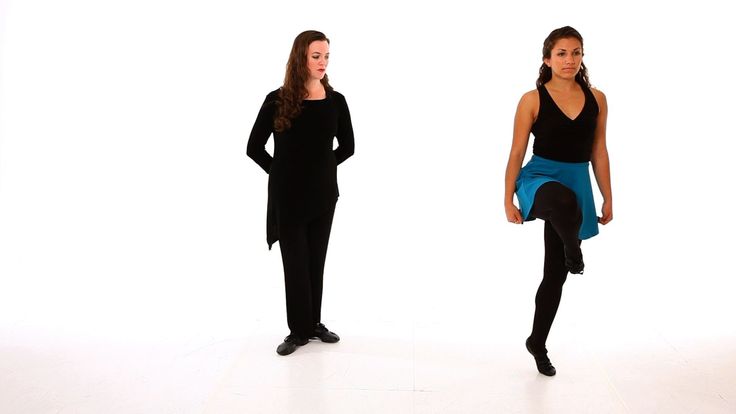 Then you jump back to the starting position and do the same on the other side.
Sidekick
From the starting position, you turn your hips to the side with a jump and spread your legs a step apart from each other. The standing foot in front is placed on the heel, the standing one behind remains on the pillow. Then, with a jump, you collect your legs and do the same on the other side.
Try other variations of the basic shuffle movements
You can perform the basic movements in different directions: forward and backward, turning around. This will give you more freedom to improvise.
Variations Running man
Do several times in place and then turn around. You can also try walking this way to the side. Each time the leg will need to be placed slightly crossed in order to slowly move to the side.
Variations T‑step
You can lower your foot on the toe, on the whole foot, touch the floor to the side of the supporting leg or forward and behind it.
You can also keep the other leg off the floor at all - leave it on the toe and turn the knee in and out.
Variations Diamond
Here one more element is added to the movement – the heel strike. In the starting position, you wrap the toes of the feet and knees inward, and then jump on the heels, turning the socks to the sides.
From this position, without jumping, you turn your toes and knees inward, cross your legs with a jump, turning your feet with your toes outward, and then return to the starting position.
Charleston Variations
After three turns of the Charleston, turn both toes in one direction and then in the other. At the end, you can turn the knee to the side.
Connect familiar shuffle moves
While you lack the skills to move freely and come up with something of your own, learn a few combinations. They contain interesting movements that will replenish your dance vocabulary.
Combination 1
This is a simple combination of two basic movements - Running man and T-step.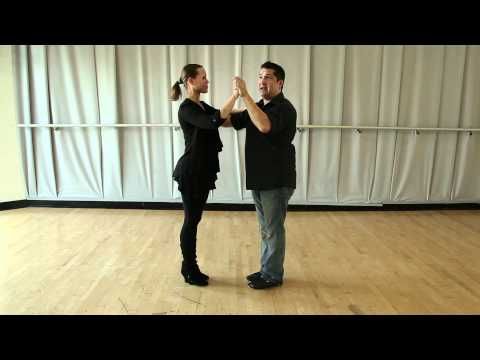 First take five Running man steps, then four T-steps to the side and repeat the same in the opposite direction.
Combination 2
Another combination of two basic movements. Here you do three Running mans, then one T‑step with a back foot touch, and two front heel touch kicks. The same on the other side.
Combination 3
There are no standard steps here, but there are already familiar Sidekick and transition from heels to toes.
Learn more difficult combinations
We will add some videos with good combinations.
1. Cool video for beginners: movements are repeated in slow motion to make it easier to dance to the music.
2. And here the combination is analyzed step by step in slow motion, dividing it into three parts. Very comfortably. Look for more on this channel, there are several such analyzes.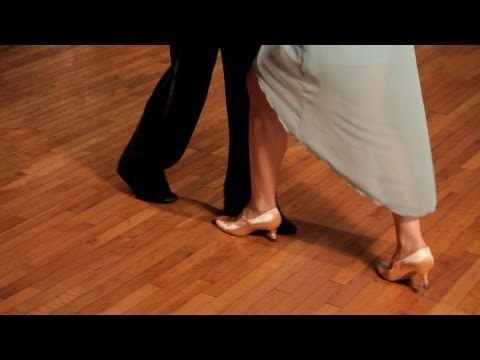
3. There is no slowdown here, just a great combination. But you already know almost all the movements, so you can figure it out. If something is not clear, watch the video at a speed of 0.25.
Pick up the music and improvise
Surely you have favorite songs to shuffle to. Include them and start with basic movements: just do the Running man and periodically add different elements when you want. Move in different directions, relax and have fun.
If you don't have favorite tracks, try our selection.
I must say that the shuffle is an amazing cardio workout. In just a couple of tracks, you will be out of breath and sweat, like after a run, but you will feel absolutely happy!
What's more, if you have to force yourself to keep going while running, shuffle requires you to have the willpower to stop and not dance. As a bonus - a short video from a beginner after a couple of hours of practice.
Shuffle is cool!
Read also 🕺💃🤸♀️
- Dancing as a sport: choosing the right direction
- Dance and movement therapy: how to know and change yourself through movement
- How to learn to dance: video lessons for those who are not afraid to try
- How to learn street dancing without leaving home
- Zumba is a fun way to lose weight for those who love dancing
*Activity of Meta Platforms Inc. and its social networks Facebook and Instagram are prohibited in the territory of the Russian Federation.
Pas de valse
0002 Pas de valse (Pas de waltz, Pa waltz) - waltz steps, waltz step
Pas de valse is a dance element consisting of 3 steps: two passing steps forward and a prefix (step-step-prefix).
Music
Time signature 3/4.
Slow or moderate pace.
The waltz pa takes 1 measure.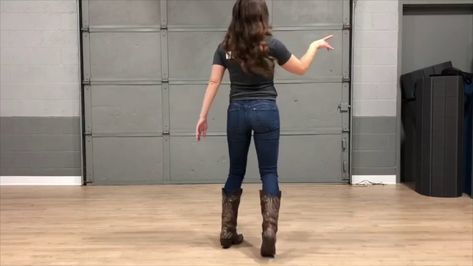
Score: I-1-I-2-I-3
Preparatory exercises
- Bringing the leg to the toe - battement tendu (battman tandyu) 3 positions in a cross one at a time (right foot and left foot).
- Rise on the half-toes (relevé - relevé) in 3 positions.
- Dance step
Waltz Pa
Starting position:
The dancers stand in a circle, facing along the dance line.
Legs - in 3rd position (right leg in front)
Arms - in ball position (slightly away from the body).
1 measure - Waltz pas forward along the line of dance from the right foot.
| Account | Movement description |
| Start (I) | Bring the right leg, straightened at the knee, forward to the toe (in 4 pos.) - battement tendu - battman tandyu with the right foot forward. Slightly soften the knee of the supporting left leg. |
| 1 | Sliding step with the right foot forward along the line of dance from the toe to the entire foot. Shift your weight onto your right leg. Slightly soften the knee of the right leg. The left leg remains behind on the toe (in 4 pos.). |
| and | The left leg, also softened at the knee, is held next to the right leg through 1 pos. (the heel of the left foot next to the heel of the right foot) and is brought forward to the toe (in 4 pos.). |
| 2 | A small step with the left foot forward along the line of dance on low toes. Shift weight onto left leg. The right leg remains behind on the toe. |
| and | With a sliding movement, pull up the right leg with the toe on the floor and put it on the toes in 3 pos. behind the left leg. (Weight is on two legs.) |
| 3 | Get down on full feet in 3 poses. (left leg in front). Shift your weight onto your right leg. |
2 measure - Waltz pas forward along the line of dance from the left foot.
Performed in the same way.
Waltz pa paired with half turns
Starting position:
The dancers stand in a circle, facing each other (the boy - with his back to the center, the girl - facing the center.
Legs - in 3 positions: the boy's left leg is in front, the girl's right leg is in front.
Hands are connected in 2 position, connection - "boat", "by the fingers" (The girl's fingers lie on the boy's fingers. The partners hold each other's fingers with their thumbs. The elbows are rounded.)
1 measure - Waltz pas with a turn of the face along the dance line.
The first step for both partners is turning - a step to the side, with a turn of 90 deg. (face along the line of dance). The second and third steps are forward along the line of dance.
The boy performs the Pa waltz from the left foot with a turn on the first step to the left by 90 degrees.
A girl performs a Pa waltz with her right foot, turning 90 degrees to the right on the first step.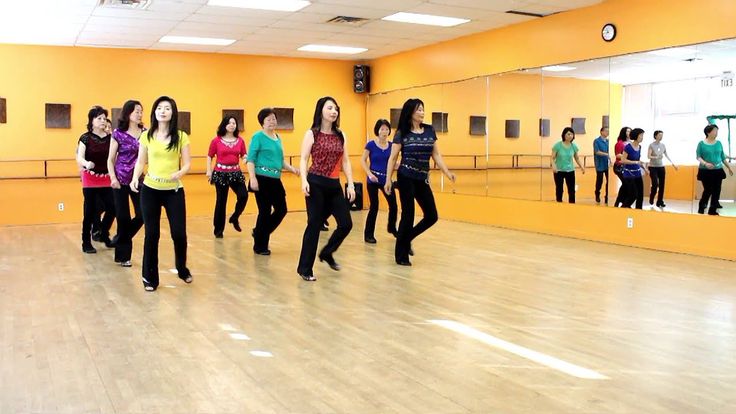
The left hand of the boy and the right hand of the girl are separated and moved to the sides (in 2nd position).
The connected right hand of the boy and the left hand of the girl pass through the bottom and are brought forward, at the level of 1 position.
Ending: partners stand facing along the line of dance (the girl is to the right of the boy).
The right hand of the boy and the left hand of the girl are connected at the level of the 1st position. Free hands - in 2 positions.
2 measure – Waltz Pa with facing each other.
The first step for both partners is turning - a step forward, with a turn of 90 degrees. (facing each other). The second and third steps are to the side.
The boy performs Pa waltz with his right foot, turning on the first step to the right by 90 deg.
A girl performs a Pa waltz with her left foot, turning 90 degrees to the left on the first step.
The left hand of the boy and the right hand of the girl join again in 2 positions.