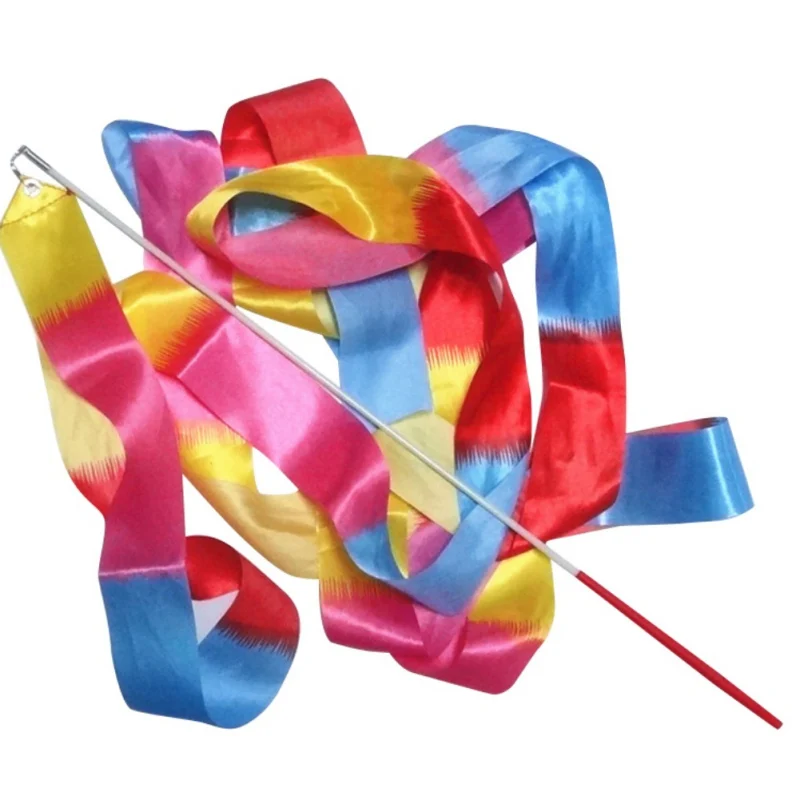
How to make ribbon dancers
How to Make Dancing Ribbon Rings
By Chelsey
As an Amazon Associate I earn from qualifying purchases. You can read more on our disclosure page.
These DIY dancing ribbon rings are super simple to make and so fun for kids to play with. Ribbon rings are such a fun homemade toy for music and movement and also make great party favors for a birthday party.
Follow Buggy and Buddy on Pinterest for even more ideas!
After watching my two year old’s fascination with dancing ribbon rings at our local music class, I knew I had to make some for him to use at home!
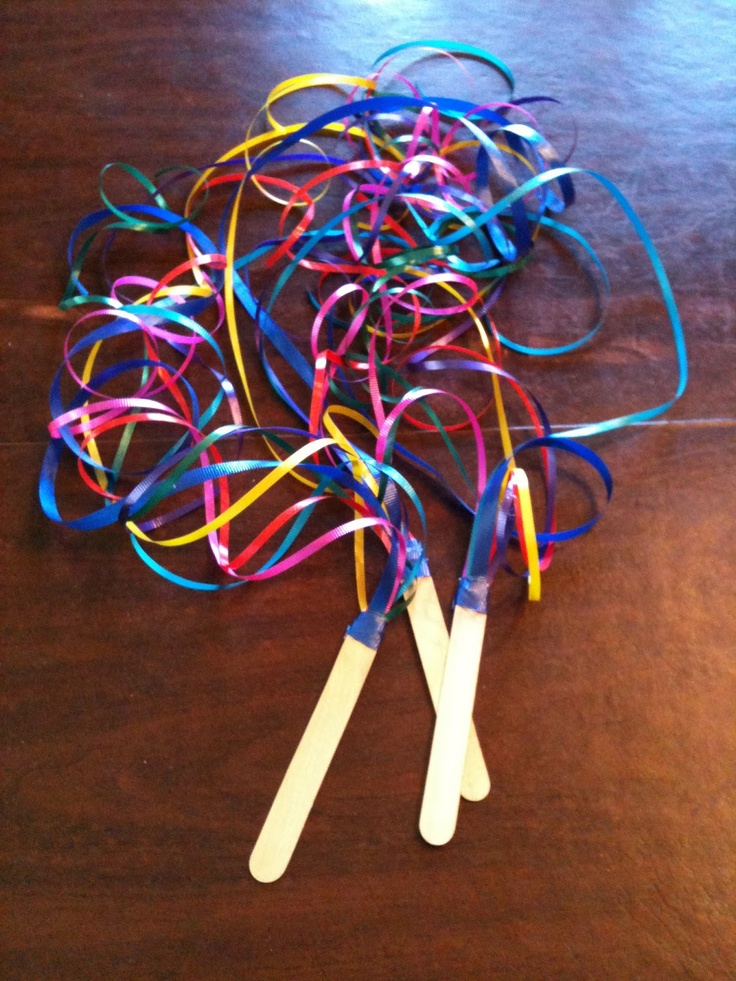
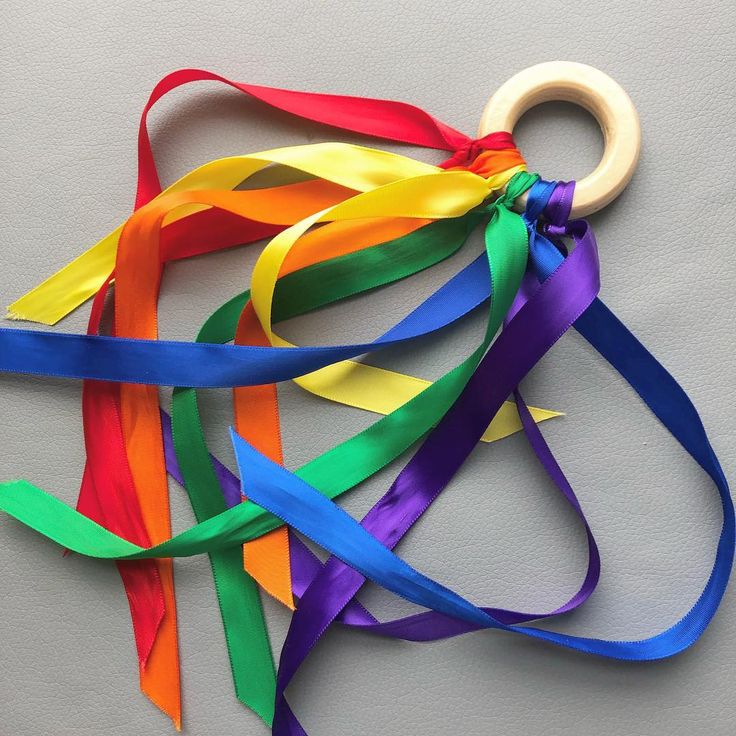
If you’re not familiar with ribbon rings, they’re basically rings (large enough for small hands to hold) with ribbons streaming from them. Ribbon rings are wonderful toys for both outdoor and indoor play and inspire all kinds of dancing, twirling, and imaginative play! And the best part- they are super easy to make! (This post contains affiliate links. )
Safety Warning: Any string from toys or window blinds longer than 12 inches is considered a strangulation hazard for all children. The finished length of our ribbon ring streamers is 18 inches. DO NOT leave your child unattended with these toys.
Materials for Dancing Ribbon Rings
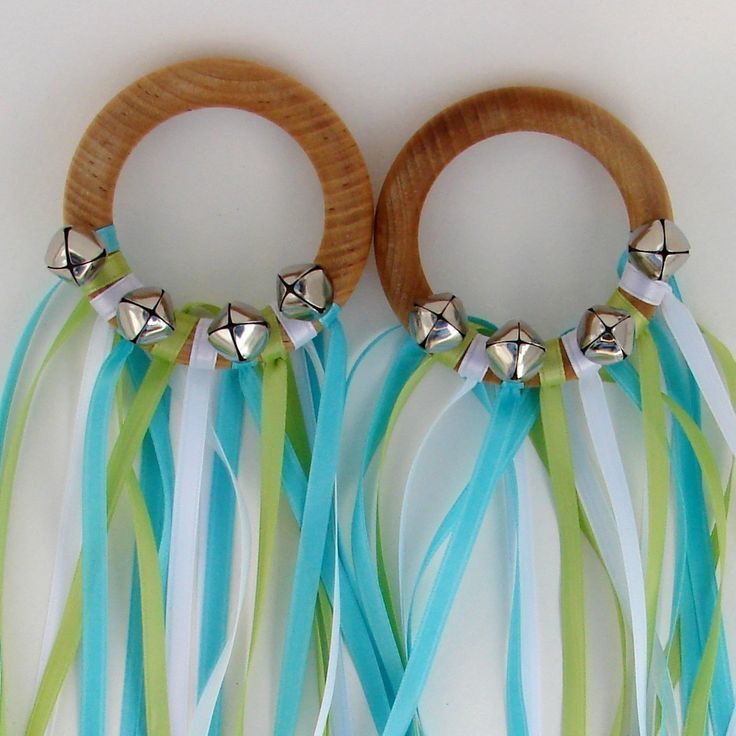
- Ring (We used 3 inch wooden rings, but you can also use these smaller wooden rings or even shower curtain rings.)
- Ribbon in variety of colors (We decided to make rainbow ribbon rings so we used all the colors of the rainbow! Our ribbon was 1/4 inch wide and purchased at our local craft store. If you are unable to purchase your ribbon locally, there are some variety packs of ribbon online like this one.)
- Scissors
- Lighter or candle (optional)
Directions for Making Dancing Ribbon Rings
1.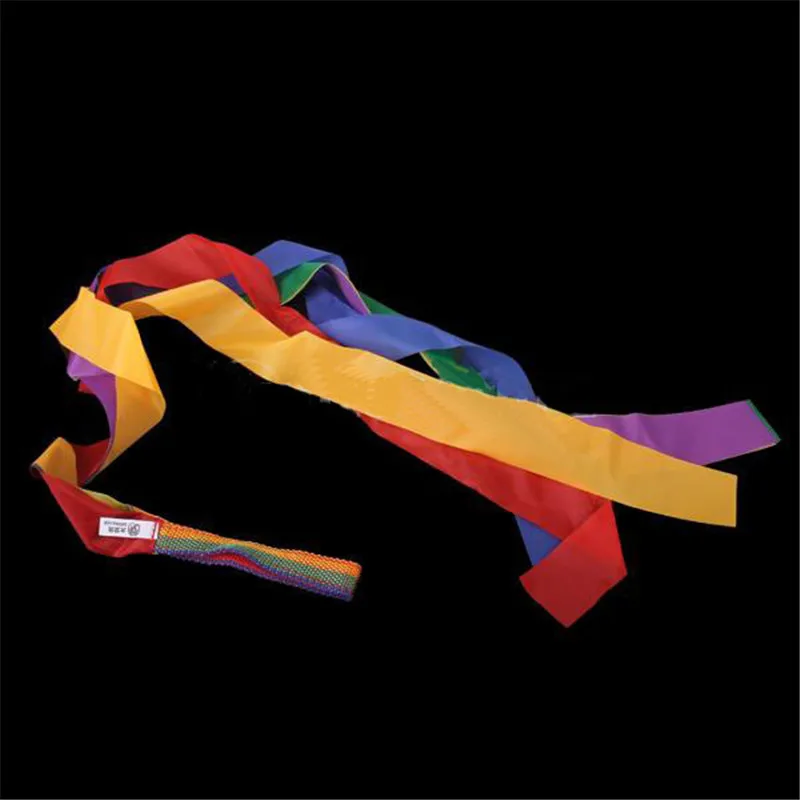 Cut your ribbon into 36 inch strips. (We used 7 different colors of ribbon, each 36 inches long, but you could use whichever colors you’d like.)
2. Tie ribbons onto the ring: Pull one 36 inch ribbon through the ring and stop when it’s halfway through.
Knot it twice onto the ring. You now have two 18 inch ribbons hanging from your ring. Do this for the remaining ribbons.
3. To keep your ribbon from fraying, quickly run the ends of the ribbons through a flame from a lighter or candle. This will melt the ends and seal them.
These dancing ribbon rings would make great handmade gifts for loved ones and wonderful stocking stuffers or goodies for an Easter basket!
Be sure not to miss these other homemade toy tutorials on Buggy and Buddy!
Felt Butterfly Wings
How to Make Your Own Felt Board
Felt Stuffed Letters Tutorial
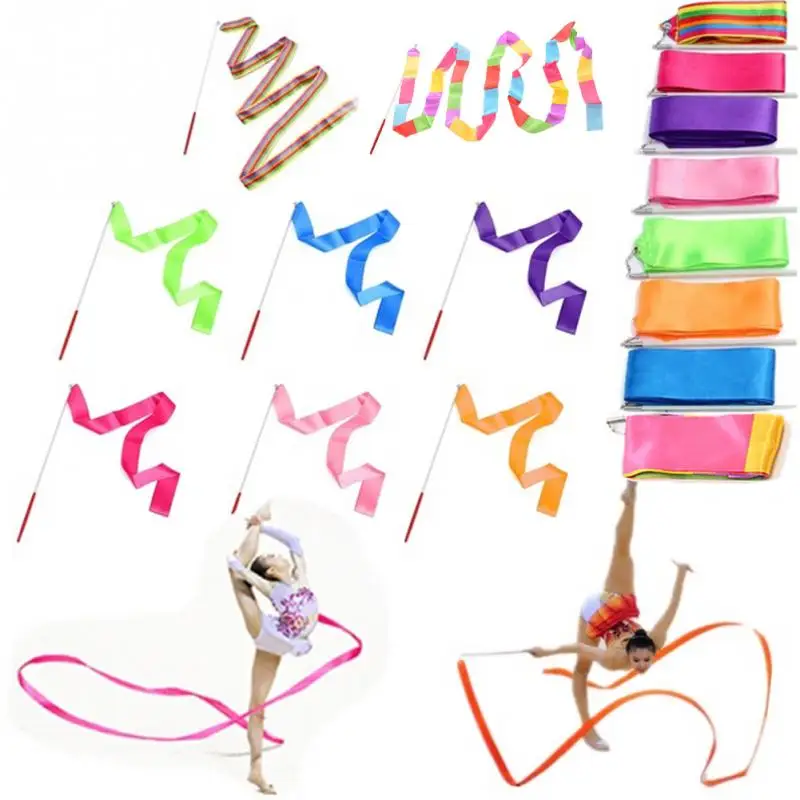
An Easy Craft for Kids: How to Make Dancing Ribbons
Make dancing ribbons on a budget with a few simple supplies…. an easy craft for kids. This is a cute party activity and the ribbons can be used for dancing, math, and literacy activities.
Here is an easy craft idea for preschoolers. Kids enjoy using these simple dance ribbons for music and movement activities and even literacy activities. Let me show you how to make these cute, budget-friendly dancing ribbons.
Craft Supplies for your Dancing Ribbons
Ribbon
Please note that these ribbon rings are intended to be created and used with adult supervision. If real ribbon fits into your budget….go for it. I like to use rectangular plastic table cloths to make inexpensive ribbons. You can find inexpensive table cloths in a wide variety of colors at the Dollar Store, discount store, or party store.
Rings
You will also need some type of ring to complete this craft. Here are some ideas for items that you can use for rings:
- jelly bracelets (looks for them in party favor section of stores)
- plastic lids (cut out a circle in the center)
- small paper plates (cut out a circle in the center)
- chenille stems (tie them into a circle)
- rubber slingshot frogs, bunnies, or other animals
How To Assemble the Dancing Ribbons
First, you will need to cut the tablecloths into strips or ribbons. To make the task of cutting the tablecloths easy, DO NOT unfold them all the way. If you happen to have a rotary cutter, you can cut strips just as you would cut strips of fabric for quilts. I couldn’t find my quilt cutting supplies, so I just used a ruler to measure the strips equally, marked them with a pen, and cut them with my scissors.
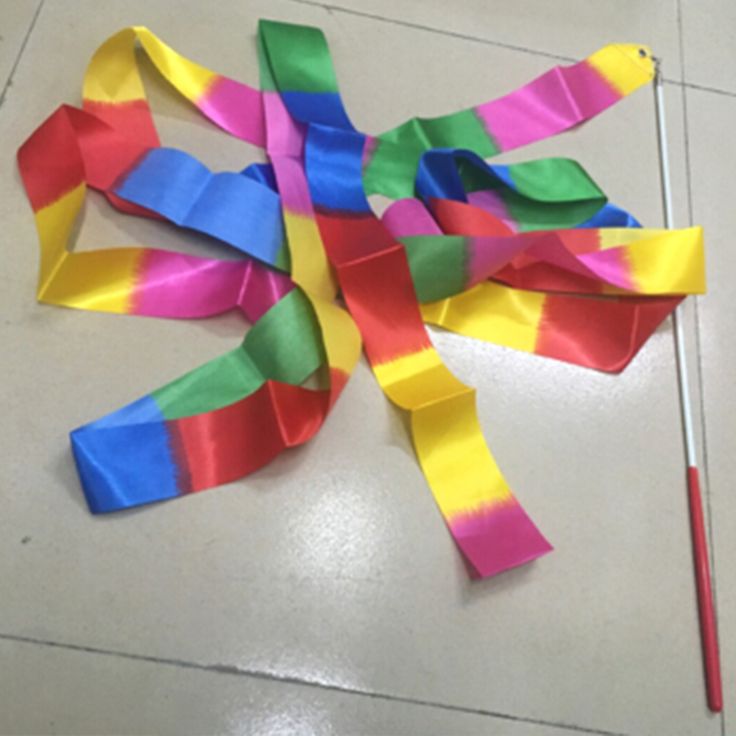
When I unfolded the strips, I had a bunch of nice, colorful ribbons to add to the rings. Now it’s time, to attach the ribbons to a ring.
Before attaching the ribbons to a bracelet, I folded them in half. I stuck the folded edge through the bracelet.
Then, I opened the fold to make a loop. I stuck my hand through the loop, grabbed the other end of the ribbon, pulled it through the loop, and pulled it tight around the bracelet.
Young kids will need some assistance with this. I like to add 3-5 ribbons to each ring. If you have enough supplies and kids enjoy the craft, they can add more. If you want to make the ends even, you can give them a little haircut.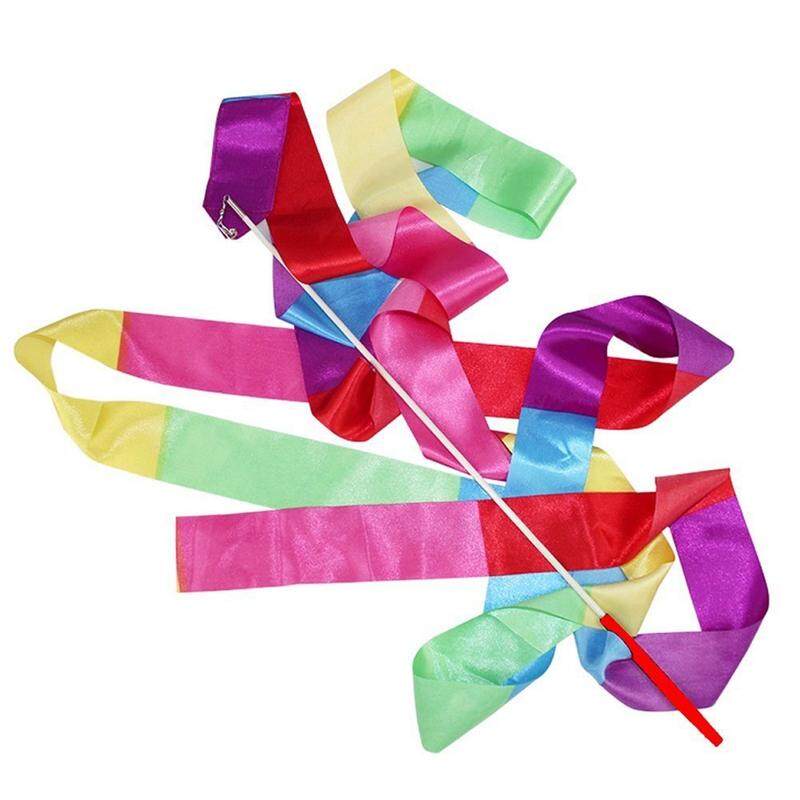
Additional Elements
In addition to the tablecloth ribbons, you can add curling ribbon (I think the addition of silver curling ribbon would look great on mine) to your rings. Jingle bells might be a fun addition as well.
Paper Plate Dancing Ribbons
If your kids aren’t quite ready to tie the ribbons onto rings as I showed above, they can use a stapler instead. We used two paper plates to make the ring a little sturdier. Kids can staple ribbons around the paper plate. They can then complete their craft by decorating or coloring the paper plate ring. In the picture below, we used Valentine’s Day stickers, but this craft can be used for any holiday or theme.
Ideas for Using Dancing Ribbons
The thing that I love about these ribbon rings is there are so many fun ways to use them. Here are a few ideas.
- Use them for a special birthday song during classroom circle time
- Create shapes, letters, or numbers in the air with the dancing ribbons
- Use dancing ribbons to count and emphasize syllables in words or names
- Make them as a party activity and use them as part of the celebration
- Have a parade featuring dancing ribbons
- And you can always use them for a dance party.
There you have it….an easy craft for kids. I’m sure that you can think of more ways to use dancing ribbons with your kids. I would love to hear your ideas.
Here are some resources from my store that can be used with the ribbon rings
.
How to make an old school neon sign with animation / Amperka
Step 1: Get inspired by old neon signs
When we think of neon signs, the first thing that comes to mind is the nighttime streets of Las Vegas in the 1930s with countless colorful neon billboards. Then neon was everywhere - on every billboard and store sign. And that they just didn’t depict using neon lamps: stars, drinks, dancers, cowboys, Indians, flowers, musical instruments and much more.
In Amperk we decided to make our own neon sign in the spirit of the old days. It was decided that the sign would be a neon cowgirl advertising a beer pub. We also decided to add some animation to the sign and control it with Arduino.
Step 2: Choosing the Neon
Real neon signs are actually quite expensive. A neon lamp is gas-discharge and consists of a curly curved glass tube filled with gas under slight pressure. The color of the glow of the lamp depends on what gas is in the tube. For example, neon gives a red-orange color, helium gives a white-orange color, and argon gives a lilac color. However, regardless of the gas, such lamps are still called neon. To light such a lamp, you need a special transformer of low current and high voltage of several kilovolts, capable of "knocking out" electrons from gas molecules. The magnitude of voltage and current also affects the shade of the lamp. Neon transformers are expensive, and making them yourself will require serious calculations and electronic components.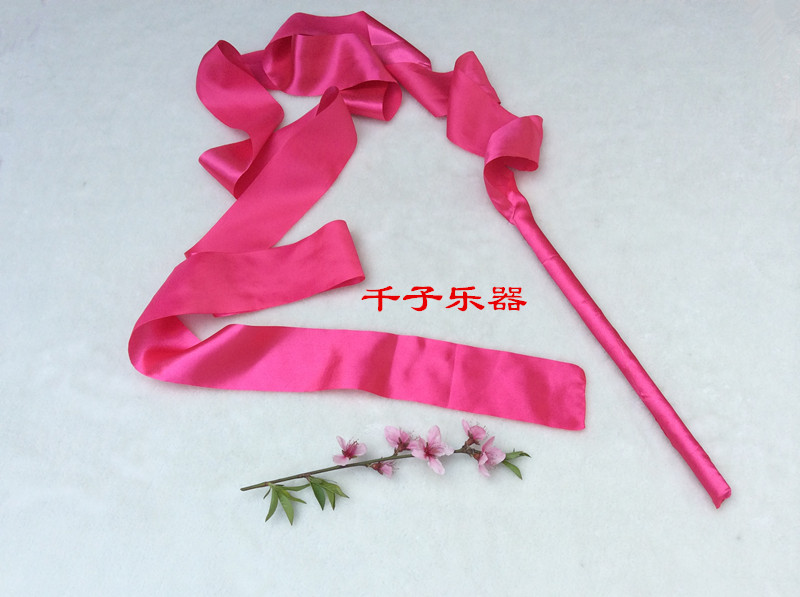 Well, blowing curly glass tubes is a real art that requires remarkable knowledge, training and tools. Thus, the manufacture of neon lamps at home is almost impossible.
Instead of real neon lamps, you can use an excellent replacement in the form of LED flexible neon. In fact, flexible LED neon is a regular or addressable LED strip in a transparent silicone shell. LED neon is cheap, its glow is not inferior in effectiveness to a real neon lamp, and special skills are not needed to work with LEDs.
For this project we used Arlight ARL flexible LED neon, which runs on 12V DC, with a section of 8x16mm and a 10mm cut ratio. The flexible neon size 8×16 mm is one of the most common and easy to find.
In total, we have purchased several coils of neon of different lengths with a glow of different colors:
- Yellow, 5 meters.
- Warm white 3000K, 10 meters.
- Blue, 5 meters.
- Cold white 5000K, 5 meters.
- Red, 5 meters.
- Amber, 5 meters.
- Green, 5 meters.
Step 3 Design Your Sign
First, draw a sketch of your sign on paper. Decide on the size of the sign and what exactly and where will be drawn on it. When the sketch is ready, it needs to be transferred to the computer and detailed. You can use any graphic editor, but we recommend creating an accurate drawing of the sign using 2D or 3D CAD systems.
Our cowgirl has a yellow hat and a green neckerchief. We have added two simple animations to the character. First, the cowgirl winks her eye. Second, the cowgirl raises her mug of beer and lowers it, slightly spewing beer foam. We also added the word “Saloon” to the upper right corner of the sign, which we gave light effects, such as blinking or “running light”.
Here are the key points when designing a sign:
- The drawing of the sign must consist of contour lines. They correspond to the places where segments of flexible LED neon will subsequently be installed on a real sign.
- The design, characters and objects on the sign should be as simple as possible. But at the same time, the drawing should be informative.
- For contour lines, use smooth curved lines and splines. Try to avoid sharp corners and small radii of curvature, because then it will not be possible to bend the tape along them.
- The width of each contour line in the drawing corresponds to the width of the flexible neon that you are using. In our case, 8 mm.
- The length of each contour line must be a multiple of the minimum cutting length of flexible neon. In our case, the neon ribbon cutting ratio is 10 mm, so the lengths of all contours are also a multiple of 10 mm. Use your CAD system to easily find out the length of a spline or curve.
- Avoid crossovers when using flexible neon. If one segment of the LED neon strip is superimposed on another, then the glow will be visible only from the upper segment. If you still need to create an intersection of two contour lines, try cutting one of the lines at the intersection.
 For example, take a look at the "winking" eye of our cowgirl.
 - Color the contour lines in colors that match the actual colors of your flexible neon.
- In addition to the contour lines of the segments of the LED strips, do not forget to draw a contour for the base of the entire sign.
CAD drawing of our sign
Step 4. Transfer the drawing to the base of the sign
Select the material from which the base of your sign will be made. As a basis, we decided to take a sheet of plywood with dimensions of 1500 × 1500 mm and a thickness of 10 mm.
Transfer the completed drawing to your sign base. To transfer our drawing, we printed it in 1:1 scale on several A4 sheets and glued the sheets together.
Then we gradually cut out the contours from the paper and repeated them with a pencil on the plywood. Both the contours of the LED strips and the contour of the entire sign must be transferred to the base.
Step 5.
 Cut out the outline of the sign
 When all the outlines have been transferred to the base, you can cut out the outline of the sign. We used a jigsaw with a wood saw.
Step 6. Try on the neon strips
Cut flexible neon strips of the desired color and length according to the drawing.
Now you can start trying on neon pieces. You can attach neon to the base in different ways - for example, with glue, but we decided to fix them with nails. We used bronze headless nails 1.2 mm thick and 20 mm long.
We placed nails on both sides of the neon strips so that the nails would squeeze the flexible strips on the sides. It is not necessary to hammer nails to the end, it is only necessary to ensure reliable squeezing of the tape. Also, with the help of nails it is very convenient to create the necessary bends of the neon ribbon. It is best to drive nails into the forming points of curved contour lines.
We designed a fairly large sign, so we had to drive in about a thousand nails.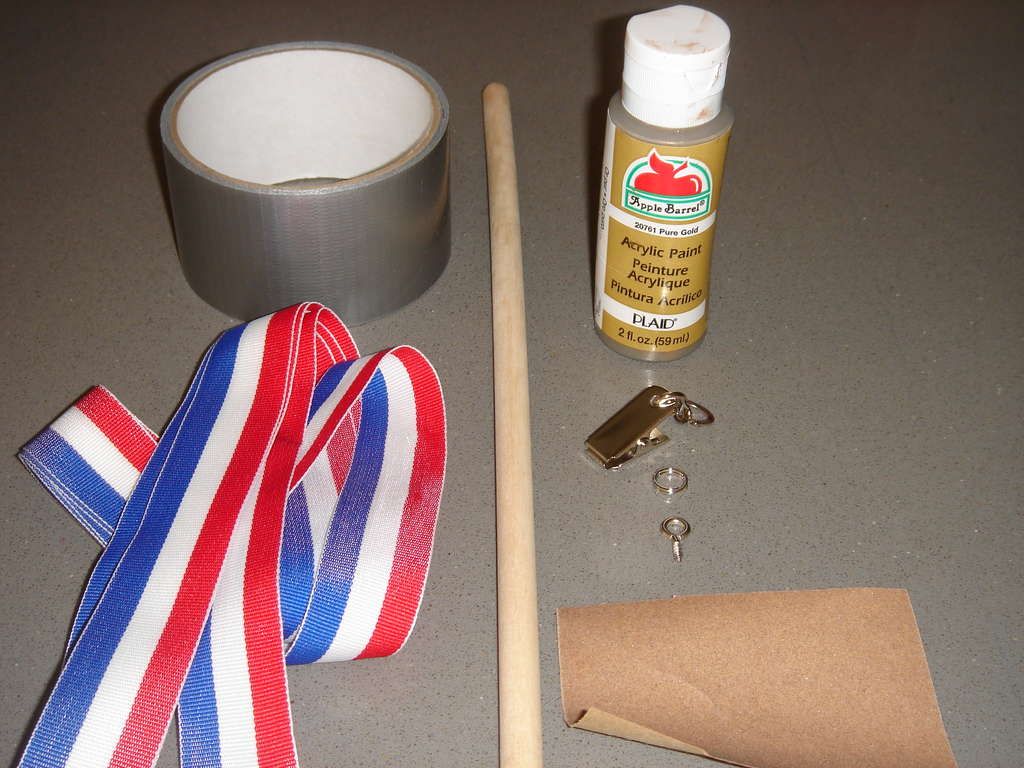 Quite a chore, so be sure to figure out how to entertain yourself in the process.
Try on all pieces of neon according to the drawing. Make sure that all dimensions match the drawing and the sign looks the way you want. Now is the last chance to correct something: for example, shorten or lengthen one or another segment, change the bend or drive in more fixing nails.
After trying on, remove all pieces of neon from the base.
Step 7: Prepare and Paint the Sign Base
The next step is to paint the sign base.
Before painting it is necessary to make holes in the base for the power wires of the neon pieces. The power wires will go from the front side of the sign to the back side. The holes should be at the edges of the neon pieces. For each neon piece of LED strip, select the end where the wires will go. We drilled holes with a diameter of 3 mm.
If your base has chips or bumps, it's time to fix them. We processed the edges of the base with a rasp, sandpaper and wood putty.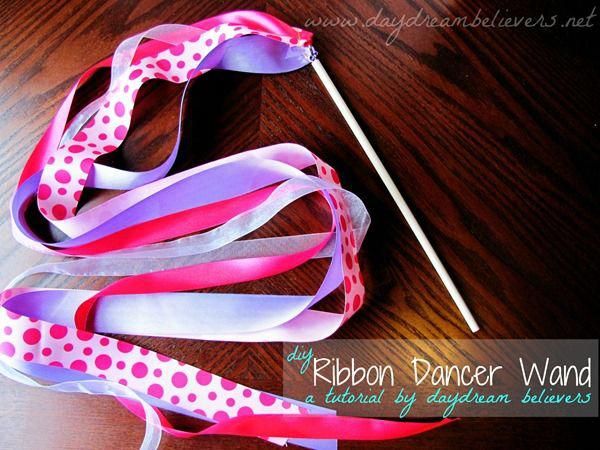
If desired, prime the base before painting. With a primer, the paint will last longer. We used regular primer on wood.
Paint the base any color you like. We decided to make the background of the sign black and blew out the base with black acrylic spray paint.
Step 8: Solder Wires to Neon Strips
While the base paint is drying, you can start soldering the wires.
Wires must be soldered to one end of each piece of flexible neon. In total, two wires are needed: one for positive, the other for negative.
Any wire can be used. But it is better not to choose too thick and short wires.
After soldering, the ends of the neon strips must be sealed. This is strictly necessary if you plan to install a sign outside. Sealed edges protect LED strips from rain, dust and dirt. The ends of the segments can be sealed in various ways.
Standard silicone end caps can be used. Such plugs, most likely, can be found in the same place as coils with flexible neon.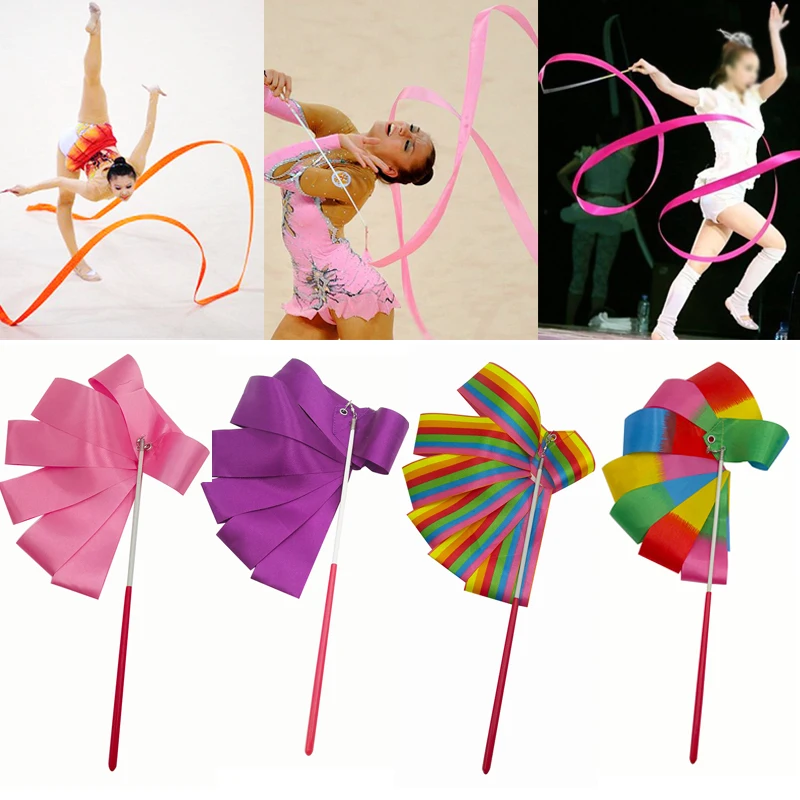
However, in our case, these silicone caps were too thick. The edges of the flexible neon in the caps were pressed heavily between the nails. So we decided to seal the edges of the flexible neon with clear liquid nails and a hot glue gun.
Step 9 Install the neon
Once the base of the sign is painted and the wires are soldered to the neon strips, you can install the strips onto the base.
Insert the soldered wires into the prepared holes in the base of the sign.
Install all neon pieces and clamp them securely between the nails. You don't need to take out the neon anymore.
Step 10. Select the electronic components
What electronics do we need to control the neon sign?
Load control
To implement animation effects, you need to turn on and off individual sections of neon LED strips independently of each other. To control a load such as an LED strip, a MOSFET power switch is ideal. And for simultaneous work with several similar modules, you can use an assembly of several power switches: for example, our Zelo P-FET module.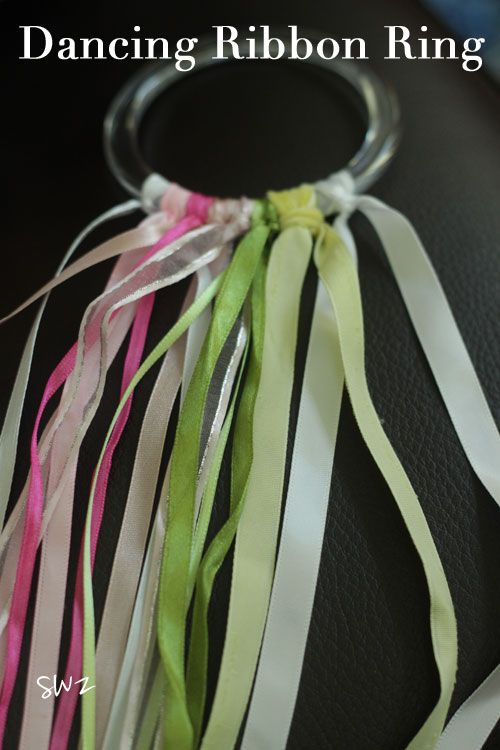 We took two modules and got 16 field effect transistors at our disposal.
2× P-FET power switch assembly (Zelo module)
Each such assembly is capable of switching eight separate DC power channels with voltage up to 30 V and current up to 3 A. This is more than enough to switch not too long LED strips. The assembly of power keys is controlled via the SPI interface, and it can be easily connected to the Arduino.
Power Supply
The sign will be powered by a conventional wall outlet and will require an AC-DC power supply to power the LED strips. Our neon strips run on 12V DC, so a 12V power supply is required. Select this based on the maximum current drawn by the neon strips. The total length of all segments of neon ribbons on our sign turned out to be about 22 meters. We powered all the segments of neon from the laboratory power supply and measured the entire current consumption with an ammeter. It turned out about 7-8 A. Thus, you need a power supply with a current margin - for example, 12.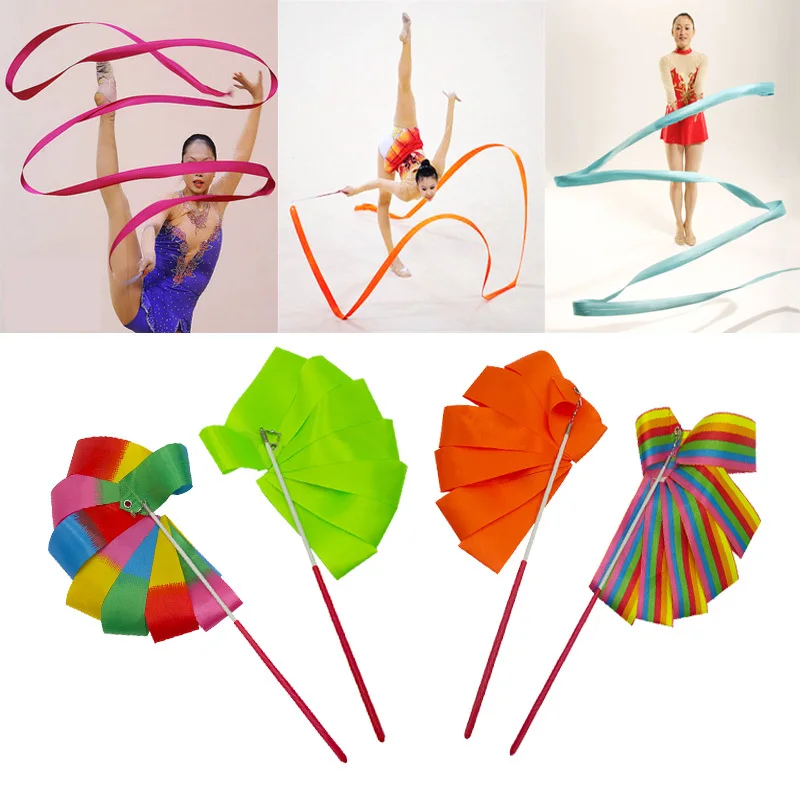 5 A.
5 A.
1× Mean Well Power Supply (12V / 12.5A, 150W)
Controller
Need a microcontroller that will control the animation effects. We use the world's most popular DIY Arduino Uno board with a 12V to 5V buck converter on board, which fits perfectly with our project.
1× Arduino Uno Rev3
Step 11. Wiring Diagram
After choosing the electronic components, think about the wiring diagram. Here's how we decided to connect everything:
Power
Flexible neon is powered by 12V DC. The power supply converts the 220VAC from the outlet into the required 12VDC, which is supplied to the following nodes:
- Arduino Uno external VIN power pins.
- VIN external power blocks on two power switch assemblies.
- All neon parts of the sign that do not participate in the animation and are constantly lit.
Logic
Power switch assemblies are controlled via a simplified SPI interface.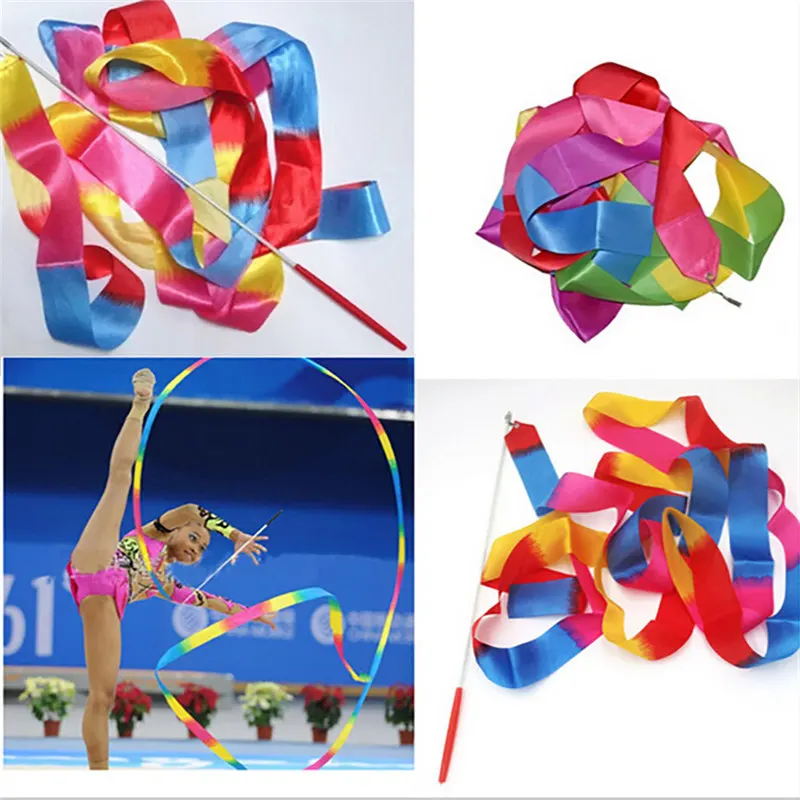 One assembly is connected to the controller with four wires:
- CS - chip select; pin D3 on the Arduino Uno.
- MOSI - master output / slave input; pin D11 on Uno.
- SCL - clocking line; pin D13 on Uno.
- GND - ground; common ground, connected to ground on the controller.
Having two assemblies of power switches, there is no need to connect each of them to the microcontroller separately. Instead, two assemblies can be sequentially chained together. Thus, instead of two assemblies for eight channels, you get one device for sixteen channels.
Power channels
We have 16 channels in total, and here is how we distributed them:
- CH0 - control of the letter "S" of the word "Saloon".
- Ch2 - control of the letter "A".
- Ch3 - control of the letter "L".
- Ch4 - control of the first letter "O".
- Ch5 - control of the second letter "O".
- CH5 - control of the letter "N".
- CH6 - control of the "open" eye of a cowgirl.
- CH7 - cowgirl winking eye control.
- CH8, CH9 - control of the mug of beer lowered down. This part of the sign draws a lot of current. We combined two channels into one to reduce the load on the transistor.
- Ch20 - not used.
- Ch21, Ch22 - control of a mug of beer raised up. This part of the sign draws a lot of current. We combined two channels into one to reduce the load on the transistor.
- Ch23, Ch24, Ch25 - not used.
Step 12. Electronics housing
We figured out the circuit. Now we can think of a case for all electronic components.
We decided to put all the electronics in a waterproof ABS plastic case and sealed cable glands for the wires.
A strong and sealed enclosure is essential if you plan to place your sign outdoors.
We placed a textolite substrate in the case, and all electronic components were fixed on it.
Step 13 Cable Management
We have attached the electronics box to the back of the sign.
It's time to run all the wires from all the neon strips into the electronics box. We used cable ties to secure the wires to the base of the sign.
Step 14. XOD
To create a program, we use the XOD visual programming language. It does not require extensive programming skills and is the perfect choice for those new to the Arduino world. The XOD language is suitable for rapid prototyping of various devices or the rapid creation of simple programs.
We placed the entire program for managing our sign in a separate XOD library gabbapeople/neon-saloon .
In this project, we used the XOD library to manage the assembly of power switches amperka/octofet .
Step 15. Programming
Here is the final patch of the program we got:
Note that in your sign design it is not necessary to use this particular patch.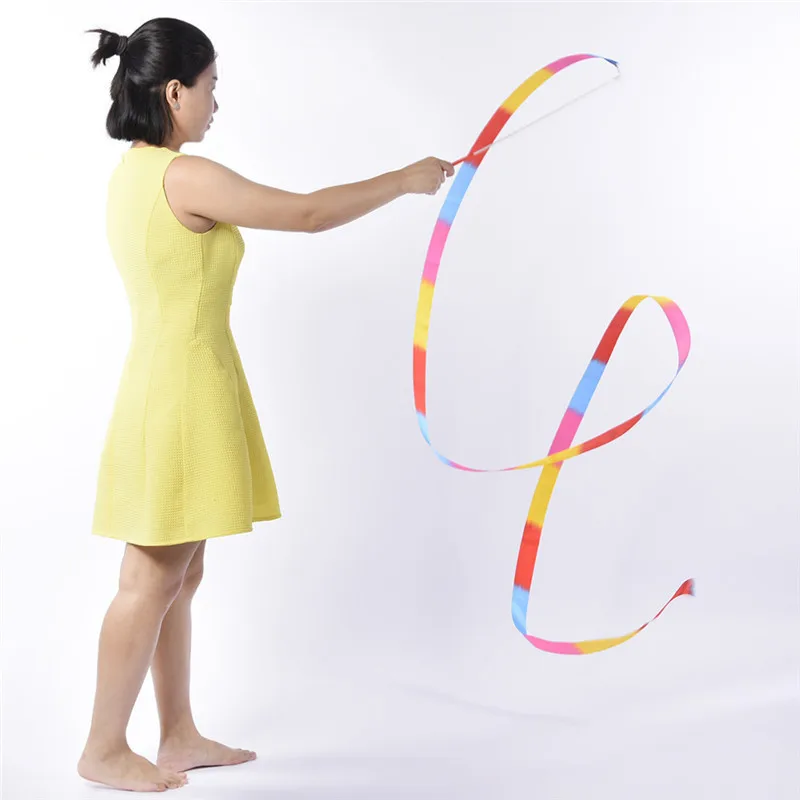 Rather, it serves as an example of how animation can be programmed. Consider the program and its principle of operation in more detail.
There are three main nodes in the gabbapeople/neon-saloon library: saloon , eye and beer-mug . Each of these nodes is responsible for managing the effects of a specific part of the sign.
Node saloon controls the word "Saloon", node eye controls the cowgirl's eye wink, and node beer-mug controls the beer mug. These nodes are composite and, in fact, consist of counters and generators of rectangular pulses. In addition, there is node 9 on the patch0261 octofet-16 from library amperka/octofet . This node is responsible for the operation of two assemblies of power keys, combined into a chain.
Node saloon
The output of the node has six pins like boolean . Each of them corresponds to one of the six letters in the word "Saloon". The idea is simple: if the output pin is
 true , then the letter is on; if is false , then it is off. At the input of node , saloon has many pins that describe its functions. The node has four functions in total:
Light up all letters in the word
Pin ALL_U (all up). An input signal of pulse on this pin will turn on the light on all six letters of the word "Saloon".
Suppress all letters in the word
Pin ALL_D (all down). An input of pulse on this pin will turn off the lights on all six letters of the word "Saloon".
Blink all letters in the word
- Pin
BLNK(blink). An input signal ofpulseon this pin will start a flashing sequence of all the letters in the word "Saloon". - Pin
BN(blink number). Integer value - shows how many times to blink. - Pin
B_Ton. Time in seconds - sets the interval during which the letters remain on during the flashing sequence.
 - Pin
B_Toff. Time in seconds - sets the amount of time the letters remain off during the flashing sequence. - Output pin
B_D(blink done). Generated signalpulseon this pin informs that the flashing sequence has completed its work.
Light up all letters in a word sequentially
- Pin
ACC(accumulate). An input signalpulseon this pin will fire all the letters in the word in sequence, starting with the first one. - Pin
A_Ton. Time in seconds - the interval between the ignition of the letters. - Output pin
A_D(accumulate done). Generated signalpulseon this pin informs that the sequential firing of the letters has completed.
Node eye
At the output, the node has two pins of type boolean .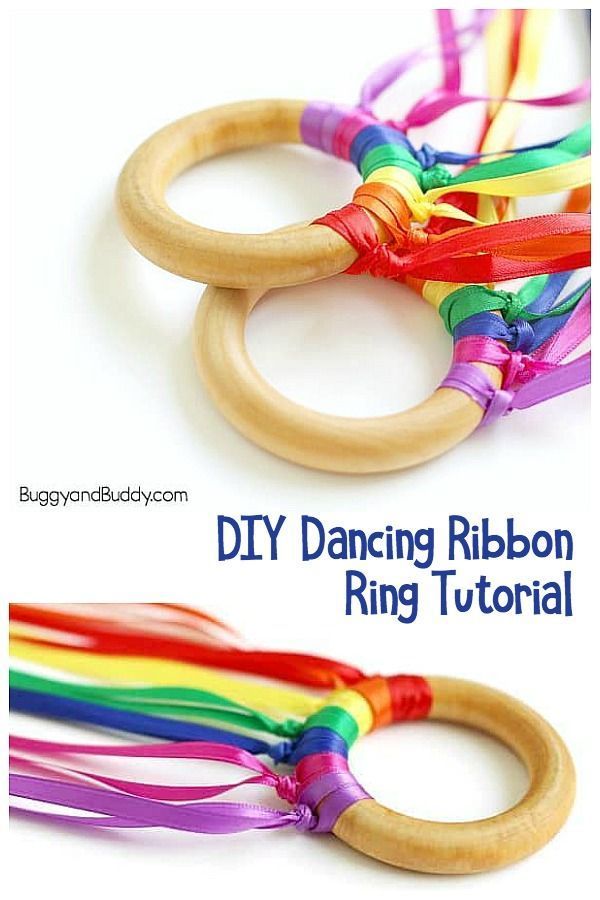 Pin
Pin EYEO (eye open) controls the open eye of the neon cowgirl, and pin EYEC (eye closed) controls the closed eye. The node has three functions in total:
Open eye
Pin O (open). An input of pulse on this pin will light the parts of the neon strips that light up the cowgirl's open eye and dim the parts that light up the closed eye.
Close eye
Pin C (close). An input of pulse on this pin will light the parts of the neon strips that light up the cowgirl's closed eye and dim the parts that light up the open eye.
Blink
- Pin
BLNK(blink). An input signalpulseon this pin will trigger a flashing sequence for the eye. - Pin
N(number). Integer value - shows how many times to blink. - Pin
Ton. Time in seconds - sets the interval during which the eye is open during the flashing sequence.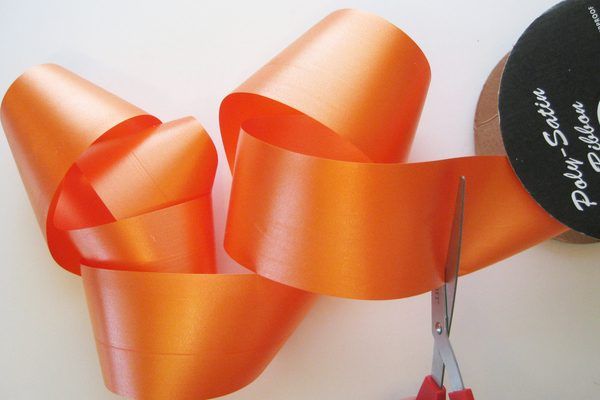
- Pin
Toff. Time in seconds - sets the time during which the eye is closed during the flashing sequence. - Output pin
B_D(blink done). The generated signalpulseon this pin informs that the flashing sequence has completed its work.
beer-mug node
At the output, the node has two pins of type boolean . Pin BUP (beer up) controls the raised mug of beer, and pin BDOWN (beer down) controls the beer down. The node has three functions in total:
Raise the mug
Pin U (up). An input of pulse on this pin will light the parts of the neon strips that light up the raised mug of beer and dim the parts that light up the lowered mug.
Drop mug
Pin D (down). Input signal pulse on this pin will light those parts of the neon strips that light up the lowered mug of beer, and extinguish those parts that light up the raised mug.
Shake Mug
- Pin
BLNK(blink). An input signal ofpulseon this pin will start a raised and lowered mug flashing in sequence. - Pin
N(number). Integer value - specifies how many times to shake the mug. - Pin
Ton. Time in seconds - sets the time during which the mug is at the top. - Pin
Toff. Time in seconds - sets the time during which the mug is at the bottom. - Output pin
B_D(blink done). The generated signalpulseon this pin informs that the cowgirl shook the mug the required number of times.
Operation algorithm
Using the functions described above, we have compiled the following program operation algorithm:
- Program start. 3 second delay.
- The cowgirl's eye is open, the mug is lowered, the inscription "Saloon" is not lit.
- Cycle start.
Cycle:
- The letters "Saloon" begin to light up in sequence.
- 1 second delay.
- Cowgirl winks 1 time. At the same time, the inscription "Saloon" flashes 1 time.
- 1 second delay.
- Cowgirl shakes mug 1 time. At the same time, the inscription "Saloon" flashes 1 time.
Step 16. Hang the sign
The sign must find its place! Your neon sign can be hung indoors or outdoors as long as it is airtight enough.
We thought long and hard about what to do with our sign. As a result, we decided to give it to our friends in a pub (56.34794336430581, 37.519853912626594), where it will really fit and will not end up in a landfill.
For more than half a year it has been working "in combat conditions", seven days a week without a break and pleases visitors. By the absence of any problems, one can judge the reliability of the modules used and that such a project really works!
Cold Valley Dancer from Dark Souls III - Gamedev on DTF
The Souls series is known for its elaborate bosses. Developers dedicate artbook pages to them, and players arrange special challenges related to unique opponents, such as killing a specific boss without taking damage or removing all armor from a character.
7592 views
One of the decorations of the third part of Dark Souls is the Dancer of the Cold Valley, which was shown in the early trailers. Small by the standards of the series and not the most difficult boss, it is remembered for both the combat mechanics and interesting aesthetic solutions. Together with game designer Sergey Prazdnichnov, level designer Denis Kuandykov, and concept artist Ivan Rastrigin, we figure out how the design of the Dancer and the battle with her work.
Author: Yuri Kulagin
Compared to many of the Dark Souls bosses, Coldvale Dancer is a relatively small opponent. Of course, in full growth, this character would tower over the player, but in battle, the Dancer moves, crouching low. The enemy is almost always at the level of the player's gaze, so it is more convenient to fight him, because all movements and attacks are clearly visible.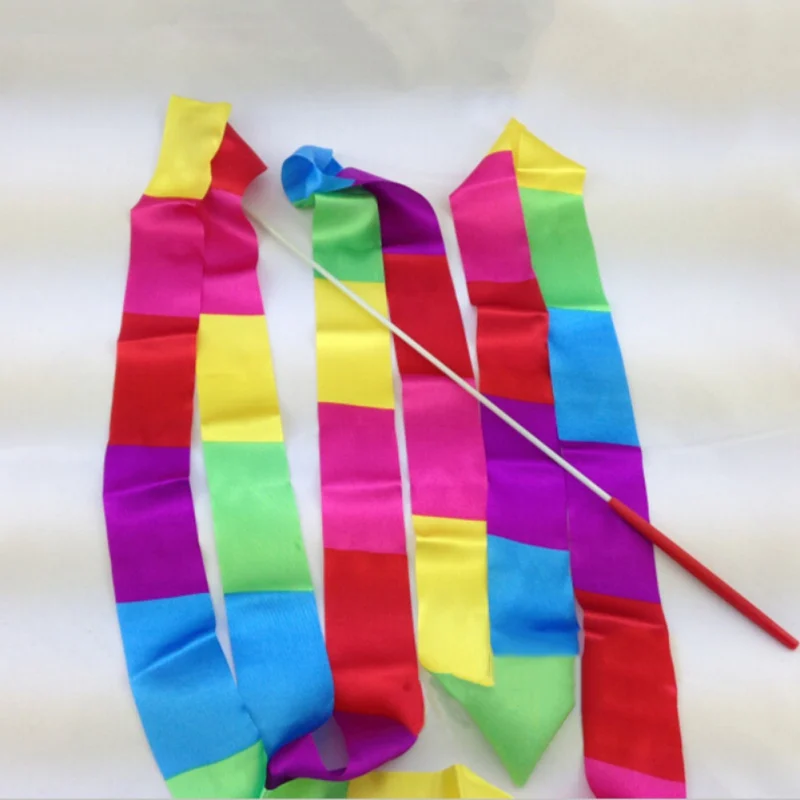
At the beginning of the fight, the Dancer has about ten moves, but there are also combinations of different attacks. It is not easy to work out such a number of attacks, but the variety guarantees an interesting challenge. At the same time, all the tricks are well read - there is always a preparation phase before the strike, which hints to the player exactly how he will be beaten.
The Dancer has two distinct phases. In the first, she only has a fire sword, and in the second, she draws a magical one. You can clearly see how the second blade appears, and how the boss's behavior changes.
The dancer picks up the pace, which indicates the complexity and intensity of the fight. She also starts to throw longer and wider combos, starts to spin around with those two swords. The player becomes both more difficult and more interesting to fight with her.
Sergey Prazdnichnov , Game designer
In the second phase of the fight, the Dancer has more area attacks, and fewer single direct hits.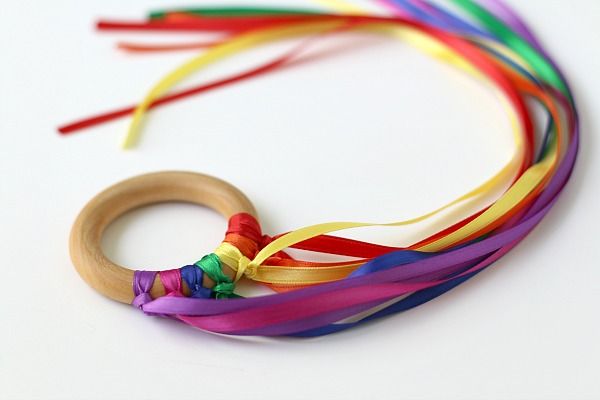 At the same stage, the connection between the mechanics and aesthetics of the boss becomes more clearly visible - the new deadly attacks of the Dancer are like a dance and emphasize the backstory of the enemy.
Dancer uses both pre-recorded punch animations and randomized combos of attacks. For example, a circular spin is a single animated piece during which all hitboxes on the boss's blades are immediately activated. And free hand strikes in the first phase can unexpectedly end with a random lunge. However, most of the Dancer's moves are arcing attacks that test the player's ability to dodge.
The dancer challenges the player to various dodges and dodges. Also, back stabs. In the Souls series, the ability to bypass the enemy and inflict more damage from the back before he has time to turn around is generally appreciated. Avid players of the series even develop an appropriate pattern of behavior.
Sergey Prazdnichnov , Game designer
During the fight, the player rarely gets a chance to properly examine the art design of the boss - the eye still tries to highlight the elements that are important for the gameplay.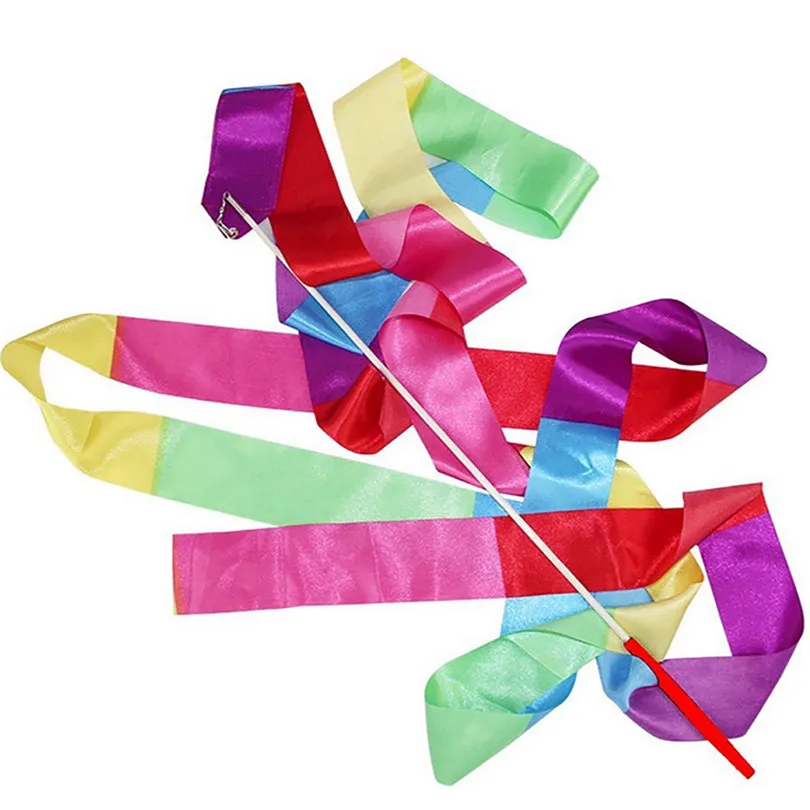 The dancer is interesting because the aesthetic and mechanical functions of her design are closely related.
The dancer is well remembered in terms of aesthetics. Her aerial veil seems to be dancing along with her swords. This emphasizes the movements of the boss and fascinates the player. It turns out that the boss has a speaking name - the fight with the Dancer really feels like a dance.
Sergey Prazdnichnov , Game designer
The rhythmic motif on the visor of the helmet is repeated throughout the figure, which makes the “suit” whole. And the white shawl on the head creates a contrasting combination of textures - metal and translucent fabric - which makes the monochrome character more visually interesting. And the shawl also develops great when moving - this gives the Dancer dynamics and an interesting silhouette that is constantly changing.
Ivan Rastrigin , Concept artist
In addition to the veil, Dancer's prominent element is her fire sword, which is clearly visible even in the second phase of the battle.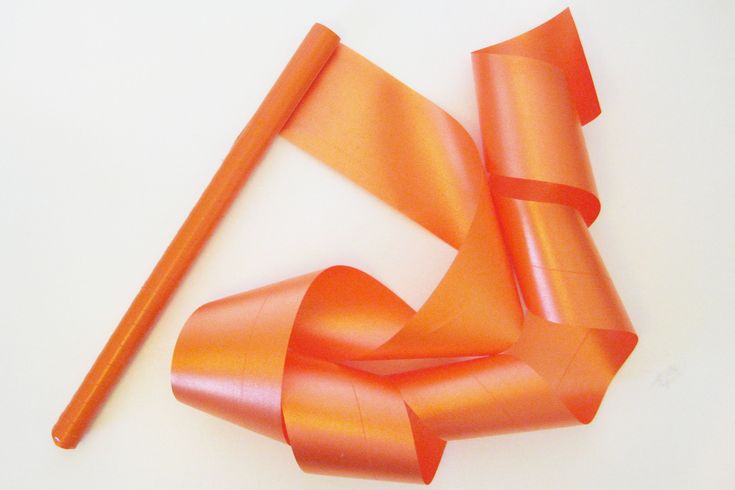 His swings repeat the silhouette of a ghostly tissue developing in the air, because of this, all the movements of the enemy look holistic.
In addition, the brightly blazing blade also helps the player to better see what they have to dodge. In the heat of battle, it is easier to navigate when the most dangerous element of the enemy is highlighted in a contrasting color and tone.
The image of a woman clad in aggressive armor, with a ghostly shawl, as well as a hunched posture - all this is associated with witches, who are subconsciously perceived as something very dangerous. But the combination of all factors not only indicates the danger emanating from the boss - it also tells his story.
Ivan Rastrigin , Concept artist
The plot in Souls games is usually complex and confusing, and no one is in a hurry to explain it to the player. Therefore, the stories of specific characters or bosses are often based on conjectures and vague hints.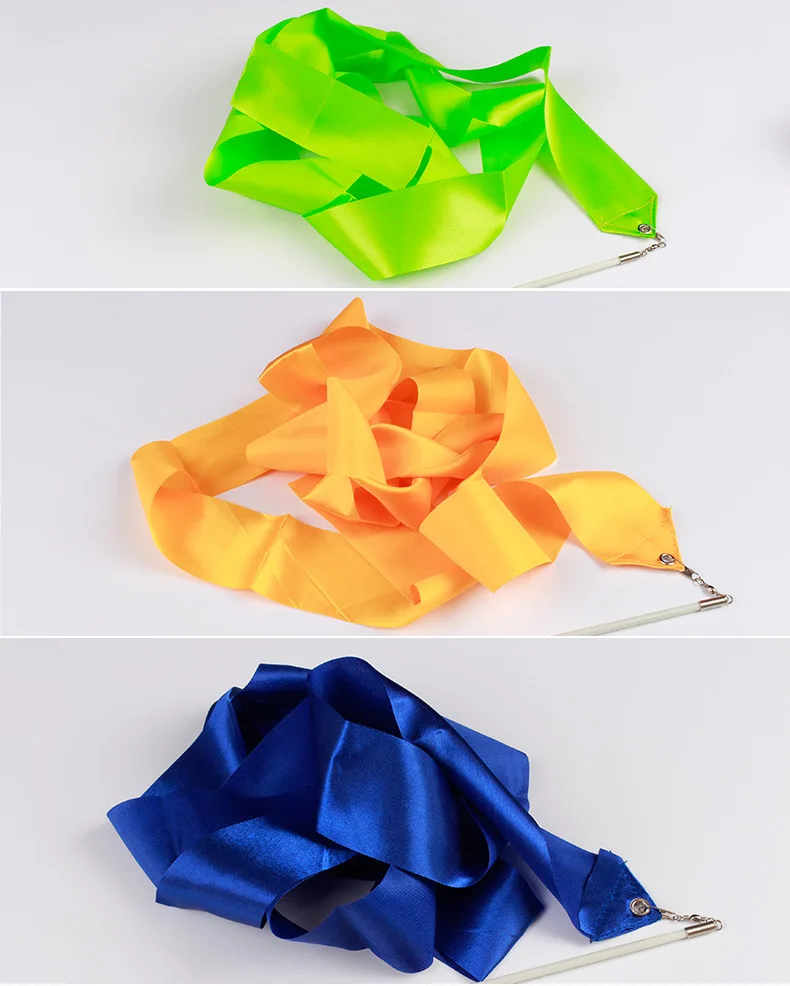 In the case of the Dancer, many hints are hidden in her design.
In this boss, an elegant, refined figure is clearly readable, indicating that the character is a woman, and in the past even a dancer. At the same time, the character is dressed in armor with sharp forms and rhythmic elements, the image is almost monochrome, but there are small color accents of jewelry. The combination of a delicate female figure and sharp aggressive armor works well to create fear in the player.
Ivan Rastrigin , Concept artist
Prior to the events of Dark Souls III, the Dancer was an aristocrat - blood ties tied her to the ruling dynasty of Anor Londo. After the fall of the city, she was forced to become a court dancer, and shortly thereafter, to join the ranks of the exiled knights. Together with Vordt, who will also become a boss in the game, the Dancer goes into a kind of exile, in which both go crazy and turn into monsters.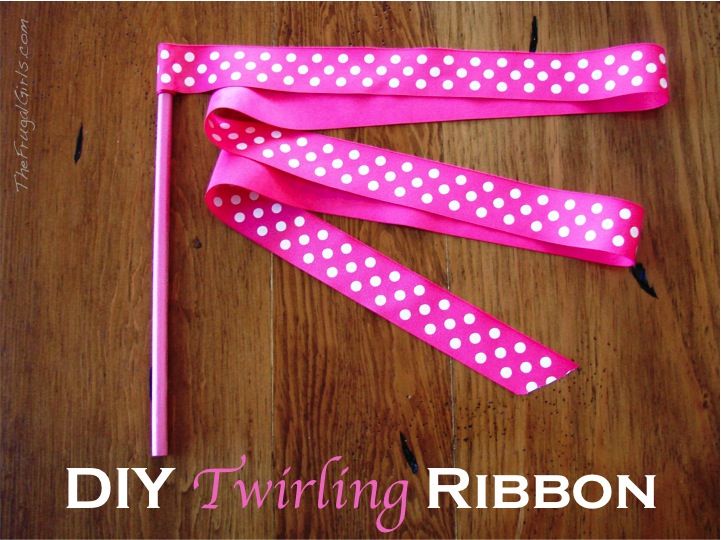
Some of these details lie on the surface - heavy armor speaks of a knightly past, a fluttering veil speaks of an aristocratic past. And the smooth movements of the enemy are referred to the very name of the boss.
Only the most attentive will notice the rest of the details. Part of the Dancer's story is told through descriptions of items and spells, with NPCs hinting at individual events. And you can even run past the main hint, which reveals the backstory of the boss - these are two ghosts slowly wandering through another location in the game.
The Dancer Arena is a background that tries not to interfere with the boss to show himself in all its glory. The battle takes place in a spacious temple, and the only obstacle in the location are the columns that the player can use as shelters.
The Dancer's Arena is one of those rare FromSoftware arenas that aren't more of a problem for the player than the boss itself. Everything here is created not only for the correct operation of the boss and its mechanics, but also for the gameplay comfort of the player.
Nothing interferes with the game camera, and the character cannot get stuck anywhere. And a slight height difference is made in just two steps, so as not to interfere with control.
Denis Kuandykov , Level designer
The color design of the arena changes gradually during the course of the battle. At the beginning of the first phase, the location is painted in calm cold colors, of which only the brightly flaming sword of the boss stands out. When the Dancer strikes with a fiery blade, interior elements light up, and by the end of the battle the entire location is engulfed in flames, and a cold color palette gives way to a warm one. After the death of the boss, all fire fades.
It is important to understand that "hard arena" is not the same as "cool arena". After all, when a player focuses on the enemy, he cannot suddenly run into some sudden stone under his feet. In the Arena of the Dancer, this even applies to artistic content: various small debris in the location is neatly grouped and "nailed" to the edges of the cathedral.