How to start hula hoop dancing
How to Hoop Dance for Beginners – The Spinsterz
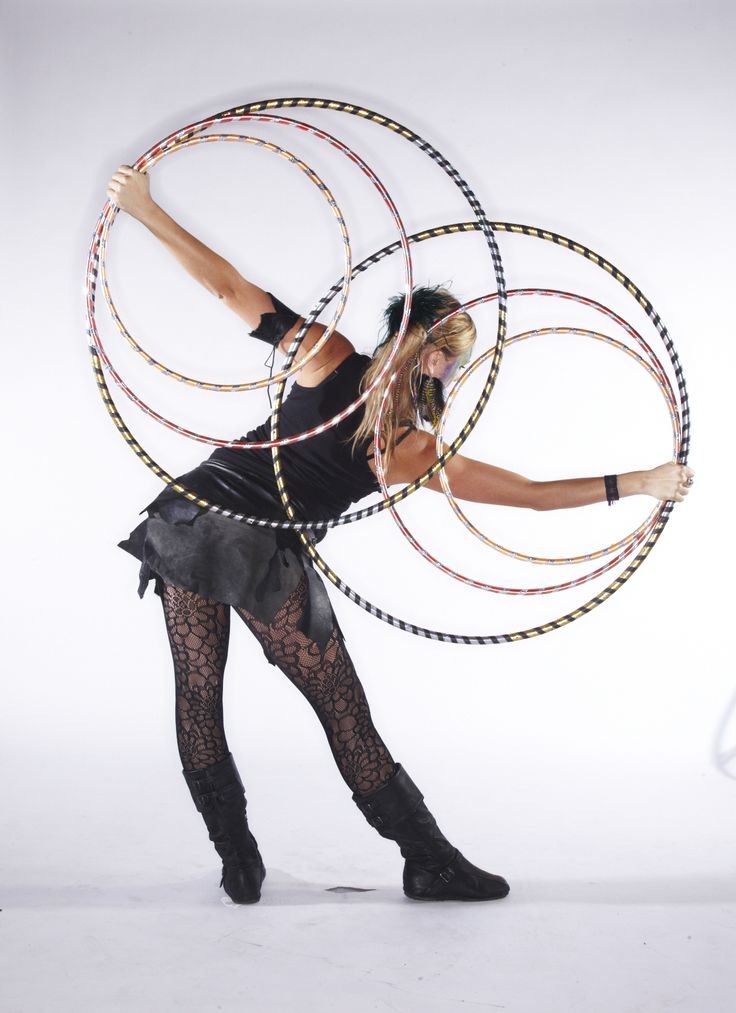
Hula Hoop Dance is a dynamically evolving genre, adaptable to any style of music, approachable for the solo dancer, duet or ensemble, and accessible to all generations and body types. Some styles of hula hoop dance keep the hoop rotating on the core body, as the dancer focuses on footwork and the movement of the arms around the hoop. Other styles keep the hula hoop off of the body the entire time, manipulating any number of hula hoops to move in the space surrounding the dancer. Still, other styles move the hula hoop between planes, core hooping, and off body hooping. Sometimes the hula hoop rotates around a body part, rolls along a path, or doesn’t rotate at all.
If you are just entering into the world of hoop dance, there are two pieces you need to focus on:
• Exploring the movement of your own body and
• Learning to communicate with your hula hoop.
After working with these fundamental skill sets, your own personal hoop dance will begin to morph into a style that feels right to you. Please note that I could spend an entire weekend nerding out and elaborating on the building blocks of hoop dance, but in the context of this moment, I hope to give you the first stepping stones to welcome you onto your own personal path of discovery.
Step One: On Body Hula Hooping aka “Body Rocking Hoop Dance”
Each of the following On Body Hula Hooping topics will begin by explaining the foundational movements. While each of these building blocks is described for the absolute beginner, it can be helpful for even the experience hula hooper to revisit these fundamentals. Even if dancing with the hoop of your body is your goal, these “Body Rocking” exercises will help you open up ways to move your body in dance that can be applied to off body hooping later on.
Each topic will end with exercises to convert the foundational movement into dance.
Waist Hooping Foot Work
Whether you are picking up your hula hoop for the first time or have already been loving on your hula hoop for a year, take it back to that first push of the hula hoop around your waist. Note that the diameter of the hula hoop will determine the speed your body has to move. For more information on how to pick your hula hoop, take a moment to review “What hula hoop size do I need.”
Place the hula hoop on the small of your back. If you lean a little into a back arch you will feel that spot that your body starts to hug the hula hoop. Take one step forward so you have one foot in front of the other. It doesn’t matter which foot you use, just pick the one that feels most natural to start. Keeping the hula hoop parallel to the ground, give it a strong push with your hand in toward your tummy so that the hula hoop can rotate around your body a few times without you even having to move your body. Learning the control of this first push can make or break the ease of your hula hoop practice. Try this same thing with the other foot in front or while pushing with the other arm and get used to both sides.
Once the hula hoop is spinning around your waist, move your body in a straight line so that your belly button is drawing a line between your toes. Keep your heels on the ground and your knees soft as your body finds the tempo of your hula hoop.
Keeping the idea of your belly button moving in a direct line between your toes, try these three-foot positions:
1. Right foot forward – Body moves front to back
2. Left foot forward – Body moves front to back
3. Feet side by side (2 feet apart) – Body moves side to side
In each of those positions practice pushing the hoop in either direction so that you can do each foot position with the hoop spinning right or left. Then try changing foot positions without letting the hula hoop drop.
The Dance
Start by putting on your favorite song. Practice changing your foot positions so that you are placing your foot into the next position with key moments of the song like the beginning of a new line or a strong beat. As you get further into the song, try changing the foot position more often or repeating patterns of movements. As you gain confidence, experiment with other foot movements like a grapevine, a box step or a cha-cha. Put on different styles of music and see how the style of music changes how you want to move your feet.
This is a core foundation of Hula Hoop Dance footwork. The more you play with this concept the more comfortable your body will become, separating the movement of your hips from the movement of your feet. You will find that while your feet will change speeds with the steps and the music, the rotation of your hula hoop will stay consistent. It is natural to feel frustrated at first, so it can help to try a hula hoop with a larger diameter than you would usually use when trying new footwork.
Turning Your Body
Turning or spinning your body while hula hooping has many purposes.
1. Adds a contrasting movement and allows you to face in any direction
2. Changes the speed of the hula hoop in relation to your body
3. Can make learning new tricks and movements easier
4. Assists in catching a hula hoop that is starting to fall
5. Disguise or smooth out transitions into other parts of a dance
Turning the same direction that the hula hoop is spinning will make the hula hoop’s rotation feel slower in relation to your body. Turning the opposite direction will increase the speed of the hula hoop in relation to your body so that you will have to move faster as well. For the purposes of beginner hoop dance, we can focus on turning the body in the same direction that the hula hoop is spinning.
A compass turn is a solid building block and starting place for beginners. Pick an anchor foot based on which way the hula hoop is spinning. If the hula hoop is spinning to your left, make your left foot the anchor. If the hula hoop is spinning to your right, have your right foot be the anchor. Place your feet side to side and find a comfortable stance to hula hoop with your hips moving side to side. While your anchor foot pivots in place, use your other foot to push your body in a small 45-90 degree turn. Once you place your foot back down, take a moment to make sure your waist still has control of the hula hoop before making your next turn.
A float turn uses a similar concept as the compass but turns your body a full 360 degrees and turns your body the same speed as the hula hoop for one rotation. This gives the illusion that the hula hoop is floating during your spin. Start with your anchor foot in a forward position and push off with your other foot, using enough force to spin yourself in a full circle. When you complete the spin place your lifted foot back down and continue waist hooping. Be sure to spin your body the same direction that the hula hoop is spinning and to restart your waist hooping movement as soon as your foot hits the ground. Remember to practice these turns in both directions!
The Dance
The use of an anchor foot helps keep a dancer grounded when learning how to turn, but finding freedom from the ground will help release the body into the flow of dance. Start practicing free form turns by moving one foot at a time, remembering from the waist hooping exercises that where ever your feet land, you can regain control of the hoop by thinking about moving your core with the line between your feet.
Put on some music and incorporate your turns into your foot work practice. Since turning with the hula hoop changes the speed of the hoop in relation to your body, you can use your turns to fit your steps and your movements closer to the speed and feel of the music. Try adding a float turn to accent a moment of the music or switch between facing a single direction and slow turns to reflect the lyrics.
Where Do the Hands Go?!
One of the most common thing's arms will do when learning how to hula hoop is to imitate a t-rex. These t-rex arms or chicken wings do well for keeping our arms out of the way of the hula hoop, but will not be your first choice when dancing with the hula hoop.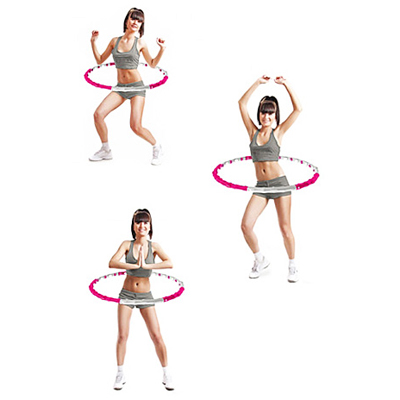 The first way to approach hand and arm movements is to start paying attention to where they are and let them do anything other than the t-rex. Think of it as a three-part process with your shoulders, your hands, and your arms dancing between them.
Start by relaxing and positioning your shoulders. Roll your shoulders forward, up, back, and down a few times, and end with the back and down, an exhale, and imagine your shoulder blades melting down either side of your spine.
Next, think about different places for your hands to be. Extend them out to either side, reach them in front of you, place them behind your head, or hold them on your heart. Your hands could be mirrors of each or each could be doing a separate thing. Experiment with the direction of the palms and the position of your fingers as if each of your hands are their own unique and relaxed sculpture.
Finally, bring your focus to your arms. Stretch your arms wide or let the elbows be soft and gently bent. Your arms might create strong lines, or curve into circles. Find different paths for your arms to take as you switch your hands to new positions.
The Dance
So much of the dance happens in the spaces where your arms are moving to a new position. Ground your feet and start your hula hoop in your dominant direction so that your focus can be on your arms while your body keeps the hula hoop moving. Turn on some music and with every line, move one of your arms. You might move your right hand to 4 different positions before moving your left, or you might switch arms each time. Try leading the movement with your hand, your shoulder, or your elbow and let the rest of the arm follow. Different ways of moving your arm will fit different styles of movement. In the beginning, just find the movements that feel good in your body.
As you get used to having your arms and hands dancing in the air above your hoop, start moving your feet again. Turn with your hoop and use your hands to make circles in front of you as they mirror your hoops movement. Then try to use these movements following the hoop to transition between a different arm and hand positions that you liked. Incorporate arm movements into your float turns by starting and ending with your arms wide, and bringing your hands toward your chest during the spin. Just like before, play different styles of music and try to change the movement of your arms to reflect what you hear.
Don’t forget to practice spinning the hula hoop in the other direction, and see how that changes the way your arms want to move!
Step Two: Empty Space and Outer Space
Getting to know the empty space in and around your hoop gives your whole body a new place to dance. At the same time, dancing within this empty space prepares us for other tricks like breaks, paddles, lifts, and other transitions.
Inside Windows aka Inner space
If you look down at the hula hoop spinning around your waist, there is a moving window of space between the circle of the hula hoop and your body.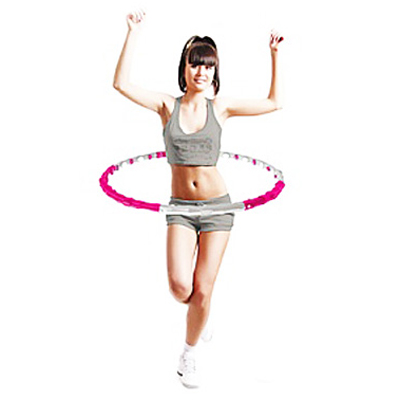 The same thing can be said of a hula hoop rotating around your legs, neck, hands, feet or any other part of your body. The empty space between the hula hoop and your body is the inside window.
To start exploring the space while waist hooping, start by trying to dip either hand into that window and pull it out again without touching the hula hoop. If your hula hoop is spinning to your left, start by dipping your left hand into the window when it appears in front of your body. If you hoop is spinning to your right, use your right hand in front. Once you dip this hand into the hoop, you can follow the window to the back of your body before you pull your hand out of the way. Where the first hand exits the hoop behind the body, the second hand can enter and follow the window back to the front of the body. With this technique, you can utilize the full window of space around your body without ever making contact between your arm and the hula hoop.
The Dance
Remember how spinning the same direction as the hula hoop slowed the hula hoop down in relation to your body? Incorporating turns gives your hands more time to dance in and out of the windows.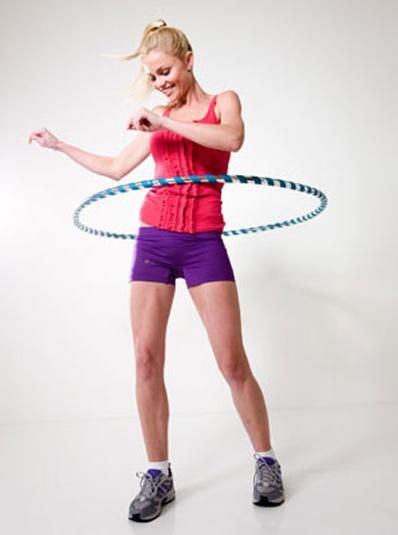 As you listen to different songs, start dipping your hands into the windows and following the movement of the hula hoop. When bringing your hands back out try to reach out to one of your favorite positions from the previous exercise and resist the urge to sit in the t-rex position. When in doubt, just let your hands and arms follow circular motions in time with the music.
As you play with the windows your body will become more comfortable crossing the line previously held by the hula hoop. You might want to try keeping your arm inside the window and close to your body so that the hula hoop rolls over it for one rotation before bringing it back out. These switches will also help prepare you for shoulder hooping and other transitions.
Outside Windows aka Outer Space
Outer Space refers to all of the space on the other side of the hula hoop from your body. It may seem far away, but at any point when the hoop is in contact with your body, outer space is an inch away. A great way to get used to playing with your outside windows is to try to touch your leg by reaching to the outside of the hula hoop and swinging your arm down and through the window to outer space. This movement is very similar to playing within the inside windows, only now your arm follows the place where the hula hoop is touching your body instead of following the point that is furthest away.
The Dance
Once you have a grasp on where your hands and arms fit into outer space, you can start playing between the inside and outside windows. Explore the space above, below, and within the flow of the hula hoop and imagine your hands making spirals and circles following the direction the hula hoop is moving. Your hands are dancing through the empty space and your body is familiarizing itself with the movement and every changing location of the hula hoop around you.
Step Three: Style
Like every form of communication, the more you practice your dialogue with your hula hoop the smoother and more natural it will become.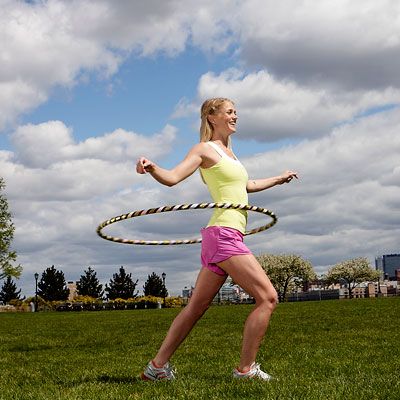 The same goes for the movement of your body. At this point do not be worried about if your movements are beautiful or if your transitions are graceful. Regardless of what your movements are, the more comfortable you become making them, the more naturally graceful and beautiful they will appear.
As you find favorite styles of music to hula hoop to, take a moment to watch a couple videos of professional dancers performing to that style of music without props. You don’t need to make any attempts to look like those videos, but see what type of inspiration you can draw from their movements. Explore ways of using your feet and your upper body to imitate styles that you like. Then put on some good tunes and let it flow. If the space allows, put on a blindfold or close your eyes. It is in these moments between you and your hula hoop that your own individual style will start to introduce itself to you.
The Next Steps
From these foundations, you can go in any direction depending on what you want to focus on. Here are some ideas for your next stepping stones:
1. For more “Body Rocking” core hoop dance, start learning chest, shoulder, waist and leg hooping
2. Keep the hoop around your waist but start exploring angled hooping and barrel rolls
3. Learn a lift or pizza toss to transition into off body hooping
4. Practice breaks and paddles to change the direction and momentum of the hula hoop
Search for a local instructor, a regional hoop jam, ongoing classes, or traveling workshops to learn from other hula hoopers and join the growing community. Keep an eye out for new tutorials and online classes from The Spinsterz if you are learning from home.
Ready to get hooping? Check out a great hoop for beginners below!
Most Fun Way to Get Fit: How to Hula Hoop for Total Beginners - Learn How to Hula Hoop | Hula Hoop Dance Videos and Tutorials
Want to feel good, move with flow and have a ton of fun? Of course, you do.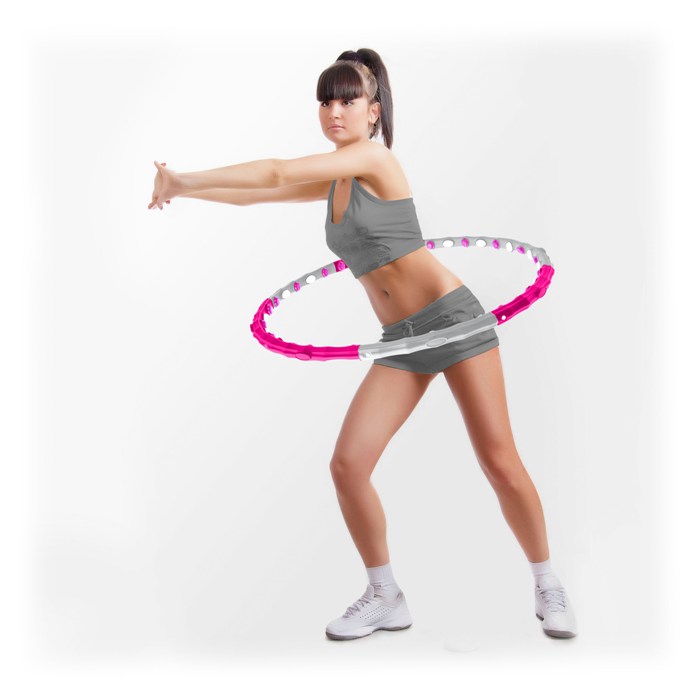 Grab an adult size hoop that is right for you, and let’s do this!
Subscribe to the Hooplovers YouTube channel for weekly free tutorials or if you want to learn all of the foundations and beyond I will show you how.
– The Right Size Hoop.
Most importantly you need the right size hula hoop. If you have tried a little kid’s hoop and felt like a failure never fear; it is not you it is the hoop! The right size hoop for you should measure from the ground up to about your belly button (or beyond). If you are trying to use a kid’s hoop from a toy store, sports store or Walmart/Kmart you are setting yourself up for disaster.
(Where to buy a hoop. Or make one.)
– Learn online now
To get you started I recommend my Free 7 Day Waist Hooping course. After that you might enjoy the 10 tricks for Total Beginners. If you are feeling like you want to continue after that I highly recommend the 28 Day Hoopers Starter Pack to give you strong support in your first month of hooping.
You can also try out a bunch of tutorials on the Hooplovers YouTube
– A Hoop Space.
Once you have your adult size hoop if you want to hula hoop inside you will need to clear some space so that you don’t go crashing into everything around you. Heading outdoors to the park or beach is ideal but a large indoor space where you can move freely is great.
– A focus on fun
Hooping is something that takes play and practice. If you have not been moving or dancing much them you need to be patient with your body and give it plenty of time and practice to get used to the movement of hooping.
Check out the free tutorials below or see the free hooping courses here to get you started
– Rocking playlist
Music helps your body and hoop find a beat and connect. Put together a playlist of your fav songs to keep you playful and ready to dance.
– Stand with your feet either hip-width apart or one slightly in front of the other.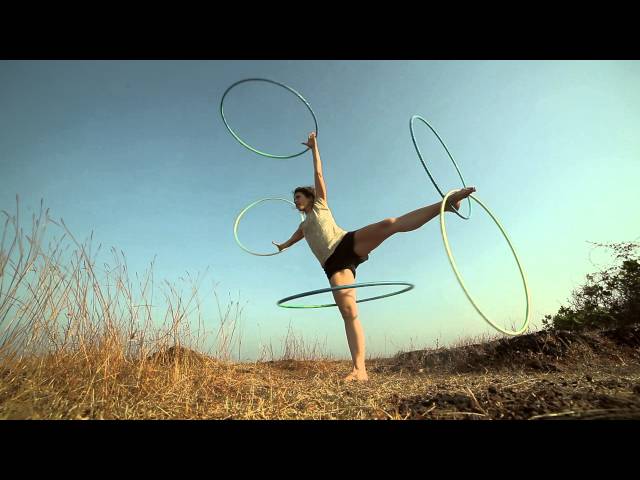
– Press the hoop into the small of your back, on a flat horizontal plane.
– Give the hoop a flat but firm push with your hands in the direction that intuitively feels best. The hoop should rotate around your body several times even if you make no movement with your body.
– As soon as you spin your hoop ignite a rhythmic pulse in your middle torso, pushing back and forth if one foot is in front of the other or side to side if the feet are parallel.
– If at first you don’t succeed…you know what they say. Pick you hoop up, press it against the small of the back, give it a firm and flat push in one direction and ignite a body pulse instantly to stop the hoop from falling down.
Start your free 7 Day Waist Hooping course now
Things to remember…
– where ever the hoop is on your body, that is the part of your body that needs to be pulsing. If there is too much movement below the hoop in your hips and knees the hoop will be drawn down.
– it can take time to build your hoop stamina, you may find your hoop automatically slows down after a few rotations. You can amp up the hoops speed by intensifying your torso pulse and it’s speed.
Free hoop courses for you here
I am going to add some beginner hoop dance tutorials below. Remember to hoop just as much as you watch, practice and play helps!
And always, always have fun. Hooping is a playful way to exercise and feel good, be patient with yourself, be confident that it will happen and have a blast!
Happy hooping!
Need some extra help with hoop dance moves? Make sure you subscribe to my YouTube channel or grab my Learn to Body Hoop workshop.
Note: Hooping may look like a ton of fun but it is a super active exercise that will totally have your heart pumping and body grooving so make sure that you check in with your health practitioner if you have any concerns before starting this as a new exercise.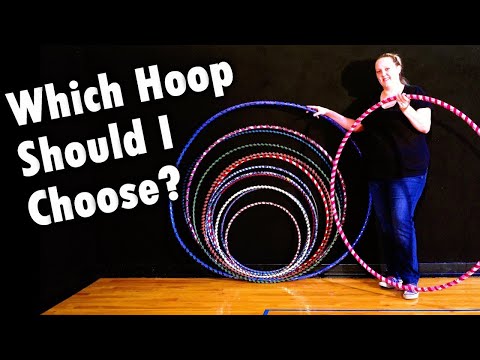
Hula hoops
February 4, 2015
The hula hoop is a slimming hoop. This is an effective simulator with which you can practice at home at a convenient time for you. Hula hoop workouts are classified as aerobics. Aerobic exercise is aimed at losing weight, burning fat and excess calories.
Hula-hoop for slimming the belly and waist, removes excess sides. When practicing with a hul hoop, it is important to follow a proper diet. Then the result will not be long in coming.
Benefits of exercising with the hula hoop
By exercising regularly with the hoop, you can easily reduce your waist. At the same time, the cardiovascular system is strengthened. With a smooth rotation of the hula hoop around the waist, the digestive organs and the spine receive a gentle massage. The presence of massage elements with magnetic inserts improve the appearance of the skin, saturate it with oxygen.
In addition to strengthening the abdominal muscles, the hula hoop exercises increase the flexibility of the back and the vigor of the whole body.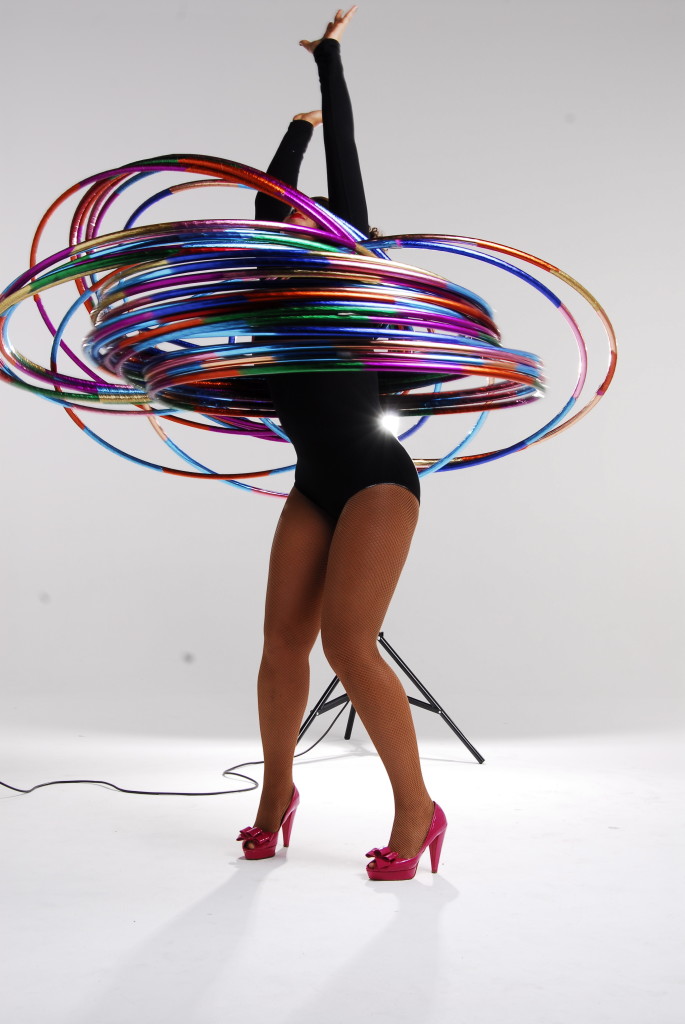
Types of hula hoops
There are 2 types of hoops on sale: regular and heavy.
Regular hula hoop. Available in plastic or aluminium. Its mass is about 1 kg. As a rule, the cost of such hoops is low.
A plastic hula hoop can be made up of several elements (i.e. be collapsible). This is convenient if you often travel or you do not have enough space to store it.
Regular hula hoop suitable for beginners and children.
Weighted Hulahoop. Compared to a simple hoop, a weighted hula hoop reduces excess weight more intensively and creates a greater load. The weight of such a hoop is from 1 kg or more, up to 3.5 kg. The weighted hula hoop intensively massages the waist and abdominal muscles.
Usually a weighted hula hoop has rubberized massage elements on the inside. They are shaped like balls. Designed for a stronger load and additional massage.
Also available with built-in magnets and bioceramics. Under the influence of magnetic fields, blood circulation improves, the skin is saturated with oxygen. There are weak currents that improve the metabolism in the body. Weighted hula hoops are more expensive than regular hula hoops. The price varies depending on the weight and model of the hoop.
Choosing the right Hulahoop
Choosing the right Hulahoop is important for maximum effect. It is selected according to height and level of physical fitness.
Place the assembled hula hoop in front of you. The top of the hoop should be just above your waist. For weight loss, hoops with a diameter of 90 to 110 cm are well suited.
The larger the diameter of the hoop, the easier it is to twist (ie, if you need to increase the load, you should use a hoop of a smaller diameter).
Be careful not to start your first session with heavy hoops. If you have never practiced with a hoop, then choose a hula hoop up to 1.2 kg. Loads should be increased gradually. The muscles of the back, abdomen need to be gradually toned, prepared for unusual loads.
Hula hoop classes
Hula hoop classes should be started from 5-10 minutes. Time to increase gradually. For the effect, you need to use a hoop 3-4 times a week for 30-40 minutes. But in the first lessons you should not get carried away. The first 3-4 times you should practice with a hoop for 5-10 minutes.
Stand up straight. Place your feet a little less than shoulder width apart. The legs are slightly bent at the knees. One of the legs is half a step ahead. Attach the hoop to the lower back, move the hoop to the side. Further, support the rotation of the hoop with the body body (move the body back and forth).
Regular training with hula hoop allows you to reduce weight by 4-5 kg in a few months, reduce waist circumference by 5-6 cm.
clothes. It will relieve discomfort and bruises. It is optimal to use a neoprene belt. It will protect the skin from abrasions and enhance the effect of losing weight.
Contraindications
Do not use if pregnant.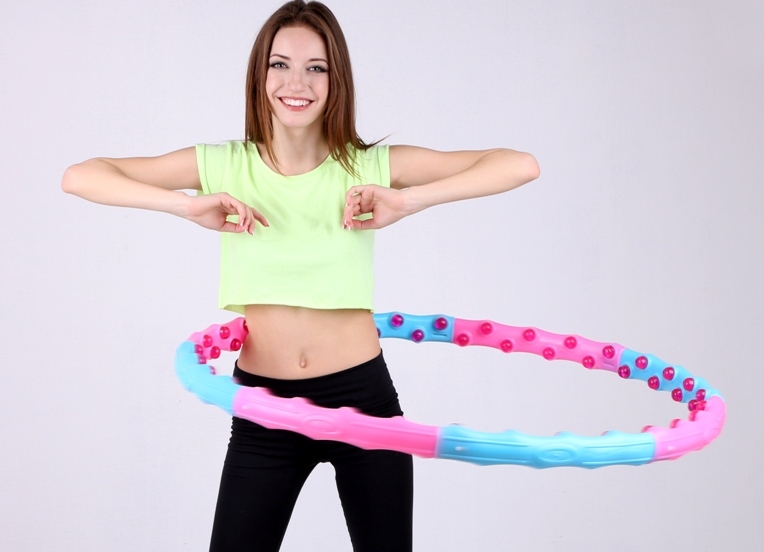 If you have back problems, you should consult your doctor. Do not twist the hula hoop for more than 1 hour (as this negatively affects the lumbar muscles).
teaching basic movements and dance features
Contents
Hip-hop, like any other dance direction, is better to learn in a professional school. After all, only a qualified teacher will find an individual approach to a new student and teach the necessary movements. But if this is not possible, or if you want to come to class prepared, you can try to master the direction of hip-hop at home. How to dance the first movements, now we will tell.
Like any dance, hip-hop training includes getting acquainted not only with the basic movements of the style, but also with a certain philosophy. And in this direction it is special. Hip-hop came to us in the second half of the last century from the most disadvantaged areas of New York and Los Angeles. Tired of injustice, aggression and blood, teenagers, who mostly did not have the cleanest reputation, invented their own special way to resolve conflicts - with the help of dance battles and rap parties.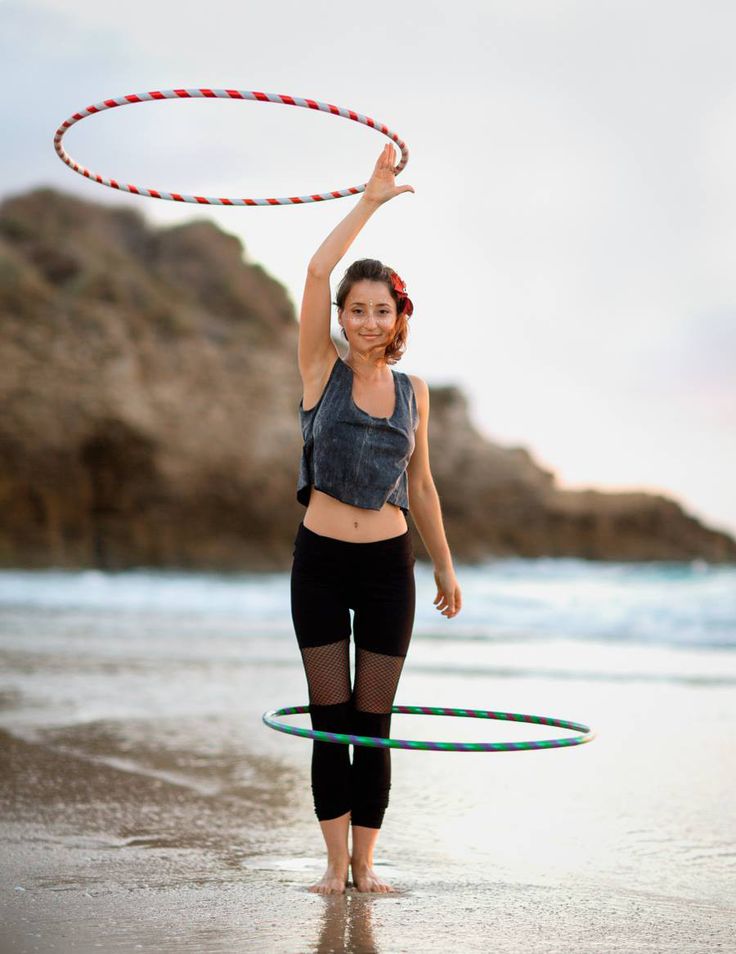 Hip-hop is a free dance, a challenge to society and a protest against any inequality. That is why the main thing in this style is not at all the clarity of the learned movements, but the sense of rhythm, improvisation and expression of the individuality of the performer.
Getting Started: Preparation and Basic Movements
Before learning hip-hop for beginners, you should make sure that you feel comfortable doing it. According to experienced dancers, there are three things that will help you relax and start learning:
- Appropriate environment: flat floor, spacious room, full-length mirror.
- Loose clothing and comfortable shoes. Nothing should hinder movement.
- Hip-hop rhythmic music.
A little ritual will help you tune yourself into the wave of hip-hop: stand with your legs apart, put your hands down and close your eyes. Listen carefully to the sound of the music and try to learn to hear the beat. Rock to the beat. And now you have already mastered the first movement. Congratulations! It's time to move on to more complex elements.
The basic movements of hip-hop are swing and step. You are already familiar with the first one. Now try to put your right foot to the side and stretch your right hand up. Bend your right leg, transferring your body weight to it, and lower your arm to shoulder level. Turn the body to the left, bend the left leg, and put the right leg on the toe. Now lower your right knee, arch your back and reach your hands to the floor. When you manage to complete this combination, consider yourself a good start in hip-hop.
Sign up for a trial lesson
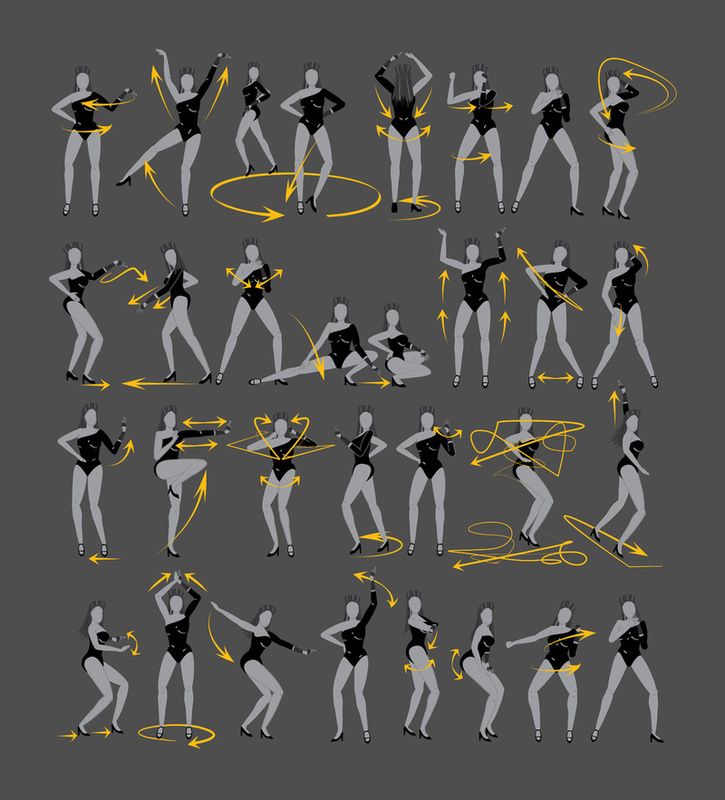
Here are some more basic hip-hop moves for beginners:
- Starting position - standing, feet shoulder-width apart, and arms along the body. We squeeze the brushes into a fist and alternately bring forward one hand, then the other. Then we connect the legs bent at the knee: left hand - right leg, right leg - left hand.
- Starting position - standing. We jump in place and cross our legs, and bend our arms as if we were rowing.
- Starting position - standing, feet slightly wider than shoulders. We put the right leg a little back, bend the legs at the knees, which at the same time look straight. With the right hand we cover the face, with the left, folded into a fist, we put it in the region of the heart. Then at the same time we tilt our head to the right and unclench the left hand, and after that we turn the right knee and right hand to the right.
- Starting position - standing, feet firmly pressed to the floor, knees slightly bent. We put the spread fingers of the right hand on the chest, keep the elbow parallel to the floor. We bend in an arc, as if we received a blow right in the heart. Then we make two turns in different directions, straighten our back and return to the starting position. The hand at this time falls from the heart to the waist. At the end, we throw the pelvis forward again, round the back and tighten the buttocks.
You can achieve the first results quite quickly. But when you start to study closely how to dance hip hop, you will soon notice that there are no clear movements and rules in this direction. Having mastered a few basic elements, the dancers begin to improvise, create their own combinations and dance as creative fantasy suggests.
How to continue: choosing a style
If you have mastered the first movements of hip-hop from videos and photos on the Internet, it's time to choose the direction in which you will develop further. Hip-hop culture is a wide range of dance styles that differ from each other both in elements and in general mood. The main ones are:
- Breakdance is still popular basic style of hip-hop, on which the direction originated.
- Popping - rhythmic contraction of various muscle groups to the music so that it looks like jolts on the performer's body;
- Wave - smooth and plastic body movements, the most famous of which is a wave with hands;
- Afro-jazz - shaking mainly the lower and most prominent part of the body in women;
- Crump - energetic shaking of various limbs to the music so that it seems as if someone has moved into the dancer;
- New Style, also known as freestyle, is an improvisational dance that combines not only hip-hop movements, but also elements borrowed from more than a dozen other dance styles.
- La Style - hip-hop, where the emphasis is on entertainment, so this style is used mainly in videos and when staging shows.
- Ragga jazz is a dance tuned to the music: the performer's legs work under the drums, and the hands become active during the recitative.
- Locking - an energetic dance with "locks" - freezing in different positions for a few seconds or periodically slowing down the movement.
- Power move is a spectacular style that includes complex acrobatic elements, handstands, various twists, and transitions.
- C-walk is a “language” dance with a criminal past that emphasizes intense and very dynamic footwork.
Women's and men's hip-hop
The next step in how to learn hip-hop without leaving home is to bring a little femininity or, conversely, brutality into your existing skills - depending on your gender accessories. The thing is that female and male hip-hop are somewhat different from each other, and, therefore, representatives of the beautiful and strong half are trained in this direction in different ways.
Hip-hop dancing for beginner girls is based on plasticity, flexibility and unobtrusive sexuality. Girls wear baggy sweatpants and hoodies on a par with men, perform sweeping movements, but their execution looks different: hips, legs and shoulders are more involved, the elements are a little smoother and sexier.
Male hip-hop, on the contrary, is more daring, energetic and sometimes even aggressive. The focus is on the work of the arms and body, acrobatic elements and movements that require strength and male endurance.
If you prefer to learn this difficult direction from videos, it is better to initially choose hip hop training, where the movements will be performed by a dancer of your gender. Together with the right technique, you will be able to capture the gender characteristics of the choreographic elements.
A few more secrets
Learning to dance hip-hop at home, without classes with a professional teacher, is not easy, but real. Especially if you add training with a few more components. Here, as in learning a foreign language, only complete immersion in the culture will help. So, here are some tips from “experienced” hiphopers who have mastered a lot not under the guidance of a qualified mentor, but at home by the mirror:
- Videos with basic exercises will help you master some movements, but for additional skills, it is better to turn to online courses. Hip-hop lessons for beginners are regularly held online, often live.
- Hiphop parties and hangouts will help you melt into this culture and make new acquaintances. Yes, of course, everyone will laugh at your first dances, but no one drags you to the center of the circle. While you're learning, watch the pros dance, adopt a style, and memorize some moves to practice at home.
- Clear training regimen. Only with regular practice can you achieve results. In addition, our body is set to a certain schedule, and if you exercise at a certain time, it will prepare for stress.
 As experienced dancers note, the optimal duration of even home workouts is two hours. This is enough for warming up, and for the lesson itself, and for stretching after.
 - Additional physical activity. If you are in the mood not just for basic hip-hop movements, but for serious hip-hop elements with tricks, strengthening the muscles of the whole body is indispensable. You will need strong arms, strong core muscles, and no extra weight. This can be achieved by exercising in the gym or additional weight training at home.
- Compliance with safety regulations. Be sure to dance in comfortable non-slip shoes and loose clothing. Do not start training without a proper warm-up, and when practicing acrobatic elements, lay something soft on the floor.
Video tutorials will be enough to learn how to dance hip-hop. But to become a real dancer, you need to study the subculture from the inside. It is believed that a hiphoper has achieved true mastery when he is in perfect control of his body, does not “slow down” on the dance floor, knows how to improvise and select universal movements for any music.![]()


.jpg)