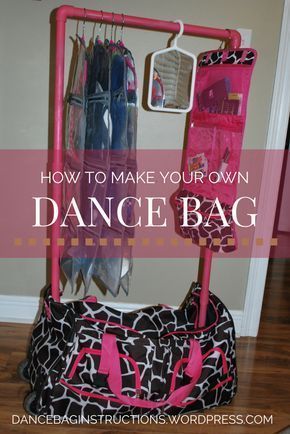
How to make your own dance floor
How to Build a Dance Floor
Home / Latest Posts / Life / Party Ideas / How to Build a Dance Floor
By: Leigh Anne Wilkes
This tutorial will show you how to build a dance floor using 2 x 2’s and sheets of plywood. So easy and less expensive than renting one.
I shared with you in a previous Wedding Carnival post the story of our dance floor. When we decided to book a live band for the Wedding Carnival I thought we needed a dance floor. My husband did not. We have a large backyard and plenty of grass and he thought dancing on the grass would be just fine.
I am not easily dissuaded or discouraged.
I got on line and immediately started pricing dance floors from rental companies. They are not cheap, between $700-800 for the size we needed. It wasn’t in the budget so I decided I needed to get creative.
To make a somewhat long, 5 month long story short, I had a dance floor and then I didn’t have a dance floor, I had a dance floor and then I didn’t. In fact I thought I had a dance floor until the Sunday before the Wedding Carnival. It fell through – five days before the event.
Remember I am not easily discouraged so I decided we were going to build a dance floor. Or rather my daughter Cali and her friend Hannah were going to build me a dance floor (with some help from dad of course.)
By this time I had totally broken Jim down and he agreed so we headed to Home Depot on Monday night (the Wedding Carnival was Friday).
Dance Floor Supplies
- 6 sheets of 1/2″ plywood
- 30 eight foot long 2 x 3’s – cut 18 of them into two 45″ pieces (you will have pieces leftover) This will leave 12 of the boards 8 ‘ long. They cut them for free for you at Home Depot.
- Nails and hammer
- Floor Paint and supplies for painting
- Painters Tape
- 6 Mending plates to join the pieces together
How Big is the Dance Floor?
The dance floor measured 12 x 16 and was created out of 6 sections that were 4 x 8 which is the size of a sheet of plywood.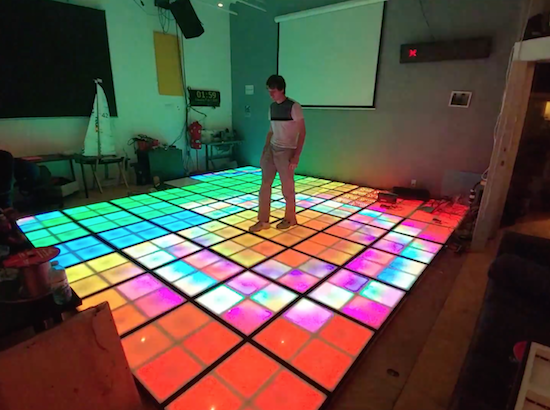
How to Build A Dance Floor
The whole neighborhood got involved or enjoyed watching the process taking place out in front of our house.
The above photo is about how involved Tessa got – she held a hammer for a photo but she was working full time so we need to cut her some slack.
- Create 6 frames from the 2 x 3’s that measure 4′ x 8′.
- Add four support pieces to each frame
- Nail a sheet of plywood to the top of each frame. Nail it down along the edges and across the support pieces.
- The moms got involved in this step of the process. Had to bring in the big muscles!
How to Paint a Dance Floor
The next step was the painting process. I decided that I wanted the floor to be checker board to go along with the carnival theme so I purchased black and white floor paint. We primed the boards first and then added a coat of white paint to each section.
Yes, I sat in a chair and watched it dry! I like watching paint dry.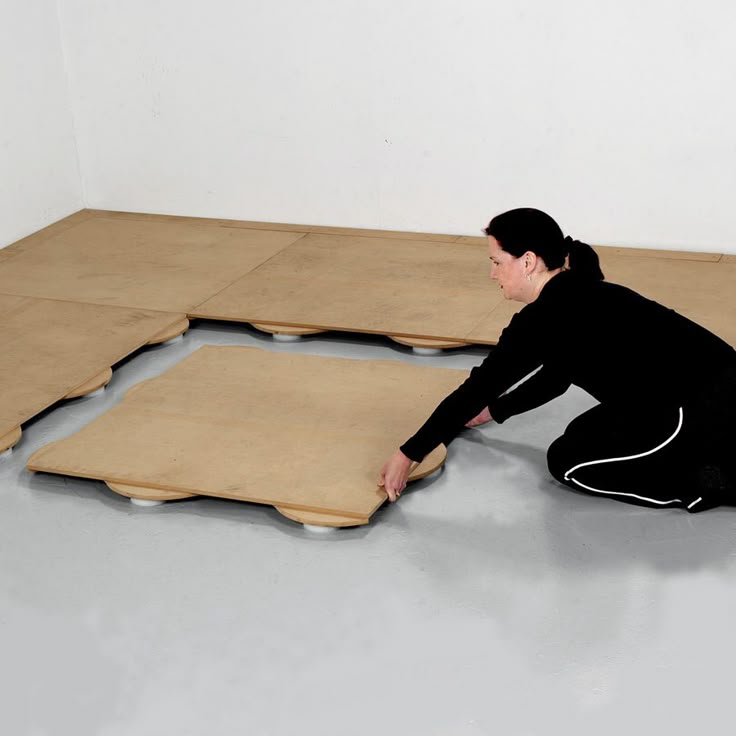
After it was dry, the girls used blue painters tape to tape off the squares. The squares measured 24″ x 24″ so each 4 x 8 section had 2 x 4 squares.
Using small foam rollers the girls rolled the black paint into the taped off squares.
We waited for the paint to dry, removed the tape and we had a dance floor!
Finally, we numbered the pieces so that we knew how to put it back together once we moved it into the backyard.
The mending pieces were hammered into to hold the pieces together.
How Much Does It Cost to Build a Dance Floor
Total Cost of Dance Floor (including paint but not including labor) Approx. $300.00.
It was perfect and it was a wonderful addition to our carnival and YES, we needed a dance floor. Even my husband admits that now. It added such a fun element to the carnival and really got people dancing.
Who wouldn’t want to dance on a black and white checkerboard dance floor!!!
Reader Interactions
How to Make a Dance Floor Out of Plywood (+ Other Methods!) in 2022
Ever dream of taking your “Dancing with the Stars” skills to dancing under the stars? Perhaps you want to complete the uniquely sentimental backyard wedding. Learning how to make a dance floor out of plywood will do just that!
People have been dancing before there was even a written language. It’s no wonder that dancing has infused itself into our society. Whether it’s for a backyard wedding or a party with friends, a dance floor is sure to get your guests tapping their toes!
There are many options when deciding on a dance floor that’s right for your party. We’ll explore four options with a budget, preparation time, and purpose in mind:
- DIY dance floor out of wood with an option of using recycled pallets
- Use what you have: Dirt, cement, or deck
- Buy
- Rent
Any of these options will have you spinning for your first dance as Mr. and Mrs. or doing the wobble in no time! Read on to learn how to make a dance floor out of plywood (and other methods!).
Table of Contents
Option 1: DIY Dance Floor
Making a dance floor can be simpler than you thought with these easy steps. One trip to the hardware store will get you all you need. Enlist the help of friends and neighbors and you can have this floor finished in one Saturday!
There is also an option to create the base using recycled pallets and plywood floor. With this option, you’ll be dancing the cha-cha slide with money to spare in your pocket!
Step 1: Determine the Size of the Floor You Need
A general rule of thumb is to plan that 30%-40% of your guests will be dancing at any given time. Each couple will need about 9 square ft. to dance (or 4.5 square ft. per dancer).
For a party with 100 guests, about 40 will be dancing at once. This means you should plan for 40 (# of dancers) x 4.5 sq ft. (area per dancer) to get about 180 square feet.
Since this method will be how to make a dance floor out of plywood, we will be using plywood that is 4’ x 8’, suggested floor sizes are: 8’ x 8’, 12’ x 8’, 12’ x 16’, or 16’ x 16’.
Calculate the area needed for your party and use the best matching suggested size above. In our instructions for how to make a dance floor out of plywood, we will be constructing a dance floor that is 12’ x 16’ which is about 200 square feet and a decent size for a party of 100 guests. Make sure to adjust the numbers if you determined to use a different size.
Step 2: Pick the Location
Now that you have determined the size of your dance floor, it’s important to pick a location. Pick an area that is level and large enough for the dimensions of the dance floor. Remember that not all guests will be dancing at once, so consider spacing for tables and chairs in view of the dance floor.
Step 3: Gather Materials
Your local hardware store should carry all of the supplies you need, making it a one-stop-shop! Stores like home depot will often cut your wood for free.
Materials:
- 6 sheets of ½ inch plywood
- 30 eight-foot long 2’x3’ (Another option is to use recycled pallets instead of 2 x 3s for the base)
- Box of screws
- Nails
- Drill or screwdriver
- Floor top finish (Tiles, dance mat, or paint)
- 6 Mending plates
Cut 18 of the eight-foot planks into 2 x 3s into two 45” pieces. Keep 12 of these 8 feet long.
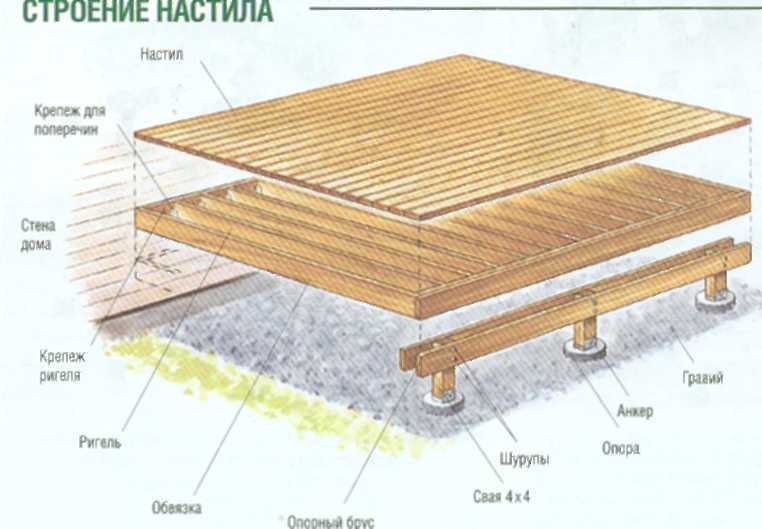
Step 4: Create the Base
Create the base using two eight-foot 2 x 3s laid horizontally. Screw six 45” pieces as supports in between these boards to create a “ladder” look.
Step 5: Repeat Until You Have Six Bases
Each base will be supporting one ½” piece of plywood that will be the top of the floor.
Step 6: Screw or Nail the ½” Plywood Sheets to the Tops of Each Base.
Carefully screw or nail the plywood on top of the base. There should be two nails or screws in each support. Four along each side length will hold your floor sturdily.
You should now have 6 completed dance floor pieces ready for your own configuration. In this video, you will see how the bases were completed.
Step 7: Lay Out the Dance Floor Sections and Complete a Finish.
Now that your dance floor is almost complete, lay it out in a 12’ x 16’ rectangle. Draw the layout on a piece of paper before you start moving the bases. Make sure it is a complete rectangle.
There are several ways to finish the dance floor.![]() If you like the wood look, you may just choose to seal and weatherproof it.
If you like the wood look, you may just choose to seal and weatherproof it.
While weatherproofing is optional, it is a great insurance policy if you are keeping your floor outside.
Keep in mind the purpose of your floor is dancing. Always opt for a nonslip finish, or your guest may do more slides than Cha-Cha. Finish the top of the dance floor with one of the options below:
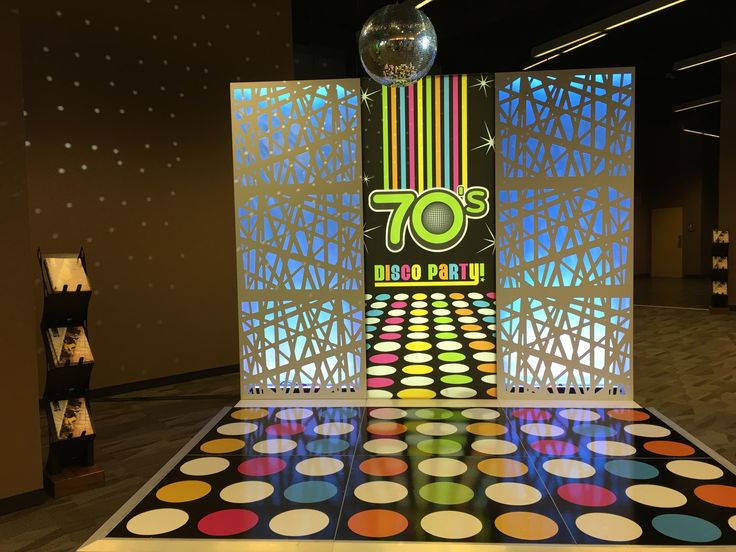
- Paint: Paint is probably the cheapest option to get the most customized look. You can write your initials, use glow in the dark paint, or even create a work of art. Check out how this floor was painted to look like a checkerboard.
- Vinyl Sheet: Make your dance floor look like a professional dance studio by using vinyl floor sheets. Just roll it out on top of your floor. See the look here. You will need to secure the floor by binding to the plywood or nailing down the ends.
- Peel and stick tiles: If you want to make sure all the pieces come apart easily when you have finished, consider using peel and stick tiles as seen here.
- Vinyl dance mat: While the most expensive option, it is great choice if you are planning to use it regularly. The mat can be rolled over the wood floor when in use.
IncStores Rosco 1.2mm Thick Reversible Dance Floor Roll | Low-Reflection Vinyl Marley Dance Flooring for Practice and Performance of Countless Dance Styles | Black/Grey, 10 Ft
- PERFORM LIKE A PRO: Take your passion to the next level with a matte vinyl marley floor that's engineered for greatness. With low-reflection, effortless portability, and balanced glide, it’s the perfect partner for almost every style of dance.
- FEEL THE DIFFERENCE: Used by pros the world over, marley flooring is right at home on set, on stage, or in the studio. Made to modernize the show-biz classic, our dance rolls are dialed in to hone your ballet, broadway, and hip-hop performances.
- MADE FOR THE MOMENT: Our 63" wide dance mats are made with resilient vinyl with matte black/white reversible sides to match your space, minimize the reflection of stage lights, provide carefully controlled floor speed, and last for years to come.

- TAKE THE SHOW ON THE ROAD: With a lightweight 1.2mm profile, our portable performance flooring is a shockingly capable touring companion, rolling up in seconds for easy transportation with the rest of your dance supplies and/or ballet equipment.
- A FOUNDATION OF QUALITY: For more than a decade, IncStores has been outfitting professional stages and personal studios with high-quality dance accessories in countless styles, because a stronger, safer, smarter performance starts from the floor up.
Last update on 2022-11-21 / Affiliate links / Images from Amazon Product Advertising API
Step 8: Secure the dance floor
You are almost ready to shake a leg! Ensure that your dance floor is positioned where you want it. Use mending plates to secure each dance floor piece together. Place the mending plates on the outside of the dance floor where each piece joins.
For the 12’x16’ floor, you will need 6 mending plates.
No matter how many people decide to get up and do the Nae, Nae or watch you whip your floor will hold it together!
Step 9: Get out and dance!
Your hard work has all paid off and now you can enjoy the next big dance party or wedding in your own backyard!
An Alternative to Option 1: Use Recycled Wood Pallets
Like the sound and look of option 1, but want to be even kinder on the wallet? Build a dance floor using recycled wood pallets.
By checking local listings, you can often find pallets for free! Wood pallets can be used to create the base, eliminating the need for any 2’ x 3’s! Depending on the size and quantity of pallets you can get, you may end up needing to trim some of your plywood. But, for the cost, it’s worth a try!
Follow all the other steps in option 1 after replacing your bases with pallets. Check out the finished product here.
Using recycled pallets can save you about $60 on materials.
Option 2: Use What You Have
If the instructions for constructing your own dance floor made your head spin, don’t give up on your dance floor yet! You may have everything you already need for the perfect dance party in your own backyard.
If you are considering a country theme to your party with line or swing dancing, kick up your boots and enjoy the cheapest way to make your dance floor: dirt!
A deck and cement area (such as a patio or basketball court) can also be easily converted into the perfect dance floor.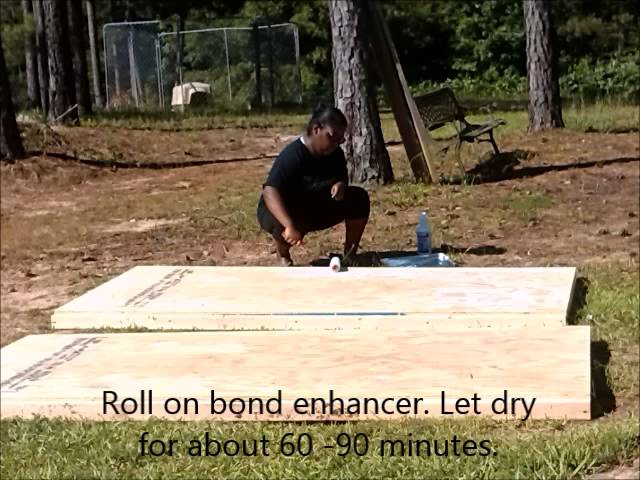
Dirt or Gravel
Step 1: Pick a Level Area of the Yard
Make sure the area you choose is free of any divots or holes. The slope of the yard should be relatively flat. If you find the yard is not smooth, make sure to level it before proceeding.
Step 2: Define the Boundary
Don’t confuse your guest by not having a clear boundary for the dance floor. There are many simple tricks for defining the boundary that will fit your theme.
Hay bales, pumpkins, flower planters, or recycled pallets placed in the four corners will do the job. Lighting can also serve a dual purpose of defining the boundary and illuminating the dance floor.
Step 3: Dust Control
Nobody will be dancing for long if they are having to breathe in the dust while dancing. Keep the dust down with these simple tricks:
- Spray the dirt lightly before the party. Don’t water heavily or you may end up mud wrestling instead of dancing!
- Use a dust control agent such as Dust Down Pro.
 It is non-toxic and a safe option if you plan ahead!
 - Consider laying down small-sized gravel such as pea gravel or even a thin layer of sand. Just a thin layer is needed, as too much will have your dancers sinking in their steps.
- Continue the country feel with a thin layer of straw. You can lightly spray this a day before the party to enhance the dust fighting capabilities.
FDC 96% Pure Calcium Chloride DUST Down PRO Pellets (Controls dust on unpaved Dirt & Gravel Roads) 5 Gallon Pail
- KEEP DUST UNDER CONTROL. Dust Down POLY PRO keeps dirt and dusty particulates from becoming airborne. Dust Down will Improve worksite visibility, prevent accidents, and protect your vehicles from dust and dirt damage.
- REDUCES FORMATION OF DUSTY RESIDUES. Dust Down is made from a specialty emulsion mixture designed to modify and break down insoluble mineral-based materials. Dust Down remains non-toxic, non-leaching, and completely safe to use around pets and animals.
- GREAT FOR RESIDENTIAL AND COMMERCIAL USE. Homeowners, contractors and city workers use Dust Down Poly Pro to treat driveways, construction sites, and gravel roads, creating a safer and cleaner environment for everyone.
- DON’T LET DUST SLOW YOU DOWN. Depending on foot traffic, Dust Down will keep dirt and dust out of the air for 3-12 month. Five gallons of Dust Down covers 5,000 sq. ft.
- 30-DAY MONEY BACK GUARANTEE. Unsatisfied with your purchase? Return the product, no questions asked! Do you have a question or concern? Call (888) 854-3914 (8-5 M-F).
Last update on 2022-11-21 / Affiliate links / Images from Amazon Product Advertising API
Deck or Cement
If you already have a good-sized deck or cement patio, consider using them as the main dance area. With a few simple tricks, your guest will never know its previous use:
- Add the perfect mood lighting. Adding just the right lighting can enhance any area and breathe new life into it!
- Level an uneven deck.
 Use 4 x 8 plywood to make and level area before laying down the flooring.
 - Use flooring. Layout a dance floor on top of your existing patio or deck. Vinyl sheets or laminate flooring on top of the cement or deck will make it look like you installed a professional ballroom floor. We suggest using a non-slip grade!
Option 3: Buy One
If none of the options above click your heels, consider buying a dance floor! While you are sure to spend more money, you will have a professional dance floor that can be used again and again! Perhaps, with enough practice, you will even be on the next “So You Think You Can Dance!”.
Many of the products available come in one square foot tiles. This makes storage a breeze! The tiles can be taken apart and easily stored in a garage or closet.
Most of the manufactured dance floors are made to be placed on a hard and sturdy surface. This would work best on a concrete slab or sturdy deck.
No deck or concrete? No problem.
Some dance floors are made to work on uneven ground. However, consider laying down a tarp and possibly plywood before assembling the dance floor on dirt or grass.
Step 1: Research Options and Pick What You Like Best
Many available sets require no tools and snap together. The sets come with options for how many tiles in each set. Make sure to purchase enough sets to cover the area you need for a dance floor.
For example, you would need to purchase about 3.5 sets of the IncStores 12″ x 12″ Practice Dance Tiles (52) to cover the area (182 sq. ft.) needed for a party of 100.
Buy three of the sets of 52 tiles and one set of 32 tiles.
If you want a border ramp, remember that it will need to be purchased separately!
IncStores 3/8 Inch Thick Practice Dance Floor Tiles | Printed Plastic Dance Flooring for Practice and Performance of Countless Dance Styles | Oak, 52 Tiles
- INSPIRE YOUR IMPROVEMENT: Envision the ultimate dance studio with a printed tap floor that's engineered for greatness.
 With effortless installation and balanced glide, our ballet floor tiles are the perfect partner for almost every style of dance.
 - ALWAYS ON POINTE: Bring the right tools for the job with our acclaimed dance floor tiles, featuring rigid materials, six dazzling finishes, and limitless coverage potential to create the perfect indoor or outdoor dance floor for events and more.
- MADE FOR THE MOMENT: Our dance board kits are made with ultra-resilient polypropylene and topped with printed vinyl to match your style, provide consistent speed, make all the right sounds, and last for years and years of passionate performances.
- TAKE THE SHOW ON THE ROAD: With a lightweight 3/8" profile, our tiles are the ultimate tap board for touring the world, assembling and disassembling in minutes for easy transportation with the rest of your dance supplies and/or ballet equipment.
- A FOUNDATION OF QUALITY: For more than a decade, IncStores has been outfitting professional stages and personal studios with high-quality dance accessories in countless styles, because a stronger, safer, smarter performance starts from the floor up.
Last update on 2022-11-21 / Affiliate links / Images from Amazon Product Advertising API
Step 2: Buy and Ship to Your House
Make sure to buy your dance floor with plenty of time before the big event. You will need to plan for shipping time and installation once it arrives.
Step 3: Install the Dance Floor in Your Backyard
It is best to install your dance floor the day of or the day before your party so it is not damaged by the elements. Don’t forget that it will also be easier to connect tiles on a hard surface.
Step 4: Disassemble and Store
Plan for storage when you purchase your own dance floor. That way you can be ready to pull it out for your next dancing extravaganza!
Option 4: Rent a Dance Floor
If you are wanting a high-quality dance floor to perform all of your “Dancing with the Stars” moves, you may want to opt for making a dance floor by hiring a rental company. They will often handle the setup and take down, leaving you time to practice your two-step!
The cost of renting a dance floor large enough for 100 guests may range quite widely depending on the area and what you want.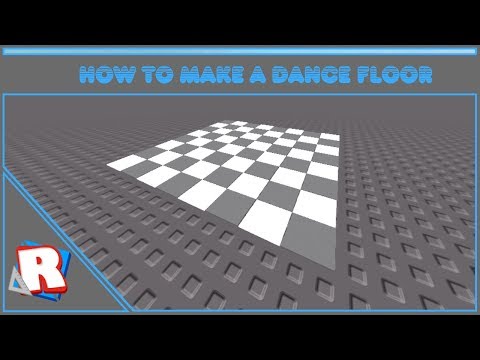
Step 1: Check Out Local Rental Companies
When renting a dance floor, always get quotes from a few different companies. Ask the right questions to ensure you are comparing apples to apples.
- Do they provide the floor underlayment for the grass or tent floors?
- What is their cancellation policy?
- Do they install and deconstruct?
- Do they deliver or are you expected to pick up?
- When do they expect payment?
- Do they cancel in the event of inclement weather?
Step 2: Choose the Floor
Certain floors are better for outdoor use. Composite laminate floors are often the most scratch-resistant and do not require a tent. Vinyl floors are a good outdoor option, but some companies may require a tent to be over the floor.
Make sure to discuss with the salesperson where you plan to place your backyard dance floor. Many looks are often available from parquet flooring to sleek black vinyl.
Step 3: Enjoy the Dance Floor with Less Headache!
No tools needed and you will have a professional floor to dance on in no time! The cost to rent may be well worth your time and energy saved!
Final Touches to Your Backyard Dance Floor
Don’t forget the final touches to your dance floor that will set the mood and make your party the envy of the neighborhood. If your party will be after dark, consider how you will light the dance floor. The only thing your guests should worry about tripping over is their two left feet!
Lighting Options
- Check out this post which has pictures of many landscape lighting options that will work for an elegant party.
- String lights bring a great ambient light.
- After-holiday sales are great times to purchase projector lights of various colors and functions that serve well for party lights.
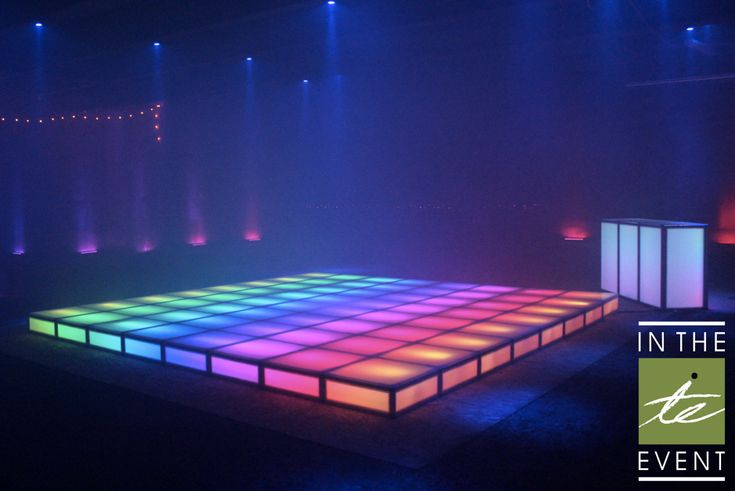
- Disco and party lights are a great addition. You will feel like the club came to your backyard!
- RGB flood lights have many color options and can be mounted on the ground, ceiling, or wall.
No products found.
Party Lights, Disco Lights, GOOLIGHT DJ Light Sound Activated Strobe Light Projector Party Light Effects with Remote Control for Home Room Dance Birthday Bar Karaoke Holiday Christmas Wedding Parties
- Multiple beams: The light can shows many patterns effect, light rotating effect can be selected as fast, slow or pause.
 Effect color can be selected as red, green or red & green.
 - Multiple Work Modes: 1) Auto Mode: Random colors create a romantic and relaxed atmosphere. 2) Strobe mode: Colors appear and disappear quickly. 3) Sound control mode: Light color and speed changes with the rhythm of the music.
- Multiple operating modes: You can manually switch light on the light body, or use remote control to select the function that you want. It can make your party attractive.
- Light and easy to install: Silver aluminum alloy shell, tiny mounting accessories, that can be easily installed on the wall or ceiling, and can also be placed on the table or floor.
- Widely used for parties, disco, ballrooms, hotels, skating rink, public square, family gatherings, bar, KTV, party, concert and festival like Christmas, parks, Halloween, etc.
Last update on 2022-11-21 / Affiliate links / Images from Amazon Product Advertising API
LED Flood Light, WAKYME 30W RGB Color Changing Floodlight with Remote Control, IP66 Waterproof, 64 Modes 16 RGB Colors Dimmable Wall Washer Light, Stage Lighting with US ETL 3-Plug, 2 Sets
- 【16 Colors & 64 Modes】Comes with a remote controller, the flood light has 8 basic modes in total, each mode has 8 speed choices, you can make total 64 different modes in your needs.
 Total 16 different colors provide colorful and bright illumination. One remote control can control several lights at the same time. You can set the right ambiance for any moment with a range of beautiful. Simply click the control button to enjoy different colors/brightness/modes of lighting.
 - 【Upgraded Super Bright】This led floodlight uses the most advanced 60pcs high quality LED integrated lamp beads, producing a soft and uniform 3000lm bright lights, more stable, brighter and Longer service life(up to 50,000 hours). Extremely long life reduces re-lamp frequency. Simple and generous appearance, more in line with aesthetic requirements. 120° beam angle, It can be better integrated with the architectural landscape.
- 【Memory Function】Lighting color remains as previous setting when turned on again. RGB led floodlights is easy to install and mounted/hang in anywhere as you like with the 1.5m/5ft power cord with ETL certification US 3-Plug. Perfectly as a lighting for the safety of your home, it's greatly suitable for both indoor and outdoor usage, including birthday party, night time barbeque, garden lighting, stage lighting, landscape lighting, etc.
- 【Waterproof & Durable】IP66 level for better wind and dust protection, ensures that the flood light work properly no matter in rain, snow, heat or cold environment. This outdoor floodlight is made of die-cast aluminum and tempered glass, more durable than iron, which effectively prolongs its lifespan. It has a thicker wire, thicker tempered glass, thicker housing, and passed stricter testing, always protect our users from unsafe situations.
- 【What You Get】: 2*30W LED Flood Lights with 1.5m US 3-Plug Cords, 2*Remote Controller, 1*Using Manual. All WAKYME flood lights have FCC, CE, RoHS and ETL certifications. We offer 2 years warranty and 30 days money back guarantee. If you have any problems, please feel free to contact us.
Last update on 2022-11-21 / Affiliate links / Images from Amazon Product Advertising API
Get a DJ
Whether it’s your Uncle Dan or a professional DJ, make sure to plan for one! This will ensure that you can get out and enjoy the dance floor instead of keeping the music on.
Conclusion
We instructed you on how to make a dance floor in your backyard by building one from plywood, using existing areas, purchasing, or renting.
What persuaded you the most? Did you go for low cost and decide using your backyard assets or handyman skills were all you needed? Or did you opt for the convenience of renting or buying your dance floor?
With so many options to choose from, you are sure to know the perfect way how to make a dance floor in your backyard and how to make a dance floor out of plywood! Now put on your blue suede shoes and enjoy the dancing!
Dance Studio Owner | December 2022
Step Draft floor "Springstep". share Tweet share Comments
Here the experts at Stagestep Flooring Solutions share their advice on building your own dance system for your studio.
Creating your own dance floor system starts with preparation, planning and asking the right questions. Do this, and as a result, you will have a successful project, saving time and money.
wade robinson dance
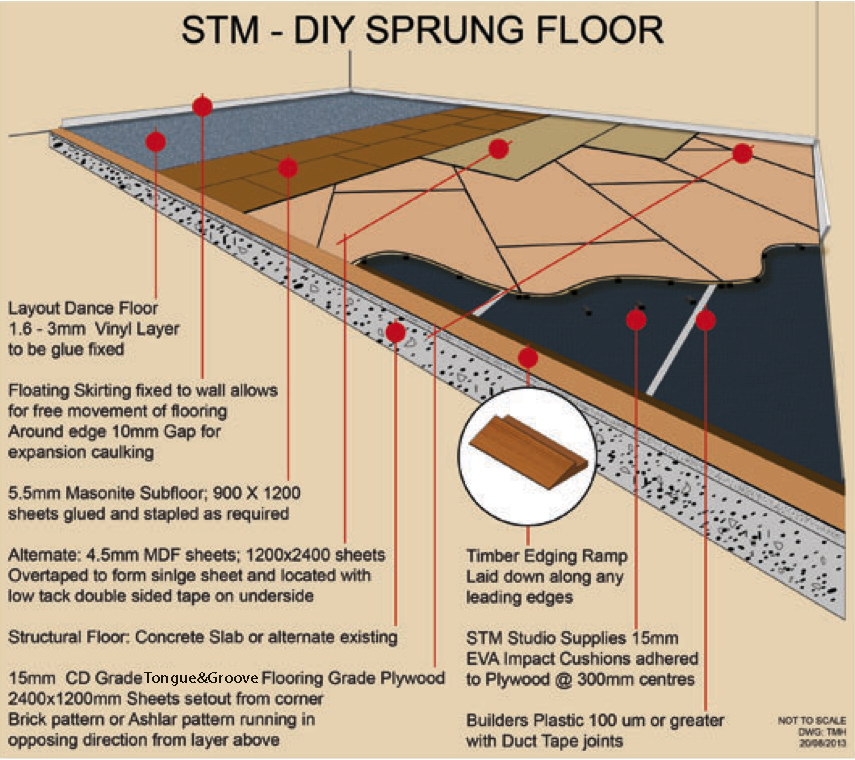
The dance system system consists of three elements:
- Plate - Your foundation
- Black floor - for absorption of energy
- dance floor
There are many options that should be taught many options that should be taught. , both in what elements are needed to meet your needs, and in how these elements are combined.
Questions you should ask yourself:
- How will the space be used? Just dance? Multipurpose? Parties and other non-dance related events?
- What dance style(s) and how often will the space be used?
- Is this a temporary, semi-permanent or permanent installation?
- What is your budget?
Springstep IV Subfloor by Stagestep
In addition, you will need to decide if you will do it yourself from scratch, use a ready-made system for self-installation, hire someone on site to install it, or have the manufacturer do it all for you.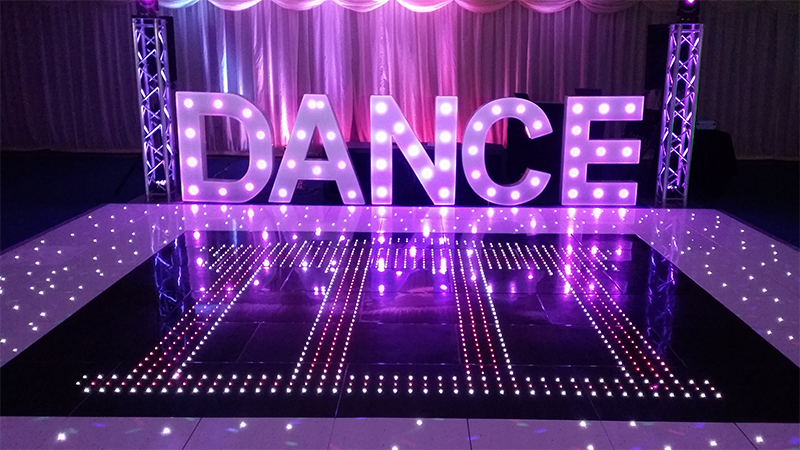 you.
you.
Once the questions have been asked and answered, you will have a plan of action. Whether you make it yourself or give it to a farm, you need to know the following so you don't miss any important steps.
boston ballet summer intensive 2018
Slab must be level and vapor barrier, especially if it is concrete. If it is uneven, you may need to apply a degreaser to it.
Floating Subfloor is available in many configurations. You will need to decide, based on features, installation instructions, budget, and performance in terms of resilience and cushioning, which type of subfloor is right for you. Make sure you have a floating subfloor and not a raised subfloor. Floating means air under all points on the surface. Foam has air.
Dance floor surface can be vinyl (gauze) or wood. Within each category, there are a variety of options based again on budget, appearance, usage, required maintenance schedule, and whether the flooring needs to be moved (e. g. to a concert stage).
Take your time and make decisions without first exploring all options, knowing your needs, talking to "experts" and other owners who have similar needs or have gone through the process.
For the purposes of this lesson, let's say we're in a studio for a few dances with a long-term arena (or we're the owner) and we have the ability to do it ourselves.
Woodstep dance floor installation by Stagestep.
First we check the stove. If it is uneven, broken in places or uneven, it must be repaired. If it is a new construction, a moisture test (a so-called "calcium chloride test" available at a hardware store) should be performed to check the moisture percentage and moisture pressure in the slab. A concrete slab needs a vapor barrier with a liquid or viscous vinyl coating. It is easy to install or apply.
The basic versatile floating subfloor for multi-purpose dance classes is called the Springstep II. .![]() Items required:
Items required:
- High Density Foam Blocks or Styrofoam Cubes (52-100 per bottom plywood)
- 2 plywood with ½" backing - top ply to be A/C (finished on one side), bottom ply B / C (unfinished on both sides)
- 50-75 top plywood screws
- 1" decking screws threaded to head
- wood filler
- sander
- electric screwdriver
- circular saw
- tape or glue to attach the floor to the subfloor
vertical position, curled up on a cardboard or plastic base.
The first step is to roll out the subfloor on the floor for 24-48 hours so that it can acclimate. Always use an industrial cutting tool (not a box cutter) to cut the floor.
There are four ways to install: temporary (top tape), semi-permanent (up to two years with 2" or 4" double-sided tape), permanent semi-permanent (ReUseIt 2.0), and permanent (adhesive). Professional installation is required for permanent installation. The rest of the options you can do yourself.
Routes are available online at www.stagestep.com. They are simple and do not require special skills. This will take time, but you can save up to $2.00 per square foot. Other options include Springstep IV, a prefabricated floating subfloor that eliminates the use of screws, sanding and wood filler, and plywood. This will save you up to 80 percent assembly time.
how old is Peter McKinnon
Remember that preparation, planning, and asking the right questions will ensure that the studio floor is right for your students, your schedule, and your budget.
“I would like to create my own hotel” – The New Bohemian
Text by Igor Shein, photo by Steve Herud
The New Bohemian about the most unusual project of Design Hotels
Where to live in Ibiza? A question from the category of reasonable and ridiculous at the same time. Well, of course, closer to all these clubs! Or, on the contrary, further away - fie on them - but so that right on the sea, fall asleep to the sound of the waves .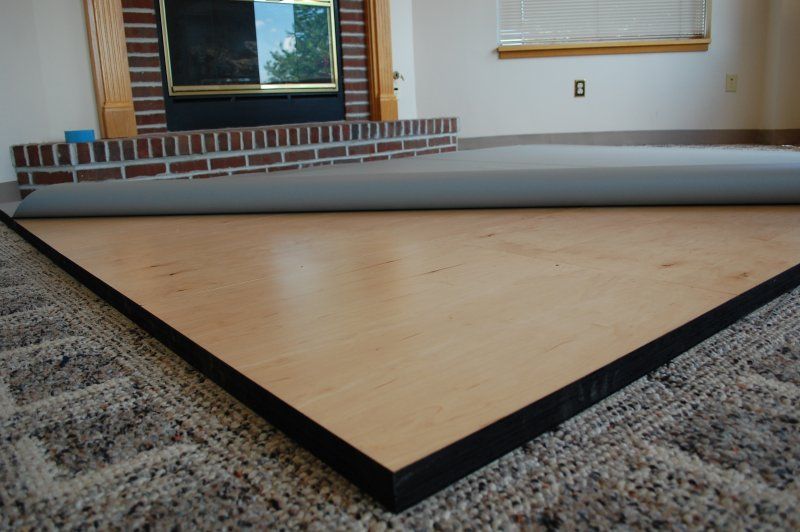 .. In this case, why then go to Ibiza? However, everyone has their own reasons, right?
A few years ago we lived in a small group in Ibiza on the territory of a former olive oil farm. It could accommodate a maximum of 6-8 people and was a complex of small buildings rebuilt into nice "numbers". In the center there was a swimming pool and a terrace with a bar. All this farm was located on the top of the mountain, surrounded by dense flowering vegetation, making its way through which, one could admire the breathtaking panorama of the island.
Birds sang deafeningly in the morning. I remember it distinctly, because just at dawn we were returning from Fuck Me I'm Famous or somewhere else, and each had an agonizing choice: either splash into the pool screaming - there was no one to wake up - or silently fall into a huge bed with snow-white linen.
Just half an hour ago, a sweaty, dense crowd was bouncing in sync, shaking the dance floor, and suddenly silence, the purest morning coolness, dew, birdsong, scents of flowers - this is the most incredible mix in terms of strength, from which we enjoyed a lot.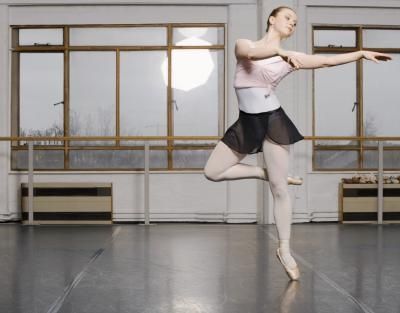
Who would have thought that a simple owner of an oil press converted into a retreat, without knowing it, anticipated the trend - whatever you call it - by creating nothing more than an ecological boutique hotel that fits perfectly into the Made by Originals concept invented by the founder of the Design Hotels group Klaus Sendlinger for a special category of travelers.
However, I anticipated that, of course. All great ideas float in the air, sometimes for years, until they land on the right head. Because what travelers are we talking about? Yes, even about those whom the American journalist Julia Chaplin once aptly called gypset (gypsy + jet set). They do not like five-star anthills, as well as generally well-known places to the general public. They leave their lofts in conditional New York or London, forget about money and go wandering. They stick together, adore everything local - food, craft, rituals. The lifestyle is generally healthy, many practice yoga, meditation, but this does not mean that they cannot spend the whole night at the fool moon party.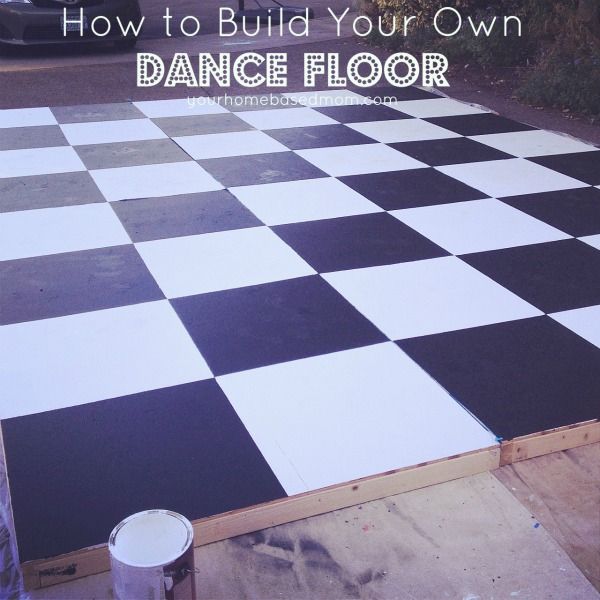 Often travel with children. They rent houses through airbnb for a month or two and are absolutely happy.
Klaus Sendlinger used to spend the winter on the island of Tao, the same island where Alex Garland placed his characters in The Beach. "Don't bother yourself with Koh Phangan, Rich <...> Tao! That's where you should go." Koh Tao was still an unknown island and Klaus liked to recover there after the hard techno parties he held in different places. He had already registered Design Hotels, but the company was still weak, although it provided marketing services to a dozen cool hotels in New York, Los Angeles, Paris and London. The period of uncertainty did not last long: today the Design Hotels group is an impressive conglomerate of almost three hundred completely different extraordinary hotels around the world, and the list of those wishing to receive the coveted “club membership” is even longer.
Obviously dreaming of returning to those blessed times when nature was as pure as it was a million years ago, prosperous businessman Klaus Sendlinger opens the Papaya Playa project in Tulum in 2015. Right on the beach, in the middle of the jungle. He brought the aesthetics of Tao Island to Mexico: DJ sets under the moon, hippie chic (meaning that you are barefoot all the time, but the linen is clean, the food is excellent, and the bill for everything is rather big). Unlike the heroes of Garland, who built their village from what God sent, Papaya Playa was created sort of by analogy - the building material grew or lay around - but by the hands of a professional architect. And most importantly - the latest systems for water purification, waste recycling, saving and using solar energy are used here - Klaus was very pleased.
During the Brazilian Olympics (Sendlinger arranged another hippie chic in the bohemian Santa Teresa quarter in Rio), a man approached Klaus, introduced himself as the owner of a la granja (farm) in Ibiza and offered to take a look at it.
Klaus Sendlinger liked the farm.
As if our nameless - I don’t remember the name for good reasons (Ibiza after all!) - the owner of the oil press, on a whim, converted her property into a cozy boutique resort, the most experienced Klaus Sendlinger decided to do the same on the farm, investing however, significant funds are spent on what enlightened intellectuals around the world love so much today: caring for the environment, saving energy and living in the style of nature calls - without TVs, air conditioners, bad (what a nightmare!) Internet and many other things that it’s time to to get used to or vice versa to get used to.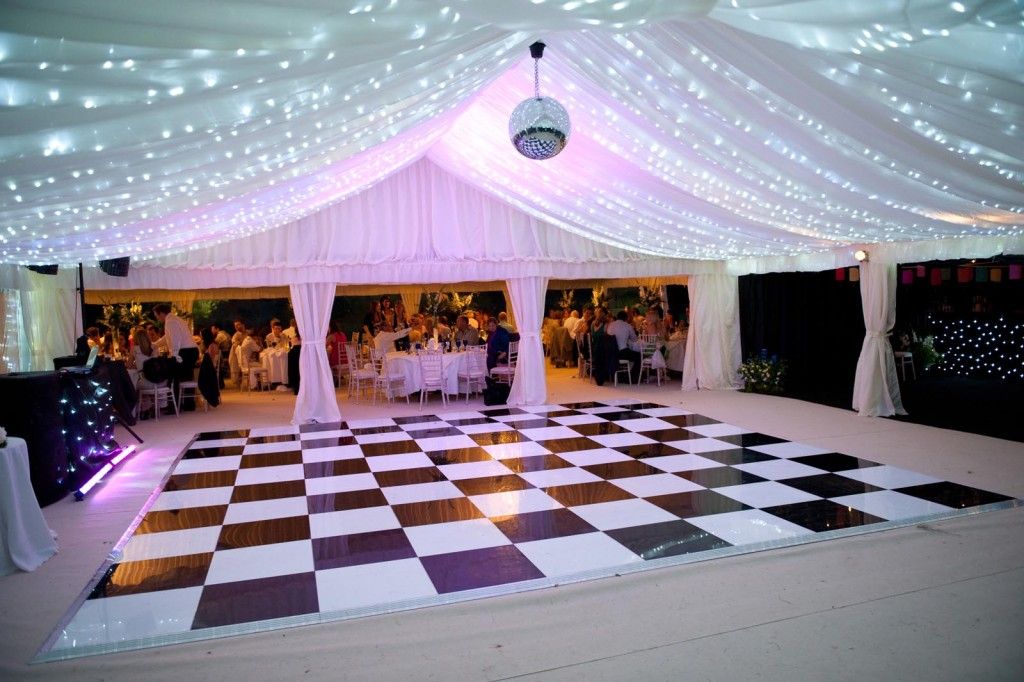 There is no menu in the restaurant - just tell the chef what you are planning for dinner and he will fulfill your desire in the best possible way. Regardless of whether it will be meat, fish or vegetative - all products of local origin, and underwater animals, as a rule, still swam in the sea the day before.
Speaking of air conditioners. Klaus, of course, did not refuse them for the sake of saving electricity. It’s just that the house in which you will live is called a finca here - that is, literally “a house with thick walls”, sometimes up to one meter - the windows are small, they close tightly and thanks to the twilight, an acceptable coolness reigns inside. Of course, if you feel unbearably hot, they will bring something, don't worry.
Armin Fischer from design studio Dreimeta designed the interiors of La Granja. She decided to sing the charm of imperfect beauty, so inherent in the dwellings of the peasants of the past. With might and main I used a tree beaten by time, often charred, a lot of stone. It turned out to be a complete antithesis to the traditional white walls adopted everywhere in the south. From modern conveniences - each room has a shower, a large bed - and what else do you need? And yes, there is a beautiful swimming pool on the territory - the farmers never dreamed of such a thing. And this is perhaps the only significant compromise that Klaus made.
Not every taxi driver will find the way to La Granja, few people on the island know about it at all - so renters receive a detailed route via whatsapp. How you spend time on the farm is up to you. For starters, you can simply do nothing. You can also take a car and have a party in clubs, and during the day you can sleep in the twilight of your finca (we did something like this on a former olive farm). But something tells you that you are in the wrong place then. Most of the companies that come to La Granja - and you can settle on a farm only with a friendly company, renting it entirely - seek to gain some kind of experience that is available only here and nowhere else.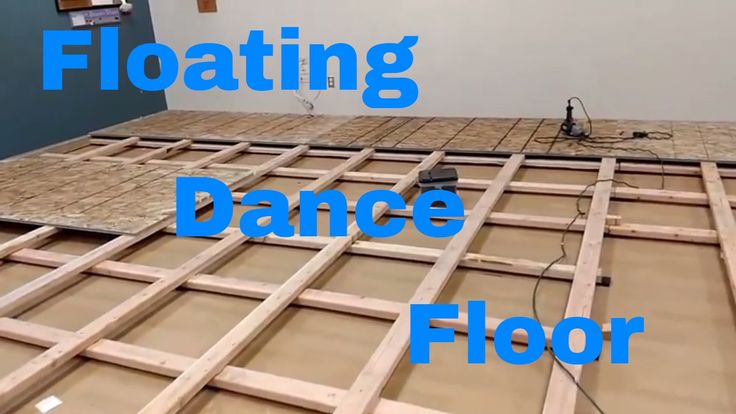 From yoga, rare spiritual practices to biodynamic farming.
The last one is serious. Thanks to the efforts of California farmer Andy Shimanovich, more than 30 varieties of seasonal vegetables and fruits grow on the entire ten-hectare plot. Biodynamics plays an important role in Andy's work. It harvests according to the lunar cycles and uses a probiotic aerosol or lacto fermentation process that activates plants to fight disease and fungus. All this he will gladly teach you. We add that La Granja cooperates with the Ibiza Conservation Foundation (IPF) and, together with other farmers, participates in the breeding program of local breeds of chickens and black sheep.
In one of his interviews, Klaus Sendlinger said that he mainly consults all the time and has long dreamed of creating his own hotel. It seems that La Granja is what it is. If so, let's hope that the great visionary did not lose. In any case, this is the first such project in his portfolio. From the outside, the truth looks like an expensive rehab (They tried to make me go to rehab but I said ‘no, no, no’) - people live in a commune, engage in various practices .