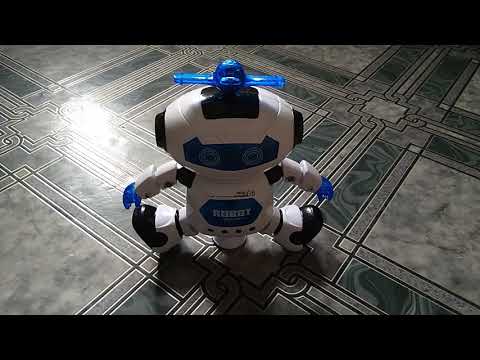
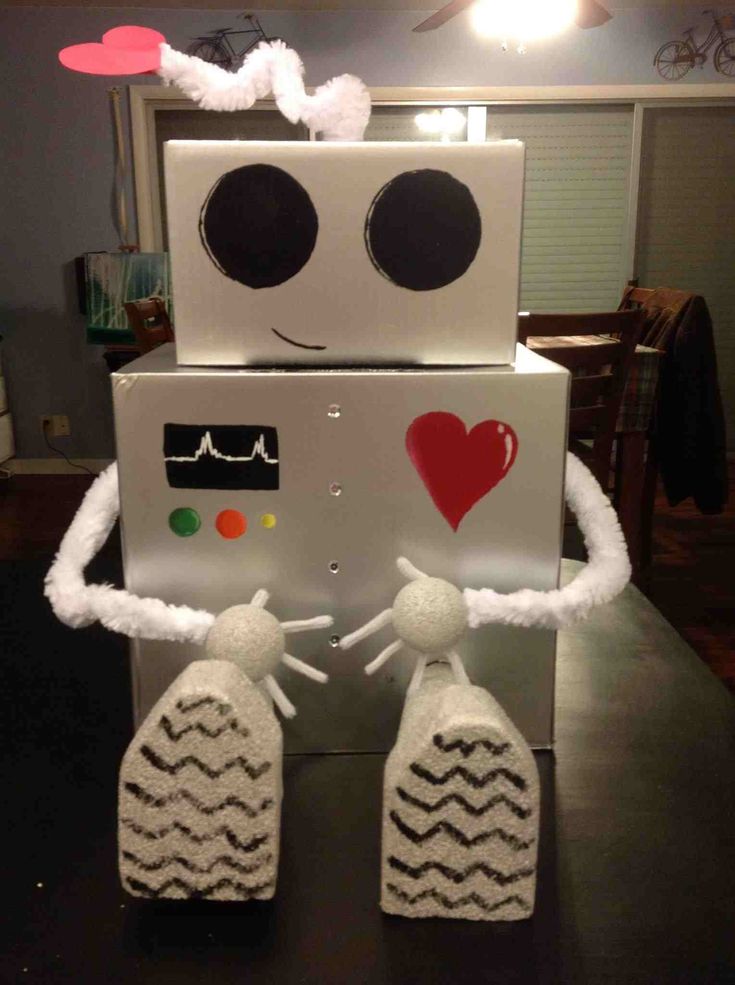
How to make dancing robot
Make a Dancing Robot
ARROW_LEFTARROW_LEFTUnit PlanLesson 1 of 15
ARROW_RIGHTWeDo 2.0 Core Set
Design and program a robot that performs a cultural dance, tells a story through dance, or dances in pairs or groups.
CLOCK45-90 min.
BRICKIntermed.
GRADUATEGrades 1-5
Introduction
This Maker lesson includes a whole range of possible Dancing Robot designs and performances. Students can explore a cultural dance, tell a story through dance, dance in pairs or groups, or even plan a dance party where WeDo 2.0 robots are more than just dancers!
Preparation
Ensure that each student has a copy of the Student Worksheet for recording their design process. They will also need the LEGO® Education WeDo 2.0 Core Set (one set for every two students is recommended).
Discussion
Hand out the Student Worksheets and allow the students to interpret the lesson themselves, or read the Maker Connect text aloud to set the scene.
2. Find a Problem
As students look at the “connect” images and questions, facilitate a discussion to steer them toward a problem or new design opportunity. Once they have decided upon a problem to solve, ensure that they record this in some way. They can use the worksheet to help structure their project documentation or use their own preferred method to record their design journey.
3. Brainstorm
Students should initially work independently or in pairs, spending a few minutes to generate as many ideas as they can to solve the problem. They can use the bricks from the LEGO® set during the brainstorming process, or sketch out their ideas in the space provided on the worksheet.
It is important for students to spend time tinkering with the LEGO® bricks in order to generate ideas. The goal of tinkering is to explore as many solutions as possible. You can use the tinkering examples at the end of these materials for inspiration, or as a means for getting started.
Students can now take turns sharing their ideas within their groups. Once all of the ideas have been shared, each group should select the best idea(s) to make. Be prepared to help facilitate this process, ensuring that the students choose an idea that is possible to make. Encourage diversity, not all groups have to make the same thing.
4. Choose the Best Idea
Students should record up to three design criteria on their worksheets. They will refer to this again as they review and revise their solutions.
5. Go MAKE
Let the students carry out one of their group’s ideas using WeDo 2.0 and other materials as needed. Reinforce that students do not have to come up with the whole solution from the start.
During the making process, remind students to test and analyze their idea as they go, making improvements where necessary. If you want students to submit their documentation at the end of the lesson, ensure that they use sketches and photos of their models to record their design journey during the making stage of the lesson.
Tinkering Examples
Some students may need a little inspiration and scaffolding to help them get started.
Students can explore the Model Library to find inspiration for the different types of dances they can do. By asking questions (e.g., Do you want to make a dancing robot that spins? That walks? ), you can help lead the students to relevant models based on their ideas. Students can remix their models by adding or removing LEGO® elements and “costume” pieces.
Remixed from #13. Sweep
Remixed from #1. Wobble
6. Evaluate What You Have Made
Students will test and evaluate their designs against the design criteria they recorded before they started making their solutions. They can record notes on their Student Worksheets.
7. Present Your Model
Allow time for each student or student group to present what they have made to the class. A good way to do this is to set out a table large enough to display all of the models. If time is short, pair off the groups and have them present to each other.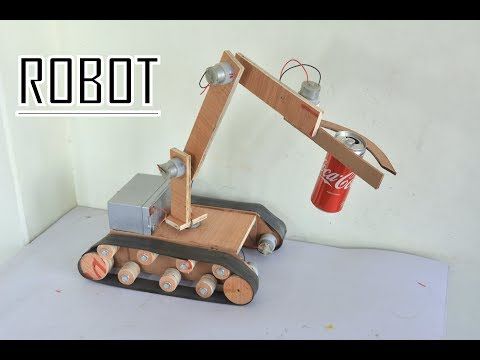
8. Assessment
Students will use the Student Worksheet assessment rubric to evaluate their design work according to the ‘Four Bricks Scale’.
9. Tidy Up
Ensure that you leave approximately 10-15 minutes at the end of the lesson to break down the models and sort them back into the LEGO® boxes.
Teacher Support
After completing this lesson, students will have:
Defined a clear design need
Developed their ability to iterate and improve design solutions
Developed their problem-solving and communication skills
Used and understood the design process
LEGO® Education WeDo 2.0 Core Set
WeDo 2.0 Software or Programming App
Optional
Use craft materials that you already have in your classroom to add another dimension to this lesson. Some materials could be:
Plastic or paper cups
Cardboard boxes
Egg cartons
Fabric or felt
Foam, pom-poms, or beads
Pipe cleaners
Introduction to the Maker LessonsMaker ConnectStudent Self-AssessmentClassroom Poster of the LEGO® Education Maker (Design) Process
NGSS
Science and Engineering Practices
3-5-ETS1. 1, 3-5-ETS1-2, 3-5-ETS1-3
Disciplinary Core Ideas
ETS1.A, (3-5-ETS1-1)
ETS1.B, (3-5-ETS1-2), (3-5-ETS1-3)
ETS1.C, (3-5-ETS1-3)
Common Core State Standards
ELA/Literacy
RI.5.1, RI.5.7, W.5.8
Mathematics
MP.2, MP.4
Student Material
Student Worksheet
Download to view and share the student worksheet.
Download pdf
Share with:
Google Classroom
Flippy, the Dancing Robot | Science Project
Science Projects
Abstract
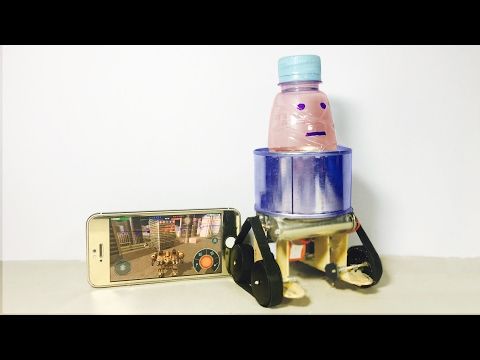
Have you ever seen a robot dance? In this project you will build your own simple flipping, tumbling robot that can dance around on the floor or a tabletop! If you have never made a robot before and would like to get started with a fun, easy project, this is a great place to begin. You will follow directions to make a basic robot, and then make your own additions to make it even better!
Summary
Robotics
Average (6-10 days)
None
This project requires robotics parts from an electronics vendor.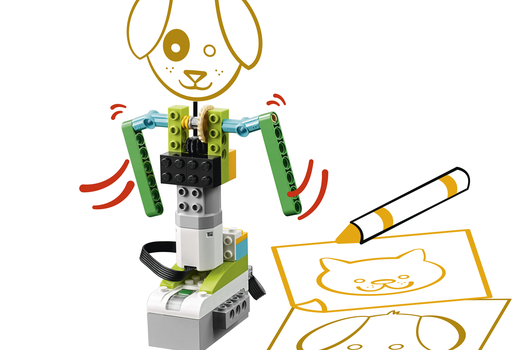 See the Materials and Equipment list for details. Estimated project time includes shipping for the parts.
Low ($20 - $50)
Adult supervision is required when using a hot glue gun or super glue.
Ben Finio, PhD, Science Buddies
Objective
Build a dancing robot and improve its design to make it sturdier.
Introduction
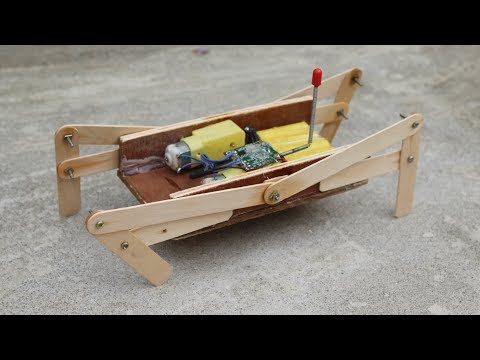
Imagine inviting your friends over for a dance party. You've got delicious snacks and some great music on, but when they walk in the door it's not you they see dancing around, but a dancing robot! In this project you will build a robot, like Flippy the dancing robot, shown in Figure 1, that can dance, flip, and tumble around the floor. The video after Figure 1 shows the robot in action.
The robot uses two small motors in order to move. Each motor spins around when it is turned on, and has a popsicle stick attached to it as a "leg," which pushes the robot around when it moves. In order to power the motors, the robot also needs a battery, which provides electricity to the motors. Electricity powers battery-operated devices that you use every day, like toys or television remotes, and also powers things that plug into wall outlets like lamps. When you connect the motors to the battery, you complete an electrical circuit, which allows electricity to flow and make the motors spin. Electricity cannot flow to the motor without a complete circuit. If you want to learn more about electricity, you can read the Electricity, Magnetism, & Electromagnetism Tutorial.
In this project, you will use a breadboard (the green rectangular piece in Figure 1) to make it easier to connect the wires in your circuit. Breadboards make it very easy for beginners to make circuits, because the wire connections are not permanent. You can just pull the wires out if you make a mistake. You can learn how to use a breadboard in the Science Buddies reference How to Use a Breadboard for Electronics and Circuits.
There is just one problem—all that flipping and tumbling around can be pretty hard on the robot. If you are not careful, it could even cause some of the pieces to fall off! In this project, you will put your engineering skills to the test to see if you can design and build a sturdier dancing robot.
Terms and Concepts
- Robot
- Motor
- Battery
- Electricity
- Circuit
- Breadboard
- Row
- Column
Questions
- Why is a battery required to make the motors spin?
- What is a breadboard, and what is it useful for?
- If your robot falls apart, how do you think you could re-connect the pieces to make it stronger?
Bibliography
- Woodford, C. (2014, May 14). Electricity. Retrieved August 22, 2014.
- Grusin, M. (n.d.). What is a Circuit? SparkFun Electronics. Retrieved July 31, 2014.
- Science Buddies. (n.d.). How to Use a Breadboard. Retrieved September 25, 2015.
Materials and Equipment
The following electronic components can be purchased from Jameco Electronics:
- Geared DC motors with leads (2), part #2260834. Note that the motors are sold in a two-pack.
- 3xAA battery holder with cover and switch, part #216144
- Mini breadboard, part #2155452
- AA batteries (must be ordered in multiples of 4, but this project only requires 3), part #198707
You will also need the following tools and supplies:
- Corks (2)
- Popsicle sticks (2)
- Double-sided foam tape
- Electrical tape or duct tape
- Scissors
- Small Phillips head screwdriver
- Hot glue gun or super glue
- Other materials you could use to help attach parts of your robot together. Here are some suggestions:
- Rubber bands
- Twist ties
- String
- Modeling clay
- Lab notebook
- Optional: Arts and crafts materials to decorate your robot (pipe cleaners, googly eyes, etc.
 )
) - Optional: Camera to take pictures of your robot
Disclaimer: Science Buddies participates in affiliate programs with Home Science Tools, Amazon.com, Carolina Biological, and Jameco Electronics. Proceeds from the affiliate programs help support Science Buddies, a 501(c)(3) public charity, and keep our resources free for everyone. Our top priority is student learning. If you have any comments (positive or negative) related to purchases you've made for science projects from recommendations on our site, please let us know. Write to us at [email protected].
Experimental Procedure
Note: This engineering project is best described by the engineering design process, as opposed to the scientific method. You might want to ask your teacher whether it's acceptable to follow the engineering design process for your project before you begin. You can learn more about the engineering design process in the Science Buddies Engineering Design Process Guide.
Building Your Robot
- Gather all the materials you need to build your dancing robot (see the Materials list). Figure 2 shows the main parts of the robot.
- Put the batteries in the battery holder as follows, and as shown in Figure 3.
- Use a small Phillips head screwdriver to remove the screw that holds the cover on the battery holder.
- Press down on the cover and slide it off the battery holder.
- Place the batteries into the battery holder. Make sure the "+" symbols on the batteries line up with the "+" symbols inside the battery holder.
- Slide the cover back onto the battery holder. It should click into place. You do not need to replace the screw.
- Press corks onto the motor shafts as follows, and as shown in Figure 4.
- Carefully use the Phillips head screwdriver (or another pointy object, like a pen) to poke a hole in one side of the cork.

- Find the motor's shaft (the white part sticking out from the side), which is on the opposite side from the motor's wires. Firmly press the motor's shaft into the hole you made in the cork.
- Repeat steps 3.a.–3.b. for the second cork and motor.
- Carefully use the Phillips head screwdriver (or another pointy object, like a pen) to poke a hole in one side of the cork.
- Use electrical tape or duct tape to tape a popsicle stick to the cork, as shown in Figure 5. One end of the popsicle stick should be flush with the bottom of the cork and motor. Do this for both motors.
- Use double-sided foam tape to tape the motors to the battery holder, as shown in Figure 6.
- Cut two pieces of double-sided foam tape and place them on opposite ends of the back side of the battery holder (the side without the power switch).
- Firmly press the motors onto the double-sided tape so the corks are suspended from the sides (both left and right), as shown in Figure 6. The motors should be pointing in the same direction.
- Mount the breadboard on top of the motors, as shown in Figure 7.

- Peel the paper backing off the bottom of the breadboard, exposing the sticky adhesive.
- Firmly press the adhesive part of the breadboard onto the top of the motors.
Connecting the Circuit
Before you connect your circuit, remember to check out the Science Buddies reference How to Use a Breadboard for Electronics and Circuits to learn more about breadboards. To connect the circuit for your robot, follow these steps:
- Connect the battery holder to the breadboard, as shown in Figure 8.
- Orient the robot so the black and silver parts of the motors are pointing to the left, as shown in Figure 9.
- Plug the battery holder's black wire into the upper-right hole of the breadboard (where the first row and the far right column meet).
- Plug the battery holder's red wire into the lower-right hole of the breadboard (where the last row and the far right column meet).
- Connect one motor's wires to the breadboard, as shown in Figure 9.
- Make sure your battery holder's switch is in the OFF position.
- Pick one motor (it does not matter which one).
- Plug the motor's black wire into the first row of the breadboard, next to the battery holder's black wire.
- Plug the motor's red wire into the last row of the breadboard, next to the battery holder's red wire.
- Now it is time to test your first circuit.
- Hold your robot carefully in one hand, so your fingers and arm will be out of the way of the popsicle sticks when they spin.
- Use your other hand to turn the battery holder's switch to ON. Just one of the motors (the one you connected to the breadboard) should start spinning.
- If the motor does not spin, make sure you have the wires firmly pushed into the breadboard, and that they are arranged as shown in Figure 9.
- Remember, you need a complete circuit in order for the motors to work.
 If even one wire is disconnected, the motors will not spin.
 - If you accidentally pushed a wire into the wrong hole, you can just pull it out and re-insert it into a different hole. This is the nice thing about breadboards; they make it very easy to fix mistakes when you are building a circuit.
- Remember, you need a complete circuit in order for the motors to work.
- If the motor still does not spin, open up your battery pack and double-check to make sure the "+" symbols on the batteries line up with the "+" symbols inside the battery pack.
- If the motor still does not spin, try using fresh batteries.
- Once the motor is working, turn the battery holder's switch back to the OFF position.
- Connect the second motor's wires to the breadboard, as shown in Figure 10.
- Note: You will plug this motor's wires in "backwards" (compared to how you plugged in the other motor's wires). This will make the motor spin in the opposite direction of the first one, causing the robot to "dance" instead of just rolling in a straight line.
- Plug the motor's red wire into the first row of the breadboard (next to the black wires from the battery holder and other motor). From left to right, the wires in the top row of the breadboard should now be red, black, black.
- Plug the motor's black wire into the last row of the breadboard (next to the red wires from the battery hold and other motor). From left to right, the wires in the bottom row of the breadboard should now be black, red, red.
- Note: You will plug this motor's wires in "backwards" (compared to how you plugged in the other motor's wires). This will make the motor spin in the opposite direction of the first one, causing the robot to "dance" instead of just rolling in a straight line.
- Now, test your circuit again.
- Carefully hold the robot in one hand and turn the power switch to the ON position.
- The motors should spin in opposite directions. If one motor does not spin at all, or the motors spin in the same direction, double-check that your wiring matches what is shown in Figure 10.
- Congratulations, you just built your first robot! Spend some time admiring your creation, and start thinking about how you might want to decorate it or make it sturdier.
 Move on to the next section when you have some ideas.
Building a Better Robot
Now you are ready to follow the engineering design process to test and redesign your robot.
- First, you might want to spice your robot up by adding some decorations like googly eyes, as shown in Figure 11. How you decorate your robot is entirely up to you. You could add stickers, pipe cleaners, use markers to draw on the robot, or do anything else you want; googly eyes are just one idea to help you get started!
- Next, try to figure out how you can test and redesign your robot. Start by turning your robot on and putting it in the middle of an open space on the floor. Watch as the robot dances and tumbles around. Does the robot's "dancing" seem similar to any real-life style of dancing?
- Note: your robot might work better on carpet than on a slippery surface like tile or wood. Try the robot on different surfaces if possible.
- If you use the robot on a table, be very careful and be ready to catch the robot before it falls off the edge.
- Keep watching until something breaks on the robot (you may want to set an upper time limit on how long you will wait, for example, 10 minutes; you do not want to sit there and watch your robot all day!). Here are some examples of things that could go wrong:
- One of the wires might come loose from the breadboard.
- One of the corks could pop off a motor shaft.
- The double-sided tape holding the motors to the battery pack might peel off.
- Some of your decorations, like the googly eyes in Figure 11, might fall off.
- If something breaks, turn the robot off and investigate what happened.
- Which part(s) broke?
- Why do you think they broke or fell off?
- Write down your findings in your lab notebook. If you have a camera, use it to take pictures of the broken parts of your robot.
- You wouldn't want your robot to literally "break a leg" in the middle of a dance performance.
 What could you do to fix the problem and prevent it from happening again?
 - For example, what construction materials could you use to make the robot stronger?
- What about using more tape or rubber bands to secure parts together?
- What about using a hot glue gun or super glue instead of tape? Caution: Adult supervision is required when using super glue or a hot glue gun!
- What about bundling the wires together or attaching them flat up against the robot's body, so they are not sticking out and easily able to get caught on things?
- Could you build a "case" for the robot's body out of cardboard, that encloses the battery pack, motors, breadboard, and wires; but lets the corks stick out of the sides so they can spin?
- Important: One thing to keep in mind is that eventually, you will need to change your robot's batteries. So, you should be careful not to permanently glue the battery pack shut or design a case that cannot be opened again to access the battery pack.
 Make sure you can still slide the top and bottom halves of the battery pack apart so you can change the batteries.
 - Write down some of your ideas in your lab notebook. If you want, you can also make sketches of your redesigns or changes you want to make.
- If you need to keep a formal design notebook for a science fair project, refer to the Science Buddies resource on Engineering Design Notebooks.
- Now, repair your broken robot using some of the ideas you came up with in step 4. Write down how you repaired the robot in your lab notebook, and remember to take pictures of the repairs if you have a camera.
- Repeat steps 2–6 until your robot no longer breaks after a certain period of time, and until you are satisfied with your robot's performance. This is a very important part of the engineering design process. Engineers very rarely get something right on the first try!
- Remember to document in your lab notebook what breaks and the fixes you make each time.

- If you will be entering your project in a science fair, you can use this information and your pictures as part of your report or display board.
- Remember to document in your lab notebook what breaks and the fixes you make each time.
- When you are finally done, enjoy playing with your dancing robot! Have it put on a dance performance for your family and friends!
Explore More!
Looking for more robot fun? Explore the World of Robotics with This Suite of Projects!
Ask an Expert
Do you have specific questions about your science project? Our team of volunteer scientists can help. Our Experts won't do the work for you, but they will make suggestions, offer guidance, and help you troubleshoot.
Post a Question
Variations
- Investigate how the robot's movement changes if you make different attachments for the "legs." For example, what happens if you glue multiple popsicle sticks together to form a "T" or "X" shape, instead of using a single popsicle stick on each cork?
- Use a stopwatch to time how long it takes for your robot to break for each new test, and make a graph of the data.
 Does the robot last longer with each new redesign? Do you reach a point of diminishing returns, where the time does not increase much, if at all, between tests?
 - Try building a new robot body where the motors are not lined up with each other (for example, mount them at 90 degree angles to each other). Does this change how the robot moves?
- Order another robot kit and try building a new robot with three or even four motors. How does it compare to your original dancing robot?
- Try using different size battery holders (for example, 2xAA or 4xAA instead of 3xAA; but do not use 9 volt (V) batteries with these motors, the voltage will be too high). Do they change the speed of the motors?
- Reverse the connection of one motor's wires to make both motors spin in the same direction. Instead of a dancing robot, make a racing robot. Can you make the robot go faster by altering the popsicle stick attachments? For example, mount the popsicle sticks so they are centered on the cork instead of sticking out, or use two popsicle sticks to make an "X.
 "
" - Add light-emitting diodes (LEDs) to your circuit, so your robot also lights up when it dances. If you have not worked with LEDs in circuits before, check out our Electric Play Dough projects. Note that you will also need to add resistors to this circuit to prevent the LEDs from burning out. The Science Buddies LED Traffic Glove: Build a Safety Device to Direct Traffic and LED Dance Glove: Get the Party Started with Your Own Interactive Light Show projects explain more about LEDs and resistors.
- Are you ready to build a more advanced robot? Check out these Science Buddies robotics projects:
- Build a Speedy Light-Tracking Robot (BlueBot Project #2)
- Build a Zippy Line-following Robot (BlueBot Project #3)
- Build a Motion-Activated Guard Robot (BlueBot Project #1)
- Build an Obstacle-Avoiding Robot (BlueBot Project #4)
Explore More!
Looking for more robot fun? Explore the World of Robotics with This Suite of Projects!
Careers
If you like this project, you might enjoy exploring these related careers:
- Science Fair Project Guide
- Other Ideas Like This
- Robotics Project Ideas
- My Favorites
News Feed on This Topic
, ,
Cite This Page
General citation information is provided here.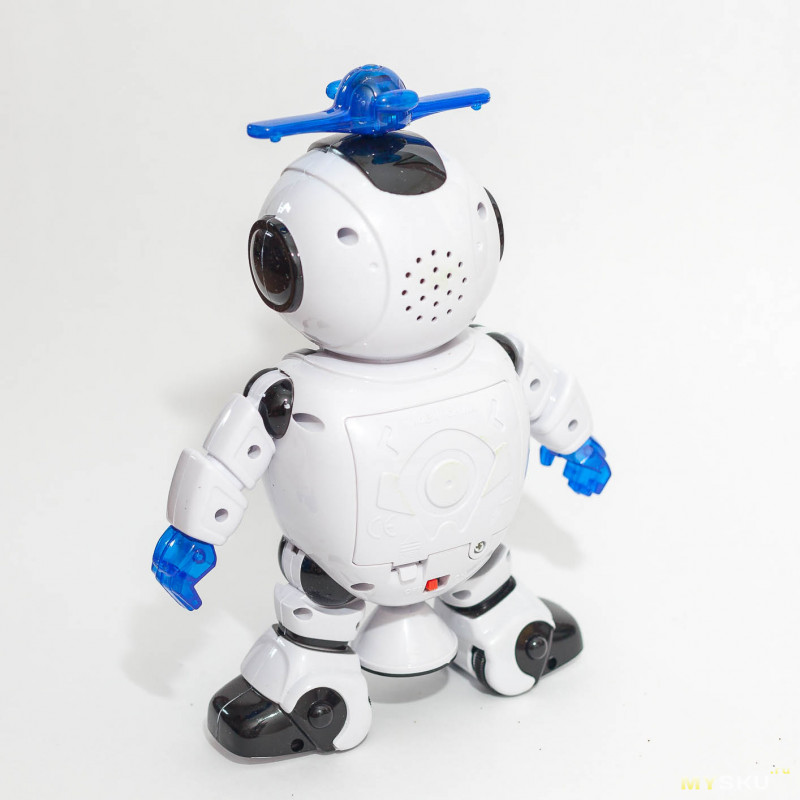 Be sure to check the formatting, including capitalization, for the method you are using and update your citation, as needed.
MLA Style
Finio, Ben. "Flippy, the Dancing Robot." Science Buddies, 23 June 2020, https://www.sciencebuddies.org/science-fair-projects/project-ideas/Robotics_p027/robotics/flippy-the-dancing-robot. Accessed 24 Oct. 2022.
APA Style
Finio, B. (2020, June 23). Flippy, the Dancing Robot. Retrieved from https://www.sciencebuddies.org/science-fair-projects/project-ideas/Robotics_p027/robotics/flippy-the-dancing-robot
Last edit date: 2020-06-23
Explore Our Science Videos
Explore Flipbooks
Paper Chromatography | Fun Experiments and Clear Explanations
Build A Vortex Cannon!
90,000 project for robotics "Dancing robot"Head:
Stepanenko Olga Vladimirovna, meachi Svetlana Aleksandrovna
Institution:
MBOU BGO "Borisoglebskaya gymnasium No. 1" Borisoglebsk
in this creative project for robotics on the topic "on the topic" Dancing robot" a 4th grade student presents a model of a robot dancing a Russian folk dance to the stylized music "Kalinka-Malinka".
The robotics project "Dancing Robot" created by the student is aimed at realizing the set goal - developing a model of a dancing robot capable of dancing Russian folk dance " Kalinka »
The LEGO Mindstorms robotics kit was used to build the dancing robot. The dancing robot models the traditional Russian folk dance techniques - round dance: movements in a circle, forward, backward, with a spread of arms in different directions and waving handkerchiefs.
The research work on robotics proposed by the author on the topic "Dancing Robot" will be of interest to students of grades 3, 4 and 5 of the school who are fond of robotics and lego design, will help to identify their interest in robotics, programming and design.
Table of contents
Introduction
Conclusion
References and Internet sources.
Introduction
There are many dances in the world. All of them are different, they all have specific features: they differ in style, dramatic content, musical content, etc. They are all beautiful and different.
Russian folk dance - Russian folk dance art, presented in the form of folk amateur or staged stage dance. The male dance is characterized by boldness, breadth of soul, humor; female dance is distinguished by smoothness, majesty, light coquetry.
Russian dances are an integral part of the Russian national culture. It is known that " Kalinka " (from the name of the plant viburnum ; also known as Kalinka-Malinka) is a Russian song written by Ivan Petrovich Larionov in a folk style. Sometimes erroneously regarded as a folk song. See also " Kalinka " is a folk dance performed to the melody of this song.
There is a ballroom dance " Kalinka " based on folk movements. Sometimes " Kalinka " becomes synonymous with improvised Russian dance in general. The musical size is 2/4, the tempo is variable, where traditional techniques of squat dance, round dance and other elements are used. The movements consist of stately movements in a circle with a spread of arms in different directions.
Can I make a dancing robot with Lego Mindstorms?
The above confirms the relevance of the chosen theme of the creative project: " Dancing Robot ".
Purpose of work: development of a model of a dancing robot capable of dancing the Russian folk dance " Kalinka ".
In accordance with the goal, the following tasks were formulated :
- explore Lego Mindstorms to create a dancing robot;
- learn how to use NXT 2.
 0 Motion Blocks;
 - build a dancing robot model from Lego Mindstorms;
- design and sew a Russian folk costume for a dancing robot;
- conduct experiments and refine the model in accordance with the identified design problems;
- to process the results of the study, draw conclusions and prepare presentation material.
To solve the tasks set, a set of methods was used : study and analysis of literature on the research problem, including from the Internet, collection of information material, its analysis; designing a model of a dancing robot; generalization, comparison, experiment; formulation of conclusions based on the results of the study.
History of Russian folk dance "Kalinka"
0011 Kalinka ", which has long been considered a Russian folk song. In fact, the text of the song and the music were written in 1860 by the composer, writer and folklorist Ivan Petrovich Larionov, and the song was first performed on the amateur stage in Saratov in a play, the music for which he wrote.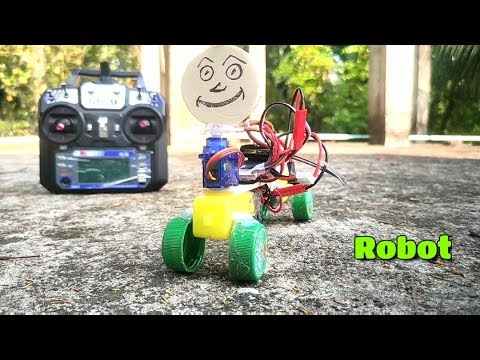
And soon Larionov, at the request of the then-famous singer and creator of the Agrenev-Slavyansky folk song choir, with whom he was on friendly terms, gave this song to his repertoire. Popularity began with the Slavic Choir " Kalinki ".
The work gained worldwide fame in the arrangement of the composer and conductor, People's Artist of the USSR Professor Alexander Vasilyevich Alexandrov (1883-1946) due to the repeated brilliant performance of the song abroad by the Alexander Red Banner Song and Dance Ensemble.
There is a ballroom dance " Kalinka " based on folk movements. Sometimes " Kalinka " becomes synonymous with improvised Russian dance in general. The musical size is 2/4, the tempo is variable, where traditional techniques of squat dance, round dance and other elements are used.
The movements consist of stately movements in a circle with the spread of the arms in different directions. A lot of time has passed, but today the song is so popular that many, without a doubt, consider it folk.
Dance " Kalinka " belongs to the ballroom dances and is based on the most popular dance movements of the Russian school of folk dance. A feature of the Russian dance " Kalinka " is that it is performed simultaneously at a slow and fast pace in pairs. As in any Russian dance, improvisation is widely used in it.
The main movements used by choreographers when staging are:
- Smooth passages in a circle, reminiscent of a round dance;
- Emphasizing the breadth of movements with arm spans;
- Squats of various kinds;
- Stomping feet and clapping hands to the beat of the music.
The fervent Russian dance " Kalinka " is included in the repertoire of almost all dance groups. It looks especially attractive in the performance of children. A mischievous and cheerful song, framed in beautiful energetic and at the same time graceful dance movements, always cheers up and charges with positive. With the help of a dance set to the song of the same name, one can easily demonstrate prowess and cheerfulness.
Russian folk dances today are of interest in many countries of the world. An attractive feature of them is the reflection of the reality and character of the people with the help of dance movements. In Russian folk dances, all movements are distinguished by a special clarity of performance. They always play a huge number of different figures, smoothly flowing into each other. Thanks to this, Russian folk dances always look like a single whole.
It is safe to say that the Russian folk dance " Kalinka "is known all over the world. It has long been a hallmark of Russia. Each movement in it is thought out by choreographers and reflects the perky character of a Russian person. According to its genre, it can be attributed to Russian dances. And they, as you know, with all their cheerfulness, are always filled with deep meaning.
Creation of a dancing robot
I really like the Russian folk dance " Kalinka ", I love to design and I wanted to create a robot dancing this dance.
Thus, in the process of long-term experimentation, the model of the dancing robot was designed by me completely independently, i.e. I didn't use ready-made instructions. I also tried to make the robot look like a girl in a Russian folk costume.
Dancing robot model
Robot structure
Chassis.
The robot's undercarriage consists of two servo motors connected to ports B and C. For greater stability, the robot is equipped with gears in front and behind:
Chassis of the dancing robot
The frame is a rectangle with a microcomputer center, on the side of which there is a third servo connected to port A. On the left side there is another servo, which is synchronized with the servo connected to port A. A. Both servo motors are connected to a worm gear mechanism with a knob/cross gear to rotate two arms. The touch sensor is located on the right hand. An ultrasound transducer is used as the head.
Dancing robot costume
For the robot, I sewed a Russian folk costume: a yellow sundress, a red apron, two red scarves, a red kokoshnik, which I embroidered with sequins.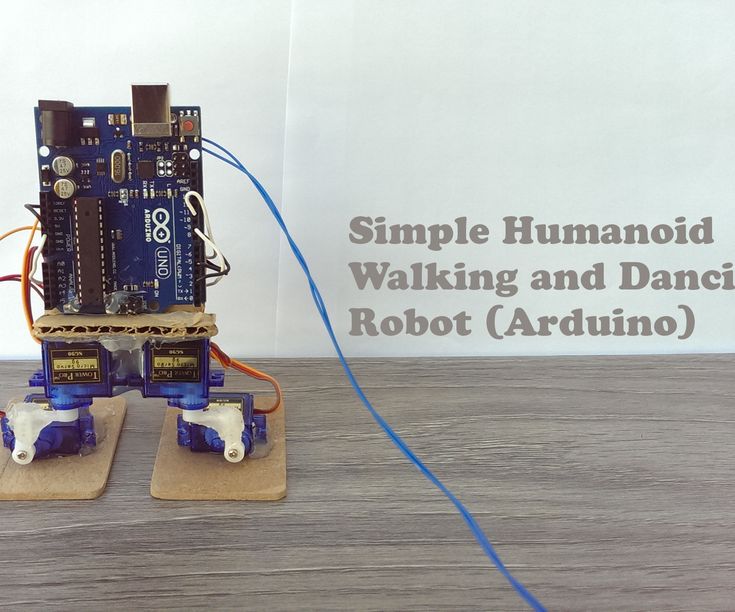 Hair was made from brown thread.
Final version of the dancing robot
Program of the dancing robot
0012 The robot is waiting for the touch sensor to be pressed. After the sensor is pressed, the robot moves forward, turns left, waves handkerchiefs, moves backwards, turns right, waves handkerchiefs, moves forward, turns around, waves handkerchiefs, and so on for 160 seconds.
Robot dance programming
Conducting experiments
Conclusion
During the experiments, I was able to create a model of a dancing robot capable0011 Kalinka ".
I am sure that my ideas will be used in the process of developing models of dancing robots.
References and Internet sources
- Russian folk dance " Kalinka "
- Filippov S.A. Robotics for children and parents.
 - St. Petersburg: Nauka, 2013. - 319 p.
If you liked the page, share it on social networks:
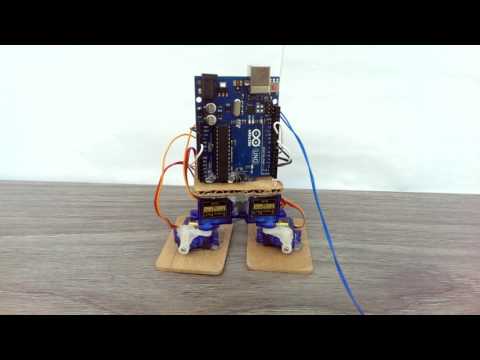
Assembly and programming of the robot from the age of 7. Lesson notes
Many children dream of building a real humanoid robot that could walk, talk and smile. However, often in robotics circles they deal only with robots on wheels.
The Dancing Robot Otto project will help children fulfill their dream!
The project consists of 8 one and a half hour lessons and one master class. This course can be conducted in the format of a vacation intensive or included in the plan of the annual program as a separate educational module.
Otto can be programmed by children from 7 years of age
Otto is programmed using the Scratch block programming language. The whole program is made up of building blocks, as from the details of a constructor.
Programming the robot, children will learn linear algorithms, loops and branches. "Teach" Otto to walk, turn, bend over, make sounds, smile and, of course, dance!
Children are interested in building a real robot, not a model from the constructor
During the assembly process, project participants will get acquainted with many electronic components: the Arduino Nano microcontroller, servo motors, ultrasonic distance sensor, LED matrix and speaker.
Students will connect all of the robot's electronics by themselves using wires and connectors.
Thanks to this, the project has a great educational value and at the same time is very attractive for children.
Equipment and accessories list
- Computers by number of students
- Accessories for each robot: Arduino Nano microcontroller, Nano Shield, 4 servos, distance sensor, LED matrix, piezo speaker, wires (we will provide a complete list with part numbers for ordering)
- Tool for each student: Phillips screwdriver.
It is desirable to have a 3D printer so that you can print the plastic parts of the robot yourself.
If you do not have a 3D printer , you can purchase a set of prefabricated plastic parts (they are not included in the price indicated below on this page).
A detailed specification of all required accessories is included in the package we provide.
What else needs to be prepared in advance
- 3D print all parts for robots (or buy the required number of ready-made kits)
- Buy all components according to the list, check their serviceability
- Install software on all computers mug
- Download firmware to all microcontrollers
- Build a test instance of the robot and test it in action
- Prepare for the program by reviewing the detailed course notes.
The entire preparation may take one to two weeks.
Required teacher qualification level
- Strong knowledge of the Arduino microcontroller: the ability to properly connect electronic components to the microcontroller board, upload firmware to the microcontroller.

- Good knowledge of the Scratch programming language.
- The ability to quickly find possible malfunctions or errors in connecting components.
You can purchase a package to launch the Otto Dancing Robot project
It includes:
- Detailed notes 8 lessons and one master class. The duration of each lesson is 1.5 hours
- Illustrative material for teaching lessons: pictures of components, connection and assembly diagrams
- Ready-made programs in the Scratch programming language to illustrate learning tasks for programming the Otto robot.
In addition, you will receive everything you need for directly programming the robot as part of the objectives of this course. Namely:
- Firmware for the Arduino microcontroller required to connect the robot to the mBlock program.
- mBlock 9 extension module0026 , which adds Otto robot control blocks to it
- A suitable version of the mBlock program with high-quality Russification.