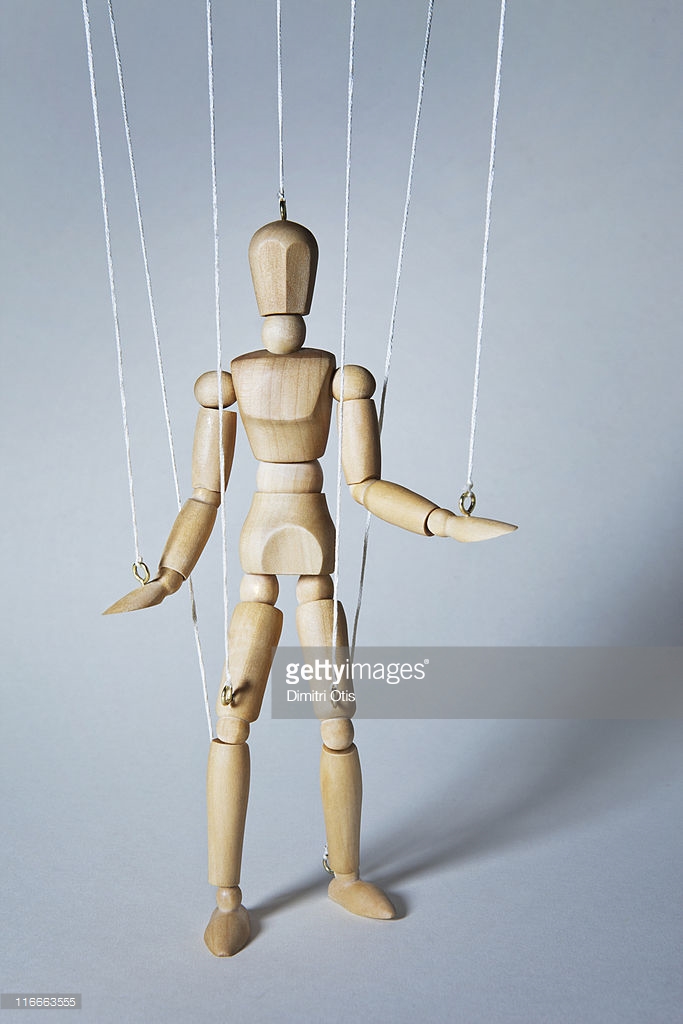
How to make dancing puppet
How To Make A Dancing Napkin Puppet
- Home
- Kids
Buy Now
I was cleaning out our crafting drawers lately and came cross some brightly coloured napkins I’d forgotten about and an old package of pipe cleaners, and I was struck with a simple idea for making easy but super cute and posable dancing napkin puppets!
Check out these step by step instructions complete with photos! If you’d rather follow along with a video tutorial instead of written words, scroll to the bottom of this post to find just what you’re looking for.
For this project, you’ll need:
- Yellow napkins
- Light brown pipe cleaner
- A crafting pom pom
- Scissors
- A glue stick
- Light pink ribbon
Step 1: make a bow
Use your pink ribbon to make a bow! Curl one end inwards to make a small loop until it crosses back over itself with a little bit of excess like a ribbon’s end. Apply glue where the end of the ribbon crosses over the rest of itself and stick it into place. Loop the other side inwards too to make a second loop and cross the ribbon over in the same spot as the first end, sticking it down in the middle as well. Trim the ends to the same length; I cut mine on an angle so the ribbon wouldn’t fray. You now have a bow! Set it aside for the moment.
Step 2: head and body
Use your pipe cleaners and crafting pom pom to make your puppet’s head and body! Take your first piece and fold it in half so the ends are even with each other and at the bottom and the halfway point makes a curve at the top. Pinch the curve closer together and slide your crafting pom pom (I used a white one but you can use whatever colour you like) into the arc shape there. Pinch the pipe cleaner right under the pom pom together so the pom pom is wrapped in the fuzzy wire and twist the two long ends around each other several times underneath the soft sphere to hold it in place.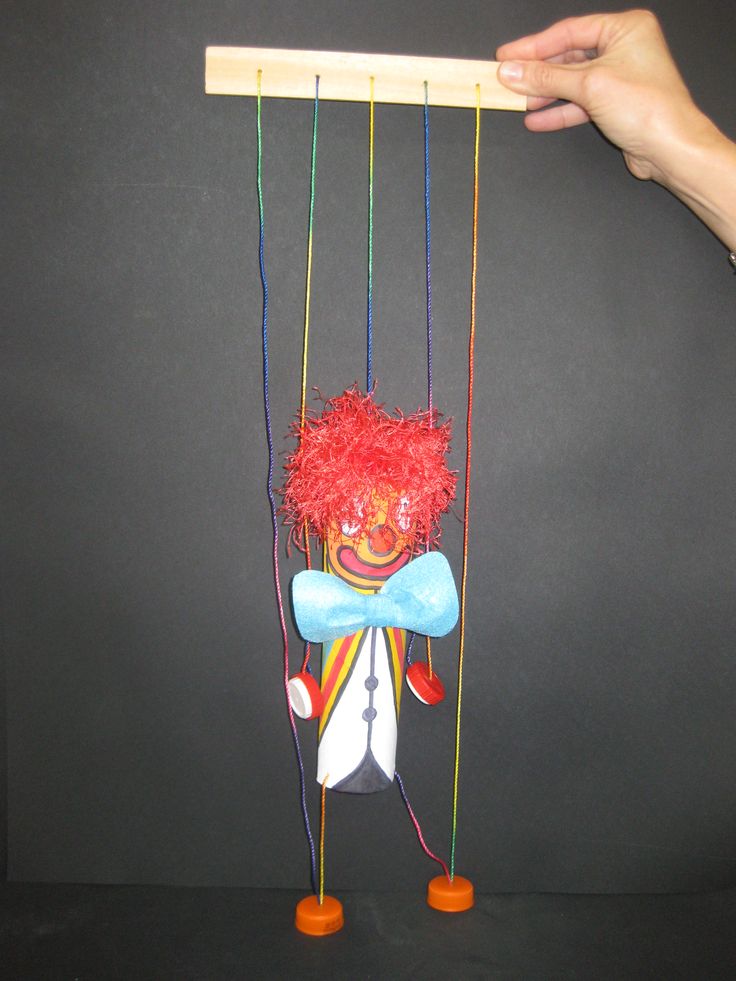 Your puppet not has a head and a body! Straighten out the ends so they point downwards again, giving your puppet a torso and legs. Take your second pipe cleaner and place the base of the pom pom head where you just twisted the first pipe cleaner right at the second one’s halfway point in the middle so the two are perpendicular. Bring the ends forward and twist them around the first pipe cleaner to attach the two and make the puppet’s arms!
Step 3: make the dress
If your napkin isn’t already square shaped like mine, cut one end of your rectangle off until you do have a square. Then turn the napkin so you have a diamond shape rather than a square, with points at the top, bottom, and each side rather than corners. Place your scissors at the bottom point and cut in a gently rounded arching shape from that spot all the way up to the top point, in a sort of soft semi-circle. You’ll still have one point on the left side.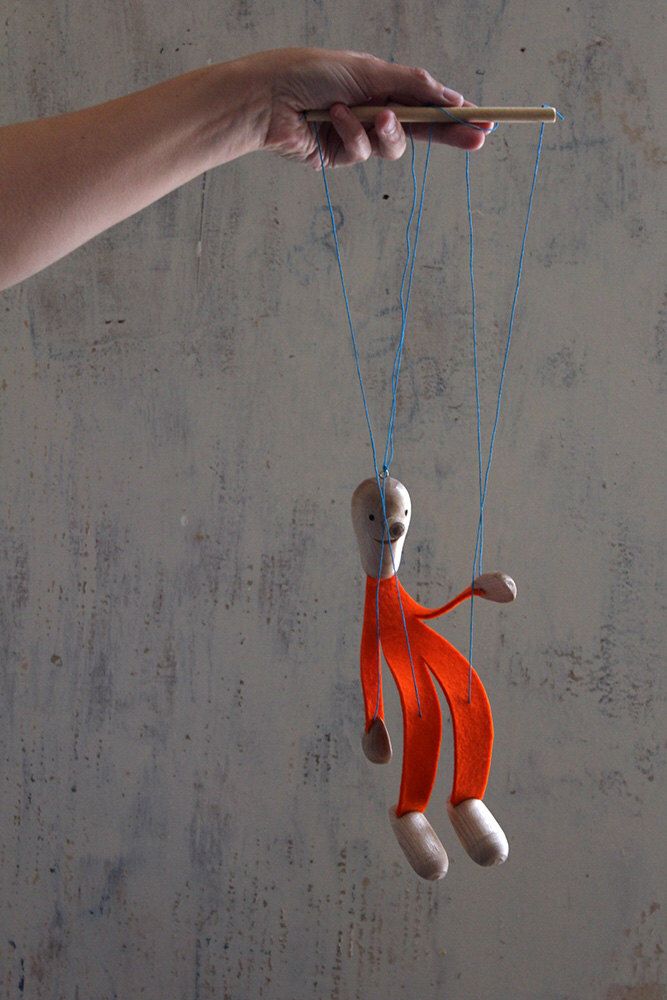 Now open the napkin out and see how the rounded cut becomes an actual semi-circle and the pointed bit you held onto before becomes a straight edge. In the centre of this straight edge, cut a very small semi-circular hole, only about half an inch wide. On either side of that, a few centimetres away from the ends of the hole you just cut, make one small, straight cut downwards on each side. You’ve just made your puppet’s dress, complete with a neck hole and sleeves.
Step 4: dress your doll
Now open your napkin up completely, finding the bottom of all the layers in what you’ll see becomes a circle. From the underside, put the ends of your puppet’s two pipe cleaner arms up through the very small slits you cut on either side of the hole in the centre. As you push them through, the pom pom head will fit right through the hole between them. Your puppet is now wearing a napkin dress
Step 5: finishing touches
Cinch your paper napkin dress in at the puppet’s waist, below the arms, gathering it together so the skirt can flare out below.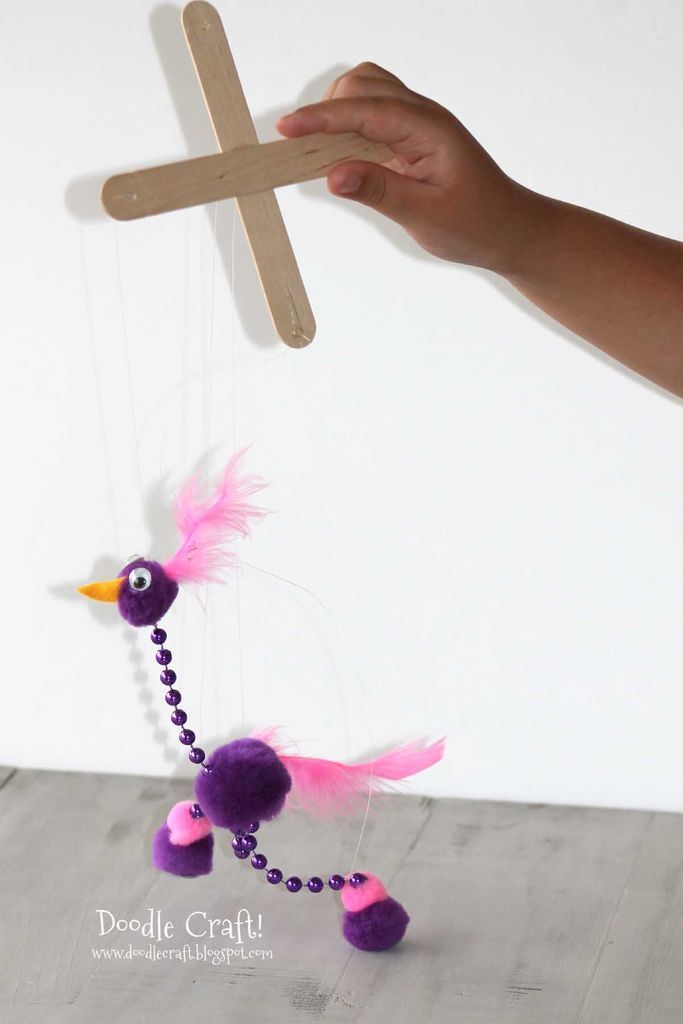 Take another piece of ribbon (I cut a piece of about two inches) and tie it around the cinched section like a sash, keeping the “fabric” gathered in place. I tied mine in a double knot to keep it from untying. Next, apply glue to the back of the little bow you made earlier and stick it down over where you tied your sash. You can choose to have your bow and ties at the front of the dress or the back; I chose the front! Finally, position your puppet’s pipe cleaner arms to look like she’s dancing.
Your puppet is all ready to be posed and played with! Of course, you can use whatever colours you like in any of these supplies. You could even add yarn hair if you have some scrap yarn lying around! Just in case you’d like to try this project out for yourself, here’s a fantastic tutorial video to help you!
Dancing Skeleton Puppet Craft - Halloween DIY
Back to Activities Hub
We love getting spooky at toucanBox and have a fangtastically fun and easy Dancing Skeleton Puppet craft for you to make at home! It’s super simple to make, lots of fun to play with and makes a great party decoration too.
50% Off Your First Box! Craft ideas newsletter
Let’s Make the Dancing Skeleton Puppet
You Will Need
- Template print out
- 4 x Split pins
- String
- Hole punch
- Scissors
Download Skeleton Template
What To Do:
1 Print out template and cut out the skeleton pieces.
2 Use a hole punch or push a pencil through the holes on the skeleton template.
3 Place the skeleton template face down. Lift the body piece and slot 4 split pins through the holes of the body facing upwards.
4 Thread some string (approximately 10cm long) through one of the arm holes and tie a knot to secure it. Once you have tied the knot flatten the split pin to make it secure.
5 Thread through the other arm and tie a knot. Again flatten the split pin and make sure the string is taut. Trim off any excess string.
6 Repeat the process on the legs.
Tip: Try and make sure the knot is positioned above the hole - this will make your skeleton dance better.
7 Attach a piece of string approximately 40cm long to the arms and legs, tying a knot in the middle of both pieces of string as shown.
8 Attach a piece of string through the hole above the head and hang your skeleton. Pull the bottom string to make it dance.
Download Skeleton Template
JOKE OF THE DAY
Q: Why didn’t the skeleton dance at the Halloween party? A: He had no body to dance with!
Need some more Halloween inspirations?
We have many more exciting activities for younger and older children. Why not try our Halloween Masks activity and combine it with an exciting Halloween Treasure Hunt inside your home? Your kids surely deserve a healthy snack afterwards. Luckily with our Boonana Pops we have exactly the right snack for your exhausted kids.
HAVE FUN AND SHARE YOUR CREATIONS WITH US
We’d love to see your creations, so why not share them on Facebook, Instagram or Twitter with #toucanBox. Our favourite snaps could feature in the next issue of toucanBox Magazine!
Not tried toucanBox yet?
Want craft projects, with all the materials you'll need, delivered straight to your door? Sign up today and save 50% on your first box!
Not ready to commit? Subscribe to our fun-filled weekly newsletter, jam packed with craft ideas, recipes, fun activities and more!
50% Off Your First Box! Craft ideas newsletter
Back to Activities Hub
Share with Friends
More Activities
All the materials you need to Explore, laugh, create and play.
toucanBox is a subscription service delivering fun filled activity boxes to your door.
Find out more
Doll haircut. Dancing grass doll
07/08/2019
Haircut doll is a popular doll among the Slavs. Children especially like it, as a properly made haircut can dance. Such toys are made from natural materials: from grass, hay or straw with the interweaving of fragrant healing herbs - thanks to which playing with them turns into a healing action - into aromatherapy.
The main feature of this doll is that its bottom is not braided, but on the contrary, it unwinds so that it looks like a straw skirt. And this skirt is cut evenly so that the doll can stand on any horizontal surface. That's why people call her a haircut.
To make the Shearer dance, they put her on a plank, wooden table, stool or other surface and knock next to her with fists or palms. From vibration, the doll literally starts dancing, spinning and spinning, which gives extraordinary pleasure to children, especially the smallest ones. And if such a doll is not one, but their whole company, then such a dance turns into a whole performance, where the dolls become in pairs, spin in round dances. So a simple and unpretentious toy gives a truly joyful feeling and has a beneficial effect on the players: both children and adults.
These dolls have a long history.
When you used to have to take your children to work in the fields, you had to keep them busy. Then they collected everything that was at hand, and most often it was grass or straw, and in a couple of minutes they twisted a doll out of this, which they gave to the children.
Those dolls that were made at home were created without haste, used more materials, and they were much more elegant than their field sisters. Such haircuts were dressed in bright skirts with aprons, scarves with warriors, they were decorated with braid, beads, embroidery and other decorative elements. If you try, then on the basis of a haircut you can create a real work of art - an author's doll.
As items of Russian antiquity, shear dolls are even presented in the Russian Museum in St. Petersburg and the State Toy Museum in Sergiev Posad near Moscow.
How to make a shearing doll
Making such a toy is easy, but the process and the result are a lot of fun.
- Making a doll is the development of motor skills and logical thinking.
- This is the inhalation of phytoncides from fresh herbs, admiring the greenery.
- This is the ability to interact in a team, work together, help each other.
- This is the formation of ecological consciousness: children learn to understand the importance of caring for the planet's resources, learn to enjoy the simple and see the beauty in the natural. People spend a lot of resources, literally depleting the planet, and we can make a toy from natural resources with our own hands, which will please us and, returning back to nature, will not harm it.
- A toy made by hand is warmer and closer to the heart.
- And also knowing how to make all sorts of items such as these dolls, we can live calmly and confidently, because we know that we can do everything that we need, we will be able to do it ourselves. We will be able to survive in any difficult conditions, and we will help others.

Whatever the haircut doll is - the most ordinary one made of grass or an elegant souvenir with a whole wardrobe, the process of its creation is the same in all cases.
To make a shearing doll, dry straw, dry grass or fresh grass, as well as bast, thin twigs of grass, shrubs and trees are suitable. Some craftswomen recommend steaming the straw in hot water, or at least holding it a little over hot steam so that it does not break when it needs to be bent almost in half.
As for grass, only certain grass is suitable for products. It is long and thin, grows around trees in small bushes and looks like a lawn. The structure of the plant is very beautiful, it is easy to work with, and in addition, such a product is stored for a long time.
So, a bunch of grass, straw or other suitable material is taken, cut evenly around the edges, and folded in half. In the upper part, at the level of the neck, the bundle is tied with a red thread or ribbon to make a kind of roundness that will represent the head.
Next, you need to make hands for the doll. The arms are made from a new bundle of straw that can be twisted or simply tied at the ends with strings. The resulting hands are inserted into the body of the doll, below the red thread (neck), after which the main bundle is tied up again below the hands - at the waist.
You can also make miniature braids out of straw, which you then need to attach to your head. After that, you need to trim the bottom of the doll so that it is a kind of straw skirt.
You can choose healing herbs for weaving into a doll, depending on what kind of healing effect you want to achieve, here or here.
A sundress can be specially sewn for a shearer from different fabrics with embroidery and braid. Do not forget about the hands, armlets are made for them or a shirt is cut out. Bast or straw are perfectly combined with natural fabrics and in this case you get an original, interesting doll. Sometimes they even make a papier-mâché head and draw a face. But this is already in the order of creative search, each master determines for himself the limits of permissible liberties.
The shearing doll is ready.
Grass dolls from time immemorial were amulets and protectors against diseases for children. In our time, many folk recipes and secret actions for making such dolls have been forgotten. However, nothing disappears into nowhere, just as nothing is taken from nowhere. And forgotten recipes come from the past and new ones come into the light.
So while the herbs are fragrant and juicy, collect them and create charms for yourself and your loved ones. Prepare medical supplies for the winter.
© Methodological Center "Tree of the Family"
Other articles on the topic "Sanity"
If you want to always learn about new publications on our site, then subscribe.
Ceremonial doll "Shear" | GBU "Tatkultresurstsentr"
Ancient customs of making ritual animals and dolls from straw have come into our lives. They have become a theme for the work of many contemporary masters and artists.
A hand-made folk doll is part of the folk tradition. Making it, the child learns the history of his people. A doll is not born by itself, it is created by a person, and the most inspired doll creators are children.
To make this doll, you will need straw, compressed by hand - then it will be even and long. The straw must be dried and tied into a sheaf. Before work, to make the straw softer and more elastic, it can be soaked in hot water (a little salt can be added to the water). Some craftswomen recommend steaming the straw in hot water, or at least hold it a little over hot steam. Then it will not break when it needs to be bent almost in half. A haircut can also be made from other materials: from bast, twigs or long even rods, and even from some herbs (herbs of the cereal family are suitable, for example, bluegrass, timothy). Sometimes fragrant and healing herbs are woven into such dolls so that, in addition to the game moment, the haircuts have healing properties. Today it is called aromatherapy. It is also customary to dress dolls in special sarafans, miniature scarves, and skirts.
The main feature of this doll is that its bottom is not braided, but, on the contrary, is unraveled so that it looks like a straw skirt. The bottom is cut evenly so that the doll can stand on any horizontal surface.
1. Take a large bunch of grass or hay and fold it in half. This will be the body of the doll.
2. In place of the proposed neck, we tie it with a thread or ribbon to get a kind of roundness that will represent the head.
3. Prepare hands - another bunch of grass or hay, half as long as the previous one.
4. Bandage it at the ends, forming palms.
5. We put the hands in the body and tie them below the red thread (neck), after which the main bundle of straw is tied again below the hands - at the waist.
Also, miniature braids can be made from straw, which will then need to be attached to the head.
6. After that, you need to trim the bottom of the doll so that it looks like a kind of straw skirt. It is worth noting that it was precisely because the bottom of such dancing dolls was not tied up, but cut in the form of a straw skirt, that they were called haircuts.
7. The base of the doll is ready. In order for the doll to look like a person, now you can dress it up - put on a skirt and an apron, tie a ribbon on a braid, put on a necklace, sew a sundress, a shirt, weave a beautiful belt, etc.
8. Let's dress the doll in a sundress with an apron. To do this, we cross two narrow strips of fabric on the chest and back of the doll.
9. Put a narrow piece of fabric on top of a square one, fold it in half and put a ribbon in the middle. Got a skirt with an apron.
To make the Shearer dance, they put her on a plank, wooden table, stool or other surface and knock next to her with fists or palms.