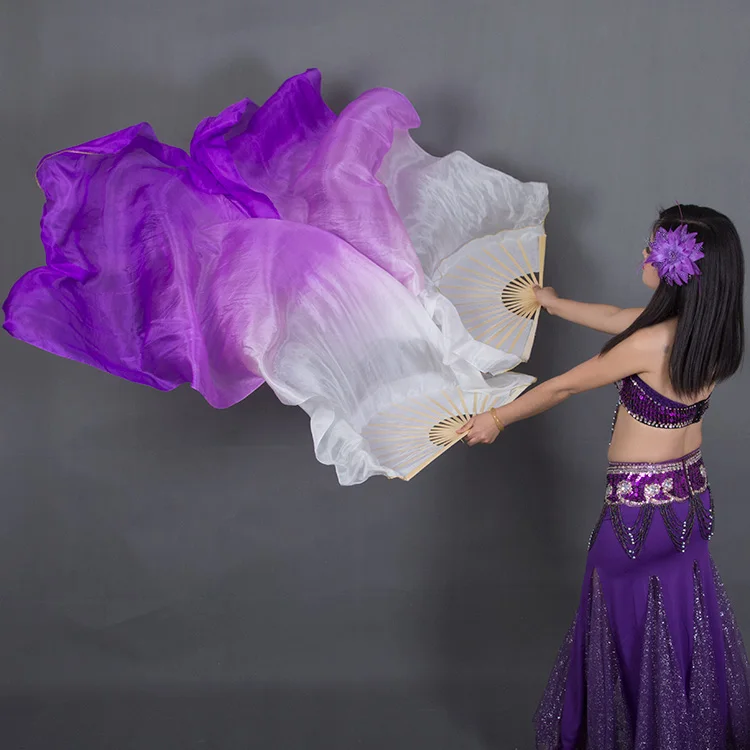
How to make chinese fan for dance
Chinese Fan — History, Tradition, and Culture
Chinese Fans, throughout history, have served as ritual wares, practical devices, carriers of traditional arts and literature, and representatives of one's aesthetic taste and social status.
Silk Fan with Carved Ebony Handle of the Qing Dynasty (1636 — 1912) — Palace Museum (Photo by Dongmaiying)
Origin, Classification, and Symbolization of Chinese Fans
The origin of fans in China has been believed something ancient people use to wave to create a current of air, such as broad leaves and birds' feathers, to stay cool in hot weather.
Besides this basic function, however, there are some other main utilizations throughout history, which made fans valuable art pieces and eminent crafts.
Silk Fan with Carved Lacquer Handle of the Qing Dynasty (1636 — 1912) — Palace Museum
Wuming Shan or Zhang Shan — The Most Ancient Ritual Fan
Wuming Shan or Zhang Shan is a long handle, door-shaped fan for ceremonial uses, believed invented by King Shun (about 2294 BC — 2184 BC).
Wuming means enlightened, open-minded, and bright in all five directions, east, west, north, south, and the middle.
The shape of the Wuming Shan changed to some extent over history, however, its ritual uses as the symbol of imperial power, and authority remained, until the fall of the last feudal Qing Dynasty (1636 — 1912).
Ritual Fans or Wuming Shan in Court Painting "Bunian Tu" about Emperor Taizong of Tang Receiving the Tibetan (Tu Bo) Envoy, by Yan Liben (601 — 673) — Palace Museum
Tuan Shan or Gong Shan — Moon-Shaped Fan with Artistic Values
Tuan Shan or Gong Shan is a round moon-shaped fan, which was originally used to shelter nobles from sun, wind, and sand, usually held by servants.
Centuries later, the fan became smaller, and could be held and designed by nobles themselves, as artistic decorations.
Usually, Calligraphy, Painting, and auspicious Patterns are the main artistic decorations for fans.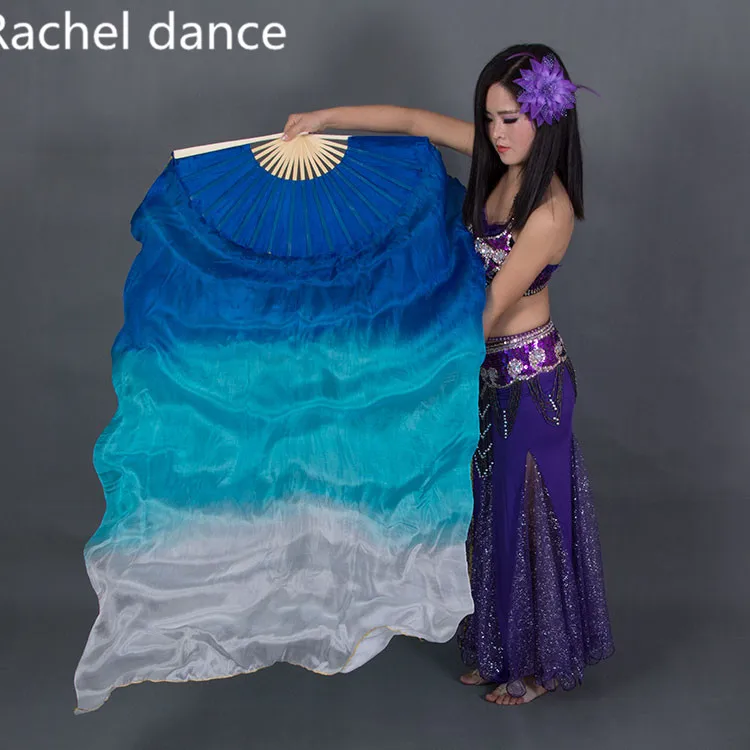
Moon Shaped Bamboo Fan of the Qing Dynasty (1636 — 1912) Inlayed with Carved Agarwood and Silver Threads — Palace Museum (Photo by Dongmaiying)
Another important use of both Wuming Shan and Tuan Shan is to hide one's face behind.
Some sovereigns didn't want to reveal their faces to the public, such as Emperor Wang Mang (45 BC — 23 AD), who would command the servants to hold long-handle fans as screens.
Other men, to show respect, and avoid impolite or unnecessary eye contact, also would use their fans to shield them in certain situations.
Women in history mostly would use fans to hide their faces when they feel shy or unwilling to see certain people.
Different Moon-Shaped Fans or Tuan Shan in Painting "Huishan Shinv Tu" by Zhou Fang of the Tang Dynasty (618 — 907), On Hands of Imperial Court Lady and Her Servant — Palace Museum
Wedding Fan or Bridal Fan — Ceremony of Que Shan
In a Traditional Chinese Wedding, the bride would hold a fan, usually moon-shaped Tuan Shan, in front of her face, to hide her shyness, stay mysterious, and exorcise evil spirits.
When the new couple completed all other wedding ceremonies, after the groom impressed the bride, such as writing a good poem, the bride would remove her wedding fan and face the groom.
This is the Rite of Que Shan, an important ceremony of a traditional Chinese wedding.
Wedding Fan or Bridal Fan in Chinese TV Series "The Story of Minglan"
Folding Fans or Zhe Shan — Aesthetic Arts Folded on Hands
Folding Fans or Zhe Shan originated relatively late, during the Han (202 BC — 220 AD) to Tang (618 — 907) dynasties, or were introduced from Japan.
Until Ming Dynasty (1368 — 1644), Folding Fans were popularized rapidly.
Scholars wrote Calligraphy and draw Paintings on each side of exquisite folding fans, which became one of the most important accessories that could represent one's social status, aesthetic taste, and literary attainment.
Folding Paper Fans of the Qing Dynasty, Painting by Dong Bangda (1696-1769), Calligraphy by Qianlong Emperor (1711 - 1799) — Palace Museum
Materials for Making Chinese Fans
Feather, silk, paper, bamboo, wood, rattan, bulrush, straw, and bone are all common materials to make fans throughout history.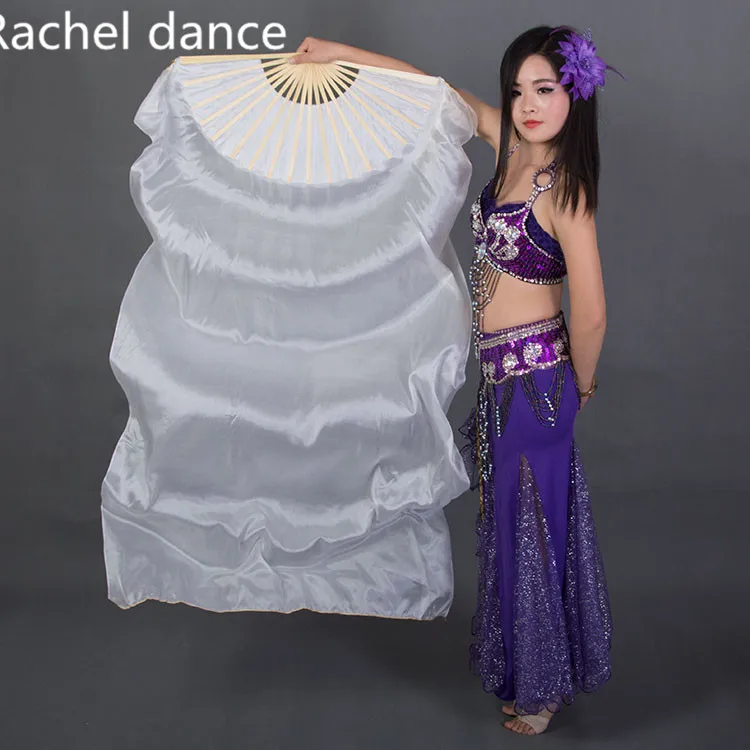
Feather Fan of the Qing Dynasty (1636 — 1912) — Palace Museum
Luxurious materials like gold, glaze, jade, mica, and ivory, also have been used to make or decorate fans, mostly by nobles and wealthy people.
Besides, exquisite fan bags, fan pendants, and fan boxes are beautiful art pieces as well.
Folding Fans and Fan Boxes of the Qing Dynasty, Painted with Views of Mountain Resort Chengde and Calligraphy by Li Zongwan (1705 - 1759) — Palace Museum
Design, Drawing, and other Cultural Content of Chinese Fans
Including painting, calligraphy, and embroidery on fans, some motifs have been quite popular throughout history.
Chinese Characters with Cultural Meanings
Calligraphy, the supreme art form to write Chinese Characters, is one of the most popular fan decorations among scholars, in history and today.
This is also considered the best representative of one's temperate, social status, literary attainment, and ambition.
Characters, phrases, poems, articles, and artistic seal stamps, are all common content to write on fans.
Click to Read Chinese Characters, Phrases, and Poems For:
-
Love
-
Family
-
Friendship
-
Strength and Power
-
Peace
-
Beauty
-
Hope, Dream, and Ambition
-
Happiness, Luck, and Blessing
-
Life, Longevity, and Health
Chinese Fan Drawing — Landscape, Bird, Flower, and Figure Paintings
In Traditional Chinese Paintings, landscape, bird and flower, and figure are the three main genres.
Hence, these are also the most popular motifs of fan drawings and embroideries.
Auspicious Picture and Patterns on Ebony Handle Kesi Silk Fan of the Qing Dynasty (1636 — 1912) — Palace Museum
You Might Also Like:
Chinese Art — Aesthetic, Characteristic, and Form
Color Symbolism in Chinese Culture
Chinese Patterns — Ultimate Introduction to Origin, History, Meaning, and Culture
Chinese Silk — Traditions, Utilizations, Fabrics, Embroideries, Products, and Art
Chinese Paper and Art — Paper Cutting, Oil Paper Umbrella, and Kite
Chinese Calligraphy — Scripts, Aesthetics, and Appreciation of the Supreme Art
Chinese Paintings — Tradition, Aesthetics, Poetic Beauty, and Artistic Conception
Chinese Poetry — Eternal Resonance in Poems To Chant and Appreciate
Chinese Lanterns — History, Utilization, Tradition, Culture, and Artifact
Chinese Porcelain and Pottery — Art of Earth and Fire
Chinese Architecture — Tradition, Characteristics, and Style
Chinese Palaces — Architecture and Art of Imperial Feats
Chinese Gardens — Aesthetics, Philosophy, and Architecture in Nature
Chinese Furniture — Oriental Artwork with Aesthetic and Practical Values
Chinese Music — History, Classifications, Artists, Eminent Songs, and Fun Facts
Traditional Muscial Instrument
Chinese Dance — Ancient Art Form Across Time and Space
Shadow Puppetry and Puppet Show — Magnificent World of Art of Fingertips
Traditional Handicrafts in Chinese Art
Chinese Jade — Origin, History, Meaning, Culture, and Utilization
Chinese Costume and the Strict Hierarchy in the History
Chinese Zodiac Signs — A Comprehensive Introduction
Chinese Astrology — Three Enclosures, Four Symbols, Twenty-eight Lunar Mansions
Valuable Pieces of Jewelry and Their Historical, Cultural Meanings
Beautiful, Exquisite Traditional Chinese Hair Ornaments
Delicate Pendant Accessories in the History of China
Traditional Love Token — Representative of Romance and Affection
Chinese Novels — Timeline, List, and Brief Introduction
Wuxia and Jianghu — Fairy Tale of the Adult World
Xianxia and Chinese Web Novels
How to Make a Chinese Paper Fan
Chinese fan culture has a deep cultural heritage, and China has always been recognized as the ‘fan kingdom.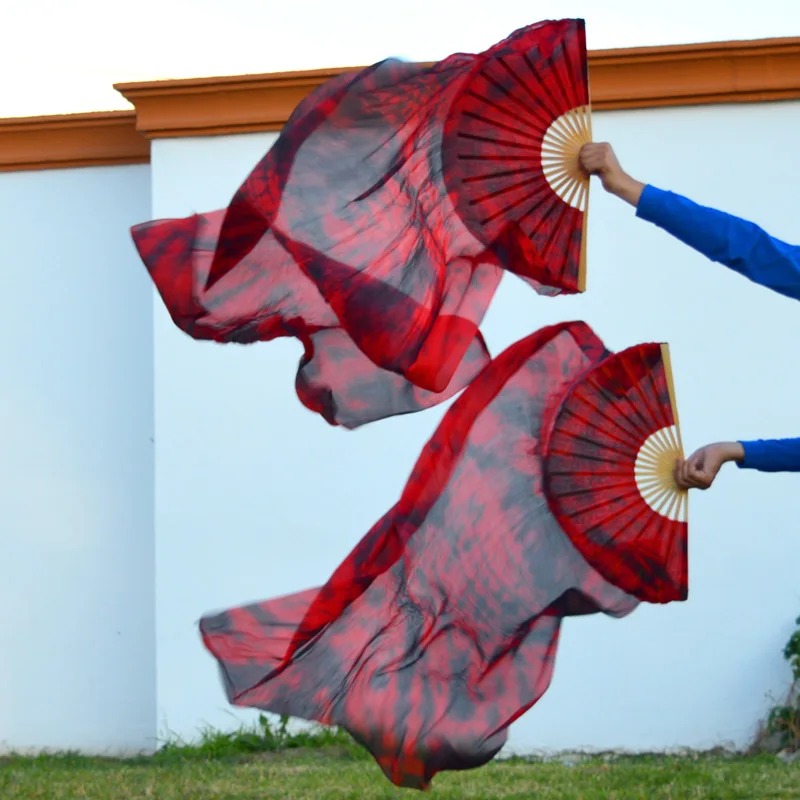 ’
’
Together with bamboo culture and Buddhist culture fans are an integral part of China’s national culture.
The Origin of the Paper Fan
Around three or four thousand years ago, the ancient Chinese people originally used large leaves or bird feathers to fan themselves during the hot summer season, and this soon evolved into a more sophisticated tool, the fan.
Just as the early peoples made barriers against the wind and rain, so too, they protected themselves against the heat and fans became an essential part of their life.
Over the millennia, fan design has improved and developed into hundreds of different kinds, but the two main categories are the flat fan and the folded fan.
The Use of the Fan
In modern times, with the invention of other cooling devices such as air conditioning, fans are not so much everyday necessities.
Chinese fans are now used mostly for decorative purposes, in advertising, and as souvenirs for tourists.
Chinese fans have made their way into private collections as works of art, often combining the crafts of weaving, sculpture, painting, calligraphy, and embroidery among other technical skills, but also as folk art and other performing arts props.
Four Famous Fans
The Sandalwood Fan (Jiangsu)
Sandalwood fans were among the first in antiquity, and have been much loved for their unique style and craftsmanship. Sandalwood is a hard wood with a natural long lasting scent, often lasting many years.
Kept in a suitcase, drawers or your cupboard it makes an excellent pest deterrent. Fans made of sandal wood can be quite fancy, decorated with painted or carved flowers, mosaics, and bone.
The Fire Fan (Guangdong)
The “Fire fan” was founded in the final years of the Qing Dynasty Tongzhi, with later developments including the production of fans made with a thin glass handle attached to a double-sided fan.
These were decorated with a special fire pen painting. The vivid colors of fire pen ink are bright and never fade, and so these fans are highly sought after by collectors.
The Bamboo Fan (Sichuan)
Characteristically peach-shaped, the Bamboo Fan is made of bamboo silk, woven as fine as onion skin, and decorated with Canruo brocade.
Bamboo silk is translucent yellow, very fine and delicate. These fans are adorned with painted scenes of beautiful landscapes, figures, or birds and insects.
The handles are usually exquisitely carved ivory or bone and some of the ancient ones are considered national treasures.
The Aya Silk Fan (Zhejiang)
Aya silk is silk damask, usually brightly colored, light and delicate like morning fog, and makes beautiful fans.
Two Chinese Paper Fans You Can Make Yourself
Folded Paper Fan (Simple & Practical)
Here I teach you how to make a lovely yet simple and practical paper fan.
Materials:
Old magazine
Glue stick
This fan will work with plain white paper, but I use a magazine for the color and the structure the glossy paper gives to the fan.
Carefully tear two pages from the magazine so that the edges are straight. Fold over the long edge about 1.5 cm using the edge of the page as a guide.
Flip the page over and fold again in the opposite direction. Continue folding in concertina style for both magazine pages.
Now that you have two sheets of folded paper glue the edge of one to the edge of the other so that the folds continue.
Lastly, glue all the folds at the bottom of the paper together.
Traditional Wooden Handled FanMaterials and Tools
10 or so long pieces of thin wood such as balsa wood, cut to the length of the size of fan you want.
white paper and colored/patterned paper
tassel
push pin
thin wire
pencil
drawing compass
craft glue
scissors
pliers
Using a pushpin, make a hole in one end of each piece of wood, the same distance from the end, so they will line up later.
You can drill the hole, but be careful not to put too much pressure on the wood making the hole too big for the wire.
Thread the wire through the holes, stringing the wood pieces together.
Use the pliers to tie the two ends of the wire together, so the wood pieces are joined tightly, forming the base of your fan.
Grab your drawing compass and draw a semi-circle on the white paper, according to the size of the pieces of wood. Cut out the semi-circle.
Position the fan (joined strips of wood) on the white paper.
Fan out the strips of wood and markthe position of each with a pencil.
Apply glue to the wood strips and paste them onto the white paper lining them up with the pencil marks.
Trim off excess paper.
Do the same with the colored paper, but make the semi-circle slightly larger than the white paper so you can overlap the edges.
Trim off the excess colored paper, and glue on the other side of the sticks. fold over and glue the edge. You should now have white paper on one side and colored on the other.
Wait for the glue to dry.
Finally, install the tassel in place for decoration.
There you have a beautiful paper fan!
how to make your own hands, from fabric or paper, round dancing fans, step by step instructions
Making a Japanese fan with your own hands is not difficult. First, you should decide on the version of the model, select the appropriate materials, as well as tools. It is important to think over the decor of the finished product so that the theme matches the type of construction.
- What materials and tools are needed for work
- How to make a Japanese fan with your own hands: step by step instructions
- from cardboard
- from fabric
- from paper
- from improvised materials: forks
- Summer mini fan
- Option of the Japanese fan
- Tips and recommendations
What materials and tools are necessary for work. on where and how the finished product will be used. If it will be an accessory worn by a lady, then a more durable design that can be folded is needed.
To make this variation, you will need wooden sticks or long skewers. For simpler models, cocktail tubes can be used.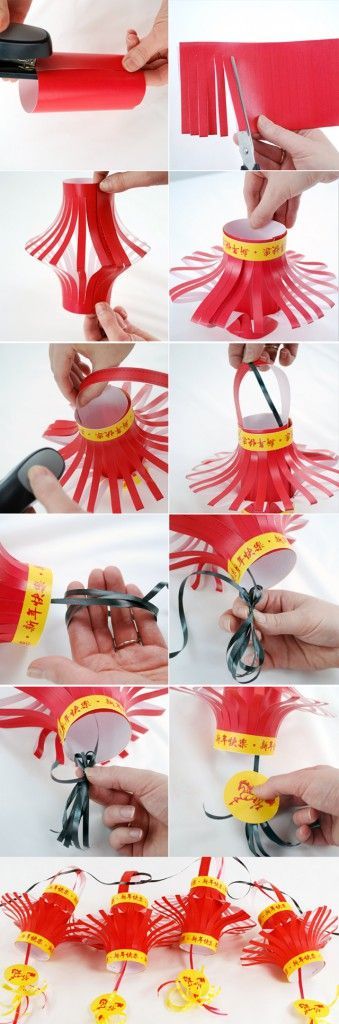 The same set of basic materials is needed if it is an interior decoration. But besides the frame, it is important to think over the basis here. Usually it is textiles of good quality.
When choosing a fabric, you should pay attention to colors and prints. It is advisable to select red fabrics with gold monograms.
For the manufacture of the simplest options, paper or cardboard is used. Additionally, in each case, you need a glue gun, scissors, a pencil with a ruler, and decorative attributes.
How to make a Japanese fan: step by step instructions
There are several options for how to make a fan. In this case, different materials and techniques are used. Some schemes are quite complex, while others can be handled even by a small child.
Cardboard
Using only 1 sheet of double-sided cardboard and a stapler, you can make the most primitive version of a fan. At the same time, the design is very functional - the body folds and unfolds at the right time.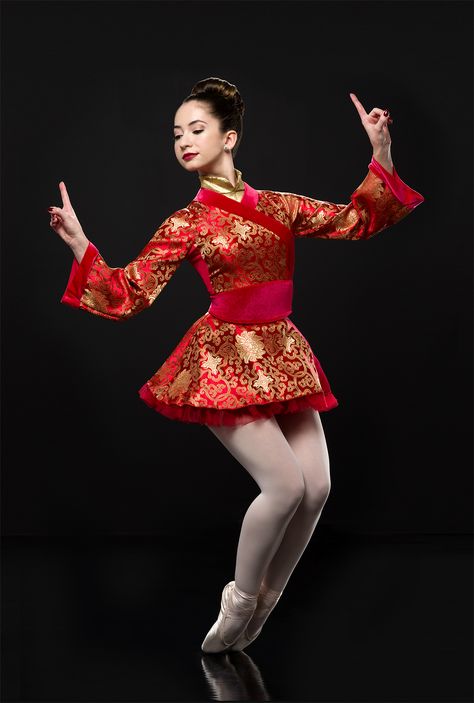 If necessary, you can consider decoration.
How to make a Japanese-style cardboard fan:
- Fold the cardboard sheet into a small accordion.
- Staple the base of one of the ends.
- If desired, decorate with appliqué colored paper pieces.
The material is quite easy to process, so a child of the preparatory group of a kindergarten can make and use a ready-made model.
Fabric
Fabric is easy to make and looks very attractive. You can use this craft to decorate the interior of the room or as an accessory. To work, you will need the following tools and materials:
- interlining;
- cloth;
- PVA glue;
- glue gun;
- wooden sticks;
- wire;
- stationery needle;
- compasses and scissors;
- pencil and ruler.
Textile fan tutorial:
1. On one side of each stick, use a ruler and a pencil to measure the same distance - approximately 3 cm.
2. Using a stationery needle, make a hole in each marked point.
3. Fold the wooden elements, matching all the holes obtained. Pass a piece of wire through the holes and fix with a loop on both sides. The frame for the fabric base is ready.
4. Cut out a rectangle from the interlining. First you need to try on the frame on the basis, since the figure should be approximately 2 times larger. Using a compass, draw a semicircle from the middle of the larger side (diameter 5-10 cm). cut the piece.
5. Lay out the non-woven rectangle on a flat surface. Open the frame and attach to the workpiece. Pre-place each stick in its place. Make notes with a simple pencil on the non-woven fabric. On sticks, also mark the edges of the fabric.
6. Next, grease each stick to the bottom mark with PVA glue. This must be done evenly and accurately. Better to use a brush. Glue each stick to the interlining in a specific place for it. Cut off the excess part of the base at a distance of 5 cm from the edge of the sticks.
7. The fabric base is prepared in the same way as the interlining. Cut out a semicircle at the base of the textile rectangle.
8. Lubricate the wooden sticks on the other side with glue. The next step will be the fixation of sticks on a fabric basis.
9. Trim off excess fabric and interlining at the top. Now you can make a cut right next to the sticks.
10. Bend the edge strips on the side of the interlining, fold them over with a glue gun and glue them to the wooden bases.
Attach a brush to the wire for decoration and functionality. Thanks to this arrangement, the product is easier to hold in your hand.
This version of the fan can be used in various areas. The design is quite strong and will withstand mechanical stress.
Paper
The easiest way to make an origami fan. To create this option, you need the following tools:
- 3 sheets of paper of different colors;
- scissors;
- hole punch;
- glue;
- tape.
Algorithm on how to make a paper fan with your own hands:
- Leave the first sheet unchanged. Reduce the second by cutting off a strip 3 cm wide, from the third even more - 6 cm.
- The smallest leaf must be processed with a hole punch. Cut the edges of the second with a fringe with scissors, and leave the largest one unchanged.
- Place sheets on top of each other. Fold accordion.
- Determine the center of the workpiece. Tie the ribbon into a knot.
- Glue the center strips together.
Spread the fan. Correct all tiers in accordance with the compositional solution.
From scrap materials: forks
A variety of scrap materials can be used to make a Japanese-style accessory. Thanks to the thoughtful combination of all the components, you can get a beautiful craft.
To make an item from improvised materials, you need the following:
- glue gun;
- satin ribbons of uniform thickness;
- wide lace band;
- scissors;
- disposable forks;
- old disc.

This fan is easy to make:
1. Divide the disc by diameter and cut it in half. Glue disposable forks along the workpiece. To do this, use a glue gun.
2. Turn the workpiece over so that the disc is on the reflective surface. Pass the lace ribbon through the tines of the forks. Glue the edges of the textile element to the forks.
3. At the base, namely near the disk, satin ribbons are fixed in tiers according to the same principle as lace.
Glue the tapes to the outer fork legs. The decorative version of the product is completely ready.
Summer mini fan
You can make a summer functional version of the product, which can be used as a full-fledged fan. For the manufacture will need:
- sheet of double-sided colored paper;
- glue and scissors;
- wooden clothespin;
- rubber band.
Even a child can do the job:
1. disassemble the clothespin by removing the spring base. Only halves are needed to work.
2. Cut a strip from a sheet of paper to make the rectangle narrower.
3. Fold the paper base like an accordion.
4. Put the halves of the clothespins on top of each other and fix them together with a rubber band.
5. Glue the paper blank to the finished frame.
This design is quite functional - it can be used on a hot day, like a fan. The product can be put in a handbag, as the whole structure is a team.
Japanese fan decorating option
To get a beautiful Japanese-style fan, you should think about decorating. Usually in the Eastern culture of this country adhere to minimalism.
Initially, only natural materials should be chosen for manufacturing. This option is already the basic decor of the thing.
What kind of decor can be:
- If the base of the canvas is plain, then painting can be applied. Pick up some beautiful hieroglyphs and draw on the canvas.

- Small details can also become a decoration: a satin ribbon or a thread tassel on the accessory's handle.
- For decorative models, you can depict a whole picture of sakura, draw a geisha. You can replace this type of decoration with floral ornaments made using the quilling technique.
Do not use rhinestones, sequins, bright colors. This type of jewelry is not inherent in Japanese culture.
Tips and tricks
There are a few tips to follow when making these fans:
- If you need a frame, it is better to use wooden elements or a vine.
- It is better to use at least a simple fabric to form any pattern. Maybe even interlining.
- If this is a functional craft, then you need to consider the option of attaching the handle so that it fits comfortably in your hand.
- The simplest painting on the basis of the product will be an ideal decoration option.
Making Japanese fans can be a great activity. Additionally, you can get an original summer accessory or a non-standard decoration for the interior. To obtain such a product, it is enough to use available materials and manufacturing techniques.
Make a fan in 15 minutes? Easily!
Summer has come, and with it terrible heat and closeness. For me, temperatures over 30 C are sheer agony. Therefore, in the summer I never part with the fan. At one time I was engaged in historical dances, so I have accumulated quite a lot of various beautiful fans. How wonderful it is after a polka or a waltz to lean against a column and fan yourself with a fan. And now, in such heat, especially, the fan is always with me. Not so long ago, I had to go to one event, the organizers of which announced a flash mob - for everyone to come with fans ... and then these fans were exchanged for memory. The evening before the event, I realized that I did not want to exchange my fans with anyone. Not some kind of Chinese, but Spanish hand-painted fans. So I had to invent a bicycle fan. I remembered that in China and Japan, not only opening accordion fans were common, but also simple paper (sometimes made of fabric) fans on a handle. As in the photo below.
What an idea! And it's easy to do! As a result, in the morning I quickly made myself a fan and happily ran to the event. True, it seems that I was the only one who read about the flash mob, since no one else brought a fan with them. And, nevertheless, if not for this event, there would be no this master class!
We will need:
1. Two pairs of Chinese sticks. Preferably new.
2. Sekunda glue.
3. A sheet of watercolor paper 180-200 g / cm3 (if you want to draw a picture on the fan yourself) or any beautiful piece of thin cardboard.
4. Watercolor, brushes, pencil, black gel pen if you are going to paint yourself.
5. Hole punch and scissors.
6. Satin ribbon and lighter to burn the edges.
Let's start with drawing.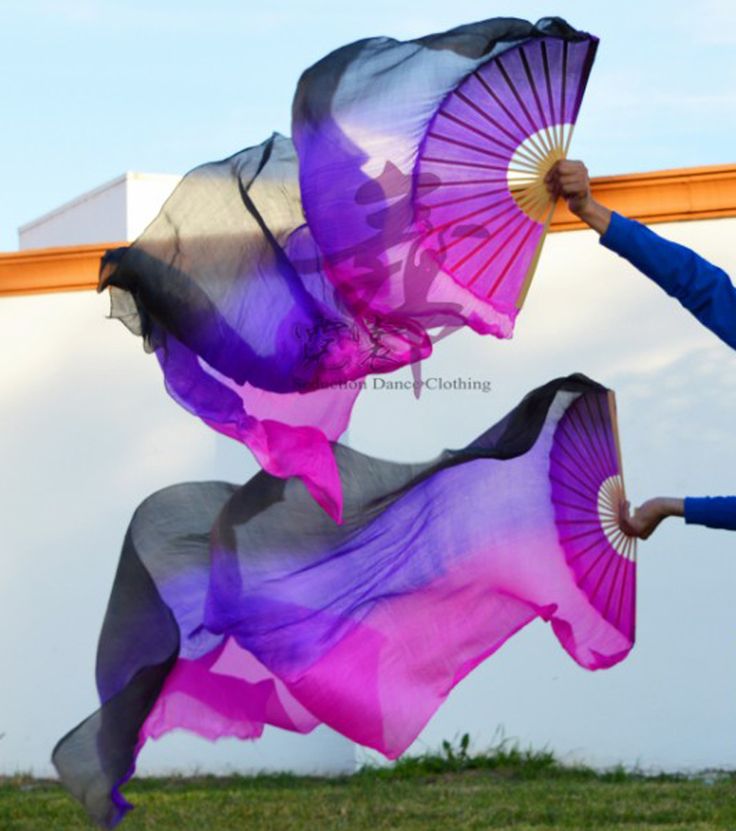 If you have a nice piece of cardboard or you don't feel like drawing, read the next paragraph, and then skip to paragraph 5.
1. Using a plate, draw a circle on the sheet. The shape of the fan can be given any. I made my first such fan round. Now I decided to come up with some new form. To do this, I put dots on both sides of the circle and connected them with smooth lines to the circle. It turned out such "ears". We remove the excess with an eraser.
Since we have to draw until we cut out our fan, this is much more convenient. And the paper warps less and there is always a palette on the sides.
What can be depicted? It all depends on your skill. If there is no skill at all, use my lessons on inkblotography: here >> and here >>.
Another option is to paint multi-colored spots, and then apply various geometric shapes and other prettiness on top with a gel pen. There are Doodling and Zentangle lessons at the Crafts Fair. For example, here >>.
I'll show you a slightly more complex (in fact, it couldn't be easier!) variant of painting using the saiboku technique.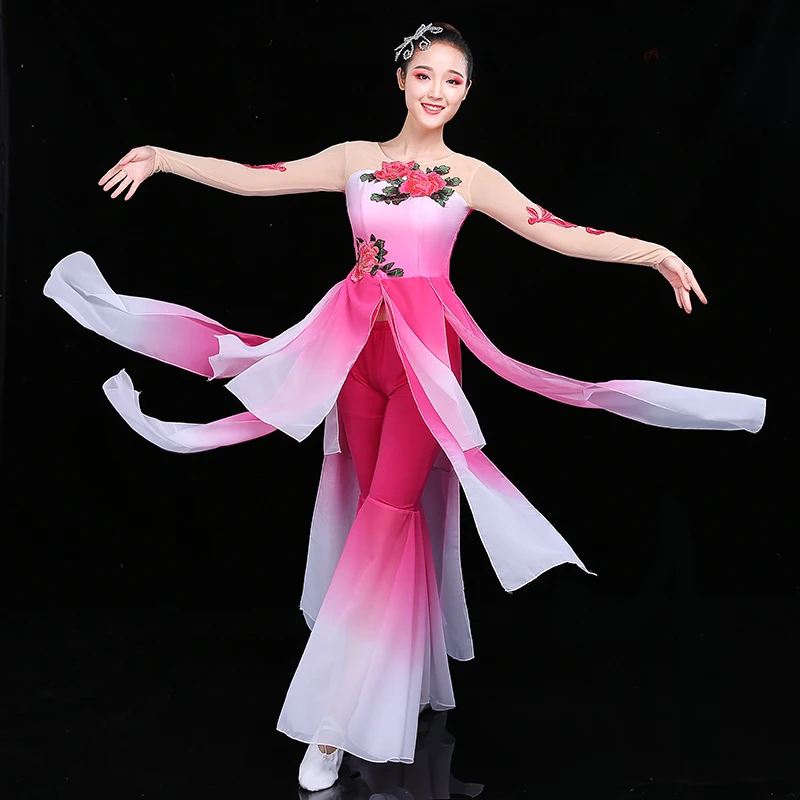 At least that's what my book is called. This is a classic Japanese (and also painted in China) ink painting. I don't have ink, but watercolor will do just fine. The main secret here is light strokes with a large or medium brush. On the Internet, I found a picture with red flowers. We will draw her.
2. Draw a sketch with a pencil. Next, with black paint, we make light strokes - the trunk, stem, leaves. To do this, add more water to the watercolor - it will be lighter. Leaves are drawn with two or three touches. Stems - thin or medium brush. We only need to give them a background. In the future, we will contrast them with a darker black color.
Now add more leaves and stems. But we use less water - the paint will be darker. It's good if you get several shades. The main thing here is not to draw! Light touches! It didn’t work out - it’s not scary if the sheet does not look like a sheet - then we’ll fix everything. We are waiting for the black paint to dry.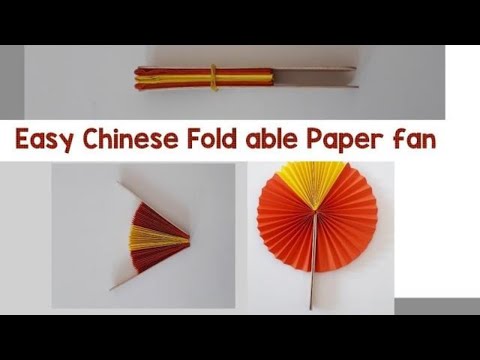
3. Now with a large brush, start painting flowers. We take red. I mixed it a little with raspberry to make the shade more interesting. In general, if somewhere the petal shimmers from red to burgundy or pink, this is good, it will add realism to the picture. Again, we start first with paint heavily diluted with water. Let dry or blot the petals with a paper towel. We draw flowers so that the middle remains white!
Use a medium to fine brush. Now we need to give texture to the flower petals. We use paint almost undiluted with water. You can take other close colors. We coat the edges of the petals, try to give them a shape. But then again - no need to draw. A few strokes of the brush, no more!
4. Again we wait for drying, then we take yellow and paint over the middle. Again, no fanaticism. In fact, we put a yellow spot in the middle. We leave to dry. At this time, prepare the handle for the fan.
5. We will need new Chinese chopsticks or sushi chopsticks.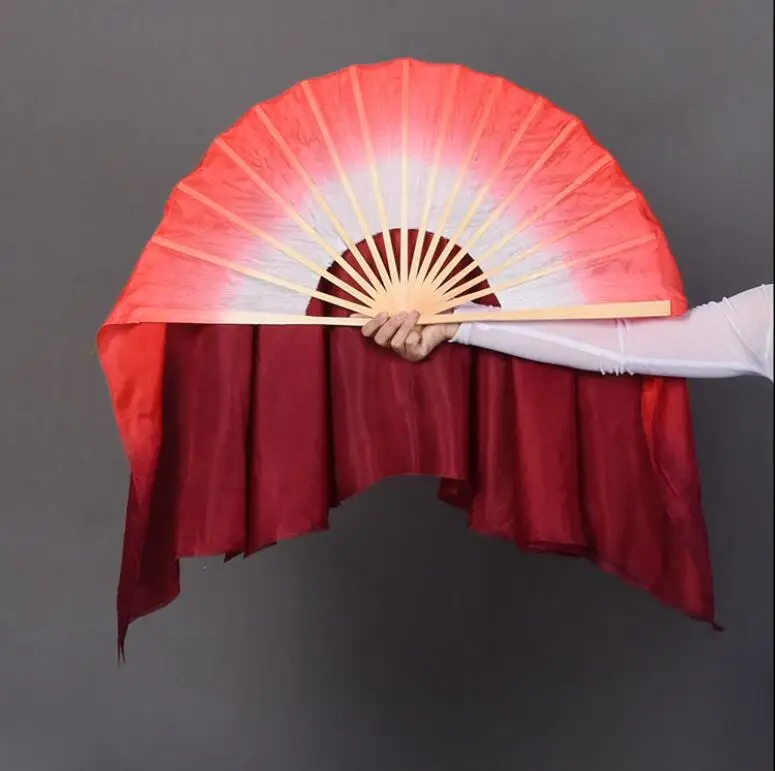 Why is new better? The fact is that the new sticks are fastened in two, which is very convenient - less glue. If you don’t have new ones, you just have to glue them longer. First fasten two, and then every two pairs together. You can also use any thin rails.
Place the sticks together, bringing the bottom (!) edges together.
Take them in your hand and mark the width of your hand with a pencil (maybe a little less, because then the sheet will not be inserted close to this line anyway). Using glue, coat the sticks from the bottom edge to the mark, glue and place under a heavy book.
6. By this time, our drawing sheet should have dried. We take a thin black felt-tip pen (very thin) or a gel pen.
- Draw the centers of the flowers. To do this, draw an oval of dots on yellow. Then, from one of the sides of the oval, add several parallel lines.
- Adding details - light touches, some zigzag lines. We focus on leaves, stems, branches, you can finish something new.
 Outline the flower petals. In principle, everything is visible in the photo. Here, too, do not try to draw - just place accents. Our brain is arranged in such a way that when it sees a sketch, it finishes the picture itself :) Do not interfere with the play of the imagination!
7. Cut out our picture, let the gel pen dry. We insert between the sticks into the base. Using glue, glue only the very top of the sticks to the paper. If you want the sticks not to be seen at all, you can draw a second picture. Then glue two sheets so that the base of the fan is inside.
8. Next, we need to somehow decorate the handle and, at the same time, attach it again to the fan. To do this, we make two holes as shown in the photo and cut off a sufficiently long piece of satin ribbon. We burn the edges of the tape. We pass the tape from the front side to the wrong side through the hole and leave a piece of 20 - 30 cm.
Bring the tape to the bottom of the handle with a few turns.