How to make a dance mat
Building a DIY Dance Dance Revolution | by Melanie Huang
The magical combination of the hardware store and an Arduino.
Firstly, if you don’t know what Dance Dance Revolution is — here’s VICE to explain it’s awesomeness:
If you DO know what Dance Dance Revolution is, did you know Konami run a tournament for all their rhythm games?! Here’s their live 2017 stream — ft. CHRS4LFE taking out the DDR title.
AND if you’re still in doubt of DDR’s brilliance — it even had a movie made about it! It’s really bad but worth a watch to believe how bad it is.
Anyway, I digress — this is the story of how I built my own two player DIY dance machine.
It all begins after school in the arcade.
Dance Dance Revolution was high on my extra-curricular activities list and after hours of blood and sweat and more sweat — I became above average at DDR.
Fast forward a decade later, I convinced myself that my basic electronics, soldering skills and shoddy woodwork teamed with Google and Bunnings, could pull off building a DDR for my lounge room.
*Bunnings is an Australian/New Zealand hardware store and a lot like Disneyland.
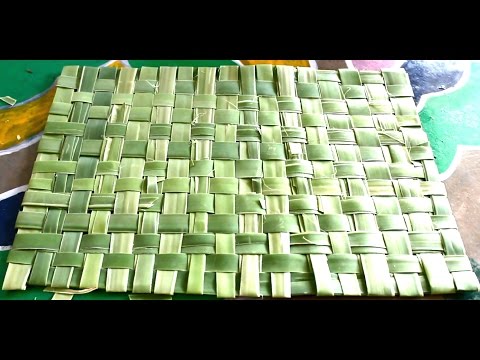
Now, having a dance mat at home started to become fairly common, at the height of DDR, but they were hideous, slippery buggers. I was sick of slip and sliding through my favourite songs and ditched it almost immediately.
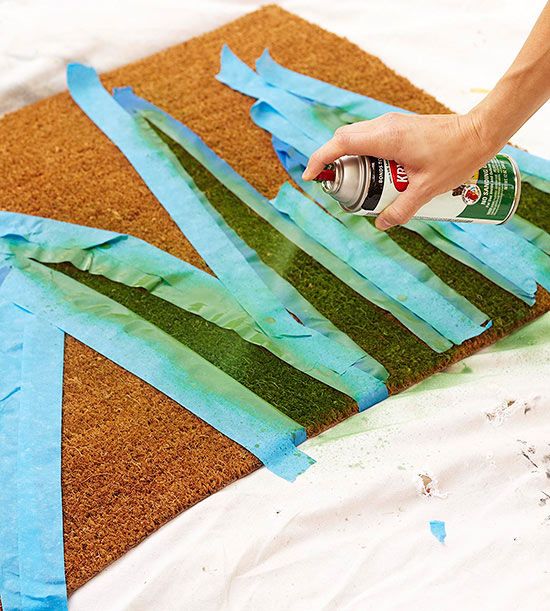
https://en.wikipedia.org/wiki/Dance_pad#/media/File:DDR_Controllers.jpgSo, here’s how I made my own sensors and wooden/acrylic dance mats:
MY REQUIREMENTS
- Must be made of wood and acrylic (Metalwork is too daunting)
- Must be plug and play — I needed both players to act as USB dance mats for StepMania; an open source rhythm video game and engine originally developed as a simulator of Konami’s arcade game series DDR
- Must utilise Arduino somehow for the sensors because I don’t know how to connect sensors to anything else
- Must be robust so I could dance/stomp/carry/store without an issue
RESEARCH
My research consisted of a buttload of Instructables, Youtube and Google.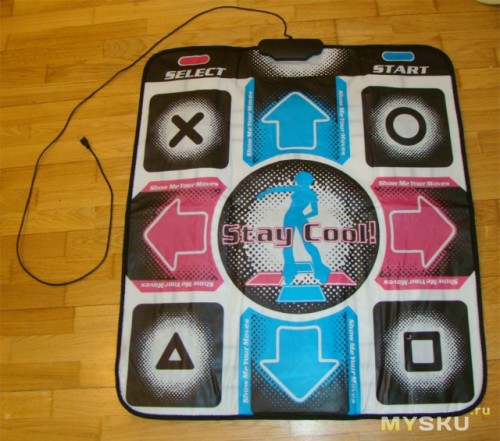 Through this, I discovered that there were two possible ways this could go down:
1. Modify a plastic mat and glue it to something sturdy
2. Build my own structure and DIY sensors
Now, in my mind, the first option seemed like the easier route however I could already see myself buying a plastic dance mat, cutting it up, messing it up and having to wait for another one to be sent to me.
I decided I wasn’t patient enough for that.
So I went straight to Bunnings to get some MDF to trial this first video:
Super Make Something USB DDR Dance PadThe wooden structure and Arduino communication I ended up including in my final dance mats are pretty similar to the above video. Therefore, I won’t go into detail about those parts. Just watch the video.
However, I wanted to share with you my approach to the sensors and how you can create it too with regular items from the hardware store.
For this particular video, they use what’s known as a comb circuit cut out of aluminium foil.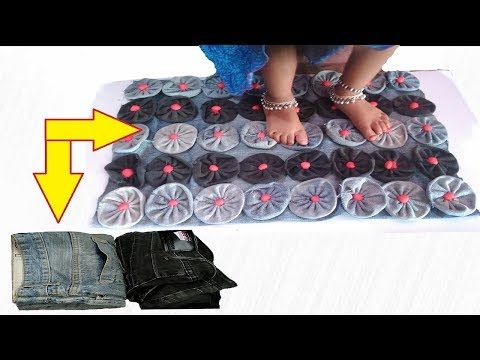 When the two “combs” connect with another piece of foil it completes the circuit. See below:
Then, as you stomp on an arrow and the circuit connects — a keystroke would be sent to an Arduino. This meant that each arrow became a single letter on a giant 4-letter keyboard.
NOTE: This method will only work with Arduino Leonardo, Micro or Due. I tried to hack my Uno to work and it doesn’t — so don’t waste your time. https://www.arduino.cc/en/Reference/MouseKeyboard
Overall, this was a really great approach to building your own DIY dance mat — however, it lacked the click-y arcade button feel that I craved. So I went back to Google and found the holy grail of DDR DIY videos.
Brace yourself…
Meet Hieu Nguyen.
Hieu created an incredible arcade replica of Pump It Up(another version of DDR) with a detailed guide on creating your own sensors. I owe my Bunnings DIY sensors to him.
So, back to Bunnings!
SENSORS SENSORS SENSORS!
For the sensors I used the following:
- 12 x 1m aluminium flat bars (25 x 1mm) Link
- Suntuf Access Tape(foam tape) Link
- Sheet metal screws
- Copper tape with conductive adhesive Link (Melbourne supplier)
- Super glue
- Wiring
- Bolt cutter
- Floor protectors
- Duct tape
For the bars, I sourced 1m Aluminium Flat Bars(25 x 1mm) and cut them to size with bolt cutters.
HOT TIP: Bolt cutters > Tin Snips. Tin Snips bend the ends of the flat bar(see image below) and as a result affect how flush the bars sit on top of each other. This caused an unreliable connection between the bars. Bolt cutters slice those flat bars like jelly butter. FLAT smooth jelly butter.
2ND HOT TIP: Flat bars are located with the aluminium mouldings in Bunnings. I first tested copper bars but besides being not as malleable — they’re also hellish expensive($2 p/m vs.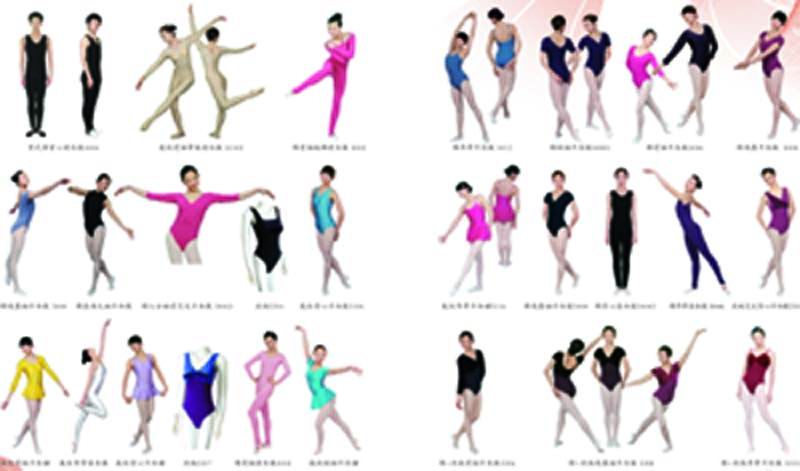 $50 p/m).
1. Cut 2 x 12 cm and 1 x 7cm of the flat bar and assemble as shown below.
2. Connect the 7cm length to a 12cm length with a very, very, very teensy amount of super glue. This isn’t the greatest solution as too much glue will cause the 7cm piece to lose connectivity with the 12cm piece. However, I reinforce the join in the next step.
3. Cut 7cm of copper tape. Make sure you have the copper tape with CONDUCTIVE adhesive. Wrap the tape around both edges of the superglued 7cm piece to reinforce the conductivity.
4. Drill holes through the bottom piece on each side.
BREAK: Before you proceed, make sure you have finished painting/varnishing your wooden base UNLIKE the next photo.
5. Secure the bottom bars to the inside of the dance machine arrows with sheet metal screws.
6. Cut 2 x small rectangles of foam and attach them to both sides of the 7cm piece. )
)
Post-defiance I accepted that this was not going to work and soldered onto what I already knew I could solder on to — copper tape with conductive adhesive :)
7. Place strips of copper tape where you intend to solder wires and solder quickly and not-burning-ly. This requires mad soldering skills, some flux or several attempts. Hang in there! If you try to solder for too long, the adhesive melts and your beautiful copper slides right off the bar. Not helpful.
Now to wire this bad boy up.
The individual sensors will connect to the Arduino in the following way:
- Top bar slot goes to 5V
- 1st bottom bar slot goes to Input (Analog/Digital)
- 2nd bottom bar slot goes to GND through a 10K resistor
We will connect four sensors to make up a single arrow.
When wiring the sensors to each other and then to the Arduino I had a lot of trouble getting it to work responsively. The layout below was the best config I could work out.
8. INPUT: Connect the four individual sensors together. Then, run wire from the set to the Arduino input pin.
I also highly recommend that you colour code your wires for each arrow. This helps infinitely when you’re trying to figure out why your dance machine isn’t working… or when your puppy chews through your cables and you need to rewire…
GND: On first attempt, I attached all the GND wires together like the 5V(which you’ll see in the next step). This causes every arrow to be triggered when one arrow is triggered. This is obviously useless. Hence why I have placed a random “plate” in the top left hand corner of the top arrow and connected the arrows to this.
9. Connect the four sensors for each arrow together and run that wire to the plate via a 10k resistor. Run the single plate to GND on the Arduino
10. Put little dabs of super glue on the bottom foam rectangles and place the top bar, non-foam side, on top of the bottom bar.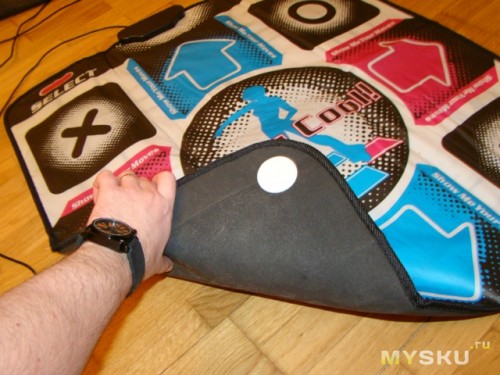 Hold in place for a moment.
11. Connect all the tops of the sensors to the 5v on the Arduino as shown.
12. To make this plug and play, I connected all 6 wires(4 x INPUT, 1 x GND and 1 x 5V) to 6-pin JST SM Plug + Cable Sets.
13. Place square floor protectors in each corner of the acrylic. Get some duct tape rolled into itself to make it double sided and place on floor protectors. Place acrylic squares on top of sensors and hold into place.
14. Time to dance. There are eight points of each arrow to test for responsiveness.
And then, if all the sides and corners work, we have a DANCE DANCE REVOLUTION (DIY edition)!
If they don’t… inspect your wiring. It will work eventually, I promise.
As an extra measure, I also built this box to “plug and play” the mats into. There are a million tutorials for connecting arcade buttons to Arduino so I will leave you to Google that. These are then mapped to keystrokes within StepMania as a keyboard input.
Early prototypes of one square working:
First square communicating with Processing
goo. gl
gl
First square in place
goo.gl
And here’s the whole thing working with the help of Scott Pilgrim :)
So, last but not least, I’ll end with my largest disclaimer…
This is intended as a personal project and just the shoddy soldering alone is enough to burn down a house. Therefore, proceed better and with caution.
This also began as a cost-effective venture to own a more solid dance mat. However, with the amount of trials, experiments and tool collecting, it was quite the opposite. This is why I’m posting this article so hopefully it is a cost effective way for other people to own a dance mat :)
All my code for the Arduino is available on Github. It is an altered version of Super Make Something’s version to cater for 2 players and the way I wired the sensors: https://github.com/melaniehuang/dancedancerevolution
There is also a Processing sketch in there if you just want to test connectivity.
Please send any questions, recommendations or fire safety hazard warnings to hello@melaniehuang. com
com
A big thank you to my wonderful boyfriend-in-crime, Andrew Buntine, who helped me drill and saw through everything I was too afraid to attempt myself.
How to build your own dance game with a Raspberry Pi
Those who lived through the 1990s may remember the craze of dance games in the amusement arcades. People would throw themselves around a miniature stage trying to time the movement of their feet to the arrows scrolling up the screen. From a distance, it might even look like they were dancing.
To relive this experience or enjoy it for the first time (without buying a full game or console), you can use a Raspberry Pi and a microcontroller to duplicate the features of the game.
Stats
- Time: 2-3 hours
- Material cost: $100-$140
- Difficulty: moderate
Materials
- Raspberry Pi 4
- StepMania dance software
- Circuit Playground Classic
- Micro SD card (8GB or more)
- HDMI monitor
- Micro-HDMI cable
- USB-C power supply
- Adafruit I2S three-watt speaker bonnet
- 2 speakers (4-8 ohms)
- GPIO riser or extension cable
- Micro-USB Cable
- Two pieces of upholstery material in contrasting colors
- Thread
- Conductive thread
- Crimp-on ring connectors
- Four-way terminal block
- 4 (6 millimeter-long) 2.
 5-millimeter bolts
 - 4 (2.5-millimeter) nuts
- Varnish or nail polish
- (Optional) duct tape
Tools
- USB (Type A) keyboard
- USB (Type A) mouse
- Crimp tool (or pliers)
- Internet connection
- Soldering iron and solder
- Sewing needle
Instructions
1. Set up your Raspberry Pi. To do so, you’ll need to plug the keyboard and mouse into it and connect it to the monitor with the Micro-HDMI cable. Copy the Raspbian Buster operating system onto the SD card, ensuring you use the one that includes a desktop—you’ll need it to use StepMania. Insert the SD card into the Raspberry Pi and plug in the USB-C power supply. Follow the instructions to install the operating system and to connect to your Wi-Fi network.
- Note: Once the project is complete, you’ll be able to manage without the mouse and keyboard, as their functions will be fulfilled by the Circuit Playground and dance mat.

2. Install StepMania. Start a terminal session using the >_ icon at the top of the screen. From here, enter the following commands to install the software:
cd ~
git clone https://github.com/SpottyMatt/raspbian-stepmania-arcade/
cd raspbian-stepmania-arcade
make
- Note: StepMania has been ported to the Raspberry Pi by Matthias Rozensztok.
3. Reboot the Raspberry Pi. Once you do, StepMania will start automatically.
- Note: See StepMania for Raspberry Pi for advice on using alternative sound cards, mapping for different controllers, and performance benchmarks.
4. Boost the sound. The Pi’s sound capability is a little lacking, but it can be improved by an add-on. The Adafruit speaker bonnet can run two small speakers. Solder in the two screw connectors that came with the bonnet kit and screw the speaker wires into the connectors.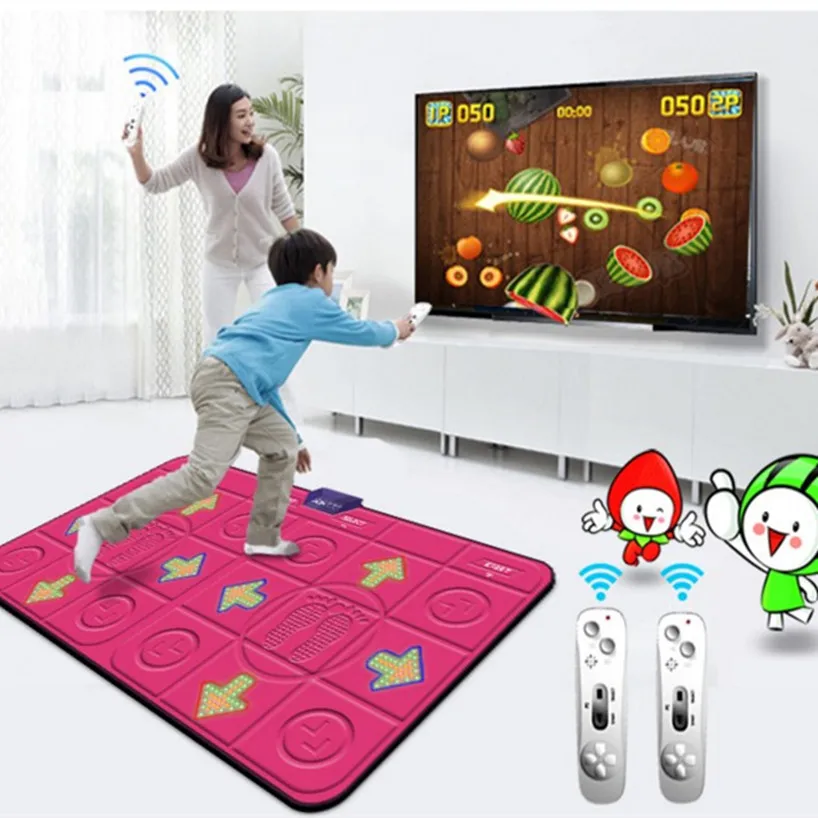
- Note: You can buy pre-soldered speakers for the bonnet.
5. Separate the bonnet and the Pi. Without space between them, the bonnet may contact the pins on the Pi, potentially damaging one or both pieces of hardware. To avoid this, connect a GPIO riser or a ribbon cable between the two.
- Note: Having a cable to mount the bonnet gives you the option of adding a heatsink. The Pi will slow down if it gets too hot. If you find this happening, you can buy small, stick-on heat sinks to keep the temperature below 176 degrees Fahrenheit (80 Celsius).
6. Install the driver software for the bonnet. Use these commands:
curl -sS
https://raw.githubusercontent.com/adafruit/Raspberry-Pi-Installer-Scripts/master/i2samp.sh/ | bash
7. Ensure the sound comes out of the bonnet. Installing StepMania will configure the Pi to have USB sound by default.![]() To remove this and get the sound to come out of your speakers, run the following commands:
To remove this and get the sound to come out of your speakers, run the following commands:
sudo rm /etc/modprobe.d/usb-audio-by-default.conf
rm ~/.asoundrc
8. Reboot the Pi to get the sound working properly.
9. Set up the Arduino software. Start a terminal session with the >_ icon and install the software with the following commands:
sudo apt-get update
sudo apt-get install arduino
- Note: There are two variations of the Circuit Playground board. This project uses the cheaper “classic” board, but will also work with the newer “express” board. The classic board uses the C programming language and can be coded using the Arduino Integrated Development Environment (IDE).
10. Install the Adafruit Circuit Playground library. Launch the Arduino IDE and choose Tools > Manage Libraries. In the library manager, search for Circuit Playground. Install it.
11. Load the Dance Controller software. The controller software is written in C. The disco lights are provided by its onboard multi-colored LEDs and the dance mat contacts use the board’s touch sensors. Use a terminal session to download the code as follows:
cd ~
git clone https://github.com/Workshopshed/DanceController/
Then, plug the Circuit Playground into the Pi with the Micro-USB cable. Open the DanceController.ino file in the Arduino IDE and click the right-facing arrow near the top-left corner of the IDE to upload the compiled code to the Circuit Playground.
When your dance mat is done, it should resemble the “stage” you’ve seen at arcades or at your friends’ houses. Andy Clark12. Make the dance mat. Because you’ll be stepping all over it, you’ll want to use a square of tough material such as upholstery or denim. Choose a contrasting color for the triangles. Stitch the triangles in place using a needle and regular thread.
- Note: If you’d like, apply a black and yellow “caution-style” tape border along three sides of your mat, leaving the edge that faces the screen untaped so it doesn’t interfere with any wires. There’s no real functional advantage to the tape, but it will make it look nicer.
13. Using the conductive thread, make large stitches all over the triangles. The aim is to ensure that wherever the dancer steps, they’ll make contact with the thread. We used a catch stitch—a herringbone-shaped stitch that covers a large area with a small number of stitches. Feed the ends of these areas of conductive stitching out to the edge of the mat.
14. Connect the conductive thread to the Circuit Playground. Use solder tags or crimp-on ring connectors screwed into a terminal block and tie the thread onto the loops. Add varnish or nail polish to provide insulation and to stop the knots from coming undone. You can use the same tags or crimps on the other ends of the cables, and use the 2.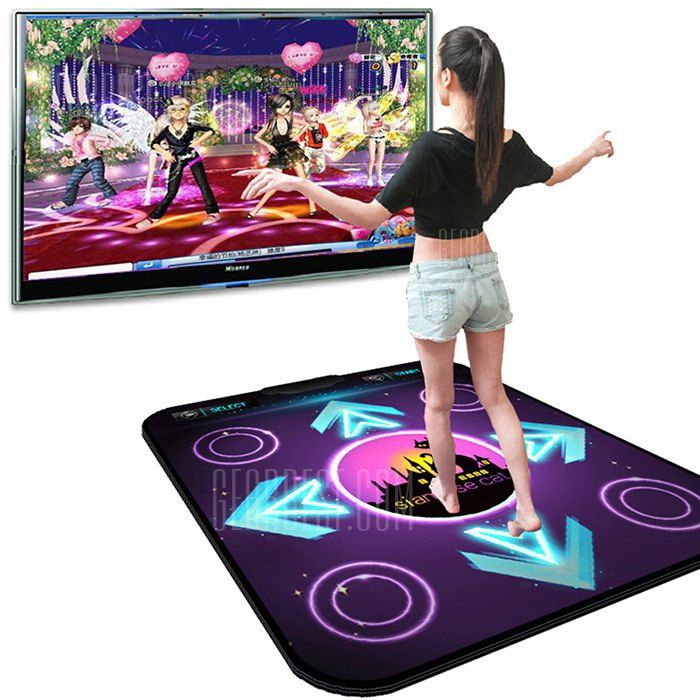 5-millimeter bolts to connect these to the pads of the Circuit Playground.
- Note: The code is configured so that pin 0 is up, pin 1 is down, pin 2 is right, and pin 3 is left. Ensure you connect the right pads to the right pins.
15. Play the game. Connect your Pi to a suitable monitor and connect the bonnet and the Circuit Playground via USB. Turn on the Pi, and if it’s all working, it should boot straight into StepMania.
- Note: You might need to adjust the settings to configure the game to use your entire screen. Navigate the menu with the up and down arrows; use the left button on the Circuit Playground to select and the right one to exit.
Connecting a dance mat, installing and running Stepmania
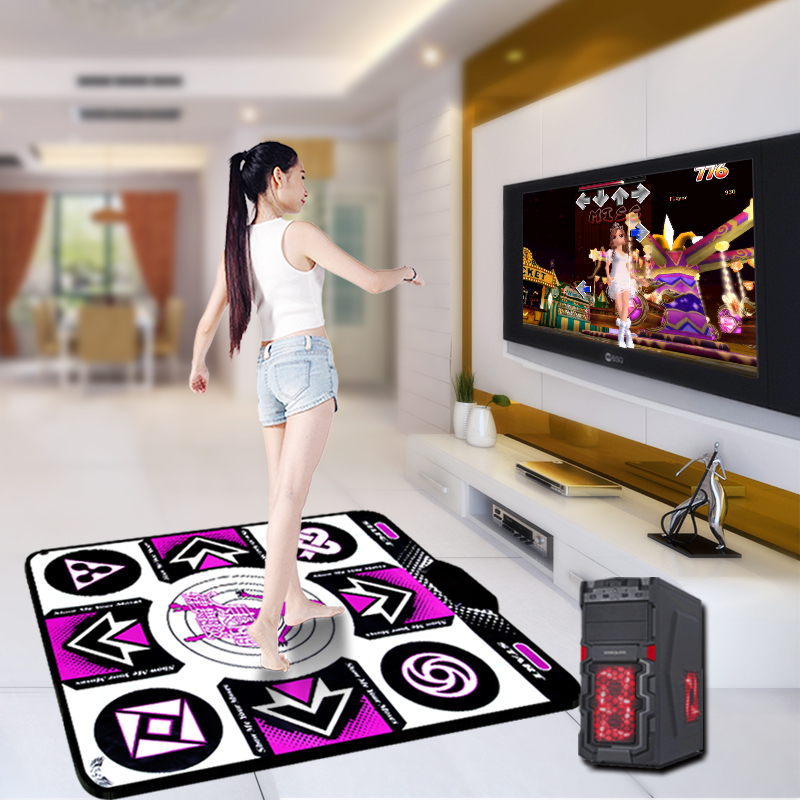
In this article we will tell you in detail what to do with a dance mat (also called a dancepad) or a dance platform (metalpad). In addition to connecting and testing, you need to know how to install and run the Stepmania program, which simulates the dance machine of the Dance Dance Revolution and Pump It Up systems.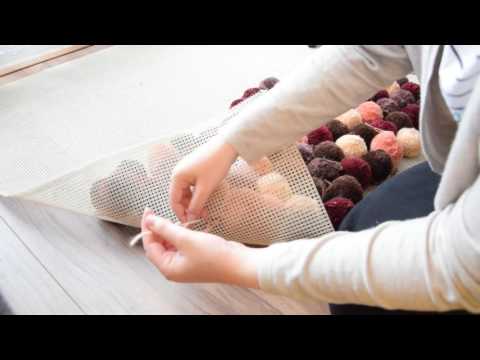
CONTENTS:
Step 1: Connecting the mat.
Step 2: Testing the performance of the pad.
Step 3: Install STEPMANIA.
Step 4: Starting STEPMANIA for the first time and setting up the control keys.
Step 5: Dance.
Steps 1-4 on video
Step 1: Connecting the mat.
Connecting to a computer
Connect the mat to an available USB port on your computer. Windows will detect the new device and install all the necessary drivers on its own:
Windows has detected a rug (Part 1)
Windows has detected a rug (Part 2)
Windows has installed the drivers and the pad is ready to use
Step 2: Check if the pad is working.
It is recommended to check the properties of the connected mat. To do this, you should enter CONTROL PANEL and find GAMING DEVICES :
Press START and select CONTROL PANEL.![]() ..
..
In the control panel, select PRINTERS AND OTHER EQUIPMENT...
... and select GAME DEVICES
The Connected Gaming Devices window opens. The connected pad will appear in the list as a USB GAMEPAD. Select it from the list and press the 9 key0034 PROPERTIES .
List of connected gaming devices
You will see a window with the properties of the mat. It will look like this:
Pad properties
This figure shows the properties of the connected BASE-8 pad. It can be seen that the rug has 10 buttons: 8 arrows + START and SELECT. Depending on the model, the number of buttons will be different.
Now you can test all keys by stepping on them. The numbers of the pressed buttons will be highlighted (in the figure, key No. 4 is pressed).
Step 3: Install the Stepmania software.
Insert the supplied CD into your CD-ROM drive, the installation will start automatically. Follow the prompts on the screen and complete the installation.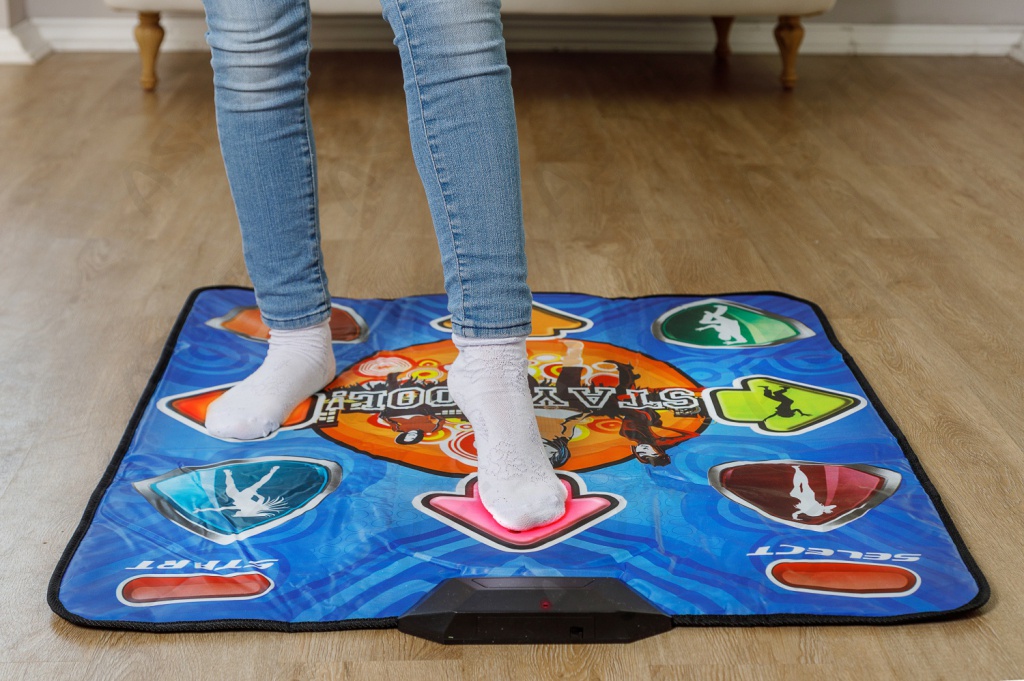
Welcome screen of the installer. Click NEXT to continue.
Select the installation folder. For a full installation, you will need about 700 megabytes of free space. Click NEXT to continue.
Select the installation type. We highly recommend a full installation. The compact and minimal installation should only be used when space is limited. Click NEXT to continue.
Specify the name of the folder created in the START button menu. In most cases, you don't need to change the suggested name. Click NEXT to continue.
Select whether you want a quick launch icon on your desktop. If needed, check the box. We recommend checking the box. Click NEXT to continue.
This is an information screen that displays the installation options you have selected. To change them, you can return to the respective screens with the BACK button. Click INSTALL to continue installation.
Files are being copied. It remains to wait for the installation to complete.
Step 4: Starting STEPMANIA for the first time and setting up the control keys.
To launch the game, click on it in the START menu or launch it from the desktop icon (if you created one during installation).
This is what the Stepmania icon looks like on the desktop. Please note that it will only be visible if you checked the appropriate box during installation.
By default, the game is installed here.
At the first start, Stepmania looks through the installed songs, collects data about them and forms a database. This process may take several minutes. The second and subsequent launches will be much faster.
Loading - Stepmania is compiling a catalog of songs.
After downloading all the songs, the program will expand to full screen and you will see the splash screen. If you do not press any keys for a while, you will see a tutorial screen, a demo, and set records.
The very first splash screen.
IMPORTANT: Adjusting the mat.
Once you have started your program, you will need to set up the dance mat. Don't worry! This will only need to be done once, not on every launch. To do this, enter the program's SETTINGS MENU by pressing the M key. Move the cursor over it using the UP or DOWN keys on the keyboard and press ENTER. After that, the key settings screen will open in front of you.
Keys setup screen
On the left side of the screen are the control keys of the first player, on the right side of the second. To assign a control key, you should use the cursor keys to select the desired cell, press ENTER, and then press the selected key on the keyboard or on the pad.
Let's look at an example. Assign the LEFT key to PLAYER #1:
- Use the cursor keys to select the cell labeled LEFT for player #1. As you can see, this is the top left cell (we circled it in red in the figure).
- Press the ENTER key.
- Press the LEFT key on the first player's dance mat (or any other key we choose).
As you may have noticed, there are three spaces for the first player's LEFT key.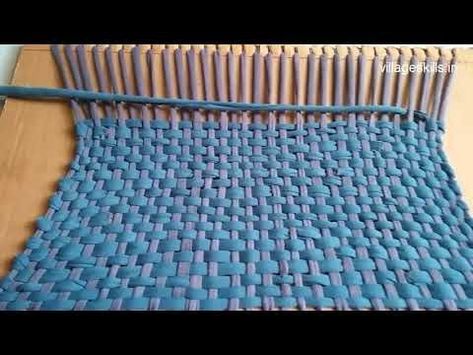 This means that we can independently assign TWO different keys - for example, on the keyboard and on the pad. The third cell is filled in automatically.
To delete a key, you simply hover over the desired cell and press the DEL (DELETE) key.
We do not recommend that you assign the following keys yourself:
- cursor keys on the keyboard LEFT, RIGHT, UP and DOWN>;
- keys of the small numeric keypad;
- ENTER, ESCAPE, TAB and DELETE keys;
- M keys (both Russian and English).
We recommend that you set the CANCEL function to the SELECT button of the mat.
After setting all the keys you need, return to the main menu by pressing ESCAPE several times.
Step 5: Let's dance.
So, all the difficulties are over and it's time to start the gameplay.
Press START (let's agree that START is either ENTER on the keyboard, or START on the mat - that is, exactly the key to which you assigned the START function). So, by pressing START you will be taken to the introductory screen.
Welcome screen
Press START again and you will be taken to the game mode selection screen.
Game Mode Selection Screen
You can select from five game modes. Depending on how many dance mats the START buttons are pressed, different game modes will be available:
Single mat modes:
- SINGLE - standard game mode. One person plays on one mat. It uses four buttons: up, down, left and right.
- SOLO - extended mode for one person. In addition to the four main buttons, two more keys are used: "right forward" and "left forward".
Modes for two mats:
To activate these modes, on the second mat, you must also press the START button.
- SPORR - mode for two mats. Two people are playing at the same time. They dance to the chosen song and their steps are exactly the same. Ideal mode for competitions and championships.
- PAIR - again for two rugs, but unlike VERSUS, they don't dance the same way.
 It uses a special sequence of arrows designed for doubles. If such a sequence is not provided by the authors, then the game itself will generate it.
 - Trickster - game on two mats for one person. Here you already have to run on the rugs. The most difficult version of the game for one.
After selecting the game mode you want, press START to move on to the difficulty level.
Difficulty selection screen
All songs can be played at different difficulty levels. Depending on the level of difficulty, movements, their frequency and complexity of execution change. The more difficult the level, the more difficult it is to follow what is happening on the screen and turn it into movement.
Standard difficulty levels
- BEGINNER - Rare and simple movements. This level is recommended for those who first encountered the game.
- EASY - Here the movements are more active, but generally quite simple.
- EXPERIENCED - Beginners will have a hard time. The frequency of steps is growing, there is less and less time for a break, and more and more complex frequent steps.
- DIFFICULT - A lot of frequent movements. There is definitely no time to look at the rug here.
Expert difficulty levels
These levels are located to the right of the "hard" level, on the second screen. Be careful. They are really very complex. For best results, a metal mat is recommended here.
- WITHOUT PAUSES - several songs follow one another.
- CALL - the same as WITHOUT PAUSE, but you must press all the arrows in time, without the slightest delay. You must dance on "great", "very good" and "good". All other options are considered an error. Loss comes after four mistakes.
- ETERNAL GAME - Endless game. The songs from the selected collection go one after another until you lose. And if you are a good dancer, you will play endlessly.
- MAGIC DANCE - Dance battle. Who will out-dance whom. The better you dance, the harder it will be for your opponent.
So, after you decide on the level, press the START key and go to the next menu - to select a collection.
Collection screen
All songs in the game are collected in collections. When you select a collection, you can view its cover art and the titles of the songs in it. If you do not know which collection to choose, select the first item in the list ALL MUSIC (all music) to see all the songs at once and choose from the full list.
Initially, only one collection of 21 songs is available to you. In order to gain access to other collections, you must collect hidden points.
Hidden points are awarded for each successfully completed song. As soon as you score a certain number of points, one or another collection becomes available to you. By the way, it is impossible to view the number of hidden points you have collected.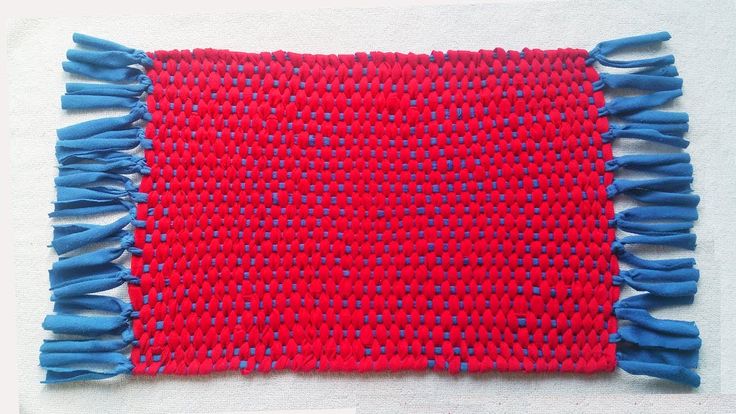 That is why they are called hidden.
Select the collection of songs you need and press START. The next screen is the most interesting - song selection.
Song selection screen
Look carefully at the song selection screen. It has a lot of useful information on it. On the right side of the screen there is a list of songs, on the left side there is information about the selected song.
Use the LEFT and RIGHT keys to scroll through the song list. Lingering a little on the song, you will hear its fragment.
Also included in the song list, two additional options:
- RANDOM (randomly) - completely impartially selects a random song from the collection.
- ROULETTE (roulette) - spins the wheel with songs and you just have to press START to stop it. Roulette is interesting in that you can even come across a hidden song.
Once you have selected a song, press START.
If you immediately press START again after starting the song, then the song settings menu will open - this is a rather complicated menu and only experienced users are recommended to "tinker" in it. If you accidentally got into this menu, then press the START key several times.
The dance itself is finally starting...
The game screen
The game screen consists of moving arrows and a walking zone. STEP AREA is a line of translucent arrows at the top of the screen. When music is playing, arrows run across the screen from bottom to top. When an arrow crosses the step zone, the player must step on that arrow.
In the upper part of the screen there is also a DENSMETER - a scale in the form of a snake. At the beginning of the game, it is half full. If you step on the arrows correctly and on time, then it charges. If you make mistakes, the densmeter runs out of power. Loss occurs if the densmeter is completely discharged.
The bottom of the screen shows the currently played difficulty level and the points scored.
In the center of the screen you will see the words that appear when you click on the arrow:
- GREAT and VERY GOOD: you clicked on the arrow at the right time.
- GOOD and NOT BAD: you stepped at the wrong time, but the arrow is counted.
- BAD: You had a hard time keeping up with the arrow.
- SKIP: You missed an arrow.
- OK: Appears when you hold FREEZE correctly
- FU-U: Freeze not completed.
If you do GREAT, VERY GOOD or GOOD in a row, you earn extra points.
At the end of the dance, you get points and a rating. You will get the highest rating if all of your clicks happened at the perfect moment (it was always GREAT). Pressing should not even be “a little earlier” and “a little later”.
Results screen
Rating - the main indicator of your skill - varies from AAA (the best) to (E - the worst). Worse than E can only be an option when you lose before reaching the end of the song.
Loss counts if your DANCE METER drops to zero. There is nothing left but to try again. Tip: listen to music and exercise more.
Lose
By the way, in the BEGINNER difficulty mode - the first stage cannot be lost, and in any case the second and subsequent stages can be played until the end of the song.
In one game you have to overcome four stages. With each subsequent stage, the game becomes more difficult: the requirements for the accuracy of pressing the arrows increase, and in case of errors, the densmeter discharges much faster.
At the end of the last stage, Stepmania sums up the entire game. And if you set another record for points, then you will be prompted to enter your name in the table of records.
Entering the player's name
Adding songs to Stepmania
CHAPTER 6. DANCE MAT. . Scratch 2 Programming Part 2
There was a girl who loved to dance. She was given a dance mat for her birthday. The girl was so happy that she danced all day long. She pressed all the arrows in the correct sequence and scored the most points! How many points can you score? The main thing is not to press the demo button!
In this game, the black arrows float up one by one and touch the colored arrows. You have to press on the keyboard on such arrows that are in contact at this moment and are highlighted on the screen. One point is awarded for each correct click. When you press the arrows on the keyboard, the ballerina girl will perform the corresponding movements.
There will be only eleven sprites in this game. Ballerina, four colored arrows, four black arrows, and two buttons.
We start creating the game by drawing the scene and sprites. First remove "Sprite1"
Select scene.
Go to the Backgrounds tab.
Fill the background with a gradient (two-color) fill. Select the Fill with Color tool.
You will get such a beautiful background.
The scene is ready. Add a Ballerina from the sprite library.
Select the Music and Dance section.
Select our beauty and click OK.
Rename her Ballerina. Expand the sprite properties window.
Enter a new name.
Click the Suits tab.
Ballerina already has four costumes! Just one suit for each shooter.
The third costume, in which the Ballerina is sitting on the splits, we will change to a jump that will occur when you press the up arrow on the keyboard.
Select the third suit and click the Set Suit Center button.
Set the center of the costume below the Ballerina. Now she will do splits in a jump!
The ballerina lacks one more costume - a costume where she raises her right leg. This is the costume she will wear when the left arrow key on the keyboard is pressed.
Duplicate the "ballerina-d" costume.
Select the Ballerina with the selection tool.
And now, press the "Flip left to right" button at the top.
The ballerina will be mirrored.
The ballerina will be mirrored.
Select the "Items" section.
Select Button2 and click OK.
Rename the button.
Click the Suits tab.
Remove the second button suit, we won't need it.
Now we need to write the word "start" on the button. This button will launch the program. Select the Text tool.
Click on the button and write "start".
If you, like me, get crooked, take the "Select" tool, and move the label exactly to the center.
Button ready. Duplicate it.
The button that appears will immediately have the correct name "Button2".
Edit Button2 costume. Select the Text tool.
Click on the caption and change it.
Buttons ready. Now let's add the first arrow. After we program its behavior, we will duplicate it three times to immediately get arrows with scripts. It remains only to slightly change the scripts. Open the sprite library.
Select the "Items" section.
Select Arrow1 and click OK.
Rename the arrow.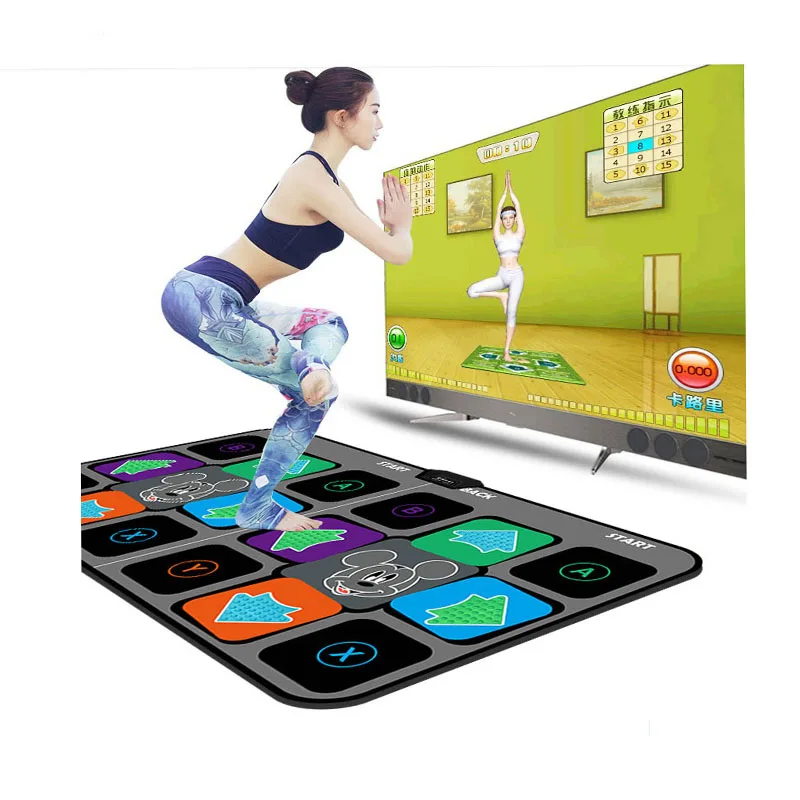
Click the Suits tab.
Remove all costumes except the first one, we won't need them.
The arrow must be painted red. Select the Colorize Shape tool.
Here is such a red arrow.
When touching the red arrow with the black arrow, it should be highlighted. To do this, you need to make a second suit, and fill the rim of the arrow with white on it. Duplicate the first suit.
To make it easier to fill the rim, zoom in.
Select a white color.
Gently touch the border of the arrow with the paint tool. It will become white, and almost invisible.
We got two suits of arrows to the right.
Now we need to make a black arrow. Let's make it from the Right Arrow. Duplicate the Right Arrow. She immediately got a good name - Right2, let's leave it. Go to the Right Arrow Costumes2 tab, and delete the second costume.
Select the remaining arrow using the Select tool.
The arrow will be framed.
Drag the bottom center selection box up a bit. The arrow will become thinner.
Now fill it with black.
Here is such an arrow.
Now that all the costumes are drawn, we start creating the program.
First, let's program the scene. Let's start with creating variables, click the corresponding button.
Create four global variables: dance, points, dance length, and action number.
The score variable will count the number of correct arrow keystrokes on the keyboard. The dance variable encodes the order of movement of the small arrows, that is, which arrow follows which, it's like a queue. The arrows are encoded with letters. L - arrow moves to the left. R - Right arrow moves. B - Up arrow. H - Down arrow. In order to determine how many actions need to be performed, the “length of the dance” variable is used, and the “action number” variable is used to determine the number of the action.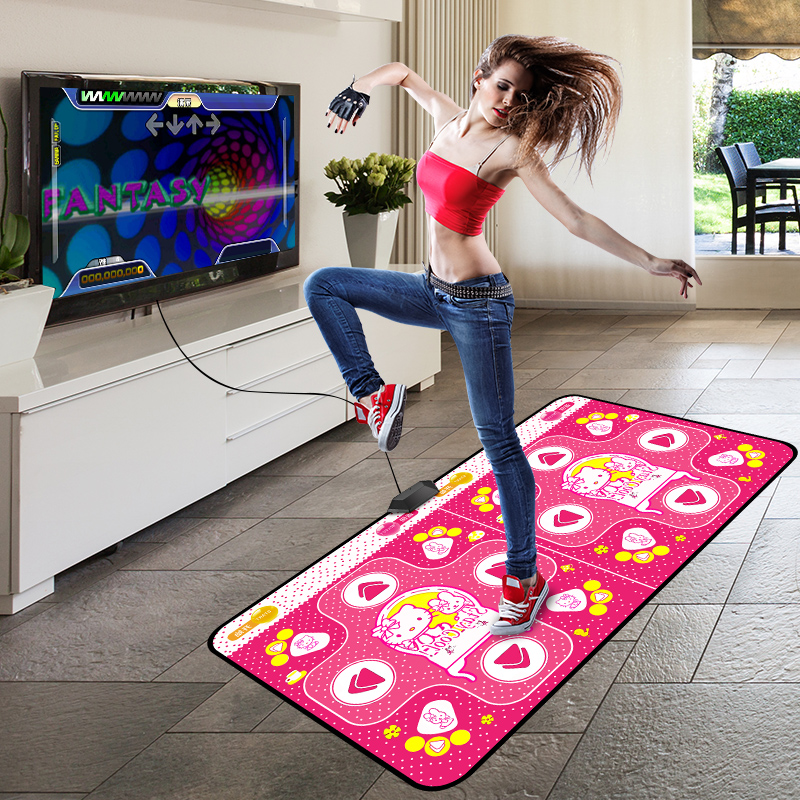
The scene will have two scripts in total. Make the first script, it sets the initial values of the variables.
The second scene script transmits different messages every quarter of a second according to the sequence encoded in the "dance" variable. First, create a new "start" message.
Make a script. During the creation process, you will need to create four more messages.
Let's see how this script works. At the very beginning of the program, the value of the variable "action number" is equal to one, which means that the first condition will look like this.
If the first letter in the dance is equal to "l", and it is equal, then we send the message "to the left". Upon receiving this message, the little Left2 arrow will float up. The script works cyclically, it repeats exactly as many times as there are letters in the "dance" variable, and in each cycle it changes the value of the "action number" variable by one. This means that after the message "left" corresponding to the first letter, the message corresponding to the second letter in the variable "dance" will be transmitted, and this is "right".
Now program the buttons. Button1 has only one script, it just sends the "start" message.
Button2 also has only one script, it sends a "demo" message. Create this post.
Script Button2.
Let's start creating a program for the Ballerina. Her program consists of eight scripts. The first script puts the Ballerina on the right side of the screen, and puts her first costume on.
The following four scripts determine how the Ballerina reacts to pressing the arrows on the keyboard. If the down arrow key is pressed on the keyboard, the Ballerina will change her costume to a squatting one and return to her original position.
If the up arrow key is pressed on the keyboard, the ballerina will change to a bouncing costume and return to its original position.
The next two costumes are for right and left shooters.
With the help of the following script, the girl at the end of the game will tell you how many points you have scored.
Here's a little hint on how to put together such a complex script.
The following script will make the girl dance a demonstration dance. Make the girl such a script.
The "techno" sound can be found in the sound library. Go to the "Sounds" tab.
Click on the sound library button.
Go to the Music Loop section.
Select the desired sound and click OK.
Now, upon receiving a “demo” message from Knopka2, the Ballerina will start dancing, look how she is sausage!
You can start programming the hands. The sequence of actions (algorithm) will be as follows. First we make programs for the Right arrow and for the small Right arrow2. Then, by duplicating the red arrow, we get the Left, Up, and Down arrows, and by duplicating the small Right2 arrow, we get the small Left2, Up2, and Down2 arrows.
First of all, we will make a program for the red arrow. It has only two scripts. Here is the first script.
Here is the second script.
Now let's program the little Right Arrow2. She has only three scripts. The first script sets the arrow to its initial position in the center of the screen.
The second script moves the Right2 arrow 50 times up by 3 dots - a total of 150 dots up, and returns to the starting point again.
The third script checks if you managed to press the Right arrow at the moment of touching the arrows. If you have a good reaction, and you were in time, then the “points” variable will change by one.
Both arrows to the right are ready. Now let's make the other three big arrows by duplicating the red arrow. After all the arrows are ready, we will change their programs. Let's make a left arrow first. Duplicate the red arrow.
Rename the resulting sprite.
Go to the Costumes tab.
It is necessary to recolor the arrow in orange and turn it to the left. Select a coloring tool.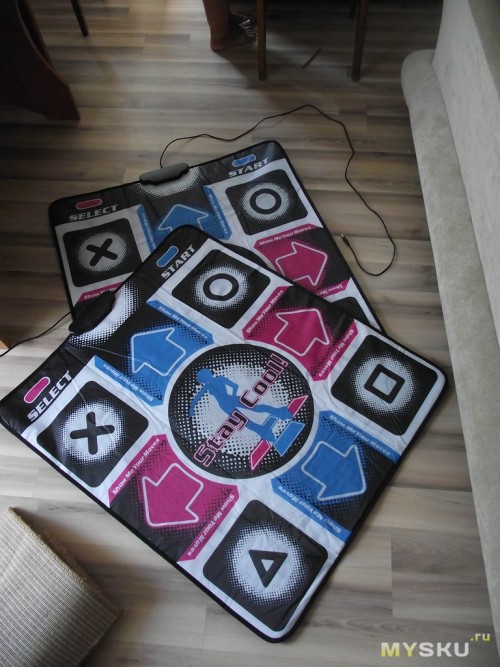
Mirror the arrow.
Select the second shooter outfit. Color it the same way and reflect it.
Now let's make an Up arrow. Duplicate the red arrow again.
Rename the resulting sprite.
Click the Suits tab.
It is necessary to recolor the arrow in blue and turn it up. Select a coloring tool.
Color the arrow.
To rotate the arrow vertically, select it with the selection tool.
Click on the top circle, and turn the arrow up.
Color and rotate the second arrow suit in the same way.
Create a down arrow by duplicating the up arrow.
Rename the new sprite.
Recolor the arrow purple.
Mirror it.
Recolor the second Down Arrow suit in the same way, and mirror it.
All large arrows are drawn. We will change their programs after we make all the small arrows. Duplicate the little Right Arrow2.
Rename the resulting sprite.
Click the Suits tab.
Click the "Flip left to right" button.
Left arrow2 ready.
Now we will make an arrow Up2 from it. Duplicate the Left arrow2.
Rename it.
To rotate the arrow vertically, select it with the selection tool.
Now gently click on the circle and turn the arrow tip up.
Arrow Up2 ready. Let's make a Down arrow out of it. Duplicate Up2.
Don't forget to rename the new arrow.
Mirror it.
Now, finally, all the arrows are ready. It remains to change their scripts a little, and the game is ready. Start with the Left Arrow. In the first script, correct the X and Y coordinates. The first script should look like this.
In the second script, correct only the note number and who it concerns. The second script should be like this.
Correct the Up arrow scripts in the same way.