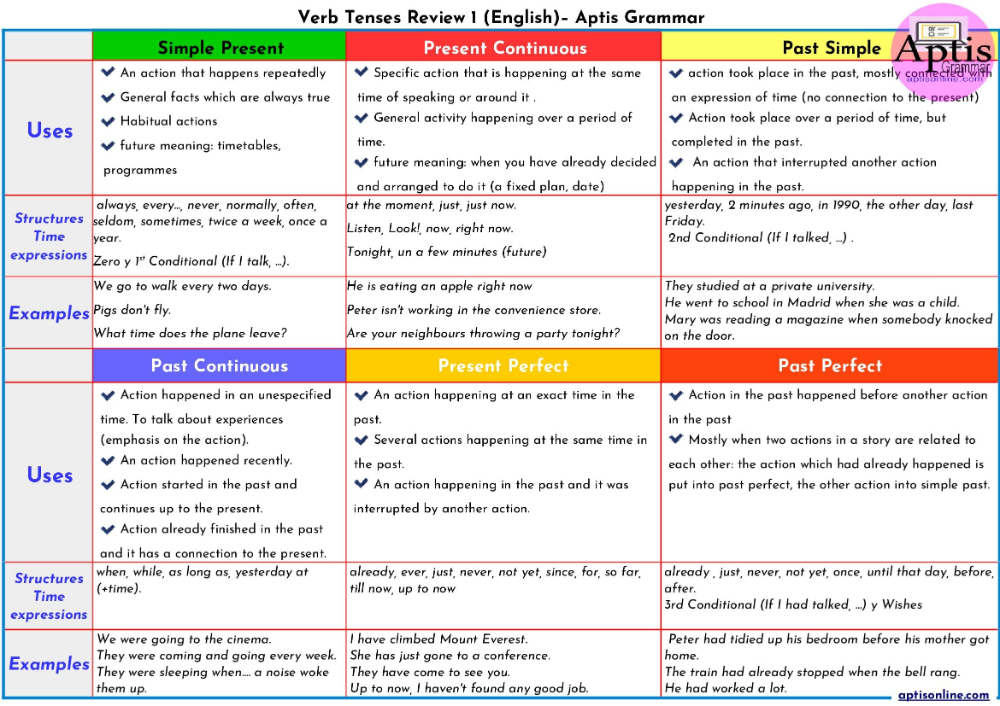
How to make a dance leotard
How to Make a Leotard at Home
Dancing is all about expressing yourself, so you (or your little one) need a leotard to help show off your punchy personality. Whether you want a funky pattern or prefer to go with a more traditional color, making your own means you get to customize the design, the fabric, the fit, the whole vibe.
The leotard you’ll make in this tutorial works perfectly for ballet, gymnastics and all kinds of other dance and fitness classes. You can use the same instructions to make a kids’ leotard or an adult bodysuit. The best part? There’s absolutely no pattern needed.
Leotard
Level: Intermediate
What You Need
Good to Know: If you want a longer sleeve than the one shown in this tutorial, you can trace a long-sleeve T-shirt during the drafting process. Or you can make a sleeveless leotard (or even a bathing suit) by finishing the sleeve openings the same way as the neckline.
Instructions
1. Draft the Leotard Front
Fold your bathing suit in half along the side seams, with the front side out. Align the suit’s fold with the straight edge of your paper. Trace around the suit.
Turn the T-shirt inside out and fold it in half. Fold the sleeve back inside the bodice so the sleeve seam is exposed. Line the shoulder up with the bathing suit shoulder, and the side seam with the side of the bathing suit line you just traced. Trace the sleeve from where it meets the side seam to the bathing suit marking at the shoulder.
Pro Tip: For tracing these two garments, it might help to use different pen colors so you can easily tell what markings you’re looking at.
Move the T-shirt so the fold is along the edge of the paper, with the shoulder still aligned with the bathing suit markings. Trace the neckline.
When you’re done, the paper should look like the image above.
2. Add the Seam Allowance
Using a seam gauge, add ½” seam allowance to the crotch seam, sides and shoulders. Add a ¼” seam allowance at the neckline and leg openings.
Mark the pattern piece with a fold notation and add any other important info (like a label that this piece is the front). Cut it out — you can use it to draft the back of your leotard.
3. Draft the Leotard Back
Trace the pattern for the leotard front on another edge of the paper to use as a reference.
Refold the bathing suit, this time with the back side out. Align it with the tracing of your front piece and trace any portion that’s different (like the leg openings).
Make sure to add a ¼” seam allowance along the leg opening to account for the previously added seam allowance from the traced leotard front. Make sure the crotch and side lines still match up.
Draw in a lower back opening to allow for easy dressing without closures.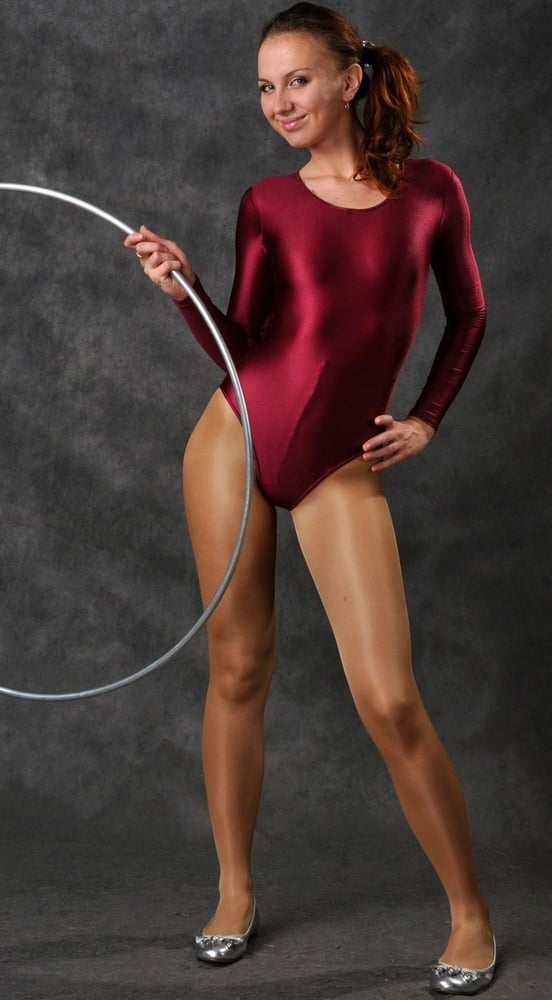 The bottom of the new curve should be at least as low as the bottom of the sleeve opening. Add a ¼” seam allowance to the new back opening (the black line in the photo above).
Mark the pattern piece with a fold notation and any other important details.
4. Draft the Sleeves
With the T-shirt still inside out, fold it into the sleeve and lay the folded edge along the straight edge of your paper. Trace the curve and bottom edge of your sleeve.
Draw a 90-degree line from the paper edge to the end of the sleeve.
Add a ½” seam allowance around the entire sleeve. Mark the pattern piece with a fold notation and any other important info.
5. Cut the Fabric
Use the pattern pieces to cut your fabric. Cut one front, one back and two sleeves on the fold. Mark the top center of each sleeve once it’s cut out.
6. Sew the Neckline
Align the front and back shoulders, right sides together. Pin and sew the shoulders with a ½” seam allowance.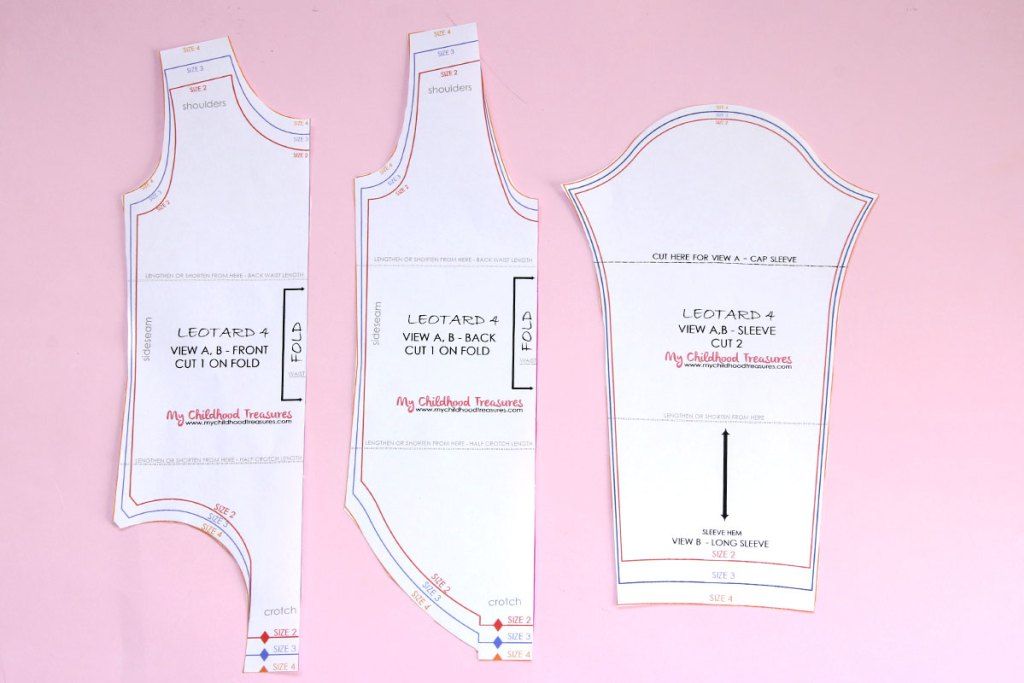 Trim the seam allowance to ¼” and press open or to the back.
Measure out a piece of ¼” elastic so it’s the length of the entire neck opening.
Baste the elastic to the neck opening with a wide, long zigzag stitch. Line up the edges of the neckline and elastic as you sew, making sure to not stretch the elastic or the fabric.
Turn the elastic under and all the way along the wrong side of the neckline. Topstitch about ¼” away from the edge with a stretch or zigzag stitch.
7. Add the Sleeves
Press the sleeve hem under ½”.
Match the top center sleeve marking with the leotard’s shoulder seam, right sides together. Pin the sleeves to the leotard sleeve opening.
Stitch each sleeve in with a ½” seam allowance.
Pro Tip: Stitch with the sleeve fabric next to your machine’s feed dogs to help ease the sleeve in.
Trim the seam allowance to ¼” or press it toward the bodice.
8. Stitch the Sides
Place the leotard front, back and sleeves right sides together, aligning the side seams. Unfold the pressed sleeve hem and stitch the side seams from the leg opening to the end of the sleeves with a ½” seam allowance. Trim the seam allowance to ¼” or press it toward the back.
9. Hem
Refold each sleeve along the pressed line. Hem the sleeves about ⅜” from the fold, using a zigzag stitch, stretch stitch or twin needle.
Stitch the crotch seam with a ½” seam allowance. Trim to ¼” and press it open or toward the back.
Baste and stitch more elastic into each leg opening, the same way you did with the neckline.
And there’s your snazzy new custom leotard, ready to bust a move at the dance studio or gym!
How to Make a Leotard | LEO#4 SEW ALONG
Learning how to make a leotard is immensely rewarding and considering the cost of these sparkly little numbers, very economical. Don't be put off by the high prices of dance and swim fabric, you will often get more than one leotard in a yard, particularly for younger girls. If you have been a little scared to learn how to make a leotard yourself, then here are is a simplified tutorial for beginners to give you the confidence to get started.
Once you learn the basics of how to make a leotard you can start creating variations including unitards, skirted and color-blocked.
Contents
- How to Make a Leotard - Your Supplies
- How to Make a Leotard - Cutting Lycra and Spandex
- How to Sew a Leotard
- How to Sew a Leotard - Sewing Instructions
- Step 1 - Join the Shoulders
- Step 2 - Insert the Sleeves
- Step 3 - Stitch the Sleeve Hems
- Step 4: Stitch the Sides and Bottom
- How to Make a Leotard - Inserting Elastic
- How to Make a Leotard - In Conclusion
- Shop Leotard Patterns
- More on How to Make a leotard
How to Make a Leotard - Your Supplies
- Dance or swimwear lycra with at least 75% stretch. If you are not sure what stretch factor your fabric has then get my stretch factor of fabrics chart. If this is your first time learning how to make a leotard, then choose a fabric that has a matt finish and no sparkles or sequins as it will be much easier to sew.
 (Read my buying guide for Spandex and Lycra)
 - Stretch needles (Read sewing machine needle guide)
- ⅜ inch (10mm) swimwear elastic. Always choose a good quality swimwear elastic such as Birch, Singer or Dritz. Swimwear elastic is specially treated to stop rot caused by chlorine and sweat and is nice and firm so your legs won't stretch out of shape. Don't choose the clear type of elastic as it is hard to sew and gives inconsistent results.
- Your sewing machine and basic sewing supplies. The great news is you don't need a serger! You can learn how to sew a leotard on just an ordinary machine. (Read sewing Spandex and Lycra and with a regular machine)
- A leotard pattern. You can make your own by tracing around a leotard you already have, or purchase one of my quality premium leotard patterns. Here are some of my bestsellers. I've used leotard pattern #4 for this tutorial
SHOP LEOTARD PATTERNS
- Leotard Pattern L5U01
- Leotard Pattern L508
How to Make a Leotard - Cutting Lycra and Spandex
Start by cutting out your pattern and fabric.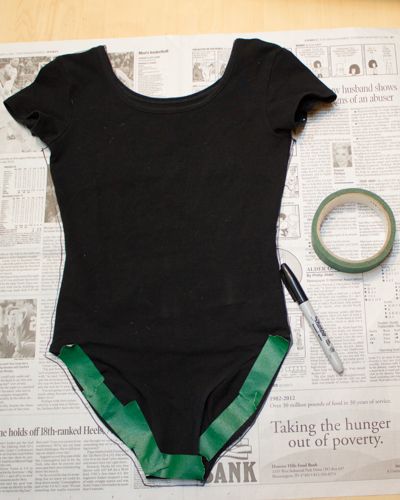 When cutting leotard fabrics, be careful that your pins don't leave marks. Test a scrap of fabric and if the pins leave a mark, then use pattern weights or a simple tin from your pantry to hold the pattern down.
Always make sure you use really sharp scissors that won't burr the edges of the fabric when you cut. If you are confident with a rotary cutter you can get nice clean edges by using it with a cutting mat. Just watch your fingers!
You will often save fabric if you cut your leotard pieces one at a time, folding as you go. Leotard fabric is expensive so plan ahead when cutting and place your pieces close together. You will often have enough fabric left to make a bikini bottom or top if you cut carefully. Scraps can also be great to applique shapes and designs.
How to Make a Leotard - The Leo #4 patternHow to Sew a Leotard
Now you are ready to start sewing!
The are several stitches you can use when learning how to sew a leotard so please read how to sew leotards with a regular machine if you haven't already.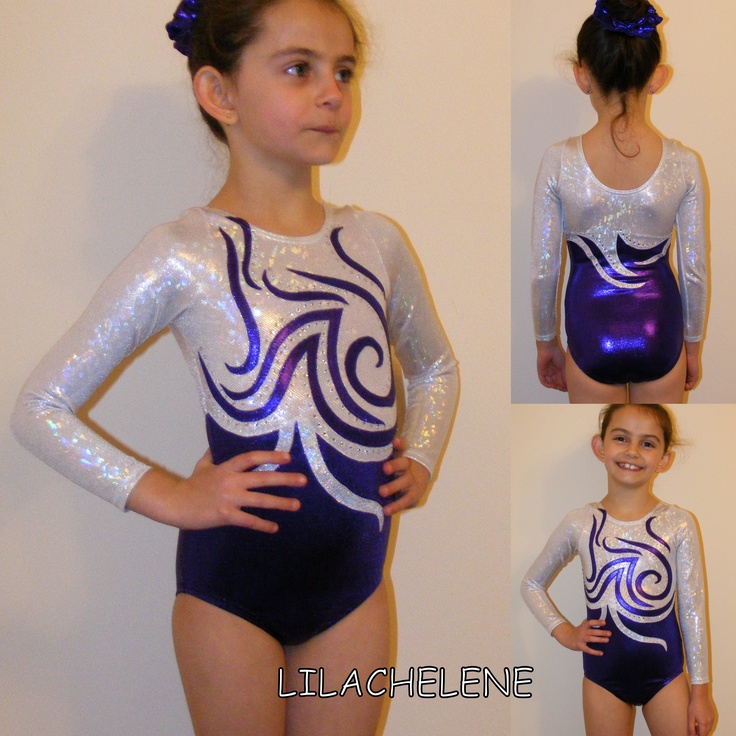 If you don't have a serger the best stitch to use is a narrow zig-zag stitch which will retain the elasticity of the fabric.
Grab a piece of Lycra scrap and try a zig-zag of width 1.0 and length 2.5. Stretch it out and see if the stitches snap or if they bounce back. You want your stitches to have a similar elasticity as your fabric.
Finishing the edge can be done with a wider zig-zag like in the photo below. Try a width of 4.0 and length of 3.0 on your scrap.
How to Make a Leotard - SeamsDon't forget your stretch needles. It makes all the difference and will save you from a lot of frustration and skipped stitches.
How to Sew a Leotard - Sewing Instructions
Here is a video I made for you!
Enjoy and don't forget to subscribe to my YouTube channel for more sewing and craft videos.
How to Make a Leotard VIDEOStep 1 - Join the Shoulders
With the RIGHT sides together, stitch the front to the back at the shoulder seams.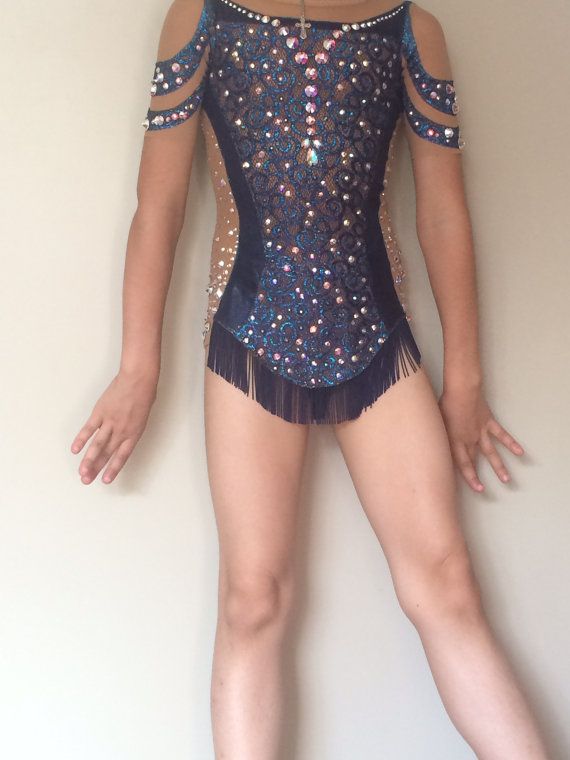 Most of my leotard patterns have a seam allowance of ¼ inch (6mm) so make sure you check your individual pattern instructions for any variances.
Step 2 - Insert the Sleeves
Fold the top of the sleeve in half and mark the center. Match the center top of the sleeve to the shoulder seam. With RIGHT sides together, stitch the sleeve to the armhole. You will notice that the sleeve and the armhole curve in opposite directions so work them together pinning carefully before you sew.
How to Make a Leotard - SleevesStep 3 - Stitch the Sleeve Hems
Open up your leotard and then on the WRONG side of the fabric, turn up the sleeve hem by the seam allowance in the pattern. Most of my leotard patterns will have a seam allowance of ⅜ inch (1cm) for the hems.
Just zig-zag across the sleeve hem catching in the raw edge. Try a width of 5.0 and a length of 2.5. Experienced sewers could even use a twin needle (double needle) on the outside of the sleeve.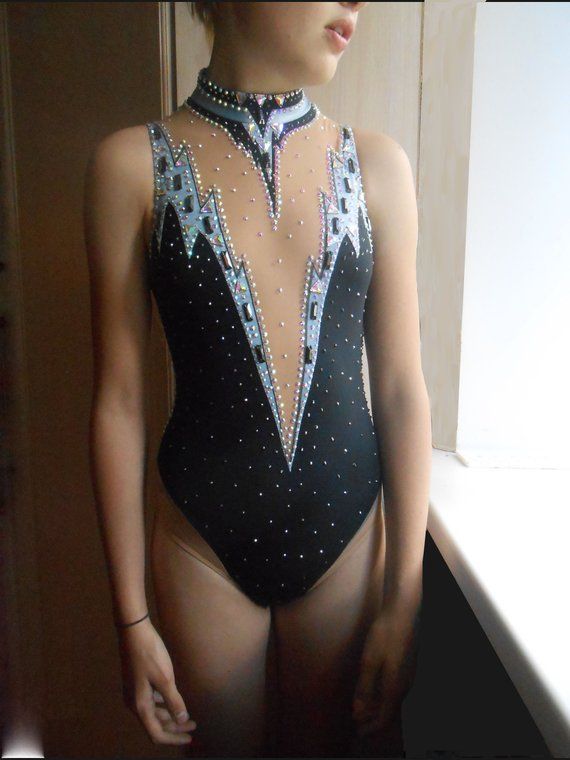
It is often a good idea to test a scrap of fabric first to see if the hem will pucker. If it does then use some hemming tape underneath to smooth it out. (Read how to use hemming tape for perfect stretch hems)
How to Make a Leotard - SleevesSome patterns call for you to sew the neck elastic at this stage while your pieces are still flat. Ultimately it doesn't really make a difference whether you sew it now or at the end. It just comes down to personal preference.
Step 4: Stitch the Sides and Bottom
Now you can fold your leotard with RIGHT sides together, matching the arms and crotch. Stitch the side seams all the way along to the bottom of the sleeves. It is a good idea to reinforce the ends of the sleeves with a few extra stitches.
Stitch across the crotch.
How to Make a Leotard - SeamsHow to Make a Leotard - Inserting Elastic
Now you have your leotard all together it is time to sew the elastic in the neck and legs.
I have a full tutorial on how to sew elastic in leotards for those of you that haven't done this before.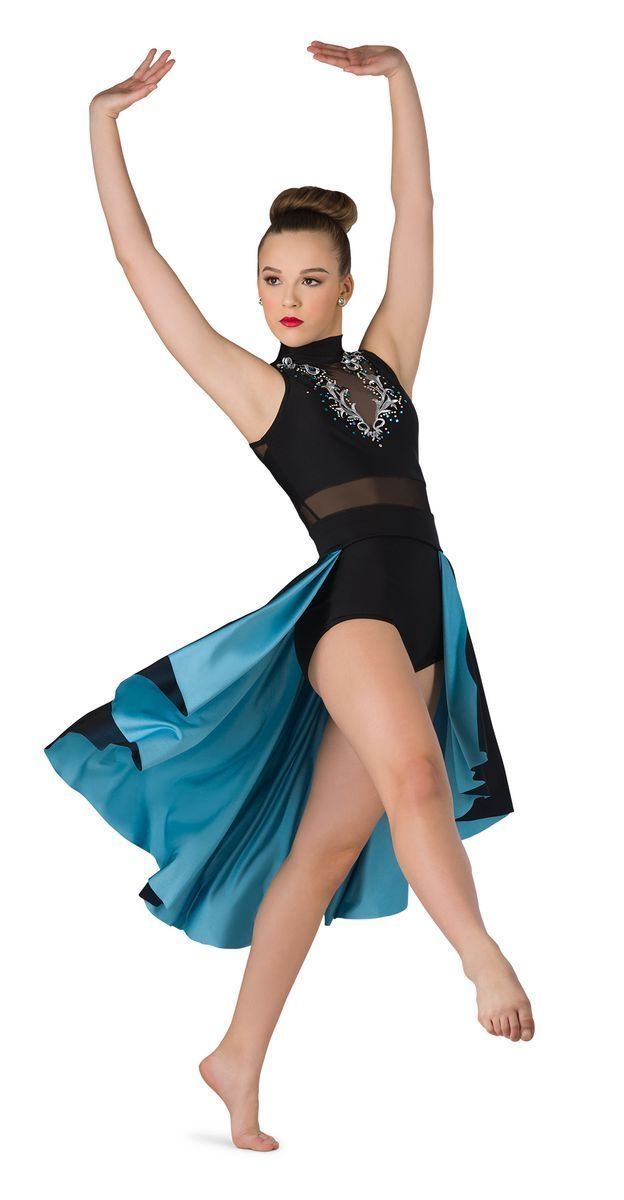
It may seem a little daunting the first time but it really is quite easy. The trick is to use a good quality elastic that doesn't stretch out of shape and to accurately divide your openings in quarters.
How to Make a Leotard - In Conclusion
So I hope that demystifies the process of sewing leotards! They are really rewarding to make and most of the time they will take you longer to cut out than to sew once you have made a couple.
Did you know that my Treasurie and My Childhood Treasures sewing pattern labels have a large number of leotard patterns? Here are just a few of the leotard patterns you can choose from.
The leotard featured in this tutorial is leotard #4 and is the perfect beginner leotard project.
SHOP Leotard patterns
- Leotard Pattern L507
- Leotard Pattern L509
- Tops Pattern #3
- Tops Pattern #3
- Leotard Pattern L508
More on How to Make a leotard
- How to Measure Stretch Factor
- Sewing Spandex and Lycra and with a regular machine
- How to Sew Elastic in Leotards and Swimwear
- How to Sew Binding
- How to Sew Spandex Straps
- How to Sew Stretch Fabric
- Types of Knit Fabric
We sew a leotard for rhythmic gymnastics
My master class is dedicated to .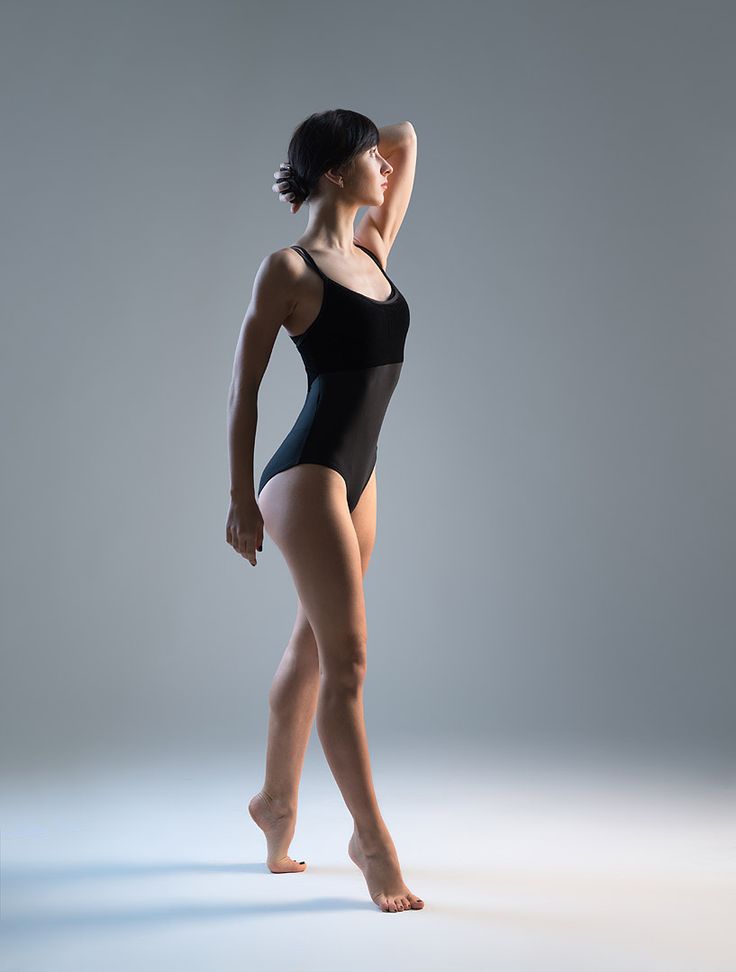 .. my daughter, sewing her leotard for rhythmic gymnastics.
Materials : elastic jersey (I have a cotton cooler with elastane), elastic for trimming the neckline and legs, matching threads.
Tools: scissors, sewing machine/carpetlock (I have a 5-thread machine), iron, and most importantly my own hands :)
Cutting. We lay out the details along the share (I have a drawing with zebras along the edge, I want to rotate by 90 degrees, but you can’t, otherwise it will be inconvenient to put on and take off the swimsuit), add allowances for cuts and cuts: 1 front part, 1 back part, 1 gusset part, 2 sleeve parts (on the cut of the bottom of the sleeve 2.0 cm).
Sewing. Now we pin the sections of the gusset with the front and back with pins, folding the “sandwich” like this - front face up, back face down (the front face with the back face is natural, but how else), and the gusset face down.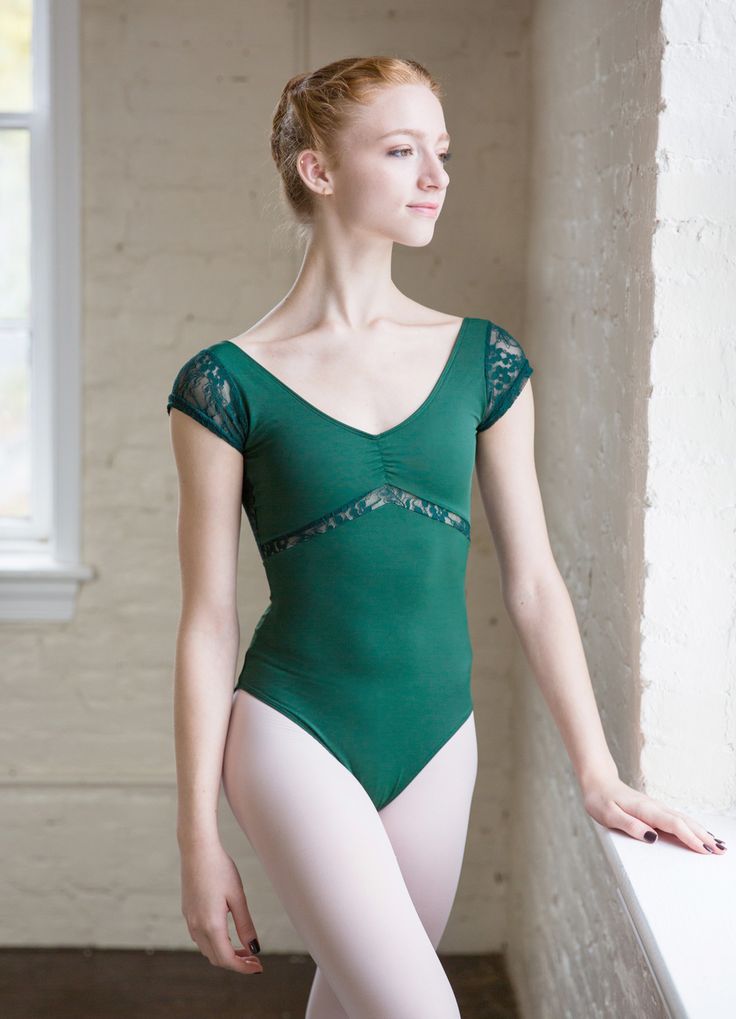
Immediately cut off the shoulder sections of the front and back. Pay attention to how the pins are located in relation to the cut (this is an appeal to beginners in tailoring), so you can as close as possible, and sometimes without pulling out the pins, overcast the cuts on the overlock without hitting the pins with a knife.
Unfolded to show the “sandwich” for clarity:
We are going to grind and overcast with four threads, everything that was chipped, plus the upper open cut of the gusset.
Next, I want to show you two options for processing the cuts of the neck and for ... legs (so we will call it). For clarity, I took a different color jersey, it really stretches less, but it can be seen well.
To begin with, how will we process the slices. On the left 1 - a white latex elastic band, such a pleasant one, it is used exclusively in swimsuits, on sale in ordinary ateliers and fairly large stores they say this: “Does this happen? where did you even hear that?” It can be replaced in case of emergency with rubber bands 2,3,4, for some reason they sell it to me under the name “elastic oblique trim”, in fact, it is an elastic band, it is easy to bend in the center and the fold will always be clear. It is used to process underwear, well, what a fantasy is capable of :) Colors and widths, patterns are different, you can pick it up perfectly.
Finishing the neckline and leg ends
Option 1. With latex ribbing.
We take an elastic band and apply its edge to the cut of the neckline from the side of the wrong side, we chop it off with a pin from the side of the face. We chip off like this along the entire cut of the neck, making the knitwear fit on the elastic.
Now we overlock the neckline on the overlock, grabbing the elastic from the wrong side. Knitwear is stretched in both directions. Here and below in the photo I took pictures with one hand, and with one I showed the stretching of the knitwear, there was no third hand for clarity, we will assume that it is there :) 3 threads.
Now fold the overcast seam inside out and pin it.
We set up the overlock for a wide flat seam (coverlocks are capable of this), and we sew by stretching the seam and pulling out the pins along the way, the left edge of the line should fall along the edge of the elastic band from the inside, so the entire elastic band will be captured and folded over and not rubbed will be.
It turns out like this seam:
This is how sections of leotards, not only gymnastic ones, are processed.
Option 2. With elastic band.
We take an elastic band and apply a cut of the neck to its middle, the wrong side of the inlay is combined with the wrong side of the jersey. The middle is very easy to find, above in the photo of the rubber bands it is very clearly visible. And we cleave with a pin from the side of the face, so that the tip of the pin sticks out from the wrong side through the elastic. Like this:
We chip off along the entire cut, making the knitwear fit on the elastic.
And now we bend the inlay in half, wrapping it with a cut of knitwear. And we notice, pulling out the pins. I sew bathing suits once a year, I have to notice, you can just chop off.
Now you need to set a zigzag and repeat again: pull in both directions and scribble along the elastic.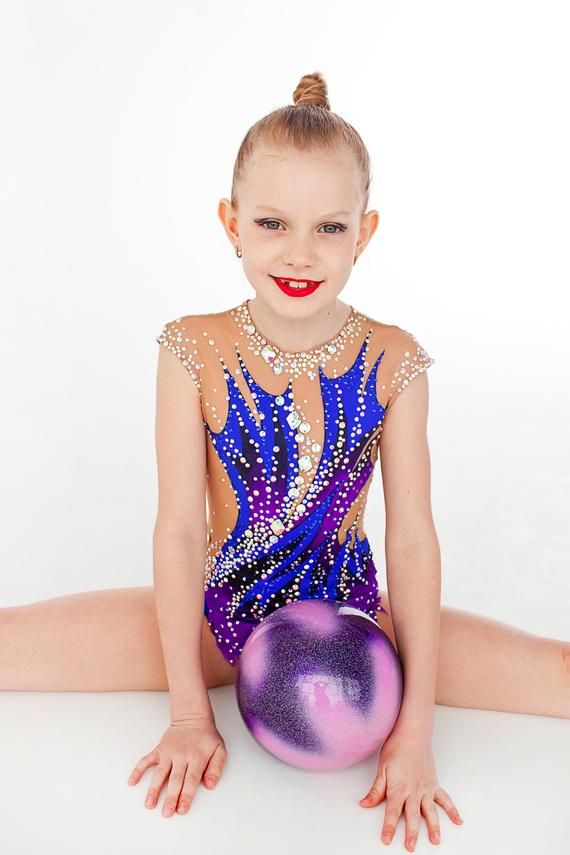
It turns out like this, this is for processing underwear, but this leotard for my daughter is not for performances, and there are no requirements for it, so I chose this particular method of processing cuts, I like it more for children's clothes.
Back to the swimsuit. Pin the gusset, aligning the cuts with the front for ease of work, and repeat all the operations described above in the second variant for the cuts of the legs and for the neck. Finished seam:
Iron the hem of the bottom of the sleeve to the wrong side and pin it with pins from the front side, you can sweep it up.
We sew with a wide flat seam.
We stick the sleeves into the armholes, combining all the control marks, and then we sew it.
We cut off the side and lower sections of the sleeves, combining the control marks, then we sew and overcast.
We thread all the threads, iron the seams, and make a backtack with a narrow and frequent zigzag, and we do the same on the samples.
From an overabundance of rhinestones at home (all hamsters have an overabundance of something), I decided to add them to the zebra stripes and muzzle. In the figure, I laid out the area with rhinestones, turned off the steam on the iron, and pressed it for a while, while the main thing was to freeze and not move the iron, then I repeated the operation with the second half of the rhinestones on the zebra.
And now let's compare two samples of rubber bands for stretching. Samples A, B - in the stretched state; C, D - without tension.
And for the thickness of the seam, the processing of sections with an elastic band and on the side at the backtack. Samples A, B - cut processing; C, D - side seam.
Only a caliper noticed the difference in thickness, it looks like nothing! Stretches the same. For my daughter, I prefer to do it in the second way, it seems to me that the rubber band itself is softer to the touch, and the trainer does not present elastic bands for a swimsuit for regular classes :)
I'm distracting the culprit of the master class from extremely important activities and games, and I ask you to demonstrate convenience and functionality :) Comfortable, nothing pulls anywhere, and this is the most important criterion in a leotard for rhythmic gymnastics.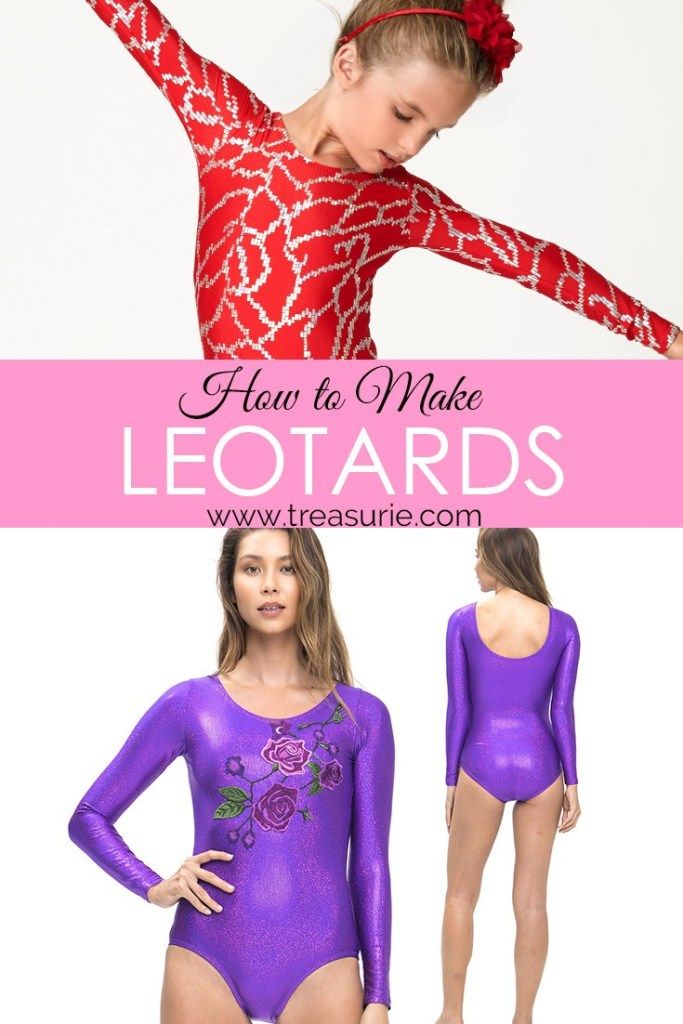
I will be glad if the master class was useful for you. If suddenly something is not clear, ask, I will answer.
for the pool, for choreography, leotards for gymnastics
Proper sports education of children is important to start from an early age. At the same time, it is not necessary to send the child to the professional section, in which they will make a champion out of him. A weekly visit to the pool, dancing and gymnastics - this is quite enough for a general strengthening of the body.
If you attend or are just going to join a sports club with your child, be sure to take care of a comfortable and beautiful uniform for classes in advance. Most sports organizations will tell you in detail about the rules and features of such clothing. For example, there are a number of conditions, fixed at the world level, which dance clothes must comply with. Gymnastic and swimming swimsuits also have a number of important characteristics that contribute to the correct performance of all necessary exercises.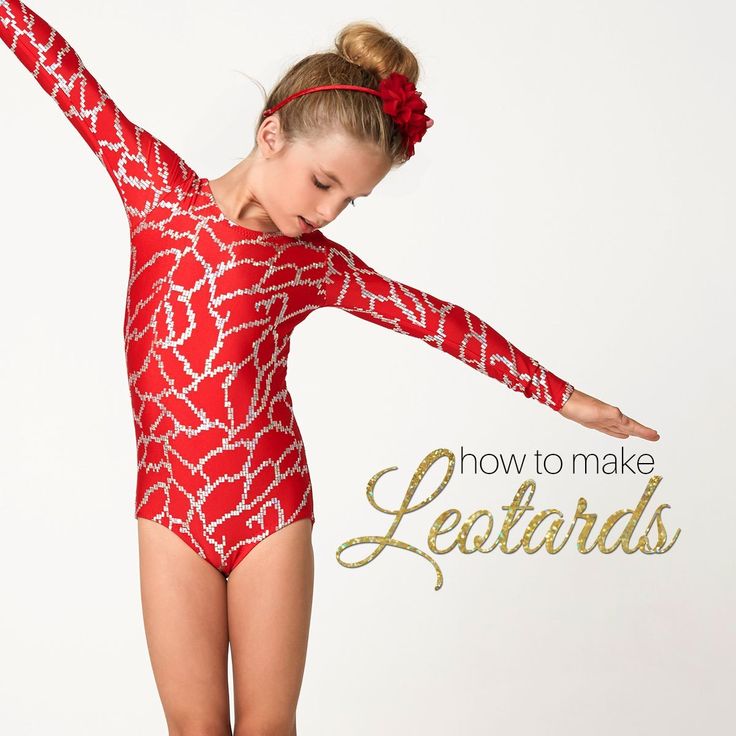 In this article, we will take a closer look at these types of sportswear.
Swimwear for the pool
If your child has a swimsuit for the beach, it does not mean that it is suitable for the pool. Separate models with a bandeau, bikini, swimsuits with skirts, ruffles and decor, in general, everything that would adorn a little fashionista during her holidays will only interfere with her during classes. Swimwear for the pool should be of a simple sports design. A one-piece model with wide straps or a top combined with comfortable swimming trunks is ideal. To improve the child's athletic performance, a swimming suit must be chosen with a minimum amount of decor, since unnecessary details will only worsen the streamlining. And, finally, the fabric from which the product is made must be specially designed for the pool, which means it is resistant to aggressive chlorine environment.
The Arina+Nirey line of sports swimwear for girls takes into account all the above requirements.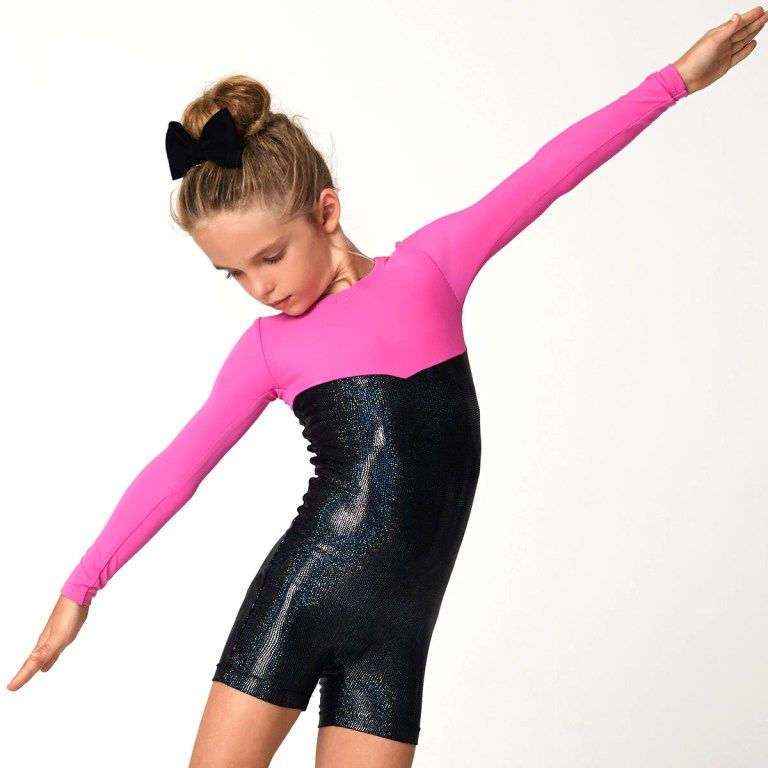 From year to year, the brand offers models developed with the participation of sports trainers. All swimwear and trunks have a perfect fit and improved streamlining. Despite the laconic decor, all models look incredibly bright and fashionable. Exclusive prints are drawn by hand every season by the brand's artists. The sports line is made of Italian fabric from the world-famous company Carvico. This is Vita's specialized fabric designed for harsh chlorine environments and field tested in pool conditions. According to research, this fabric is more than 25% better at stretching in water with the addition of bleach than similar fabrics from manufacturers of sports swimsuits.
Leotards for gymnastics
For sports in the gym, it is best to opt for a sports leotard. Moreover, your child does not have to do rhythmic or artistic gymnastics. Sports models are perfect for training in stretching, rhythm, aerobics. The main task of a sports swimsuit is to securely fit the body without restricting movement, so the design must have a perfect fit. For such clothes, choose hygroscopic, breathable fabric so that the child is comfortable to practice.
Gymnastic leotards from the Arina Ballerina brand are created taking into account the special recommendations of trainers and doctors. Excellent fixation of products on the body, special fabrics for quick muscle warm-up, breathability and hygroscopicity of materials - all this is accompanied by a unique design of each product, taking into account the preferences of the child.
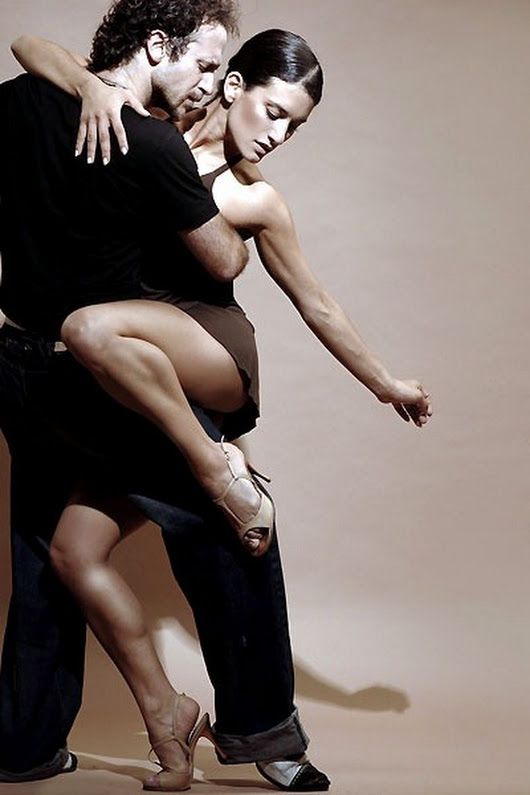
Choreography leotards
The magical art of dance requires an equally sophisticated costume, so Arina Ballerina's dance leotards and bodysuits are made of shiny fabric in bright colors with romantic prints complemented by rhinestones. To complete the image of a young dancer, the leotard can be supplemented with an airy skirt, which sits securely on the body due to the elastic waistband.
For little ballerinas, the brand has released a series of real ballet tutus, which were created using the same technologies as theater costumes.