How to draw ballet dancers
Ballet Girl Drawing - Etsy.de
Etsy is no longer supporting older versions of your web browser in order to ensure that user data remains secure. Please update to the latest version.
Take full advantage of our site features by enabling JavaScript.
Find something memorable, join a community doing good.
(1,000+ relevant results)
A Closer Look at Edgar Degas' Ballet Dancers
“A painting requires a little mystery, some vagueness, and some fantasy.
” Edgar Degas
Let’s take a closer look at Edgar Degas’ ballet dancers. It’s a large body of work, containing around 1,500 paintings, sketches, pastels, and sculptures. Degas sums them up nicely in the above quote. I cover:
- A Study of Movement and Life
- Use of Line to Reiterate Forms and Outline Subjects
- Degas the Colorist
- Dancer Studies and Sketches
- Compositions
- Key Takeaways
- Other Resources
- Thanks for Reading!
A Study of Movement and Life
Degas spent most of his life painting dancers, but perhaps it was as a means of studying movement rather than an innate interest in ballet. In his own words:
“People call me the painter of dancing girls. It has never occurred to them that my chief interest in dancers lies in rendering movement and painting pretty clothes.” Edgar Degas
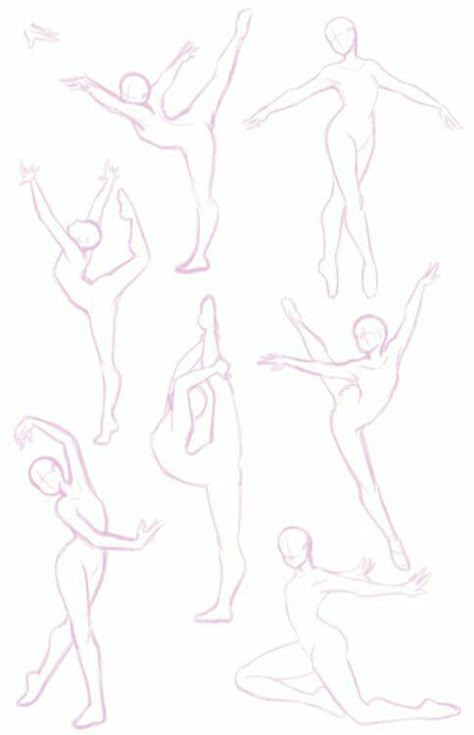
I cannot think of a better demonstration of movement than ballet.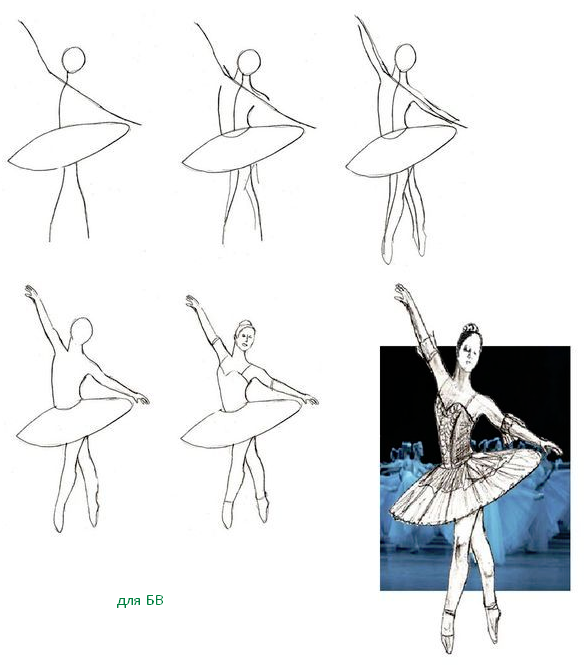 The dancers twist, turn, and pivot effortlessly through space. What a wonderfully impossible challenge to capture this on a flat surface. Especially given we artists don’t have the benefit of multiple frames in time like in film or even photography. We must create the illusion of movement with a single image.
Degas wasn’t the only artist to paint the same or similar subject over and over again. Claude Monet did it with water lilies, the Rouen Cathedral, the Waterloo Bridge. Vincent van Gogh did it with olive trees and sunflowers. Painting the same subject allows you to gain a more intimate understanding of it. The constant subject also allows you to better observe changes in other elements such as color and light, which was Monet’s chief concern.
Anyway, back to Degas. Below is Ballet at the Paris Opera. Notice how the dancers’ movement is shadowed by the surrounding brushwork. This is an effective technique for reiterating movement if used correctly, but careful not to overdo it.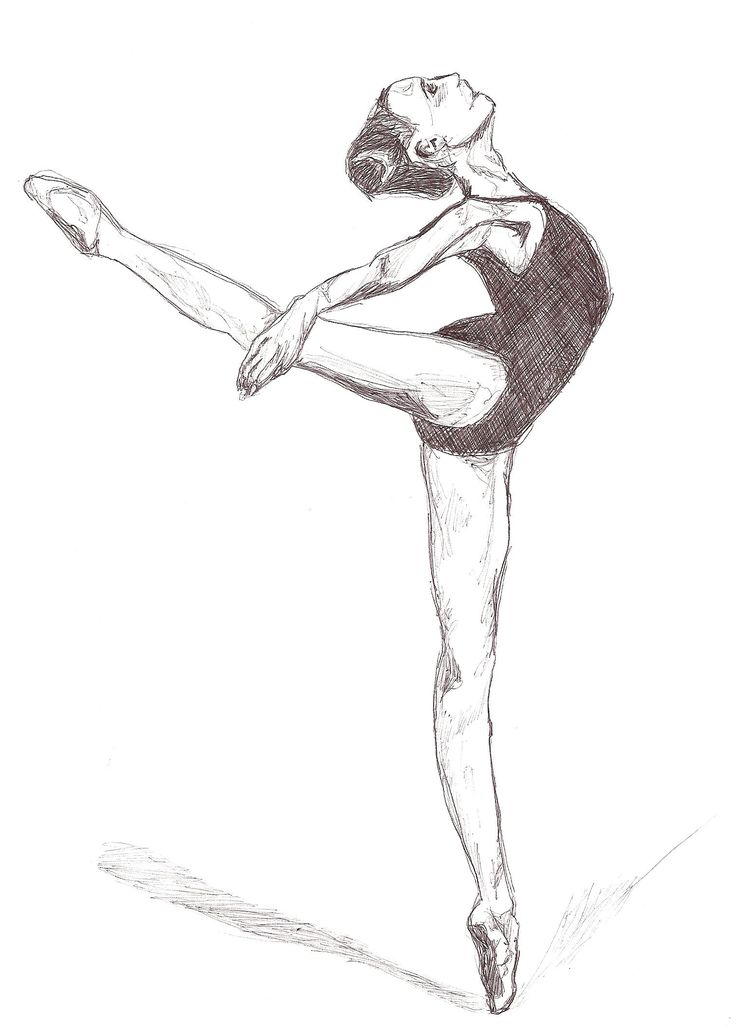 Less is more here.
There are also several implied lines created by the dancers and audience looking around. Implied lines being lines that don’t physically exist but are merely implied or suggested. A line of vision is an implied line. We want to look where others are looking. In this case, the lines of vision help direct us through the painting.
Edgar Degas, Ballet at the Paris Opera, 1877Refer to my draw-over below. I’ve indicated the strokes shadowing key movements and the implied lines. Notice the sweeping movement created by the implied lines first to the right, then back to the left, and finishing at the main dancer who looks back in the midst of a pose.
Dancer With a Bouquet of Flowers captures the dancer in the middle of a movement. Her arms span wide, one leg kicks up, and the other pivots. There’s a wonderful sense of balance about it.
Degas didn’t try to inject movement into the dancer with energetic brushwork. He didn’t need to. Movement is inherent in the dance.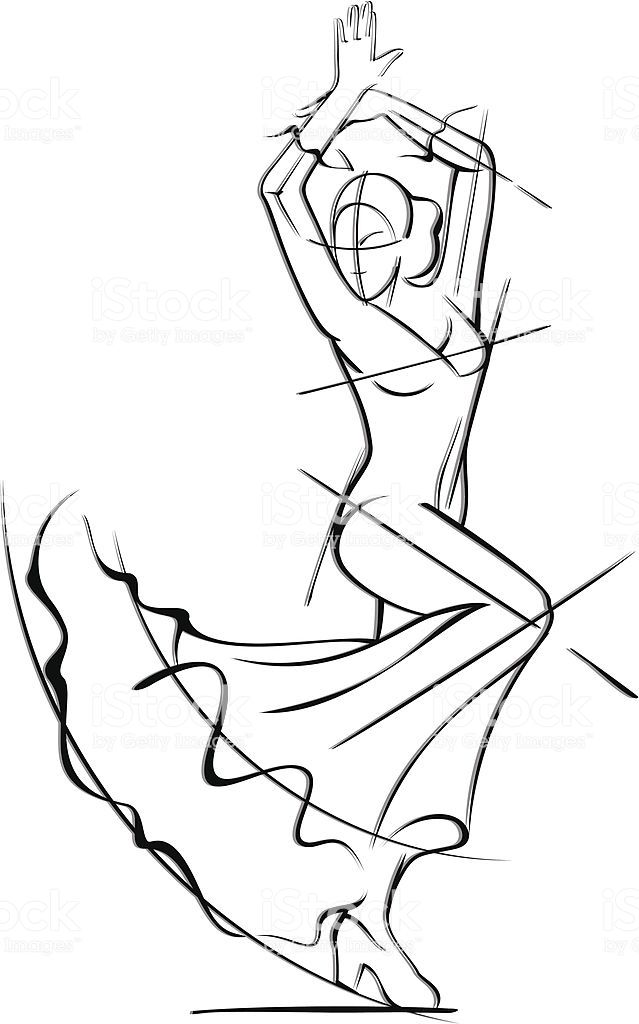
Stage Rehearsal is a busy painting. It feels like a rehearsal. People are moving, dancing, pointing, and talking. Again, movement is inherent in this scene, so Degas didn’t need to rely on painting techniques to inject movement into the painting.
Edgar Degas, Stage Rehearsal, c.1878-79Deux Danseuses, on the other hand, is a relatively still scene. There’s no dancing, swinging, pivoting, instructing, talking. Just two dancers resting and stretching on the bench. In this case, Degas did inject a sense of movement and life using scratchy brushwork and lines.
Edgar Degas, Deux Danseuses, 1879Use of Line to Reiterate Forms and Outline Subjects
Degas relied on line to reiterate forms and outline key objects, as opposed to the delicate rendering of light and shadow. The result is an illustrator-like effect. Van Gogh did a similar thing, though he was more overt with his linework.
Below is a great example.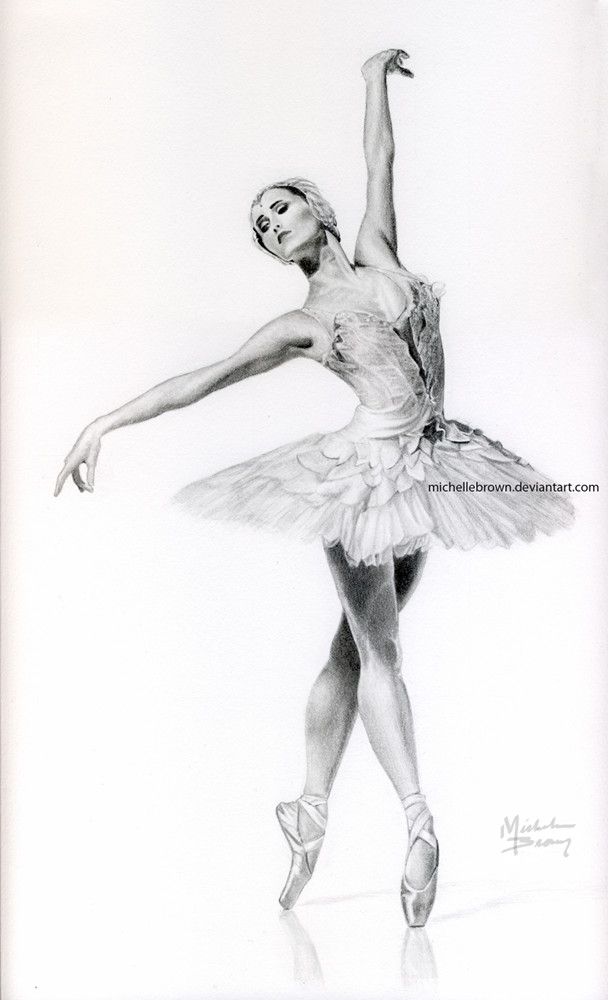 Strange use of color though, perhaps due to Degas’ failing eyesight in his later years. This painting demonstrates the power of outlining to transform flat planes of color into distinct shapes and forms.
Below is an earlier painting by Degas featuring similar use of outlining. Though this one is more sophisticated and the colors more appealing, to me anyway.
Edgar Degas, Pink and Green, 1853Degas’ sketches provide insight into how he thought about and used line, without the added complexity of color. Below are a few, plus some key observations:
- Lines follow the contours of the shapes and forms.
- Line density is used for rendering light and shadow.
- More pressure=darker strokes.
- Less rendered=less focus.
Degas the Colorist
“I am a colorist with line.” Edgar Degas
Degas was diverse in his use of color. Sometimes bold and vibrant. Sometimes soft and pastel. Sometimes gray and muted. He never got caught in his own ways.
Unfortunately, his eyesight started failing from around 1880. As you can probably tell from his later work, which although beautiful, features some odd colors. A similar thing happened to Claude Monet. Life can be cruel.
Below is perhaps my favorite Degas painting, Dancer Posing for a Photographer. It’s a wonderful play between the dark interior and the moonlit city in the background.
Edgar Degas, Dancer Posing for a Photographer, 1875In Ballet Dancer, the dancer’s vibrant colors merge with the background. Her dress seems to be the key feature, with the most vibrant reds, oranges, and intricate patterns. Compare this to her understated face, hair, and arm. Degas himself said he was interested in “painting pretty clothes”.
Tip: As the artist, you decide what’s important.
Edgar Degas, Ballet DancerBallet Rehearsal on Stage (below) is a grisaille painting, which is a fancy word to describe it’s lack of color.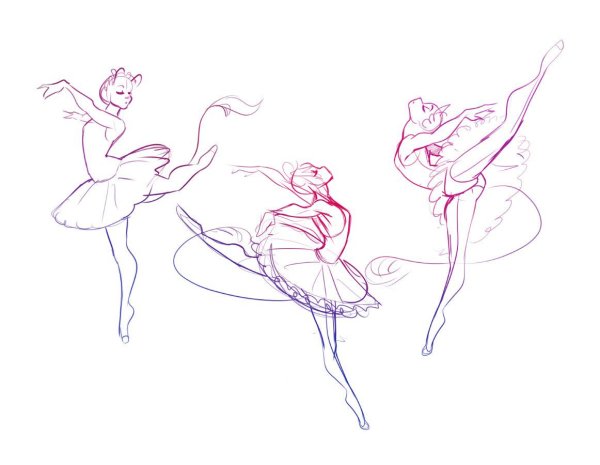 It was exhibited at the first Impressionist exhibition in 1874. Some critics considered it a drawing rather than a painting. Refer to artist Giuseppe De Nittis’ description of the painting in a letter to a friend:
Edgar Degas, Ballet Rehearsal on Stage, 1874“I remember a drawing that must have been of a dance rehearsal […] and I can tell you it was extremely beautiful: the muslin costumes were so diaphanous, and the movements so true to life that it has to be seen to be believed; it is just impossible to describe.”
Below is one of Degas’ later paintings, Dancers at the Barre, done in 1900. The two dancers are depicted with pale blues and grays against a vivid orange background. Usually, we see rich and vivid colors used for the main subject, not the background. Degas flipped the switch here.
The painting is held by The Phillips Collection and was restored in 2007. There’s some interesting commentary in this article published on their website.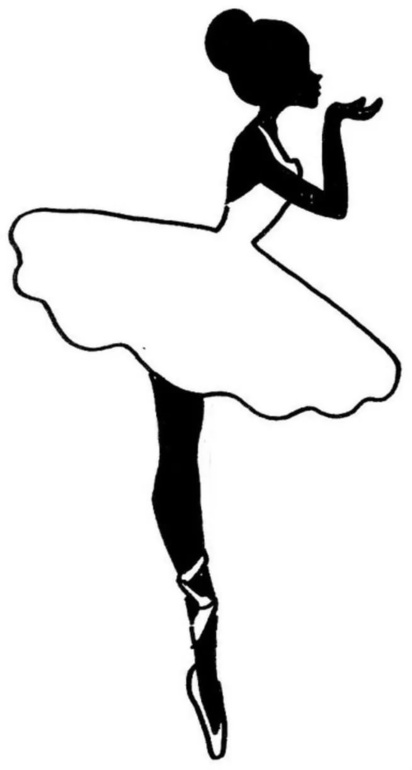
Degas did a similar thing with Ballet Dancer With Arms Crossed. Vivid reds frame the delicate and understated dancer. Black outlines help distinguish the two areas.
Edgar Degas, Ballet Dancer With Arms Crossed(See the supplies page for details about what I use and recommend.)
Dancer Studies and Sketches
Degas frequently visited the Paris Opera, though he rarely created studies there. He preferred working in his studio from memory or models.
Edgar Degas, Dancer Stretching at the Bar, c.1877-78 Edgar Degas, Sheet with Sketches of Hands and a Ballet Dancer on the Bow, 1885 Edgar Degas, Ballet Dancers Rehearsing, c.“It is very good to copy what one sees; it is much better to draw what you can’t see anymore but is in your memory. It is a transformation in which imagination and memory work together. You only reproduce what struck you; that is to say, the necessary.” Edgar Degas via Understanding Art by Lois Fichner-Rathus
 1877 Edgar Degas, Seated Dancer Adjusting Her Shoes Edgar Degas, Dancer Adjusting Her Slipper, 1885 Edgar Degas, Dancer With a Fan
 Compositions
Degas’ compositions are interesting, unconventional, and break many “rules”. Often candid snapshots of active scenes, as if his subjects weren’t aware they were being painted. This may have been the influence of photography.
Below is The Dance Lesson. It has unusual dimensions, being much wider than it is tall. This allowed Degas to cover a large area of the room without the ceiling and floor taking up much space in the painting.
The girl sitting hunched over in the bottom left corner is partially cropped out. Theory warns against this, but I find it works in this case. It adds to the candid nature of the scene and ensures this girl is not the key focus. Rather, she’s a part of the whole.
As with many of Degas’ paintings, instead of having a single dominant focal point, he opts for several lesser points of interest.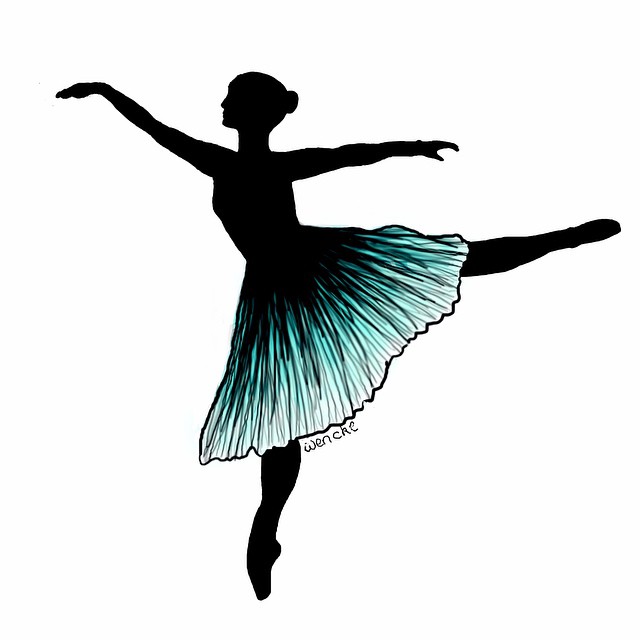 This gives our eyes a number of different places to jump between.
The painting has a strong sense of depth and perspective. The girls get smaller in the distance, the colors weaker, and the detail softer. The vivid red on the nearest girl is an exclamation point.
Finally, a quick point on simplification. Notice how Degas didn’t detail the framed image hanging on the wall. You just get a faint suggestion of some colors and shapes. Though this is just a minor aspect of this painting, it’s an important lesson in general. Artists simplify the world; we don’t add more detail.
Edgar Degas, The Dance Lesson, c.1879In the appropriately named Waiting (below), there’s a pleasant balance between positive and negative space. Positive being the dancer and who is perhaps her mother waiting on the bench. Negative being the surrounding floor and wall. Notice how the relatively small area of contrast, color, and detail is balanced against the larger “quiet” area.
Edgar Degas, Waiting, c.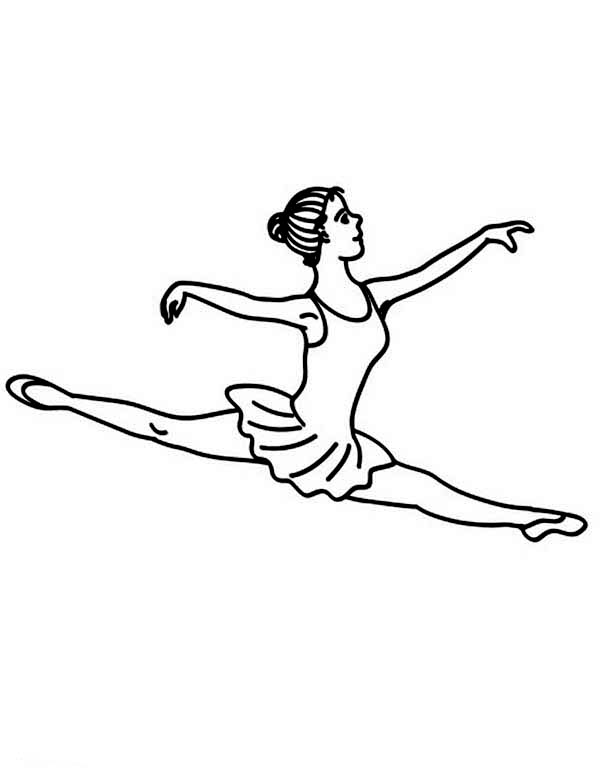 1880-1882
 The Dancing Class features a similar balance between positive and negative space. Had Degas used intricate detail for the background and floor, our attention would be diluted.
The black-suited violinist acts as a dark accent and a point of contrast for the delicate and white-dressed dancers. The mirror also adds an interesting dimension to the painting. It reminds me of Édouard Manet’s A Bar at the Folies-Bergère, which I wrote about in the Manet artist spotlight post.
Edgar Degas, The Dancing Class, 1871Here’s Manet’s painting for reference. Is that a mirror on the right, or is it a double-sided bar? I remember there being some interesting discussion on this in the comments.
Édouard Manet, A Bar at the Folies-Bergère, 1882Below is Ballet Rehearsal (I can sense Degas was struggling to come up with different names for all these dancer paintings). The architecture, namely the grand windows in the back, provides a foundation of linear perspective. Notice how the lines in the room converge towards the same invisible point on the horizon line. This contrasts against the people in the room who are organic, dancing, living, moving. There is a subtle bridge between the rigid architecture and the dancers-look how the extended arms and legs of a few dancers reiterate the room’s perspective lines.
Key Takeaways
- Keeping the subject consistent allows you to better observe changes in other variables. Degas painted dancers over and over again in his study of movement.
- Movement is implied in some subjects. Think of something pointing, running, dancing. In “still” subjects, you need to rely on suggestive brushwork, line, contours, and color to create the illusion of movement and life.
- Line is a powerful visual element for outlining an object, creating a sense of movement, or reiterating shapes and forms.
- Use studies to gain a more intimate understanding of the subject before embarking on a larger studio piece.
- Composition rules and theory are merely there as a guideline, not a strict rulebook. Feel free to break the rules if it makes sense, as Degas did in many of his paintings.
Other Resources
- More Painting Breakdown Posts
- How to Capture Movement in Art
- Wikiart – A complete list of Degas’ artworks.
- Painting Academy – My fundamentals course.
- Master Artist Ebook Bundle – Get PDF ebooks of my best posts. Yours to download, print, and annotate.
Thanks for Reading!
Thanks for taking the time to read this post. I appreciate it! Feel free to share with friends. If you want more painting tips, check out my Painting Academy course.
Happy painting!
Dan Scott
Draw Paint Academy
How to draw a ballerina with a pencil step by step - 3 easy drawings for beginners
Easy and simple to draw a ballerina with a simple pencil. We show how to learn how to draw a ballerina in 3 ways - step by step lessons + 10 photos and videos.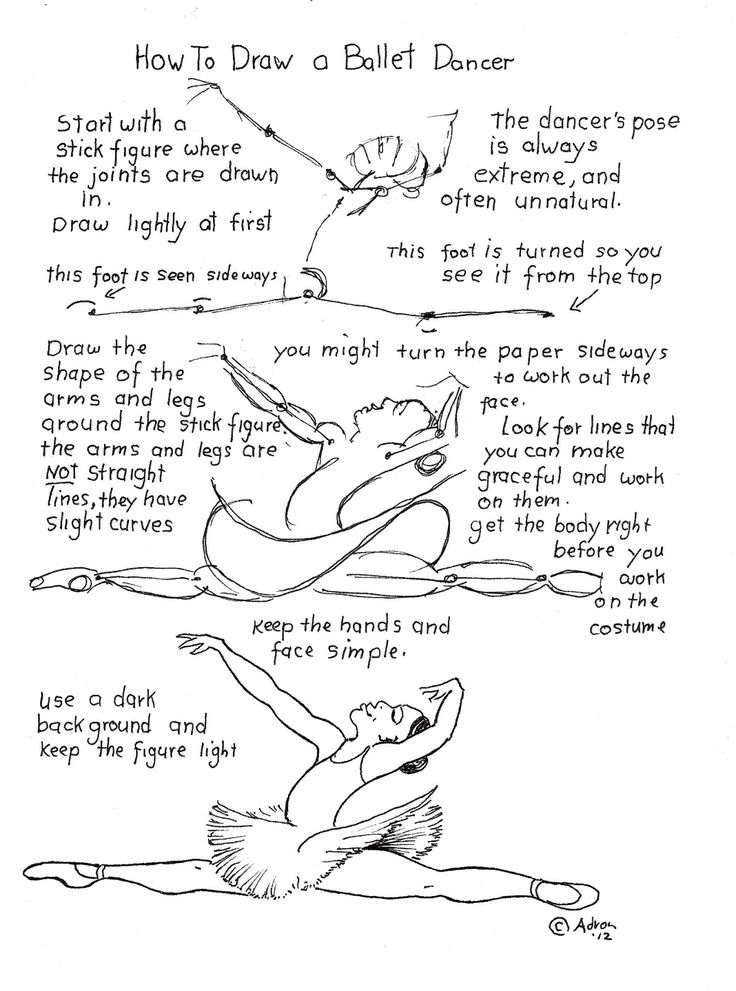
Ballet is perhaps the most elegant art form. And ballerinas in motion, on the stage seem somehow unrealistic - is it possible to move so easily, airily? So drawing them seems to be a very difficult task - how easy and simple to draw a ballerina without special skills?
In this article, we offer you 3 step-by-step master classes, with the help of which you will definitely be able to create a beautiful drawing of a dancing girl.
For the first master class, we also prepared a video where you can see step by step how to draw a ballerina with a simple pencil in black and white.
If you have little girls who dream of becoming ballerinas, daughters or granddaughters, connect them to this master class, we are sure they will be interested in creating their own drawing.
There is no drawing of a person on the twine in this article, but having mastered all three master classes, it will not be so difficult for you to make a drawn picture of a ballerina on the twine.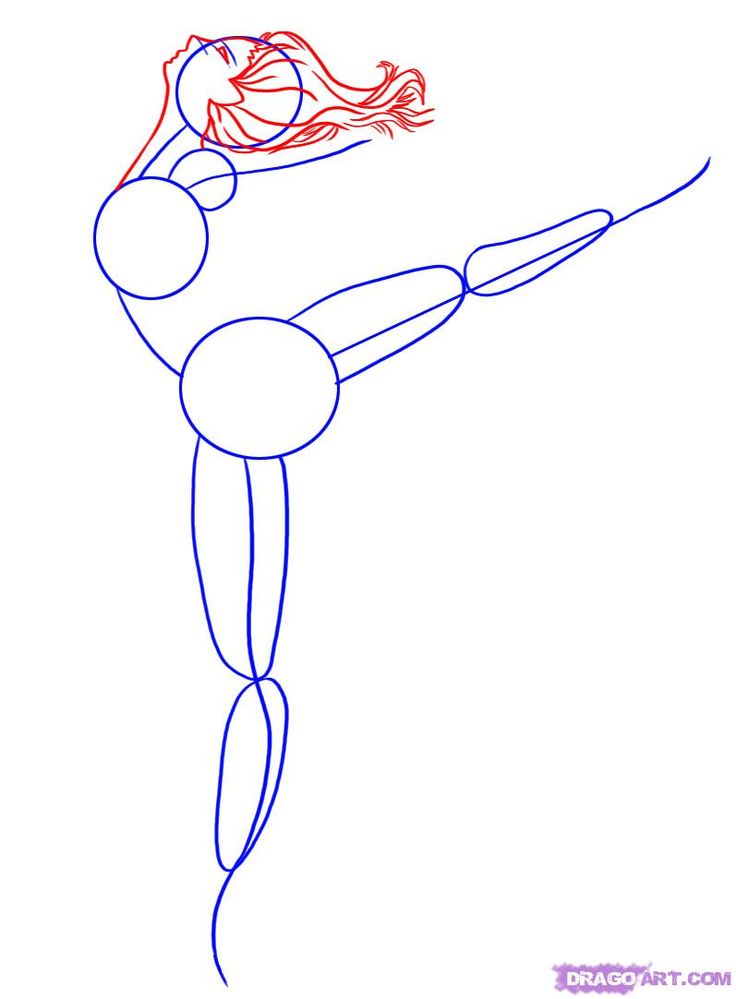
Don't forget to rate the article 5 stars if you like the tutorials!
Contents
- Tools and materials
- The easiest way to draw a ballerina
- How to draw a ballerina in motion
- How to draw a ballerina jumping on stage
- Video
Tools and materials
For these workshops you will need:
- drawing paper with a weight of 200 g/m3 or more. We will need 3 sheets, but you can buy a set of paper at once to make other drawings, or use several sheets as a draft.
- simple pencil - HB
- stationery knife for sharpening pencils
- eraser to remove unnecessary details
The easiest way to draw a ballerina
With this simple and quick tutorial you will make easy pencil drawings of a ballerina.
Stage 1 - outline the shape of the ballerina
With the HB pencil, we begin to outline the proportions and general movements of our ballerina.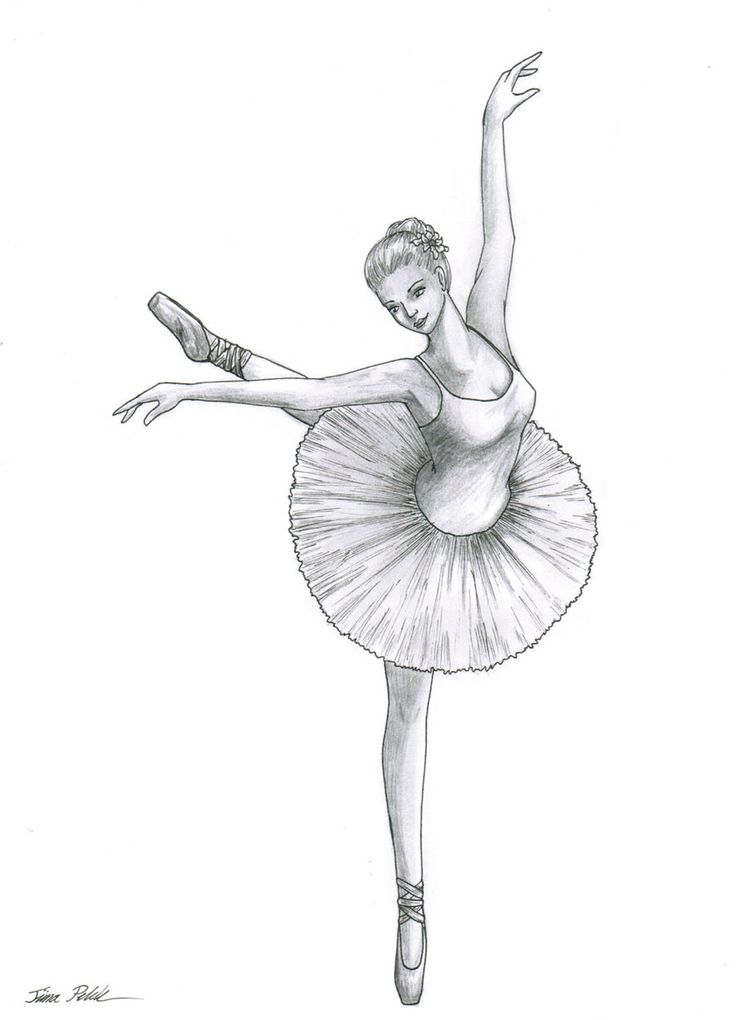 We draw a circle - this will be our ballerina's head. Then, we retreat the field for the neck and draw an oval - this will be our body, the entire chest with the stomach. Next, we draw hands with ovals - one hand is raised up, the other is lowered down. We make sure that all of our ovals - arms and legs - are symmetrical.
Also, pay attention to the fact that the supporting foot, on which the ballerina stands on her toe, passes approximately through the middle of the head. This is necessary so that the figure on our sheet does not fall.
Stage 2 - refine the silhouette and add details
We begin to refine the silhouette of our ballerina. We outline the hair, the central line of the head. Please note that our head is turned ¾, so the center line of the head will be offset from the middle. This will not be the central part of the head, but the central part of the face.
Also, we refine the shape of the hands, make the lines smoother, rounded so that there are no sharp corners.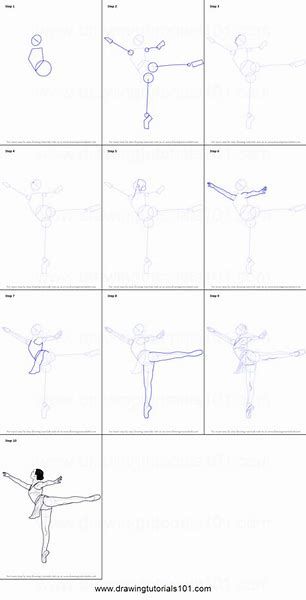 We pay attention to the turn of the torso, look at the deflection in the lower back, where we have the waist.
At the same stage, draw the legs, pointe shoes, and with an oval, which has a slight slope, outline the shape of the pack.
Stage 3 – we refine the details and stroke
Somewhere once again we refine the shape, erase extra lines, draw the face, hair, ear, fingers. Do not forget to draw a pack, the folds that we have on the pack. We fill in the hair, the costume of our ballerina and pointe shoes with light shading.
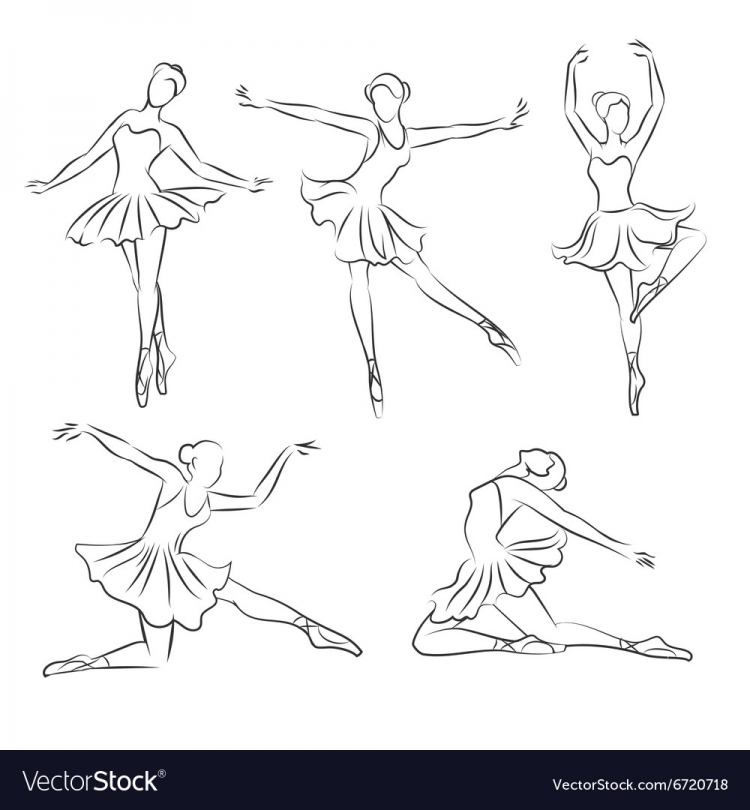
How to draw a ballerina in motion
Step 1 – draw a ballerina using ovals
Draw ovals for our entire ballerina – head, body, legs, arms. We break the legs into the thigh, lower leg and foot. We divide the arms in the same way - into the forearms, shoulder and hands.
Pay attention to the slope of the ovals. That is, they are not all located exactly vertically, or exactly horizontally, they each have their own specific slope.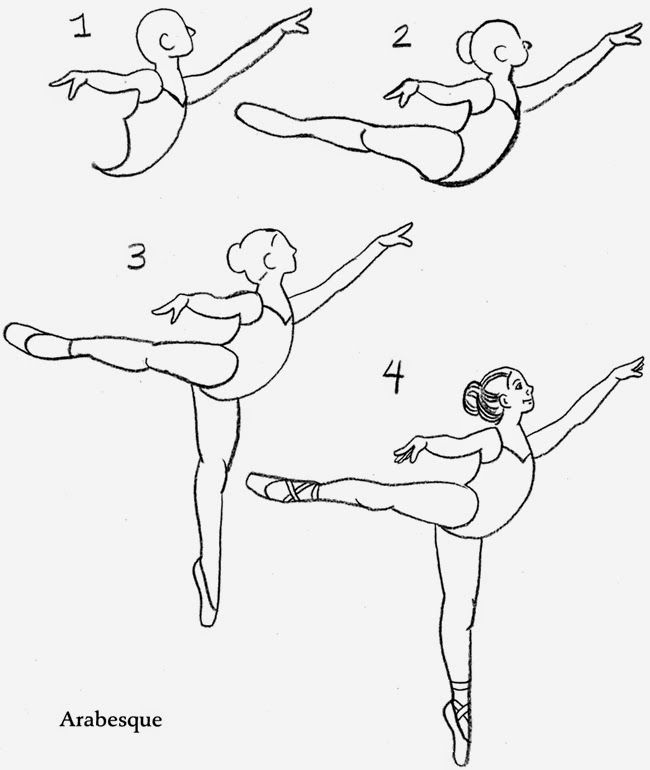 Since our head is slightly tilted back, so our head will be tilted to the left. And, in the same way, the body is pushed forward a little, so the oval should be slightly to the right.
Stage 2 - draw the silhouette, add details
We begin to refine the silhouette of our ballerina, we try to make the lines more plastic, without angular edges. We show the waist of our ballerina, the line of the back. Then we outline the silhouette of the skirt, and in general the dress, where it ends in relation to the waist. We outline pointe shoes, hair, ear. We slightly refine the shape of the head and designate the nose.
Stage 3 - add details to the drawing
Erase all the extra lines that we don't need, refine the shape, draw the face. We draw our skirt and fingers.
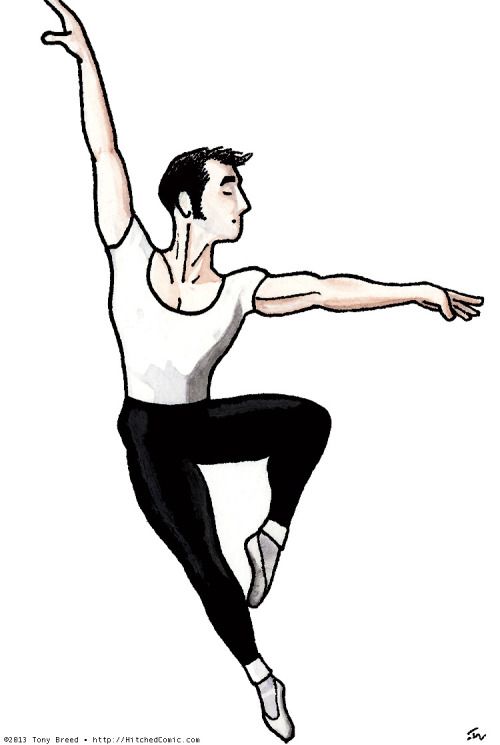
How to draw a ballerina in a jump on stage
How to draw a ballerina in a jump? From this photo in motion, you can make a drawing of a ballerina on stage.
Stage 1 - draw the body of the ballerina using ovals
Make a sketch. We outline the movements of our ballerina, trying to keep the proportions. In the same way, we outline everything with ovals - legs, arms, body. Try to make the ovals in different directions so that the ballerina turns out to be more plastic and graceful. We draw attention to the fact that our ballerina is very strongly bent in the back, so the oval of the body should be smaller than it could be if the ballerina were just standing, since our body is very curved and it is in perspective contraction.
Also at this stage we outline the skirt of the general form.
Stage 2 – we refine the silhouette, draw the details
We begin to refine the silhouette of our ballerina. We try to make the lines more rounded and smooth, plastic. This is necessary in order for our ballerina to be more lively, more graceful. Try not to draw sharp corners. We also focus on showing a strong deflection in the lower back, at the waist of the ballerina.
We show the decollete, the shape of the skirt, the eyelet, the neck, and outline the fingers and hair a little.
Stage 3 - detailing
Once again we refine the shape, draw the face. We draw a skirt, pointe shoes. Lightly mark the fingers.
Video
In this video we show how to draw a beautiful ballerina step by step for beginners with a simple pencil. Watch the video until the end if you are passionate about ballet and want to learn how to draw.
How to draw a ballerina step by step • Makusha
Step by step drawing lesson for those who want to learn how to draw a ballerina . Here, of course, it is desirable to have some drawing experience behind you, but this will not be a stumbling block. Therefore, anyone can try and draw a ballerina step by step with us! I confess that drawing a person is not at all easy and we trained on a pirate, a football player, a princess and we know what muscles a person has. We practiced drawing beautiful girls, and we did great. And yet it will be very difficult to convey all the grace and sophistication of movements that the dance of a ballerina carries in itself. And at the same time it's easy with our simple steps! By drawing in stages, you will quite get a beautiful drawing of a ballerina at the end of the lesson. Good luck to you!
How to draw a ballerina step by step
Step 1.
[yandex]It is important to keep the proportions here and stay within the initial contours and proportions of the drawing, then our drawing will be as accurate and beautiful as possible. And this is our first place! In the beginning, you will need to draw on paper the base for the skirt - the most important element in any ballerina's outfit.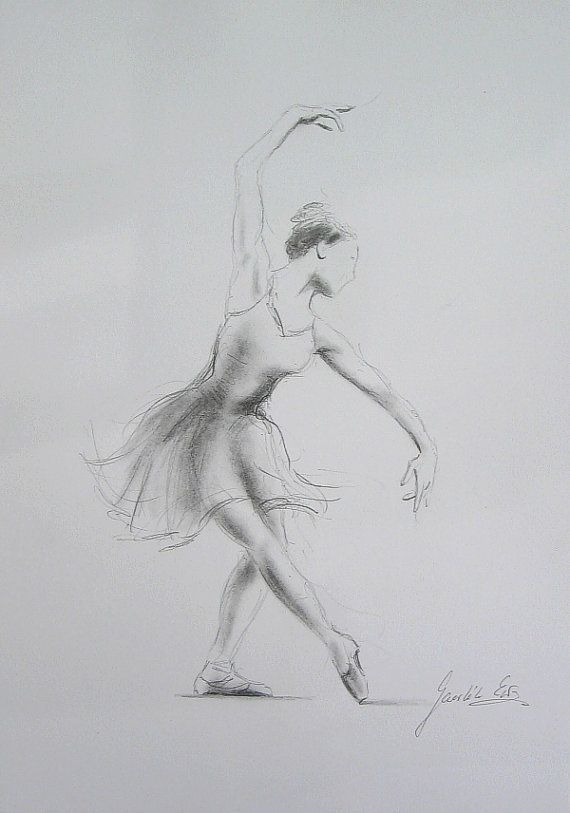 It's called a "pack". It should be a slanted ellipse shape with a pointed left edge. Then draw two lines for legs ballerina , add two arms and a circle for the head. Now the basic template is complete and will allow you to draw ballerina further with more ease.
How to Draw a Ballerina Step by Step
Step 2
Now add more definition to the basic shapes to make the ballerina more defined. Draw lines for the shoulders, a line for her waist, and a roughly rough shape for her legs. Ballerinas tend to be thin and muscular in the legs, although they are very slender overall. Therefore, try to make her figure convey the delicacy and grace of her profession. The figure should be slender, but without busting in this direction.
How to draw a ballerina step by step
Step 3.
Finish drawing her legs and arms. In a beautiful and complex dance, she stands on tiptoe, so we are lucky and it will not be difficult to draw legs.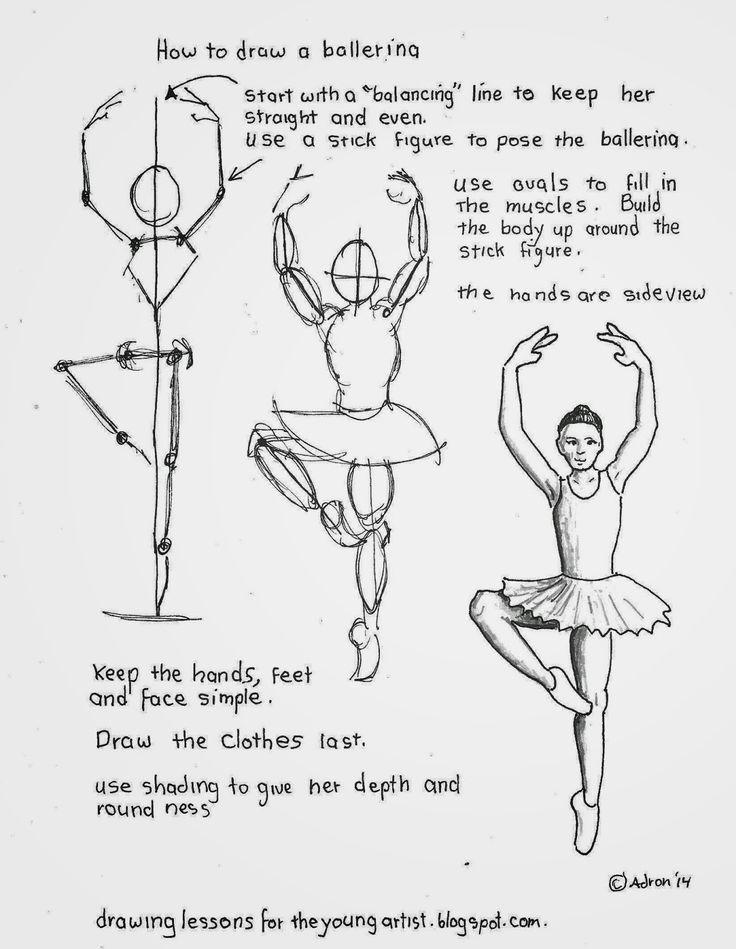 They look very simple thanks to the fact that she wears pointe shoes. Try not to make her legs too thick so as not to ruin the look.
How to Draw a Ballerina Step by Step
Step 4
As the last step for the figure, erase all extra horizontal lines and contour lines and work on the ballerina's arms. Draw her palms and fingers. She is already dancing! We will add to the drawing of a ballerina only a few important details and draw a face.
How to draw a ballerina step by step
Step 5.
[yandex]A ballerina outfit is pretty easy to draw compared to her facial features. Drawing faces and portraits requires some experience. If you draw your ballerina on the whole sheet of paper, then you should draw her face in as much detail as possible so that the features are close to natural. If your ballerina is not too big, then you can ignore all the details and just focus on defining the lines for her mouth, nose, and eyebrows. Shade the face a little and it will be very nice. The ballerina's hair is always styled very neatly - mostly in a large or small bun. Therefore, we should draw it with you in the form of a small outline around the head. Looks like a bun? Now your ballerina looks much more realistic and all you need to do is cut off part of her dress and add shadows on the ballerina's figure. We'll do this in the next step.
How to Draw a Ballerina Step by Step
Step 6
A ballerina tutu is usually translucent, so make sure you draw it with a pure white or pink tint. Draw the details of the belt or corset. Evaluate your drawing so you don't forget to add important details, such as pointe lacing. Keep in mind that drawings from real life look more realistic and this is important! Do not miss a single detail, this is the art and talent of the artist. The ballerina is performing on stage and the background needs to be drawn accordingly. Be careful not to overload your drawing with additional elements; You should not take away attention from the main character of the picture.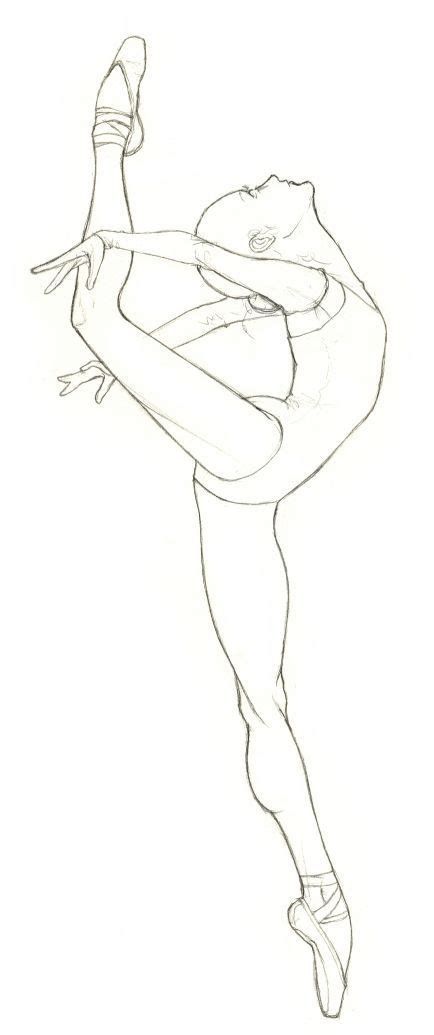
How to Draw a Ballerina Step by Step
Step 7.
Your drawing of a dancing ballerina is complete! A few facts about ballerinas that may be of interest to you.
- To sew one ballet tutu for a ballet dancer, you need about thirteen to sixteen meters of tulle and several days of work.
- Does a ballerina manage to change up to three hundred pairs of ballet shoes during the year? although it’s hard for me to imagine how she dances, trains, and after class immediately throws holey pointe shoes from her corns.
- Ballerinas are extremely superstitious and shy. They have, for example, a tradition to enter the dressing room only with the left foot and nothing else!
- They also have a sign before their very performance on stage, in no case look in the mirror over their shoulder.
- Traditionally, ribbons on pointe shoes are sewn on by the shoe owners themselves.
- If pointe shoes are dropped, they are first tapped on the floor with their toes.