Dance photography how to
Dance Photography (How to Shoot Beautiful Dance Portraits)
By Taya IvanovaA- A+
Download as PDF
Subscribe Below to Download the Article Immediately
You can also select your interests for free access to our premium training:
Business Basics
Cheat Sheets
Child Photography
Colorful Cityscapes
Composition
Creative Photography
Creative Portrait Concepts
Digital Photo Collages
Fairytale Portrait Photography
Food Photography
Interior Photography
Landscape Editing
Landscape Photography
Lightroom Processing
Lightroom Presets
Long Exposure
Macro Photography
Milky Way Photography
My Camera and Photography
Organic Marketing
Pets
Product Photography
Sky Photography
Social Media
Still Life
Time-Lapse Photography
Travel Photography
Urban Photography
Wildlife Photography
Your privacy is safe.Dance photography is a fascinating genre that can turn even the simplest movements into art.
Here are 14 tips to help you easily capture the beauty of any dancing style.
14. Get to Know the Dancer(s)
Dancing is often very expressive and intimate. This is why it’s important for you and your model to feel comfortable together.One of the best ways to understand someone is to talk to them about their passion.
Instead of blindly going into a photoshoot, find out who your model is and why they love dancing. Let them know why you’re interested in dance photography, too.
Once you get to know each other, you’ll feel more relaxed and confident during your session.
This will allow you to make mistakes without feeling embarrassed. And it will give you enough room to experiment with different concepts.
13. Familiarise Yourself With the Dance Style
What type of dance are you going to photograph? If you answer this question in detail before your photo shoot, you’ll be able to predict your model’s movements and adjust your camera settings accordingly.
For example, if you want to get better at dance recital photography, you might want to use a wide-angle lens to take wider photos. If you want to take interesting close-ups while your model is dancing, you might need a zoom lens.
If you’ve never photographed a specific dance style before, watch a few videos or talk to the dance company before your shoot.
The more you know, the easier it will be for you to come up with cool ideas. These will not only impress your models but also put a spotlight on your skills.
12. Make Sure Your Models Know They’re Being Photographed
No, this doesn’t mean you have to shout at them as you quickly press the shutter. They just have to know that someone is going to take pictures of them as they dance.
Dance photography is quite similar to street photography when it comes to permission. If you’re going to photograph a group of strangers, you’ll have to get their permission first.
This will be easy to achieve if you work with a dance instructor who can inform the dancers about your presence. It won’t be as easy if you stumble upon a random group of dancers outdoors.
If you just want to practice, you can freely photograph strangers. But you have to be careful when it comes to online sharing and selling.
To avoid unwanted confrontation, get to know a few basic street photography laws.
11. Use a Tripod to Avoid Camera Shake
You might be tempted to move your camera around all the time to get the perfect shot of a dancer’s graceful movements. This might confuse or frustrate you, especially during a fast-paced dance event.
To avoid unnecessary stress and camera shake, use a tripod. By limiting your movements, you’ll be able to make the most of the compositions in front of you.
A tripod will also help you take beautiful long exposure photos (you’ll find out more about this topic soon) that will fill your gallery with diversity and surrealism.
10. But Don’t Take Photos from One Angle All the Time
One of the best things about dance photography is that it doesn’t have to be photographed a specific way. If the situation allows, take photos from the ground. This will create a blurred foreground and naturally lead viewers’ eyes to your dancer.
If you constantly shoot from a standing or sitting point of view, your photos will look dull. You can easily change this by shooting from different angles.
If you want to make your photos stand out even more, create depth using foregrounds. For example, if you photograph a dancer through a fence, you’ll add both texture and depth to your photo.
Don’t be afraid of experimenting with different objects and foregrounds. The more you practice, the more interesting your compositions will look.
9. Shoot on a Real Stage
Stage lights are perfect for taking atmospheric dance photos.If your model spends a lot of time on a stage, take photos there!
A stage already has all the equipment you need to photograph professional dancers. The black background will put the focus on your dancer and the natural or artificial light will create a photo-worthy atmosphere.
All you’ll need to do is focus on your dancer and your camera settings.
In addition to providing you with tools, a stage will make your model feel at home. This will enable them to feel more confident and powerful in front of your camera.
8. Use Long Exposure to Elegantly Track Movements
In some photography genres, sharpness is a priority. When it comes to good dance photographs, this isn’t always the case.
Long exposure is often used in landscape photography to emphasise certain movements, like running water or a windswept tree.
Dance photographers can use it in a similar way to photograph body movements. This is why it’s worth memorising the various guidelines of long exposure.
7. Use Dramatic Lighting
Dancers don’t always have to be photographed outdoors or on a stage. You can use simple locations with dramatic lighting to take unique photos of your models.
An empty white room with window blinds on a sunny day, a roof during the golden hour, and a dance studio with artificial light. These can all be used to create dramatic compositions that emphasise the dancer’s movements.
6. Take Photos at Dancing Events
Not sure what kind of dancers you want to photograph? You can introduce yourself to different dance styles by taking photos at events or recitals.
Once you get permission to photograph the dancers, you can significantly improve your knowledge of dance, portrait, and even candid photography.
Even a couple of hours at a recital will expose you to different styles, movements, and lighting situations. Use this opportunity to experiment with different angles, fast shutter speeds, and apertures.
All of this exposure will give you a better idea of the type of dance photography you should pursue. It will also teach you how to make the most of a busy setting.
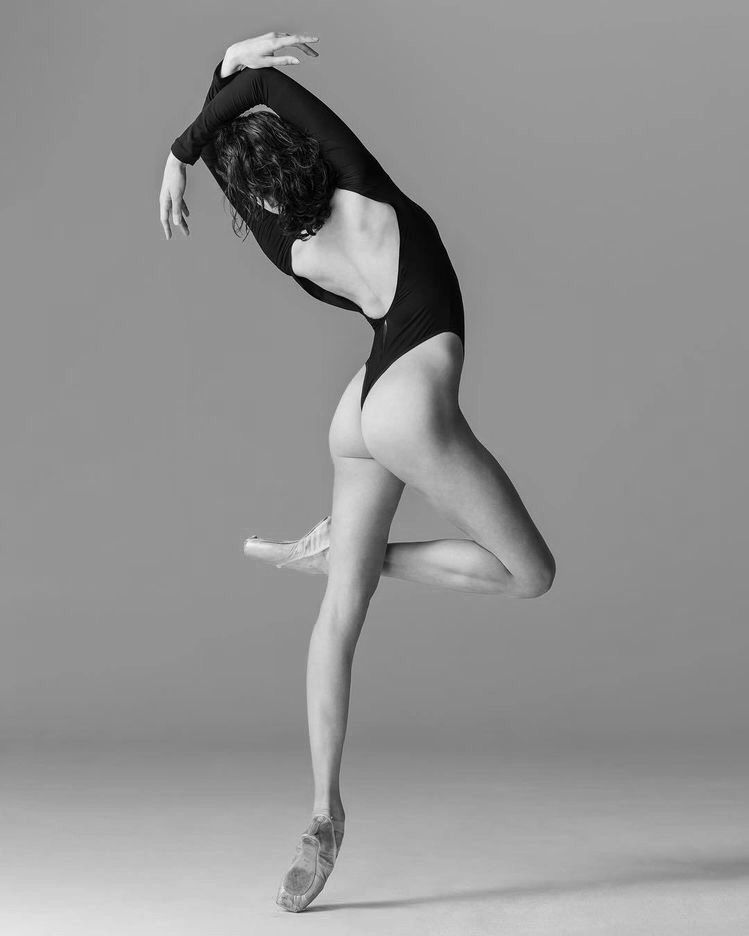
5. Use a Large Aperture to Separate the Dancer from the Background
The photographer used a large aperture to separate the ballerina from the busy city background. If the aperture were smaller, the model’s outfit, pose, and expression wouldn’t stand out.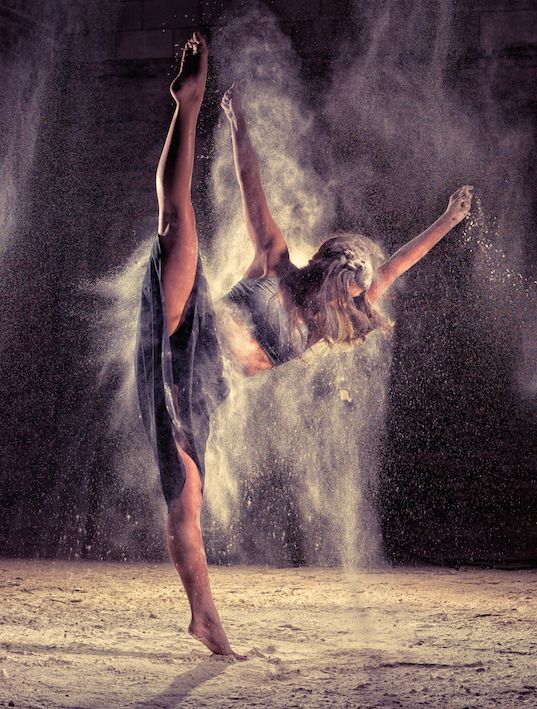
Dancers aren’t always surrounded by beautiful backgrounds. Sometimes, they’re surrounded by curious strangers, unflattering buildings, or a street full of cars.
All of these distractions can make it difficult to focus solely on one subject. Photography projects showcasing ballet dancers in urban settings are popular still.
If you can’t move to another location, you can separate your subject from their background by using a large aperture. A large aperture, also known as a small f-number, will add more depth to your photos. Examples of a large aperture are f/1.2 and f/2.8.
The larger your aperture, the blurrier your background will be. However, this might stop you from taking sharp photos.
If your aperture is too small, you might find it difficult to focus on specific parts of your model’s face. A relatively large aperture, such as f/2.0, will blur your backgrounds but also let you take sharp photos.
4. Focus on Details to Tell a Story
Diptychs can be used to create contrast, emphasise details, or simply tell a meaningful story.
Details are just as important as the big picture in any photography genre. Even though wide shots are what make dance photography beautiful, they need to have a story to be meaningful.
Details can add depth, texture, and emotion to your photos. You can use them to create diptychs, which are collages that consist of two photos.
You can also include them in a set of photos inspired by the dancer(s) you’re working with.
3. Take Photos in Vibrant Places
A carousel isn’t usually associated with dance. But it was the perfect location choice for this vibrant photograph. If you want to take unique photos, be open to finding potential in unusual places.Overly vibrant locations can take the spotlight away from your subject. However, if used correctly, they can dramatically enhance your compositions.
No matter what location you shoot in, make sure you use a large aperture to separate the dancer from their background.
The larger your aperture, the larger the background bokeh will be. This will make it easy for you to blur out almost any background distraction.
With the right amount of blur, you’ll be able to photograph your dancer in front of fantastic locations like carousels, cityscapes, and neon lights.
2. Photograph Multiple Dancers from Above
If you have to photograph multiple dancers, you can create symmetrical compositions by taking photos from above.
This is easiest to do in a dance theatre or any location with an indoor balcony.
This unique perspective will allow you to play around with different concepts and outfits, like the rainbow umbrellas in the photo above.
1. Take Surreal Photos of Dancers With Flour
Flour dance photography is a sub-genre that involves a lot of messiness and surrealism. You’ll need the following things to have a successful flour photo shoot:
- A black backdrop to highlight the whiteness of the flour,
- Lots of flour,
- Any kind of material to protect objects that shouldn’t be covered in flour,
- A fan or large window to prevent suffocation,
- A mop to clean everything up at the end of your photo shoot,
- A clean set of clothes for you and your model.
If you need some ideas or inspiration, check out Derrick Senior’s flour portraits.
Conclusion
Dancing is freeing, vibrant, and eye-opening. You can use it to take photos that are just as emotional as your models.
With the right amount of practice, you’ll be able to photograph all kinds of dance styles, capture true joy, and take your photography skills to the next level.
If you’re looking for ideas to get started with dance photography, try a ballerina project.
Or call up your local dance company to see if they’re interested in some great dance photos. It’ll be good practise for you even if it’s unpaid!
Guide to Dance Photography (Plus 13 TOP tips!)
Dance photography can be a very evocative genre. It brings together two art forms to create some amazing results.
It combines the beauty of the human body, the energy of movement, and the passion of the subject.
Of course, it doesn’t come easy as you have to master techniques from action photography to portraits to events photography.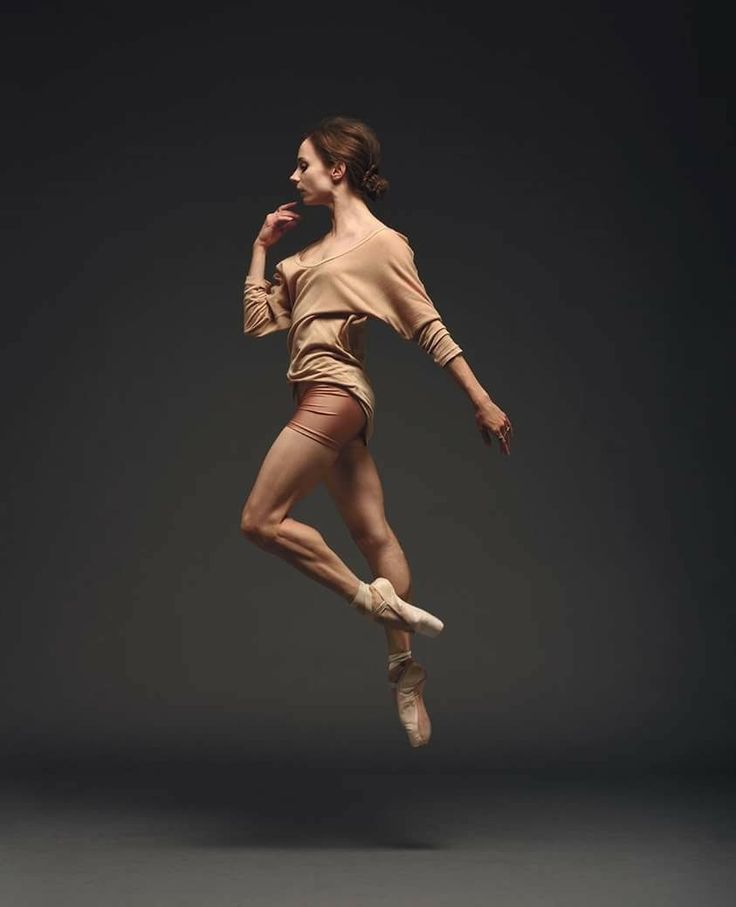
Not to worry though: this article aims to help you take your first steps into the dance world – and to keep improving with every set of dance photos you take.
Ready to get started?
Table of Contents
What is a Dance Photographer?
Put simply, it’s a professional that takes pictures of dancers. He or she can specialize in performance or events which means photographing the dancers on stage and backstage.
Another area of expertise is dedicated to posed or studio images. These are portraits of the dancers in the studio or on location. Normally these photos are created for the dancer’s portfolio.
Merging both specialities is also popular, meaning that the dancer will perform specifically for the photo shoot. In this case, the use of flash on stage is allowed.
There’s also do-overs of a scene or choreography to capture them in the best way possible.
This is always a difficult question to answer, but it’s also one of the most frequent questions people ask before deciding to specialize.
The rates can be very different from country to country. They’ll also differ depending on if you work exclusively with artists and big theater companies, or if you photograph the recitals of local studios.
Aaron from Dance Studio Photography in Texas shared his figures to shed some light on this. He generates $100,000 from his work at dance schools, which is already an impressive number, but he doesn’t stop there.
On top of that, he makes another $1,000 – $3,000 selling performance photos online, plus $3,000 – $10,000 photographing professional competitions.
Finally, photoshoots for dancers’ portfolios can range from $300 to $1,000 per session – just multiply that by the number of photoshoots you can book.
This is just one example to show you how it can be a six-figure business.
Bear in mind that it will take time and experience to build up to that level. The website ZipRecruiter reports an average annual income of $42,462 for a US-based dance photographer.
Check out how much professionals in your area charge for their services so that you can position yourself in the market.
13 Famous Dance Photographers
Credit: Engin Akyurt
This list could easily be very long, as there are many amazing photographers out there. These are my 13 favorites:
1. Gordon Anthony – Best known for his ballet photographs. He published the first color photography book in England entitled Studies of Dancers.
2. Lois Greenfield – Captures the emotion and dynamics of the human body. She turned dance photography into an art form that is popular both in museums and in commercial assignments.
3. Kelly Pratt and Ian Kreidich – Founders of the project Dancers & Dogs, which pairs ballet dancers with adorable dogs to make this type of dance more approachable to people. The results are as sweet as they are successful.
4. Claire McAdams – Although she shoots dance photography in live performances and in the studio, her most unique shots are done underwater.
5. Gabriel Davalos – He is a Cuban photo reporter. Drawing on his background, he puts storytelling into his photographs of dancers on the street. While it’s quite a competitive genre, he manages to stand out.
6. Eric Paré – Combines light painting with dance and portrait photography; a trend that has become very popular. He also specializes in bullet-time photography.
7. Derrick Senior – American creator who does high-speed dance photography. By combining powder and flour with motion, he creates amazingly ethereal pictures.
8. Gene Schiavone – He works for the American Ballet Theater and has taken portraits of many famous dancers including Natalia Osipova, Maria Kochetkova, Alina Cojocaru, and more.
9. Jordan Matter – With millions of followers on Instagram and YouTube, he inspires people around the globe. His photos are beautiful and original.
10. Ira Yakovleva – Russian dancer who jumped to the other side of the lens.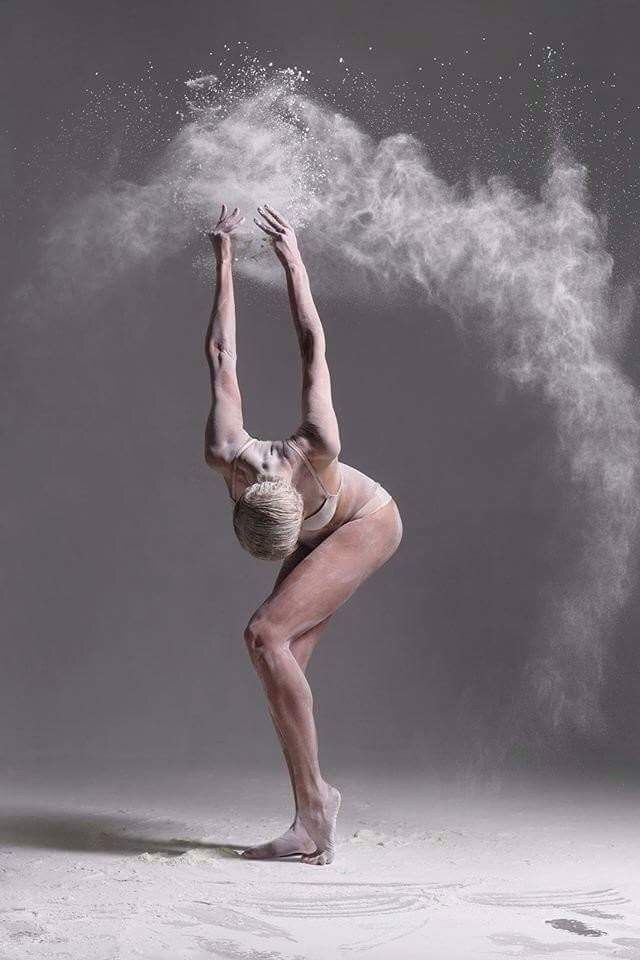 Her own training and experience as a dancer makes her relate to her subjects and understand how to portray them.
11. Lois Greenfield – Conceptual author. Her photos are often the perfect symbiosis of both art forms: dance and photography.
12. Rick Guest – He uses strobe lighting techniques to capture motion and make dynamic dance photos.
13. Dane Shitagi – Creator of the ballerina project, a collection of photos from over 18 years of work that highlights world-renowned ballerinas. The project was published as a book, but you can also follow the Instagram account.
13 Dance Photography Tips
It doesn’t matter if it’s your first photoshoot or if you’ve been at it for a while and want to up your game – these tips can help you to capture dancers in the best possible way.
1. Photograph amateursCredit: Maksym Kaharlytskyi
Practice makes perfect, and fortunately, in dance photography, you don’t have to wait for a professional job to keep your muscles flexed.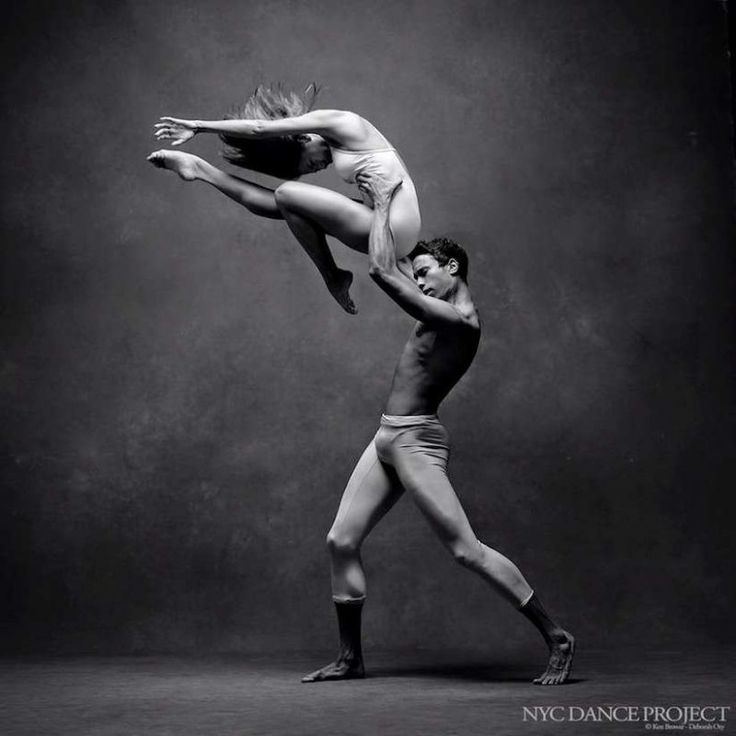
There are amateur dancers everywhere. From weddings to a nightclub dance floor, from street performers to your daughter’s ballet recital.
Freezing the movement or deliberately capturing motion blur, finding the right angle, capturing the emotion… these are all things that you can practice even if the subject is not professionally trained.
Doing this will also help you build your photography portfolio.
2. Use a wide apertureCredit: Jansel Ferma
If you’re photographing a live performance, then you’re going to be facing low light situations almost every time.
You’ll need a wide aperture to let more light in while you use faster shutter speed to freeze the movement of the dancers.
If instead, you’re doing a posed photo session, the wide aperture is still necessary – just as it is for any type of portrait photography.
Unless you want to include the background as part of the concept, the best idea is to blur it in a way that makes the dancer stand out (i.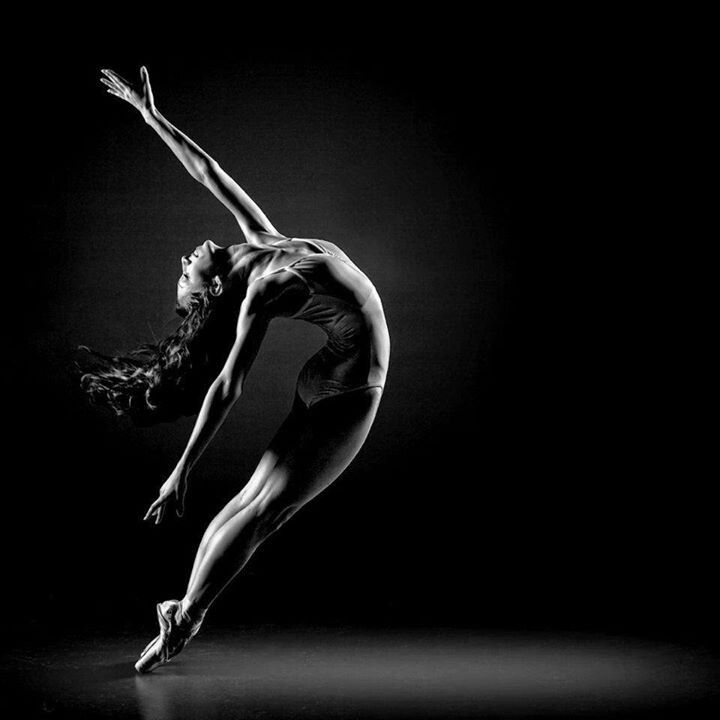 e. create a bokeh background).
Prime lenses usually have wider apertures (e.g. f/1.4) which will work well for portraits. Zoom lenses, on the other hand, will give you more versatility for theaters and performances but usually have a maximum aperture of f/2.8.
(See: prime vs zoom lenses.)
Either way, by opening up the aperture, you can use a faster shutter speed that will keep your photos sharp and free of camera shake.
3. Experiment with long exposureCredit: Ahmad Odeh
Movement is one of the key aspects of dancing. It’s important to have the shots where you’re freezing that movement, but also to include some motion in other pictures.
When you leave your shutter open for a longer time, the sensor (or film) will capture the trail of the dancer’s movement creating a surreal and beautiful image.
Next time you’re taking dance photos experiment with motion blur. You’ll be amazed at the beautiful effects you can create with a slower shutter speed.
Just make sure to use a tripod to avoid camera shake.
4. Use back-button focusCredit: Pixabay
Many photographers prefer to use autofocus mode. That’s great, but if you’re not doing it already, you should give back-button focus a try.
At first, it will be difficult to get used to, but you’ll see that separating the focus from the shutter will make your life easier.
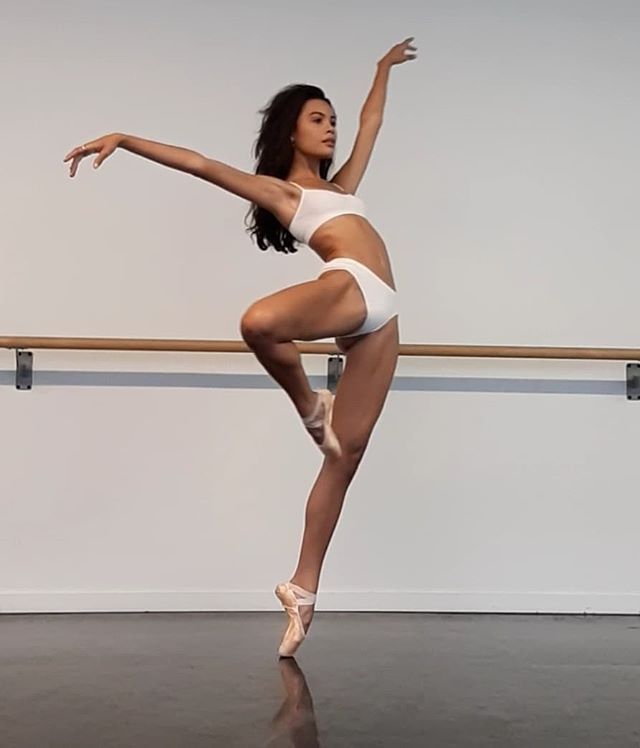
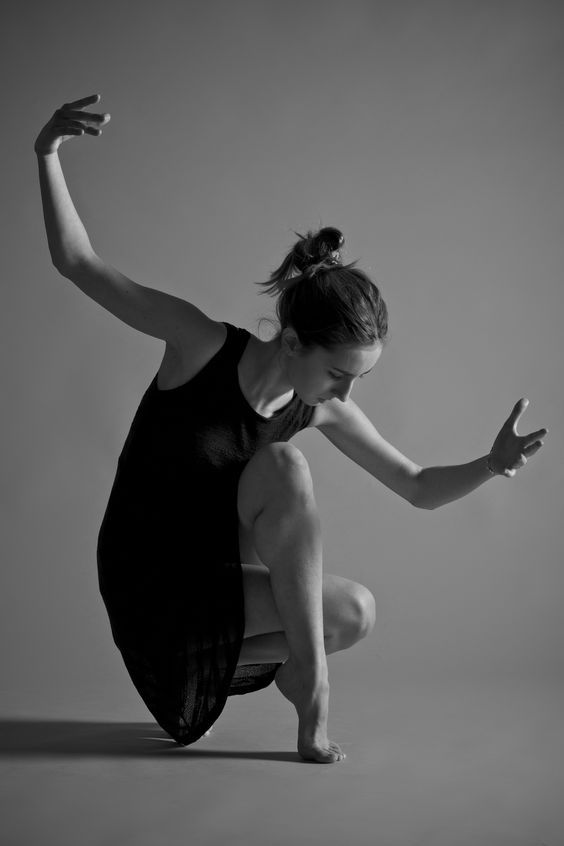
5. Try silhouettesCredit: Laura Gomex
Dancers have amazing bodies and their movements create naturally graceful and elegant figures.
A good way to make use of that fact is by doing some silhouette shots. Place your dancer in front of a light source and see what interesting shapes you can capture.
6. Find interesting backgroundsCredit: Liel Anapolsky
When you photograph a dance performance on stage, often you’ll have a dark background that will make your subject stand-out.
However, when you’re in a photoshoot, you can get creative with the background.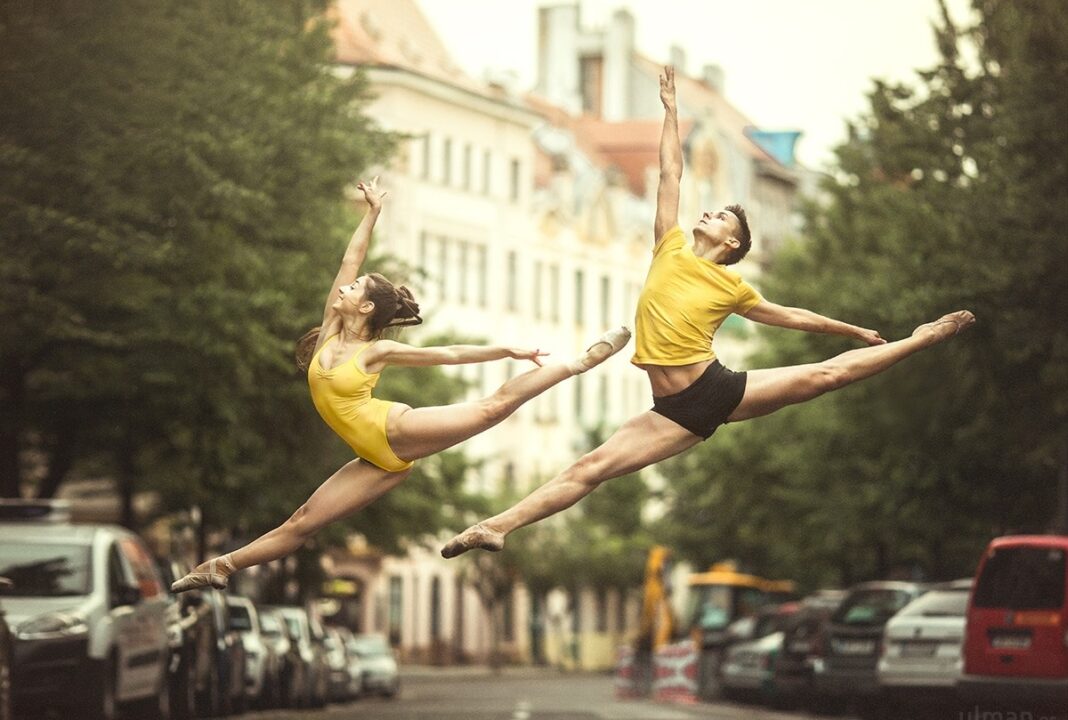 Find something that compliments the dancer’s body and matches the type of dance.
Credit: James Lee
Often the type of shoes, the costume, or a specific accessory is an essential part of the dance itself. This is the case for the castanets in Flamenco, the waist accessories for belly dancing, or the colorful skirts in Mexican traditional dance.
Talk to the dancer and understand what’s important, what has a special meaning, and what things you should focus on. Then, remember to take some close-up shots.
8. Add interest to quiet situationsCredit: Anna Shvets
Dance performances are already curated for lights, scenery, costumes, etc. And professional dancers already have the body and positions to make the photographs interesting.
But what about amateurs or children’s lessons?
It can be difficult to find variety in your photographs when you work with beginners during lessons. The settings are not particularly interesting and the movements won’t be very dynamic.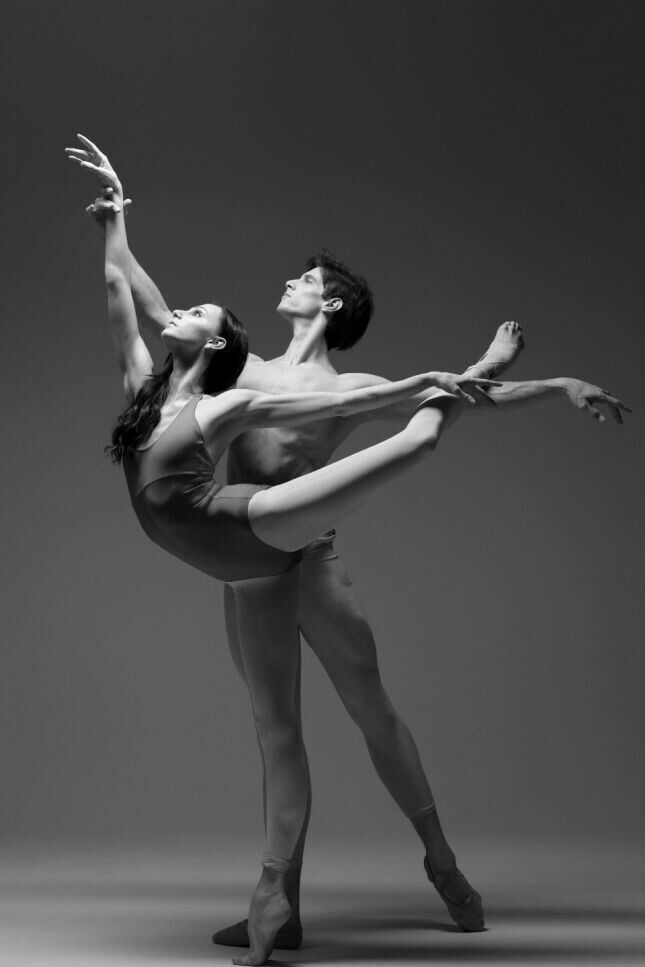
What you can do is to change your angle of view and experiment with composition (always making sure you’re not in the way, of course!).
Also, try to capture emotion in your photos. Remember the dancers aren’t pros, so they’re doing it to have fun, challenge themselves, or pursue a long-lost passion.
9. Stay at a proper distanceCredit: Mike
It can be easy to lose track of where you are if you’re moving while you look through the viewfinder. However, it’s very important that you’re aware of your subject’s movements.
You should never be in the way and you shouldn’t intrude on their space. It’s better to bring a telephoto lens with you if you want to capture close-ups and details.
10. Talk to the dancers and crewCredit: Pixabay
Talking to the dancers to understand what they want to communicate is important in every type of dance photography.
If you’re shooting a live performance, then you need to talk to the crew as well.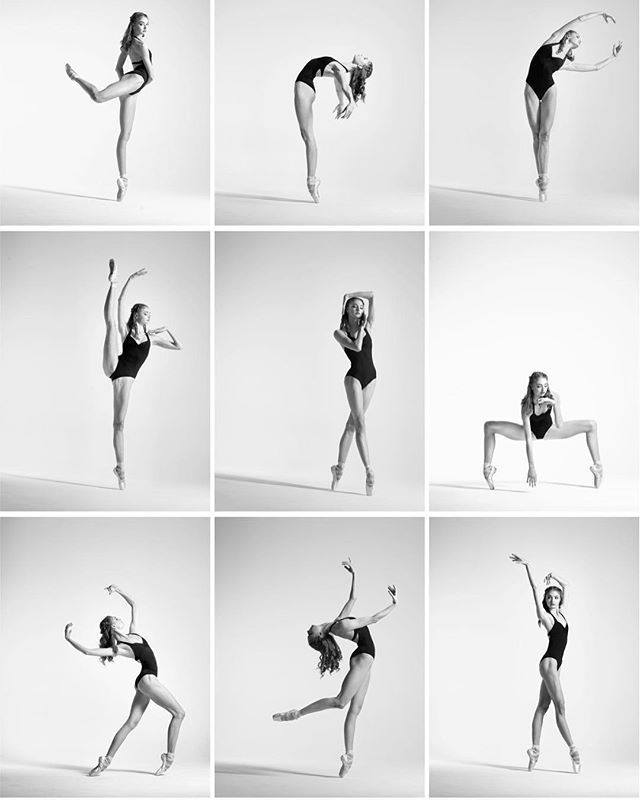 Speak with the director to get an idea of the concept and/or story of the performance.
The choreographer can tell you how the dancer will be moving on stage in a way that you can anticipate the moves for composition and framing.
Also, the lighting designer and technicians are essential for your job given that, as a photographer, you work with light.
11. Photograph their rehearsalsCredit: Michael Zittel
Dancing is not only about the big performance. There’s a long path that leads up to that moment.
Dancers dedicate a lot of time and effort into getting in shape, preparing new shows, learning choreographies, etc.
Making a photo session in one of their practices will help you to capture the complete story. It’s also a great way to show another side of them.
They’ll often be more relaxed and wearing comfortable clothes, and you can take some nice spontaneous pictures that you could never get when they perform on stage.
12. Don’t forget about the backstage
Credit: Kazuo Ota
The rush before going on stage is one of the most interesting moments to photograph when you work with performers.
Everybody is excited and at the same time concentrating and getting ready. The candid expressions and emotions that you can capture are not to be missed.
13. Showcase their skillsCredit: Pixabay
Dance is an art form, it’s often conceptual, and it’s something that performers work on many different levels.
Dancing is about movement in space, the limits of the body, and the emotion of performing. Your photos should help convey that power and showcase the skills, efforts and accomplishments of the performer.
How Do You Edit Dance Pictures?
Credit: Daniel Tong
When you take a picture of a dancer, it’s often under low light situations. That’s why one of the most needed edits is sharpening.
Noise reduction can also be useful since you probably have to use a high ISO sensitivity.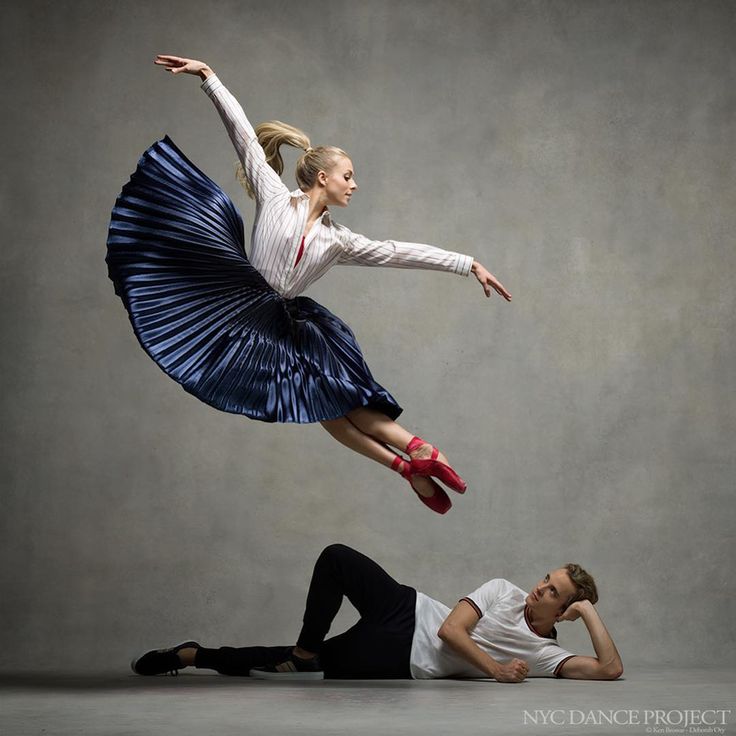 Lightroom is great for this type of edit; just be careful not to lose too much sharpness.
Dancers are constantly moving and the action can get very fast (depending on the type of dance). That’s why you’ll probably have to crop your photos to find better framing and composition.
For the rest, it’s just like any other photograph. Correct the exposure if necessary, and add your personal style to it.
See our guide to the best photo editing software for some info on choosing the right tool to edit your images.
Dance Photography FAQsHow do you take good dance pictures?
As per the tips above, a good place to start is by getting to know the style of dance and the dancers themselves. From there, master your camera settings – especially necessary if you’re photographing performances in low-light situations. Then it’s a matter of experimenting with different angles and photography styles to get the kind of compositions you want.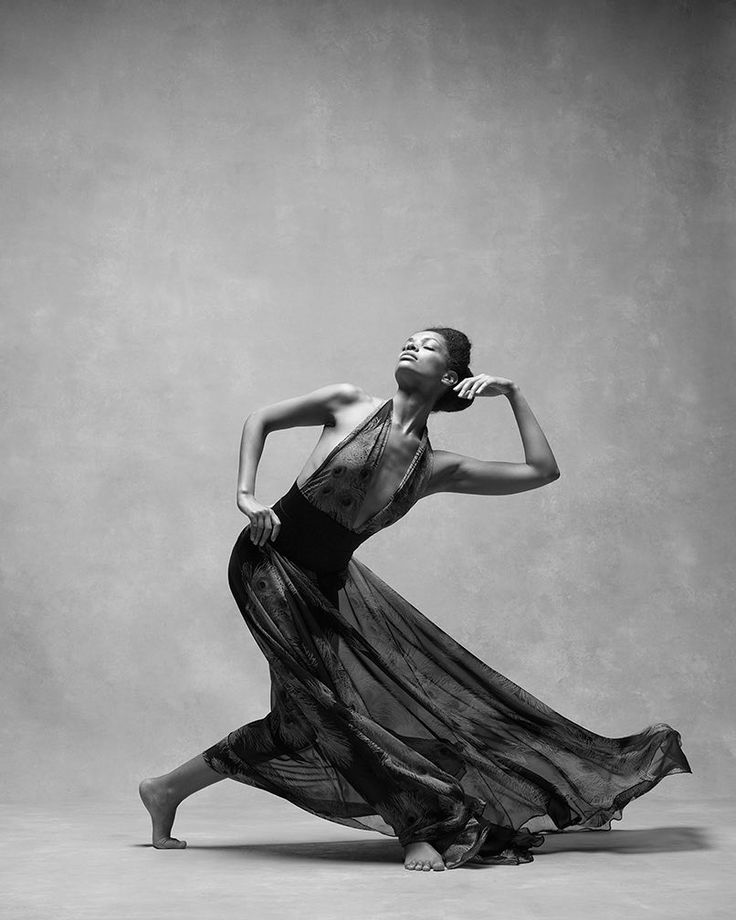
How much do dance photographers make?
ZipRecruiter reports an average annual income of $42,462 for dance photographers in the US. That said, some photographers report six-figure incomes, so it all depends on what you’re shooting, your experience level, and your business model.
How do you photograph dancers in motion?
If you want to freeze the dancer in motion, you’ll need a fast shutter speed. You can also pan the camera following the dancer to capture motion blur in the background. Another creative idea is to use a tripod and capture long-exposure photos, embracing the motion blur that comes from the dancer’s movements.
Final Words
To get into dance photography, you can start with friends and family, local dancing schools, or the dance floor of a local club. From there, it’ll be easier to move on to professional dancers.
Hopefully, you’ve found this article useful and inspirational. Go out and give it a try, and if you find a tricky situation, you can post your question in the comments below.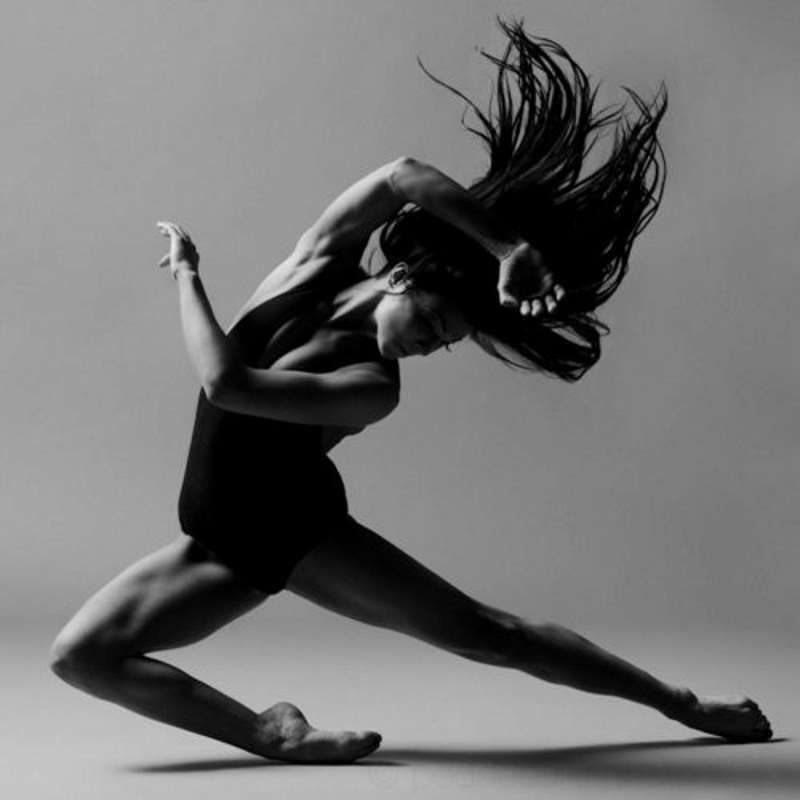
Also, feel free to share the best picture of dancers you’ve taken – we’d love to see your work!
Highly Recommended
8 Tools for Photographers
Check out the 8 essential tools to help you succeed as a professional photographer.
Includes limited time discounts.
Learn more here
Dance photography - the nuances of shooting, the secrets of success, polishing skills
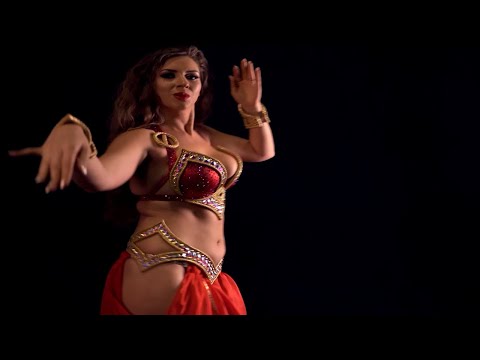
Dance photography is an expression of the beauty of movement and emotions. Dance can be a source of great shots, but it's no secret that photographing dancers is very difficult: framing, focusing and releasing the shutter at the right moment - absolutely everything must be done, and at the same time with the best exposure in the available light. For Bernie Ng, one of Singapore's most prolific dance photographers, shooting choreography involves not only capturing the action, but also the aesthetics and emotion that permeates the movement.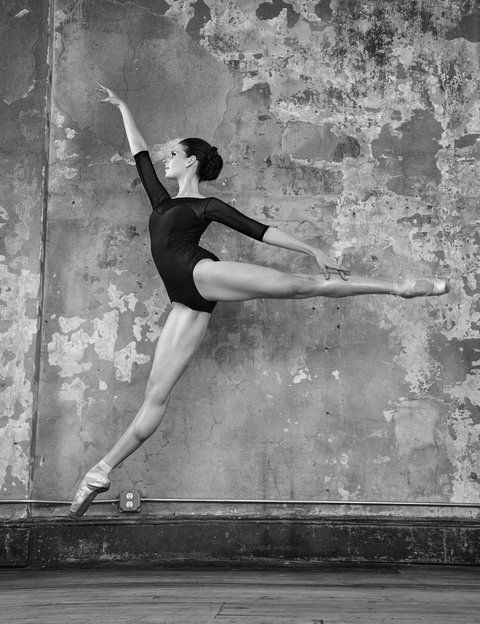 She shares some tips for capturing dramatic shots of dancers.
EOS 5D Mark III / EF24-70mm f / 2.8L II USM / Manual exposure (f / 2.8, 1/250 s) / ISO 2500 / WB: Auto. "Pure" by T.H.E Dance Company (2016) / Choreography: Kuik Swee Boon / Dancers: Anthea Seah & Wu Mi
- Exposure
Getting the exposure right is probably the most difficult aspect of dance photography . Since flash photography is generally not allowed indoors, you should do your best with the available lighting, which will vary from one show to the next.
Use fast lenses
This will allow enough light to reach the camera sensor so you can keep the ISO sensitivity as low as possible to minimize visible noise. Ideally, your camera kit should include both a wide-angle lens for capturing the entire scene and a telephoto lens for close-ups.
Shoot in manual mode or use exposure compensation in Av or Tv mode
The action in the scene (and hence the shooting conditions) can change very quickly, so you'll need to keep control of your exposure settings.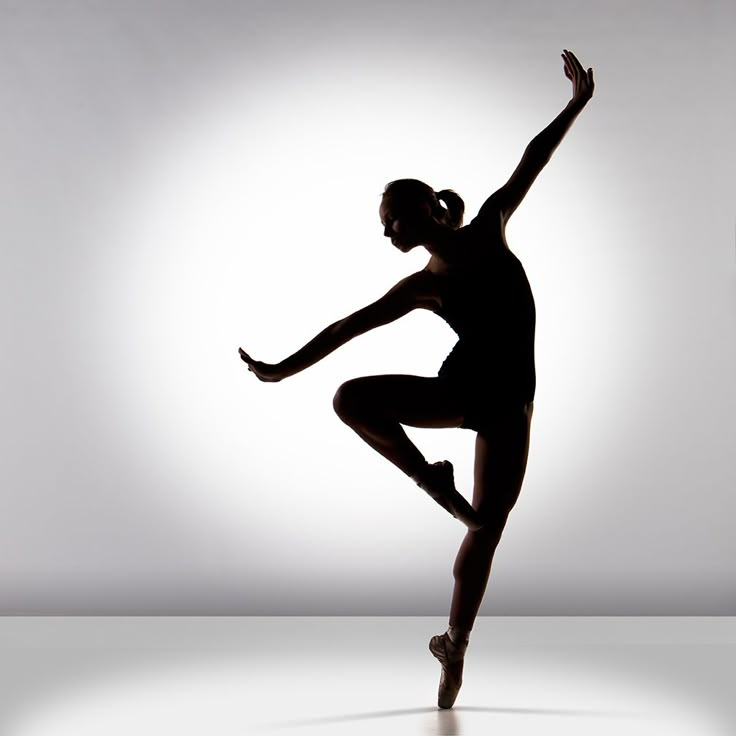 Bernie prefers to shoot in manual mode to fine-tune the camera. But if you choose to use semi-auto, she advises using compensation to get the right exposure.
For beginners, aperture-priority (Av) mode will probably be easier to use: you just need to set the maximum aperture and the camera will give you the fastest possible exposure without underexposure. Shutter priority mode (Tv) gives you control over shutter speed, but it can be a little more difficult for an inexperienced photographer to get an adequate exposure.
Shutter speed. Know what you need
Consider factors such as dance style, choreography, and the type of shoot you want. Bernie's shutter speed is 1/250 second, which she adjusts as needed. For example, she may decide to use a slow shutter if she feels it is necessary for the image.
EOS 5D Mark III / EF24-105mm f / 4L IS USM / Manual exposure (f / 4.0, 1/13 s) / ISO 800 / WB: Auto. "Giving" by Frontier Danceland (2015) / Choreography: Adrian Skjoldborg
Using a slow shutter speed can add momentum to a photo and bring the whole composition to life. In the shot above, you can see that the photographer chose to use a slow shutter speed to create some motion blur while keeping the dancer in focus. This filled in the empty spaces and added movement to the image.
Pro Tip: If you have access to a stage crew and lighting designer... about the upcoming show. Bernie usually asks what the lighting will be like.
Creative ideas: stroboscopic lighting can be a great opportunity!
EOS 5D Mark III / EF70-200mm f/4L IS USM / Manual exposure (f/4, 1.3s) / ISO 320 / WB: Auto. "Planet Romeo" / Presented at DiverCity as part of the M1 Contact Contemporary Dance Festival (2015) / Choreographer and Dancer: Daniel Kok
Some shows use stroboscopic lighting, which can cause you to miss many moments if you're not ready. However, if you prepare and react quickly enough, this can be an opportunity to get creative. For the shot you see above, Bernie made a quick decision to slow down the shutter and get a strobe effect.
- Dance is more than just action
EOS 5D Mark III / EF24-105mm f / 4L IS USM / Manual exposure (f / 4, 1/400 sec) / ISO 12800 / WB: Auto. "The Ordinary Man" by T.H.E Dance Company (2014) presented by Huayi - China Arts Festival, Esplanade - Theaters in the Bay / Choreography: Wu Yi-San & Kuik Swee Boon
A lot of people think about snapshots in a jump at the mention of dance photography, but quiet moments can be just as dramatic.
Your photography will definitely be influenced by:
- beautiful lines and correct poses
Find out which ones work well and which don't. They can be different for different dance genres. However, you don't have to have a dance background to take decent shots - basically it all comes down to a well-developed sense of aesthetics. Make the dancers look good in the frame.
- dancers' faces
A big part of dance is conveying thoughts and feelings to the audience, so Bernie tries to capture the emotions and facial expressions of the performers. This is exactly the moment when it is useful to know what the choreography really is before you shoot! The intriguing facial expressions of the dancers above reflect the comedic nature of the choreography. Take those shots where the dancers blink or their eyes are empty and unfocused (unless it's part of the choreography) and mercilessly throw them in the trash.
Pro Tip: Be sensitive to the shots you take
Remember that your camera can capture things that the human eye cannot see: pressing the shutter button will inevitably take pictures that may not be the most flattering for dancers. Be very careful and careful when choosing the final set of shots (if you are an invited photographer and completed an order). Get permission from a particular dancer or company if necessary, especially if you share images on social media, a website, or wherever.
Dance photos don't have to include the entire body of the dancer!
EOS 5D Mark III / EF24-70mm f/2. 8L II USM / Manual exposure (f/2.8, 1/100s) / ISO 400 / WB: Auto. Pallavi in Time by Chowk Productions (2017) / Choreography: Raka Maitra
Close-ups of the dancers' faces or other details of the mise-en-scene can also create memorable shots.
"The legs were very important to this choreography," Bernie recalls of the above shot. She wanted to get closer to the ankle bracelets of the dancers. The photo turned out to be successful also because the lighting was also focused on the legs.
Bonus: if you really want to capture the jump…
EOS 5D Mark III / EF24-105mm f / 4L IS USM / Manual exposure (f / 4, 1/250 sec) / ISO 5000 / WB : Auto. "Schubert Symphony" Singapore Dance Theater (2016) / Choreography: Chu-San-Go
The most important thing in pictures of dancers in a jump is the exact time: "If you see a jump, you are already too late." To get the timing right, the photographer advises not to rely too much on continuous shooting. Instead, learn when to press the shutter button. Sometimes you can tell from the music at what point the dancers are getting ready to jump. It will probably take a lot of trial and error, but it will only improve your photography skills.
Other noteworthy parts
- You will need to react very quickly.
As mentioned above, things obviously move quickly on stage and you have to anticipate the moments and react almost instinctively to get the shots you want. What will help?
- - The presence of a fast and "responsive" camera.
- - Good knowledge of the functions of your camera and its configuration at the level of intuition. Customize your own shortcut buttons.
- - If you focus with the back button. This makes shooting more efficient because you don't have to refocus every time you press the shutter button.
- - A lot of practice helps you think faster.
- - If you watch a lot of dancing, even outside of filming.
 This will help you familiarize yourself with the timing of the shutter release and aesthetics. In addition, it is easier to evaluate the dance when you see it with your own eyes, and not through the lens!
- Respect who is on stage and respect the audience.
It's easy to get carried away here, but be aware of both the audience and the dancers on stage.
YES!
- - Take pictures only when allowed.
- - Turn off red light autofocus.
- - Turn off your flash.
NOT…
- - Get too close to the dancers. This can be quite distracting if you (or your huge telephoto lens) intrude into their space, especially since they will have heightened spatial awareness as they dance.
- - Make it difficult for the audience to see.
- Last but not least, respect the dancers.
The dancers work very hard to perfect their art, and without them you wouldn't have your photos.
- - Think about how they would like to look in the frame. Show them in the best light, and make their efforts worthwhile.
- - Never forget to credit the dancers and choreographers on your photos when you post them on your social media profile.
- - Create your connection to your object. Watch more dances or even take choreography classes! Your increasing appreciation of your subject may be reflected in the pictures you take.
The career of dancers is short. Your photographs of performing on stage in the dance element may be the only record of these precious moments, so try to take pictures that will bring joy to people and bring back fond memories.
How to photograph a dance? 5 tips for shooting dance
Rehearsal bases, dance halls, recording studios
in Moscow
How to photograph a dance? 5 Tips for Shooting a Dance
How to photograph a dance? Taking a photo of a dancing person or couple is not so easy, the frame should turn out not only beautiful, but also alive. To get a good photo, regardless of whether it will be taken in the hall , rented by or on stage, it is recommended to follow 5 basic rules.
5 simple tips on how to photograph dancing
1. Counting
For an average person who is far from the world of dance, counting "five, six, seven, eight" is usually unfamiliar. The thing is that music is divided into many squares, each of which includes 8 accounts. Thus, a photographer who counts from 1 to 8 to himself will be able to synchronize with the playing music, which means he will better feel all the dance moves. If you have to make a photo essay or a photo report about the event, then you just need a dance score. And if you have 9 to shoot0008 rent hall , then you will be able to agree with the dancer on what account he will make the necessary movement.
2. Fast shutter speed
Shutter speed can be called almost the main characteristic in this type of shooting. All parts of the dancer's body should turn out to be unlubricated, clear. When using a shutter speed of 1/50, gestures and movements will be blurry. Therefore, it is better if the shutter speed is at least 1/600, and if the light allows it, then 1/2000. The faster the selected shutter speed, the clearer and more detailed the photo will be.
3. ISO
When you are indoors ( halls in rent does not count), you do not have the ability to somehow adjust the lighting. So, if it is not enough, then you need to increase the sensitivity, keeping it in the range from 400 to 1200 ISO. If the picture turns out to be “noisy”, then it can be made black and white.
4. Readiness
Of course, every photographer in the arsenal should have several winning ideas for a photoset and renting hall will help in their implementation.