How to draw a ballet dancer
Ballerina Drawing - How To Draw A Ballerina Step By Step
Ballet is one of the most beautiful and elegant forms of dance there is. Skilled ballerinas can tell stories through dance and fancy moves, and becoming a ballerina is something that many people dream of!
Not everyone can become a ballerina though, so the next best thing would be to learn how to draw a ballerina.
By the end of this tutorial, you will easily be able to create your very own ballerina!
We hope that you have a great time with this step-by-step guide on how to draw a ballerina in just 6 steps, and we’re sure it will help make this drawing a breeze for you to do!
What's in this Blog Post
- How to Draw A Ballerina – Let’s Get Started!
- Step 1
- Step 2 – Start working on some finer details with your pen
- Step 3 – Now, draw the bottom half of the ballerina
- Step 4 – Add some face and finer details
- Step 5 – Now, you can add some final details and erasethe pencil lines
- Step 6 – Finish off your ballerina drawing with some color
- 5 Tips To Make Your Ballerina Drawing Even Better!
- Your Ballerina Drawing is Complete!
Step 1
For this first step of our guide on how to draw a ballerina, you will be using a pencil to draw some outlines to guide you.
These guiding lines and shapes can be a bit complicated, so don’t be afraid to closely follow the reference image as you draw!
You will be drawing some rough outlines for the entirety of the dancing ballerina, and these pencil lines will make it much easier when you start refining the image and adding some more detail.
As long as you take it slow and refer to the reference image you’ll definitely be able to do it! Because you’re drawing with your pencil, you can always erase any mistakes or areas that aren’t looking right.
Step 2 – Start working on some finer details with your pen
Now that you have the pencil outline of your ballerina drawing done, you can start to use a pen or darker pencil to add some finer details to the image.
From this point onward, you’ll definitely want to take it slowly! Drawing isn’t a race, however, so take your time and have fun with it!
You can use your pen to start adding detail to the top half of the ballerina’s body.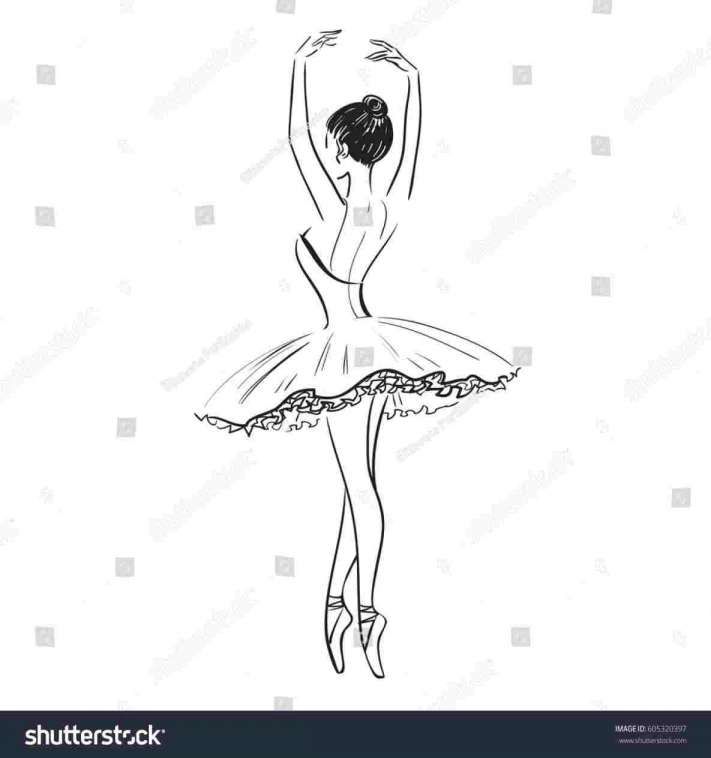 This will include her arms, face and her tutu.
In our reference image, the lines you will be adding will be darker than the grey lines from the first step.
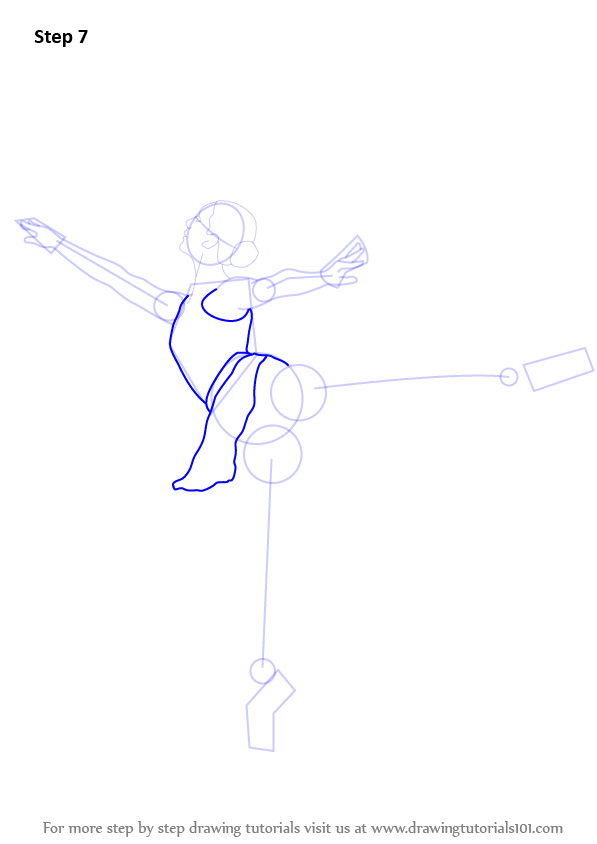
Step 3 – Now, draw the bottom half of the ballerinaYou’ve drawn the top half of the ballerina, and in this step of our guide on how to draw a ballerina you can add the second half.
To do this, simply keep adding more pen lines to the legs and feet of your ballerina until it matches our reference image. You can also use a flat line for the floor she is dancing on.
Step 4 – Add some face and finer detailsYou’re making great progress with the outline of your ballerina drawing, and now you can start adding some final details.
The main part of this step will be adding her facial features like her eyes, nose and mouth. You can also add some details to her hair in this step.
Then, there are a few more line details that you can add to her clothing and her body for some fabric and muscle detailing.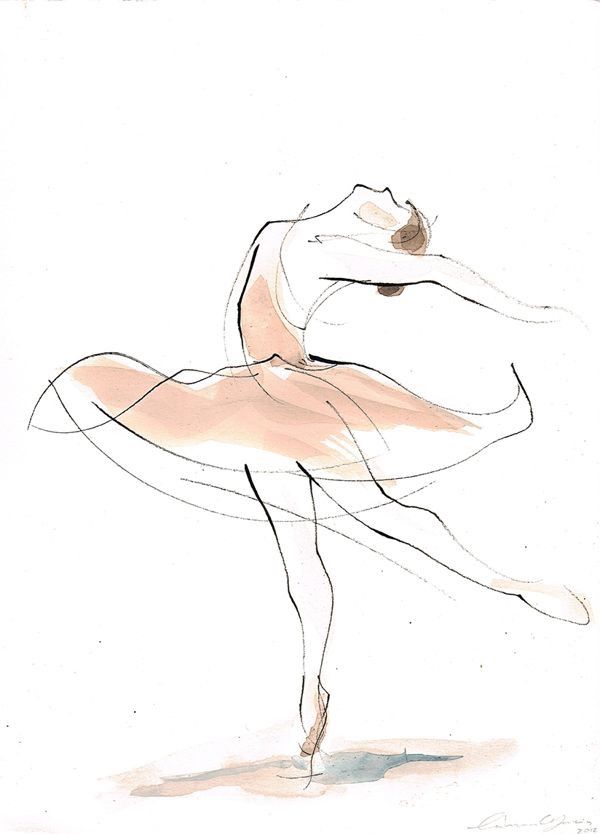
Before you start to add some color to your ballerina, we have a few more details to add in this guide on how to draw a ballerina.
The main feature of this step will be her tutu, which you can add some lines to in order to give it more depth.
Once that’s done, you can also add any additional details that you would like for your drawing!
You could even draw a background for her, and some examples could include showing her in a dance studio or perhaps in front of a giant crowd!
Adding a background and some of your own details are a great ay to add some of your own personality and creativity to an image, so be sure to let your imagination run wild!
Once you’re happy with how it’s looking, you can erase the pencil lines from step 1, as you won’t be needing them anymore.
Just be careful when you do this, as if the pen ink isn’t totally dry yet you could smudge it.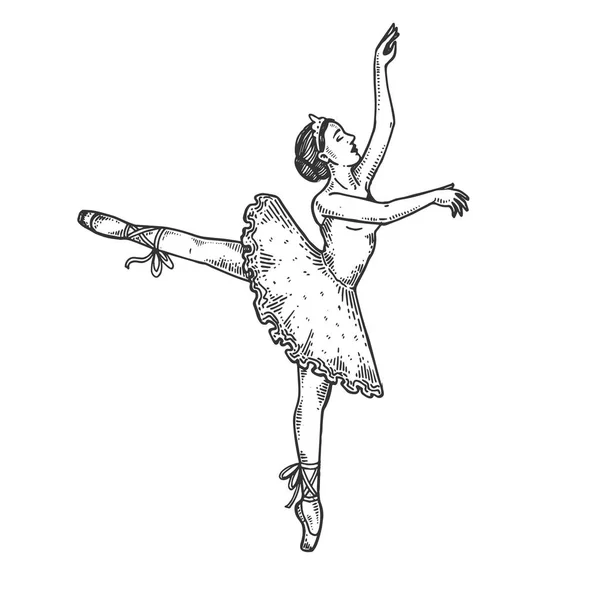
Once you’ve erased the pencil, you can go over any details you may have missed out and then you’re ready for the final step!
Step 6 – Finish off your ballerina drawing with some colorThat brings you to the final step of your ballerina drawing, and this is where you get to have fun coloring in your pretty drawing!
In our reference image, we went with some nice blues and greens for her tutu and used some red for her hair.
This is just one way that you could go about it, however, and for this step you should really let your creativity flow!
Tutus often come in elegant pink or purple colors, but they can be any color you would like! It’s completely up to you and you can show what your tutu would look like if you were a ballerina.
You could even alter some of the details and colors to make her look like you so you can really imagine what it would be like to be a ballerina!
What colors and art mediums will you use to finish off your ballerina drawing?
5 Tips To Make Your Ballerina Drawing Even Better!
These tips for your ballerina sketch will make it look even more stunning!
Seeing a ballerina doing a beautiful dance is always amazing, but it’s even better when you can see multiple ballerinas doing their thing.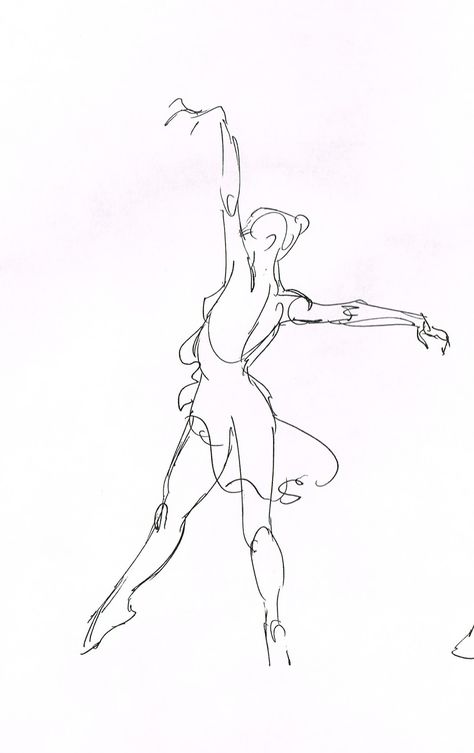
Now that you have completed this drawing of a ballerina you could add some more!
They could even be drawn and posed very similarly to the first one and it would look like they are dancing in formation. How many ballerinas would you like to dance in this picture?
Ballerinas will wear all kinds of beautiful outfits, and this drawing shows just one. You could personalize it a lot by changing the outfit that she is wearing.
This could be as simple as changing the colors of the tutu or you could use an entirely different design.
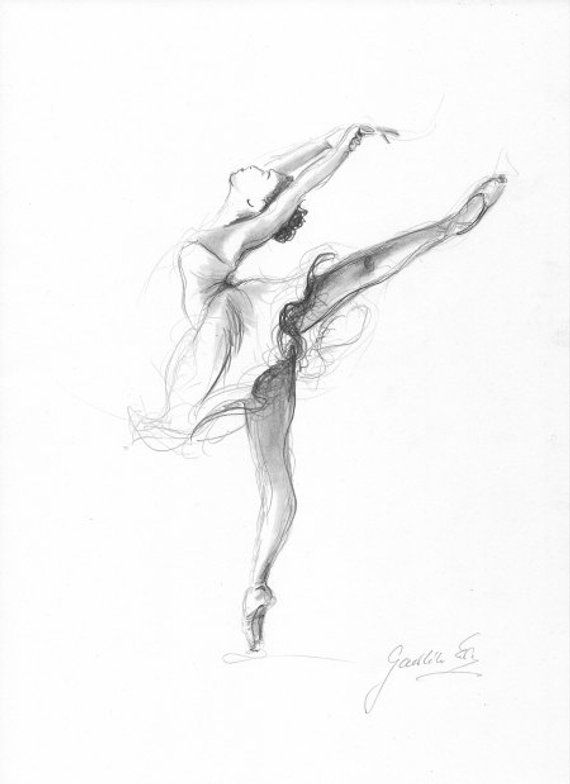
This ballerina drawing shows her performing a classic ballet pose. If you want to really challenge yourself, you could try to portray a different pose as well.
To do this, you may wish to look up some photos or performances showing real ballerinas. Then you could use these as a reference point as you adapt the pose to the same style as our image.
If you love to perform ballet or have always dreamed of being a ballerina, then you could adapt this picture to look like you are the dancer! This could be done with just a few changes.
Another option would be to make this ballerina look like a real ballerina that you admire or maybe even know. The hair and face would be the most important aspects to change, but you can add any other details.
Finally, you could finish off this ballerina sketch with a background. This could be a simple stage to keep the focus on the ballerina, or you could make it really complex.
Using your colors, you could even add aspects such as a spotlight shining on the ballerina and create some props. You could also have a crowd in the background that is cheering her on!
Your Ballerina Drawing is Complete!
We hope that you had a wonderful time working with us on this step-by-step guide on how to draw a ballerina!
This drawing had a lot of detailing to it, but once you follow this guide and get the hang of it you’ll see how easy it can be when you have some steps to follow!
This guide is just the start of the fun, however, and now you can have a great time adding your own details such as clothing changes or a background.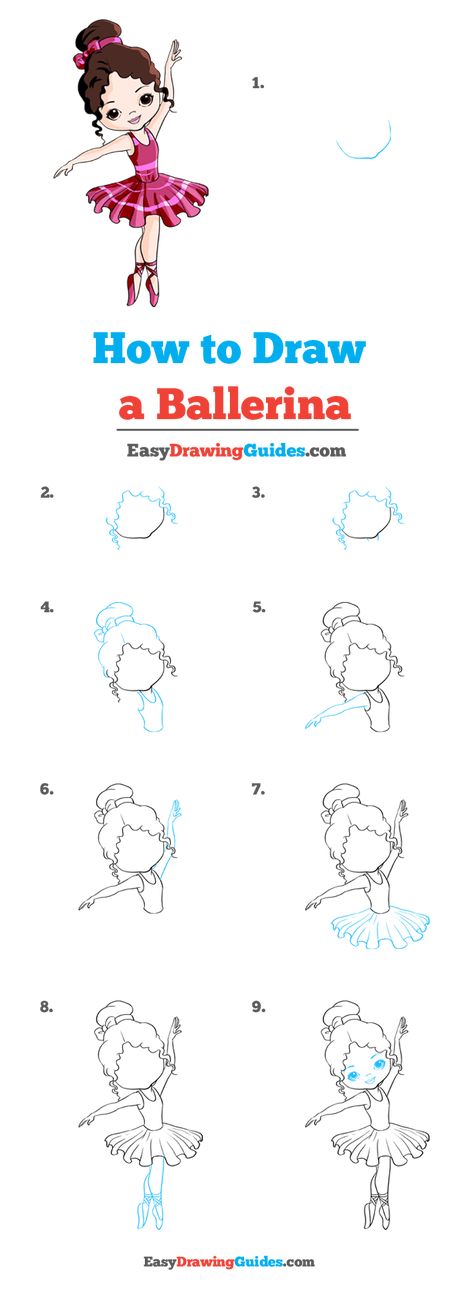
Once you add some colors it will really finish it off nicely!
When you’re ready for more drawing fun, we hope to see you on our website where we have many guides for you to enjoy. We also upload new ones all the time, so be sure to visit often!
Once you have finished your ballerina drawing, we would love to see your pretty artwork! You can show us on our Facebook and Pinterest pages, and we can’t wait to see!
Ballet Dance Drawing - Etsy.de
Etsy is no longer supporting older versions of your web browser in order to ensure that user data remains secure. Please update to the latest version.
Take full advantage of our site features by enabling JavaScript.
GERMANY Find unique items from around the globe that ship to Germany
(1,000+ relevant results)
How to draw a ballerina with a pencil step by step - 3 easy drawings for beginners
Easy and simple to draw a ballerina with a simple pencil.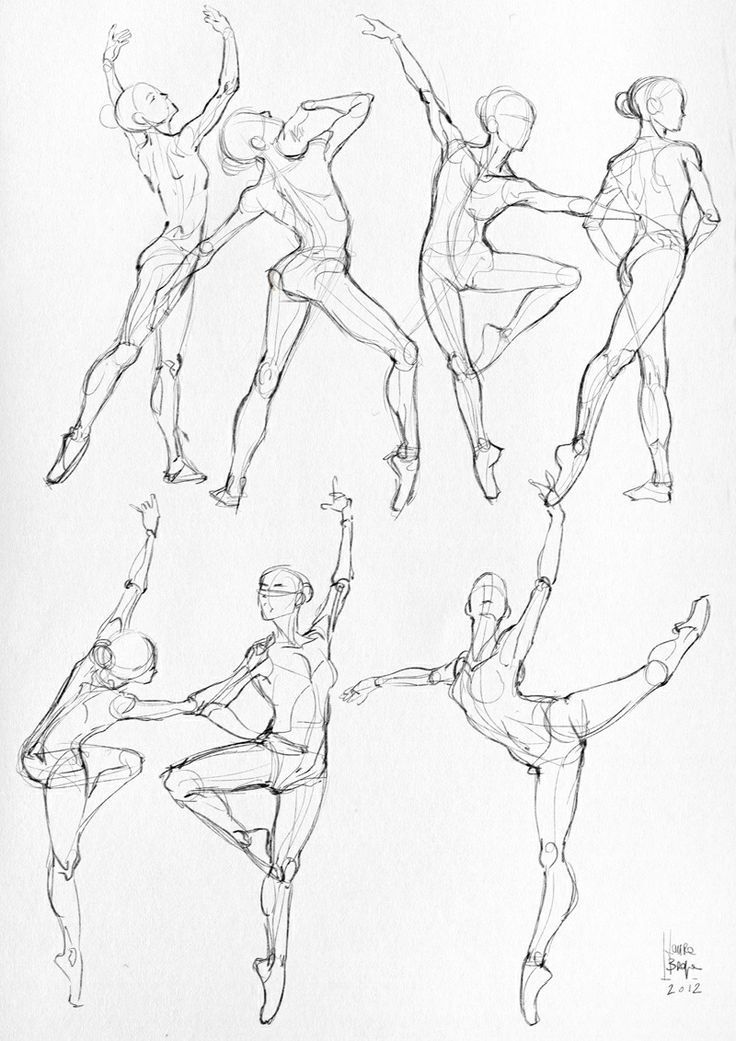 We show how to learn how to draw a ballerina in 3 ways - step by step lessons + 10 photos and videos.
Ballet is perhaps the most elegant art form. And ballerinas in motion, on the stage seem somehow unrealistic - is it possible to move so easily, airily? So drawing them seems to be a very difficult task - how easy and simple to draw a ballerina without special skills? nine0005
In this article, we offer you 3 step-by-step master classes, with the help of which you will definitely be able to create a beautiful drawing of a dancing girl.
For the first master class, we also prepared a video where you can see step by step how to draw a ballerina with a simple pencil in black and white.
If you have little girls who dream of becoming ballerinas, daughters or granddaughters, connect them to this master class, we are sure they will be interested in creating their own drawing. nine0005
There is no drawing of a person on the twine in this article, but having mastered all three master classes, it will not be so difficult for you to make a drawn picture of a ballerina on the twine.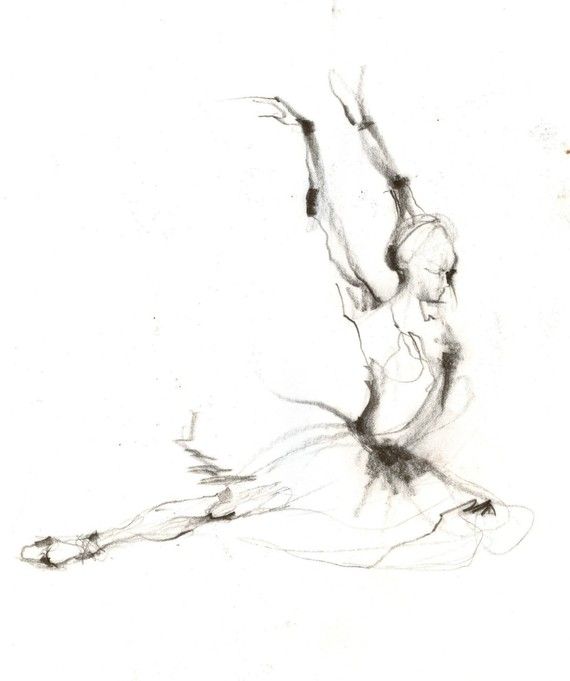
Don't forget to rate the article 5 stars if you like the tutorials!
Contents
- Tools and materials
- The easiest way to draw a ballerina
- How to draw a ballerina in motion
- How to draw a ballerina jumping on stage
- Video
Tools and materials
For these workshops you will need:
- drawing paper with a weight of 200 g/m3 or more. We will need 3 sheets, but you can buy a set of paper at once to make other drawings, or use several sheets as a draft.
- simple pencil - HB
- stationery knife for sharpening pencils
- eraser to remove unnecessary details
The easiest way to draw a ballerina
With this simple and quick tutorial you will make easy pencil drawings of a ballerina.
Stage 1 - outline the shape of the ballerina
With the HB pencil, we begin to outline the proportions and general movements of our ballerina.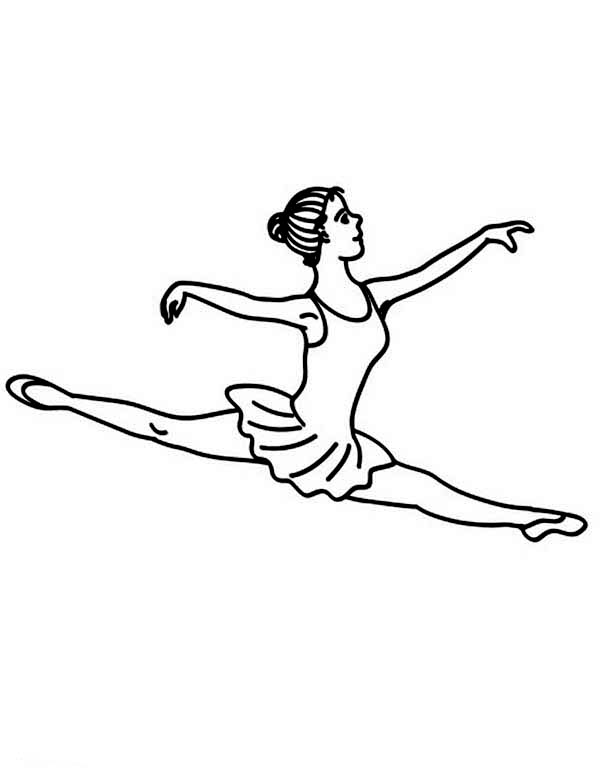 We draw a circle - this will be our ballerina's head. Then, we retreat the field for the neck and draw an oval - this will be our body, the entire chest with the stomach. Next, we draw hands with ovals - one hand is raised up, the other is lowered down. We make sure that all of our ovals - arms and legs - are symmetrical. nine0005
Also, pay attention to the fact that the supporting foot, on which the ballerina stands on her toe, passes approximately through the middle of the head. This is necessary so that the figure on our sheet does not fall.
Stage 2 - refine the silhouette and add details
We begin to refine the silhouette of our ballerina. We outline the hair, the central line of the head. Please note that our head is turned ¾, so the center line of the head will be offset from the middle. This will not be the central part of the head, but the central part of the face. nine0005
Also, we refine the shape of the hands, make the lines smoother, rounded so that there are no sharp corners.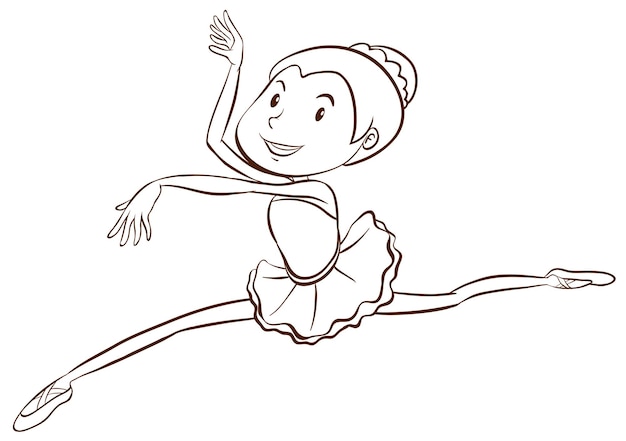 We pay attention to the turn of the torso, look at the deflection in the lower back, where we have the waist.
At the same stage, draw the legs, pointe shoes, and with an oval, which has a slight slope, outline the shape of the pack.
Stage 3 – we refine the details and stroke
Somewhere once again we refine the shape, erase extra lines, draw the face, hair, ear, fingers. Do not forget to draw a pack, the folds that we have on the pack. We fill in the hair, the costume of our ballerina and pointe shoes with light shading. nine0005
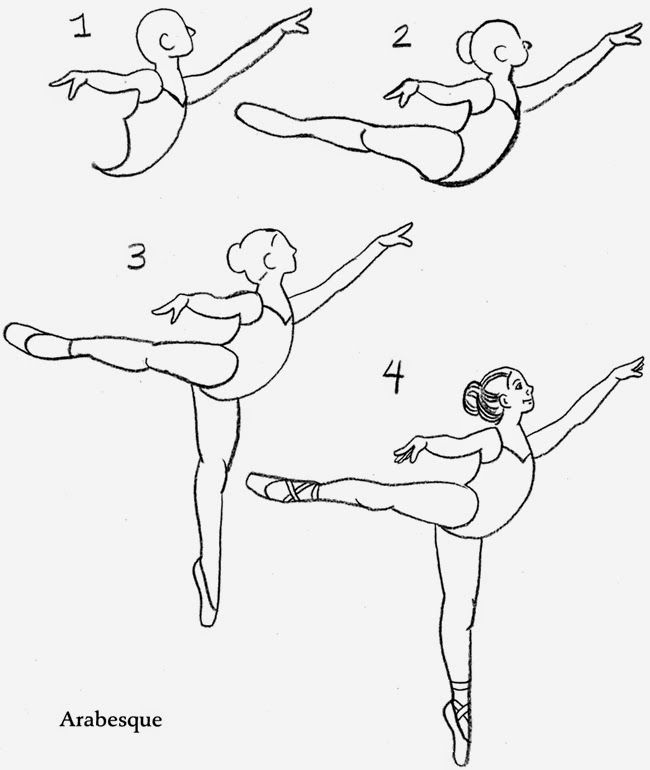
How to draw a ballerina in motion
Step 1 – draw a ballerina using ovals
Draw ovals for our entire ballerina – head, body, legs, arms. We break the legs into the thigh, lower leg and foot. We divide the arms in the same way - into the forearms, shoulder and hands.
Pay attention to the slope of the ovals. That is, they are not all located exactly vertically, or exactly horizontally, they each have their own specific slope.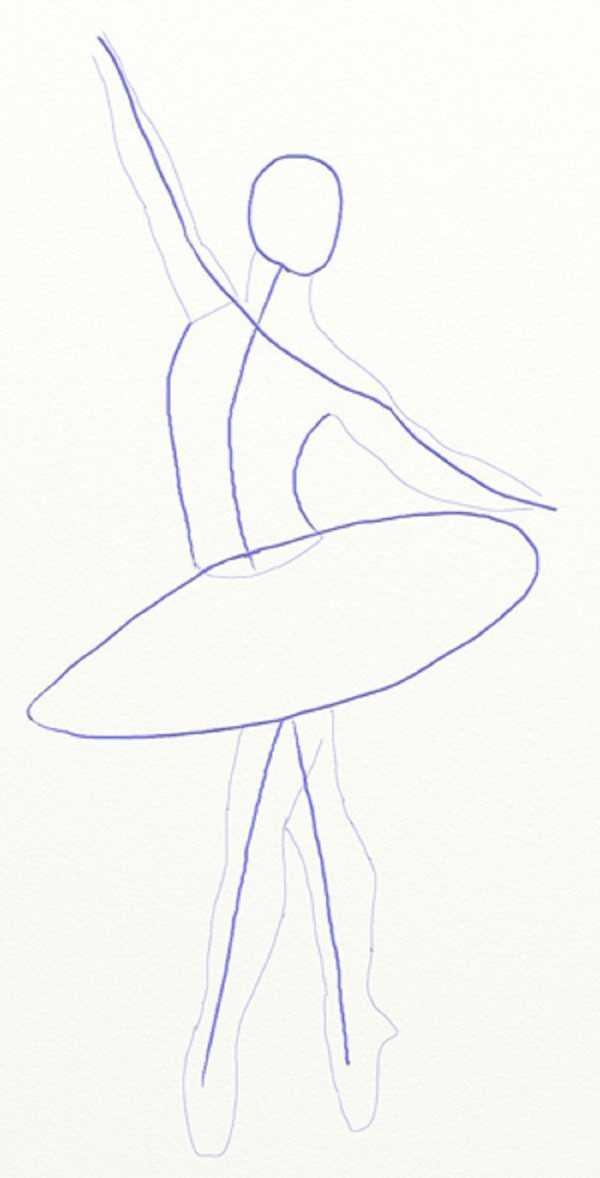 Since our head is slightly tilted back, so our head will be tilted to the left. And, in the same way, the body is pushed forward a little, so the oval should be slightly to the right. nine0005
Stage 2 - draw the silhouette, add details
We begin to refine the silhouette of our ballerina, we try to make the lines more plastic, without angular edges. We show the waist of our ballerina, the line of the back. Then we outline the silhouette of the skirt, and in general the dress, where it ends in relation to the waist. We outline pointe shoes, hair, ear. We slightly refine the shape of the head and designate the nose.
Stage 3 - add details to the drawing
Erase all the extra lines that we don't need, refine the shape, draw the face. We draw our skirt and fingers. nine0005
How to draw a ballerina in a jump on stage
How to draw a ballerina in a jump? From this photo in motion, you can make a drawing of a ballerina on stage.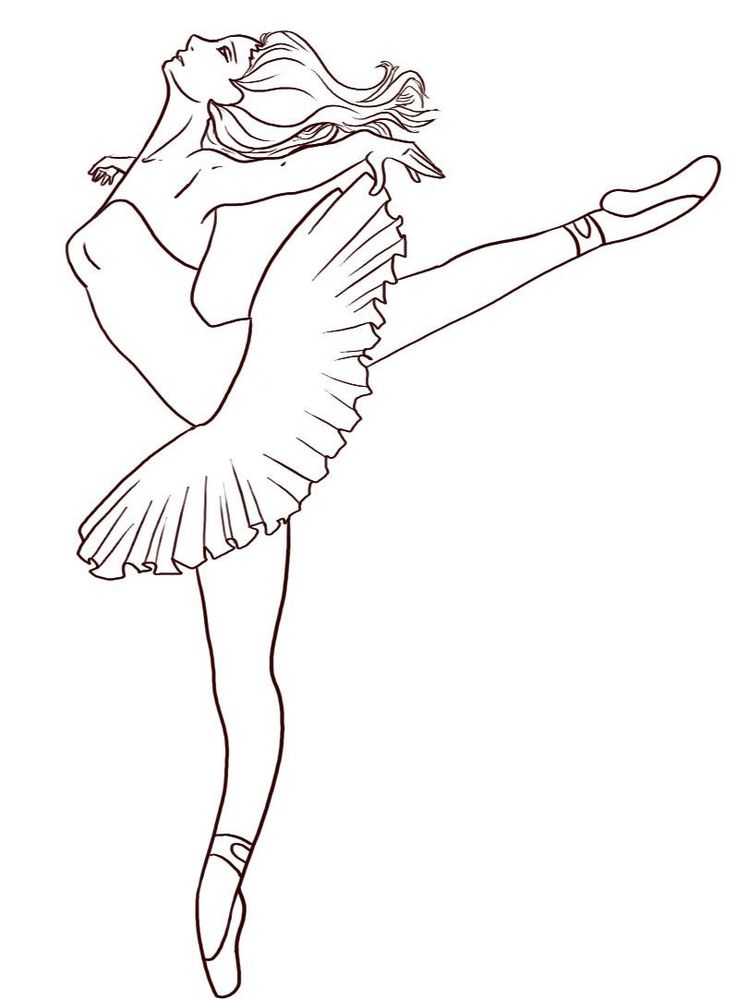
Stage 1 - draw the body of the ballerina using ovals
Make a sketch. We outline the movements of our ballerina, trying to keep the proportions. In the same way, we outline everything with ovals - legs, arms, body. Try to make the ovals in different directions so that the ballerina turns out to be more plastic and graceful. We draw attention to the fact that our ballerina is very strongly bent in the back, so the oval of the body should be smaller than it could be if the ballerina were just standing, since our body is very curved and it is in perspective contraction. nine0005
Also at this stage we outline the skirt of the general form.
Stage 2 – we refine the silhouette, draw the details
We begin to refine the silhouette of our ballerina. We try to make the lines more rounded and smooth, plastic. This is necessary in order for our ballerina to be more lively, more graceful. Try not to draw sharp corners. We also focus on showing a strong deflection in the lower back, at the waist of the ballerina.
We show the decollete, the shape of the skirt, the eyelet, the neck, and outline the fingers and hair a little. nine0005
Stage 3 - detailing
Once again we refine the shape, draw the face. We draw a skirt, pointe shoes. Lightly mark the fingers.
Video
In this video we show how to draw a beautiful ballerina step by step for beginners with a simple pencil. Watch the video until the end if you are passionate about ballet and want to learn how to draw.
step by step instructions for beginners and children
Beautiful ballet dancers have always amazed not only lovers of these dances, but also ordinary observers with their grace, beauty, skill and ease of movement.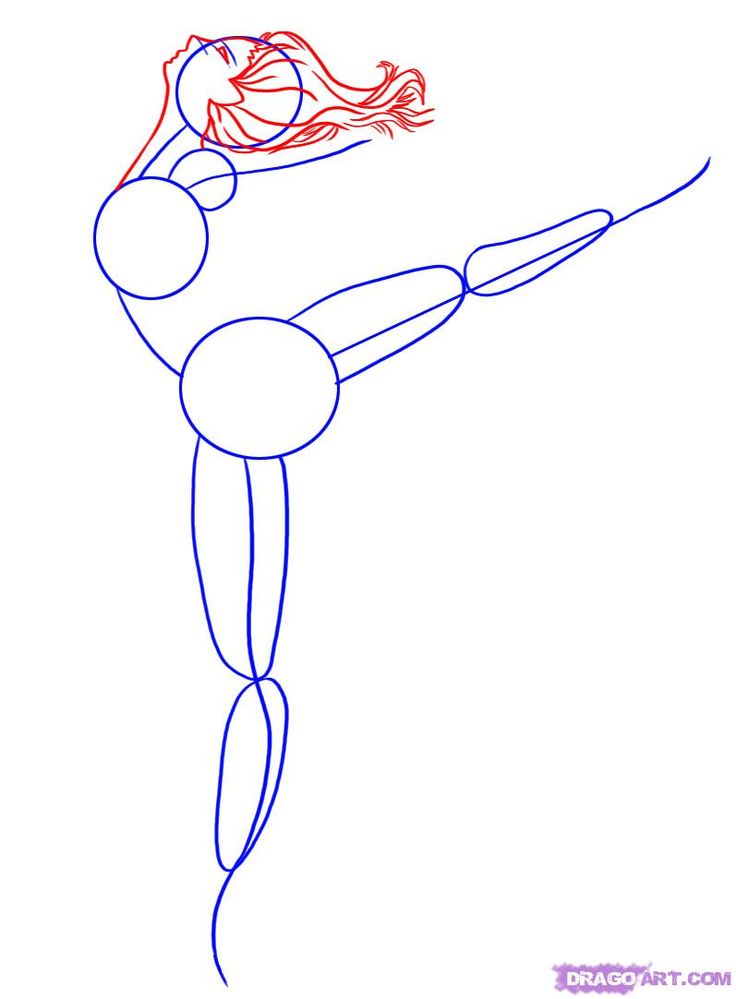 nine0005
To expand their horizons and to introduce children to such a wonderful profession, you can try to draw a ballerina together. One has only to follow some recommendations, thanks to which you will learn how to draw a ballerina easily and simply.
It is important to be able to convey with the help of a drawing the qualities that are characteristic of dancers. Endurance, stamina and many years of training help ballerinas dance well.
Professional dancers start ballet at an early age. It is important to portray a strong but refined body that is able to accurately and gracefully assume different positions. nine0005
Ballet is also aesthetics and beauty. Dancers always have specially designed looks during their performances from elegant ballet tutus, tops of the costume and beautiful hairstyles.
Ballerinas in the process of dancing take different positions, so in each version of the drawing the dancer of the ballet theater will be depicted in different poses.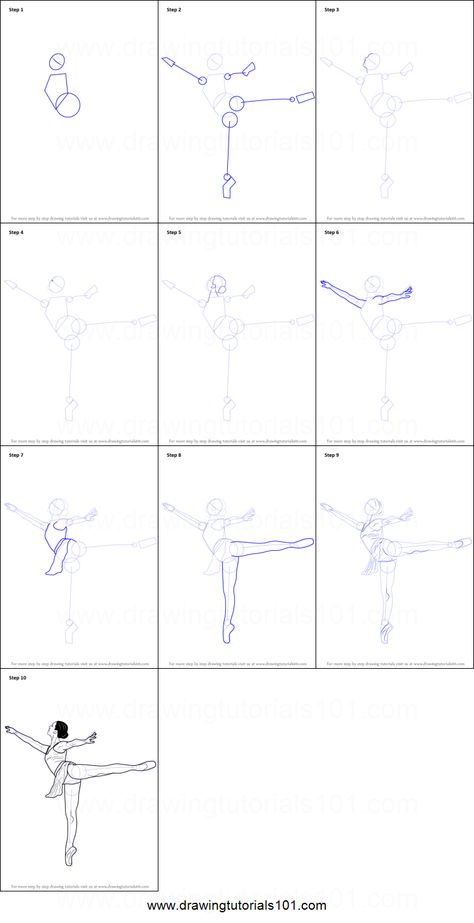 If you are just starting to draw and have no experience, then you need to arm yourself with a drawing of a ballerina for sketching. nine0005
Content:
Easy children's drawing of a ballerina
Everyone will be able to draw a ballerina step by step, especially drawing for children will be the easiest. For a children's drawing, you will need a simple pencil and felt-tip pens:
- First, draw a circle that is rounded and stretched down in an arc, forming a chin.
- In the area of the extended arc, draw an arcuate segment directed downward with a soft angle. This will be the mouth.
- A little higher draw another arcuate segment, but smaller, depicting the tip of the nose. nine0026
- Rising a little higher, two symmetrical parts of a semicircle appear, the distance between the eyes is observed. To add charm, add cilia.
- Hair is drawn on the top of the circle. It can be depicted in the form of a hat, you can also add bangs, but at the top there will still be a tied ponytail.
- When the head is completely ready, it remains to proceed to the rest of the body. From the lower part of the face, the chin, 2 thin parallel lines are drawn. This will be a thin neck. nine0026
- Shoulders and arms are drawn from the neck, and the details of the upper part of the dress are also drawn. Hands can be depicted with three-dimensional arcs. The arms are in such a position that they tend to each other, as in a typical ballet pose. The upper part of the dress includes harnesses and a belt.
- Draws a horizontal downward arc along the girdle. It will be the basis for an elegant ballet tutu. Next, we extend the arc and draw it. Below, from the bottom of the skirt, we make the edge wavy and can even be depicted in several layers. nine0026
- Two legs emerge from under the edge of the skirt, which are depicted as two horizontal thin oblong ovals.
- Dance shoes are drawn on thin ovals from below. The legs as a whole are detailed, with thin and non-protruding lines, you can outline the knees.

- The resulting image must be fully detailed and circled with a black felt-tip pen or black pencil.
- It's time to color the picture. To color the skin, you can use a soft pink or beige shade. Hair color can be anything, but in our case, let it be blonde, so we take a yellow felt-tip pen. We paint the ballet costume completely in pink, although you can combine colors and make the outfit colorful. nine0026
Drawing of a ballerina with felt-tip pen in cartoon style
Preschool and elementary school children will love the opportunity to portray a ballet dancer in cartoon style. Children watch all kinds of cartoons that have different drawing styles, so each child will try to portray ballerinas in the spirit of their favorite cartoon:
- If you have confidence in your skills, then you can immediately apply the main lines with a black felt-tip pen. nine0025 The lower part of the head is sketched in a rounded shape. Without finishing the arc in the upper part of the head, you need to immediately proceed to the hairstyle.
- Eyes can be drawn large, which will take up most of the face. In many cartoons, the characters have big eyes, they are the most emphasized, as they express all kinds of emotions. They will look like the eyes of LOL dolls. Do not forget about the rest of the facial features: nose and mouth. For their image, simple small lines will suffice. nine0026
- Next, the neck and shoulders are drawn. In this costume, the forearm will be open. Just below the shoulder, the upper part of the dress is drawn. Further, the waist of the ballet dancer is expressively loomed. The drawing of the upper body also includes the upper limbs - the arms. They can be drawn as if divorced on the sides.
- Draw a puffy skirt in several layers near the arms. The legs will be long, they are gracefully folded across each other.
 Shoes are drawn at the end of the legs.
 - Next you need colored pencils. We decorate the dress in a blue tint. You do not need to draw everything tightly and evenly, in this image you can try to make the drawing more voluminous, decorating the dress, highlighting the shadows, leaving light places, making soft transitions. It is important in the process to focus on a previously found picture of a ballet outfit. nine0026
 The hairstyle itself will be quite short, with braided ponytails on the sides. You can also add bangs. To add idleness to the outfit, you can add a bow of the same color as the main outfit at the top of the head.
 Dark silhouette of a ballerina with paints
From performances at halo concerts, you can often see aesthetic shots where a ballerina, having taken an elegant position, gracefully stands in the beams of spotlights and other lighting equipment, and against the backdrop of hundreds, or even thousands of spectators who admire the performance with admiration.
A semblance of such a frame can be created by following the instructions. For this drawing you will need ordinary gouache, a palette for mixing shades, a jar of water and several brushes:
- First, it is important to create a background for the silhouette, which is best done in an abstract style.
 White gouache is mixed with blue, it turns out a soft blue hue. This hue creates an abstract background with neat and casual strokes. Further, the background gradually darkens. The middle remains light, and dark blue strokes must be applied along the edges, then simple blue, closer to the middle, blue.
 - Silhouette drawing is in preparation. The blue paint is slightly mixed with a black tint. A thin brush is taken and an elegant silhouette of a ballet dancer is drawn. It is necessary to focus on the reference - a pre-found image that is suitable for the topic. nine0026
- When a dark silhouette is depicted, you can add volume to the image with the help of elegant strokes of white paint on the key points of the ballerina's figure: the bun, arms, tutu. The brush should not be too wet, even rather dry. The dark figure should also be well dried out. Strokes are made with a special flat brush.
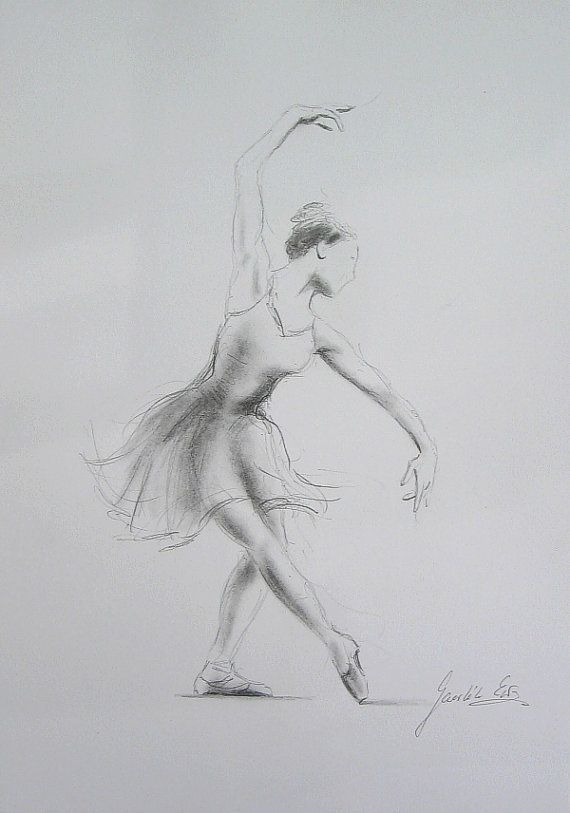
Ballerina pencil
For this drawing you will need 2 pencils: a soft pencil and a medium soft one.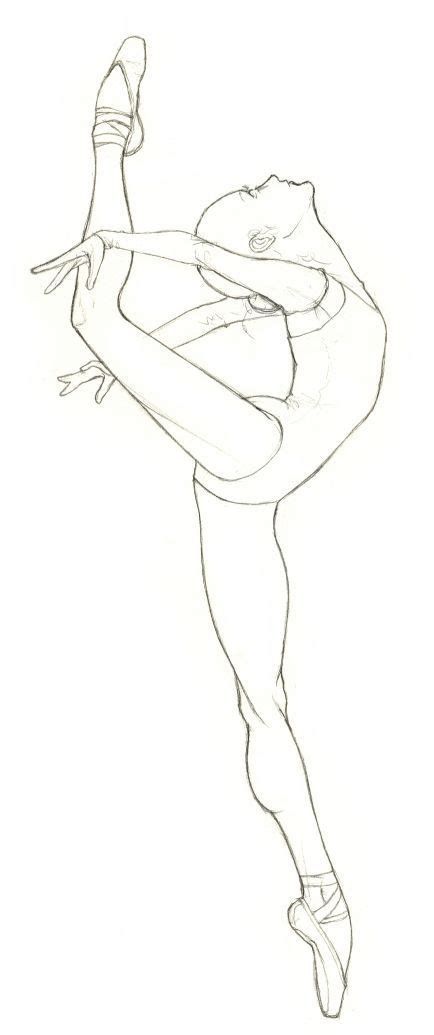 One for sketching, and the other for drawing general features and highlighting details. nine0005
A ballerina with a simple pencil will turn out to be especially refined if you make sure that the hand movements when drawing are gentle and made with feeling.
- It all starts with soft pencil sketches. The lines are light and without strong pressure. It is not recommended to use an eraser while sketching.
- Sketches are drawn along previously created proportional lines. The zones of the location of body parts are fully depicted so that the torso looks harmonious. nine0026
- We draw the body of the ballerina, fully focusing on the reference.
- Let the silhouette resemble the letter X from a distance, smoothly turning into the body. The tutu is drawn in the same way as in the previous tutorials. For ease of drawing a ballet tutu, first draw an oval. The lower part of the skirt is also wavy, you can draw several wavy layers.