How to wear a belly dancing hip scarf
24 Ways to Wear a Hip Scarf - belly dance easy costuming!
by Mao on in DIY Belly Dance Costume Blog, Uncategorized • 9 Comments
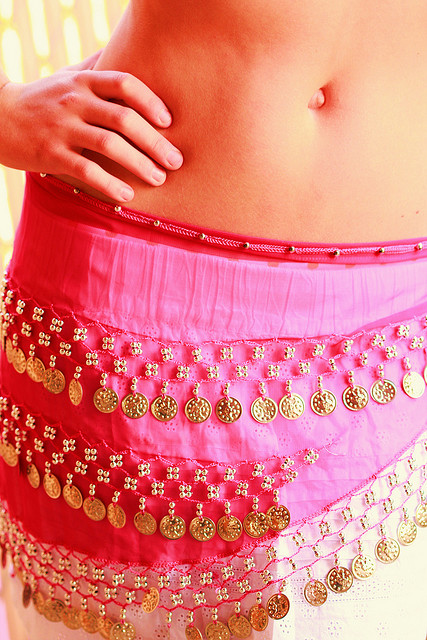
Every belly dancer has a hip scarf…. or two…. or 100 🙂
So I thought it would be really awesome if we can make more out of all these hip scarves we own!
As I was brainstorming how a belly dancer could wear a hip scarf, I realized something amazing….
A hip scarf can become not only a pretty layer around the hips, but a bra cover, belly drape, hood… and an instant shrug!
Have a look in this video 🙂 (and welcome to my living room!)
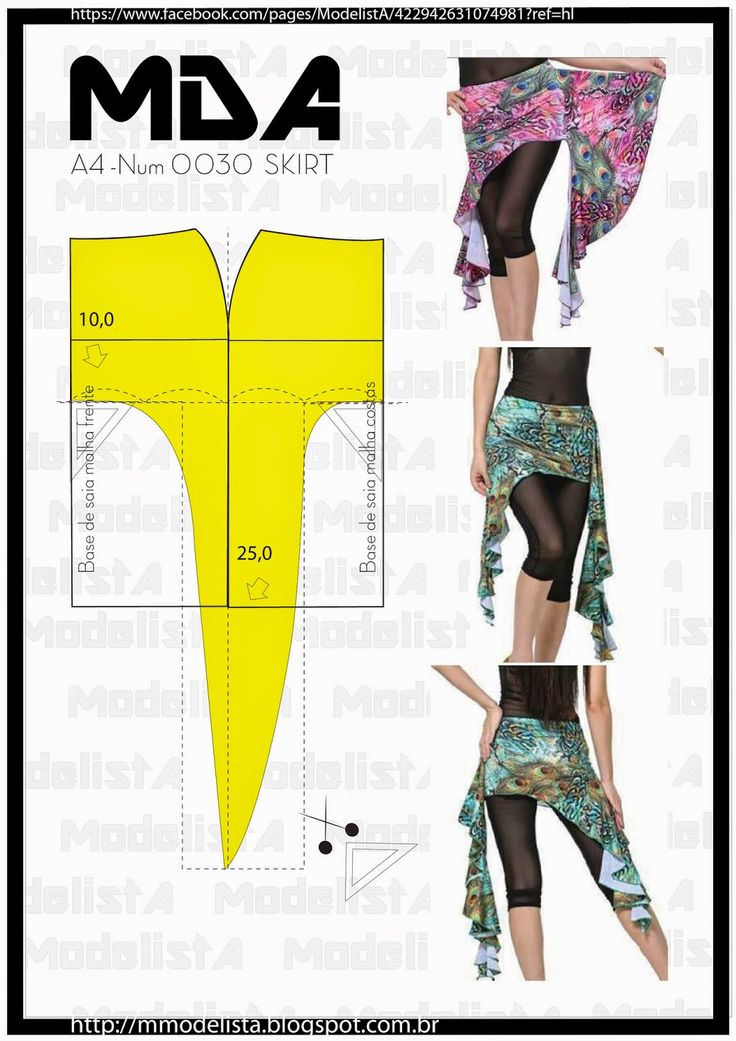
Want to make the bra and skirt I’m wearing in this video?
How to make the same bra 🙂
How to make the same skirt (scroll down the page to see the style options) 🙂
You can find a similar hip scarf here and here (affiliate links – if you purchase using these links, the store will pay me a small commission for referral. But no pressure 🙂 )
Or make your own hip scarf – check out my DIY hip scarf tutorial 🙂
24 Ways to Wear a Hip Scarf for Belly Dancing
#1. regular hip scarf
Wrap the hip scarf around your hips and tie in the front.
#2. layered hip scarf
Wear a belt or another scarf over #1.
#3. back drape
Tuck the hip scarf at sides of your skirt waistband and make it drape around your buttocks.
#4. front drape
Same as #3 except the drape is on your front side.
#5. side drape
Tuck the centre of the hip scarf at the back of your waistband, and tuck the ends at the front centre.
#6. side drape + belt
Wear a belt over #5.
#7. twist belt
Twist the hip scarf and wrap it around your hips.
#8. instant shrug
Drape the hip scarf around your shoulders, and tie the ends at the back.
#9. bra drape 1
Pull one end through at the back of the halterneck straps, drape the hip scarf over one wide of your bra, and pull the other end through at the back of the side straps.
#10. bra drape 2
Pull each end of the hip scarf through the shoulder straps at each side, adjust the length of the hip scarf to cover the bra, and tie the excess ends at the back.
#11. drape over belly 1
Pull each end of the hip scarf through the shoulder straps at each side, adjust the length, and tie the excess ends at the back of your neck.
#12. drape over belly 2
Pull one end through a shoulder strap, and tuck the hip scarf at the sides of the skirt waistband. Keep the hip scarf loose so it drapes nicely over your torso.
#13. drape over belly 3
Pull one end through a shoulder strap, and pull the rest through the other shoulder strap. Make the rest of the hip scarf drape over your torso, and tuck the end at the back centre of your skirt waistband.
#14. drape over belly 4
Tie one end at a shoulder strap, let the hip scarf drape over your torso, and tuck the other end at the back centre of your skirt waistband.
#15.
 instant top
Tie ends at the back of your neck and drape the rest over your chest.
#16. drape sleeves
Tuck the centre of the hip scarf at the centre of your bra. Twist one side and pull it through a shoulder strap. Take the rest around your arm and tuck the end at the back of your side straps. Repeat for the other side.
#17. torso drape + sleeve
Tuck one end of the hip scarf at the side of your waistband and tuck the centre corner of the hip scarf at the other side of your waistband. Pull the other end through the shoulder strap and drape the rest over your arm.
#18. arm drape
Wear 2 stretch armbands on your arm, and put ends of the hip scarf through them so it drapes in the middle.
#19. whimsical back drape
Pull hip scarf through the back of the halterneck straps about half way. Drape each end over your arm and tie the ends at the shoulder straps.
#20. tail
Tuck the centre part of the hip scarf at the back of your skirt waistband.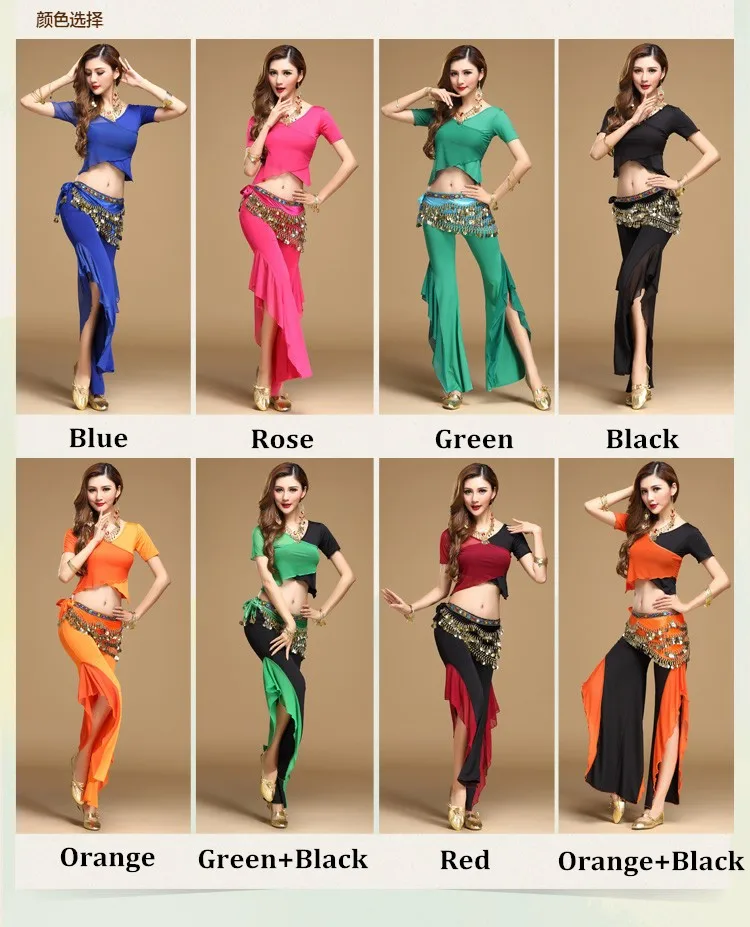 Adjust length and secure it with a couple of safety pins.
#21. headband
Twist the hip scarf and tie it around your head.
#22. head veil
Drape the hip scarf over your head.
#23. hood
Drape the hip scarf over your head like #22, then tie the ends at the front and throw the ends over your shoulders.
#24. modesty panel
Take the centre of the hip scarf and pull it through the slit of your skirt. Adjust length, and secure it to the inside of your skirt with a couple of safety pins.
Isn’t it amazing how many looks you can create out of 1 hip scarf?
You can also combine a few of these with matching hip scarves or even a simply piece of fabric!
If you want to quickly spice up your costume or have a uniform look for your troupe members or have a bit more coverage… I think hip scarves will be your best friend! 🙂
Got more ways to wear a hip scarf? Share in the comment below!
Want to make the bra and skirt I was wearing in above photos?
Here’s how to make the same bra 🙂
Here’s how to make the same skirt (scroll down the page to see the style options) 🙂
Speaking of coverage, in my next post, I’ll share with you DIY ghawazee coat inspired shrug! If you’re curious, be sure to sign up for my newsletter so I can let you know when it’s ready!
Click here to sign up and hear about the DIY shrug!
Oh, and if you’re new to costume making but curious to learn, get introduced to belly dance costume making and find easy ideas in my free course, Belly Dance Costume Making 101 🙂 Learn more here!
Thanks for reading, and keep sparkling! 🙂
P.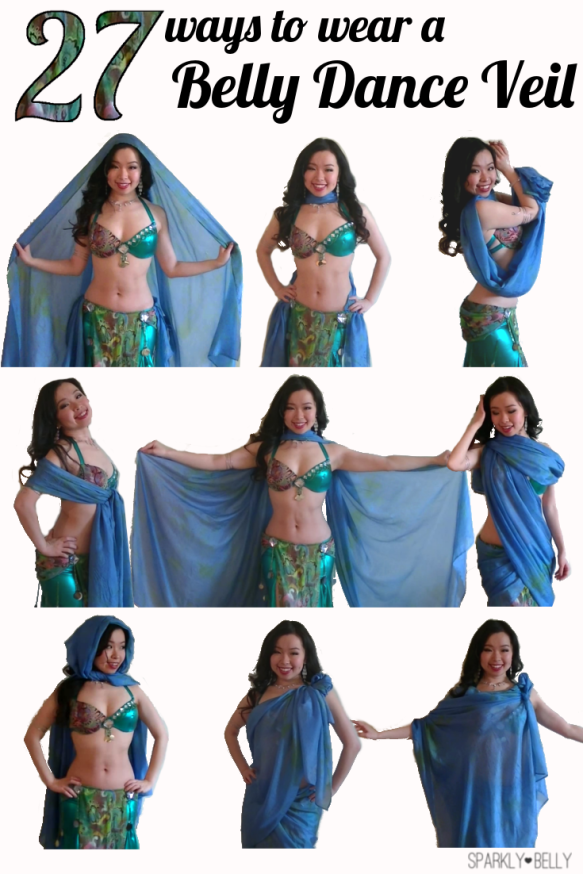 S. Pin & share this image for your next costuming ideas 🙂
Like what you read? Want to make more costuming bits yourself?
Sign up for my newsletter here and get my free email course, Belly Dance Costume Making 101!
|
Ask the Costume Goddess:by Dina Lydia
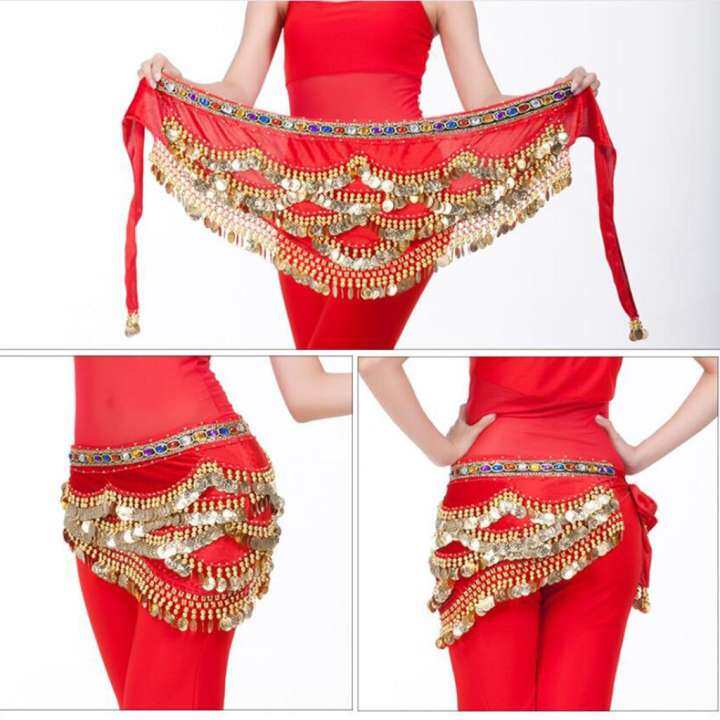
The QuestionDear Costume Goddess: I bought this lovely coin/beaded triangle belt. --Clueless On Coins
The Costume Goddess RespondsDear Clueless, You're right. Tying a beaded hip scarf risks damaging the scarf and produces an unattractive golf-ball-sized knot that doesn't hold securely anyway.
--The Costume Goddess
About the Costume Goddess
Costume Goddess PhotosTo view a photo gallery featuring pictures of Dina, costumes she has designed, and her friends, either click on the choices below or visit her web site:
The contents of this page are copyrighted 2009 by Dina Lydia. All rights reserved. Unauthorized duplication is forbidden.
Copyright NoticeThis entire web site is copyrighted. All rights reserved. All articles, images, forms, scripts, directories, and product reviews on this web site are the property of Shira unless a different author/artist is identified. Academic papers for school purposes may use information from this site only if the paper properly identifies the original article on Shira.net using appropriate citations (footnotes, end notes, etc.) and bibliography. Consult your instructor for instructions on how to do this. If you wish to translate articles from Shira.net into a language other than English, Shira will be happy to post your translation here on Shira.net along with a note identifying you as the translator. This could include your photo and biography if you want it to. Contact Shira for more information. You may not post translations of Shira's articles on anybody else's web site, not even your own. If you are a teacher, performer, or student of Middle Eastern dance, you may link directly to any page on this web site from either your blog or your own web site without first obtaining Shira's permission.
|
Belly dance scarf
The scarf or shawl is always associated with the East and is an important part of the belly dance costume. The rectangular shawl is the most common because it is the easiest to dance with and offers the most varied set of moves. But there are scarves of a different shape - triangular, round, semicircular. Butterfly shawls are also quite impressive - full-length shawls made from pleated lamé or transparent organza .. They are gaining more and more popularity among belly dancers. In the dance, even two shawls of contrasting or complementary colors can be used at the same time.
Rectangular scarf
The scarf can be made of light and transparent chiffon, matching one of the colors of the suit.
It is convenient to calculate the length of the rectangular scarf as follows: you need to measure the arm span and add 40 cm to this length.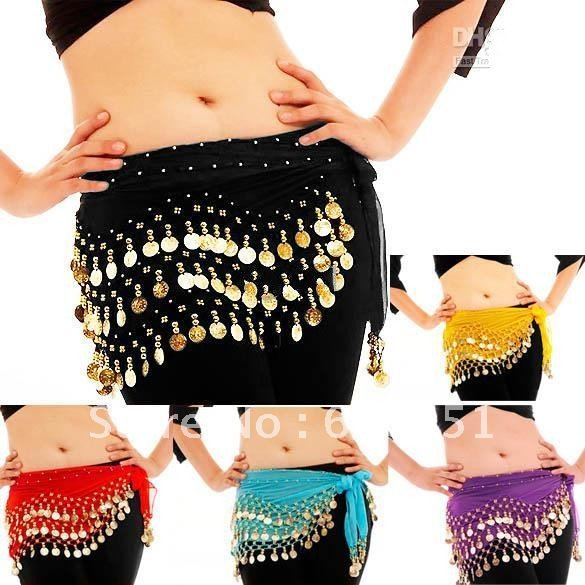 The length of the scarf can be from two to three or more meters, depending on the style of dance. It should be remembered that it is more difficult to work with a very long scarf. The optimal width of the scarf is no more than one meter, otherwise it will interfere with movements.
Semi-circular scarf
To make a semi-circular scarf, it is better to take a fabric with a length of at least 2.2 m and a width of at least 1.1 m. In fact, such a scarf is a rectangle with two rounded corners on the long side. You can choose the "degree of rounding" yourself.
Scarf with wings
Scarf with wings is a rectangle 2-2.5 x 1 m, cut in half almost to the very end, or two squares with a side of 1 m, interconnected by corners or small jumpers made of beads, ribbons etc. Very often, the wings are attached to the "collar" - a strip of fabric fastened around the neck. The collar clasp is on the front. The fastener button is usually made so that it can be easily and quickly unfastened during the dance. As a rule, this accessory is decorated, just like the bodice and belt.
Chopsticks
Chopsticks most often have two rounded corners on the long side. Two sticks are sewn on the opposite side, wrapping them with a scarf so that they are invisible.
A handkerchief with sticks can also be made from two wings that are attached to the “collar”. The pattern of each wing is a quarter of a circle with a radius of 75 cm and a rectangular panel of fabric 69 cm wide, which is sewn around the circumference to a quarter of the circle. A strong, inflexible stick 70 cm long is inserted into each wing on one side.
To make dancing more comfortable, the headscarf corners can be attached to the bracelets.
Round handkerchief
Round handkerchief is a circle with a diameter of approximately 2.2 m, cut strictly along the radius. A round scarf can be made with wings, cut in half, and with sticks - increasing the diameter accordingly. The corrugated version of the round scarf looks very impressive. The most characteristic and beautiful movements with this accessory are rotations, turns and, of course, flapping wings .
Tube scarf
To make this scarf, take a fabric 3-4 m long and 1-1.5 m wide and sew it into a tube with long sides.
The short sides are not sewn. Open cuts are sometimes trimmed with a feather boa. In the dance with this accessory many unusual specific movements are used.
Handkerchief fabric should be very soft and transparent . It can be chiffon, crepe de chine or silk. Before using a scarf, be sure to process the edges of the fabric. This can be done with a regular zigzag stitch - sew on a sewing machine or hem with your hands. Silk must be hemmed, but in a polyester scarf, you can simply singe the edge. To do this, quickly hold the edge of the handkerchief over the candle flame. Although, as practice shows, the scorched edge begins to bloom over time.
To make the scarf look more impressive, it is decorated with coins, braid, beads, rhinestones, sequins (small shiny circles) , but don't be zealous - the scarf should be light, not cling to the suit.
Belly dance, for yourself, for him, for everyone
_Title Belly dance, for yourself, for him, for everyone
_Author
_Keywords
Belly dance (belly dance) has long ceased to be exotic for Russian women. Today it is danced not in big cities, but also in school clubs far from the center of small settlements. Why is he so good, and is it possible to master the art of bellydance on your own?
What's the use?
In order to list all aspects of the beneficial effects of bellydance on the female body, there are not enough fingers not only on both hands, but also on the legs. Here are just the most obvious health benefits:
- in the process of belly dancing, blood circulation increases, which has a particularly beneficial effect on the pelvic organs, “female” problems are eliminated: there have been cases when, after regular classes, inflammation of the appendages passed, and even fibroids resolved ;
- the condition of the spine improves significantly after 1 month of belly dancing, even in people who have suffered spinal injuries;
- significantly develops the flexibility of the joints - after 2-3 months, the results are noticeable both in young girls and in women of age;
- actively develops coordination of movements, the vestibular apparatus, has a beneficial effect on the ligaments, the cardiovascular system, is an excellent prevention of hypertension and cervical osteochondrosis;
- already after a few belly dancing lessons, women "straighten up", open up, stop stooping. As a result, pain in the cervical, thoracic, lumbar spine decreases, constant headaches disappear;
- bellydance is also great for pregnant women (of course, after consulting a doctor) - during the classes, deep abdominal and pelvic muscles are trained, which work during childbirth.
In addition, it is a good prevention of varicose veins, belly dance trains the muscles of the shoulder girdle and back, corrects the figure, and contributes to the redistribution of subcutaneous deposits. And the most important and most exotic element - shaking - perfectly copes with cellulite.
Oriental dances also help a woman to become liberated, to change her attitude, to find a special charm. And for others, such a woman “with a twinkle” becomes more attractive. And now the men are turning around, and the ranks of fans are filling up, and the phone is ringing incessantly ... Here it is - a highlight! And all the fault (or not fault?) Oriental dances.
Taking dance lessons
As belly dance experts say, there is no woman who could not dance belly dance. It's just that every woman needs to master at least a minimal set of oriental dance techniques. Here they are.
Lower Body Exercises
Brazilian Carnival
Starting position (ip): slightly spread your legs, transfer the weight to your toes and relax the muscles of the legs and buttocks as much as possible. Start walking slowly in place, keeping your toes on the floor and slightly bending your knees. The pelvis stays in place, does not sway. Gradually increase the pace and reduce the amplitude of the movement of the heels. Make sure your muscles don't tense up. You should feel your buttocks and tummy begin to vibrate.
“Knee rubbing”
I. p.: put your feet together, slightly bend your knees. Now alternately push your knees forward, as if rubbing them against each other. Let your pelvis swing as you move your knees. Relax your stomach, increase your speed, try different ranges of motion.
“Wave”
I. p.: standing, feet shoulder-width apart. Tighten your upper abs (the ones above your belly button) while fully relaxing your lower abs (below your belly button). Then, on the contrary, relax the upper press and tighten the lower one. Do this exercise slowly and you will see that you get a smooth undulating movement. If you can’t relax the corresponding muscles, try this exercise first while lying in the bath.
“Eights”
— horizontal
I. p.: draw an imaginary eight on the floor and stand in its supposed center, legs together, knees slightly bent. Without lifting your heels off the floor, draw half of an imaginary eight with your left thigh (along the path forward - left - back). Back the thigh to the maximum “twisted” position. From this position, start moving with your right hip (forward - right - back). Repeat the exercise 20 times. It is necessary to achieve the most smooth movements with a fixed upper body.
- vertical
I. p.: the same. Bend the right knee, lowering the right thigh down to the limit. Bring the thigh to the right and at the same time up, describing a quarter of a circle, until the thigh goes to the limit to the right. From this point, continue moving, drawing a quarter circle to the left and up “towards you”. Now start bending your left knee. Lift the hip and bring it closer to the body, bending the left knee even more, lowering the left hip down. Then bring the left thigh to the side and up, gradually straightening the knees. Continue drawing a half circle with your left hip, up and to the right, begin to bend your right knee. Repeat the exercise 20 times.
Strokes
- inside
Gather the abdominal muscles. Try not to involve your breath in this movement, just slightly tighten your abdominal muscles so that it “crawls”. Now relax your muscles. And again, sharply collect the muscles, as if hitting inward, and immediately relax. Repeat 20-40 times.
- forward (out)
Tighten the abdominal muscles, then forcefully push the abdomen forward.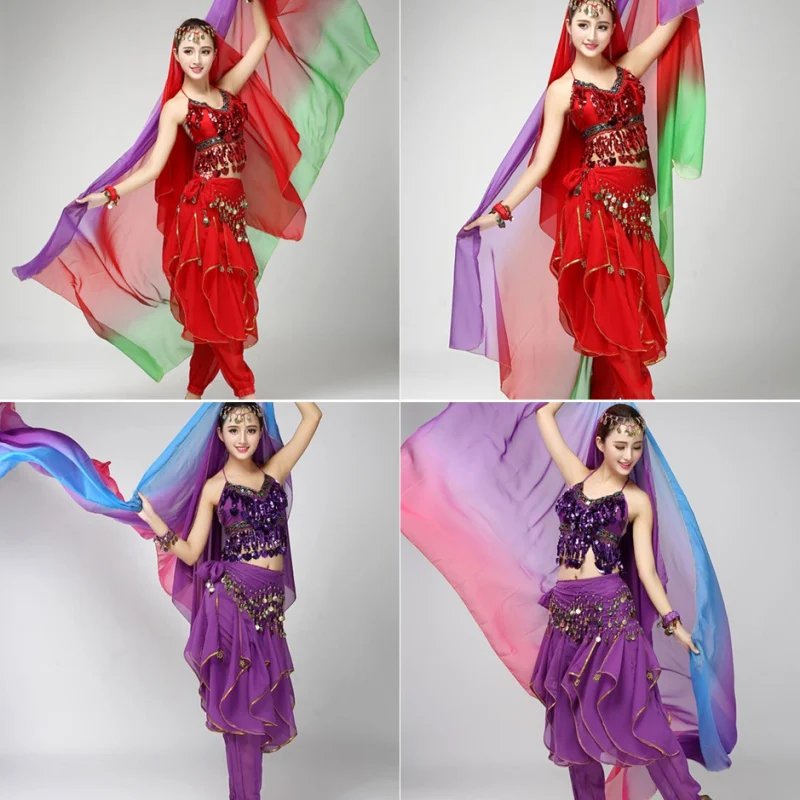 Pause. The abdomen should not relax, it remains quite elastic, as if slightly inflated. Reassemble and push out. Repeat 20-40 times.
Circles of the hips
Mentally imagine a circle in a horizontal plane and try to outline it from behind with your buttocks, bending your lower back as much as possible, and in front - bringing your pubis to your stomach as much as possible. This exercise can be performed on straight or half-bent legs.
Shaking
Alternately bend and unbend your knees at a fast pace, keeping your feet on the floor. While keeping the hips, buttocks and stomach as relaxed as possible, feel a pleasant upward vibration in the lower body. As you master the exercise, reduce the amplitude and increase the speed of your knees.
Then start shaking the femur. Start moving your hips from side to side, relaxing your buttocks, while the upper body should be less mobile. Let your buttocks vibrate freely. Change this exercise to shaking in the other direction - move your hips forward and backward, as in a rocking chair, only very quickly.
Upper Body Exercises
Starting position: pelvis and hips are still, shoulders and neck are relaxed, body muscles are relaxed.
Horizontal movements
Shift the chest left and right so that the line of the shoulders remains parallel to the floor, the head does not tilt. The movement is soft, stretch as far as possible.
Back and forth movements
Move the chest back and forth, the shoulders are relaxed and not involved in the movement.
Circle movements
Connect movements 1 and 2, describe circles with the chest in a horizontal plane.
Clothes to match the dance
It is advisable to choose special clothes for oriental dance classes. Such that the main element is visible, in honor of which, in fact, the dance got its name - the stomach. Clothing for dancing should be loose, not restrict movement - not very wide soft trousers or a skirt. It's better if you can see your legs too.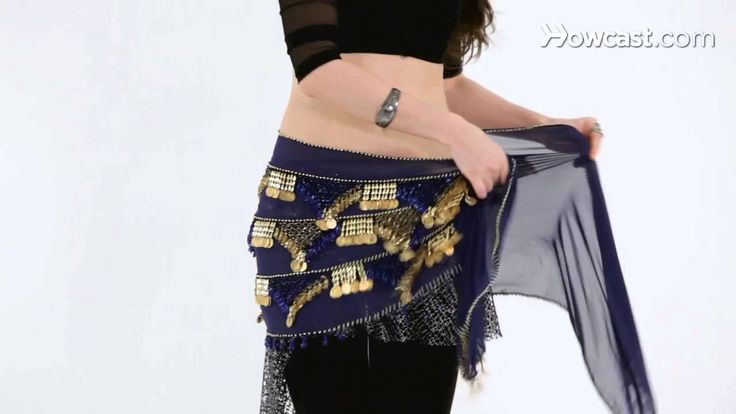 It is better not to wear shoes - in extreme cases, get socks, ballet flats. Although some belly dancers prefer to do barefoot. As a hint, you can tie a scarf or scarf with a bell on your hips - move correctly, hear the ringing. Some dancers wear bracelets with bells on their feet for the same purpose. Simple, original and convenient.
Add more exotic
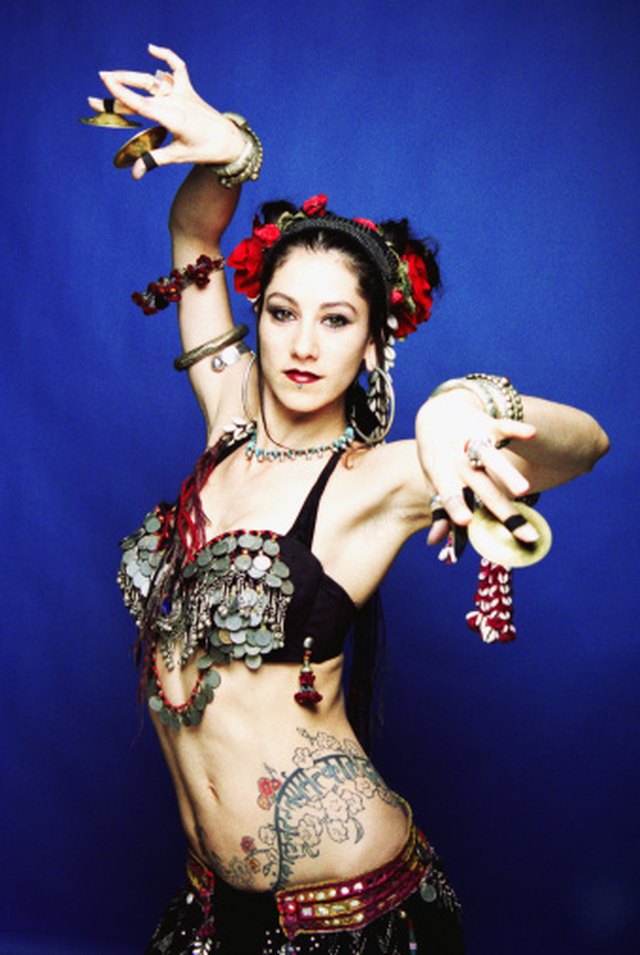
And dance an oriental dance with some object. By the way, today's bellydance has more than a dozen styles and trends. So, by dancing a belly dance, you will gain health, and you will be able to amaze loved ones to the core. Choose what to dance with - oriental dance suggests using shawls and scarves, cymbals (a musical instrument), a saber, fire, snakes and many other items to decorate the dance. For example, the dance with the candelabra has long been danced in Egypt. A large patterned chandelier with lit candles is carried by a dancer at a wedding, illuminating the young people's way to a happy family life. If you are just mastering the art of bellydance, hold off using a candelabra - it takes a lot of skill to make the movements of the hips and chest isolated, and a special softness of step when a girl dances with a candelabra - after all, it must be motionless! And if you still decide on this experiment, think carefully about the costume so as not to set it on fire and not ruin it with dripping wax.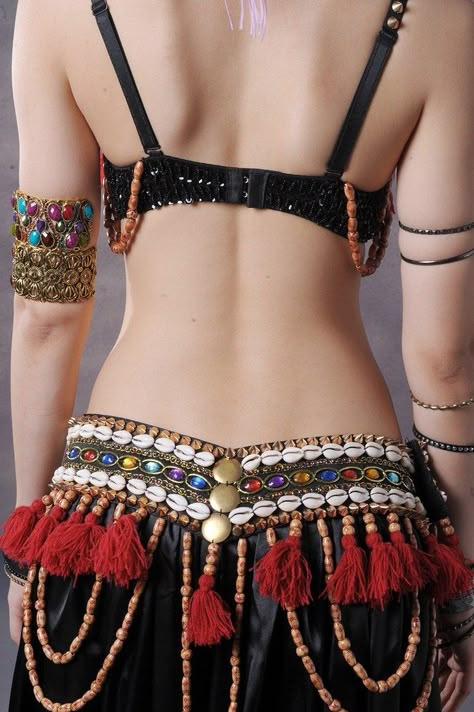
 But it's heavy
and it keeps sliding down my hips. I hate to tie it — that pulls
some of the beads and coins into the knot and I'm afraid they
will pull off. Help! Is there some way to keep it from slipping
without hurting the bead / coin work?
 Using
this method, the scarf can't slip down and it looks much nicer
too.
 She's
become expert as well in altering those troublesome ready-made
Egyptian costumes, and modifying designs to flatter individual
figures.
 Advice on designing a belly
dance costume that will look flattering for your figure type.
 Material from this web site may not be posted on any other web site unless permission is first obtained from Shira.
  Click here for link buttons and other information on how to link.