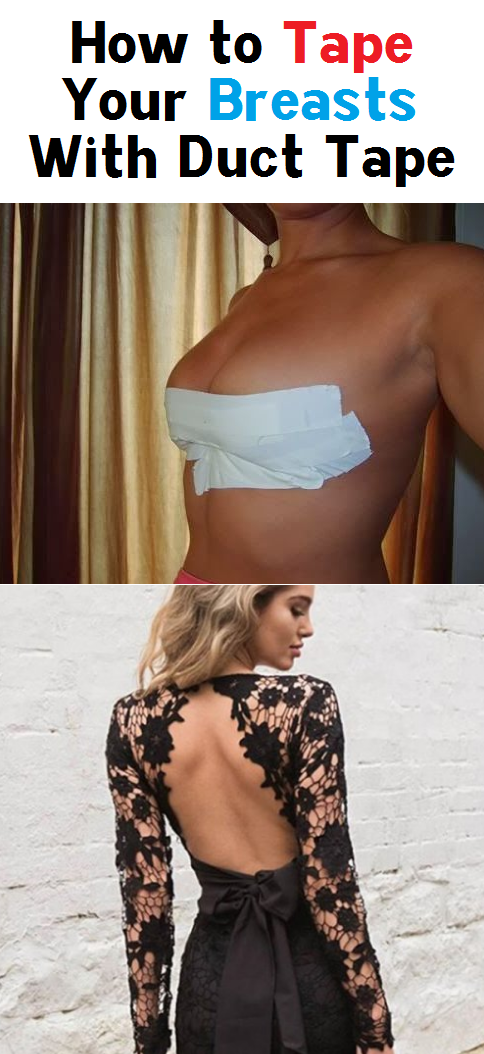
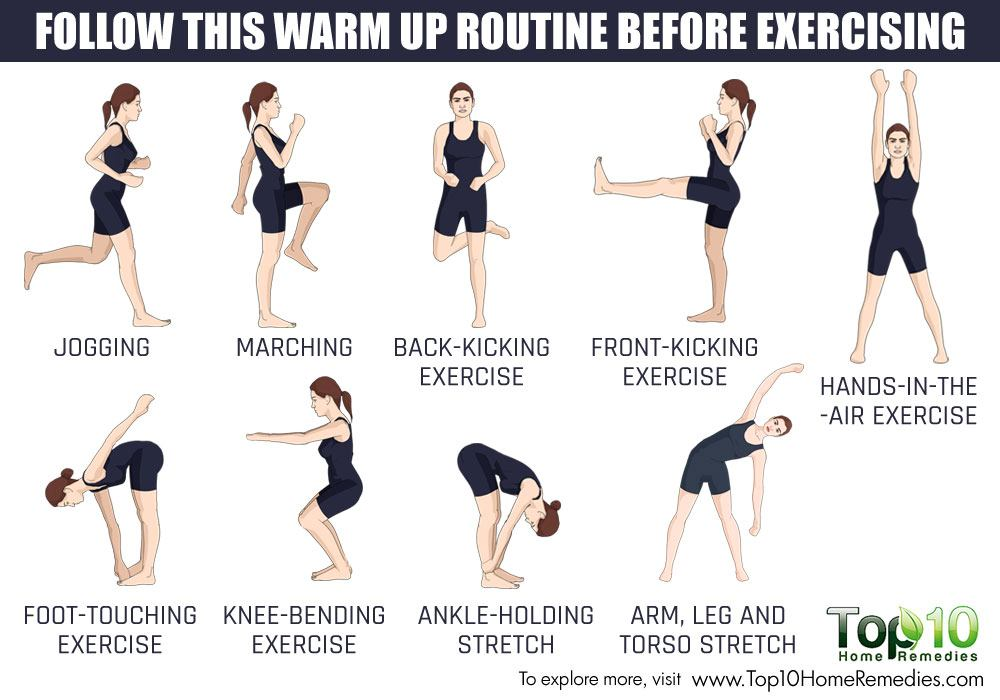
How to tape your breasts for dance
Boob Tape Is a Total Game Changer—Here’s How To Use It
Boob tape may not be a perfect or absolutely necessary product, but for those who are looking to ditch a bra and still have some level of support for their breasts in whatever they’re wearing, it’s a downright game changer. As the name suggests, boob tape is an adhesive strip of fabric specifically designed for keeping breasts in a fixed position.That could mean pushed together for more pronounced cleavage or holding them in a slightly lifted and shaped way. Imagine your favorite, most comfortable bra became nearly invisible. It’s kind of like that.
Similar, but old-school, solutions may have inspired folks turn to more household-use tapes—for example: Kim Kardashian wearing gaffers tape in 2008 under a low-cut look—but the options today are not only better, they’re gentler, more effective, and come in a range of nude color shades to suit different complexions. This includes Nue, a brand launched in 2020 by beauty/fashion-editor-turned-founder, Stephanie Montes. The product comes available in three skin tone options and donates a portion of its sales to the Breast Cancer Research Foundation, however it’s most known for being a self-professed “boob job in a box.” That’s not to suggest Nue—a French word meaning “nude”—is for augmentation. It simply allows the wearer to choose how their breasts look on their frame.
Like the decision to wear a bra at all, boob tape is an optional and completely personal wardrobe choice. If you rather wear convertible bras or nothing at all, stick to tape for household odd jobs and gift wrapping. But if you’re curious about the specifics of how boob tape works, stick around. Ahead, Montes helps us break the logistics of applying, wearing, and removing boob tape like a pro.
Meet the Expert
Stephanie Montes is a fashion and beauty editor whose work can be found on Byrdie, Elite Daily, Elle, Women’s Health, and more. She is the founder and CEO of Nue, a breast tape brand that serves as an alternative for traditional bras.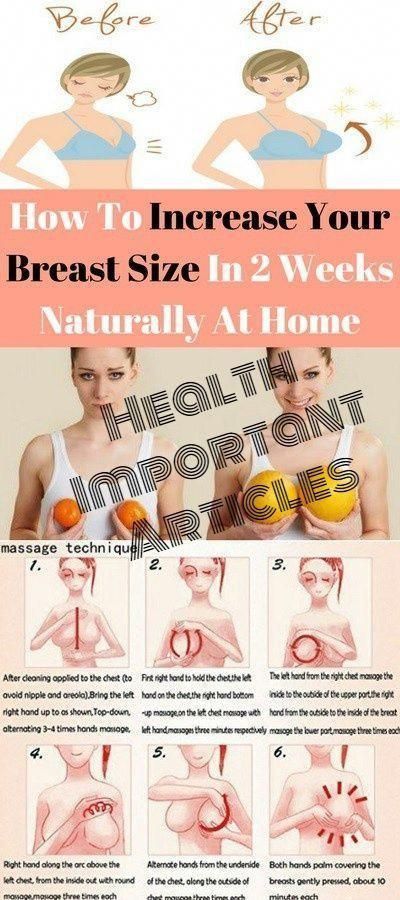
Before You Tape
Montes says that some of the same rules apply to boob tape as they do with skincare. “If you know that you’re a super sensitive skin type, just do a little patch test whether it’s on your chest or your arm,” she says. Nue’s tapes are hypoallergenic and latex-free, but you’ll want to be sure this or any other product won’t cause you irritation, especially if it’s going to be taped to your skin for multiple hours. Once you’re in the clear, the conditions for proper applications are straightforward: clean, dry skin. “Don’t wear lotion as it would mess with the adhesive and it won’t stick as well,” Montes adds.
To make sure you’re applying tape to the proper spots so it won’t show under clothing, Montes recommends using a nude eyeliner to mark the outline of your top on your skin. However, should you have any tape sticking out of your clothing after application, it’s also easy to carefully cut away any excess. Either way, keep scissors handy as you’ll use those to cut the strips of tape you’ll be using in the looks below.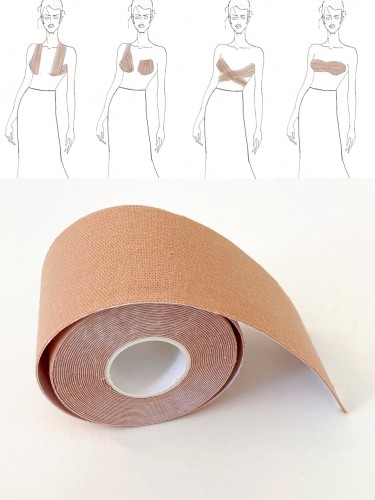
For Low-Cut Tops
For plunging necklines or silhouettes with a wide opening down the sternum, boob tape can be used to create a lifted breast shape without visible bra lines. Begin by holding your breast in the desired position. Once established, apply the first strip of tape beginning from under the breast (about where a bra band might be), following it along the curve of your bustline, pulling as much as necessary to hold the breast in your selected place. “I like to go straight through the nipple, to give lift, as my base strip,” says Montes. “Then if I want to go in more for cleavage, I’ll put a strip on the outside [of the breast] and push inwards.”
As she explains, the next strips can run vertically along the outside of the breast, slightly pushing inward to create cleavage, while smoothing the tape along the curve of your body for a natural shape and hold. You can optionally apply a piece vertically next to the piece on the nipple, closer to the breast bone, to define your shape. In total, you’ll likely use between two and four strips to establish a secure fit. “You do need a lot less than you think because the tape does stretch so much,” says Montes. Ultimately, the amount you use will depend on the size of your bust.
For Strapless Tops
If you can think of nothing more frustrating than tugging at a strapless bra when wearing a bandeau top or dress, you may be relieved to know that boob tape can do the trick, too. “I like to start underneath and kind of pull upwards,” says Montes of the application. She explains that a bandeau look can be created with strips of tape running horizontally from the bottom side of one breast—securing where the breast tissue begins, nearly under the armpit—to the outside of the other. “Build from the bottom up for support,” Montes explains, with strips of tape layering toward the nipples. “Pull upwards for lift and inward for cleavage...to get a balconette look.”
Montes says this supportive-at-the-bottom, fullness-at-the-top look not only works well for strapless pieces or “a Bridgerton look,” but she also chooses this taping technique under everyday T-shirts, too. “If I want my T-shirt to look really crisp and smooth, then I can add the tape underneath and I don’t have to worry about the crease in the back or the line showing up top.”
For Triangle-Shaped (and Other Tricky) Tops
For extra tricky silhouettes such as with cutouts, triangle tops, or anything else nearly impossible to hide a bra beneath, there’s another way to provide support (if you want it). Use the strips of tape to create two individual bra cups. Determine the ideal placement of your breast, then begin applying smaller strips horizontally from the bottom of the breast toward the nipple or top to create what Montes calls a “mermaid cup.” Again, pull the tape slightly upward and inward to create cleavage and lift. Then repeat the same process on the other breast.
When using products like Nue, which are sweatproof and waterproof, this application can even be worn under swimsuits. “I laid out, swam, sweated, and went back to my hotel room and it was still on,” says Montes of her own recent experience at the beach. “And then when I removed, it peeled right off.”
Removing The Tape
We’re not interested in any fashion tool that requires painfully tugging a strong adhesive off of our body. This is why boob tape is the much preferred option over gaffers or other industrial strength tapes. For Nue, Montes says the strips, which lay directly over the breast skin and the nipples, will peel easily off the body after a day’s worth of wear.
“Your skin does get a little more sensitive when you’re on your period so if you feel like removal is a little rough or if you're sensitive in general, you can use a body oil or olive oil or any oil you have around the house to soak the tape off,” she says.
Fair warning: Montes notes that getting the tape with water will actually do more harm than good. “Some people will jump in the shower with it and think that’s how to remove it—don’t do that," she says. "Because it’s made to be sweatproof and waterproof, it actually gets even sticker as it gets wet so it won’t slide off in the pool. ” For additional removal comfort, some brands also offer pasties that go under boob tape or you can layer a thin cotton round on top of the nipple, but Montes says it may not be needed at all.
As stated from the start, boob tape requires some practice to get it right, at least at first. Application takes some testing and playing around with the product to get the look you want. If that look is nothing different than what nature gave you—great! If it calls for a little assistance, then keep scrolling to shop more boob tapes options available on the market.
-
Fashion Forms
-
Booby Tape
-
Good Lines
-
Brassy Bra
10 Best Adhesive Bras For Seamless, Comfy Support
Best Ways to Use Boob Tape – Nueboo Boob Tape
Boob tape is a girl’s versatile best friend when it comes to keeping the girls secure and in place in any outfit. Now as you already know that how you tape your breasts depends on the outfit and the reason you’re opting for boob tape in the first place.
Image Source: Instagram
So before dawning any outfit, it’s important to know how you want to dress up or down your boobs. The three most common reasons to use boob tape are which are commonly the following
- Create cleavage - for those who have small breasts and even no breasts at all, using boob tape can help create a more plump and voluptuous cleavage in no time at all.
- Flatten out chest - in contrast to the first reason for boob tape, it can also work the other and disguise the appearance of having boobs.
- Reduce movement and support breasts - if you’re into doing a lot of strenuous activity like dancing boob tape is great to make sure your boobs stay securely in place and reduce discomfort.
Now that we’ve gone over the basic reasons for using boob tape, let’s get down to the different ways you can tape your boobs - for your various outfits.
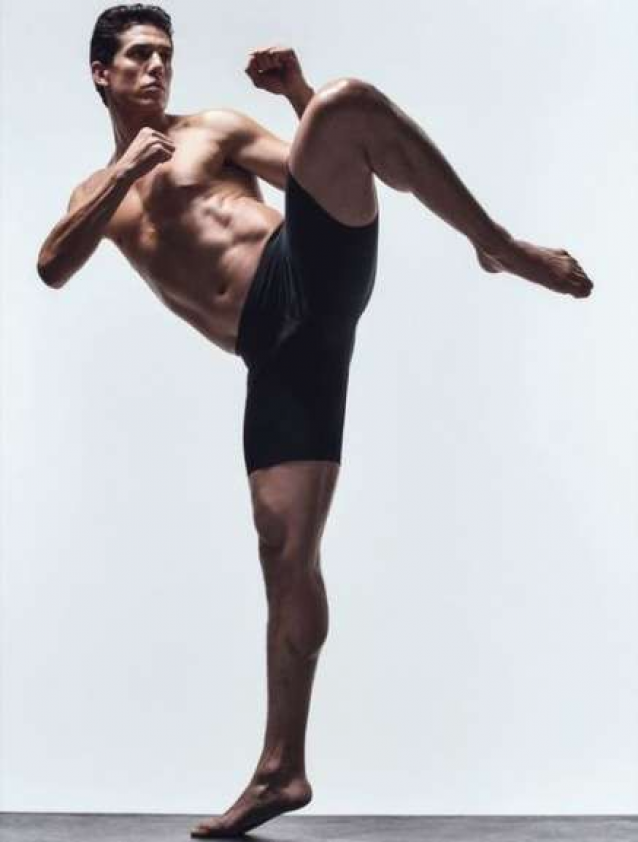
Dance-proof
Got a dance class you would love to attend and not worry about your girls getting in the way? Well, there are many good quality boob tapes available in the market that are sweatproof and are designed for comfort even when doing copious amounts of physical activity.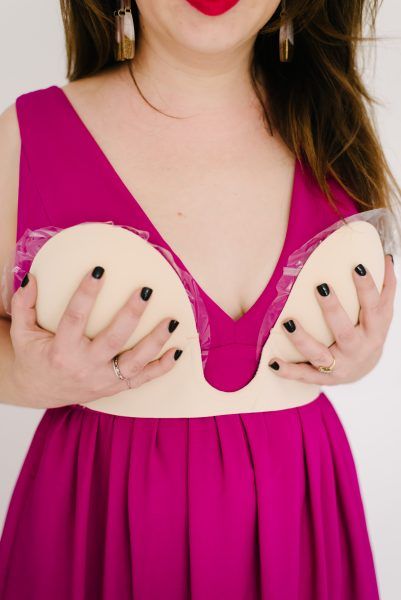
Image Source: Unsplash
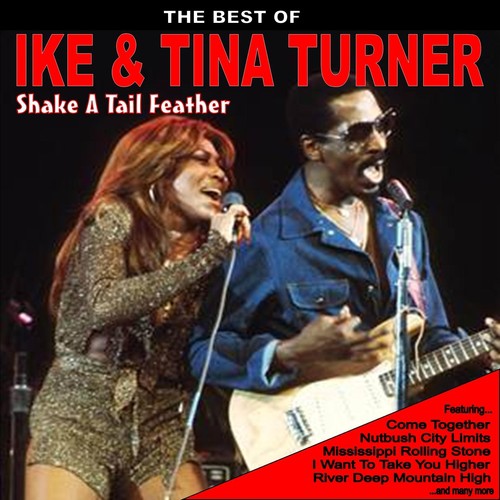
Play the part
If you’re into costumes and performing on stage then you would know that they are certain costumes that will require secure bindings for your chest to appear more flat and even.
Image Source: Scene7
Method for securing breasts
If you’re wearing anything low-cut bear in mind that you will have to tape your boobs separately and it always helps to lean forward when taping- you create the lift to secure breasts by starting to tape from below on the breast and going upward to create a solid lift.
Do not tape all around the breasts as this can restrict your breathing and cause possible injury.
Image Source: Byebra
Method for flattening the chest
This one of often used by dancers to restrict the movement of their breasts while performing and for transgenders. All you need to do is to start by taping strips of boob tape across your chest to compress your breasts.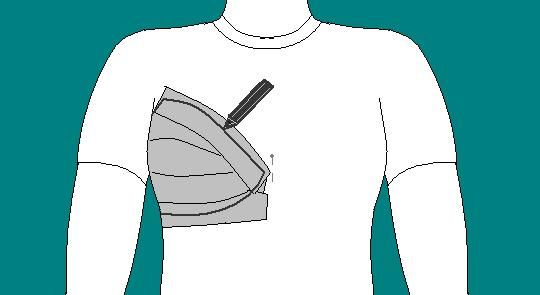 Make sure to use strips to pull each breast to the side.
Also, take note that it isn’t recommended to use this method for long periods of time.
Image Source: Tumblr
Instant lift
You don’t need to be an A-lister to know that you can get that celebrity gorgeous plump chest with just a few strips of boob tape. From ball gowns, strapless shirts, and backless outfits you can rock any outfit with the versatile boob tape!
Image Source: eBay
Method for creating cleavage
Last but certainly not least is to use boob tape to create the much-desired cleavage. Start by taping across your chest to push them together and add padding under the boobs to make them look fuller and adds comfort.
Image Source: A Practical Wedding
Tips to know when taping your boobs
Just like any new practice, it doesn’t hurt to know some handy tips and tricks before you actually get down to taping your boobs- after all, they are a delicate part in any woman’s body.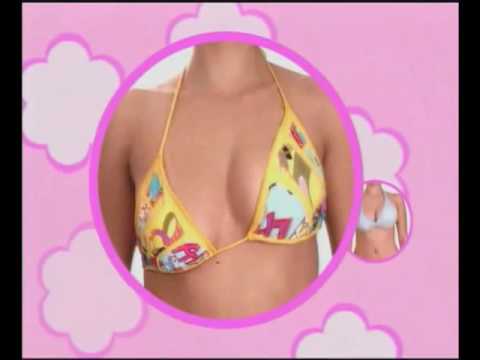
- Nipple covers - if you want to the shape of your nipples it’s best to a nipple cover to do this. Or if you don’t have one on hand you can use anything padded and soft like cotton wool and gently tape over it with boob tape.
- Damaged skin- do not ever apply boob tape on damaged or sunburned skin as this can cause irritations.
- Clean skin - use rubbing alcohol to clean the skin before application to rid it of oils and dirt.
- Get help - there is no shame in asking a good friend to help you tape your boobs, it’s easier for many because with two people you can hold your boobs the way you want while your friend does the taping for you.
Breast movements. Belly dance. Master's Lessons. Advanced level
Breast movements
Check your posture. Stand up straight, pull in your stomach, push your chest slightly forward, both feet are stable and firmly on the floor, arms are spread apart. We begin to move the chest.
Without moving the lower part of the body, with a short movement we lift (push) the chest up due to the deflection in the upper part of the spine.
We seem to take a deep breath, spreading the ribs to the sides (in fact, breathing does not depend on movement). Make sure that the shoulders remain in one place, while the body does not lean. Only the back muscles work. The abdomen remains relaxed. We lower the chest, slightly pulling it back (let it “fall” freely) - we return to the starting position.
If you perform this movement a little sharper (but nevertheless soft), as if tossing an imaginary ball with your chest, you get a movement "breast blows".
Strikes are sharp movements performed with maximum amplitude, the muscles in the process of their execution remain tense all the time. To make the movement look more precise, a reset usually follows immediately after the strike, when the muscles relax abruptly and you return to the starting position. A reset is often called a delay in the movement when performing a circle with the chest or hips.
The abdomen is pulled in, the shoulder blades are brought together, the shoulders are lowered, the back is straight, the chest is slightly pushed forward, both feet are stable and firmly on the floor, the arms are spread apart, bent at the elbows, the hands are held vertically to the floor.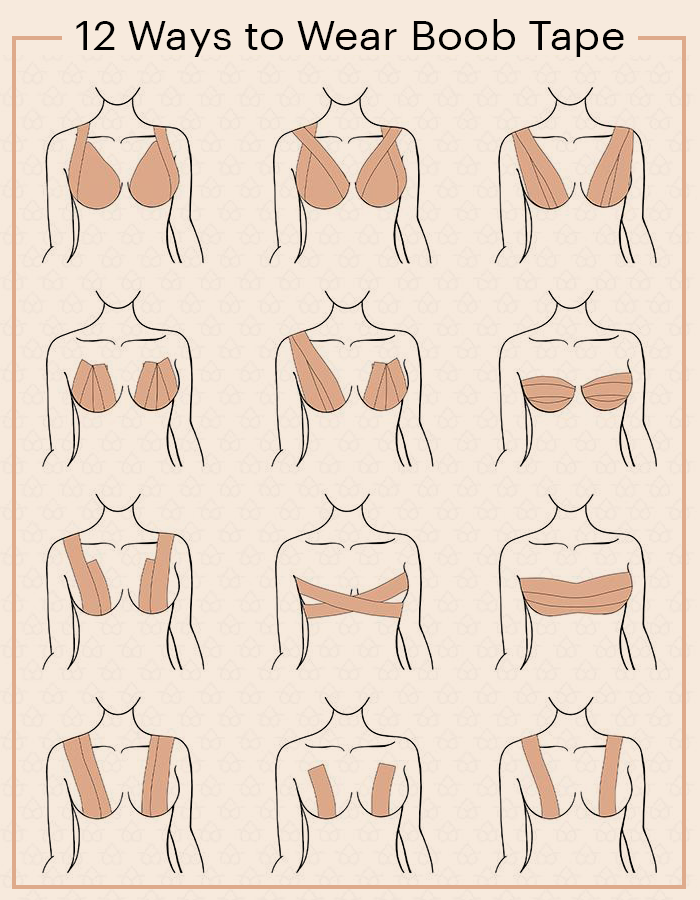 Without moving the lower body, we perform isolated chest movements in the lower semicircle. Gently shift the chest up at an angle of 45° and to the side.
At this upper point, we linger for a moment - we make an accent. Then we move the chest to the other side, drawing with it the lower semicircle of an imaginary circle in the vertical plane (we try to touch its lowest central point, as it were, we draw the chest diagonally upwards and put the emphasis on the second point of movement).
If you can't immediately keep the lower part of the body still, that is, you can't make the upper part independent of it, try to start the exercise while sitting on the floor and cross-legged (or sitting on your heels).
Then execute isolated movements of the chest in the upper semicircle. Do not forget to emphasize the upper points for the clarity of the pattern of this movement (as if you are hitting a ball with your chest, making a soft blow). Make sure that the shoulders do not move and remain parallel to the floor, the lower body also remains motionless. Keep your back straight. From time to time we add circular movements with brushes to the main movement.
Execute chest circles vertically, first to the left, then to the right. Smoothly draw a circle in a vertical plane, starting with the movement of the chest up and then counterclockwise: lift the chest up - move it to the left - lower it down - move it to the right - up again, closing the circle and pulling the chest back; connect all four points in a smooth circle. Let's perform this movement in the opposite direction: up - right - down - left in the same sequence (connecting the points in a smooth circle). Do not forget to decorate the main exercise with circular movements of the hands.
While performing chest movements, watch your stomach: it should remain calm, relaxed.
Perform the same sequence of chest exercises at a fast pace.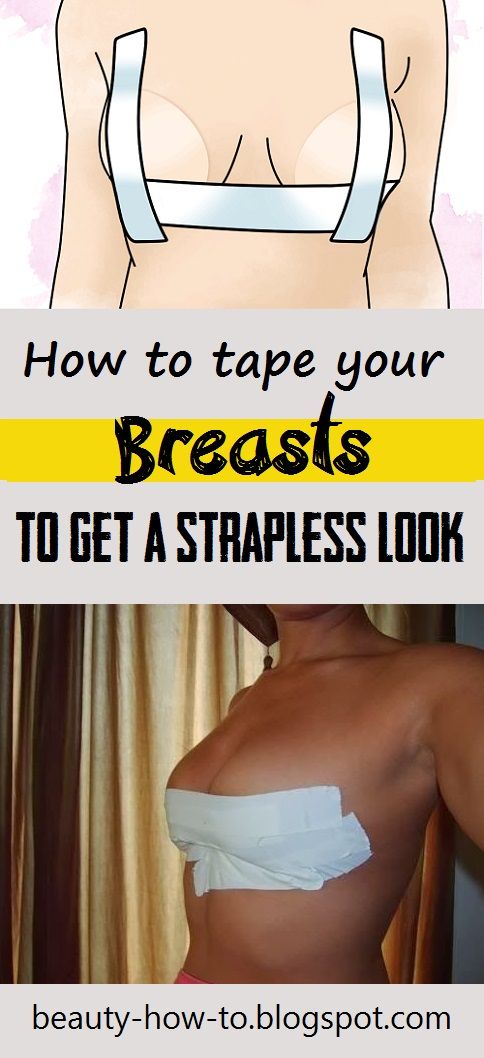
1. Move the chest up and down.
2. Isolated movements of the chest along the lower semicircle.
3. Isolated movements of the chest along the upper semicircle.
4. Chest circles vertically to the left.
5. Chest circles vertically to the left with a smooth squat.
6. Chest circles vertically to the right.
7. Chest circles vertically to the right with a smooth squat.
This text is an introductory fragment.
Circle movement adjustment
Adjusting the movement of the circles The speed of movement of the circles depends primarily on the specific gravity of the material from which they are made (foam and cork circles float faster in the wind than wooden ones). The thicker the circle, the faster the movement. At the mug with thick and
Hip movements
Hip movements Starting position: we stand on a full foot, legs slightly apart (about the width of the foot) and located on the same line parallel to each other, the body is slightly tilted back, the back is straight, the stomach is relaxed, the arms are lowered along the body, knees
Tilt motion
Tilt movements Let's move on to the movements in the pull.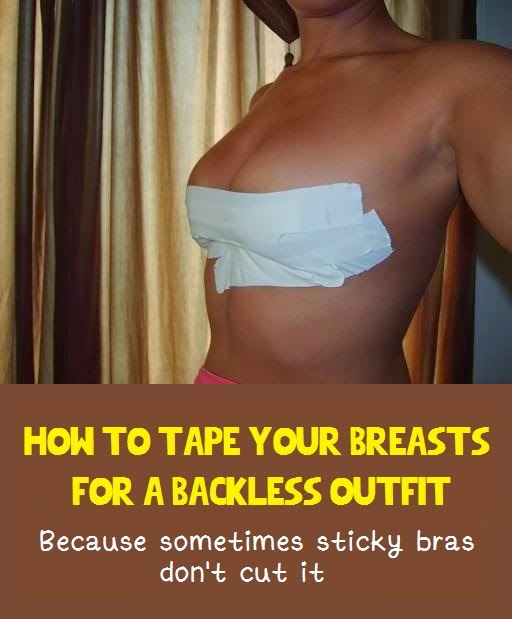 Starting position: stand straight on the full foot (legs are on the same line), the body is slightly tilted back, the back is straight, the legs are shoulder-width apart, the knees are “soft”, the arms are at the sides. Pull the hips to the right and shift the weight
Walking with a cane on the shoulder
Walking with a cane on the shoulder Holding the cane on the right shoulder, perform penetration "C grade" with a turn in place around its axis in the direction to the left. Raise the left thigh and leg, bent at the knee, up. Then we lower the thigh down (while the left leg is still
Movement with a shawl
Movements with a shawl The dance with a shawl (scarf, veil, handkerchief) is one of the most traditional. A scarf can amazingly transform, decorate the movements of a dancer. Its possibilities are almost limitless, and therefore working with it is a special pleasure.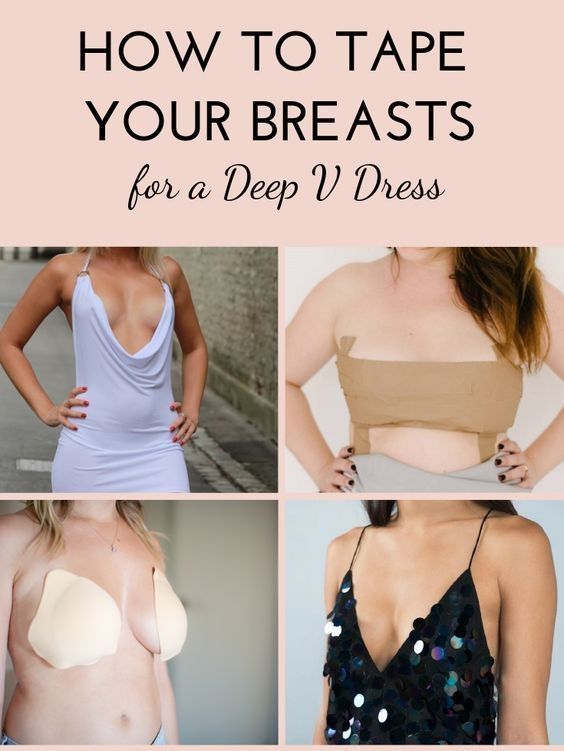 Competently
Travel speed
Travel speed One of the key factors affecting the economy of a car is the speed of movement. Everyone knows that the most economical driving mode is driving on a country road in calm weather at a speed of about 80-90 km / h at the highest (in
How the motion sensor works
How is the motion sensor In the middle of the sensor there are receivers of IR light - photocells. The Fresnel lens consists of many small lenses, each of which focuses IR light on the plane of the photocell, and one of them focuses directly on the photocell itself (signal
3.5.6. Motion detectors LX-19B and LX-2000
3.5.6. Motion detectors LX-19B and LX-2000 Infrared motion sensors are commercially available, adapted in shape to wall light switches for flush wiring (Fig. 3.62) LX-19B and LX-2000 (Fig. 3.63) manufactured by the Chinese company Litarc Lighting & Electronic Ltd. Rice. 3.62. Household light switch
3.5.8. Setting motion sensors
3.5.8. Setting motion sensors Sensors are adjusted by potentiometers; usually there are three of them (Fig. 3.69): • to set the sensitivity of the sensor (SENS), the brightness of the IR light is set, to which the sensor must respond; • to set the delay time for switching off the lighting
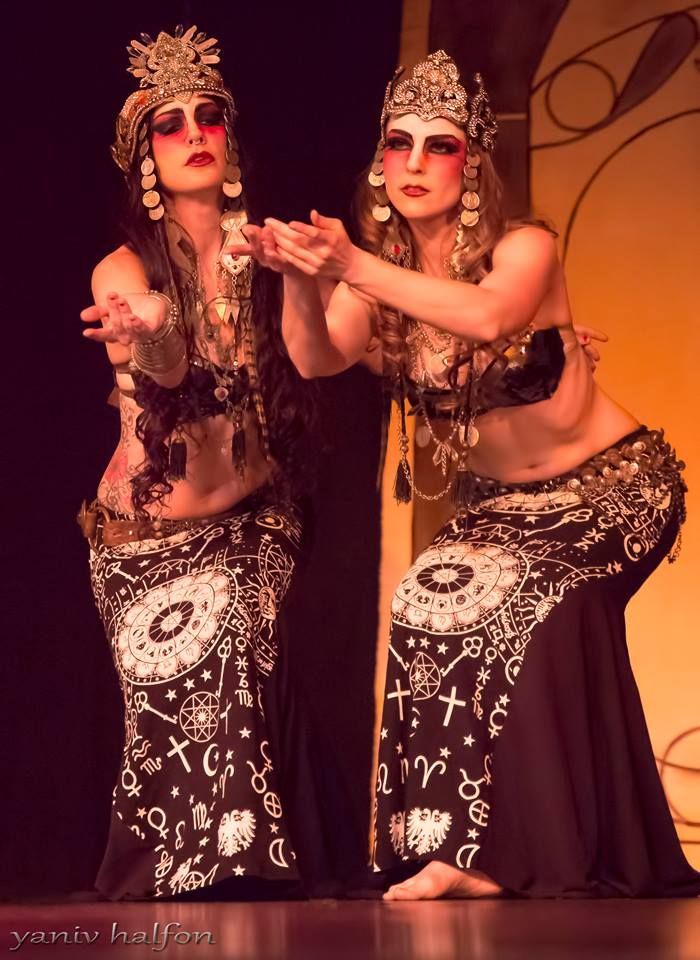
How to do breast shaking - video lesson in online belly dance school
A delightful feature of oriental dance is that during its performance the dancer can use separate parts of the body and thus place original accents in the dance. One such movement in bellydance is the so-called chest shaking.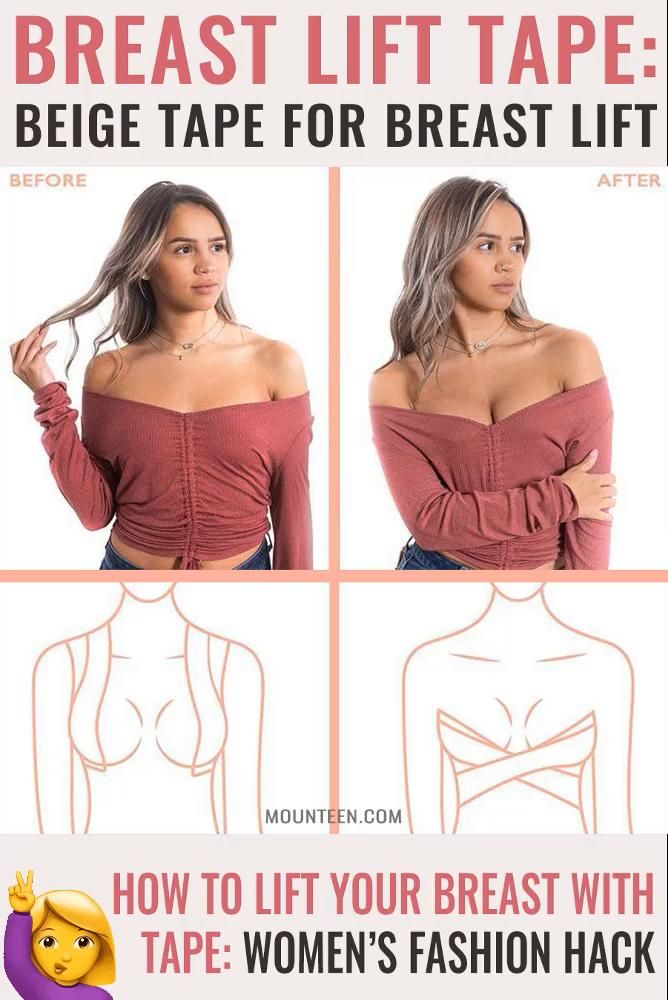 The presence in the dance of such an element as shaking the chest reminds us of the roots of modern bellydance: the characteristic movement of the shoulders was obviously introduced into the dance by the gypsies. This element is very effective, feminine and is always present in any dance. But for its successful execution, it is necessary to develop a special skill.
To understand how to shake your chest, you must first learn to feel separately the upper part of your body, that is, to work the muscles of the chest and back, as well as the shoulders, while leaving the hips and legs practically motionless. Secondly, you will learn that breast shaking, the video of which is presented in Samira's online school, is not performed with the breast at all and you will get acquainted with the secrets of its execution. In addition, in her video tutorial, Samira talks about how to include breast shaking in the dance, how to combine it with body movements and superimpose it on the walk. It is impossible to study chest shaking in isolation: when performing this element, it is necessary to pay attention to the beautiful position of the hands and the correct position of the neck and head.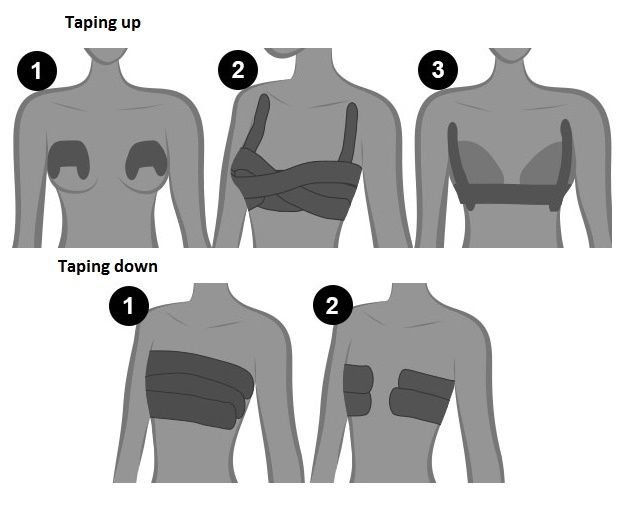
Like other elements of belly dance, breast shaking should not look provocative in any way, because oriental dance is generally characterized by a chaste, restrained, though often flirtatious representation of female beauty, emotions and feelings in dance. It is precisely the correctly worked out technical side of shaking, clearly explained and demonstrated by the teacher, that will allow to achieve the desired effect.
Novice dancers sometimes tend to attribute their failures in performing certain movements and elements to the characteristics of their figure. The secret and special attraction of belly dance for women lies precisely in the fact that it is designed to emphasize female beauty in any of its manifestations, regardless of the figure. It does not matter at all whether your breasts are large or small - with the right technical performance, your breast shaking will look irresistible!
| Personal video consultation |