How to tape a sprained ankle for dance
How to Tape an Ankle with Medical Tape or Kinesio Tape
Share on PinterestWe include products we think are useful for our readers. If you buy through links on this page, we may earn a small commission. Here’s our process.
Ankle tape can provide stability, support, and compression for the ankle joint. It can help reduce swelling after an ankle injury and prevent reinjury.
But there’s a fine line between a well-taped ankle, and one that’s taped too tight or doesn’t provide the needed support.
Keep reading for our step-by-step guide on how to effectively tape an ankle.
Tape
You have two main options for taping your ankle: They are athletic tape, which an athletic trainer may also call strapping or rigid tape, and kinesio tape.
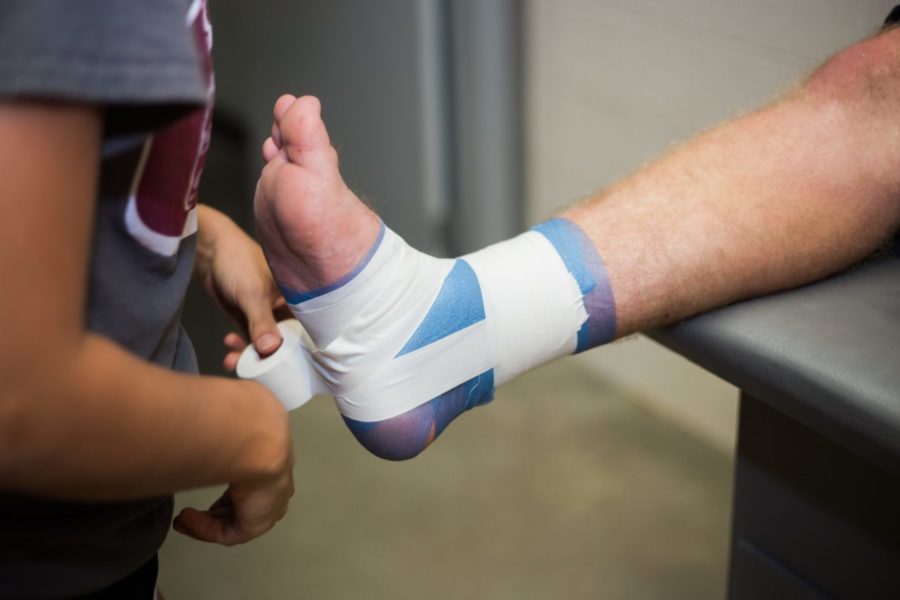
Athletic tape
Athletic tape is designed to restrict movement. The tape doesn’t stretch, so it’s usually best-suited for stabilizing an injured ankle, providing significant support to prevent injury, or otherwise restricting movement.
You should only wear athletic tape for a short period of time — roughly less than a day unless a doctor suggests otherwise — as it can affect circulation.
Shop for athletic tape online.
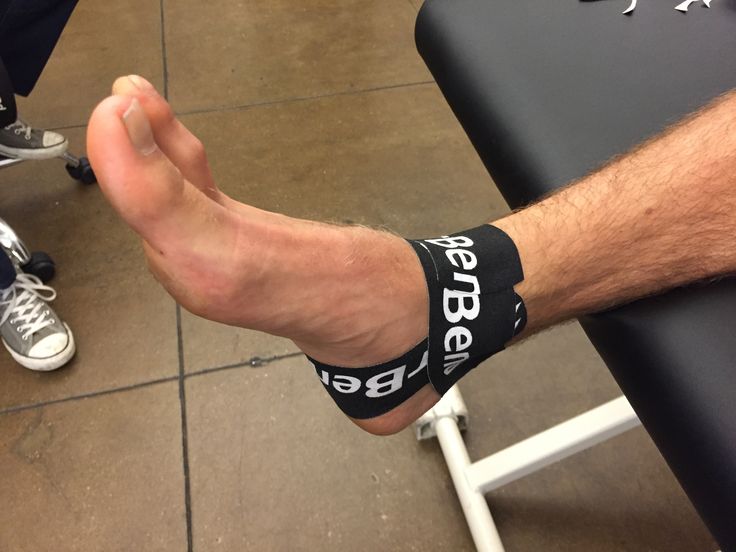
Kinesio tape
Kinesio tape is a stretchy, moveable tape. The tape is best-suited for when you need range of motion in the ankle, but want additional support. You may want to wear kinesio tape if:
- you’re back to physical activity after an injury
- you’re back on the playing field
- you have unstable ankles
Kinesio tape can stay on much longer than athletic tape — usually up to 5 days. The stretchy nature of the tape doesn’t usually restrict blood flow and is waterproof, so you can still shower or bathe with the tape on.
Shop for kinesio tape online.
Support accessories
Some people may also use special accessories to increase the tape’s effectiveness and reduce blistering or discomfort that it can sometimes cause. Examples include:
- heel and lace pads, which are applied on the top of the foot and over the heel
- taping base spray, which helps reduce friction while also allowing the tape to better adhere to the skin
- prewrap, which is a soft, stretchy wrap that’s applied before athletic tape and makes the tape easier to remove
Shop for heel and lace pads, taping base spray, and prewrap online.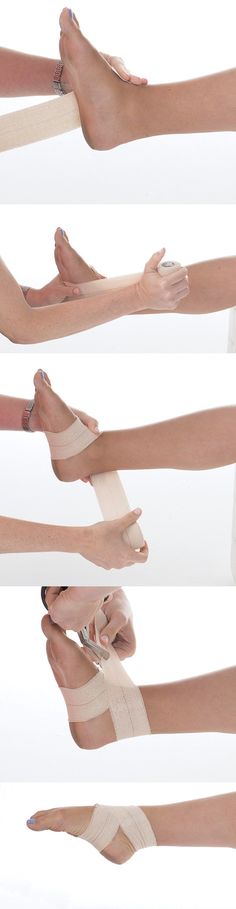
Since using athletic tape involves a different approach than kinesio tape, there are a few separate steps for each approach. Both approaches will start with clean, dry skin. Be sure to avoid taping over open wounds or sores.
Desired, but not required, first steps
- Apply a base spray to the ankle, spraying on top of the foot and on the ankle.
- Then, apply a heel pad to the back of the foot, starting just behind the ankle (where shoes often rub), and a lace wrap on the front of the foot (where shoelaces often rub) if desired.
- Apply prewrap to the foot, starting just underneath the ball of the foot and wrapping upward until the ankle (and about 3 inches above the ankle) is covered.
- Take the athletic tape and apply two anchor strips at the top-most part of the prewrap. This involves starting at the front of the leg and wrapping until the strips of tape overlap by 1 to 2 inches. Apply an additional strip halfway past where the first strip is located.
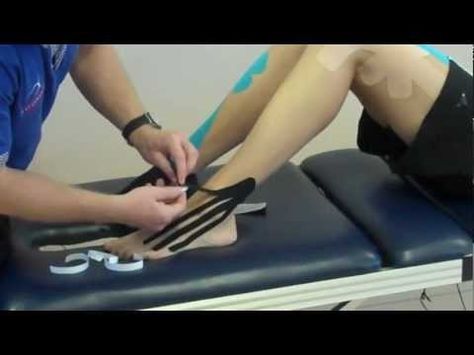
- Create a stirrup piece by applying the tape against the top of one anchor strip, advancing it over the ankle, going over the heel, and ending at the same place on the opposite side of the leg. This should look like a stirrup.
- Repeat and place an additional stirrup piece slightly more in the center of the top part of the foot, going around the ankle, and having the tape adhere to the anchor strip.
- Place another anchor strip over the stirrup tape, wrapping about halfway from the start of the last anchor strip. This helps hold the stirrup piece in place. Continue wrapping in this fashion until you reach the top of the foot.
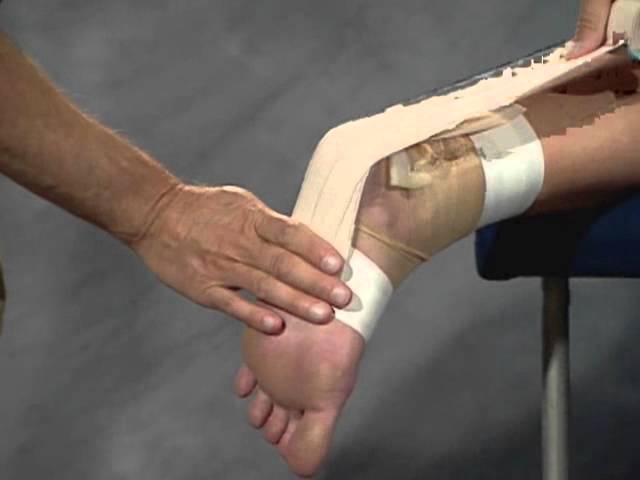
- Wrap the heel using a figure-eight technique. Starting on the inner aspect of the arch, bring the tape across the foot, angling down toward the heel. Cross over the foot and ankle, continuing the figure-eight for two complete wraps.
- Finish by placing pieces of tape from the front of the lower leg, around the arch or heel to the other side.
 You may also need additional anchor strips. You shouldn’t have any open areas of skin.
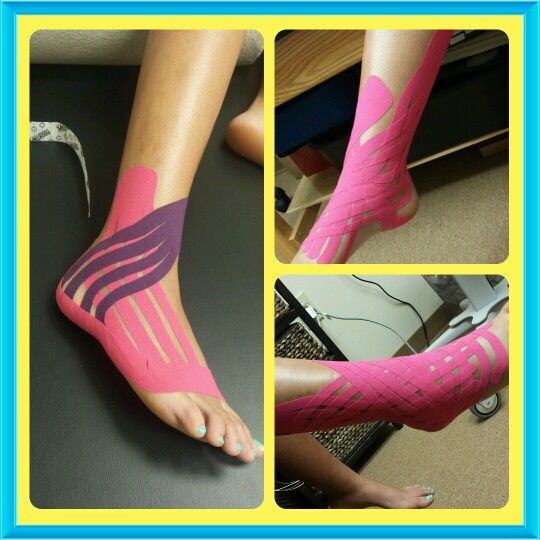
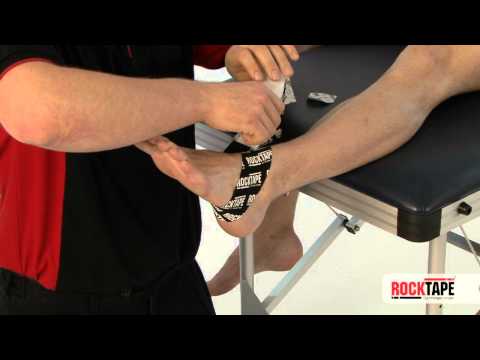
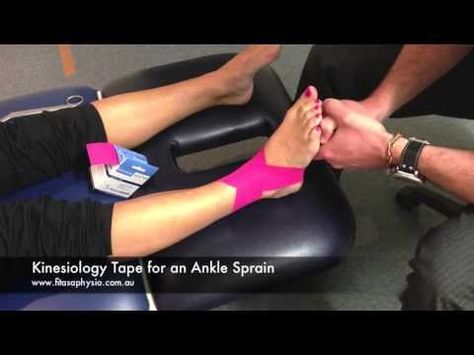
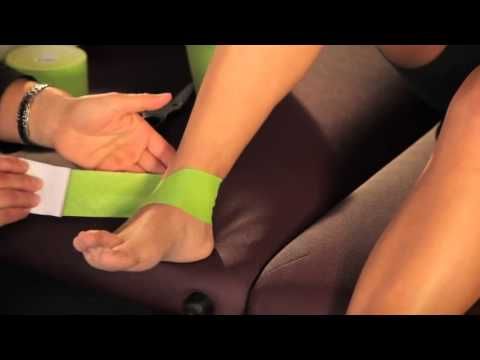
Kinesio tape doesn’t cover most of the foot and ankle as athletic tape does. While different methods exist, here’s an example of a common kinesio ankle taping approach:
- Take a piece of kinesio tape, and start on the outside of the ankle, about 4 to 6 inches above the ankle. Create a stirrup-like effect as you take the piece of tape over the heel, pulling the tape to the opposite side, over the inner aspect of the ankle, and stopping at the same level as the first piece of tape.
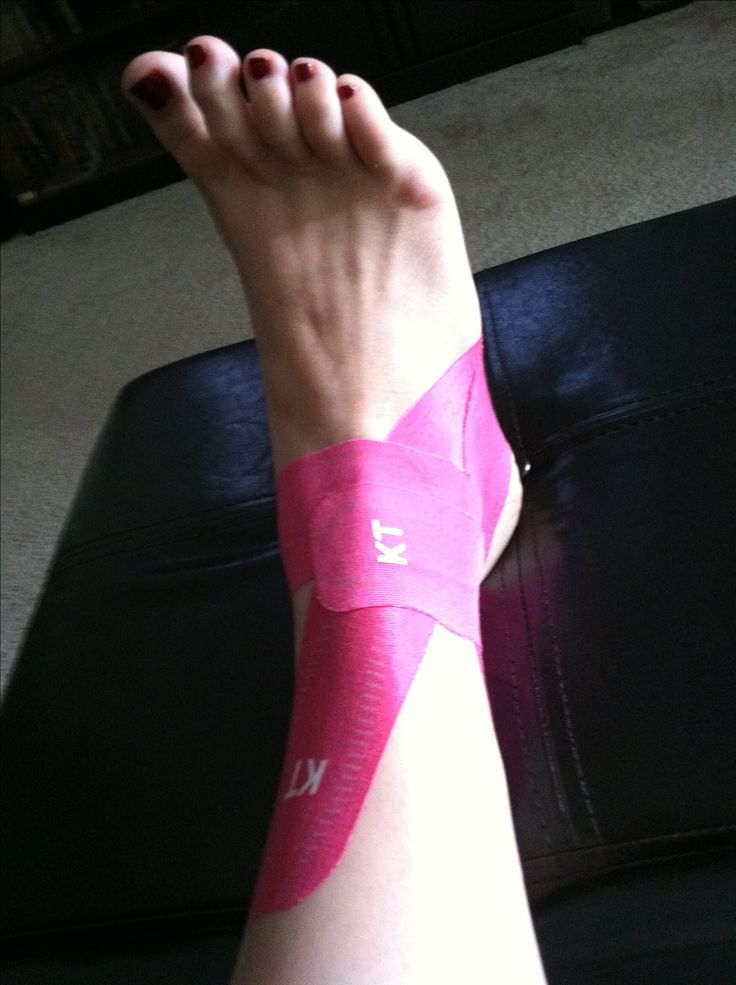
- Put another piece of tape on the back of the foot, centering it with your Achilles (heel) tendon. Wrap the tape around the ankle to circle it around the foot. The tape should be tight enough so the foot bends, yet still feels supported.
- Some people don’t circle the tape around the ankle, but instead cross it like an X. This involves centering a piece of tape under the arch and bringing the two ends across the front of the lower leg to create an X.
 The ends of the tape are secured behind the leg.
Be sure to remove any tape you may have applied if at any time your toes appear discolored or swollen. This could indicate the tape is too tight and may be affecting your circulation.
According to an article in the journal Best Practice and Research: Clinical Rheumatology, 28 percent of people treated with tape report the most common adverse effects are discomfort from too-tight tape or an allergic reaction or sensitivity to the tape.
Steps for removing athletic tape
- Use a pair of bandage scissors (scissors with blunt ends and an extra blunt edge on the side) to slide the scissors under the tape.
- Cut the tape gently until you have made a large cut over most of the tape.
- Slowly peel the tape away from the skin.
- If the tape is especially persistent, consider using an adhesive remover wipe. These can dissolve the adhesive and are usually safe for skin as long as they’re labeled as such.
Shop for adhesive remover wipes online.
Steps for removing kinesio tape
Kinesio tape is intended to stay on for several days — therefore, it takes some extra effort to remove sometimes. Steps include the following:
- Apply an oil-based product, such as baby oil or cooking oil, to the tape.
- Allow this to sit for several minutes.
- Gently roll the edge of the tape downward, pulling the tape away in the direction of the hair growth.
- If you have residual glue from the tape after removal, you can apply the oil to further dissolve it.
Ankle taping can help prevent injuries and reduce discomfort following an injury. The approaches to taping depend on the type of tape you use.
If you’re having trouble taping your ankle, talk to your doctor or a sports medicine professional. They can recommend injury- or body-specific taping approaches that may help.
It's a Wrap
- Follow
- Follow
- Follow
- Follow
- Follow
January 22, 2007
Whether you’re going back to class after an injury or just need extra support, a proper tape job can do the trick.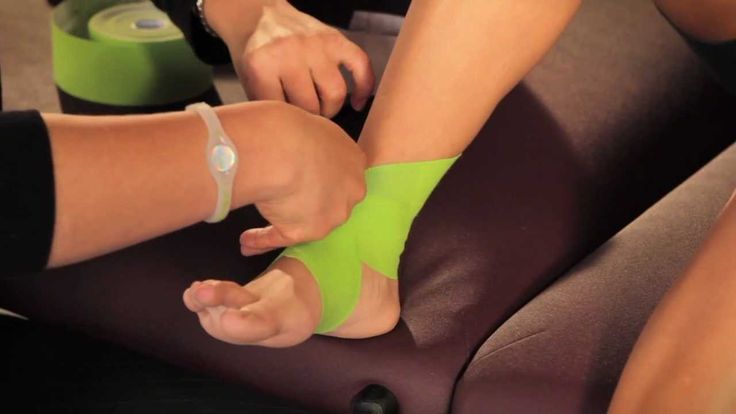 Here’s how to wrap your ankle, arch and patellar tendon.
Target:
Ankle
To support:
Weak ankles
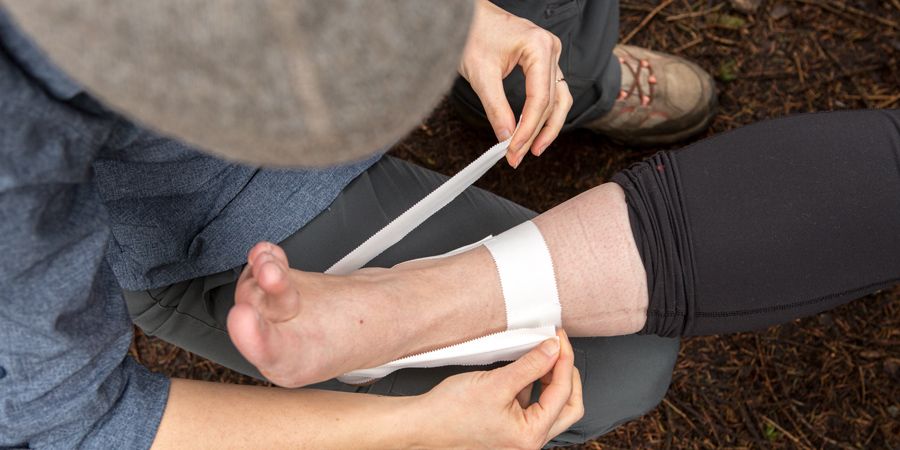
Use: Elastikon
- Flex foot, and lay the tape across the ankle from the inside anklebone down toward the outside of foot.
- Wrap underneath foot, pulling tape tight, but not so tight it stretches out the tape.
- Continue wrapping up and over the arch.
- Cross in front of the ankle to complete a figure 8.
- Repeat winding the tape in the figure-8 pattern, 4-5 times.
- Finish at the top of the foot to prevent curling. Cut and press down until tape sticks to itself.[
Tightness Tests
:
Use the following to make sure the wrap isn’t cutting off circulation:
- Press and release the nail bed of each toe—the blood should return to the bed instantly.
- Touch skin of foot. It shouldn’t tingle, be too hot or cold or have changed temperature.
- When you stand up, you should be able to feel all your toes on the floor.
Target:
Arch
To prevent:
Rolling in resulting from weakness
Use: Elastikon
- With toes splayed as wide as possible, place end of tape slightly below ball of foot.
- Wrap around foot once, keeping tape taut and pressed smoothly and firmly against skin.
- Continue to wind tape around foot 4-5 times. On each consecutive wind, pull taut at the inside of arch.
- Finish at the top of foot to prevent curling. Cut and press down until tape sticks to itself.
Target:
Patellar Tendon
To relieve:
Patellar tendonitis, without limiting range of motion
Use:
Foam prewrap
- Relax knee by lifting heel off floor and resting weight on ball of foot. If this is uncomfortable, place a small block underneath heel.
 Then, starting above the thigh, wrap the foam around the leg.
 - Work your way down to about an inch below knee.
- Locate your patellar tendon between the kneecap and above the tibia. It will feel like soft tissue.
- Roll the foam from the top down and the bottom up, toward the patellar tendon.
- Finish with the foam band running across the patellar tendon. The foam will place pressure on the tendon, relieving stress at either end, where it connects to the tibia and the kneecap.
Tightness Tests:
Use the following to make sure the wrap isn’t cutting off circulation:
- Gently rub the back of knee, where there are many nerves and blood vessels. There shouldn’t be any discomfort.
- There shouldn’t be any temperature changes or sensations running down your leg.
Stock Your Bag
For this article, PT Megan Richardson used:
- Elastikon, an elastic cloth athletic tape that is thin enough to fit into pointe, ballet, jazz and tap shoes, and sticky enough to prevent curling for barefoot dancers.
- J-Wrap Pretaping Underwrap, a soft foam prewrap designed for use beneath athletic tape to protect skin.
Both are made by Johnson & Johnson and are available at medical supply stores and some drugstores such as CVS or Duane Reade.
Caution!
Remember that wrapping should never be used as the only treatment for injury or in the place of strengthening exercises—always consult your doctor and physical therapist prior to dancing with or returning from an injury.
Megan Richardson is a physical therapist at the Harkness Center for Dance Injuries at the NYU Hospital for Joint Diseases in NYC.
How to properly apply an elastic bandage?
October 4, 2019
An elastic bandage should be in every first aid kit. It is useful for first aid for sprains, dislocations, bruises.
In addition, an elastic bandage is indispensable for varicose veins: it keeps the veins in good shape, eliminates heaviness in the legs, relieves swelling and pain.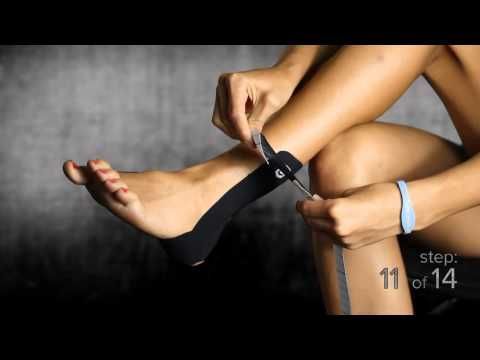 And athletes use it during intense workouts to reduce stress on the joints.
When buying an elastic bandage, pay attention to the degree of its extensibility: the higher it is, the less pressure the bandage exerts on the body. So, for first aid, keep a low stretch bandage in the first aid kit to securely fix the injured limb. And with varicose veins or with intense sports, choose bandages with a high or medium degree of extensibility.
In order for the elastic bandage to perform its function, apply it correctly! Our infographic will tell you how to do this with injuries. But remember that the use of an elastic bandage may be contraindicated for certain types of injuries. Be sure to consult a doctor for a correct diagnosis.
Ankle bandage
-
Turn two circles over the ankle to secure the bandage.
-
After that, pass the bandage obliquely over the back of the foot and make a double turn.
-
Next, the bandage must be passed on the other side of the dorsum of the foot and circled around the ankle again.
-
Repeat the eight steps several times until the joint area is completely covered. Secure the bandage over your ankle.
Wrist bandage
-
Apply the bandage to the inside of the wrist and rotate.
-
Pull the bandage diagonally down the outside of your arm between your thumb and forefinger. Through the palm, return to the wrist.
-
Turn around at the wrist, pull the bandage down through the palm and back to the wrist.
-
Repeat the eight-fold several times, then continue to bandage the arm towards the elbow. Having reached the elbow, start bandaging in the opposite direction. Secure the elastic band over your wrist with clips.

Knee (or elbow) bandage
-
Relax the affected knee, bend to a comfortable position.
-
Pull the bandage over the back of the leg above the knee joint, tighten with a double twist.
-
Repeat one turn overlapping the previous layer below and above the knee, gradually approaching the middle of the joint. Secure the end of the elastic bandage.
-
There is also a reverse version of bandaging: start with a double turn in the middle of the joint, then apply the bandage one turn below and above the knee several times.
General rules
-
Apply each next layer of bandage, overlapping the previous one by a third of its width.
-
Tighten the bandage at the beginning of bandaging, and slightly loosen the tension with each new wrap.
-
The maximum pressure should be in the narrowest area, the minimum in the widest one.
-
Apply the bandage as gently as possible, without folds or gaps between the tissues.
What can and cannot be done if you twisted your leg
Sprained your leg? This can cause seconds of pain or weeks of recovery due to torn ligaments. We explain what to do if you sprained your leg, and what determines the severity of the consequences.
This has probably happened to everyone: you are walking, it would seem, on a flat surface, without looking under your feet, and suddenly - on a bump that you did not notice, the foot turns to the side, it pierces with a sharp pain. This means that you twisted your leg. Today we will find out what happens in this case, whether such an injury is dangerous and what to do if it does happen.
What does it mean to “tuck your leg”
"Turn the foot" is not a medical term, as such a combination of words means only a mechanical process of how you can turn the foot in an unusual and unsafe way for it.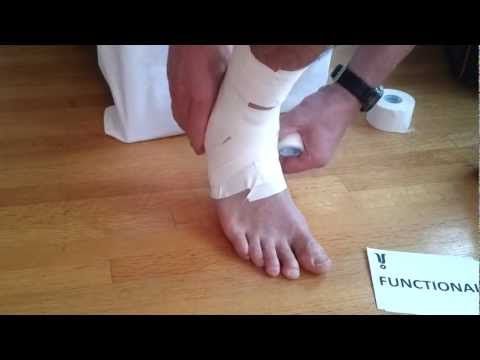 This usually occurs when touching a surface that a person is walking on, although in some sports (such as football), similar injuries can occur when touching a ball or any other object.
So the twisting of the foot itself is not dangerous, but the damage that this can cause to the ankle joint and the surrounding tissues is dangerous. The ligamentous apparatus suffers most often, less often bones, muscles and nerves. It is from the fact that that is injured and how badly that the consequences of the injury depend.
What can be damaged
All the consequences of such an injury are assumed by the ankle joint. It is located near the ankle and connects the bones of the lower leg and foot. Alas, this is a rather fragile and generally problematic joint. In order for us to walk easily and freely, it must be quite mobile and therefore consists of small bones, which together form a complex system.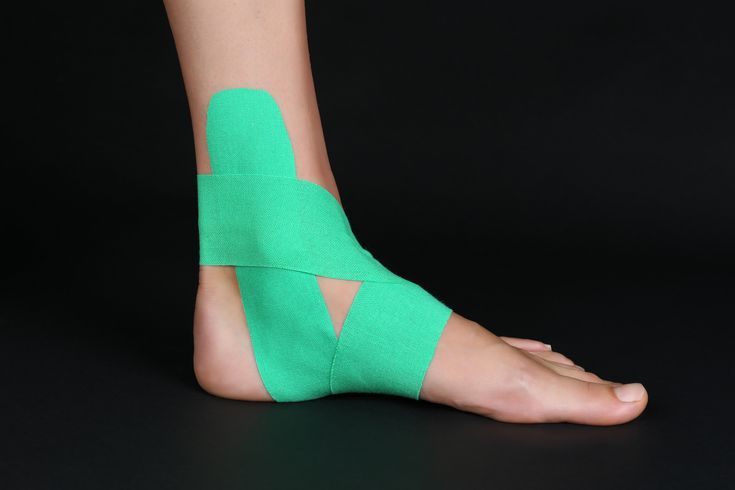 The situation is aggravated by the fact that the ankle joint has the weight of the whole body, and during loads like running or even fast walking, the pressure on the joint only increases. So the consequences of twisting the leg are injuries in the ankle joint: sprains, tears and even torn ligaments, as well as dislocation of the leg and, in the worst case, bone fractures.
In most cases, the foot turns inward, resulting in damage to the ligaments on the opposite (outer) side of the leg. This can lead to their stretching, tearing or even rupture (sometimes a click or crunch is heard at the time of injury). As a rule, the stronger and sharper the leg is twisted, the worse the consequences for the ligaments. If the ligaments cannot compensate for too sharp a turn in the joint, it may dislocate, and if a person has a tendency to brittle bones, even nearby bones may break. In a word, the consequences can be very different: from mild to quite serious.
What to do if you sprain your leg
If you just twisted your leg, after ten seconds the pain goes away and you can move on - nothing needs to be done.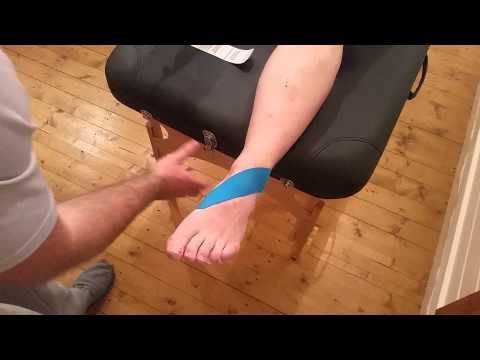 However, if the pain still persists, you need to examine the leg in the area of the affected ankle joint.
First of all, we pay attention to the nature of the pain. Suspicious is pain that remains severe for an hour, appears and intensifies when you try to step on the injured leg. Even touching the skin near the ankle can be painful. This may be accompanied by bruising and swelling of the tissues around. A more formidable symptom is a change in the shape of the joint and a violation of its mobility (especially the appearance of new, previously impossible movements - say, an unusual deviation to the side). In the most severe case, even the shape of adjacent bones can change - this already suggests a fracture.
If you twist your leg and it continues to hurt, there are four things you need to do:
- Let it rest. Try to walk less in the next couple of days, ideally, activity in the affected ankle joint should generally be minimized.
- Cool the joint area.
 Ice is best for this, but you can also use a towel soaked in cold water. During the first day, apply it on the ankle for 15-20 minutes every 3 hours. However, do not overdo it: if the skin is very pale, immediately remove the ice from the leg and warm it up.
 - Put something heavy on your leg. It can be tight stockings, compression stockings or a tight bandage - the goal is to prevent excessive swelling around the ankle joint from developing. The compression should be tight, but not too squeezing, otherwise there will be a threat of impaired blood flow.
- Elevate the affected foot to avoid swelling. We are not talking about the fact that you need to lift it high: a pillow placed under the leg is enough.
If the pain seems too strong for you, in the absence of contraindications, you can take painkillers from the group of nonsteroidal drugs: paracetamol, ibuprofen and others. There are also local ointments and gels with a similar effect.
There are also a few things that you should NOT do:
- Warm baths in the early days are contraindicated.
 Warm water activates the blood supply to the damaged area, which threatens to increase swelling and inflammation.
 - You don't have to keep walking and exercising a lot to overcome the pain. So there is a risk of additional damage to an already diseased joint, which threatens to aggravate existing injuries.
- Massage in the area of injury may not be very helpful at first either. The reasons are the same - massage improves the blood supply to the tissues, and this is not at all what we need: it will increase inflammation, swelling and may even cause bruising.
- There is one more thing to avoid: staying too long. Rest in the first day or two is necessary, but in the subsequent gradual increase in activity in the ankle only contributes to healing. The only exception will be the most severe injuries, when the pain simply does not allow walking, but in such cases it is also impossible to lie at home - you should consult a doctor.
When to seek medical help
The most common ankle injury, a sprain, usually resolves on its own with no sequelae. However, in some cases, the injury can be much more serious, and one cannot do without going to the doctors. Here are some signs of such an injury:
- if unusual movements become possible after an injury in the joint, its stability is impaired;
- if there is visible bone deformity;
- if on the second day, when touching the skin over the damaged joint, severe pain persists;
- if after 4 days the affected leg is still difficult to step on;
- if you are in severe pain, swelling or bleeding;
- if you find that all or part of your foot is numb (a sign of nerve damage).
In all these cases, contact a traumatologist. He should ask you about the circumstances of the injury and will most likely take an x-ray. As a rule, these data are enough to make a diagnosis, but sometimes additional studies may be required: ultrasound of the joint, CT or MRI.
If you don't have any of the symptoms listed above, it's worth waiting and seeing how your ankle behaves.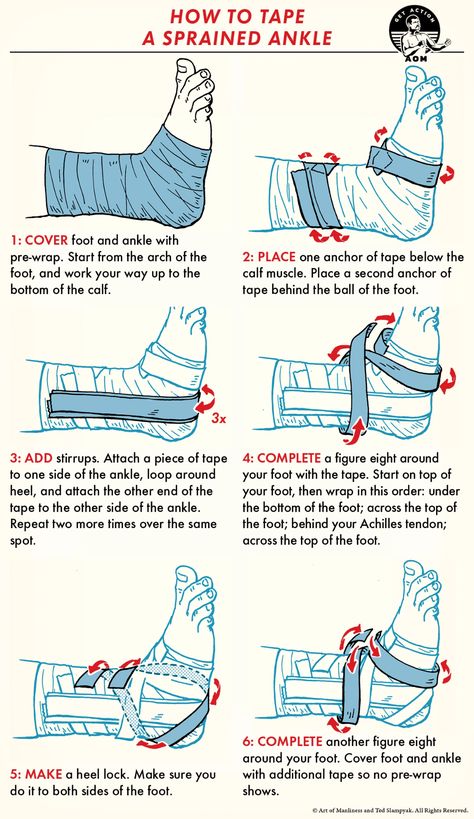 There is evidence that in case of damage to the ligaments, the examination after 5 days is more informative than the examination during the first 2 days. So if there are no pronounced symptoms, in the first days you can wait for the pain to disappear.
Preventing Ankle Injuries
If you often twist your foot, you need to think about how to protect yourself from ankle injuries. Their insidiousness also lies in the fact that once you damage this joint, you make it much more prone to injury in the future. According to statistics, up to 80% of people who injure their ankle will injure it again in the future.
Most ankle injuries do not occur during sports, but in everyday life - even when walking on level ground. But when it comes to sports, the highest risk of injury is in tennis players, basketball players, soccer players, and jumpers. These athletes should pay special attention to the ankle joints.
A few simple steps to prevent ankle injuries:
- Wear only comfortable shoes.
 If you have flat feet, use orthopedic insoles. And women need to know that wearing high-heeled shoes for a long time makes the ankle joint and adjacent bones much more vulnerable.
 - Strengthen your ankle muscles. For this, whole complexes of very simple exercises have been developed that can protect against injuries: after all, it is the muscles that protect the joint from damage.
- If you play sports, do not neglect the warm-up before training.
- Practice balance exercises.
- Look under your feet, after all! Most ankle injuries, alas, are due to the fact that people do not follow this simple rule.
Let's make a conclusion: twisting of the leg, as a rule, does not entail serious consequences. However, injury to the ankle joint is quite possible: ligaments most often suffer. Rest in the joint, its compression and cooling will help to cope with swelling and pain, but if the symptoms are more serious and continue to bother you, you should consult a doctor.