How to take pictures of dancers
Dance Photography (How to Shoot Beautiful Dance Portraits)
By Taya IvanovaA- A+
Download as PDF
Subscribe Below to Download the Article Immediately
You can also select your interests for free access to our premium training:
Business Basics
Cheat Sheets
Child Photography
Colorful Cityscapes
Composition
Creative Photography
Creative Portrait Concepts
Digital Photo Collages
Fairytale Portrait Photography
Food Photography
Interior Photography
Landscape Editing
Landscape Photography
Lightroom Processing
Lightroom Presets
Long Exposure
Macro Photography
Milky Way Photography
My Camera and Photography
Organic Marketing
Pets
Product Photography
Sky Photography
Social Media
Still Life
Time-Lapse Photography
Travel Photography
Urban Photography
Wildlife Photography
Your privacy is safe.Dance photography is a fascinating genre that can turn even the simplest movements into art.
Here are 14 tips to help you easily capture the beauty of any dancing style.
14. Get to Know the Dancer(s)
Dancing is often very expressive and intimate. This is why it’s important for you and your model to feel comfortable together.One of the best ways to understand someone is to talk to them about their passion.
Instead of blindly going into a photoshoot, find out who your model is and why they love dancing. Let them know why you’re interested in dance photography, too.
Once you get to know each other, you’ll feel more relaxed and confident during your session.
This will allow you to make mistakes without feeling embarrassed. And it will give you enough room to experiment with different concepts.
13. Familiarise Yourself With the Dance Style
What type of dance are you going to photograph? If you answer this question in detail before your photo shoot, you’ll be able to predict your model’s movements and adjust your camera settings accordingly.
For example, if you want to get better at dance recital photography, you might want to use a wide-angle lens to take wider photos. If you want to take interesting close-ups while your model is dancing, you might need a zoom lens.
If you’ve never photographed a specific dance style before, watch a few videos or talk to the dance company before your shoot.
The more you know, the easier it will be for you to come up with cool ideas. These will not only impress your models but also put a spotlight on your skills.
12. Make Sure Your Models Know They’re Being Photographed
No, this doesn’t mean you have to shout at them as you quickly press the shutter. They just have to know that someone is going to take pictures of them as they dance.
Dance photography is quite similar to street photography when it comes to permission. If you’re going to photograph a group of strangers, you’ll have to get their permission first.
This will be easy to achieve if you work with a dance instructor who can inform the dancers about your presence. It won’t be as easy if you stumble upon a random group of dancers outdoors.
If you just want to practice, you can freely photograph strangers. But you have to be careful when it comes to online sharing and selling.
To avoid unwanted confrontation, get to know a few basic street photography laws.
11. Use a Tripod to Avoid Camera Shake
You might be tempted to move your camera around all the time to get the perfect shot of a dancer’s graceful movements. This might confuse or frustrate you, especially during a fast-paced dance event.
To avoid unnecessary stress and camera shake, use a tripod. By limiting your movements, you’ll be able to make the most of the compositions in front of you.
A tripod will also help you take beautiful long exposure photos (you’ll find out more about this topic soon) that will fill your gallery with diversity and surrealism.
10. But Don’t Take Photos from One Angle All the Time
One of the best things about dance photography is that it doesn’t have to be photographed a specific way. If the situation allows, take photos from the ground. This will create a blurred foreground and naturally lead viewers’ eyes to your dancer.
If you constantly shoot from a standing or sitting point of view, your photos will look dull. You can easily change this by shooting from different angles.
If you want to make your photos stand out even more, create depth using foregrounds. For example, if you photograph a dancer through a fence, you’ll add both texture and depth to your photo.
Don’t be afraid of experimenting with different objects and foregrounds. The more you practice, the more interesting your compositions will look.
9. Shoot on a Real Stage
Stage lights are perfect for taking atmospheric dance photos.If your model spends a lot of time on a stage, take photos there!
A stage already has all the equipment you need to photograph professional dancers. The black background will put the focus on your dancer and the natural or artificial light will create a photo-worthy atmosphere.
All you’ll need to do is focus on your dancer and your camera settings.
In addition to providing you with tools, a stage will make your model feel at home. This will enable them to feel more confident and powerful in front of your camera.
8. Use Long Exposure to Elegantly Track Movements
In some photography genres, sharpness is a priority. When it comes to good dance photographs, this isn’t always the case.
Long exposure is often used in landscape photography to emphasise certain movements, like running water or a windswept tree.
Dance photographers can use it in a similar way to photograph body movements. This is why it’s worth memorising the various guidelines of long exposure.
7. Use Dramatic Lighting
Dancers don’t always have to be photographed outdoors or on a stage. You can use simple locations with dramatic lighting to take unique photos of your models.
An empty white room with window blinds on a sunny day, a roof during the golden hour, and a dance studio with artificial light.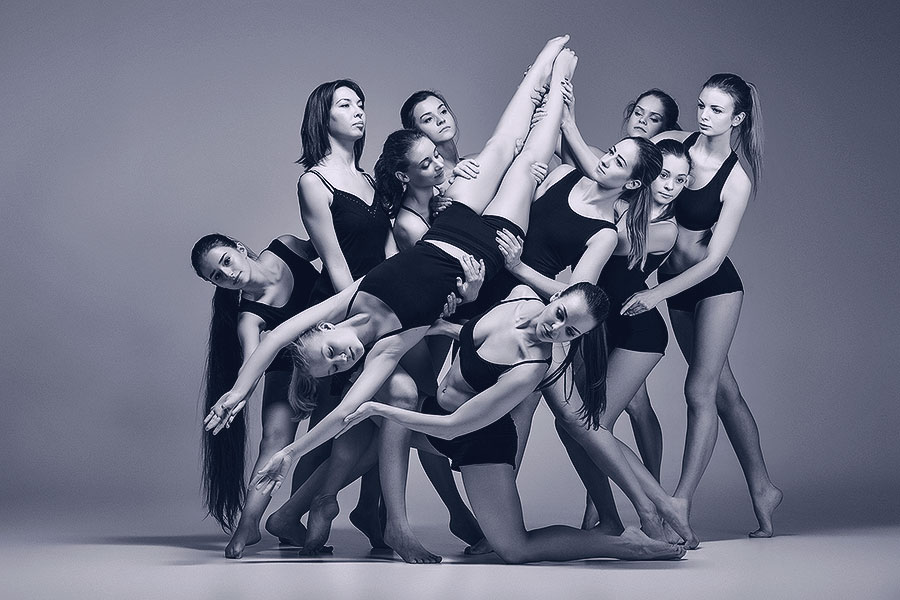 These can all be used to create dramatic compositions that emphasise the dancer’s movements.
6. Take Photos at Dancing Events
Not sure what kind of dancers you want to photograph? You can introduce yourself to different dance styles by taking photos at events or recitals.
Once you get permission to photograph the dancers, you can significantly improve your knowledge of dance, portrait, and even candid photography.
Even a couple of hours at a recital will expose you to different styles, movements, and lighting situations. Use this opportunity to experiment with different angles, fast shutter speeds, and apertures.
All of this exposure will give you a better idea of the type of dance photography you should pursue. It will also teach you how to make the most of a busy setting.
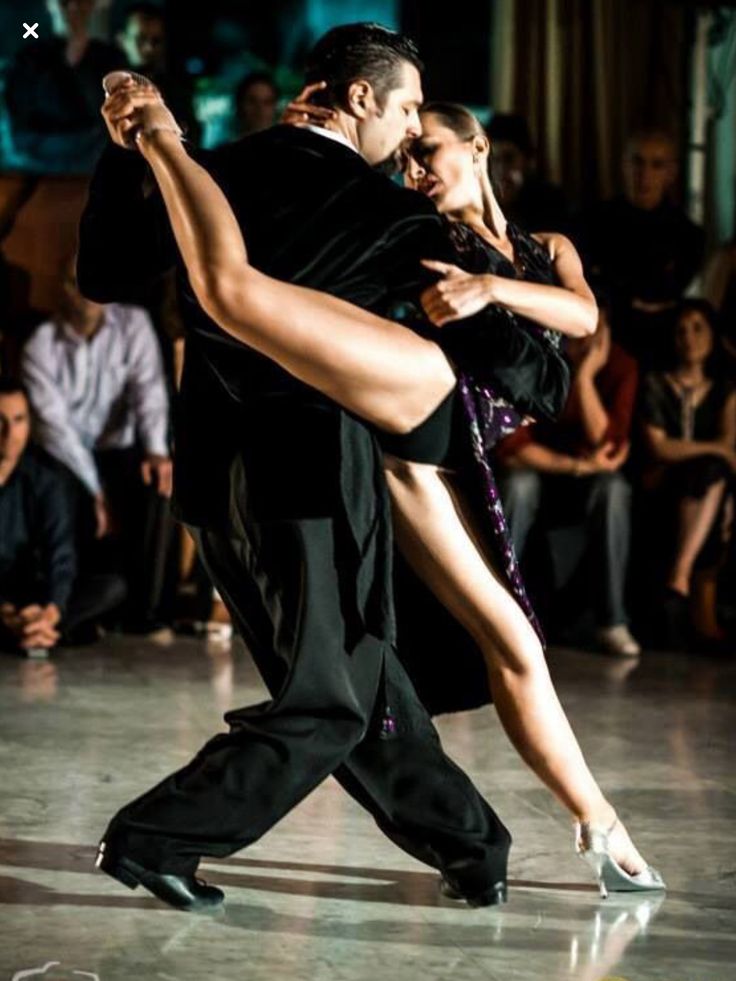
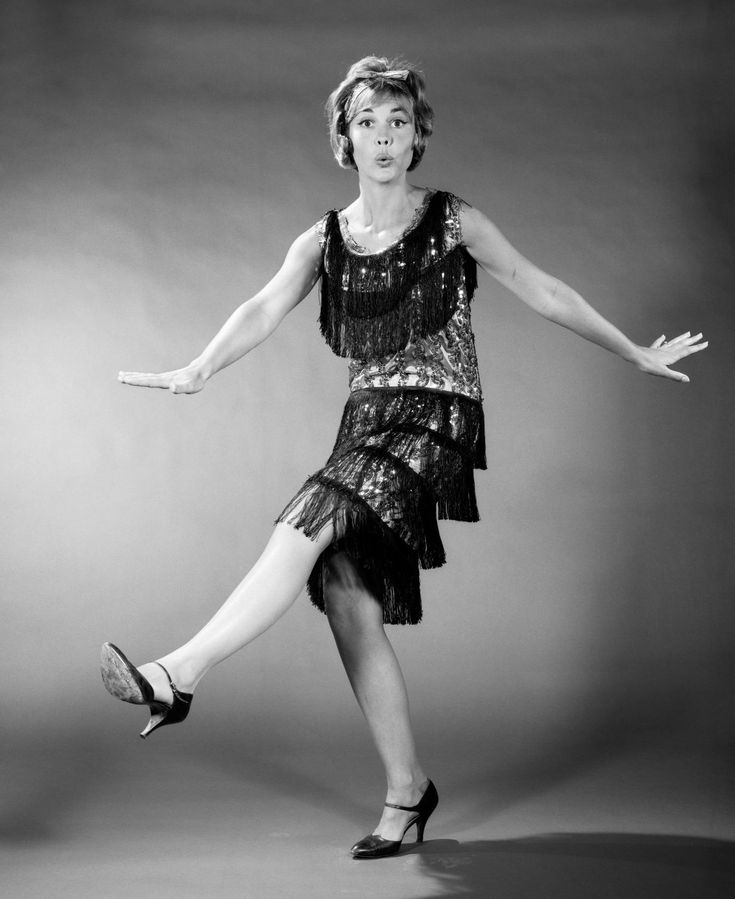
5. Use a Large Aperture to Separate the Dancer from the Background
The photographer used a large aperture to separate the ballerina from the busy city background. If the aperture were smaller, the model’s outfit, pose, and expression wouldn’t stand out.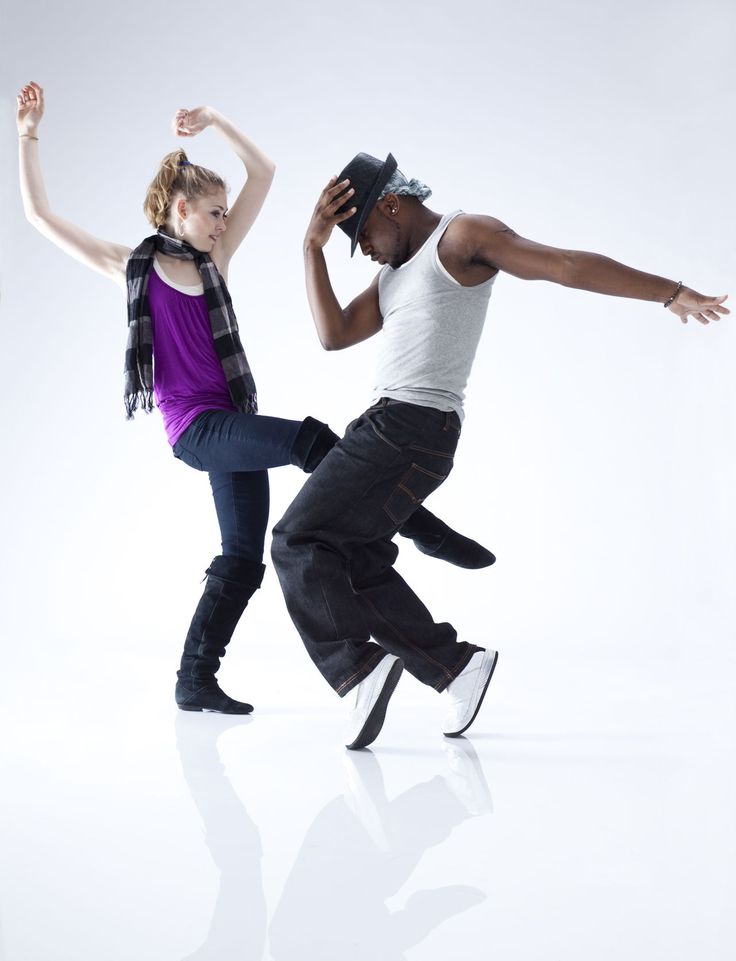
Dancers aren’t always surrounded by beautiful backgrounds. Sometimes, they’re surrounded by curious strangers, unflattering buildings, or a street full of cars.
All of these distractions can make it difficult to focus solely on one subject. Photography projects showcasing ballet dancers in urban settings are popular still.
If you can’t move to another location, you can separate your subject from their background by using a large aperture. A large aperture, also known as a small f-number, will add more depth to your photos. Examples of a large aperture are f/1.2 and f/2.8.
The larger your aperture, the blurrier your background will be. However, this might stop you from taking sharp photos.
If your aperture is too small, you might find it difficult to focus on specific parts of your model’s face. A relatively large aperture, such as f/2.0, will blur your backgrounds but also let you take sharp photos.
4. Focus on Details to Tell a Story
Diptychs can be used to create contrast, emphasise details, or simply tell a meaningful story.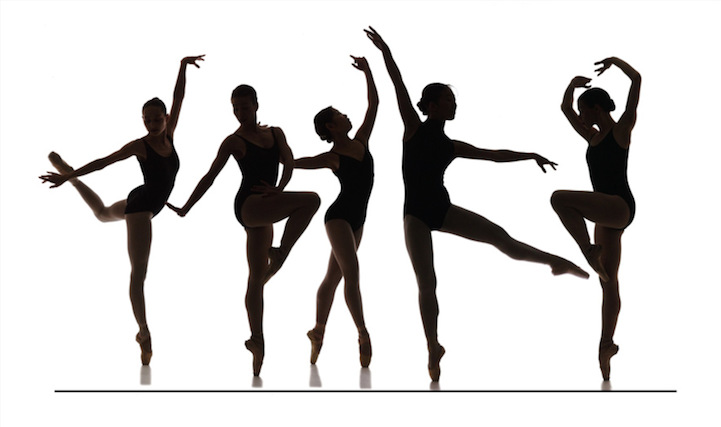
Details are just as important as the big picture in any photography genre. Even though wide shots are what make dance photography beautiful, they need to have a story to be meaningful.
Details can add depth, texture, and emotion to your photos. You can use them to create diptychs, which are collages that consist of two photos.
You can also include them in a set of photos inspired by the dancer(s) you’re working with.
3. Take Photos in Vibrant Places
A carousel isn’t usually associated with dance. But it was the perfect location choice for this vibrant photograph. If you want to take unique photos, be open to finding potential in unusual places.Overly vibrant locations can take the spotlight away from your subject. However, if used correctly, they can dramatically enhance your compositions.
No matter what location you shoot in, make sure you use a large aperture to separate the dancer from their background.
The larger your aperture, the larger the background bokeh will be. This will make it easy for you to blur out almost any background distraction.
With the right amount of blur, you’ll be able to photograph your dancer in front of fantastic locations like carousels, cityscapes, and neon lights.
2. Photograph Multiple Dancers from Above
If you have to photograph multiple dancers, you can create symmetrical compositions by taking photos from above.
This is easiest to do in a dance theatre or any location with an indoor balcony.
This unique perspective will allow you to play around with different concepts and outfits, like the rainbow umbrellas in the photo above.
1. Take Surreal Photos of Dancers With Flour
Flour dance photography is a sub-genre that involves a lot of messiness and surrealism. You’ll need the following things to have a successful flour photo shoot:
- A black backdrop to highlight the whiteness of the flour,
- Lots of flour,
- Any kind of material to protect objects that shouldn’t be covered in flour,
- A fan or large window to prevent suffocation,
- A mop to clean everything up at the end of your photo shoot,
- A clean set of clothes for you and your model.

If you need some ideas or inspiration, check out Derrick Senior’s flour portraits.
Conclusion
Dancing is freeing, vibrant, and eye-opening. You can use it to take photos that are just as emotional as your models.
With the right amount of practice, you’ll be able to photograph all kinds of dance styles, capture true joy, and take your photography skills to the next level.
If you’re looking for ideas to get started with dance photography, try a ballerina project.
Or call up your local dance company to see if they’re interested in some great dance photos. It’ll be good practise for you even if it’s unpaid!
Dance Photography 101: How to Take Dance Photos
Dancing is one of the finest arts ever known to man. The graceful movements, the poetry in motion and the music. Everything about dancing is a feast for the senses – especially for the eyes. The lure of dancing is simply irresistible, which is why a lot of photographers love making it their central subject.
But, like anything that’s in motion, taking photos of the dance or dancers is not easy. Owning and using a DSLR camera does not guarantee you great dance photos. You have to consider a lot of factors before shooting even one scene.
image by Felipe Cardoso Moreira de Oliveira
Things to Consider Before Shooting
Here are some important things you need to think about before you go taking dance photos.
- Dancing is moving. Therefore, your subjects move around most of the time. You need to know how to focus well. And for this, you need to have a fast shutter speed – at least 1/1000 second.
- Since your subjects are always on the move, it will be difficult to get a photo showing their faces. But, you need to show the dancers’ faces because your story will be incomplete without them. Plus, who would want to look at a photo of someone’s back? You need to know how to get the right angles and catch the interesting poses.
- Next, you need to have a good grasp of proper photography lighting.
 Even if you’re photographing a dance concert, the lights won’t be good. There’ll be a lot of reds, greens and blues. Your aperture should be at least f2.8 – in most cases. If you’re shooting a dance class inside a small dance studio with a proper lighting, though; that’s an altogether different story! With this environment, you can get away with f3.5 to f4.
There are several tips and techniques that you can use to address the above-mentioned issues.
image by OrniCosa
Tips and Techniques for Taking Dance Photos
- Let’s focus first on focusing. You will need to have the proper settings for your camera to get the focus you want to achieve. Here are some simple suggestions:
- Use Autofocus. Don’t try to be Superman or Wonder Woman. You should not do all the focusing yourself. Don’t fall too deeply in love with manual focusing (or do – some people much prefer manual focusing).
- Use Continuous Shooting Mode or Burst Mode.
 Be sure, however, to hold or press down the shutter while doing so. This is useful when the performance is at its peak and the excitement is building.
 - Since you’re in the Autofocus Mode, you should also set your camera to Continuous Autofocus (AI Servo AF for Canon and AF-C for Nikon cameras) so you’ll be able to easily adjust as the dancer moves. This should be done while the shutter is half-pressed.
- Use a monopod (or tripod if it’s allowed). This is the best way to keep your shots still. It is also a good technique for keeping your photos in good focus. You won’t have to worry about shaky photos because you’ve been holding your camera far too long. This is true especially if you have a heavy lens. A monopod or tripod will also allow you to pan across the room or location.
- If possible and if it’s allowed, use a flash so that your subject/s will freeze and look good at the same time. Combine your flash with slow shutter speed and your dance photo is good to go! With a slow shutter speed, you’ll get some blurriness into the background of your photo, but your subject is clear.
 This is known as the “blurry but sharp effect”.
 - Use the widest aperture available, as this will allow more light to come in to your sensor. In sports and other action photography, an f2.8 aperture is the norm.
- If you want to show the faces of the dancers, you have to be willing to move around and experiment on different angles. Aside from giving you dynamic shots, moving around will also help you explore different backgrounds you might want to include in your photos. For example, your primary focus is a couple on the dance floor; you shouldn’t isolate them from the rest of the crowd by taking their photo from just one side of the room. Move around so that you can show their background – the other dancers and judges, probably. This will make the photo more dynamic and interesting. Taking photos from different angles will also help you yield good results. You’ll be surprised with how dynamic your photos will look. If your camera has a rotating screen, try to place it over your head, look down on the dance floor or dancers, and take the photo.
 You can also try shooting from a low angle. To get the best results when you’re shooting a crowded dance floor or studio, stand in the middle of the crowd and shoot from different angles. Be like a dancer or choreographer so that you’ll be able to visualize the sequence of shots you’re going to take.
 - If you want to make your photos look really alive, set your camera to the longest focal length. Doing this will light your subject while blurring ambient light. To add more life and color to the photo, tilt your camera up and down and make it go from left to right. This will give you light trails that will make the image “move”. It’s the best way to capture dancers in action.
- For photos that come out with a dark background and those with very little (unnoticeable) blur, you’ll need to get more ambient lighting into the picture. To do this, you should use longer shutter speeds, a higher ISO and/or a wider aperture.
- Know how to use your flash properly.
 If you use too little of it, your images will not come out sharp. If you use too much of it, you’ll get overexposed and non-blurry photos of faces. To correct this problem, reduce the ISO, narrow the aperture and/or slow down the shutter speed.
image by Luke Addison
These are just some tips and techniques that you can use in taking photos of dances and dancers. Remember, though, that all these won’t work if you don’t practice. Practice, practice and practice. Try and try again. It’s the best way to learn and become good at what you love to do.
About the Author: Michael Gabriel
Michael Gabriel L. Sumastre is an experienced writer who loves to take pictures of the countryside as well as aerial photographs. He maintains his professional writing portfolio at TheFinestWriter, and you can visit his photography portfolio at Sumastre Photography. Michael was hired by Booking.com to photograph 10 of the most beautiful beaches in Palawan, Philippines.
How to photograph a dance? 5 tips for shooting dances
Rehearsal rooms, dance halls, recording studios
in Moscow
How to photograph a dance? 5 Tips for Shooting a Dance
How to photograph a dance? Taking a photo of a dancing person or couple is not so easy, the frame should turn out not only beautiful, but also alive. To get a good photo, regardless of whether it will be taken in room , rented or on stage, it is recommended to follow the 5 basic rules.
5 simple tips on how to photograph dancing
1. Counting
For an average person who is far from the world of dance, counting "five, six, seven, eight" is usually unfamiliar. The thing is that music is divided into many squares, each of which includes 8 accounts. Thus, the photographer, counting from 1 to 8 to himself, will be able to synchronize with the playing music, which means he will better feel all the dance moves.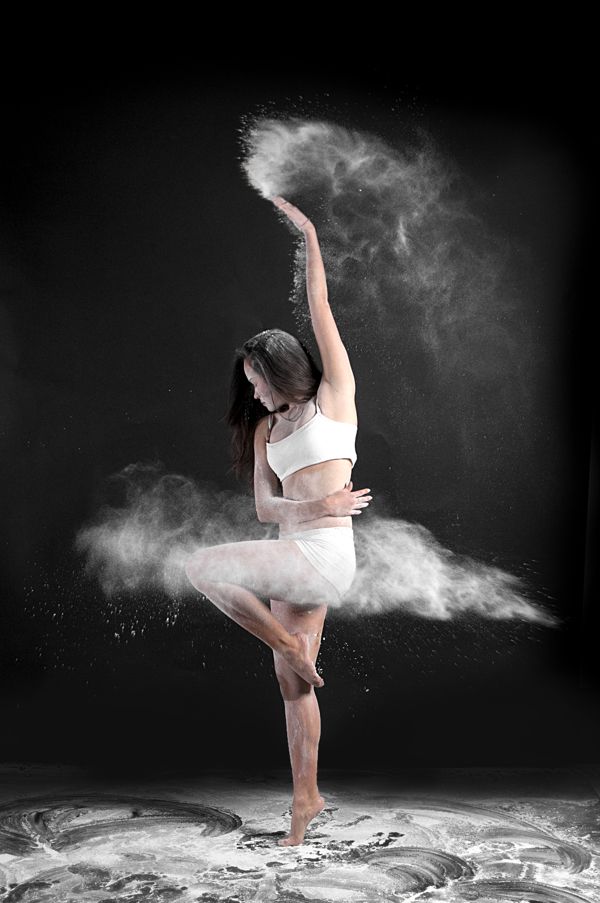 If you have to make a photo essay or a photo report about the event, then you just need a dance score. And if you have 9 to shoot0012 to rent room , then you will be able to agree with the dancer on what account he will make the necessary movement.
2. Fast shutter speed
Shutter speed can be called almost the main characteristic in this type of shooting. All parts of the dancer's body should turn out to be unlubricated, clear. When using a shutter speed of 1/50, gestures and movements will be blurry. Therefore, it is better if the shutter speed is at least 1/600, and if the light allows it, then 1/2000. The faster the selected shutter speed, the clearer and more detailed the photo will be.
3. ISO
When you are indoors ( halls in rent does not count), you do not have the ability to somehow adjust the lighting. So, if it is not enough, then you need to increase the sensitivity, keeping it in the range from 400 to 1200 ISO.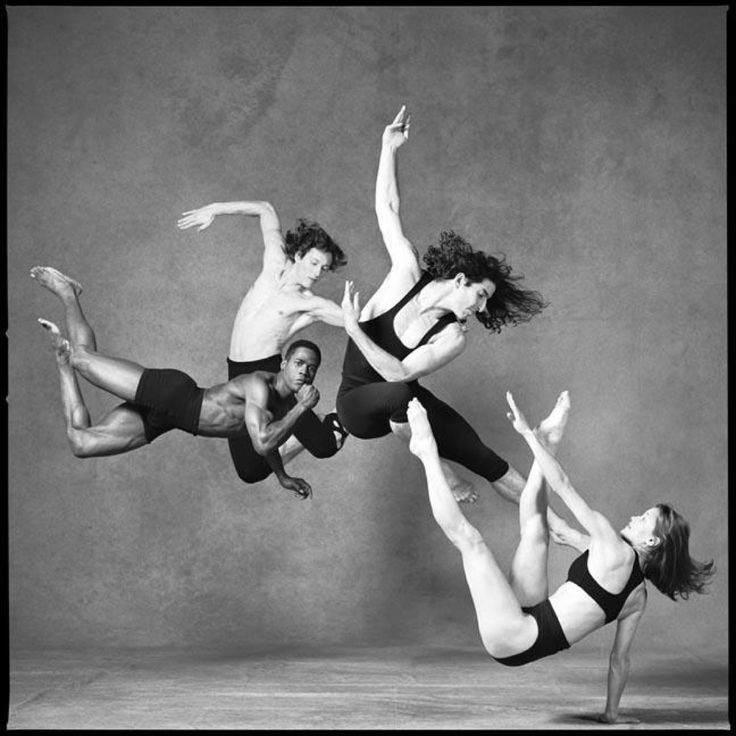 If the picture turns out to be “noisy”, then it can be made black and white.
4. Readiness
Of course, every photographer should have several winning ideas for a photo shoot in their arsenal, and renting hall will help in their implementation. But, as you know, the most wonderful photos come out absolutely spontaneously. Any dance is, first of all, a storm of emotions, self-expression, disclosure of the inner world, for this reason, it is extremely important to give the dancer complete freedom of action. If there is no music, we recommend turning it on.
5. Parts
Not every shot has to catch a turn, a jump or some other element of the dance. For greater effect and success of photography, you can take pictures of various little things from the hall, rented by , thereby telling the story of a dancer.
How to photograph dancing
How to photograph dancing? This question is often asked by our students, because dancing has always attracted photographers with its unusual figures, energy of movement and bright costumes.
How to choose a lens
Think about where you will be photographing in advance. If the dances will be held in the open-air format (on the street, in nature, outdoors), then, as a rule, there is enough free space for the photographer to work and the question of choosing a lens with one or another focal length is not so acute. But in any case, you will take both general shots and close-ups, so to make it easier to photograph, you can take a zoom lens with focal lengths from 24 mm to 70 mm or up to 105 mm (such lenses are widely available in stores and are used very popular due to its versatility).
But the answer to the question "what maximum aperture should the lens have in this case" is ambiguous. On the one hand, it is easier to photograph when the depth of field is large (for this you have to close the aperture to F / 8 - F / 10), but then everything in the frame will be sharp. In most cases, such photos look good (especially if the dances take place in a club where there is a lot of colorful light music).
But sometimes photographers want to single out one couple from many dancing ones - then it is better to open the aperture to F / 2.0 or even to F / 1.4, but the number of unsuccessful shots increases dozens of times, because the depth of field becomes very small and catch the dancing couple in focus is not an easy task. But if you manage to take a sharp shot, then the joy of the photographer is unimaginable, because the background is so blurred that it creates a feeling of unreality of what is happening in the photo: as if the dancing couple had momentarily left the real space and froze in the air.
Do I need a flash to photograph dances
If there is enough light on the dance floor to take pictures with a slow shutter speed (about 1/320 sec or less), then a flash is not needed. Well, perhaps only to create various light or color effects. But if there is not enough light (as a rule, this is when dancing takes place in a room with poor lighting), then it is better to take a flash, because without it it will be difficult for you. Flash operation in automatic mode (ETTL mode) gives good results if the illumination of the dancers and the hall is approximately the same, otherwise we switch to manual mode (M mode) and manually set the flash power value (the flash power level strongly depends on the actual photographing conditions - here It's hard to give clear advice.
Light from the flash is best softened by using a softbox (there are small softboxes just right for mobile photo shoots) or by directing the light towards the ceiling. If the ceiling is not too high and white, then flash power will be enough for you and soft light will make your photos very attractive due to smooth light-shadow transitions on the faces of the dancers.
What shutter speed to use to photograph dancing
If you do not use a flash, then the advice is simple - the lower the shutter speed, the better (but only within reasonable limits - so that the brightness of the photo falls into the dynamic range of the camera's matrix).
But if you use a flash, then there is a purely technical limitation of cameras - synchronization of the camera with the flash, as a rule, only works up to values of 1/200-1/250 sec. At slower shutter speeds, part of the frame simply does not have time to be exposed.
There is one more nuance. With high flash power and low shutter speed (even if this value is 1/160 sec), the flash overshadows all the lighting devices in the room with its light - thus, in the photo you will see not the light-color picture that the participants in the dance event saw, but the one the picture painted by the flash. Therefore, if possible, then try to increase the exposure time (according to experience) to about 1/30-1/20 second and direct the flash at the dancers - then the flash draws the dancing couple in the photo, and the local light filling the dance floor creates an atmosphere in the frame . Thus, you can get a photo that feels close to the atmosphere that prevailed on the dance floor.