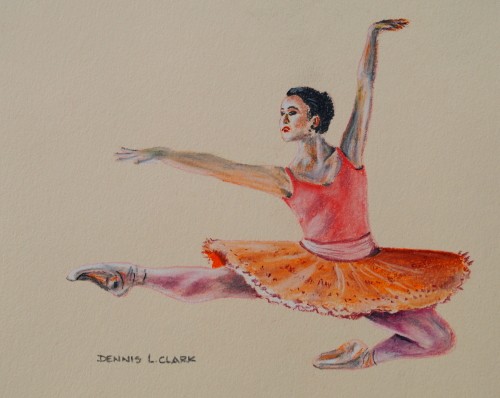
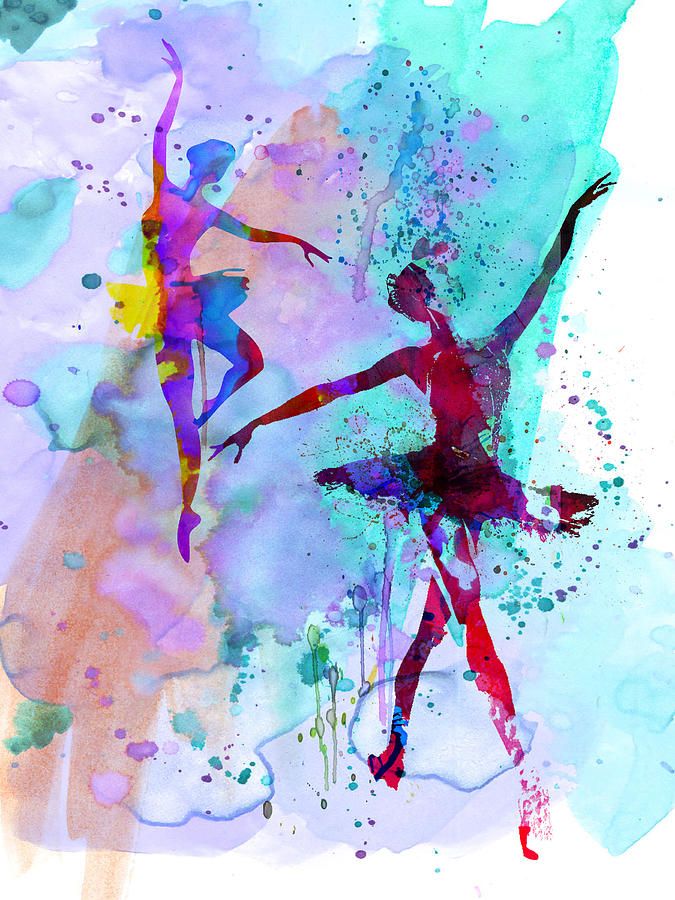
How to paint a dancer
Dance Painting - Etsy.de
Etsy is no longer supporting older versions of your web browser in order to ensure that user data remains secure. Please update to the latest version.
Take full advantage of our site features by enabling JavaScript.
Find something memorable, join a community doing good.
(1,000+ relevant results)
Abstract Ballerina Dancer Christmas ☃️ How To Paint Acrylics For Beginners: A Step-By-Step Tutorial
Abstract Ballerina Dancer Christmas ☃️ How to paint acrylics for beginners: A step-by-step tutorial ☃️❄️ Easy Acrylic painting tutorial for beginners. #AcrylicTutorial #TheArtSherpa #Painting course for those who want to learn how to paint better. It's all 100% real-time, multi-camera angles, and fully explained. YOU CAN PAINT THIS !! The Art Sherpa brings you all your art lessons. You can connect with other painters like you through our Live Stream Chats every video..
Difficulty meter level in Hoots :
✏️ FREE Student resources : www.theartsherpa.com
Chapters :
Below are a list of RECOMMENDED MATERIALS.
The Art Sherpa is a participant in the Amazon Services LLC Associates Program, As an Amazon Associate I earn from qualifying purchases.
Here are the materials I have curated for my classes
https://www.amazon.com/shop/theartsherpa
*** Acrylic Paint Colors ***
Cadmium Yellow Medium
Yellow Ochre
❤️ Cadmium Red medium
❤️ Quinacridone Magenta
Phthalo Blue Green shade
Ultramarine blue
Phthalo Green Blue shade
Dioxazine Purple
Burnt Sienna
☁️ Titanium white
Mars black
.
CANVAS
8x8
OTHER TOOLS
Sta-wet palette on show
Dritz chalk tool
T Square Ruler
Golden Glazing Liquid For Blending
Saral Paper
Artist Tape
The Pioneer Woman Turning Table
Brushes -
Please use these brushes as a guide for what I intend to use. These are brushes I use a lot. It is not necessary to have the exact brand of brushes that I use. The brands are D'Artigny Raphael brush, Simply Simmons Extra Firm, Princeton Catalyst and Select - When a brush is called a Hog Brush, it means it uses natural Hog Bristles
⭐️ Subscribe: http://bit.ly/TheArtSherpaSub
Check out my TopVideos! http://bit.ly/TheArtSherpaTopVideos
Check out my Upcoming Live streams http://bit.ly/UpcomingLiveStream
Follow The Art Sherpa
Website: https://theartsherpa.com/
Facebook: https://www.facebook.com/TheArtSherpa/
Instagram: https://www. instagram.com/theartsherpa
Pinterest: https://www.pinterest.com/cinnamoncooney/
Art Sherpa Merch : https://theartsherpa.com/store
#TheArtSherpa #AcrylicPainting
PLEASE note there are many other places to buy materials and I support you shopping and finding your best deal.
Please let me know if a link is broken. [email protected]
About The Art Sherpa:
Artwork and video is the sole property of The Art Sherpa™ and intended for the students personal education and Enjoyment. For questions regarding using any Art Sherpa painting in a commercial setting contact us [email protected] for all other questions [email protected]
Read our full disclosure here that covers partnerships and affiliate links http://bit.ly/affiliatedisclosureTAS
How to draw a ballerina with a pencil step by step? How to draw a dance with a pencil step by step
You can capture the moment of a graceful dance if you know how to draw a ballerina. Below are 2 versions of the image. Someone wants to paint an aspiring ballerina who looks like an anime heroine. Others may like the second image method, which will help draw a professional dancer.
Young ballerina. Starting to create from the head
Little draughtsmen can draw just such a heroine, she is funny and sweet.
Now we will tell you how to draw a ballerina. For beginners, this option is perfect, since in this image you do not need to draw the details of the face, each of them is drawn with just one line.
Start your creation by drawing a circle. Having placed a sheet of paper vertically, mark the contours of the circle. Draw a horizontal oval at the bottom of this shape. It will help to portray the chubby cheeks of a girl.
Here's how to draw a ballerina with a pencil step by step. In the center of the circle, draw two curved lines - these are the squinted eyes of the heroine of the canvas. Draw almost the same rounded line, similar to an inverted celestial month, draw just below the eyes - this is the snub nose of a little dancer. Her mouth will also help create a semicircular line, but it is curved down.
It remains to draw 2 eyebrows, and you can outline the face along the contours, indicating protruding cheeks. Draw the ballerina's hairstyle - smoothed hair, a bun at the top, and you can start depicting other parts of the body.
Body, arms, legs
Draw a line from the shoulders to both sides. Draw a small circle at their ends - this is a schematic representation of the palms. Draw the girl's hands, based on their scheme. Draw fingers at the end of the circles-palms.
Let's start drawing the legs. In the lower part of the body, in the middle, draw a small circle. This is the upper part of the dancer's left leg. You will also create the same detail of the right leg using a small circle. Two lines originate from these figures. The first goes down, the second - to the left. As you already understood, the dancer stands on one leg, and stretched the other back. She performs a fouette or other ballet movement.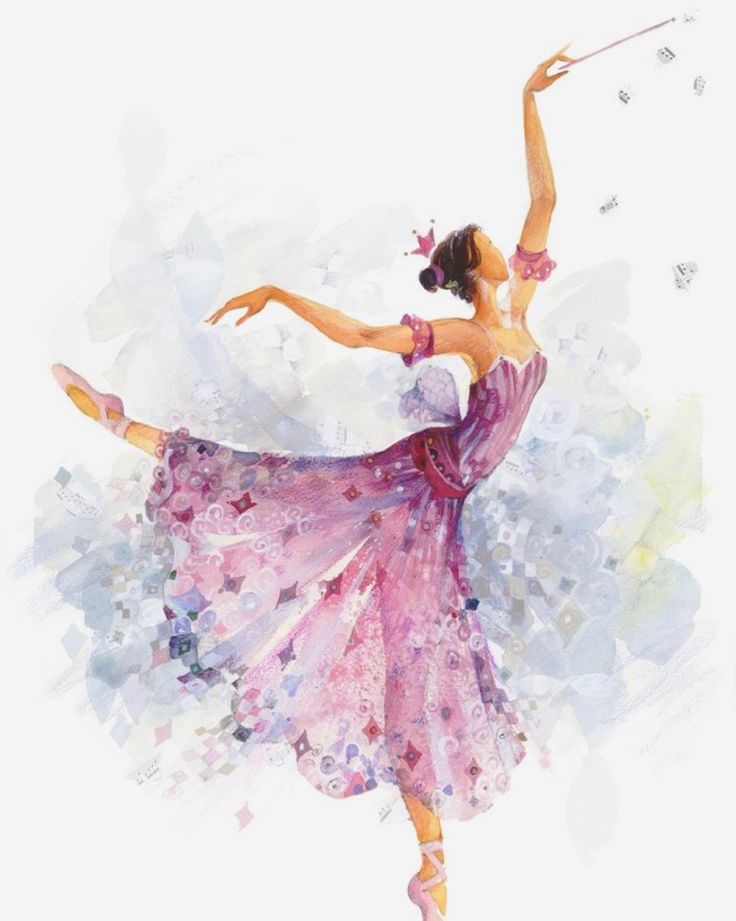
Finishing the first drawing
Now outline the legs with pointe shoes at the end. The lacing with which they are fixed on the leg is tied around the calves.
Talking about how to draw a ballerina with a pencil step by step, it should be noted that it's time to erase the auxiliary lines. This is easy to do with an eraser. Dress up the dancer in a leotard and a fluffy skirt. The upper part of the robe is on thin straps, it fits the girl's figure. The skirt is semicircular, draw its bottom with a wavy line. If you like the drawing, you can leave it like that. Color the painting if you like. Walk through the hair with a black pencil, make the dress pink.
Here's how to draw a ballerina who is still quite small. If you want to portray a girl, a professional dancer, use the tips below.
We draw an adult ballerina, starting with a diagram of the head and torso
We also start drawing a graceful girl with circles. Two of them will be the same size. First draw the first one, positioning it at the top of the sheet. Draw a small straight line from it down to the right, attach a circle of the same size as the one just shown to its end - this is the upper body. From this circle down and slightly to the left, draw another line, but it is larger than the previous one.
Draw a circle at the end of it too, but it is slightly larger than the previous two. This is a schematic representation of the hips of a dancer. Create her legs using two straight lines. The first is drawn from the circle down, the second - to the left and slightly up. Here's how to draw a ballerina to convey her image at the moment of performing a dance move.
Sketch of the legs and arms
Now you need to draw the upper part of the legs, calves and feet. You will do this with the help of ovals, which are slightly beveled towards the bottom. The top one is the largest, it ends with the knees. Next comes a smaller oval - these are the strong calves of the girl. She has pointe shoes on her feet, her socks are stretched out.
A small circle that is drawn from the upper part of the torso will soon turn into the girl's shoulder. From it to the left and quite a bit up goes a straight line, which will soon become the dancer's hand.
Outlining auxiliary lines
Performing a dance movement, the girl tilted her head back. Facial features will help convey this. The eye and nose are almost on the same straight line. Since the girl is facing the viewer in profile, only one of her eyes is visible. Draw lips, chin.
Her hair will help convey the fact that the ballerina is in motion: they are fluffy. Outline their growth line and show volume with several slightly wavy lines placed horizontally.
Speaking about how to draw a ballerina with a pencil gradually, it must be said that the girl's neck is slender, thin, like her figure. This is even more clearly seen when the ballerina tilts her head back.
From the bottom of the chin to the beginning of the chest, draw a straight line down and slightly to the right.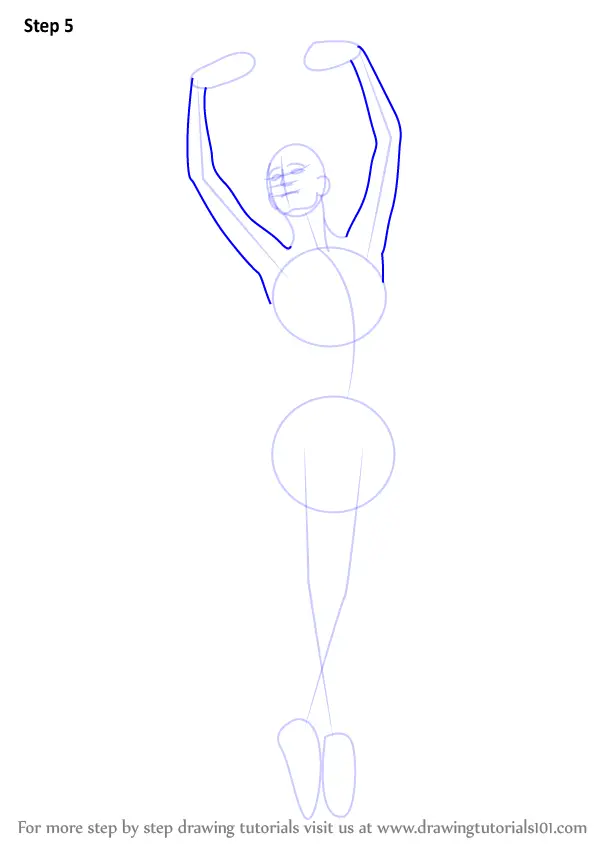 In the photograph, this feature is shown in red. Next, outline the ballerina's chest, her belly. From the line of the hips, draw the full tutu of the dancer, then draw her back and finish the image of the upper body by outlining the arms. Do not forget that the girl's hands and fingers are thin.
Based on the ovals created earlier, mark the heroine's legs, they are wearing pointe shoes.
Finishing the Art
At this stage, you need to erase the sketchy lines with an eraser and dashes in the upper part of the legs. Here you will draw the dancer's tutu. The photo shows how to give it volume. Designate the armpit, then depict the upper part of the adjacent garment.
Here's how to draw a ballerina step by step using a pencil. If you like, you can depict the scene, let the graceful girl soar across it in a magical dance.
This is an average lesson. It can be difficult for adults to repeat this lesson, so I don’t recommend drawing a ballerina for this lesson for young children, but if you have a great desire, then you can try. I also want to note the lesson "" - be sure to try to repeat it if you have time and desire to draw today.
What you need
In order to draw a ballerina we may need:
- Paper. It is better to take medium-grained special paper: it will be much more pleasant for novice artists to draw on this particular paper.
- Sharpened pencils. I advise you to take several degrees of hardness, each must be used for different purposes.
- Eraser.
- Stick for rubbing hatching. You can use plain paper rolled into a cone. She will rub the shading, turning it into a monotonous color.
- A little patience.
- Good mood.
Step by Step Lesson
Many professions are chosen and some are not. It is very pleasant to draw a ballerina, this profession is very unique not only by the kind of activity, but also by its costume. The artist needs to draw not only a person with all the features of the anatomical and physical nature, but also a costume, which can be more complicated.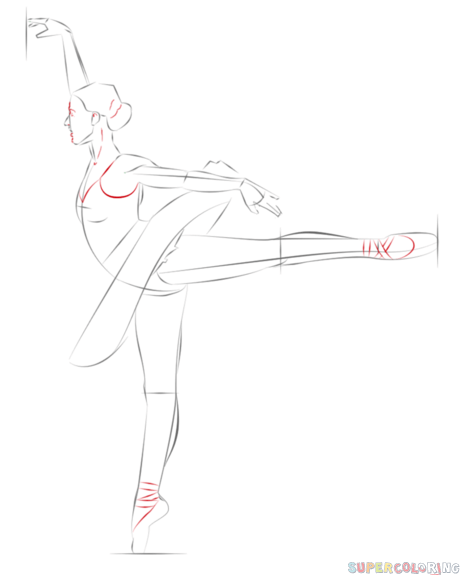 I strongly recommend that you look at the photos before starting work on this character.
By the way, in addition to this lesson, I advise you to pay attention to the lesson "". It will help improve your mastery or just give you a little pleasure.
Please note that every object, every living being, every phenomenon on paper can be depicted using simple geometric objects: circles, squares and triangles. It is they who create the form, it is them that the artist needs to see in the surrounding objects. There is no house, there are several large rectangles and a triangle. This makes building complex objects much easier.
Tip: Sketch with as little thick strokes as possible. The thicker the strokes of the sketch, the more difficult it will be to erase them later.
The first step, or rather zero, is always to mark a sheet of paper. This will give you an idea of where exactly the drawing will be. If you place the drawing on half of the sheet, you can use the other half for another drawing.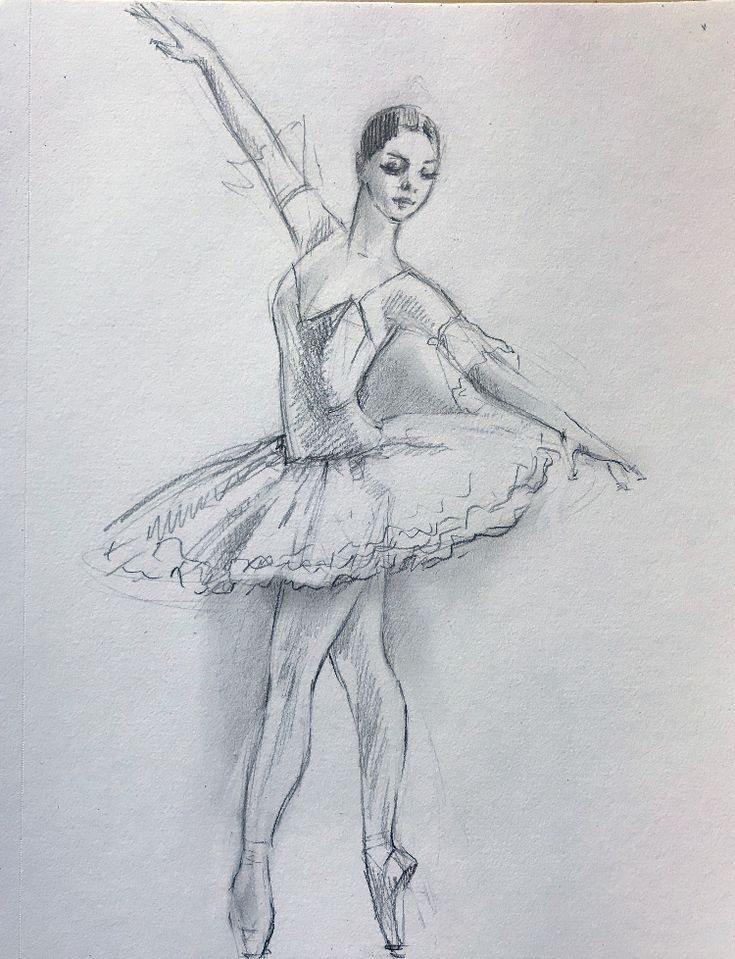 Here is an example of marking the sheet in the center:
The lesson "How to draw a ballerina" is designed for those who already know how to draw well, since drawing a person is not at all easy. Drawing a picture of a ballerina is especially difficult, because the drawing needs to convey the grace and grace of a ballet dance. But if you want to draw a ballerina, try to do it step by step. Drawing, in stages with a simple pencil, you may well get a beautiful drawing of a ballerina.
1. The initial contours of the drawing of the ballerina
The main thing is to strictly observe the proportions and location of the contour initial lines, then the drawing will be more accurate. First, draw a ballerina's skirt (tutu), in the form of an inclined oval, only draw a sharp left edge. Next, draw two lines for the ballerina's legs, two and a circle for. Now it will be easier for you to draw a ballerina.
2. The general shape of the ballerina
In the next steps, you just need to add lines to the main outline with a pencil, drawing out the ballerina's figure completely. Draw the line of the shoulders, the line of the waist and the approximate shape of the legs. The ballerina should be slim, so try to draw her figure graceful and tall so that the ballerina does not turn out to be full.
3. Completely draw the shape of the ballerina's legs and arms.
Draw the complete shape of the ballerina's legs and arms. In the dance, she stands on her toes, so drawing them is actually easy, especially since she has pointe shoes on her feet. The ballerina's legs should be slender, don't make them too full.
4. Remove extra contour lines from the drawing. In any case, after you remove the extra contour lines with an eraser and draw the palms and fingers, the ballerina will already be “dancing”. It remains only to add a few details to the drawing of the ballerina and draw.
5. How to draw a ballerina's face
Drawing a ballerina is easy, but drawing a face is quite difficult, especially without experience. If you draw a picture on the whole sheet, then you need to try to draw a face in detail. If the picture is small, then it is quite possible to get by with just a few strokes for the mouth, nose and eyebrows and then slightly shade the face. the ballerina's hair is always tidied up, so a small outline around the head is enough. Now the ballerina is almost alive, and all that remains is to decorate her dress, or rather the ballerina's costume and add shadows to the ballerina's drawing.
6. The final stage of the ballerina drawing
Make the ballerina's tutu transparent, for this you need to leave as much white as possible. Draw the details of the corset and shade the entire drawing. Look again carefully, perhaps some you missed the little things, for example, strings on pointe shoes. Any drawing always looks more alive against the background of the environment.
7. Drawing a ballerina on a tablet
Since the ballerina is dancing on the stage, it is desirable to draw the stage too, it is possible even with the environment in the future, scenery. Just do not overload the drawing with additional elements so that they do not distract attention from the main character of the picture - a dancing ballerina.
Now you know how to draw a ballerina, I hope it was interesting and informative. Now you can pay attention to the lesson "" - it is just as interesting and exciting. Well, social network buttons are there for a reason =)
A ballerina is the embodiment of sophistication and grace in every ballet step. Therefore, it is sometimes difficult to realize all the painstaking and incredible work invested in the dance, from which it is impossible to take your eyes off. To keep memories of him for a long time, you can capture the most beautiful moment on paper - a dancing ballerina. If you follow step-by-step instructions, such a task is within the power of both an adult and a child.
How to draw a ballerina - the first sketches of a drawing
To give the drawing natural proportions of a person, you need to draw the contour of the future silhouette, adhering to the rules for the ratio of all parts of the body.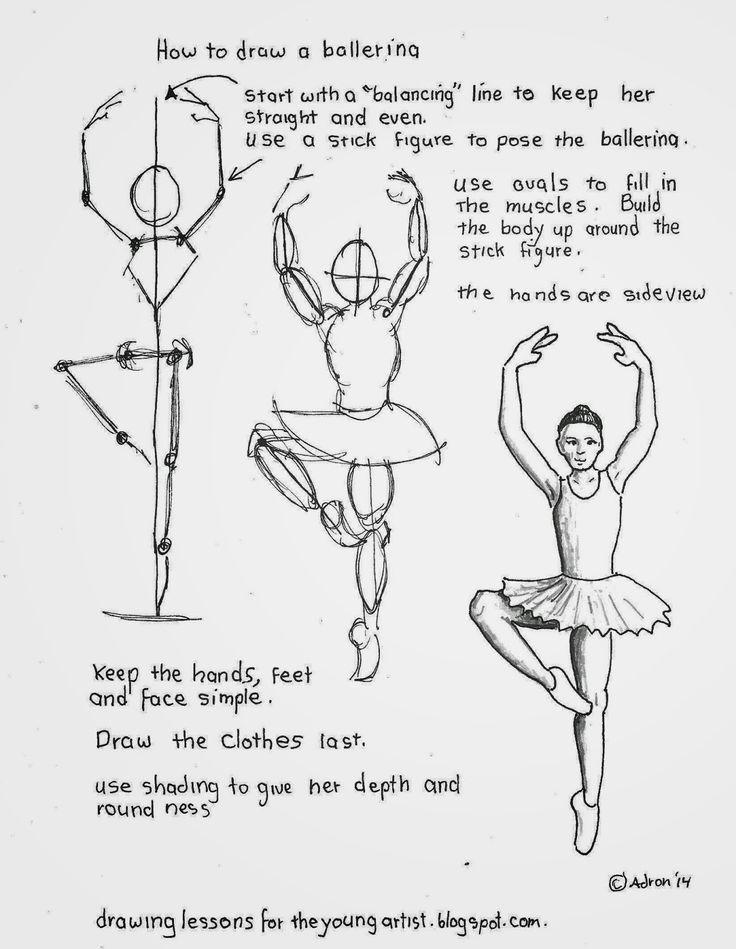 To do this, draw an oval in the middle of the sheet, which is slightly tilted down on the left side, while making the left side sharp.
How to draw a ballerina - give the primary lines a three-dimensional form
Now it's time to "spice up" the ballerina's look a bit. Emphasize the line of the shoulders and draw a narrow waist. Now give the drawn lines of the legs a believable shape.
Keep in mind that ballerinas are quite thin, so try not to depict body parts too curvaceous.
How to draw a ballerina - draw the ballerina's arms and legs
Draw the arms repeating all the curves. Then proceed to the end of the drawing of the legs - draw out the knees and slender legs with a pencil. Now draw a toe stand, considering that in the final version the ballerina will be in pointe shoes.
How to draw a ballerina - remove unnecessary drawing lines
Use the eraser to erase all the sketches that the drawing was drawn from. At this stage, the ballerina is almost ready.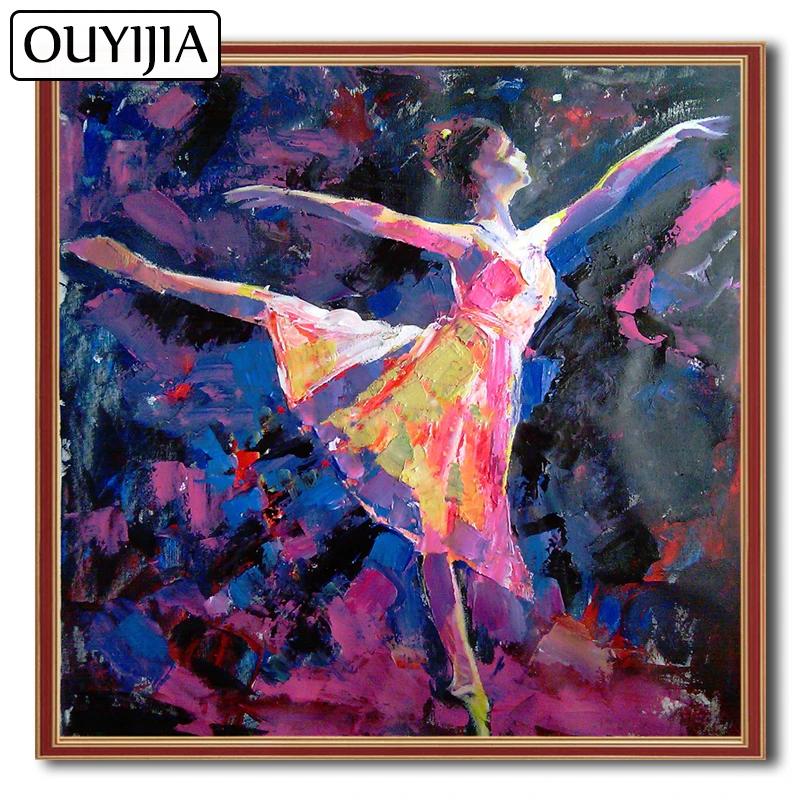 You just need to finish the palms with neat fingers. And then proceed to create the face of the dancer.
How to draw a ballerina - draw a ballerina's face
This step can be the most difficult if you don't have the skills of the artist. In this case, you should not be upset, it is quite possible to do it.
If you are drawing a large close-up of a ballerina, all elements of the face need to be depicted in more detail. To do this, divide the face oval into four sections using two lines. This will help draw the eyes and nose in proportion. And if you make a small image without detail, the general strokes of the eyebrows, mouth and nose will do just fine.
The ballerina's hair is always styled in a neatly styled bun, so draw only a thin outline of the hair on the head.
How to draw a ballerina - finishing touches
To make the picture more believable, you need to finish and decorate the dancer's outfit and use a softer pencil to draw shadows on the silhouette.
Draw a tight corset with a deep neckline. Add embellishments such as embroidery or rhinestones. Also draw light airy sleeves and drawstring pointe shoes. At the end, shade the entire drawing with smooth strokes.
Make sure you haven't left out any details, like adding ears or shoelaces. Optionally, you can add a floor in the drawing, and a blurry appearance of the scenery in the background.
According to this scheme, you can draw not only a wonderful ballerina, but a lovely princess or an ordinary girl.
Step by step drawing lesson for those who want to learn how to draw a ballerina . Here, of course, it is desirable to have some drawing experience behind you, but this will not be a stumbling block. Therefore, anyone can try and draw a ballerina step by step with us! I confess that drawing a person is not at all easy and we trained on a pirate, and we know. We practiced and we did great. And yet it will be very difficult to convey all the grace and sophistication of movements that the dance of a ballerina carries in itself. And at the same time it's easy with our simple steps! By drawing in stages, you will quite get a beautiful drawing of a ballerina at the end of the lesson. Good luck to you!
Step 1.
Here it is important to maintain proportions and stay within the initial contours and proportions of the drawing, then our drawing will turn out to be as accurate and beautiful as possible. And this is our first place! In the beginning, you will need to draw on paper the base for the skirt - the most important element in any ballerina's outfit. It's called a "pack". It should be a slanted ellipse shape with a pointed left edge. Then draw two lines for legs ballerinas , add two arms and a circle for the head. Now the main template is completed and it will allow you to draw a ballerina further with more ease.
Step 2
Now add more definition to the basic shapes to make the ballerina more defined. Draw lines for the shoulders, a line for her waist, and a roughly rough shape for her legs.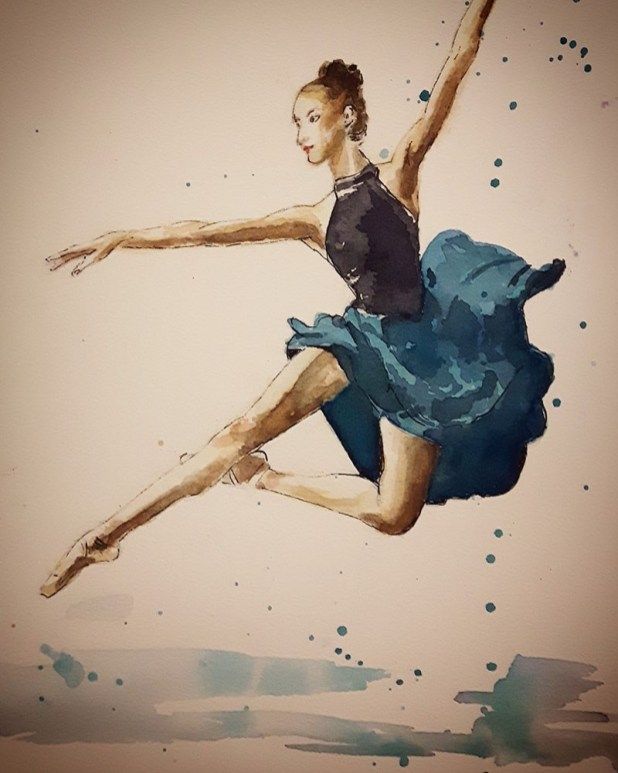 Ballerinas tend to be thin and muscular in the legs, although they are very slender overall. Therefore, try to make her figure convey the delicacy and grace of her profession. The figure should be slender, but without busting in this direction.
Step 3.
Finish drawing her legs and arms. In a beautiful and complex dance, she stands on tiptoe, so we are lucky and it will not be difficult to draw legs. They look very simple thanks to the fact that she wears pointe shoes. Try not to make her legs too thick so as not to ruin the look.
Step 4.
As the last step for the figure, erase all extra horizontal lines and contour lines and work on the arms of the ballerina. Draw her palms and. She is already dancing! We will add to the drawing of a ballerina only a few important details and draw a face.
Step 5.
The ballerina outfit is pretty easy to draw, compared to her facial features. Drawing faces and portraits requires some experience. If you draw your ballerina on the whole sheet of paper, then you should draw her face in as much detail as possible so that the features are close to natural. If your ballerina is not too big, then you can ignore all the details and just focus on defining the lines for her mouth, nose, and eyebrows. Shade the face a little and it will be very nice. The ballerina's hair is always styled very neatly - mostly in a large or small bun. Therefore, we should draw it with you in the form of a small outline around the head. Looks like a bun? Now your ballerina looks much more realistic and you only need to cut off part of her dress and add shadows on the ballerina's figure. We'll do this in the next step.
Step 6.
A ballerina tutu is usually translucent, so make sure you paint it with a pure white or pink tint. Draw the details of the belt or corset. Evaluate your drawing so you don't forget to add important details, such as pointe lacing. Keep in mind that drawings from real life look more realistic and this is important! Do not miss a single detail, this is the art and talent of the artist.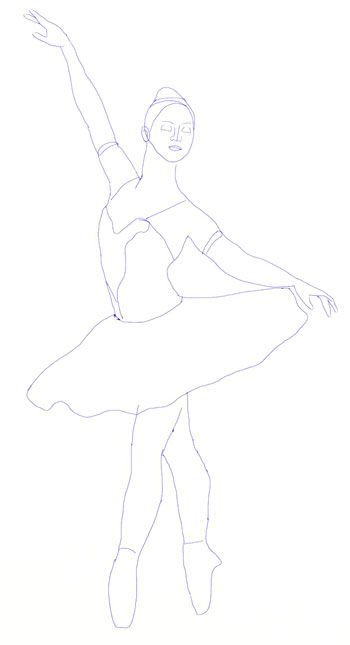 The ballerina is performing on stage and the background needs to be drawn accordingly. Be careful not to overload your drawing with additional elements; You should not take away attention from the main character of the picture.
Step 7.
Your dancing ballerina drawing is complete! A few facts about ballerinas that may be of interest to you.
- To sew one ballet tutu for a ballet dancer, you need about thirteen to sixteen meters of tulle and several days of work.
- During the year, the ballerina manages to change up to three hundred pairs of ballet shoes? although it’s hard for me to imagine how she dances, trains, and after class immediately throws holey pointe shoes from her corns.
- Ballerinas are extremely superstitious and shy. They have, for example, a tradition to enter the dressing room only with the left foot and nothing else!
- They also have a sign just before their performance on stage, in no case look in the mirror over their shoulder.
- Traditionally, ribbons on pointe shoes are sewn on by the shoe owners themselves.
- If pointe shoes are dropped, they are first tapped on the floor with their toes.
- In no case should you cross the road of a ballerina before performing on stage - an extremely bad omen for them.
- If one of the haters or envious people wants to offend the ballerina, then it is enough to throw an ordinary broom on the stage instead of a bouquet.
- A funny and very intriguing fact for ladies - male ballerinas lift at least a ton of lively and agile weight for each performance!
- Ballet has its origins in 15th century France, where at that time King Louis XIV was in good health, obsessed with dancing and dancers. It was he who in 1661 opened the very first Academy of Dances in Paris, which was based on ballet.
Now we have a step by step drawing lesson of a ballerina, or how to draw a ballerina with a pencil step by step.
1. First we will draw the face, to do this, draw a circle with very thin lines, then determine the direction of the face with straight lines. As you may have noticed, our head will be very small, so do not draw the eyes too much with a pencil, sketch the nose, eyebrows, you can draw another mouth. You can simplify the face very much, as in the drawing lesson. The contour of the face must be drawn correctly.
2. The important part is drawing the skeleton, you need to roughly draw it and show the main joints. Then we will gradually draw the body. At first we will draw hands, on the following picture the increased result. We will not draw the fingers, only the silhouette of the brush.
3. Draw the chest, top and skirt of the ballerina.
4. Draw the legs, now we can erase the whole skeleton.
5. Draw ballet shoes, more lines on the skirt and characteristic lines where the throat is.
6. If you see that something is not working for you, this place can be covered with some object, thing or hair. In this case, I didn’t like something in the hands and I drew bracelets, then the chest was very flat, I drew a few lines to emphasize it, and also drew a few additional folds on the top, painted over the hair. This is roughly the result you should get. I did not specifically focus on the fingers, because. start fiddling with them for a long time, get nervous and stop drawing.
A few simple tips on how to correctly draw a ballerina step by step
A ballerina is called a ballet dancer, a dancer whose movements are full of grace and grace. We will talk about how to draw a ballerina in stages in this article.
Starting with the skeleton
Drawing the human figure is never easy. The structure and shape of our body, as well as its movements, is determined by the skeleton. It also becomes the frame of the figure. In the completed drawing, it will not be visible, but in any case, you need to start with it. Therefore, before drawing a ballerina in stages, we outline with the main lines, as it were, a wire skeleton, and only then we will create volume based on it.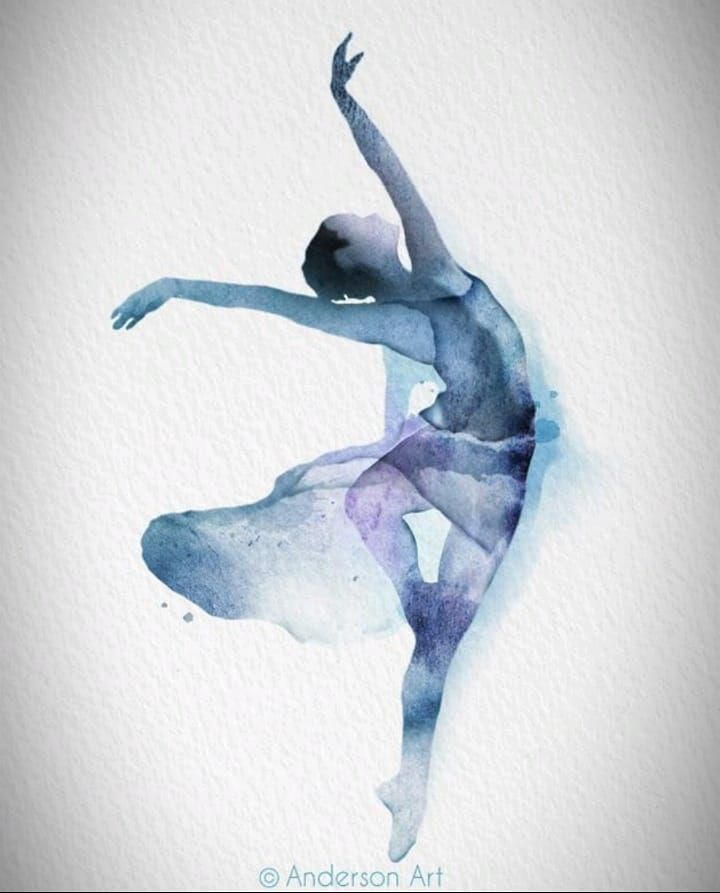
Secrets of Harmony
In order for the dancer's figure to be proportional, it is necessary to take into account the dimensional ratios of body parts. The canons of proportions were tried to be brought out by ancient Egyptian artists. The universal principle of harmony was discovered by Pythagoras in the sixth century BC, it is called the "golden section". On its basis, the masters of the Renaissance developed a system of correlations that is still applicable today. According to her, the length of the human body from the base of the head to the hips is equal to three head sizes, and the length of the legs from the base of the hips to the ankle is four such sizes.
Outline the figure
Let's start learning how to draw a ballerina with a pencil, step by step depicting the outlines of the head, body and tutu - a specific tight skirt in which the artist performs. Let's draw a circle, which will then turn into a pretty face of our heroine, draw a gracefully curved line down from it, not forgetting the ratio of the sizes of body parts.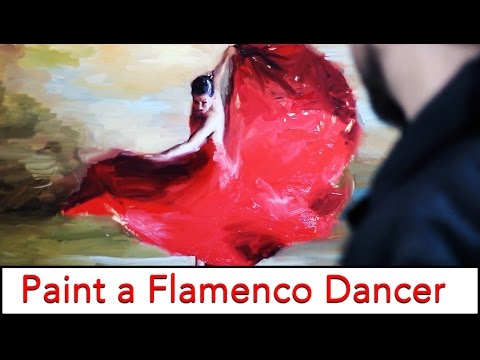 At the level of the base of the shoulders, draw a line crossing the line of the torso. These are the future hands of the model. Since we want to draw (in stages) a ballerina in the process of dancing, we will depict the wave of her hands with an inclined line, slightly bending in the head and neck area. A little below the waist level, draw an ellipse slightly tilted from left to right (future skirt), and under it - two straight lines at a slight angle. These will be the slender legs of the dancer. And here, too, let's not forget about the proportions: the length of the legs is approximately four times the size of the circle that we drew for the head. Considering that approximately one size is hidden from the eyes under the ballerina's skirt, the length of the visible straight lines will be the size of the torso.
Initial sketch
Having drawn the frame, we will “build up” the volume on it. We draw a pencil around the neck, torso, arms and legs of the ballerina, put her on pointe shoes - special ballet shoes that allow you to make ballet "pas", standing and moving on tiptoe for a long time.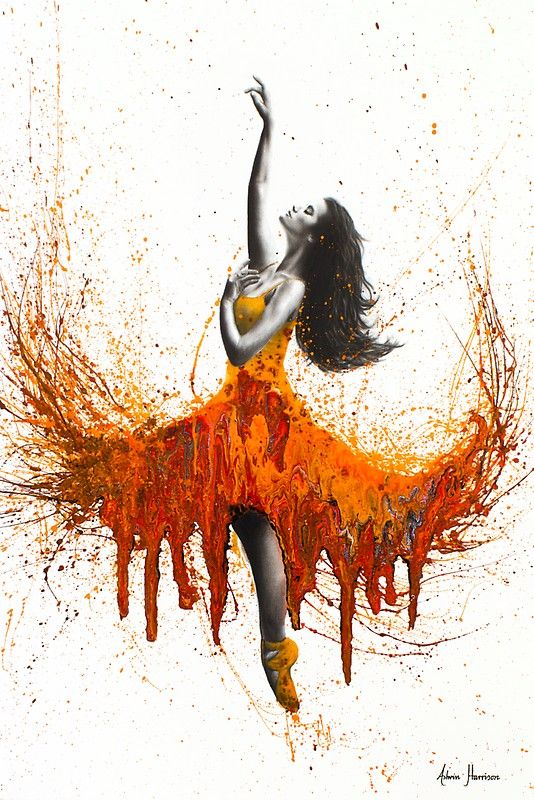 To highlight the dancer's right leg extended forward, we will impose the contour of the limb on the contour of the left leg, standing behind. This way we get a sense of perspective.
Refine the details
If we are satisfied with the result, we can safely remove the sketch of the skeleton with an eraser and confidently outline the entire figure with a pencil, refining the details of the body. Let's work on how to draw a ballerina step by step with a rounded shoulder line, smooth curves of thin but muscular legs, arms, hands. The figure should not be too thick or too thin. Ballet dancers, as a rule, are distinguished by flexibility, strength and harmony. Let's clearly depict the outstretched fingers on the ballerina's hands.
Before we draw the ballerina with a pencil in all the splendor of her outfit, let's work on the head and face of the model. Her hair is usually neatly combed back and arranged in a bun. Let's draw them using dense hatching. For greater lifelikeness, let's leave light highlights on the black strands.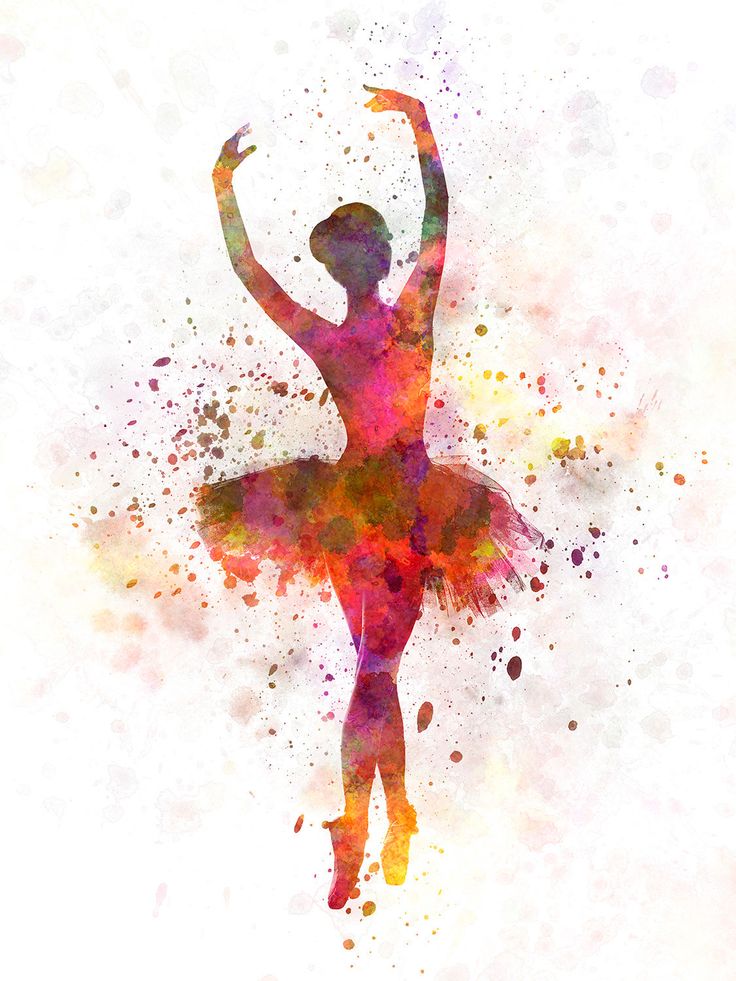 The ballerina's head is gracefully raised and proudly rests on her high neck. She is crowned with a small diadem.
Now let's focus on the face - let's designate the eyes and eyebrows, nose, mouth in the drawing. If possible, you can try to convey in the drawing the emotional state of the dancer, expressed in her features. Just by raising or lowering the corners of the lips, eyelids and eyebrows, one can depict sadness, joy, thoughtfulness, pain, laughter, contempt and concentration.
Draw the contours of the dress - sleeves, neckline, pattern, edge and relief of a translucent pack. Let's draw the details of the belt, lacing on pointe shoes.
Finishing the drawing
In general terms, these are the main tips on how to draw a ballerina. For beginners, it will be a good experience to draw light and shadow, making the figure the most realistic. To do this, imagine an imaginary light source. We will not shade the illuminated details of the ballerina's body, and we will shade those that are in the shade with a pencil, compacting the shading in the darkest parts.