How to move your hips while dancing
The Cuban Motion + Hip Exercises to Loosen Those Hips – Yami Dance Shoes
Photo Credit: Youtube
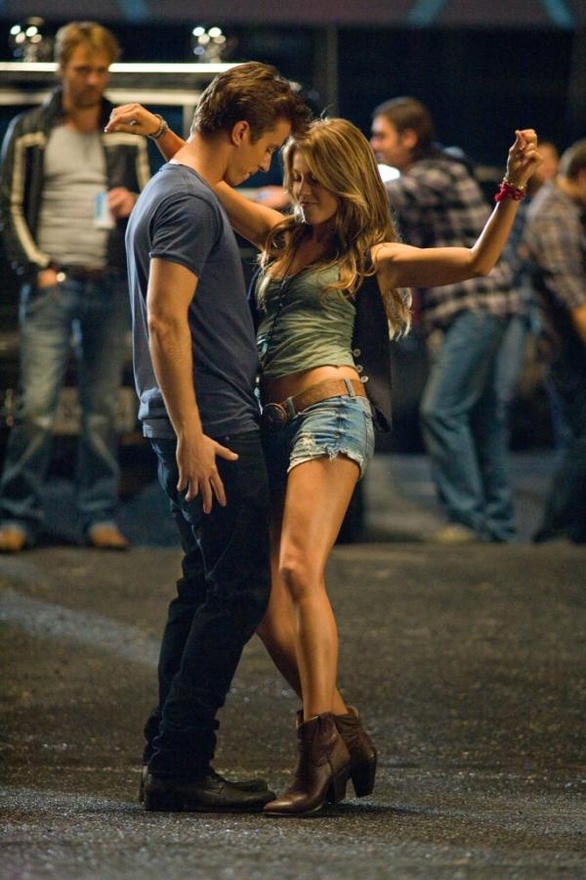
Latin dance is all about making smooth moves with the whole body. And depending on the dance style, Latin dance does require lots of hip action.
Cuban motion is a part of Latin dance that highlights the movement of the hips and the waist. Also known as the Latin hip action, this technique isn’t just about looking sexy on the dance floor. It’s about how the hip movements capture the sensuality of Latino rhythm. With your hips, you can express romance, sensuality, power.
The thing with the Cuban motion is that some people can execute it right away, and others take more training to get it right. Maybe you can’t concentrate the movement on the hips, or the action itself isn’t as smooth as you’d like. It’s frustrating when you have to spend more time perfecting the technique, but once you get the hang of it, your performance will look absolutely smashing on the dance floor.
Both men and women could use Cuban motion to elevate their performance. But women have wider hips and narrower waists, so the movements are more noticeable. It will take practice to loosen those hips and master the technique. Here are some tips to try:
Getting the Foot Position Right
The “openness” of your hips matters the most when you’re perfecting the Cuban motion, and this is determined by your foot position. It’s easier to twist and move the hips when the toes are pointing outwards. So that’s one thing to keep in mind when trying this move, do not move your feet inward! Dance every step with your feet at about 70º to build flexibility, and loosen the hips. If you’re not accustomed to dancing this way, you might feel a little pressure in certain parts of the hips, but that’s okay; you will get used to it the longer you do it.
It’s All About the Knee Action Too
Yes, the Cuban motion puts the hips front and center, but the knees also get their time in the limelight! To create the smooth movements of a Cuban action, you need to alternate the movements between the knees.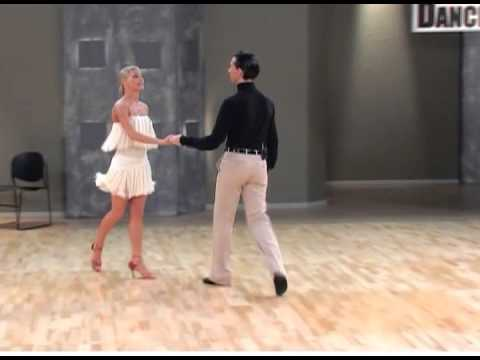 Stand with your feet together, toes pointing outwards. Bend one knee, then keep the other straight, then smoothly alternate the action by making a twisting motion with your hip. Don’t push too hard; the body weight shift between the knees should be smooth and natural so the actual dance move won’t look awkward.
When shifting the weight between the legs, take a step as if you are climbing a flight of stairs. Step up as you bend your knee. As you shift your weight forward, push yourself up with the straightened left, then vice versa. This hip motion lets you concentrate the movement on the hips and not above the waist. Your ribcage should be over the knee as you straighten it.
Learn the Basics
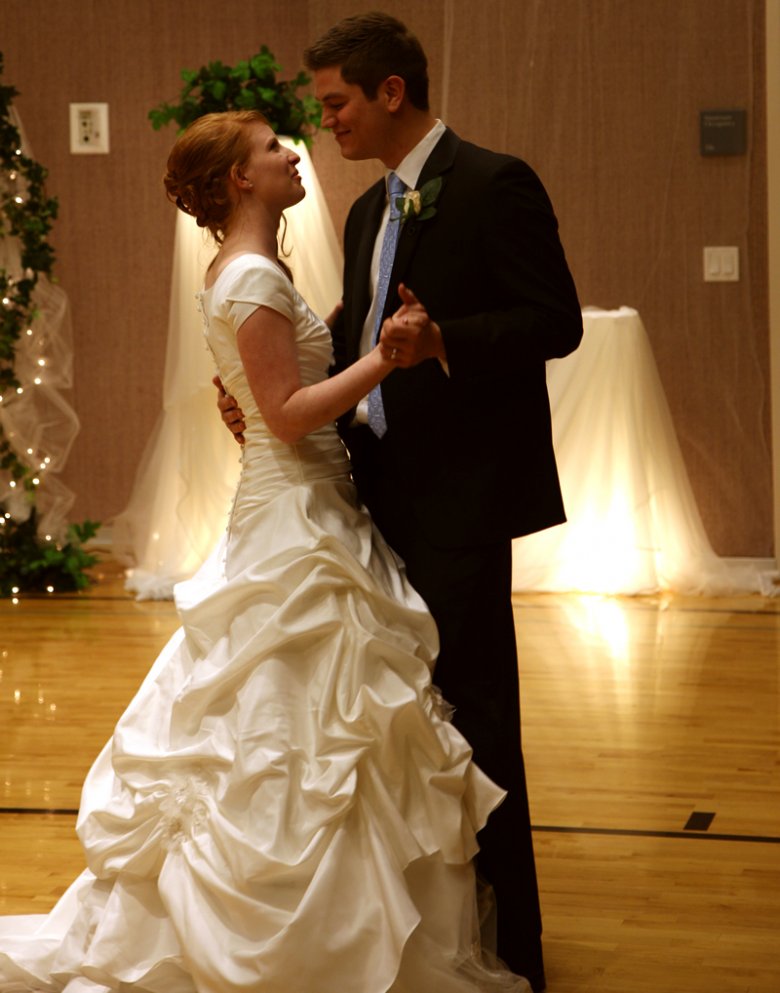
Now that you have an idea of the Cuban motion, it’s time to learn the basics of the dance style - whether it’s salsa, rumba, etc. Keep practicing the steps; make every step with your toes turned out and the knees bent. Keep the shifting of body weight smooth as butter and stick to the fundamental technique to improve your dancing.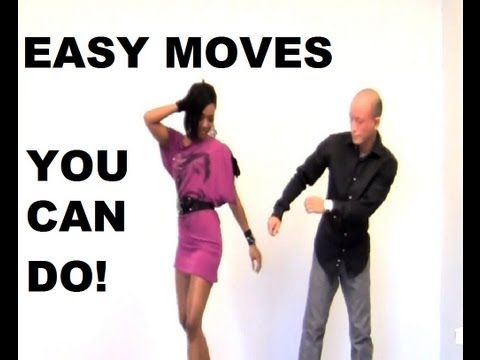 Maintain that connection with your dance partner, so the movements are synchronized. The hip action is hard to perform perfectly the first time, but you will master it in no time at all with practice.
Back to blog
Dance Advice | Flexible Hips and Hip Flexors — A Dancer's Life
Tight hips and hip flexor muscles are a common complaint for dancers.
 When your hip flexors are tight they restrict your range of motion, particularly hip hyperextension, which is required for that beautiful arabesque line we all long for. But what are the hip flexors and how can we prevent tightness and restricted movement? The hip flexors are a collection of muscles around the top of the thighs and groin which connect the upper leg to the hip. These muscles allow you to raise your leg and bend at the waist. Some of the main hip flexor muscles are the rectus femoris, tensor fasciae latae, artorius and iliopsoas. Tightness of these muscles can be a result of gripping in the front of the leg or sitting for long periods of time. The tighter these muscles get, the less flexibility we have which can lead to pain and discomfort. To compensate for the restriction that occurs as a result of this tightness, dancers tend to rotate the pelvis incorrectly, which can lead to further injuries, including lower back pain. To loosen up tight hips and relax these muscles we’ve listed 5 easy exercises you can perform daily to promote flexibility and fluidity of movement.
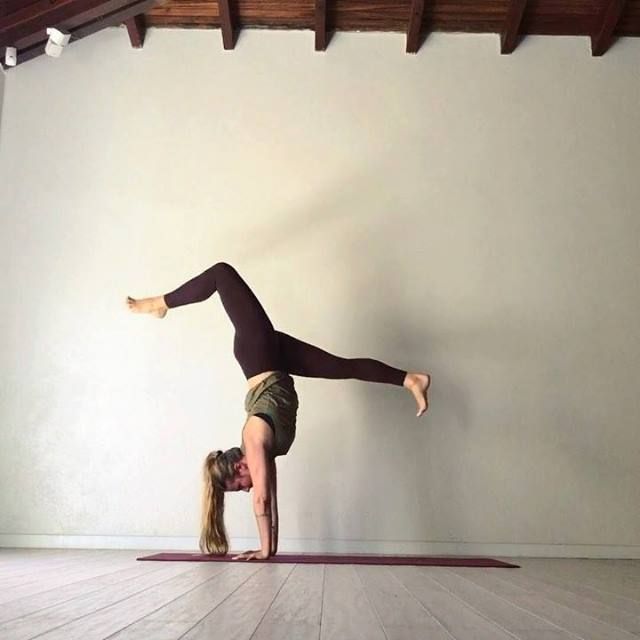
Pigeon Pose
Commonly seen in yoga practices, this stretch can be used daily to improve mobility and flexibility of the hips and hip flexors.
Begin on your hands and knees in a table top position.
Bring your right knee forward and place it behind your right wrist. Then place your right ankle in front of your left hip.
Straighten your left leg behind you, making sure your left knee is straight and your toes are pointed.
Keeping your hips square, gently lower yourself to the ground.
Hold the stretch for 15-30 seconds.
If you’re comfortable with this you can lean the upper body forward over the bent leg to enhance the stretch, arms stretched in front of the leg. Hold for another 30 seconds.
Release the position by pushing up on your hands, lifting your hips and moving the legs back to the starting position on all fours.
 Repeat on the other side.
Kneeling Hip Flexor Stretch
This stretch can be performed daily with the intensity increasing each time you perform the exercise.
Kneel on your right knee.
Place your left foot on the floor in front of you at a 90º angle.
Straighten your upper body and place both of your hands on your left knee.
Extended your right leg behind you with your knee and top of the foot resting on the ground.
Drive your right hip forward to slightly deepen the stretch. Ensure to keep your core engaged and back straight.
Hold for 30 seconds then release. Repeat on the other side.
Static Hip Flexor Stretch
Best performed when your muscles are warm this stretch lengthens out the hip flexor muscles.
Kneeling on your right knee, place your left foot on the floor in front of you at a 90º angle.

Leaning forward, place your hands either side of the left foot .
Lift the back knee off the ground so you’re in a lunge position, maintaining a 90º angle with the front leg.
Hold the stretch for 15-30 seconds and then repeat on the other leg.
Butterfly Stretch
This is a great exercise to perform after sitting down for long periods of time or as part of your warm up or cool down.
Sit on the floor with both legs straight out in front of you.
Bring the soles of the feet together, moving your heels as close to the body as you can.
Lean your body forward over the feet with a straight back.
You can also push on your thighs with your elbows for a deeper stretch. Hold for 30 seconds.
Sitting Glute & Hip Stretch
The perfect exercise to do when you are watching TV, sitting at a desk or as part of your warm up/cool down.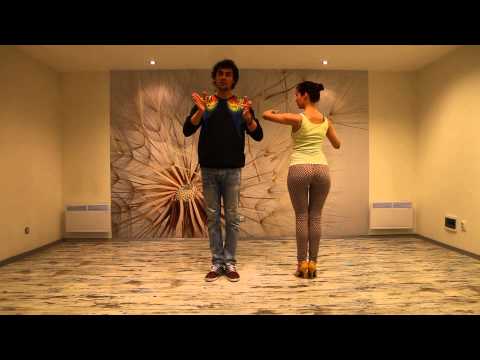
Sit on a chair with your back straight.
Place your right ankle on your left knee.
Fold your torso forward until you feel a gentle stretch.
You can enhance the stretch by pushing down on the right knee with your right elbow as you’re leaning forward.
Hold for 60 seconds and then repeat on the other side.
If you feel your hips may need a little extra love, you can also incorporate the use of a foam roller or tennis ball into your warm up or cool down routine to assist with loosening the hip flexor muscles and surrounding muscles.
Emily wears the Lara Endurance Jacket, Dylan Legging and Neoprene Jazz Boot all in Black.
Hip flexibility and mobility is something that needs consistent work and attention. Some people will naturally have tighter hip flexors than others but that doesn’t mean they can’t also have flexible hips too.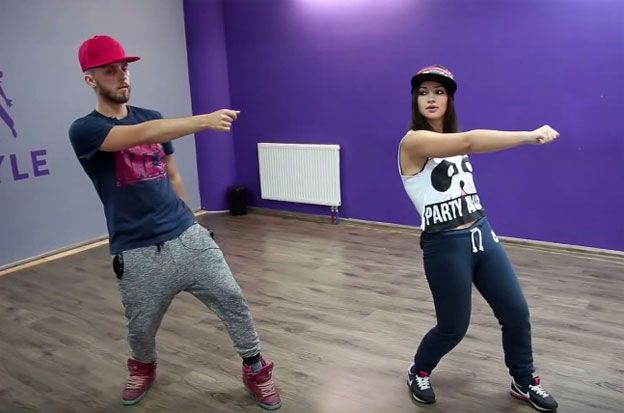 With regular stretching you’ll gradually start to see an improvement in your hip flexibility and strength which will flow into your dance ability.
For further tips and exercises to improve your flexibility and technique have a look at our Theraband Exercises for Dancers and Improving your Core Strength blogs.
Article by Sheree Ronai-Horvath
Photography by Elly Ford
Read More:
Thera-band Exercises for Dancers
So you want to be flexible…
Dance 101: Improving Your Core Strength
Dance Advice, Fitness, Health + FitnessEnergetikship flexor stretch, Hip flexor, Hips, flexibility, Dance Advice, exercises, Sheree Ronai-Horvath, Elly FordComment
0 LikesHip movements.
 Belly dance. Master's Lessons. Advanced level
 Hip movements
Starting position: standing on a full foot, legs slightly apart (about the width of the foot) and located on the same line parallel to each other, the body is slightly tilted back, the back is straight, the stomach is relaxed, the arms are lowered along the body, the knees are “soft”.
Performing an exercise “Swinging hips back and forth (“inward” and “awayward”)”. We take the buttocks back as much as possible, while we do not deviate back, hands are brought behind the back. Then we draw the buttocks into ourselves as much as possible, and bring our hands forward with a smooth movement. We tighten the hips, sharply reducing the muscles of the buttocks so that the pelvis leans forward and up a little.
Hold this position for a few seconds. Then we take the hips back as far as possible - the legs and body remain motionless - and arch.
We work in the vertical (frontal) plane. Again, we reduce (squeeze) only the muscles of the buttocks so that the pelvis leans forward and up a little ("inward"). Movement of the pelvis forward and up - back and up, emphasis at the farthest point of this movement - again the pelvis "in itself" - again back and up, emphasis, etc.
Try to keep the movement in the frontal plane along the path of the lower arc of the semicircle. Remember your posture: shoulders down, back straight.
Starting position: standing on a full foot, legs slightly apart (about the width of the foot) and located on the same line parallel to each other, the body is slightly tilted back, the back is straight, the stomach is relaxed, the buttocks are tightened, the knees are “soft” and slightly bent, arms to the sides. We perform a rocking chair with the hips.
The rocking chair is performed by alternately straightening the knees: without changing the position of the left leg, we straighten the right leg at the knee, due to which the right thigh is “pushed” up and we sort of pull it under the rib (in this case, the lateral abdominal muscles contract).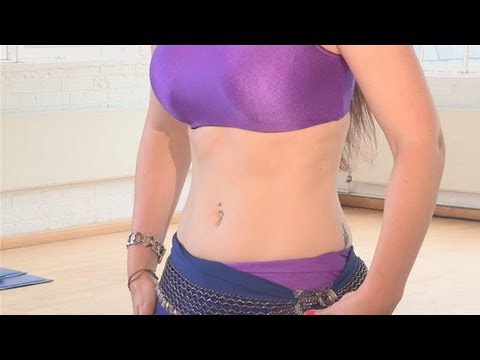
While moving, do not tear off the heels and do not shift the center of gravity from foot to foot. The top remains motionless and does not sway during the work of the hips. We make sure that the hips move only up and down, do not take them to the side or back. They should be relaxed - only the knees work. Now we bend the right leg at the knee - we lead the left thigh up.
We continue the alternating movement with one or the other hip, without deflecting the body and keeping the line of the shoulders in the same position - parallel to the floor.
Imagine that you have a bowl of water on your head and your task is not to spill the water. You can also try to put a book on your head during this exercise and try to move so that it does not sway, much less fall.
Execute rocking hips to the sides in three counts: right-left and a little more slowly to the right - slightly slow down the knee extension until the movement starts in the other direction (without a pause in the movement), left-right and slightly slower to the left, slightly slowing down the knee extension until the next movement starts in the other direction.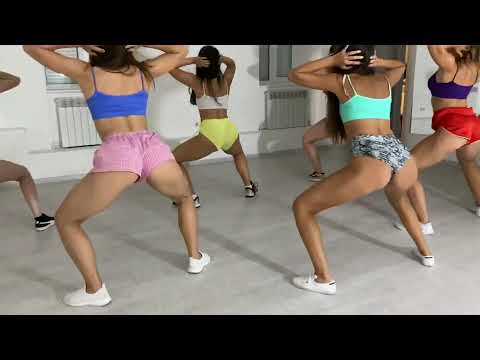 Movements should be smooth, unhurried, but continuous. Simultaneously with the rocking chair, we perform circular movements with the hands. Again we make a rocking chair with our hips to the sides without pauses. At the same time, we raise our hands up, at the same time performing rotations with the wrists along the trajectory of the eight. Repeat the movement with the hips at a fast pace.
If desired, the pace of side rocking with the hips can be increased even more: increasing it gradually and maintaining the rhythm, move on to shaking the hips. When shaking-rocking chair, the pelvis swings due to the work of the muscles of the lower back, the legs become freer. With this shaking, you can learn to walk quite easily. For example, climb on the "half-toes" and try to go forward with shaking, and then back. The faster the hips move, the more they need to relax. But don't forget to work with your hands.
If at first the shaking is good for you, and after a minute or two the muscles begin to “stone” and the shaking rhythm is lost, it does not matter. Stop, shake your legs alternately, relax your muscles and start shaking again. The vibration of the body is given by muscles relaxed at your will, and not by tension.
Performing a rocking chair at a fast pace, we take the pelvis forward, then back and then move in a circle to the left. So we impose movement "rocking hips back and forth" for movement "small circle of the hips in the horizontal plane" plus circular movements of the hands.
We connect the side rocker with the hips pulling with the hips, continuing to perform rotations with the wrists.
Hip pull is a basic element of oriental dance, a movement from the group of slips. It should be done every day during every workout.
Starting position: we stand straight on a full foot (legs are located on the same line), the body is slightly tilted back, the back is straight, the legs are shoulder-width apart, the knees are “soft”, the arms are at the sides. We take the hip as far as possible to the left (without ceasing to perform the rocking chair at the same time), leave the legs and the upper part of the body motionless and transfer the body weight to the left leg. Shoulders, belt line during pulling remain parallel to the floor, knees do not bend. We pull the hips to the right and transfer the weight of the body to the right leg. The hips move to the right and left with maximum amplitude.
Pulling with the hips stretches the lateral muscles, strengthens the muscles of the lower back and abdomen, perfectly tones the muscles of the waist, and also helps to prepare the body for further performance of various oriental movements (in particular, amplitude volumetric eights and rotations).
By sliding your hips, you can move back and forth and right and left.
After pulling with the hips, we move on to another basic movement, simple to perform, but effective and easily combined in dance with other elements, - eights. Let's start with the execution of horizontal eights (movements are performed in a horizontal plane clockwise and counterclockwise).
Horizontal figure eight backwards (“away from you”). While pulling, we lingered for a moment in a position where the left hip was maximally abducted to the left and, accordingly, the weight of the body was on the left leg.
Now we lead the right thigh diagonally forward to the right, turn it as much as possible and begin to outline the first half of the imaginary figure eight - we turn this thigh back.
Next, the left thigh is brought forward (the weight of the body is gradually transferred to the left leg), turns as much as possible (until you see your left buttock out of the corner of your left eye) and begins to outline the second half of the figure eight: to the left until it stops, and then back to the left.
Only the lower part of the body moves. Breathing remains even and smooth, like the movement itself.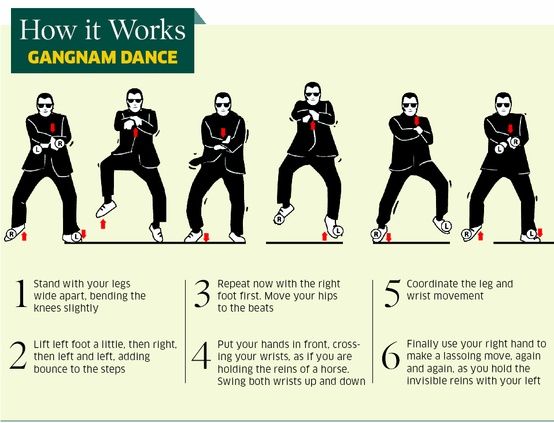
You can help yourself a little: when the hips are twisting in one direction, slightly twist the body in the other (so that the hips do not drag it along).
Straight knees, feet that remain parallel, and heels that stay on the floor will help to achieve a smooth, soft and continuous movement. Imagine that you are making your way forward without the help of your hands through some rather dense, viscous substance and, as it were, are raking it with your hips, alternately pushing it to one side or the other.
This exercise increases the elasticity of the ligaments.
Movement "horizontal figure eight forward ("inward")" schematically looks the same as the previous one, only performed in the opposite direction. We take the left thigh back diagonally to the maximum twisted position (in which the chest still remains motionless).
The weight of the body is transferred to the left leg. With a smooth circular motion, we describe half of the eight forward with the left thigh, maximally turning the right thigh back. We transfer the weight of the body to the right leg.
In a circular motion, move the right thigh forward and describe the remaining half of the figure eight. We try to bring the hips forward no less than back. We do not turn our shoulders. They must always look ahead. If you are still not very good at “separating” the top from the bottom, try doing the figure eight with your whole body first. I managed to catch the trajectory - you can move on to fixing the body and start moving only the hips.
Try to bring your hips forward no less than back, then the movement will be smooth and symmetrical. Keep an eye on the upper body: it should remain motionless, but not enslaved, keep the line of the shoulders parallel to the floor line.
When performing the figure eight, the legs should be placed parallel to one another and on the same line, not just for stability or beauty: if you put them in eversion positions (heels together, toes apart), then, involuntarily pinching the buttocks, limit the amplitude of their movement.
Another version of the eights with the hips - vertical eights, or, as they are also figuratively called, "pendulums". The second name of this dance component was not born by chance: remember how the pendulum of the clock moves, describing the lower semicircle of an imaginary circle, like a young crescent turned upside down with “horns”. The oriental dancer reproduces the described trajectory with the help of hip movements in a strictly vertical plane. Vertical eights can be performed, like horizontal ones, in two directions opposite to each other: “away from you” (from top to bottom) and “into yourself” (from bottom to top).
We still stand on a full foot (legs are on the same line and parallel to one another), the body is slightly tilted back, the back is straight, the buttocks are tucked up. But now, to perform the "pendulum", put your feet together. Body weight on the left leg. We tear off the right heel from the floor and raise the thigh as high as possible.
The weight of the body is gradually transferred to the right leg. Further, drawing a quarter of a circle to the right and down, we begin to lower the right thigh, at the same time pushing it as far as possible to the side, that is, to the right. From this extreme side point, we continue to lower the thigh to the lowest point of the circle thanks to the “soft” knee. Body weight on the right leg. We put the heel of the right foot on the floor and lower the right thigh down.
Now tear off the left heel (knee is relaxed), lift (due to lifting the heel off the floor) the left thigh up (as if leading to the armpit) and push it to the side as far as possible, without deflecting the body in the opposite direction and outlining a rather steep semicircle of the imaginary eights.
Pull the thigh towards you, returning to the starting position. We continue to draw symmetrical circles in a vertical plane. The body should remain motionless, and the line of the shoulders should be parallel to the floor line. Add hand movement to this dance element.
Hands in oriental dance move depending on the nature of the music, and therefore often their movements do not coincide with the movement of the hips: the hands work at least twice as slowly as the hips. If the hips are the rhythm, then the arms are the melody.
From the previous starting position, smoothly proceed to the next movement - step Suher Zaki, or "stilts".
We stand on straight lines, located on the same line parallel to one another on toes, the body is slightly tilted back, the back is straight, arms to the sides. We begin to alternately lower the heels to the floor in three counts. We lower the heel of the left leg - the left thigh goes down, then we raise the heel of the left leg, returning to its original position (on the toes), and lower the heel of the right leg.
Left - right - left - paused for a moment. Right - left - right - lingered for a moment. And so several times in a row in the rhythm of the sounding melody. We do not bend our knees - we only raise our hips. The head is on the same level: the movement occurs mainly only due to the hips. Continuing to perform the movement, alternately tear off the legs from the floor.
And now we “walk” on the spot without delays and stops, but still in time with the melody.
If this movement is performed correctly, you will feel the movement of the oblique muscles of the abdomen.
Performing the following exercise − hip dumps (otherwise - hip-down strikes). Starting position: standing in a half-squat and half-turned to the viewer. The body looks forward, the hips and legs are turned to the side at an angle of 45 °. We put the leg closest to the viewer (mirror) (working in this movement) in front of the one behind, on the toe, and expose its thigh and turn it forward (toward the viewer), as far as the body allows. The back is straight and slightly tilted back, arms are spread apart.
Try to keep your knees together while moving.
So, keep your chest and shoulders straight. We start the movement with the left foot, so we put it on the toe in front of the right, raise the right hand up, take the left hand to the side. Raise the thigh of the working leg up by straightening the knee, then sharply lower (throw) the thigh, again bending the working leg at the knee.
Do not lower the heel to the floor. We do the emphasis while moving down (at its maximum lower point). At the same time, the hands make smooth circular rotational movements. We repeat the movement a few more times, and then change the leg - we become half-turned to the viewer (mirror) with the right hip forward, respectively raise the left hand up, take the right hand to the side and work with the right hip.
If you relax your hips well and bend your leg at the knee, the hip will "fall" by itself.
Let's complicate the main movement "hip drop" with a leg extension, and we get a new movement - "classic key" (thigh drop with leg extension).
Starting position - as in the previous exercise: standing in a half-squat and half-turned to the viewer. The body looks forward, the hips and legs are turned to the side at an angle of 45 °. We put the leg closest to the viewer (working in this movement) in front of the one behind (supporting), on the toe, and expose its thigh and turn it forward (toward the viewer). The back is straight and slightly tilted back, the arms are spread apart (option - the arm of the same name as the supporting leg is raised up).
We perform one reset with the right hip, the emphasis is while moving down (at its lowest point). Raise the right thigh again, and then lower it, while throwing the right leg forward, the toe of the foot stretches forward and down.
Raising the hip up each time, we continue to alternate the impact with the hip down (hip drop) with the hip drop with leg extension. We perform this movement several times, and then change the leg - we work with the left thigh.
"Key" can be performed on weight. In this case, when the leg lunges forward, its toe does not touch the floor, that is, we keep the leg in the air.
We continue to develop the spine and back muscles.
We change the starting position: we stand on a full foot, legs slightly apart (about the width of the foot) and located on the same line parallel to each other. The body is slightly tilted back, the back is straight, the stomach is relaxed, the knees are “soft”, the arms are at the sides, the weight of the body is on the left leg (as in a pull).
Execute semicircle hips.
We take the hips forward - the body deviates back, but the head does not throw back in any case (!) - and take it to the right, outlining (with maximum amplitude) an imaginary semicircle.
Now let's do a full circle.
Hip circle is a movement familiar to each of us since school or even kindergarten times. He was certainly included and is still included in a variety of gymnastic complexes called "hip rotation".
At first, to help you check if your shoulders and upper chest are moving horizontally or vertically during the exercise, you can put your hands on your shoulders.
Combine the semicircle with the hips forward with the semicircle back and perform a full circle with the hips to the left on straight legs. The hips move along all four points: we take them forward (the body leans back, but the head does not throw back), we take them to the left, wrapping the hips, we take them back, transferring the body weight to the right leg, we take them to the right, etc.
While the hips make a circle, the head, shoulders and arms remain at the same level. We repeat the rotation of the hips to the left again, and then we perform a circle in the other direction: right - forward - left - back, trying not to move the upper body and keep the line of the shoulders parallel to the floor line.
This text is an introductory fragment.
Driving mode control information
Driving information When driving a car, the driver receives a huge amount of information, but attention must be focused on the main thing that determines the traffic situation at the moment or interferes with traffic and threatens to run over or
Circle movement adjustment
Adjusting the movement of the circles The speed of movement of the circles depends primarily on the specific gravity of the material from which they are made (foam and cork circles float faster in the wind than wooden ones). The thicker the circle, the faster the movement. At the circle with a thick and
Breast movements
Breast movements Check your posture.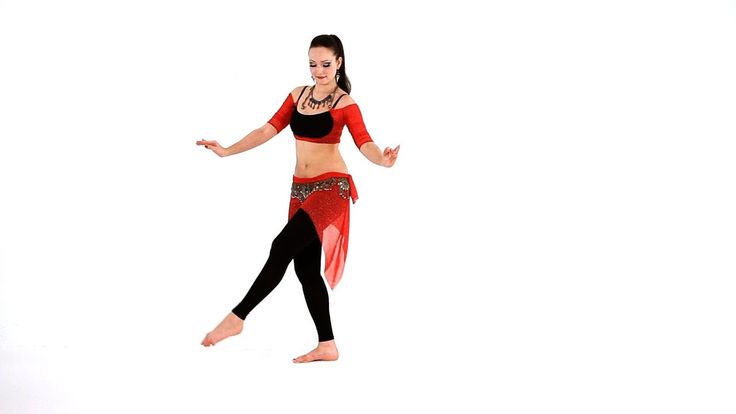 Stand up straight, pull in your stomach, push your chest slightly forward, both feet are stable and firmly on the floor, arms are spread apart. We start chest movements. Without moving the lower part of the body, we raise (push out) the chest with a short movement
Tilt motion
Tilt movements Let's move on to the movements in the pull. Starting position: stand straight on the full foot (legs are on the same line), the body is slightly tilted back, the back is straight, the legs are shoulder-width apart, the knees are “soft”, the arms are at the sides. Pull the hips to the right and shift the weight
Walking with cane on shoulder
Walking with a cane on the shoulder Holding the cane on the right shoulder, perform penetration "C grade" with a turn in place around its axis in the direction to the left.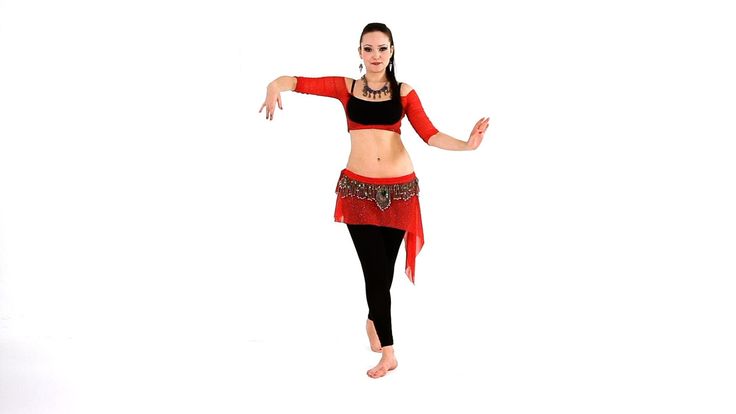 Raise the left thigh and leg, bent at the knee, up. Then we lower the thigh down (while the left leg is still
Movement with shawl
Movements with a shawl The dance with a shawl (scarf, veil, handkerchief) is one of the most traditional. A scarf can amazingly transform, decorate the movements of a dancer. Its possibilities are almost limitless, and therefore working with it is a special pleasure. Competently
Travel speed
Travel speed One of the key factors affecting the efficiency of the car is the speed of movement. Everyone knows that the most economical driving mode is driving on a country road in calm weather at a speed of about 80–90 km/h at the highest (in
How the motion sensor
works How is the motion sensor In the middle of the sensor there are receivers of IR light - photocells.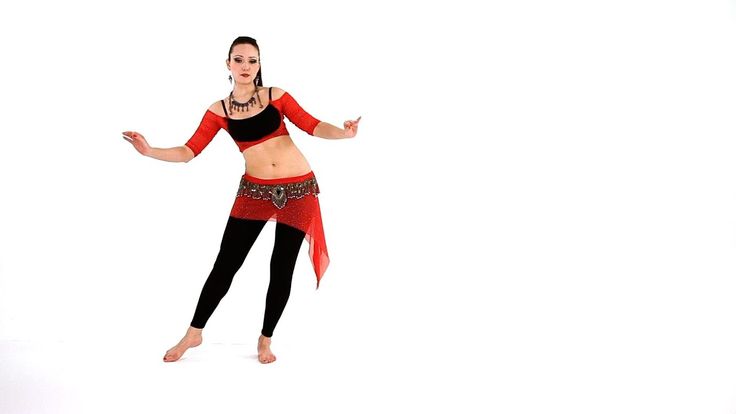 The Fresnel lens consists of many small lenses, each of which focuses IR light on the plane of the photocell, and one of them focuses directly on the photocell itself (signal
Motion sensor infrared Camelion
Infrared motion sensor Camelion The motion sensors of the Chinese company Camelion are widely and varied in stores. Economy-class infrared sensors, which were created as energy-saving switches, primarily lighting, although their functions are almost
3.5.6. Motion detectors LX-19B and LX-2000
3.5.6. Motion detectors LX-19B and LX-2000 Infrared motion sensors are commercially available, adapted in shape to wall light switches for flush wiring (Fig. 3.62) LX-19B and LX-2000 (Fig. 3.63) manufactured by the Chinese company Litarc Lighting & Electronic Ltd. Rice. 3.62. Household light switch
3.
 5.8. Setting motion sensors
 3.5.8. Setting motion sensors Sensors are adjusted by potentiometers; usually there are three of them (Fig. 3.69): • to set the sensitivity of the sensor (SENS), the brightness of the IR light is set, to which the sensor must respond; • to set the delay time for switching off the lighting
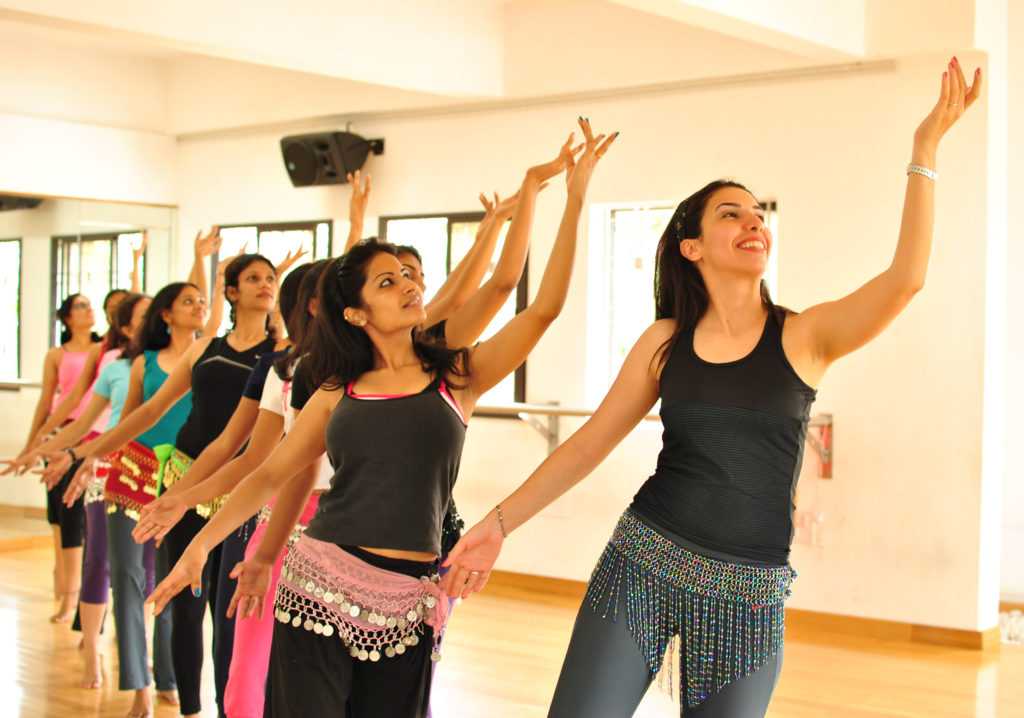
Move your body: oriental dances for beginners
Indian dances still fascinate with their energy and beauty. You can learn how to dance oriental dances without leaving your home. We share detailed instructions.
Tatyana Shamanina
Tags:
East style
Oriental beauty
Eastern dance
indian celebrities
Indian film
Shutterstock
Search the material for simple oriental dance lessons for beginners.
Oriental Dances: Basic Movements for Beginners
Slides
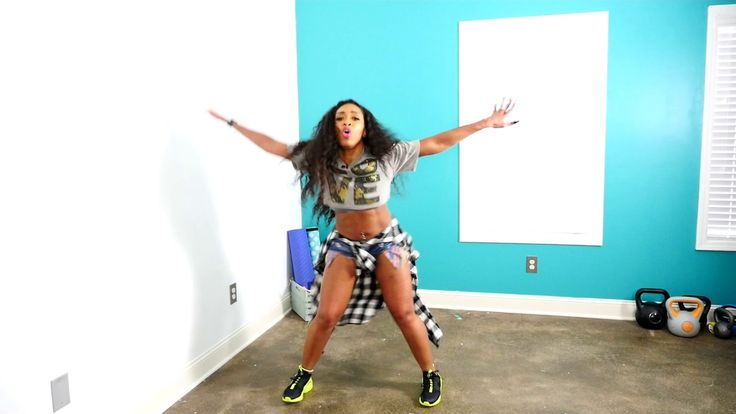
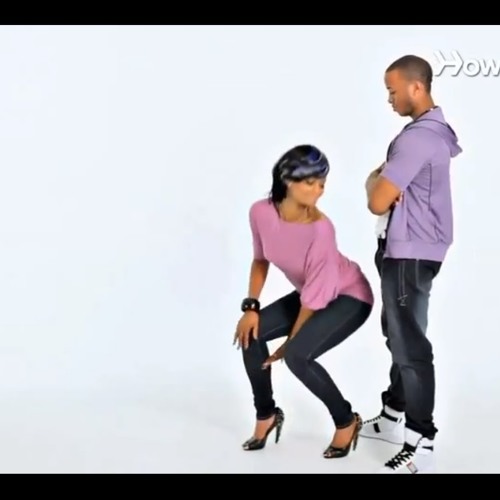
Stand on the floor with your back straight. Spread your legs hip-width apart. Start lifting your hips alternately, shifting your weight from one leg to the other. During movement, the upper body must be motionless. To understand the mechanics of the bundle, imagine that your hands are full and you need to close the car door. Gradually increase the pace. If you sign up for oriental dance lessons, the training will begin with this simple basic movement.
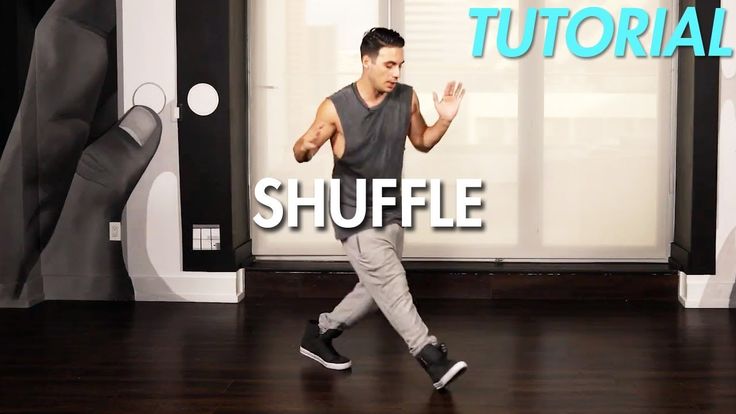
Shimmy
The basic shimmy starts from the standard oriental dance position - you stand on the floor and straighten your back. Next, you need to relax the entire lower body - from the hips to the feet. Distribute your weight evenly on both legs. Then push your right knee forward and immediately return it back. Repeat the movement on the opposite side. Practice the movement at low speed at first, then pick up the pace as soon as you're ready. Remember - the upper body must be stable and isolated from the lower. In addition, it is important to maintain the rhythm of breathing while dancing.
Curves
Get into the starting position with feet firmly on the floor and back straight. Then shift your weight from one foot to the other, straighten your lead leg and stand on your toes. Put your other foot forward. Start slowly moving your legs forward and backward, moving to the side. While moving, twist your pelvis so that the steps are smooth.
Circles
Stand on the floor with your feet slightly apart. Now start rotating your chest in a circle. Keep your back straight and pull your stomach in a little. Imagine that your circle is made up of many points. While moving, smoothly connect them with one line. Don't lean forward and don't fall back. The upper body should move on its own without the help of the pelvis.
Figure of eight
The simplest version of this combination is the horizontal figure of eight. Imagine a figure eight and start moving your hips, following its contours. Glide smoothly and continuously - this way the movement will look harmonious and beautiful.
Oriental dance costume: 5 essentials
Light scarf
Oriental dance starts with functional accessories. Dancers use long scarves to practice smooth movements, and decorated scarves are tied around the hips for a spectacular performance. Oriental shawls are usually decorated with fringes, beads or coins. By the way, it is the scarf that will help beginners understand whether they are performing the movement correctly.
Oriental dance skirt
Another must have in the oriental dance costume is the skirt.