How to make dance wings
DIY Isis Wings (Veil Wings)
by Mao on in DIY Belly Dance Costume Blog, Uncategorized • 8 Comments
It’s November, and Christmas events are coming up!
As dancers we must prepare for those events ahead of time. So, in the next few weeks, I’ll do a Christmas series! I hope it’ll spark fun holiday dance ideas. 🙂
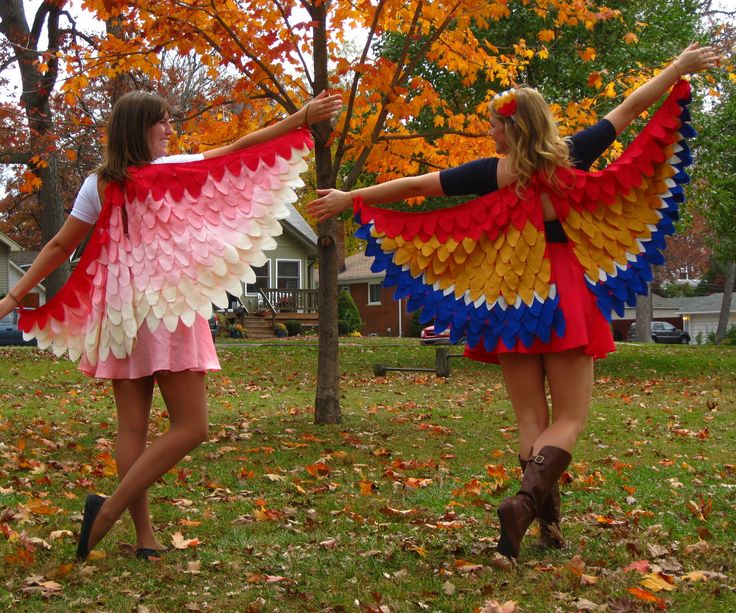
First of this series is DIY isis wings. This DIY was inspired by a video shared on Sparkly Belly’s Facebook group. This is a video of beautiful Jennifer from Orlando, Florida. You can check her out at BellyDanceByJennifer.com or her YouTube channel.
As you can see in the video below, the size of these wings are half of regular isis wings. This size is actually great for dancing in a small space where regular isis wings are too big or when you want a lighter texture. These wings have a flowy texture like veils, but you can create movements like wings. So I like to call them veil wings. 😉 And since they are smaller than regular wings, making them is not as hard or time consuming. Oh, and we’ll add lights to these wings later, so they’ll look so cool in the dark!
So in this video, you’ll see how to make these isis wings or veil wings.
Click here to be notified when the LED wings video is published!
If you want to join the free course mentioned in the video, click here 🙂
To make these DIY Isis wings / veil wings, you need:
Organza – isis wings are mostly made from organza or lame. Lame creates fluid movements, but I picked organza for this project, because organza is strong and flowy enough, and I want to attach lights to it afterwards. I got about 3m of organza.
Velcro – This is 2cm (3/4in) wide velcro. You only need 10cm or a few in of this.
Dowels – I have 2 1/4in thick dowels. You can get them at a craft store. Mine came 90cm (36in) long, and they are too long, so I will have to trim them down.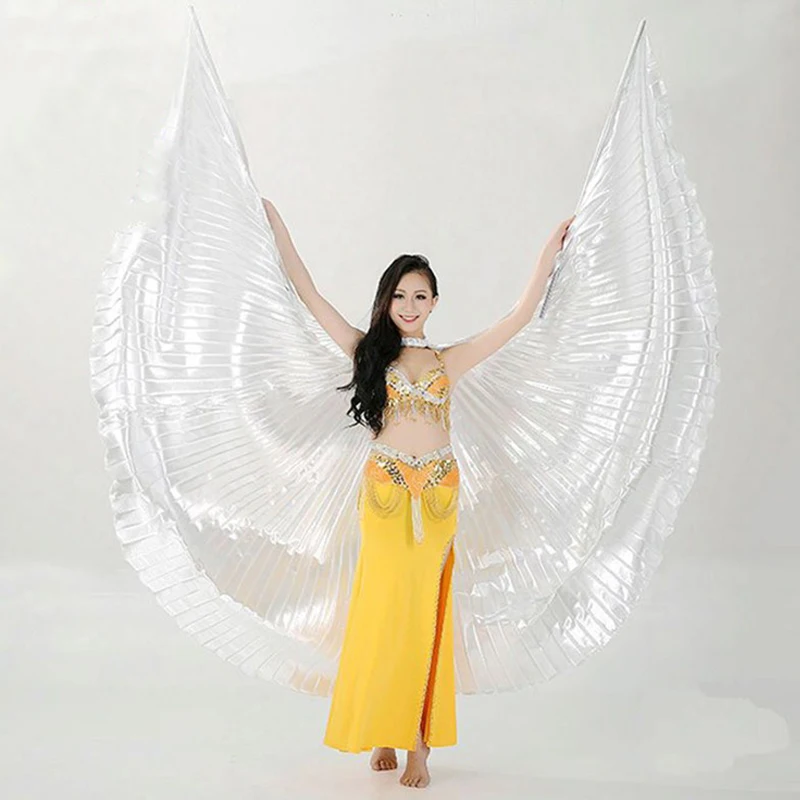 If you need to trim down yours, then you’ll need something like a utility knife and sandpaper.
Matching colour thread
Basic sewing tools – measuring tape, scissors, sewing machine etc. Check out the Resources page for my favourite sewing tools.
DIY Isis Wings / Veil Wings
First, take 2 measurements.
- Measure from your neck to the floor. This will be the length of your wings.
- Measure the circumference of your neck.
Spread your fabric on the floor. Take your wing length, and measure it from a corner and make a ¼ circle. Make another one, and cut along the lines.
From the leftover fabric, cut a rectangle that is 10cm (4in) wide and your neck measurement plus 10cm (4in) long.
Now take the 2 ¼ circles to your sewing machine, and hem all the raw edges. I just folded the raw edges twice at 5mm (1/4in) and did a straight stitch.
This is optional, but I wanted the wing panels to be connected at the top, just like Jennifer’s wings, so I placed the wings right sides together, and sewed down 15cm or 6in from the corners.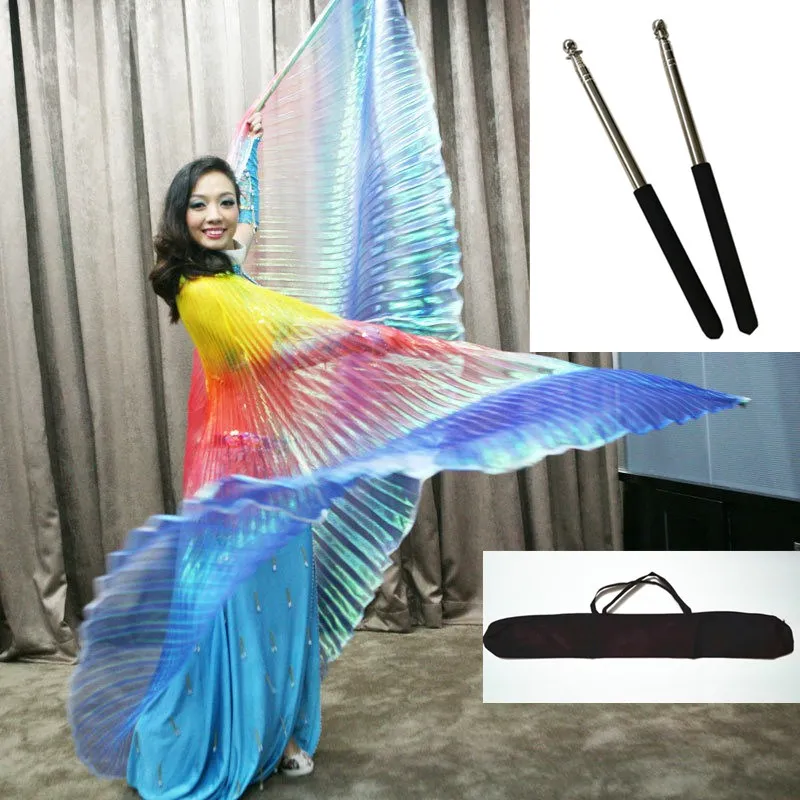
Now hold the wings up against your back, make sure the centre seam is at the back of your neck and see how far you can reach with your hands. Mark where your wrist is, and measure the distance from here to the end of the panel.
Trim your dowels to this length. Mine is 66cm (26in), so I cut my dowels down to this length and sanded the rough ends.
Now we’ll make pockets to insert these dowels. At the top edge of the ¼ circle panel, place your dowel from the end of the panel. Fold over enough fabric to cover the dowel plus a seam allowance. This pocket should be pretty snug when you insert the dowel, so adjust the fold according to the size of your dowel. Take out the dowels and do a straight stitch to secure the fold and close the end. I left the other end open so I can insert and remove the dowel if I want to.
Do the same for the other wing panel. I pressed all the seams for a clean look.
And the wings are finished. 🙂
Now take the rectangle piece, fold in 1cm or 1/2in from short edges and press.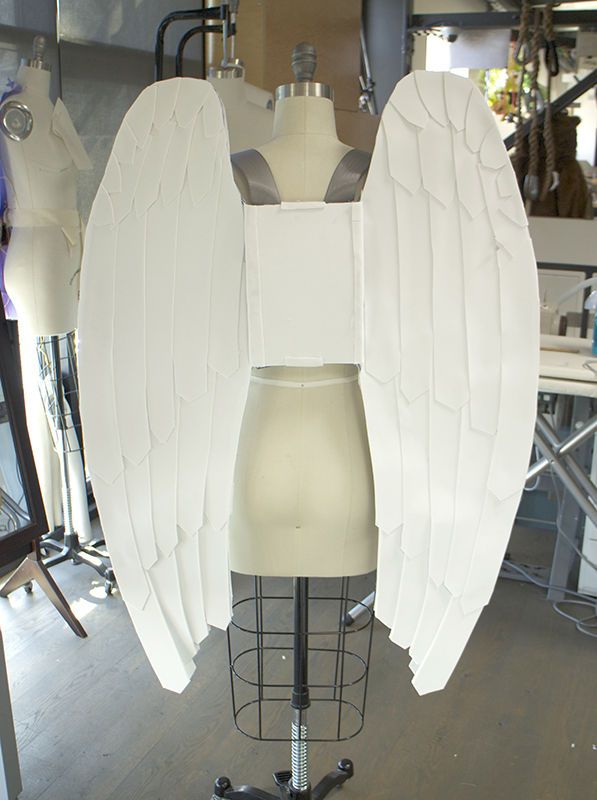 Then fold it in half lengthwise, wrong sides together. Press. Now take one edge, fold it towards the line and press again. And repeat form the other edge.
Fold one of the long edges towards the centre like below (1), and fold again in half to determine the centre point. Mark it with a pin.
Now we will attach the wings to this neck piece. Place the centre seam of the wings right on top of the centre point on the neck piece you just marked with a pin. Overlap them about 1cm or 1/2in or so, and replace a pin to hold it. And place pins at 5cm or 2in from the centre point on both sides to hold everything together. And just do a simple straight stitch between the pins. (2)
Then, fold the other edge of the neck piece towards the centre and fold again, and top stitch all around it at about 2mm or 1/8in seam allowance. (3)
Try it on and see how much the neck piece overlaps. Cut your velcro into that length, and sew them onto the neck piece by stitching very close to the edges of the velcro pieces.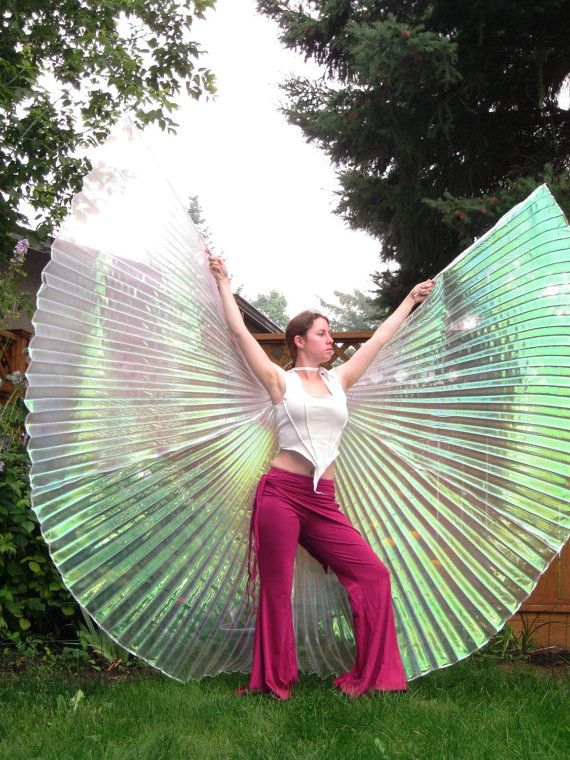
Insert dowels into the pockets, and you are finished!
They are so fun and pretty, and it really feels great to have beautiful wings to dance with. I skipped the pleating that you’d normally see on regular isis wings, because ironing that many pleats is very, very time consuming, and with the pleats, the wings will lose the veil-like texture. I really like the way these wings look, and they are unique for sure!
In next week’s post, I’ll show you how I added lights to the wings. I’m super excited to share it with you! If you don’t want to miss out, sign up for my newsletter from the link below 🙂
Click here to sign up for the newsletter and be notified when the wings with lights DIY video is published!
And if you liked this DIY project, please share with your troupe sisters and dancer friends.
And if you want to learn more than just making wings, sign up for my free course, Belly Dance Costume Making 101.
Thanks for reading, and keep sparkling! 😀
Want to make more costuming bits yourself?
Sign up for my free course, Belly Dance Costume Making 101!
DIY LED Isis Wings! - SPARKLY BELLY
by Mao on in DIY Belly Dance Costume Blog, Uncategorized • 5 Comments
Last week, I showed you how I made these pretty veil wings. Hope you liked it. 🙂
This week, I want to jazz it up a little bit, and make it even more fun and Christmas-y with LED lights!
I’ve seen many pictures of LED isis wings, and I think they are very cool, but they are pretty expensive. So here’s how I made it myself. Let’s get started!
Sign up for Sparkly Belly newsletter so you won’t miss out on future tutorials!
Curious about the free costume making course mentioned in the video? Check it out from here. 🙂
How to Make DIY LED Isis Wings
For this project, I bought 2 sets of battery-operated LED lights. It’s important that these are battery-operated, because you can’t be plugged into an outlet when you are dancing. Also, if your wings are light colour like mine, it’s best to find lights with white cords. Each set is about 6m long.
Originally, I was looking for 1 set of 10m LED lights, but I wasn’t able to find one that’s that long at my local stores.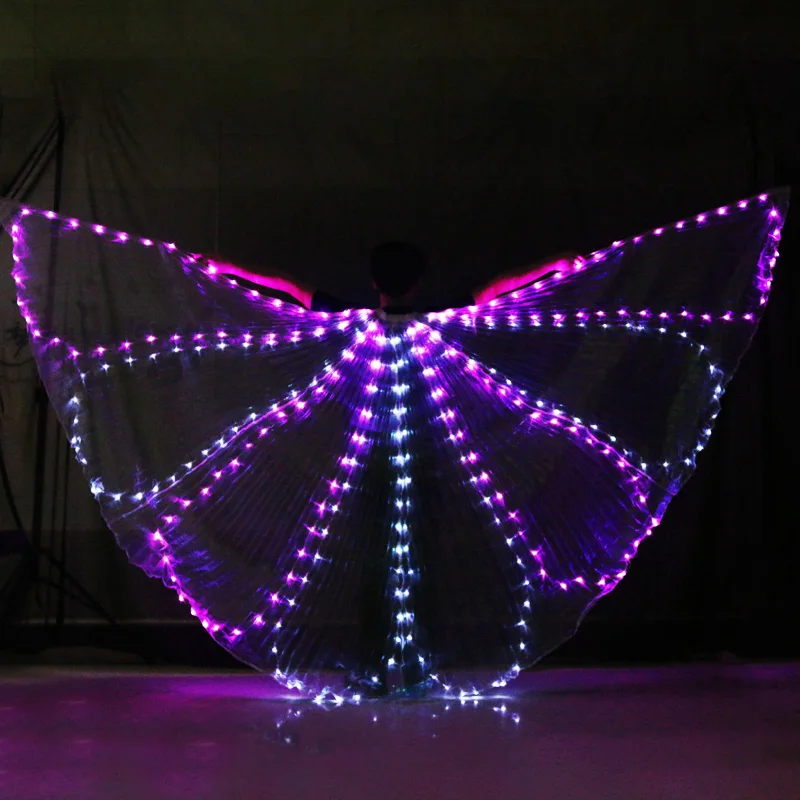 There are online vendors that sell them like this one (affiliate). This vendor only sells in the United States. If you are in Canada, this one is what I used. I’d much prefer having just 1 battery pack, but for this project, I didn’t have time to wait for the shipping, so I picked up 2 sets of the longest LED lights that my local store carried.
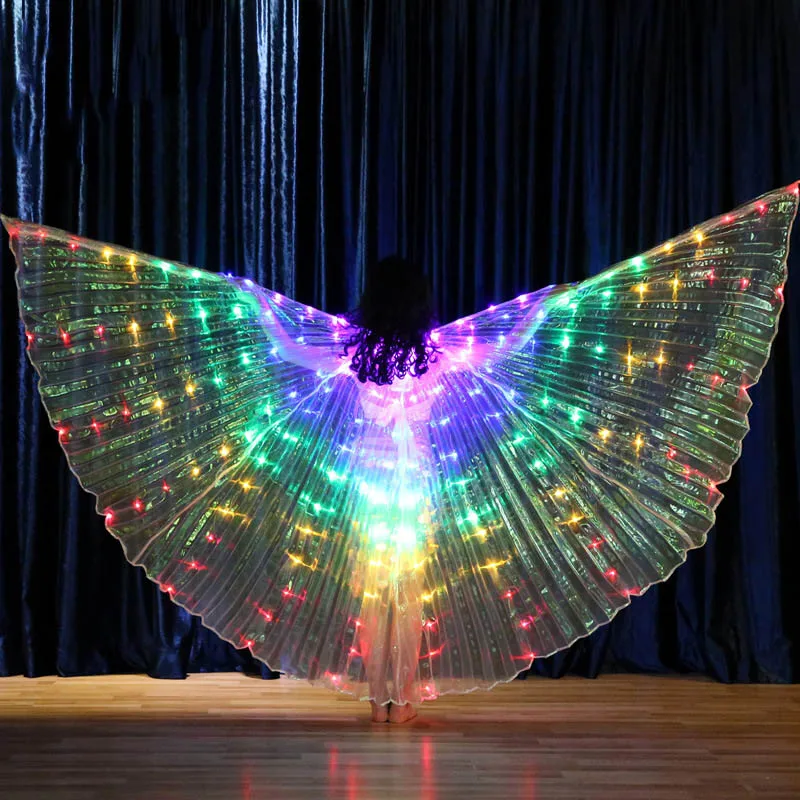
Once I had the lights, I drew out how I wanted to place the lights. Basically, this was my plan. If your wings are larger, you will need longer string lights.
First, I made a little pouch to hold the battery packs. Like I mentioned earlier, it’s way easier and simpler if you have just 1 battery pack. But I had to accommodate 2 battery packs, so I measured the width and length of the battery pack, cut out a rectangle piece out of scrap fabric.
The width is twice the width of the battery pack plus 6cm or 2.5in. And the length is twice the length of the battery pack plus 8cm or 3in. (If you have just 1 battery pack, which I highly recommend, you can just change the width of the panel to the width of the battery pack plus 4cm or 1. 5in)
5in)
Fold the rectangle piece right sides together and sew the side edges at a 1cm or 1/2in seam allowance.
Fold 1cm or 1/2in from the top edge twice, and do a straight stitch to secure the fold.
Flip it inside out. And I sewed down right in the middle. This way the battery packs fit in nice and snug.
Now spread your wings on the floor, and place your LED lights. I ended up placing the battery packs behind the part where the wings and the neck piece are connected. I made sure the switches of the battery packs are facing out so I can easily reach them when I’m wearing the wings. With 2 battery packs, it was a bit heavy but it wasn’t choking me and it was alright for for a short performance.
So I sewed it on by hand along the centre seam and the top of the pouch. Then I placed the LED lights according to my plan, all around the edges of the wings. There was some room in the string lights, so I distributed extra lights in a zigzag pattern along the curved section.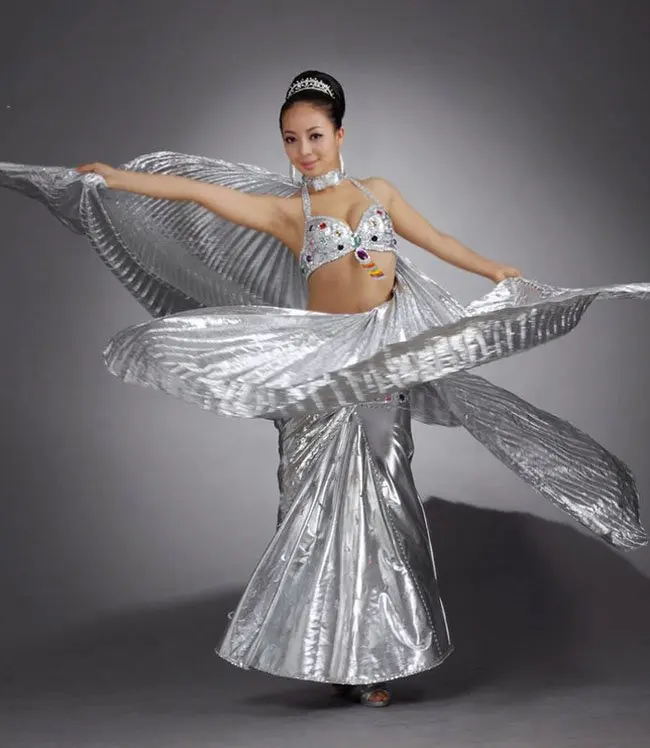
Then I put on a radio show to listen to, and went hand stitch the lights down. At every other light bulb, I went around the cord a few times on either side of the light bulb.
If you are thinking to add lights to regular wings you already have, make sure to measure how much string lights you need. Regular wings are huge, so you’ll need way more than what I used here. Also, some wings are made from flimsy lame fabric, so I would first check to see if the fabric would hold your LED lights.
Also, like I mentioned before, I would use just 1 battery pack next time!
And that’s it! Now it’s time to turn off the lights and play!
I love how they turned out, and since I used sheer organza, you can see the lights through the wings as if the lights are just floating around me! These wings will sure to impress the audience and these are perfect for holiday events. It’s pretty simple to make, and I think it would be so cool to use as part of troupe choreography!
Hope you liked my DIY LED isis wings / veil wings, and next week, I’ll share with you the last of the Christmas series, and we’ll light up our costumes!
If you make your own LED veil wings, please share a photo on Sparkly Belly’s Facebook page.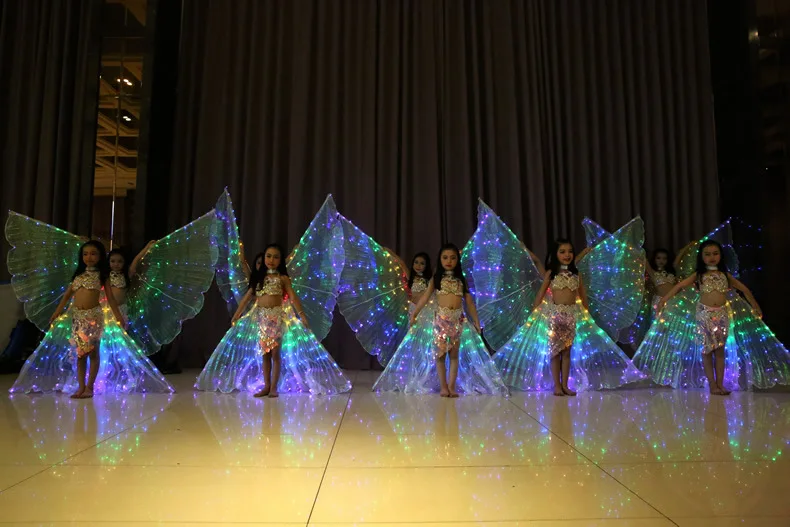
And if you want to learn to make belly dance costumes to go with the wings, sign up for my free course, Belly Dance Costume Making 101.
Thanks for reading, and keep sparkling! 😀
Want to make more costuming bits yourself?
Sign up for my free course, Belly Dance Costume Making 101!
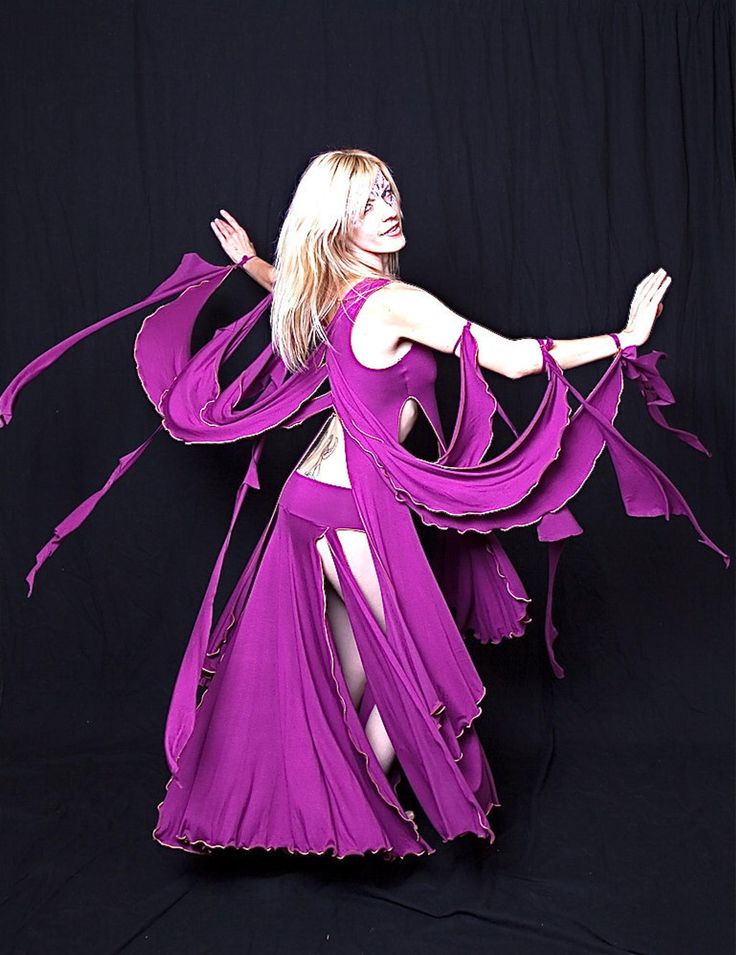
| Lea4 Reg. | Good afternoon everyone!!! I'm new here (registered recently), but I have been using various tips and ideas on the site for a long time! Very often on the forum I found a lot of useful and interesting things for myself. Now I really need your help on a specific issue . very interested in exactly how they are attached [/img][/url] | |
| NatVad Reg. Awards: 7 |
I didn’t have a chance to make such wings, so I’ll tell you purely theoretically, as I understood it about the photo. | |
| Nadezhda Nikolaevna Reg. | To look at a photo behind. Maybe they are not inserted into the seams, but only put on hands. And how among themselves - such a “sun” is ground off and looks like a cape, or two “half-suns” hang ... Interest ran through ... | |
| Lea4 Reg. | I'm also very interested in how they look from behind )))))) There is one nuance in the dance... they must be folded... In some photos, we managed to see that they can be attached both at the forearm and on the neck, rim. | |
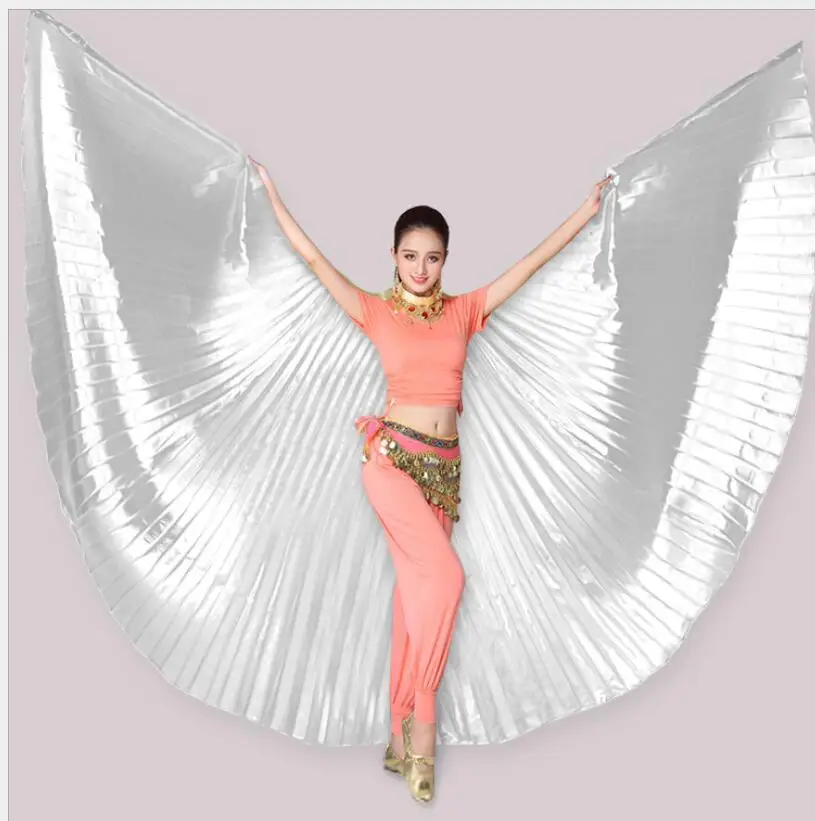
| mishka-gammi Reg. | In Egypt, at a dancer's, I saw silver ones like in the photo, only smaller in size. It looked like an ordinary pleated cape (sun-flared?) with sticks inserted along the edges for rigidity. When it was necessary, she picked them up and "waving her wings", the rest of the time the cloak hung down from behind. | |
| Lea4 Reg. | I saw a lot of different dances with them, and if you use them skillfully, it looks very impressive! | |
| Black Cat Reg. | http://www.beledi.ru/statyi/Aliya_platok.htm | |
| Lea4 Reg. | Thank you! THANKS!!! THANKS!!!!!! | |
| Olay-lya Reg. | I want to add a couple of tips, and not unfounded, I myself dance with wings and sewed them for myself not long ago. so it is very important to choose a fabric. | |
| lutic_ludic Reg. | I sewed such wings from lining silk beige and white (they fly very well and it is not necessary to pleat - cheap and cheerful), | |
| Lea4 Reg. | Thank you all for your help!!! It turned out to be more difficult to choose a fabric ... A friend explained one thing: "I want it to be pike-puff..." In general, I really liked the sprayed organza, but for the "poke-puff" they chose crepe... But now I'm thinking how to process the edge. .. just in a zigzag or better to make it heavier with some kind of edging | |
| Lea4 Reg. | Good afternoon everyone!!! I made my wings and I want to post photos)))) The performance was really at the beginning of April, but I received the photo only yesterday)))) Once again, HUGE thanks for the help!!!!!! That's what happened (the girls embroidered the costumes themselves) to photo hosting → and here's another one, my very first job | |
| 1979Lana Reg. | These are the wings I made for my performance: to photo hosting → but these wings turned out to be short for me (there was not enough fabric), the first ones with lowered hands were up to the middle of the knee. Looked better. | |
| Glavpost1 Reg. | Tell me, what are the sticks made of? | |
| Staska Reg. | Mop stick cut | |
 .. A friend asked me to make wings for her belly dance ... and I roughly theoretically imagine how they can be made, but I doubt .... Maybe someone has already done this????? Tell me please))))
 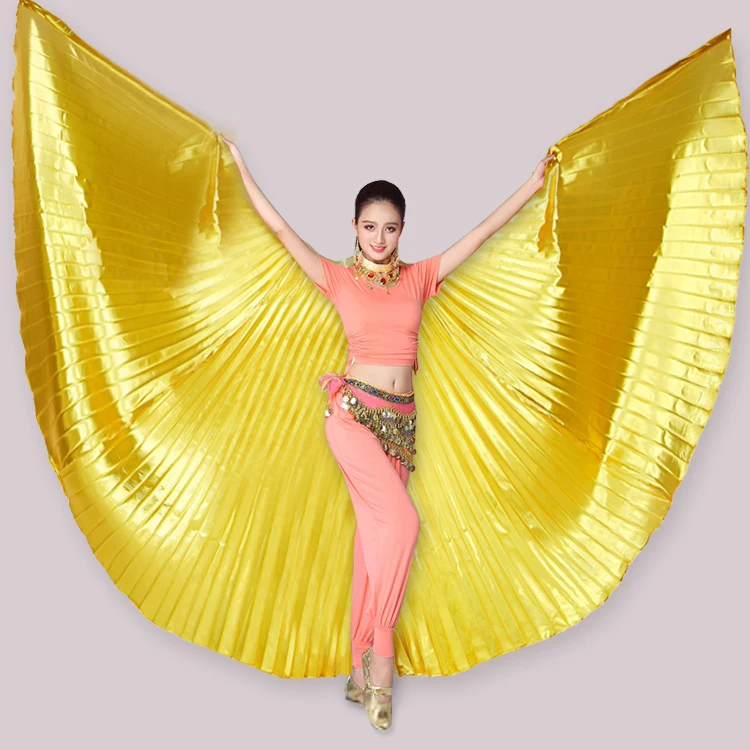 .. and I have a theoretical idea of how to make them, but I doubt it.... Maybe someone has already done this??? Tell me please))))
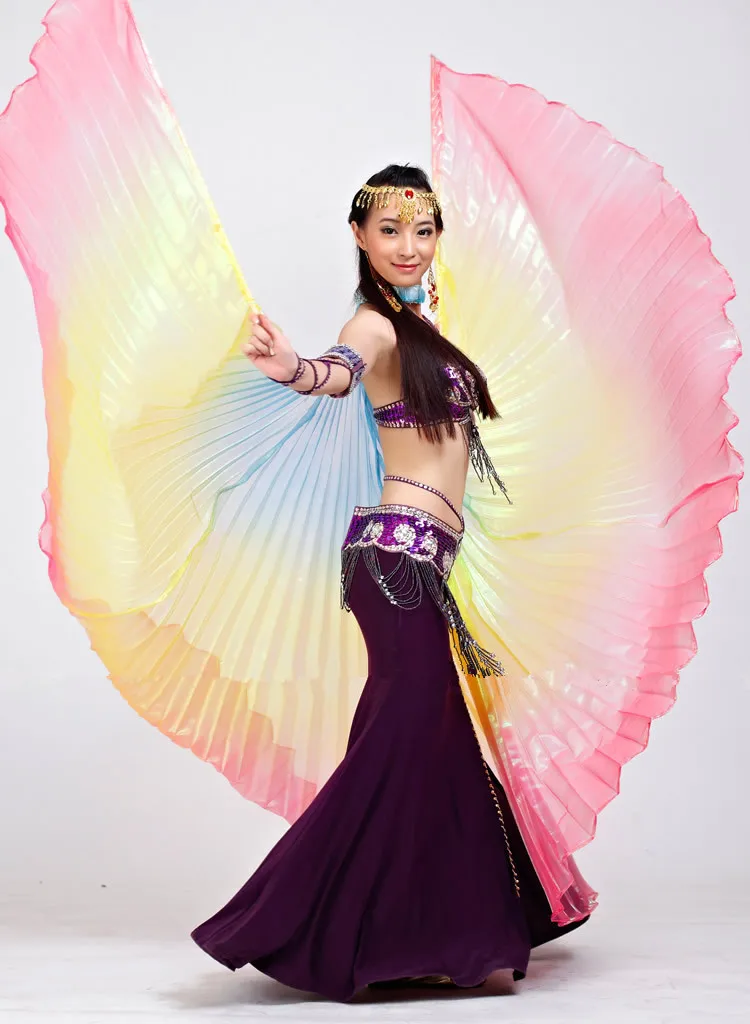
 It should not stretch at all, but in particular along an oblique, otherwise the volatility of the wings disappears, as the fabric begins to sag under its own weight. And it will be better if the fabric is not too light, otherwise it will be possible to dance with such wings only slow dances
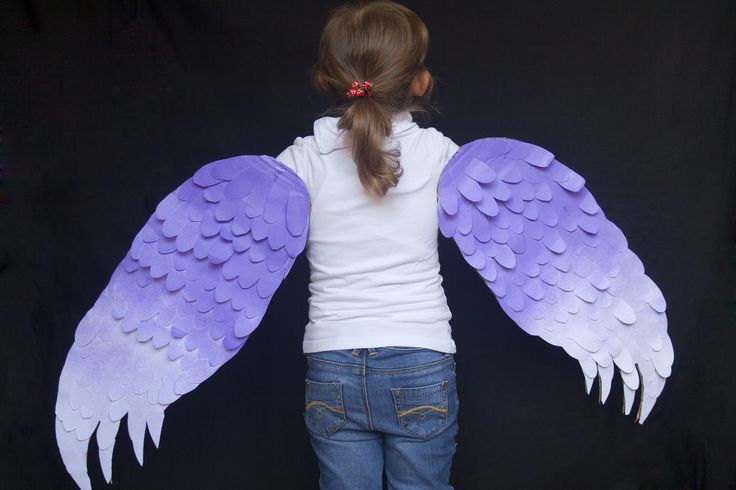
 make your own angel wings for children
To make wings, you need a template (stencil). The drawing is applied to the landscape sheet, cut out along the contour. In this case, this is important: you can choose different options for the size and span of the wings, from small, medium, to large, folded or raised. It is better to start the selection with large ones, then they are adjusted to the size of the figure (base), if necessary, reduced, but each time they are applied to the workpiece, for a better overall perception. In this way, the angel wings pattern is perfected.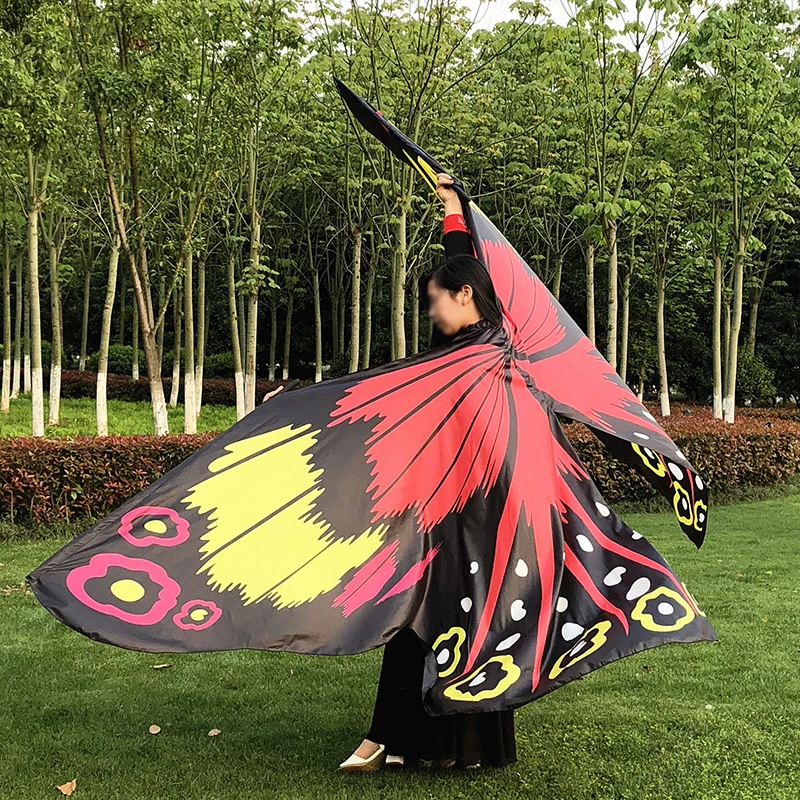
- Paper cut wings
- Classic feather and down wings
- Origami paper wings
- Fabric wings
- Napkin and coffee filter wings 90 Finishing touches
- Angel wings for children's Christmas costume
Wings must be symmetrical.
Paper cut wings
For the formation of paper wings you will need:
- Several landscape sheets (it all depends on the number of layers).
- Scissors.
- Pencil.
- PVA glue.
A prepared template is placed on the sheet, outlined along the contour, cut out. Each next cut is performed 5 mm less than the stencil dimensions (if three-layer wings are planned, then the latter will be 1 cm smaller than the template, if four-layer ones - by 2 cm).
All cut blanks are straightened, stacked on top of each other, aligned in the upper part, glued together.
To add volume, in the lower part of each wing, make small incisions up to (1.5-2 cm), at a distance of 5 mm from each other. Pass through them with the tip of scissors, which is why they twist slightly and acquire volume.
Classic feather and down wings
It's no secret that this is the most beautiful, but also time-consuming option. For this type of wings you will need:
- A thick sheet of cardboard (suitable for the finished stencil).
- Pencil.
- Scissors.
- Hot nails.
- Small feathers or down (can be decorative, for example feathers cut out of paper).
A blank is cut out of cardboard according to the template. Its pasting starts from the bottom. Each feather is attached to a small drop of glue so that the composition does not stick together the villi. Cover with cellophane on top, leave to dry completely.
Large wings made of feathers and down are more suitable for a New Year's (masquerade) costume.
Origami paper wings
Origami lovers and craftsmen will not fail to decorate a cherub with such unusual and simple wings. To do this, you need:
- White sheet of A4 paper.
- Thread.
- Scissors.
- Ruler.
The sheet is folded like an accordion, with a step of 0.7-1 cm. Stepping back 2 cm from the edge, it is pulled with a thread, folded in half, the edges are neatly straightened, glued on one side, fixing with a paper clip. Apply to the workpiece, so that the fold is at the top.
Fabric Wings
Fabric Wings look just as impressive. Required to prepare:
- Cardboard (template size).
- Album sheet.
- Needle and thread.
- PVA glue.
- White lace or satin trim.
- Scissors.
Cut out the wings from cardboard and album sheet. Tape is sewn onto the cardboard. Each next row is superimposed on the previous one. The wrong side, where the seams are visible, is sealed with a cutout from the album sheet, placed on a flat surface, pressed until completely dry.
The wings, made of lace and satin, perfectly complement the decoration in the form of a bow, fixed at the place of their splicing.
Wings made from napkins and coffee filters
You can even use disposable tableware, plastic ceiling tiles, napkins, tea and coffee filters as decoration for the wings. The latter option is expensive to perform, so it is more expedient to focus on polymer and napkins.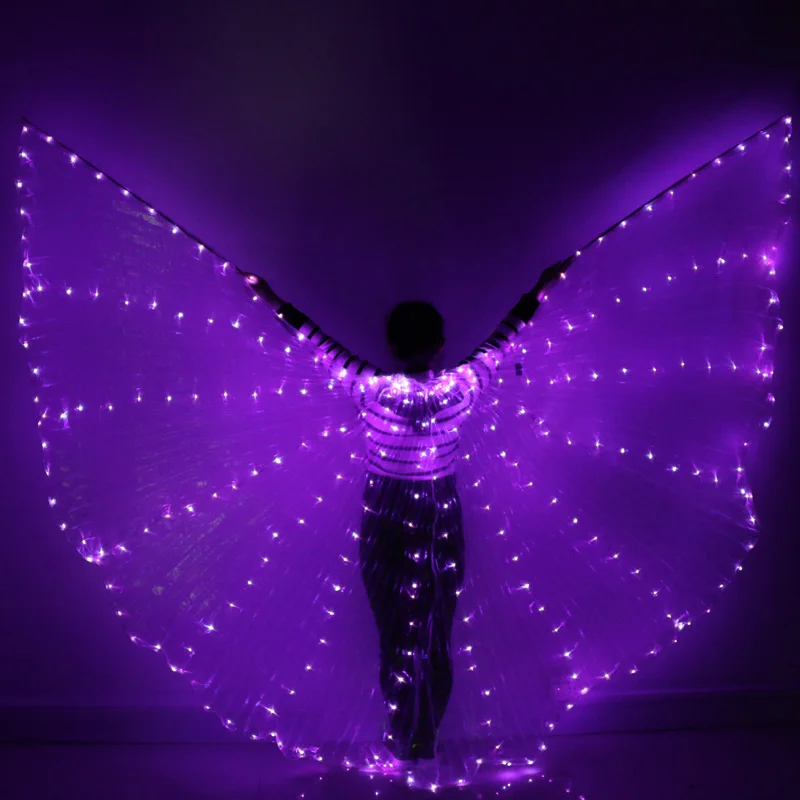 In addition to them, cardboard, scissors and glue will again be required.
When cutting wings from a ceiling tile according to the template, the material must be pressed through. In this case, the edge comes out much smoother. By pressing on the workpiece with paper clips, a pattern of feathers is obtained.
Using the same template, cut out the wing blank. Napkins are cut into strips of different lengths, twisted into a tube, folded in half. They finish each wing in rows, laying one on top of the other in a checkerboard pattern, starting from the bottom of the workpiece, and glue it.
Adjusting the harness
The harness is a strip with which the wings will be attached directly to the angel figure itself (base). She also plays the role of the hands of a cherub, so you have to cut a strip of cardboard no more than 1 cm wide, 20 cm long (the excess is cut off).
Apply the completed wings to the base and make a mark where the harness is to be glued. The strength of the entire craft depends on the strength of the connection. Wings with the help of a harness are put on the figure.
For small crafts, the wings can be attached without a harness.
Finishing touches.
The cherub is almost ready. It remains to “put” a candle into his “hands” (cut out of cardboard, paint with markers) or a bell, and decorate his head by gluing hair from yarn.
Another option: a beautiful piece of lace (10x10 cm) is glued on the top of the head, wrapped around the head with a silver cord (a kind of halo), and fastened.
You can draw closed eyes with cilia. To give the angel elegance, sprinkle the hem of the dress and head with silver (gold) paint from a spray can, prudently covering her face. Decorate the dress with a pattern, small shiny stars or snowflakes, because this is a Christmas angel.
Angel wings for children's New Year's costume
To cut out the pattern of angel wings for children, you should rely on their height and age so that the attribute of the cherub does not interfere during the dances at the matinee.