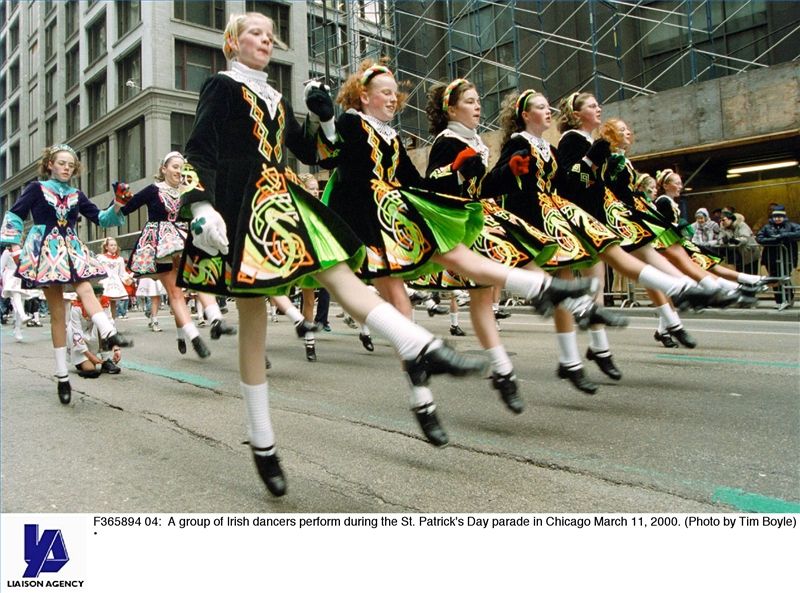
How to make dance steps
How To Choreograph A Dance Routine In 6 Simple Steps
Are you wondering how to choreograph a dance routine? Or if you even can???
The answer is YES, YOU CAN! And you totally should.
Choreographing isn't just for professional dancers with tons of clout. It's a skill that anyone can learn with a little practice and inspiration. Not sure how to start? Just follow this handy 6-step guide and start creating!
Finding the right song could be the easiest or hardest part of choreographing.
Sometimes, you hear a song for the first time and you know, you just KNOW, that it's the one.
Other times, you browse through your entire iTunes library, SoundCloud dashboard, Spotify playlists, and still don't feel anything.
But once you have a song and pick out the section you want to choreograph to, listen to it...A LOT. And don’t just listen – listen with intent.
Look up the lyrics to see how you relate to the meaning of the song. Discover hidden hi-hats and riffs that you can highlight.
Note the "pathways" for movement you want to take – do you want to hit a certain lyric? Or that dope double bass? Visualize ideas as you listen.
You don't need to come up with concrete moves, but understand how you wanna move. And if you need to cut your music, do that first.
Having to wait or skip around to different parts of the song can interrupt the process.
Some tips for finding songs: Best Ways For Dancers To Find New Music
Yes, you can watch videos from your favorite choreographers and remix their routines, but to make something unique to you, try drawing inspiration from your own life and the culture around you.
Read thought-provoking books, watch beautifully shot movies, check out MET Gala costumes, and visit cool museums!
All forms of art can inspire and fuel your art. When you see something inspiring, write it down so you can come back to those ideas later.
Even something simple like an interesting conversation with a friend can turn into a dance choreography idea or a new dance move.
Already feeling inspired? Watch this video to learn how to turn those ideas and concepts into dance moves!
Freestyling doesn’t necessarily mean that you’re going to be using those exact moves in your piece. In fact, you probably won’t even remember a lot of what you did!
The point is to let your body respond to the music. Play the whole song and let yourself move. Notice how you naturally groove to certain sounds.
This will be the first "layer" in your choreography. You can then try variations or build more intricate movements on top of it.
Not sure how to start freestyling? Read this article for a few more tips: How to Freestyle Dance
And if you put on a song you really love, but still can't come up with any moves, check out this video!
Clay gives you tips for creating unique movements, even when you think you have choreo block.
You probably decided to choreograph to the song because you thought certain sections would look dope on the body.
Is it a climax? A breakdown? An instrumental interlude?
Whatever it is, start with that part. You don’t have to choreograph chronologically from beginning to end.
Start with the chunks that come easier, then build the rest of the choreography around it.
After you've choreographed your favorite chunks, make sure to give some love to those in-between sections!
Just because it’s not a crazy beat combo doesn’t mean it doesn’t have potential to look amazing.
Sometimes it’s those slower moments that are the most memorable. Check out this piece from Galen – it's all about her presence and demeanor.
Even her simple movements are engaging because she's filling those calmer moments with presence, before she goes off in a powerful combo.
A lot of us have the problem of making choreography that looks good in our heads... But not on our bodies. At that point, you just gotta train yourself.
Some refer to this as “cleaning” or “setting,” which involves perfecting certain pictures you make with your body, looking at pathways between points, or drilling quick combinations.
Check out this article to learn more about the cleaning process: How To Execute Choreography Better By Utilizing Your Body With Carlo Darang (Choreo Cookies)
And remember: How you choreograph will be how the piece looks. So when you choreograph a dance, do the moves full out.
For example, if you want a plié somewhere, really bend those knees. Let body rolls go all the way through your body. If you’re doing floorwork – get on the floor!
It's not going to magically look amazing when you perform on stage or in front of the camera. Make it amazing as you're making it.
Watch this video to learn more about dancing full-out, in every moment.
There are probably moments within your piece that feel perfect to you. Don’t change those.
But the piece as a whole is probably a bit rough around the edges, especially if this is your first time choreographing.
As novelist Ernest Hemingway once said, “The first draft of anything is sh*t.”
So don’t worry if it’s not exactly what you wanted it to be. You can work your way there!
Do this by trying out variations of movements, scrapping some sections, changing directions, or adding floorwork – whatever you feel is necessary to “edit” the piece.
And honestly? That’s what makes creating so fun – trying things. Saying “Nope, not that,” or “YES oh my god, it worked!”
It’s supposed to take multiple drafts! Just keep editing until you’re done.
Of course, if you're a perfectionist, you might feel like your piece is never finished, but you gotta draw the line at some point.
While it’s awesome to try to keep improving your piece, there comes a point where you have to say “This is it. It's ready."
It's not about feeling like your piece is perfect. It's about making something that you feel proud to say you made. So when you're done, let it be.
Give yourself a pat on the back. Record the piece and share it with us via our STEEZY Studio members Facebook Group!
Thousands of dancers around the world are not only improving their dance skills on STEEZY Studio... they're joining our community and getting feedback from other dancers!
Click here to sign up for STEEZY ;)
Check out this video for a quick recap of this guide AND a few extra tips!
10 Tips From the Pros
Creating movement from scratch to encompass the feeling, rhythm, and theme of a song takes a little imagination and some work, whether you're a beginner or getting ready for a big performance. When you're including the movements and dance phrases for multiple performers, too, choreographing a dance can get quite complicated. That's why we're giving you some top pro tips on how to choreograph a dance when you're feeling stuck, including methods you can use to step outside the box and spice up your routine.
1. Study the Music
If you know what music you want to choreograph your dance to, start studying. Go beyond creating movements based on the rhythm and beat of the song, and study the lyrics, the emotion, and the meaning behind the song. You can find inspiration from the feelings you get when you read the words, and embrace the emotion the artist puts into the song.
Poppin' C, a Swiss popping dancer, says, "The music is everything for me, because the way my body adapts and moves, is because of the way I feel the music." By knowing every part of your music inside and out, you can design dance moves that really work with the beat and lyrics.
B-boy Junior holds a breaking workshop at Red Bull BC One Camp in Mumbai
© Ali Bharmal / Red Bull Content Pool
2.
 Watch the Pros
Take some time to watch dance-heavy musicals, like "Chicago" and "Anything Goes," competitive series like "World of Dance," and even street performers, like Logistx, to grab some inspiration for your moves. Observe the styles, transitions, and combinations of movements and note how pro dancers create a physical connection to the music. This can help motivate you to create dances that get the audience to connect with your physical interpretations of the music.
3. Plan for Audience and Venue
Think about who your performance or event is for. Consider the venue you're performing at, too, because your dance environment can help you find ways to creatively express emotion. Lighting, sound, and the overall ambiance of your venue can help you design dances that incorporate mood and emotion to connect with the audience during your performance.
4. Think About Dance Style
Choreograph with steps and dance moves that reflect a specific style. You might try incorporating hip hop steps into a classical dance to mix it up and create your own unique dance style, for example. If you're just starting out with dance choreography, try focusing on learning how to balance a specific style of dance with your unique interpretation of the music you're dancing to.
Kid David poses for a portrait at Red Bull Dance Your Style USA Finals
© Carlo Cruz/Red Bull Content Pool
5. Focus on the Basic Elements
Focus on one (or several) of the most basic elements of dance: shape, form, space, time, and energy. For form, you can focus on designing phrases and steps based on a specific form from nature, like an animal or landform. Use your stage space to showcase explosive energy and give certain aspects of your performance a punch of emotion that keeps your audience engaged.
6. Don't Start at the Beginning
If you're stuck trying to figure out how to start your dance, plan it out from the middle or from the end. Tell a story through your dance choreography and plan out the climatic elements before the small steps to help you flesh out where you want to go with your ideas. Once you've outlined the basic structure of your choreography, piece it together into an entire work.
7. Try Choreographing Without Music
Dance in silence. It might seem like a crazy idea since you're choreographing the dance to a specific song. However, just letting your body move and flow with different tunes you imagine can help you step outside your comfort zone and incorporate challenging moves and dance steps that you might not have thought to pair with a song or score. When you discover something you like, pair it with other steps you've already developed and start fitting your moves to the music.
Poppin C shows off his moves during a photoshoot in Lausanne
© Torvioll Jashari / Red Bull Content Pool
8. Embrace Post-Modernism
Study early modern dance forms and styles that can get your imagination flowing. Dancers from the mid-century modern era through the 1950s and '60s (such as Anna Halprin, one of post-modern dance's pioneers) would incorporate a whole world of nontraditional moves in their choreography. Slow walking, vocals, and even common gestures can make imaginative additions to your overall work.
9. Incorporate the Classics
Use classical ballet, traditional ballroom steps, or other classic dance moves to mix up your style. It can be a startling transition for an audience to see a classical ballet step snapped in between freestyle phrases. Combining classical techniques with your dance design can add interest and suspense to your performances.
10. Use Other Art Forms as Inspiration
Don't just focus on music and dance. Look at all kinds of art forms, from two-dimensional paintings to live art performances. Take note of the different emotions and use of space, shapes, and forms that different artworks incorporate, and think about your interpretations and how you can convey that in movement. Use this as fuel for your inspiration when choreographing short phrases. Keep up to date on new forms of art to get inspired and avoid the dreaded writer's block (for dancers).
More Pro Tips to Choreograph a Dance
Arlene Phillips CBE, a British choreographer and theater director, got her start pro dancing and choreographing in the 1970s. She's been the choreographer for a variety of performances over the years, including live theater. Her advice for aspiring dancers includes some helpful choreographing tips:
Tell the music's story through your movements
Keep practicing with imaginative steps
Be determined to learn from your mistakes
Challenge yourself with unique rhythms, styles, and techniques
Plan out your most impactful elements then work in additional steps around those
Keep practicing your choreographing techniques
Don't be afraid to learn something new
One of the most important things to keep in mind when choreographing a dance, though, is to embrace diversity. Don't be afraid to do something different or outside the norm. Try incorporating new styles or steps to make your dance fresh, and study all types of art to get excited about your work. The more you challenge yourself to think outside the box, the more creative and unique you can be with your choreography.
Dance step
Name:
Pas (fr.) - step
Marcher (fr.) - walk, walk, step; walk, move
Pas marché (on the march) - a light dance step.
The dance step is the basis of all classical ballroom dancing. This is a step when the foot is placed on the floor with an extended toe on the entire foot.
Music
The dance step can be performed in different time signatures (2/4, 3/4, 4/4) and at different tempos.
Home position
The dancers stand in a circle, facing along the line of dance.
Legs - in 1 or 3 pos. (right leg in front).
Hands in ball position.
Account: I-1-I-2
| Account | Motion Description |
| Start (I) | Push the right foot forward on the toe - battement tendu - buttman tandyu with the right foot forward. The supporting left leg softens slightly at the knee. |
| 1 | Take a small dance step forward with the right foot: - slightly raise the toe of the right foot above the floor - step from the toe on the ball of the right foot - go to the whole foot - put the heel of the right foot on the floor - stand on the right leg, transfer the weight of the body to it (the left leg remains behind on the toe, without weight) |
| AND | The supporting right leg softens slightly at the knee. The left leg, also slightly softened at the knee, is carried out in a sliding motion through 1 pos. and is brought forward on the toe. |
| 2 | Take a small dance step forward with the left foot: - slightly raise the toe of the left foot above the floor - step from the toe on the ball of the left foot - go to the whole foot - put the heel of the left foot on the floor - stand on the left leg, transfer the weight of the body to it (the right leg remains behind on the toe, without weight) |
Then repeat the movement again with the right leg.
Remarks
- Item name:
- Dance steps should be light, flowing and small.
- When the heel hits the floor, the knee of the skating leg softens slightly.
- The transfer of body weight from one leg to the other should be smooth, imperceptible.
- Monitor the eversion of the position of the feet and the tightness of the toes.
- All steps are performed in one line.
Pas (fr.) - step
Marcher (fr.) - walk, go, step; walk, move
Pas marché (Pa march) - dance walking, light dance step.
Literature
- " Ballroom dance of the 16th - 19th centuries ". Ivanovsky N.P. Under the editorship of Yu.I. Slonimsky. Moscow-Leningrad, ed. Art, 1948
- " Ballroom dancing". Sarikojumu dejas. Lasman Milda. Publishing house Latvias Valsts Izdevnieciba, Riga (Riga), 1954
- " Dance". Textbook for theatrical universities (on stage dance). Vasilyeva E.
 D. M., Art, 1968
 - " Rhythm at school, the third lesson of physical culture". Teaching aid. J.E. Firileva, A.I. Ryabchikov, O.V. Zagryadskaya, Rostov-on-Don "Phoenix", 2014
Gliding step in dance
Name
Pas (fr.) - step
Glisser (fr.) - to glide.
Pas glissé (pas glissé) - a sliding step that begins with a preliminary rise to half-toes on both feet.
Glide is performed without lifting the toe of the working leg from the floor, while performing the movement, the toe must slide on the floor.
Music
Time signature 2/4.
Glide takes 1/2 beat.
Score: I-1-I-2 (I)
Preparatory exercises
- Transfer of body weight from two legs to one.
- Bringing the leg to the toe - battement tendu - tandu battman in 1 and 3 positions in a cross one at a time (right foot and left foot).
- Rise on the half-toes (relevé - relevé) in 1 and 3 positions.
GLYSSE FORWARD
Starting position:
The dancers stand in a circle, facing along the line of dance.
Legs - in 3 positions (right leg in front).
Hands - on the belt or in the ball position.
| Account | Motion Description |
| Start (I) | Rise on the toes of both legs in 3 pos. Knees almost straight. |
| 1 | Right foot glider:Sliding motion of the right leg, without lifting the toe off the floor, bring forward to the toe in 4 pos. and take a step with the right foot forward from the toe to the entire foot. Shift your weight onto your right leg. Right knee softens slightly. The left leg remains behind on the toe (in 4 pos.). The knee of the left leg is straightened. |
| and | Straightening the knee of the right leg, with a sliding movement of the toe on the floor, pull the left leg to the right leg in 1 pos. and rise on the half-toes of both legs. Knees almost straight. |
| 2 | Left foot glider:Move the left foot forward on the toe in 4 pos. and take a step forward with your left foot from the toe to the entire foot. Shift your weight onto your left leg. The knee of the left leg softens slightly. The right leg remains behind on the toe (in 4 pos.). The knee of the right leg is straightened. |
| I | Straightening the knee of the left leg, with a sliding movement of the toe on the floor, pull the right leg to the left leg in 1 pos. and rise on the half-toes of both legs. Knees almost straight. |
Next - continue moving again with the right foot.
GLISSING BACK and GLISSING TO THE SIDE
Movements are performed in the same way.
Notes:
- Glide begins with a preliminary rise to half toes on both feet.
- When lifting on half-toes, be sure to bring the legs together (connect the feet in 1 or 3 positions, compress the knees and hips).
- All movements must be sliding (glide the toe along the floor without lifting it off the floor).
- Steps start at the toe. Feet - turn out.
- Glide slightly longer than normal pitch.
- Gliding pas can be performed all the time with one foot, or alternately, now with the right, then with the left foot.
- Before starting the step on the other leg, the free leg is brought forward through 1 position with the knee slightly bent. Then the knee should be straightened.
- Gliding can be done both forward and backward, keeping the same sequence of movements.
Literature
- " Ballroom dance of the 16th - 19th centuries ". Ivanovsky N.P. Under the editorship of Yu.I. Slonimsky. Moscow-Leningrad, ed. Art, 1948
- " Historical dance ". Tutorial. I. Voronina. M., "Art", 1980
- "Ballroom dancing". Sarikojumu dejas. Lasman Milda. Publishing house Latvias Valsts Izdevnieciba, Riga (Riga), 1954
- "Dance ".