How to make an irish dance floor
Building an Irish Dance Practice Stage...
Posted by:What The Feis onOctober 30, 2015 15 Comments
…by someone who sits on his butt in front of a computer most days.
I can be handy. I have done handy stuff, but lately I have focused more on easier projects like light fixtures, ceiling fans, adding door locks and dimmer switches, replacing toilets and their parts, putting prefab shelves together, etc… I have done bigger projects, remodeled a kitchen (with help), built an entire wall of shelving in a garage, and some others, but it has been a while. Anyway, I figured this dance floor thing should be a no brainer. I was mostly right, but kinda wrong.
Below I am going to tell you how I put TGC’s (the girl child) practice stage together, and some DOs and DON’Ts along the way. It may not be the way you would do it, and if that is the case, please write a blog post and I will put a link out to it. You can also Google the steps. There are various ways to do it. I however, went my own route.
I have put in whatever I could to make it helpful, especially for someone who doesn’t do this kind of thing all the time (or at all). I also tried to put in some tips that I discovered along the way, once again designed for the DIY novice. It may sound over simplified, but if you are not a DIYer, this may not be second nature. I am also trying to have you go to [insert your favorite hardware store here] once for this project, not 3 times like I did.
Please consider this Irish Dance Practice Stage Building For Dummies, and here goes.
The Project
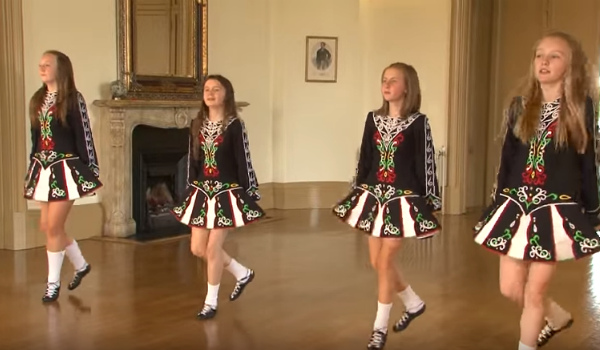
Create an 8′ x 12′ practice stage suitable for a teenage Irish dancer.
The Tools
- Power drill with screwdriver bits, and a drill bit with a slightly smaller diameter than your wood screws
- Circular saw, or some other 2×4 cutting device
- Hammer
- Small sledgehammer – one handed (not necessary but really handy)
- Measuring tape, at least 12′
- Extension cord
- T-square (or some right angle tool)
- Paint roller
- Paint tray(s)
- Pencil
The Materials
In SW Ohio dollars, no taxes added. Your mileage may vary. And remember, if you are a military veteran, like me, Lowes gives 10% off on everything all the time. Full price amounts shown below.
| Qty. | Item | Cost | Ext. Cost |
|---|---|---|---|
| 3 | 4′ x 8′ sheets 19/32 cat rated sheeting (plywood) | $16.97 | $50.91 |
| 12 | 2″ x 4″ x 96″ select studs | $2.62 | $31.44 |
| 2 | 32 oz cans of chalkboard paint | $9.98 | $19.96 |
| 24 | 3″ x 6″ mending plates | $1.10 | $26.40 |
| 2 | boxes 8×2 50 count wood screws | $4.97 | $9.94 |
| 1 | 1.88″ x 35yd roll Gorilla tape | $8.98 | $8.98 |
| Total | $147.63 |
The Steps
Prepping the Frame
You will need to cut all 12 2x4s to prep them for the frame. For my stage assembly, I laid the 2x4s out on their wide side, which made the stage a little shorter, and provided a bit more support area under the plywood.
- Cut *7 inches off 9 of the 2x4s, leaving 9 @ 89 inches
- Cut 3 of the 2x4s in half, leaving 6 @ 48 inches
If you have help, you may want to have them start putting the first coat of paint on the plywood. If you do not have help, you may want to roll a coat on before you start assembling frames. If you are working where you are painting, CUT THE WOOD AND CLEANUP BEFORE you start to paint.
*For you true DIY novices, please note that a 2×4 is really 3.5 x 1.5 inches. Cutting 7 inches off will leave just enough to use a support piece at either end, resulting in an 8′ long frame, perfect for the 4′ x 8′ sheet of plywood. (yes they are actually 4′ x 8′)
Assemble the Frame Sections
You will be making 3 frame sections and will do this step 3 times. I tried to be smart and create just two sections, but it was more work in the long run. See Don’ts section at the end of this article.
Note: If you are using mending plates for attaching the 2x4s together, it is best to work on a cement floor. Carpeted areas will work, but it is not recommended.
For this step you will need 3 of the 89″ 2x4s, 2 of the 48″ 2x4s and 6 of the 3″ x 6″ mending plates. Layout the frame as shown in the image to the left. The Red Xs indicate the position of the mending plates. Lay the 2x4s out so that the wide side is to the floor.
Square up one of the corners and using the sledgehammer, start pounding a mending plate into one of the 2x4s, working your way across the join to the other 2×4. You should be able to bang the plate into the 2x4s so that it is nearly flat. A hammer will work, but I found the sledge MUCH more effective.
Repeat this step for the other 5 joins on this section of frame and then repeat this entire step 2 more time until all 3 frame sections are complete. When they are complete, move the frames to where you will do the final assembly on the stage. (I did the prep work in the garage and then moved it all to the basement for assembly).
Note: You can use other methods to make the joins. This was recommended to me, made sense, and worked pretty well, and the plates are not too expensive.
DO NOT get ahead of yourself and attach the plywood. 1, it is probably not dry and needs a second coat of paint anyway, and B, you will need to attach the frames to each other before adding the plywood.
Add a second coat of paint to the plywood if you haven’t already. Shouldn’t be more than an hour or two between coats.
Assemble the Frame
Lay the 3 frame sections out next to each other as in the image to the left.
Note: Make sure you have it as close to the final destination as possible, because it will be harder to move after the next few steps.
Add 6 more mending plates to attach the frame sections together, in the locations marked by the green Xs. Keep in mind that you will be screwing the plywood on to these frames at about 1′ intervals, so try to space the mending plates so they are not in the way of the screws.
Go check the paint, is the second coat dry? If so, bring the plywood to the final build area.
Adding the Plywood
Dry fit all three pieces of plywood onto your frame. If you followed the measurements, and if I explained it correctly, each sheet should cover one of the frame sections nearly perfectly, and all three should cover the entire frame with no overlap or exposed frame. If you are satisfied with the dry fit, remove two of the pieces of plywood.
Lay your first sheet of plywood paint side up ;) , onto the frame. I noticed that my frame was not exactly square due to some of the shortcuts that I took (fixed for this post). If your plywood did not fit perfectly, start laying the first sheet of plywood on the most visible section of the stage, leaving any ‘errors’ for the least visible section.
Dry fit the plywood onto the frame. Take your tape measure and extend the tape 12′, lock it, and lay it along one long side of the plywood. Use this to quickly drill pilot holes every 1′ with the small drill bit. Just laying the tape out keeps you from having to measure and mark the board itself. Drill the pilot hole through the plywood and into the 2×4 beneath. Repeat every foot on both sides, up the middle, and along both shorter ends. Be careful to avoid the mending plates along the long end that butts up to another section of stage, but the plates should still be visible since you are only working a sheet of plywood at a time, so this should be easy.
When you have all the pilot holes drilled, use your drill to add a 2″ screw to each hole. Try to sink the screw far enough in where it is at least flush with the plywood, or maybe even sunk a bit into the wood, so as not to cause a trip hazard for your dancer.
Repeat for the other two pieces of plywood. For the edges that butt up against each other, you don’t need the tape measure, you can use the screws you just added to the previous piece as a guide for where to put the pilot holes. You will need it for the other three sides, but you saved a little time there.
Once all the screws are in, cover each line of screws with a layer of the Gorilla tape. I also covered the edges of the plywood which not only gives it a cleaner look, it also helps keep down any splintering. See the first picture above for the finished project.
Although the stage came out pretty well, there are some things I would have done differently now that it is complete, and some things I would have done the same. Below is a list of Dos, Donts and Considerations for when you build your stage.
DO
- DO assemble all the frames on a hard surface if you are using the mending plates. It provides a better support surface when you are pounding in the plates and does not give like the carpet (in my case) did.
- DO use premium wood screws. I used an OK screw, but some of the heads striped as I was putting them in. This is going to make it really difficult if I have to take the stage apart.
- DO check the plywood and 2x4s for quality.
 Buy the plywood as smooth as possible, and the 2x4s as straight as possible. Both of these issues caused extra work for me.
 - DO keep band aids handy.
DO NOT
- DO NOT take a shortcut and just use 3 2x4s under the plywood like in the picture to the right. In my head, it would have been fine, but when I dry fit it, the ends of the plywood between the supports was weaker and could have been a hazard.
- DO NOT try to take shortcut thinking you can create one big frame section (replacing 2 of the sections in the steps above) with 8′ 2x4s on the ends instead of 2 smaller frame sections with 4′ supports on either end. I thought of doing that, realized there was no way I could build it and get the completed section (finished size 8′ x 8′) down to the basement. So, I carried the parts down to the basement and started adding on to the 8′ x 4′ section I had already built and moved down. This is when I realized trying to assemble on carpet was not the best idea, but by then I was already to far along to do it the right way (I listed the right way above).
- DO NOT work barefoot, because inevitably you will be working in your carpeted basement, thinking all is well, trying to get the mending plates attached, and you will step on the bag of mending plates. Those are some pointy little demons. (See the band aids note in DOs). I won’t mention the fact that stepping on the bag of plates made me spin around, loose my balance, and step on the bag with the other foot. I wish I was kidding. Please just wear shoes.
CONSIDER
- Replacing 4 of the 2x4s with 2 2x8s instead, and using those in place of the 2x4s where the frame sections butt together. This would provide a more sturdy final stage, less cuts, less mending plates, etc… You will have to do your own math on putting that together.
- Alternatives to the mending plates. I was looking for something that was nearly flush when installed. Mending plates worked well in that regard, but were more difficult to install than another bracket alternatives would be.
 I acted to quick. I should have researched a bit more.
 - Consider alternates to the chalkboard paint. It is OK, but after a week, it has taken quite a beating. It is not slick, which is good, and maybe additional coats is the answer. Refer back to the research line above.
- Other surface coatings. Some other stage building blogs suggest using shower pan liner as the topper. You can get shower pan liner at [insert your favorite hardware store here] in 5 foot wide rolls for $8 a foot. Quick math says that would add nearly $200 to the cost of the stage I built. There are probably other options.
Tell Me How Yours Goes
The stage is solid and TGC loves it, so my work here is done, but I am not vain enough to think mine is the perfect way to build a dance stage. I do think other people will find this post, so I want to offer as much info as possible. If you have suggestions on how to make this better, please add them below. I may have to do this again. ;)
Categories: Ideas, Parents
Build an Irish Dance Practice Stage, Version 2 – David Whelan
Irish dancing is a significant activity for 2 of our children (and may be for the third eventually). One nice resource is to have a practice stage for the kids to work out their steps. I initially built a stage about 5 years ago using a pretty neat set of instructions I found on Zebediah & Beauregard’s Front Porch (update:
 Z&B no longer accessible he’s back!). The stage was a 6′ x 6′ stage, using a lattice underneath and window weatherstripping for spring.
We moved to a new country and new Irish dance school, our first dancer grew about 2 feet, and the 6′ square was a bit undersize. About 3 years ago, I added two 8′ x 4′ plywood panels with lattice. Unlike the initial stage, the decking was only .25″ thick. I noticed the creak more than my dancers but I resolved to stick to .5″ thick plywood sheathing the next time. The initial 6′ stage had also become a bit slick, so we bought a shower pan liner (vinyl sheet) that you can tape down on top of the plywood and it lengthens the stage life.
It was finally time to revisit the whole stage concept. First, the stage was an odd shape that made the dancers have to navigate a corner. Second, it was often covered with Lego and Playmobil and other toys. We migrated the toys to a different room and, having made that commitment, decided to expand the stage out. We ended up with a 12′ x 18′ rectangle.
I decided to approach this stage differently from the last ones. First, getting the lattice work done is a real pain. I routered the underlayer, so that it fit together nicely. I would probably have been better off cutting long and short strips. But I decided to do something completely different this time.
The goal was to maximize my use of plywood and minimize my time fiddling around with wood. Also, the weather stripping is pretty pricey as your stage gets bigger. The alternative I chose was to avoid a lattice and use a “pier and beam” idea, and replace the weatherstripping with styrofoam.
In my case, I ended up buying 6 pieces of 8′ x 4′ half inch plywood (about C$18 a sheet at Lowes). I also bought a C$10 pack of .5″ styrofoam sheets, which are precut to smaller size and useful for crafts, etc.
If you haven’t already noticed, I am a relatively lazy craftsman. My plan was based largely on making as few cuts as possible. Three of the plywood sheets were not cut at all. One was cut in half (lengthwise) and two others had 6″ strips cut off them. The lengthwise remainder (8′ x 2′) was cut into 6″ squares. I then scored the styrofoam and snapped it into 6″ pieces. In my case, I needed about 56 squares but your number might be higher or lower.
I pre-drilled holes to enable the screw heads to be countersunk. I avoided this on my first stage by inserting the screws from below. My dancer tripped on the second stages because the screwheads were poking out. Then I started to place the wood and styrofoam squares underneath the decking.
The styrofoam makes a filling between the two pieces of wood, like a sandwich. This is a bit of a change from the other stages, where the padding was at the bottom. But since the styrofoam does not come with its own adhesive, placing it in the middle means I can use the screws to hold it in place.
I placed a 6″ square of styrofoam on top of a 6″ square of plywood and screwed those into the corners of the plywood sheet that was the stage top. Then I screwed in styrofoam/plywood sandwiches every 2 feet, which works out to about 15″ pairs of 6″ squares per 8′ x 4′ sheet.
However, when I got to the edges, I slid the squares out so that they could be used to connect sheets. This saved me wood and styrofoam, and also meant that the stage would hold together better. It meant a bit of planning to make sure that I didn’t duplicate edges, but when I placed all the wood in the basement, it fit together like a puzzle.
This was significantly faster than when I did the lattice and it seems to retain the same spring. All told, it was cheaper too, and I was able to complete the whole stage (with screws) for about C$150, including tax.
And that is the reason that we have a plywood practice stage rather than one of the pre-built practice stages you can purchase. Time and materials makes building a dance stage pretty straight forward and keeps costs down. Based on our experiences so far, these homemade stages have sufficient spring to reduce the ankle injuries Irish dancers often seem to have.
If you do not have access to a saw, going the 6″ square route might make it easier to have Lowes or your local hardware store cut the wood for you. I used nearly 200 screws, so I would recommend a power screwdriver or drill with a screwdriver bit.
David Whelan
I improve information access and lead information teams. My books on finding information and managing it and practicing law using cloud computing reflect my interest in information management, technology, law practice, and legal research. I’ve been a library director in Canada and the US, as well as directing the American Bar Association’s Legal Technology Resource Center. I speak and write frequently on information, technology, law library, and law practice issues.
Tuchler Stage Linoleum
- DROSSELMEYER (ballet, contemporary dance, jazz, hip-hop, rap)
- CONSOR (ballet, contemporary dance, jazz, hip hop, rap, flamenco, tap, Irish dance)
- EVENT (ballet, modern dance, jazz, hip-hop, rap, theater stage, show)
- EVENT GLOSS (ideal for shows, theater stage, fairs, exhibitions, TV studios)
- COLOR X 150 (theater stage, shows, fairs, exhibitions, TV studios, ballet, modern dance)
- COLORX CHROMAKEY 150 (shows, theater stage, TV studios, fairs, exhibitions, contemporary dance)
- COLOR X 200 (shows, theater stage, fairs, exhibitions, ballet, modern dance, jazz, hip-hop, rap)
- ICE (shows, theater floor effects, catwalks, exhibitions, fairs, TV studios, tour)
- GLITTER (show, theater stage, cinema, TV studios, television, podiums, exhibitions, fairs, tour)
- CONFIDANCE (ballet, modern dance, shows, fairs, exhibitions)
- Fair Grip (exhibitions, fairs, tents, shows, arenas, theater scene) Broadway (Mirror surface, show, exhibition)
Harlequin ballet linoleum (harlequin)
9000 9000 9000 ) Duo\Duo (tour version for stage floor, classical and modern choreography, flamenco, jazz and hip-hop) )
)
Harlequin dance floors
- Harlequin ballet floors Liberty (stage tour floor)
- Ballet floor Harlequin (Harlequin) Activiti (floor for permanent laying in the studio)
Tappeto Stage Flooring
Tappeto Stage Flooring is a dance and stage linoleum designed for ballet, dance, performances, concerts, shows, presentations, exhibitions and fashion shows, has many original surface designs and colors, comfortable, durable , reliable and high quality.
- Tappeto Supersilvia Star Specchiante
- Tappeto Supersilvia Star Goffrato (smooth mirror dance linoleum)
- Tappeto Supersilvia Lucido (dance linoleum glossy)
- Tappeto Supersilvia (colored double-sided dancing linoleum)
- Tappeto Silvia (two-sided dancing linoleum)
- Tappeto Iris (color matt stage cover)
- Tappeto Iris Lucido (stage cover color glossy)
- Tappeto Marte (high-gloss embossed stage cover)
Alicante designer linoleum
- Alicante designer linoleum
Stage coverings in the modern world are high-tech floor coverings that meet the most stringent modern requirements, with which you can keep the audience's attention, create a great show, stage in the theater, stage a ballet or dance:
- first of all, show and theater need shine, gloss, transparency, so that everything sparkles, shines, reflects and any design decision can be realized;
- for ballet and dance, strength, elasticity, shock absorption, non-slip, wear resistance, comfort and safety, and reduction in the risk of injury are needed;
- it is very important that the stage cover can also withstand heavy scenery;
- for cinema and television, in addition to these qualities, good acoustics are also needed; The
- stage cover should also be compact and lightweight so that it does not create difficulties in transportation and installation during tours.
We are glad to offer you stage coverings taking into account all these wishes! We hope that each of you will find your stage coverage!
Bars with a dance floor in Novokuznetsk — 11 places 🍺 (addresses, reviews, prices, photos, rating)
— 11 places
- We have made a rating of 11 bars in Novokuznetsk;
- The best bars with a dance floor: real prices, reviews, photos;
- Bars with a dance floor on the map: addresses, phone numbers, opening hours;
The best bars with a dance floor — rating, addresses and phone numbers
-
16 reviews • Kuznetskstroevsky prospect, 9• 8 (384) 392-08-00 • daily from 12:00 to 02:00
A varied assortment of beer, a pleasant musical range, a trendy atmospheric interior!
-
16 reviews • ₽₽ • Stroiteley Avenue, 82a • 8 (384) 360-12-71 • Wed–Sat from 12:00 to 06:00; Mon-Tue from 12:00 to 01:00; Sun from 14:00 to 01:00
)) cozy, tasty and not expensive! And friendly staff
-
3 reviews • ₽₽₽ • Narodnaya, 9a • 8 (384) 337-73-08 • Sun-Thu from 12:00 to 00:00; Fri–Sat from 12:00 to 06:00
Nice tasty food :)
-
Floodplain highway, 13 • 8 (950) 593-63-33 • around the clock
-
Belana, 1 • 8 (905) 995-00-88 • Sun-Thu from 11:00 to 00:00; Fri–Sat from 11:00 to 01:00
-
Sevastopolskaya, 16 • 8 (909) 514-60-56 • around the clock
-
Nevsky, 1 • 8 (905) 966-22-44 • weekdays from 11:00 to 23:00; weekends from 12:00 to 00:00
Cafes and restaurants are different - Italian pizzeria, French bistro, restaurants of Russian and Japanese cuisine, and in each of them you will be offered dishes .
 ..
.. -
Dimitrova, 20 • 8 (961) 719-91-65 • daily from 07:00 to 05:00
-
Ermakova Avenue, 30a • 8 (384) 356-11-66 • Mon-Thu from 12:00 to 02:00; Fri–Sun from 12:00 to 04:00
-
Ermakova Avenue, 30a • 8 (913) 333-67-68 • daily from 11:00 to 00:00
-
Bridgehead, 21k1 • 8 (384) 360-00-33 • daily from 12:00 to 04:00
Inquiry to institutions - order a service, check the price
Send a request - receive all offers by mail:
Don't want to call a bunch of establishments?
Bars with a dance floor in Novokuznetsk - prices
- 01/23/2022 Love: Hello, can you celebrate your anniversary on February 3? Indicate the price per person, if possible,
- Restaurant-club Three fat men: Good afternoon.
 As long as the room is empty. How many guests are you planning? If you are more than 20 people, you can bring your own alcohol. The average bill is 2000 rubles, but for more information, please call <...> and the administrator will answer all your questions. Thank you for contacting
- Restaurant-club Three fat men: Good afternoon.
- 01/05/2020 Inna: On February 23, for a birthday, 20 villages need a separate hall in a cafe or restaurant. In a separate room you need a TV or a projector. In a restaurant or cafe to have the opportunity to dance. To sit with guests in one hall, to dance in another. Location central area Novokuznetsk. With your alcohol. With a low price tag
- Restaurant-sports-bar-bowling Aba: Good morning! contact phone number <.
 ..> -call at 12 30 You will receive detailed information for that date.
- Restaurant-sports-bar-bowling Aba: Good morning! contact phone number <.
- 07/18/2019 Gulnara: Dance floor, open areas, Friday, price
- Restaurant Papa Carlo: Good afternoon, Gulnara! Please leave your number so we can contact you! Restaurant Papa Carlo Gor. Novokuznetsk, Shakhterov Ave., 18 Phone: <...> Email: <...>
Bars with a dance floor
Bars with a dance floor in Novokuznetsk offer delicious cuisine, a rich cocktail list, a variety of music and the opportunity to dance on a specialized area. Choosing this type of establishments, you give preference not only to a good dinner with friends, but also the opportunity to relax to the rhythms of your favorite performers.
Deciding which bar to go to should be based on the following criteria: recommendations from friends, online reviews, the direction of the music playing on the dance floor. The main difference between a bar and a restaurant, as a rule, is the age of the audience. Bars are preferred by young people, while a restaurant is often a great choice for older people.
What is a dance floor?
Dance floor - a specialized area for dancing, which is located near the stage. Usually it is located in the center of the hall, so the dancers are clearly visible from all sides. Any songs can sound on the dance floor:
- Club music recorded or directed by a DJ;
- Live music performed by solo vocalists, duets and ensembles;
- Popular hits from leading radio stations;
- Instrumental music of different styles.
Sometimes these directions are skillfully combined with each other. For example, live music can be complemented by recorded songs when the artists are relaxing. And with a wide concert program, a host works on the stage, who invites artists according to a pre-planned plan. Dance groups can alternate with vocalists, which start the hall and cheer up. Practice shows that after their performance, the dance floor literally explodes from the number of people who want to perform their dance.
Special paraphernalia and equipment are used for a more effective performance of artists. Along with the sounding melodies, steam is released onto the dance floor from a smoke machine or soap bubbles from a profile generator. Laser installations are also used to organize a light show on the site. Multi-colored rays dissecting the darkness look beautiful and spectacular.
Safety rules in a bar with a dance floor
Not far from the dance floor there are tables, a bar, soft zones. This is very convenient, because after dancing, the guests of the establishment go to the table to quench their thirst, make an additional order and have a little rest. The tables are watched by waiters working in the hall, however, leaving valuables when you leave this area is not recommended.
In a large crowd of people, it is almost impossible to notice how thieves work. And the administration does not bear responsibility for things that have disappeared due to inattention. In this case, it is best to leave the bags to someone from your company who is sitting at the table during your dance. If everyone goes to the dance floor, then take your bag with you. It is optimal if it is a miniature clutch, and not a large backpack that will create inconvenience for you and the dancers around you.
Do not be too zealous with filming in the hall, as the dancers may inadvertently hit you, as a result of which the equipment will suffer. A phone or tablet that has fallen on the floor in the dark is difficult to find, and surrounding dancers may accidentally step on a lost gadget, after which it will be difficult to restore it. In any case, repairs will be expensive, so consider whether it is worth getting equipment in such a place. There are much more convenient opportunities to take good shots, for example, at the bar with a cocktail in hand or at a table with friends.
How to look natural on the bar dance floor?
Remember the simple truth. The dance floor is the same stage, only for bar patrons who want to relax and dance. Feel free to go public. Follow the rules of natural behavior, and then you will look organically on the dance floor:
- Do not interfere with others. If you don't have enough space, just start dancing. You should not shove, push people dancing nearby, specially run into them and step on their feet. At best, the crowd will really retreat from you. At worst, the public, heated up by alcoholic drinks, will want to sort things out. And then your vacation can end in tears. Do not swing your legs, jerk your elbows and sharp attacks to the sides on the dance floor if there are a lot of people. Move without eccentricity so that it is pleasant to be near you.
- Improvise, move spontaneously, without memorized chords and rehearsed techniques.
 Knowing the basic movements of modern dance, combine them in different combinations to the sound of music. Otherwise, you will look like a robot, which is unlikely to cause admiration in your address.
 - Dancefloor is not your first solo appearance on stage in many years of seclusion. Dance at ease, relaxing in your movements. Do not forget to listen to music, communicate with friends, perceive what is happening around.
- Be natural, try to convey the mood of the sounding melodies with your movements. With their help, you express your inner state, convey feelings and sensations.
- Try to match the style of your clothes. If you are a strict classic, you should not fall into hard hard rock to express your inner world. It will look ridiculous and feigned, which will cause increased interest from the outside. Do you want to become a YouTube star? Then there is no need for excesses.
Dancing in a bar liberates, because most often people come to the dance floor relaxed and rested. If there are a lot of people on the site, you don't have to worry. It is unlikely that you have all the professional dancers in front of you. Join the dancers boldly. If you are in the mood to dance, you hear the rhythm, you can move to the beat, you should not worry about the result. Everything will work out, you just have to want it. If there are few people on the dance floor, but your soul requires dancing, try to keep a positive attitude and look at people dancing well. Try to repeat the movements you like, choosing not the most difficult ones.
Interesting facts
Most often, people are looking for "bars with a dance floor", but there are other wordings, for example:
- night bars with dance floor
- bar where you can dance
- bar with dancing
The most popular features of the found places are: snacks for beer, breakfast, meat, pancakes, children's bowling, European cuisine, Armenian cuisine, Caucasian cuisine, Irish cuisine, Korean cuisine.
Bar is an ambiguous term:
Bar is a type of drinking establishment.
Bar - wine compartment in a cupboard or sideboard.
Bar - a shoal, a ridge in the coastal strip, stretched along the coast and composed of marine sediments.
Bar is a musical form.
Bar - £1 million in exchange slang.
Bar is a county, and from 1355 a duchy in France.
Bar — an element of an interval chart similar to Japanese candlesticks to show price changes
Bipolar affective disorder (psychosis).
Dance floor (abbreviated as dance floor) — this was the name of the place where discos and evenings of rest were held in Soviet times.
As a rule, the dance floor was a small piece of land, enclosed by a fence, inside there could be a small stage on which the equipment was placed. Depending on the popularity of the dance floor, VIA or instrumental ensembles could perform on the stage, but in most cases, phonograms sounded on the dance floors.