How to make a turning board for dance
Best Ballet Turn Boards and Turn Discs (Pirouette Board)
Best Ballet Turn Boards and Turn Discs (Pirouette Board)Turn Boards and Turn Disks
What Is a Turn Board or Turn Disc?
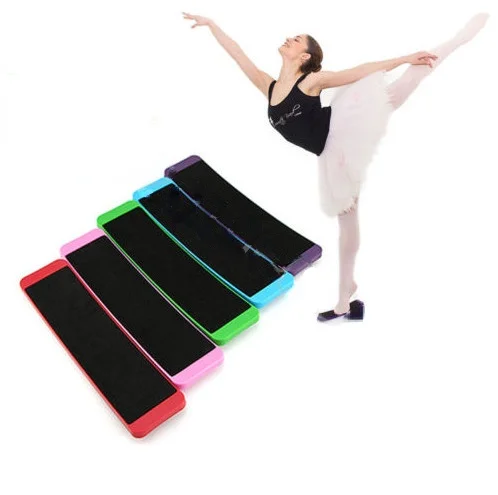
Turn boards and turn discs are used for training to perform multiple turns on one foot. They are most commonly used in Ballet but are also widely used for other forms of dance (and even outside of dance).
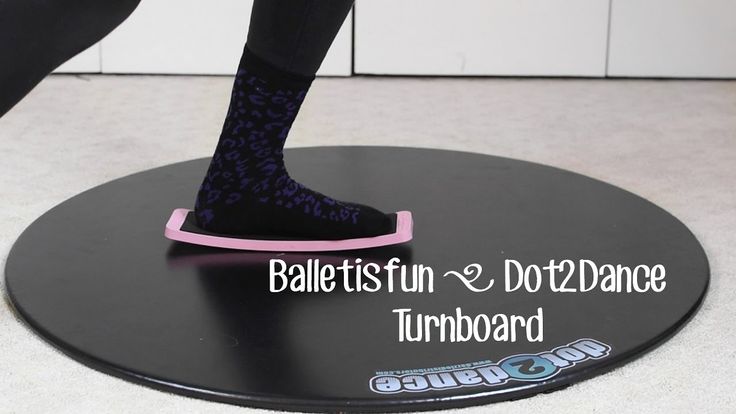
Turn boards have a convex bottom that creates a small point of contact with the floor. Because only a small portion of the turn board or disc touches the floor, there is very little friction, which makes spinning substantially easier.
What Is The Difference Between a Turn Board and a Turn Disc?
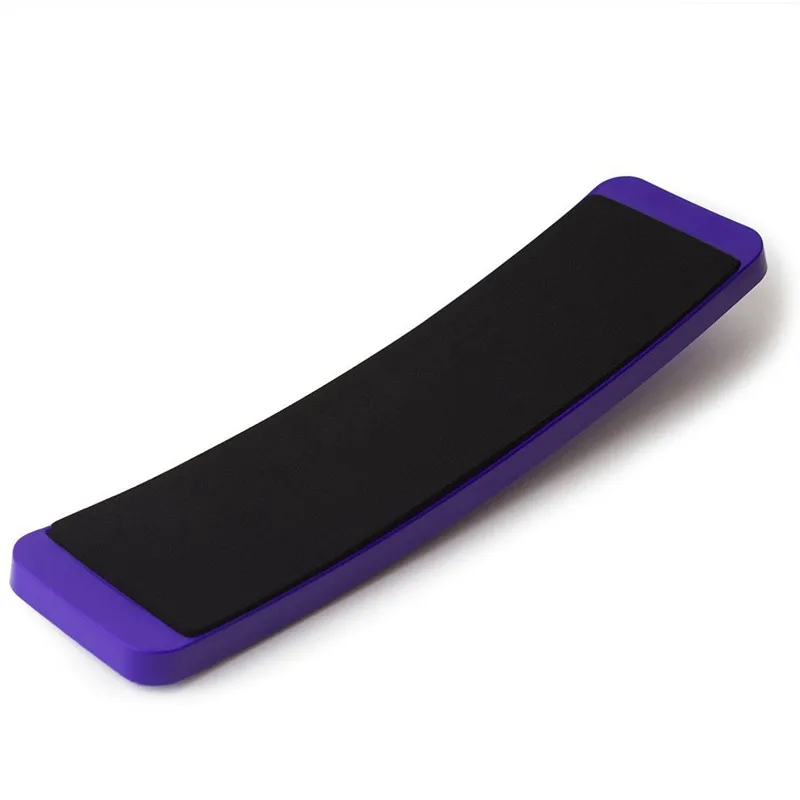
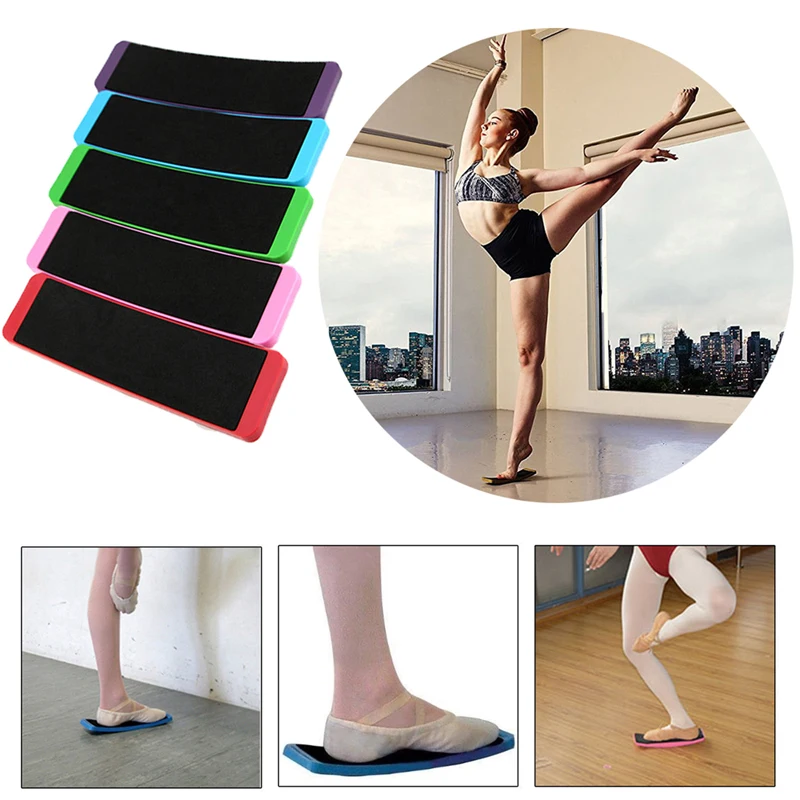
There are a couple key differences between a turn board and a turn disc. The most obvious major difference is the shape. Turn boards are rectangular while turn discs are circular. Turn boards and turn discs, although both used for turning, are quite different in practice.
- Turn Boards
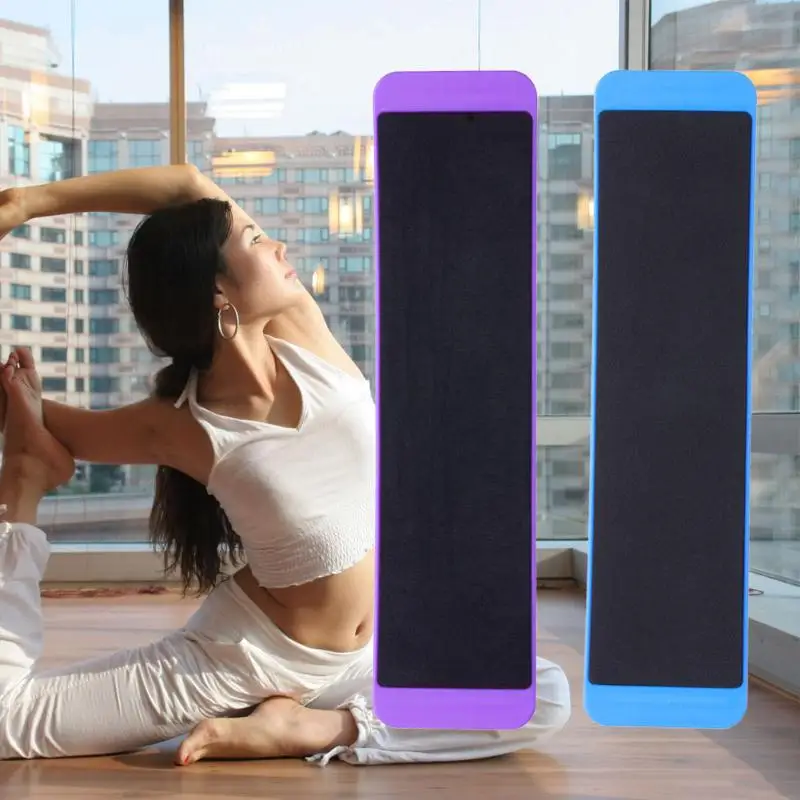
Turn boards are typically about 3 inches wide and 12 inches in length. The primary "feature" a turn board offers is that it allows you to go flat footed. Although turns aren't typically performed flat footed, it can be helpful for getting used to the feeling of doing multiple turns and developing balance. It allows the user to figure out how to find their center while in rotation, and due to the increased turn speed magnifies any imperfections. - Turn Discs
Turn discs are generally under 6 inches wide. The lack of size encourages the user to practice their spins in Releve, as they would without a turn disc. This essentially forces the user to perform their practice spins on the balls of their feet, otherwise their feet will make contact with the floor. Turn discs are growing in popularity because they encourage proper form and are more compact than traditional turn boards.
There are a variety of different brands that make Turn Boards and Turn Discs. Below we have listed some of the top rated products for both budget buyers and those looking for the highest possible quality.
TurnBoard Pro
The TurnBoard Pro is a well constructed turn board featuring an iPhone app that allows you to track the speed, number of turns and form - resulting in a total score. It is manufactured in the U.S.A. and is guaranteed not to flatten out over time.
Key Features
- Made in the U.S.A.
- App tracks turns, speed and form
- Glittery finish looks fantastic
- Rechargeable battery and cable included
- Fits inside the StretchPro Foot Stretcher
Kenzie Ziegler TurnBoard
The Kenzie Ziegler TurnBoard is the same as the TurnBoard Pro - but without the ability to monitor and track your spins using the iPhone app.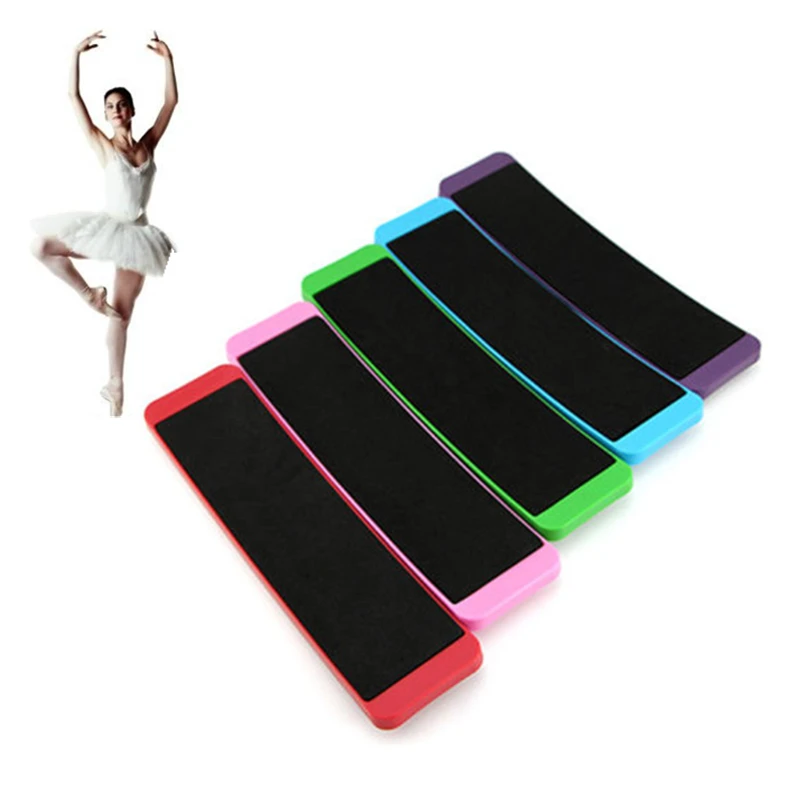 This turn board is made of high density plastic and is guaranteed not to flatten out over time.
Key Features
- Made in the U.S.A.
- Glittery finish looks fantastic
- Fits inside the StretchPro Foot Stretcher
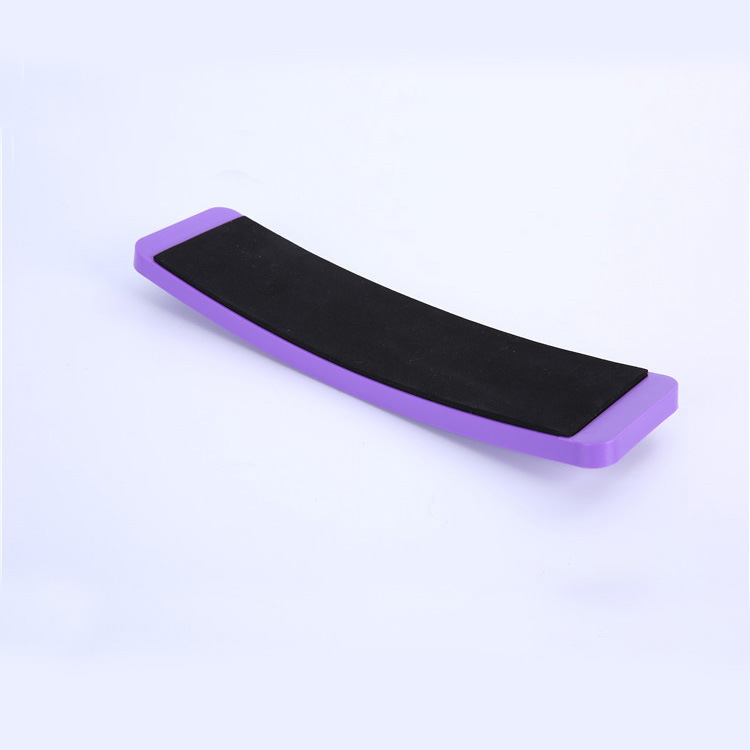
Pirouetter by Frank Frog
The Pirouetter by Frank Frog is a high quality turn board made from 7-ply Canadian Maple wood. Many people prefer wood turn boards over plastic and claim that they are longer lasting and less proned to wear.
Key Features
- Beautiful Canadian Maple wood
- Extremely sturdy and durable
- Many people claim hardwood turn boards benefit from faster rotation and less wear
My Turn On Releve Disc
The My Turn Disc is a padded turn disc made from high density plastic.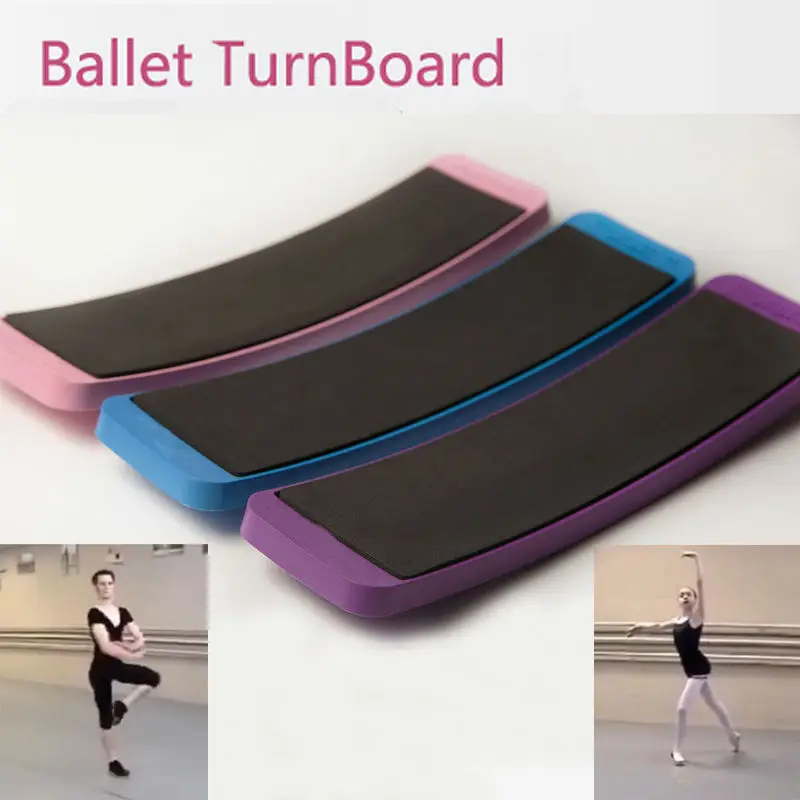 Turn discs are quickly becoming the preferred training tool for practicing turns as it forces the user into releve while maintaining the benefits of a traditional rectangular turn board.
Key Features
- Padded for comfort
- Encourages proper form by forcing user into releve
- More compact than a traditional turn board
Why Use a Turn Board or Turn Disc?
Turn boards and turn discs offer many advantages when practicing turns. They reduce the users friction with the floor, thereby allowing for much increased speed and additional rotations. The greater speed of the turns allows the user to feel imbalance easier and adjust their form to correct. Additionally, it allows the user to get used to multiple rotations and improve their overall spotting ability to maintain balance not only during their turns but after.
-
As an Amazon Associate DanceCompGuide.com earns from qualifying purchases.
Upcoming Events
-
South Open Dancesport Championships
Orlando, FL on Nov 30, 2022
-
Kings Ball
East Rutherford, NJ on Dec 2, 2022
-
The Winter Solstice Dancesport Challenge
Fort Wayne, IN on Dec 3, 2022
-
Holiday Dance Classic Championships
Las Vegas, NV on Dec 7, 2022
-
City's Dancesport Challenge
New York, NY on Dec 17, 2022
Recent Events
-
Dance Mania
Houston, TX on Nov 30, -0001
-
Studio Live!
TBD, VA on Nov 30, -0001
-
All Out Dance Competition
Cape May, NJ on Nov 30, -0001
-
Believe Dance Competition
Wheeling, WV on Nov 30, -0001
-
Riverfront Dancesport Festival
Cincinnati, OH on Jan 6, 2018
Copyright © 2019-2020 DanceCompGuide.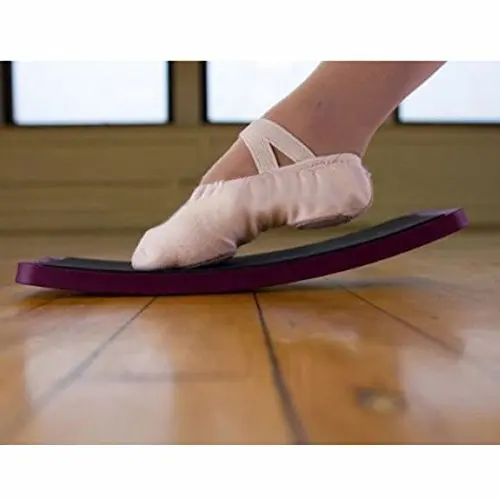 com
com
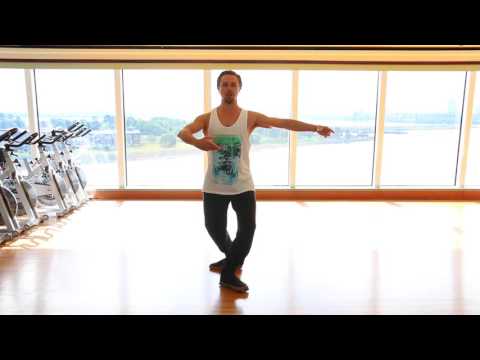
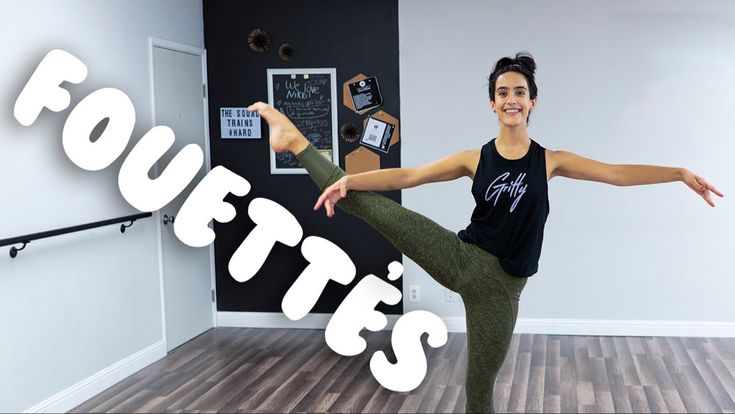
5 Safe and Effective Ways To Use A Spin Board
Spin boards, or Turn Boards were actually created for ice skaters, not ballet or jazz dancers. Dancers on the ice need to be used to spinning very quickly on a flat foot, and maintaining their balance, whereas dancers who work on relevé in a shoe have a totally different alignment required for their turn.
What does this mean for your pirouettes?
It means that if you're practicing your dance turns on a spin board, you're doing more harm than help.
- Spin boards give the dancer Centrifugal force, rather than opposition.
- Spin boards make the dancer turn fast, which is not good turning (good turns are slow and controlled).
- Spin boards train the dancer to spot too quickly, and the dancer can't break the spot down into the 3 specific parts that are necessary for a good spot! (Did you know there are 3 parts to a spot? More on that later!)
But that doesn't mean they're useless! Here are 5 great exercises to do with a spin board that will make a HUGE difference in your technique.
One last note - Spin boards can be great ways for dancers to learn to do more than 6 pirouettes. But they should not be used for turns before you have 4 or 5 turns consistently! That means every time you try for 5, you nail it. When you can't hit 6 or 7, that's when I'd pull out a spin board.
Thanks for visiting! Just so you know, my blog contains affiliate links, which generate income for me at zero cost to you. All reviews are 100% my own opinion. Any item featured may have been received free in exchange for promotion or review, but does not in any way affect my review.
#1 - Basic exercise - Activation of the Piriformis
This exercise helps dancers find their piriformis, or their "seat." The muscle is a very small muscle under the pelvis, and is the supporting muscle for maintaining turnout. When your teacher says "Squeeze your butt," she's talking about the piriformis.
- Begin standing on 2 spin boards in parallel position (feet apart, hip width).
- Demi plié with the tailbone down, and activate the seat. You should feel like you're trying to turn your hip knobs, but don't allow yourself to actually turn. You are now activating the piriformis).
- Stretch the knees straight, maintaining the activation in the piriformis and the length of the tailbone.
| All these items under $20! |
#2 - Movement exercise - Rotation of the Hip
This helps dancers feel where rotation comes from, how to properly turn out without cheating, and how to use the piriformis (as mentioned above) to maintain and keep their rotation while dancing. It is eye-opening to say the least!
- Begin standing on 2 spin boards in parallel position.
- Rotate the legs, slowly, to 90 degrees.
- Feel yourself hold and maintain the rotation without letting it slip. When you can do this, increase the rotation of your hip until you feel that you've reached your full range of motion.
 Check that the tailbone is lengthened (note, not "tucked!" just lengthened.)
 - Demi plié in your full rotation, and stretch the legs straight, maintaining the rotation.
- Control your legs back to parallel position (i.e. don't just let them go back - be in charge of the turning of the knobs back to parallel).
#3 - Before You Learn To Turn - Deep Lateral Rotator Exercise
This should be a requirement for all dancers before they learn to do a pirouette. If you cannot maintain the position stable, how are you going to maintain it while moving?
- Begin in parallel position on one spin board, with the other foot in retiré.
- Turn out the working leg, keeping the standing leg stable and not letting it rotate (engaging the seat), then rotating back to parallel.
- Turn out the standing leg, keeping the working leg stable, and return to parallel.
- Turn out both legs, and return to parallel.
- When students can do this with strength and control, repeat the exercise in relevé.
If the student is majorly struggling with this exercise, ask them to do it in sur le coups de pied instead of retiré.
#4 - Spotting - Partner Spot
This is awesome for students who are ready to turn, but who struggle with a correct and effective spot.
- Have the dancer begin in retire or sur le coups de pied, in a rotated and turned out position. The arms can be in 1st, 2nd, or on shoulders.
- The partner should check that the dancer is flat and in good alignment (advanced dancers can execute this on relevé).
- The student should look straight forward at themselves in the mirror. The teacher or assistant should hold the dancer's hands or arms and begin to move the dancer as if they were doing a pirouette. The dancer should keep their eyes and chin pointed towards themselves in the mirror the whole time.
- When the dancer has reached the extent of their neck range of motion, begin turning the dancer back around the other direction.
Advanced version:
Once the student can sufficiently "Leave the head," they can begin practicing a spot in the same position. move the dancer to a quarter turn, let go of the dancer, and allow them to spot their head in order to get around. It is important that the teacher does not push or turn the dancer - stop the dancer a little past the quarter turn position, and let go! The dancer will then spot their head, find their eyes in the mirror again, and maintain balance.
5. Rotation and Balance - Promenade
This is a highly advanced exercise designed for teaching students to execute promenade correctly, but also helps strengthen the muscles in the ankles, and improve balance.
- Begin in a turned out sur le coups de pied or retiré position.
- Working slowly, do a promenade around by turning out the standing leg and allowing the spin board to move. (This is an en de dans promenade).
- If you are sufficient in the en de dans promenade, you can try an en de hors promenade, which is much harder on the spin board! You'll have to be fully in control of your rotation and your body.
Bonus Ideas!
- Do your pliés on 2 spin boards, rotating every time you plié and relevé, and trying to maintain your rotation. Make sure your turnout isn't coming from your ankles!
- Work through this releve combination on 2 spin boards for extra burn in your turnout.
- Do a simple adagio in the center on your spin board. (a series of developpes, rond de jambe en l'air, and promenades work great for this).
What other things can you do with a spin board besides spin?
Photo credit: kcdsTM via Visual Hunt / CC BY
official website of the manufacturer Board System
Popular products
Product catalog
glass boards
1-element boards
2-piece boards
3-piece boards
5-piece boards
turntables
Flipcharts
stands
easels
Accessories
80% discount
BoardSYS is
BoardSYS manufactures and sells blackboards in Moscow, St.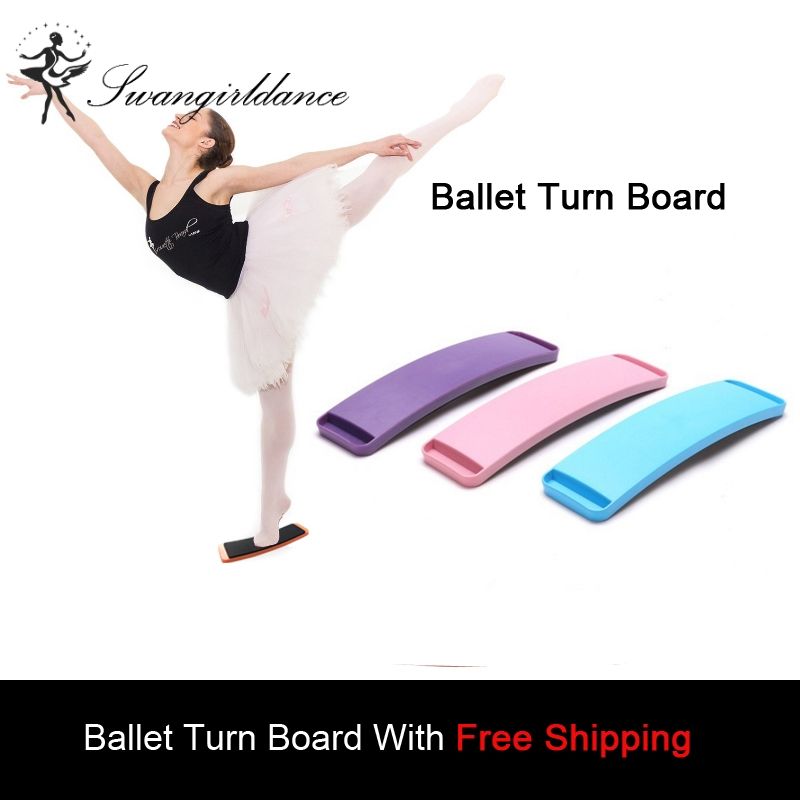 Petersburg and other Russian cities. Boards are made from environmentally friendly materials, in compliance with all quality standards. You can find the exact prices for goods in the catalog
BoardSYS assortment
The advantages and features of each model are described in the product card. The assortment of the online store includes boards:
- magnetic chalk;
- magnetic marker;
- magnetic combination - suitable for both markers and chalk;
- information stands;
- easels;
- school furniture.
BoardSYS products are intended for use in educational institutions and offices. On high-quality and reliable boards, you can write down useful information and improve its perception. Diagrams, pictures and other visual aids are attached with magnets. The board can consist of one, two, three or five elements.
When choosing a design, be sure to consider where it will be located and for what purpose it will be used. The minimum size of the board is 60 x 50 cm, the maximum is 120 x 600 cm (dimensions are indicated for the unfolded product).
Our managers will help you choose the right option and place an order. BoardSYS is a large assortment of high-quality school boards at the best prices!
Blog
How to choose an interactive whiteboard
Gradually, the usual "chalk" lesson is becoming a thing of the past, as well as equipment familiar to teachers. Increasingly, interactive whiteboards can be found in schools -
How to design a school stand
A blackboard and a stand are items that no school class can do without. It is also difficult to imagine the foyer of a modern school without stands. It is on them
How to hang a blackboard
Special requirements are imposed on school equipment, since the effectiveness of the educational process, as well as health depends on its quality
At what level to hang a blackboard
Proper organization of the workspace allows you to make the learning process as productive as possible .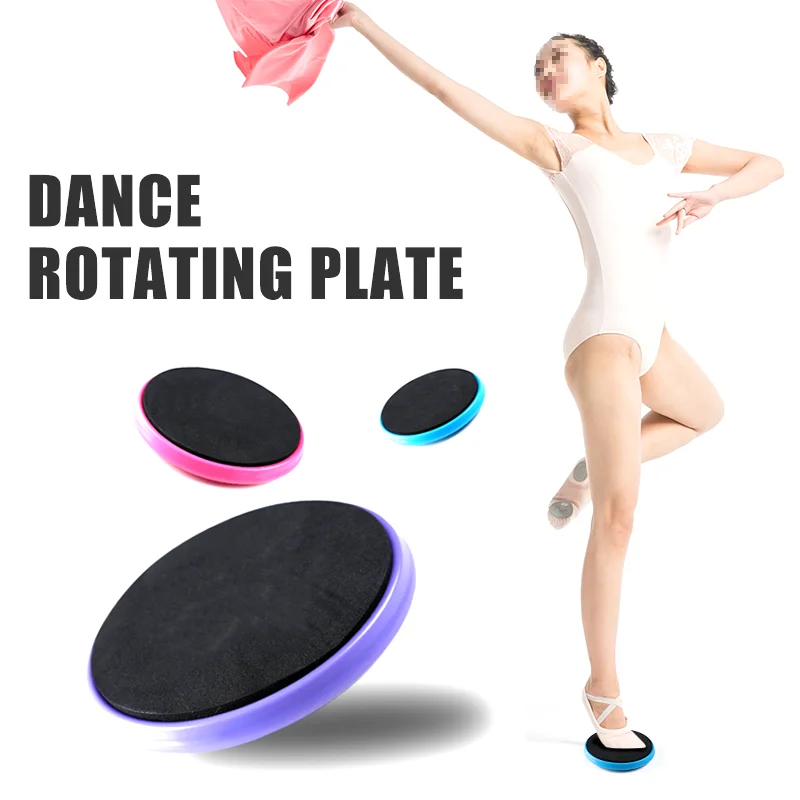 In order to unify and standardize
Magnetic board - how to choose and make it yourself?
Modern magnetic board is an excellent educational, information and demonstration or promotional tool. In the production of these functional items, different design solutions are used, so in addition to simple white rectangles, you can purchase products with colored or combined surfaces for every taste.
What is a magnetic board?
The ability to use multiple magnetic holders dramatically increases the functionality of the information plane. The owner can place his paper blanks on the surface in any order, change them in the course of work, combining this process with the application of the necessary records. It is incredibly convenient to use a magnetic flipchart, an easel or a wall-mounted version of the board. Small models can be used in a children's room for educational purposes or other rooms as a decor.
Magnetic board material:
- Made of laminated sheet metal.
- Glass magnetic board.
- Textile - cannot be written on, but paper objects can be pinned.
- Cork boards.
- Enamel boards.
- Melamine finish (chipboard base).
- Metal-ceramic coating.
Types of magnetic board
The ease of use of the magnetized surface has led to the emergence of several varieties of this information device. The magnetic whiteboard began to replace standard plastic or metal in offices, billboards, and school supplies. Depending on the design, dimensions and purpose, the following types of this useful product are distinguished:0007
- Wall magnetic board .
- Magnetic pillar – like a portable billboard on supports.
- Flipcharts are portable office easels with folding legs.
- Combination boards - manuals with several different types of working surfaces (chalk marker, textile marker, cork marker).
Magnetic whiteboard
This work surface is made from a durable and smooth material with high abrasion resistance. Such a magnetic board for drawing with markers can be used with a snow-white or color coating. The reverse side is made of metallized alloy. The frame is made of durable anodized aluminum profile. It is advisable to purchase products with a convenient bottom shelf for storing sponges, pointers, and other stationery. For writing, only special quick-drying odorless markers are used.
Magnetic chalk board
The surface of this product is coated with special slate paints with magnetic particles that form a surface for working with crayons or chalk markers. Mostly used matte enamel, resistant to scratches, repeated cleaning and tarnishing. A more expensive magnetic slate board is made from rough wear-resistant ceramics. Independent use of a unique paintwork allows you to create original walls in apartments, for example, in the form of a classic textbook for schoolchildren.
How to choose a magnetic board?
The cheapest option is lacquer and melamine coating, but it wears off the fastest and lasts no more than five, and even three years.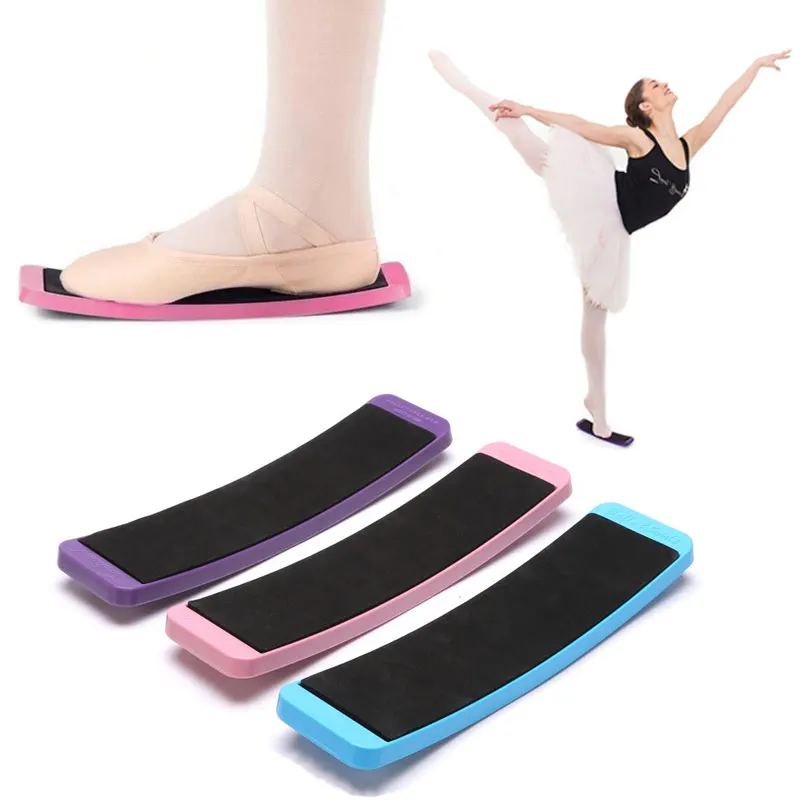 Glass, cermet and enamel are considered relatively durable. It is required to take into account what design features a magnetic board has, the dimensions of the product are selected depending on the specific room and the height of the person.
Recommendations for choosing a magnetic board:
- Magnetic easels - for children's drawing and education, for advertising purposes.
- Turntable with magnets - allows you to use both sides of the product at the same time, saving time on erasing the inscriptions.
- Magnetic flipcharts - for educational purposes, presentations, office work.
- Wall-mounted single and multi-element whiteboards - suitable for lecture halls, classrooms, home use considering the size and color of the surface.
Wall magnetic board
For a lecture hall, you should take products with a large working plane so that information inscriptions can be seen from afar. For a meeting room or planning meetings, it is recommended to buy a manual with a combined surface; important papers can be attached to its second textile part with simple pins. Magnetic boards on the wall for the home can play the role of a notebook, a children's sketchbook, an original decorative panel.
Examples of wall magnetic boards:
- Living room magnetic board .
- Magnetic colored boards in the entrance hall .
- Magnetic colored board in the kitchen .
Magnetic board for refrigerator
For the purpose of original design of the kitchen space, you can use beautiful boards with a magnetized plane in the form of funny figures for writing with board markers or crayons on the facades of household appliances. A magnetic board on the refrigerator for writing with a marker is a decorative type of information aid that will replace a notebook, a list of recipes and shopping, reminders for relatives. Toddlers will spoil the wallpaper less if the refrigerator has a convenient surface for drawing.
Magnetic board with legs
The main types of such devices are pavement signs, flipcharts, easels.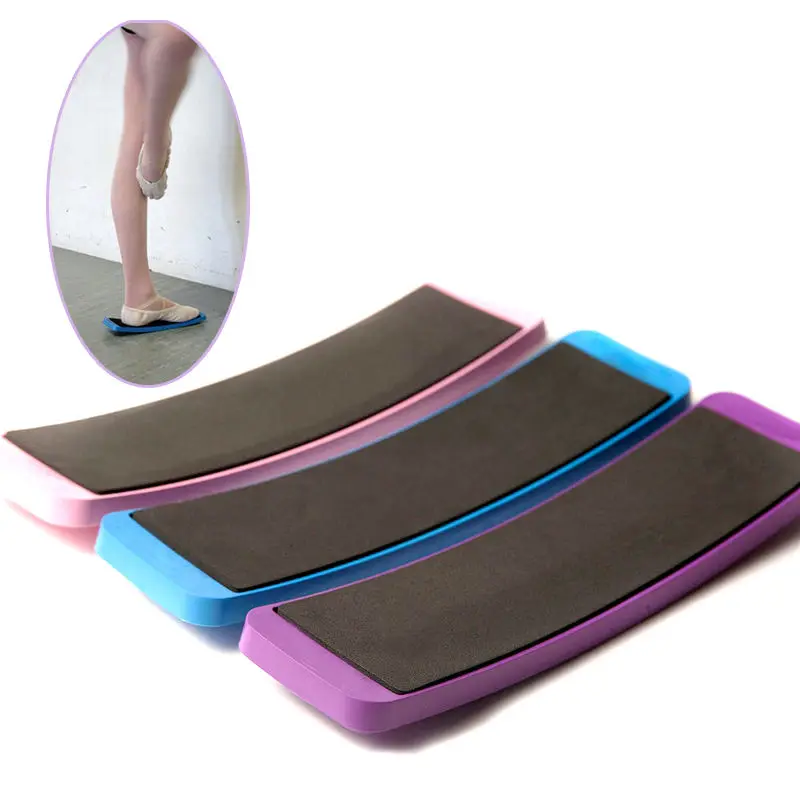 Mobile magnetic board for children takes up less space indoors, can be used in the yard, at a picnic, on the terrace, in the gazebo. In work, portable aids help to present important information to the audience, to advertise products. The legs are made stationary or folding. It is more convenient to work with racks on wheels. Even a voluminous magnetic board in this case easily moves around the hall in any direction, replacing the overall wall posters and fixtures.
Magnetic Whiteboard Kit
To prevent your fixture from suffering from stubborn stains or streaks, it is advisable to maintain the surface following the manufacturer's recommendations. First, a demonstration colored or white magnetic board is cleaned with special liquids from glue and shipping film. Before work and at the end, the plane is treated with a cleaning liquid; turpentine or other solvent is prohibited. The best option is to purchase a kit designed for a specific type of magnetic coating.
Standard contents of the magnetic whiteboard set:
- Colored markers.
- Magnets.
- Eraser.
- Felt napkins.
- Spray cleaner.
Magnetic whiteboard marker
A common mistake for owners of this functional product is drawing with simple permanent markers. Magnetic boards on the wall for the office quickly deteriorate from such treatment, because the inscriptions from them eat into the surface and are extremely difficult to remove. You need to buy exclusively special board markers filled with ink that dries quickly. After writing, this paint turns into pollen, and is easily removed even with dry felt napkins. Store board markers in a vertical position.
Magnetic whiteboard sponge
Wipe the work surface periodically to remove marker marks. Even a black magnetic board gets dirty over time and needs to be cleaned. Magnetic sponges with felt nozzles have indisputable advantages. For their storage, a special shelf is not required, because the devices are independently held on the metallized surface.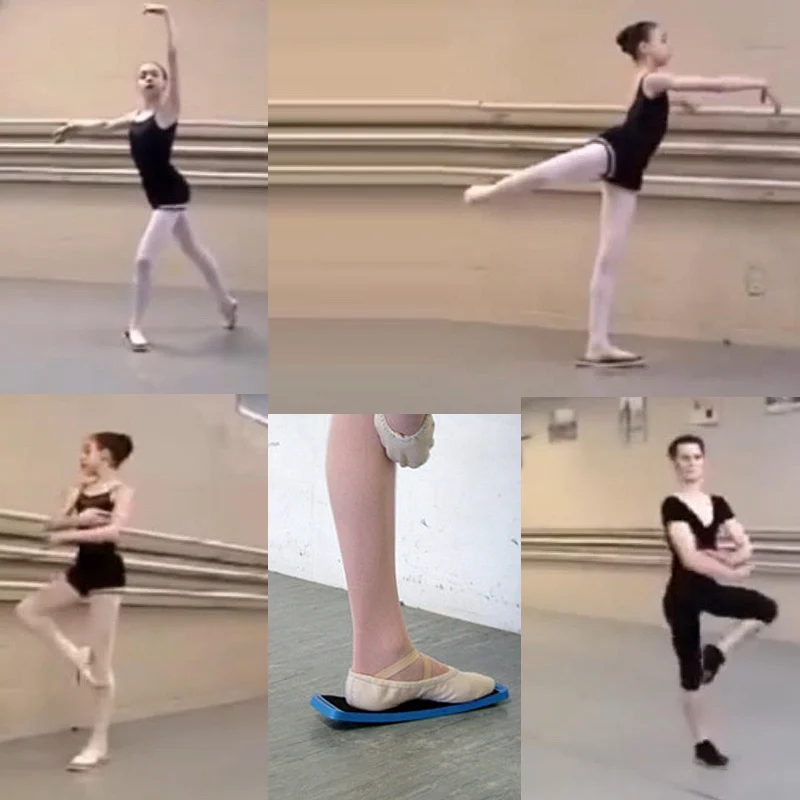 Easy-to-use sponges with built-in marker holders located in a plastic housing on the reverse side.
How to make a magnetic board?
High-quality magnetic marker or magnetic slate manuals cost money. If desired, a do-it-yourself magnetic board is made relatively quickly using available materials. By applying a special primer and paint on the surface, any surface can be turned into a school manual. Designers paint entire walls in this way, so you can deal with a small plywood board in a matter of hours without much work and huge investments.
Manufacture of a magnetic slate board:
- Main materials - magnetic paint (Tikkurila Magnetic or analogues), slate paint of the required color (Tikkurila Liitu), white or other enamel for painting the frame, slats, plywood, fasteners.
- From a plywood sheet we cut out a blank of the required size.
- For large dimensions, it is advisable to take material with a thickness of 6 mm or more so that the finished board does not sag.